Week 7
Computer-Controlled Machining

assignment
Group Assignment
- test runout, alignment, speeds, feeds and toolpaths for your machine
Individual Assignment
- make something big


Fab Lab Mini .DXF Download
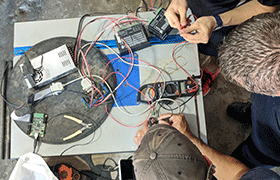
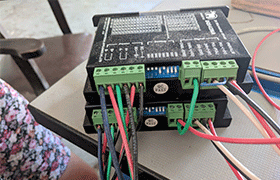
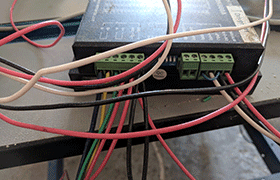
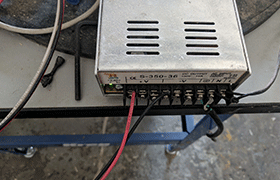
The machine has a power source which feeds an arduino controlling a larger stepper driver for the x axis and 2 smaller ones for the y and z axis. These turn repsective motors which are fixed to shafts mounted on rollers.
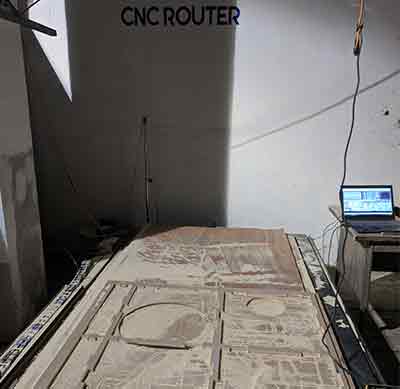
I familiarized myself with the CNC machine, which has a 5'x10' bed and is able to cut an entire sheet of 4x8 stock plywood.
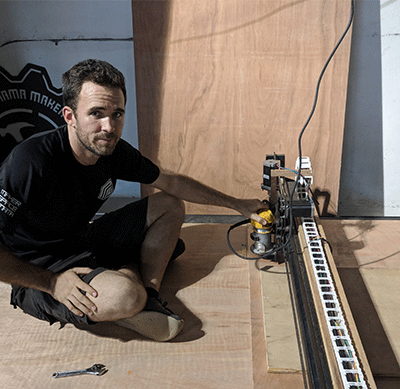
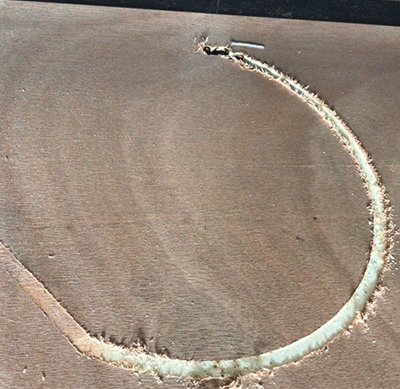
It has a 30cm plunge range but can cut up to just over 1.5". During the demonstration, the machine repeated a command but did it at a higher velocity and plunged down on the z-axis. We were reminded to pay close attention to using the machine as it is a powerful machine that can break if not properly operated.
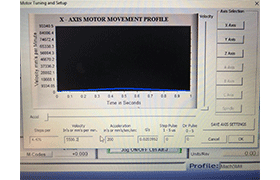
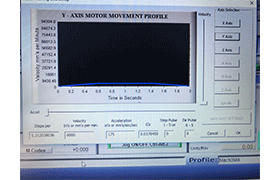
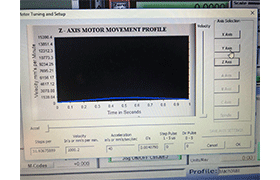
We established the correct values for each axis motor movement profile. The values to set for controlling the perceived motion vs the real motion were:
- # of steps
- Velocity (In's or mm's per sec)
- Acceleration
CNC machine parameter familiarization
With the machine properly calibrated, I imported a test piece for a Fab Lab Mini work station.
we tested a file.
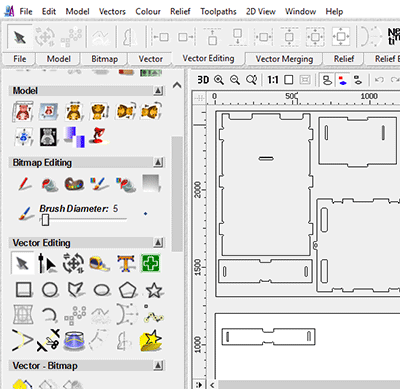
Using ArtCAM we imported .dxf line drawings and set toolpaths. In this case we were using a 6mm straight plunge bit. We exported the files to gcode for Mach3 Milling and were able to cut out these files in about 45 minutes:
With the machine working properly, I uploaded my design file into ArtCam and exported a gcode file to Mach3 Milling.
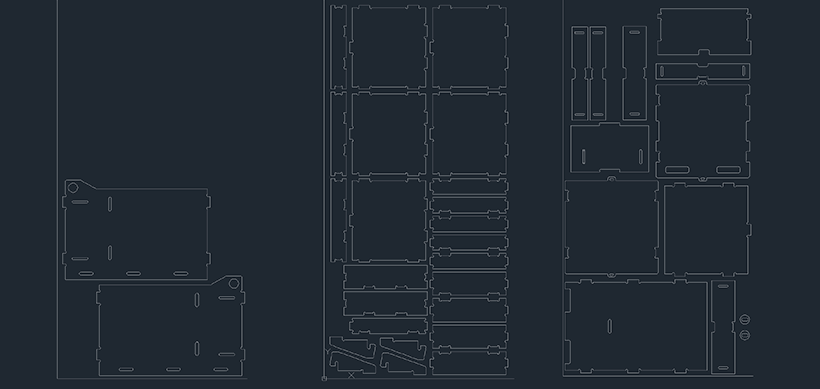
I created a new file the dimensions that I would be cutting at a time (1.2m x 1.2m or half a sheet of plywood).
I imported my .dxf file and selected the geometry that I wanted a toolpath for.
Using Mach3 Milling Software may seem intimidating but it is the same concept as the desktop mill. The only difference is the control panel and the location of the buttons.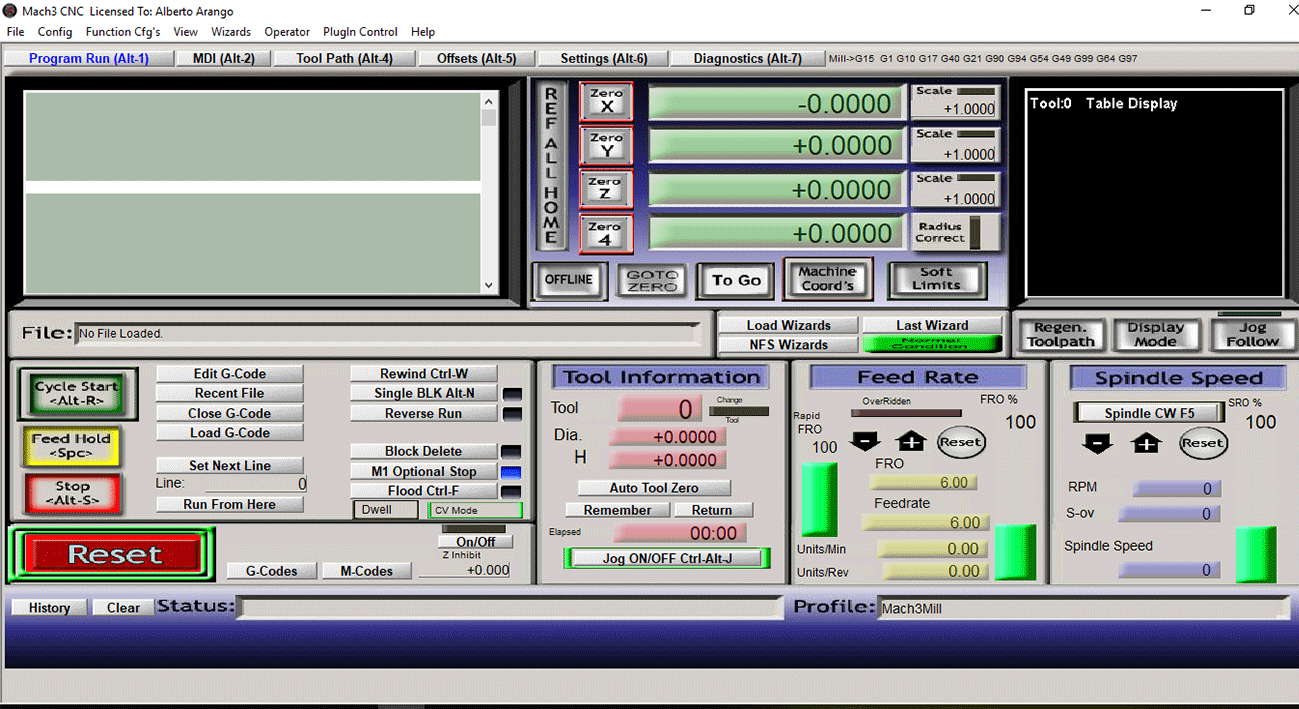
I installed the proper bit and set my home coordinates to 0,0,0.
I imported my gcode cut file by clicking load G-Code.
I double checked the cut path in the top right window.
After inputting these values I clicked calculate now and saved the toolpath on my computer.
Next I opened Mach3 and connected the CNC machine to the USB port. I loaded the GCode and positioned the xyz coordinates of the CNC machine.
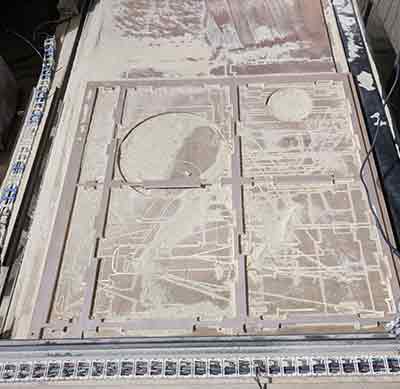
About six hours later, this is what I was able to cut. I used half of the machine only because the cable carriages are not strong enough to hold the wiring horizontal all the way across the cutting bed.
I had to use two whole sheets of 18m plywood and one sheet of 12m plywood, but I was able to cut out all of the pieces.
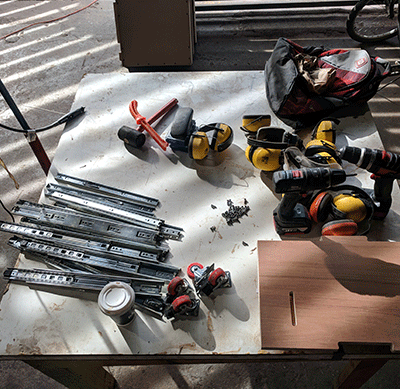
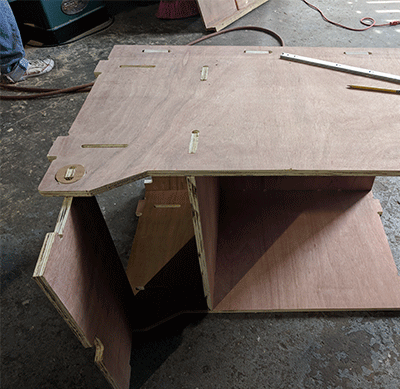
I laid down the pieces for the drawers and popped them into the slots which were cut just to size.
Using tools that I would later be filling the cabinet with, I assembled the outer frame with a lot of help from our local carpenter.
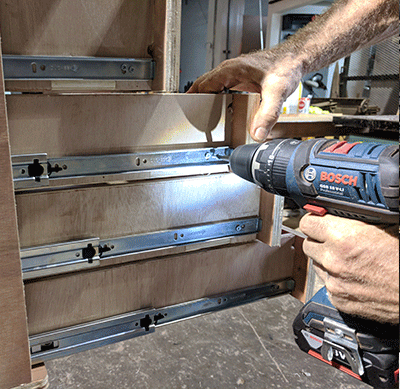
Installing the drawers proved to be especially tricky, but there are some tricks for getting a horizontal and smooth slide.
Video of rotating hinge mechanism:
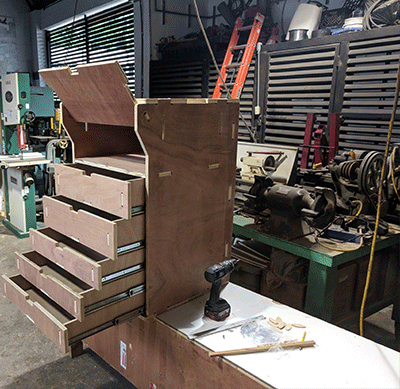
Cleanup is just as important as making a mess to build a product. With the Fab Lab Mini assembled, I made sure to vacuum and clean the work area so that the next person to work would be able to have a fresh start.

Relative to the circuit boards we have been working on, big could be a sheet of 4x8 plywood. So I decided to make a Fab Lab Mini because it is a project that I want to help improve and distribute with local communities.
The CNC machine is an excellent tool and we hope to build an iShelter in August-September.
- test runout, alignment, speeds, feeds and toolpaths for your machine
Individual Assignment
- make something big
Software Used
Mach3, Art Cam, Adobe Illustrator, Google Chrome, Sublime Text, Git
Tutorial Used
Fab Academy Week 7 - Computer-Controlled MachiningFiles used:
Test cut circle .NC DownloadFab Lab Mini .DXF Download
Walkthrough
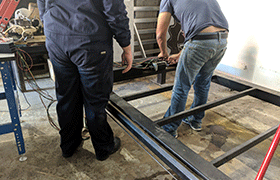
The machine was built by members of Fab Lab EcoStudio over the course of a few months. They had a frame welded together and ordered all of the stepper motors, motor drivers and wired them up.
|
|
|
The machine has a power source which feeds an arduino controlling a larger stepper driver for the x axis and 2 smaller ones for the y and z axis. These turn repsective motors which are fixed to shafts mounted on rollers.
|
|
|
I familiarized myself with the CNC machine, which has a 5'x10' bed and is able to cut an entire sheet of 4x8 stock plywood.
It has a 30cm plunge range but can cut up to just over 1.5". During the demonstration, the machine repeated a command but did it at a higher velocity and plunged down on the z-axis. We were reminded to pay close attention to using the machine as it is a powerful machine that can break if not properly operated.
We established the correct values for each axis motor movement profile. The values to set for controlling the perceived motion vs the real motion were:
- # of steps
- Velocity (In's or mm's per sec)
- Acceleration
|
|
|
CNC machine parameter familiarization
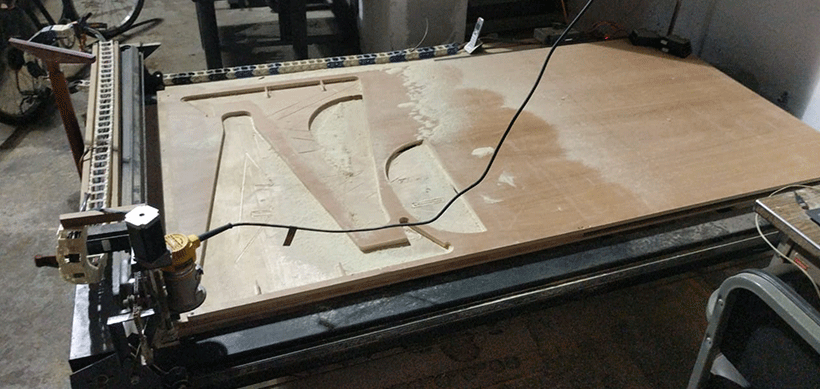
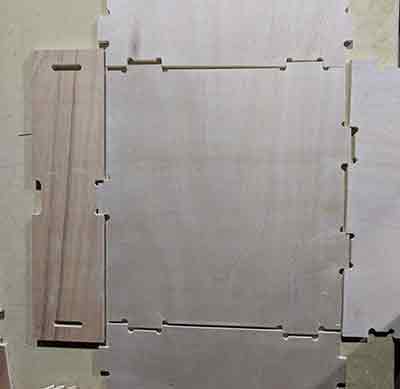
With the machine properly calibrated, I imported a test piece for a Fab Lab Mini work station.
we tested a file.
Using ArtCAM we imported .dxf line drawings and set toolpaths. In this case we were using a 6mm straight plunge bit. We exported the files to gcode for Mach3 Milling and were able to cut out these files in about 45 minutes:
With the machine working properly, I uploaded my design file into ArtCam and exported a gcode file to Mach3 Milling.
I created a new file the dimensions that I would be cutting at a time (1.2m x 1.2m or half a sheet of plywood).
I imported my .dxf file and selected the geometry that I wanted a toolpath for.
Vector info in ArtCam |
 I created a toolpath by selecting the "T" Icon with a path around it. |
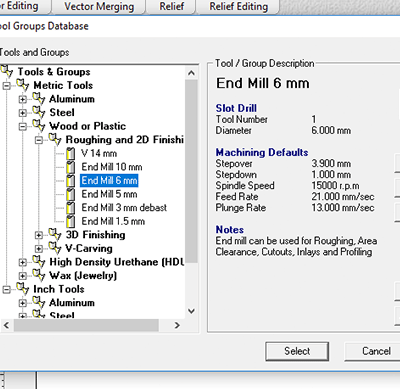 I adjusted the Bit size to 6mm |
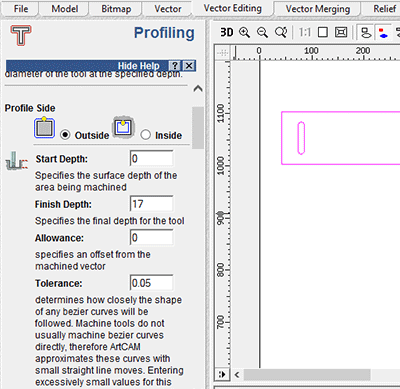
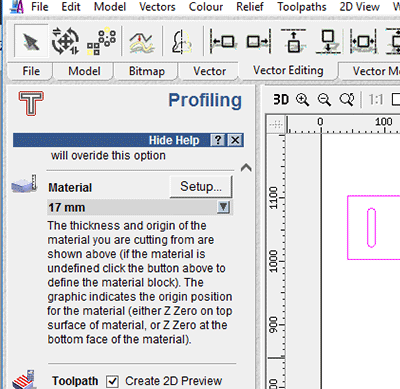
Finish depth 17mm Step down 2mm |
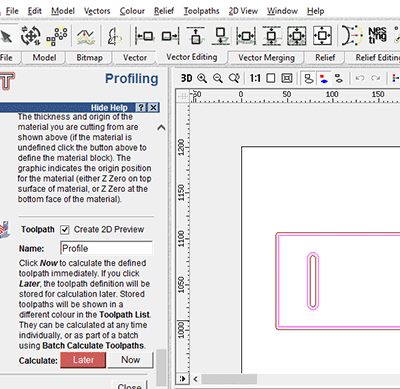 I clicked calculate to generate the toolpath. |
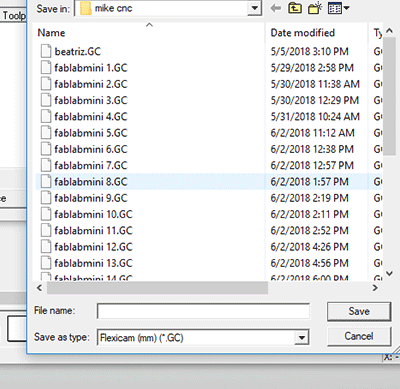 Then Save Toolpath to export a Flexicam .GCODE file |
Using Mach3 Milling Software may seem intimidating but it is the same concept as the desktop mill. The only difference is the control panel and the location of the buttons.
I installed the proper bit and set my home coordinates to 0,0,0.
I imported my gcode cut file by clicking load G-Code.
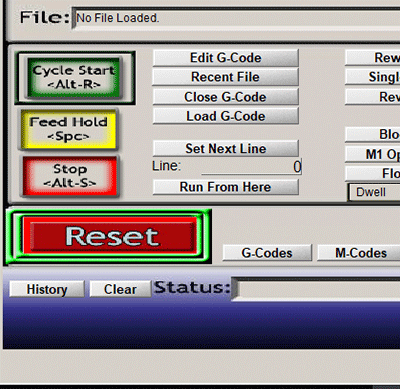
I double checked the cut path in the top right window.
After inputting these values I clicked calculate now and saved the toolpath on my computer.
Next I opened Mach3 and connected the CNC machine to the USB port. I loaded the GCode and positioned the xyz coordinates of the CNC machine.
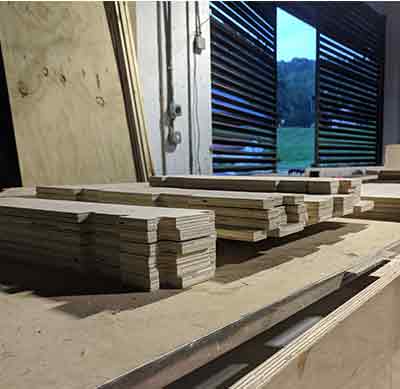
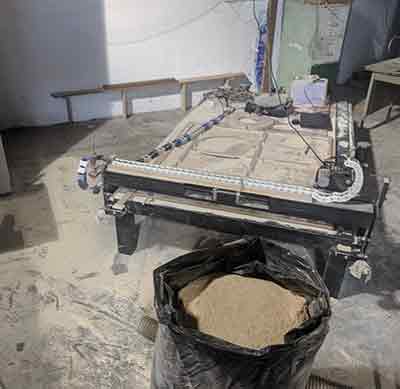
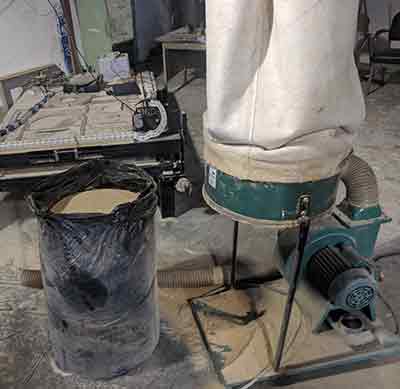
About six hours later, this is what I was able to cut. I used half of the machine only because the cable carriages are not strong enough to hold the wiring horizontal all the way across the cutting bed.
|
|
I had to use two whole sheets of 18m plywood and one sheet of 12m plywood, but I was able to cut out all of the pieces.
|
|
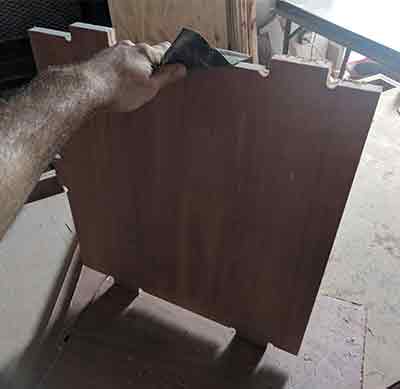
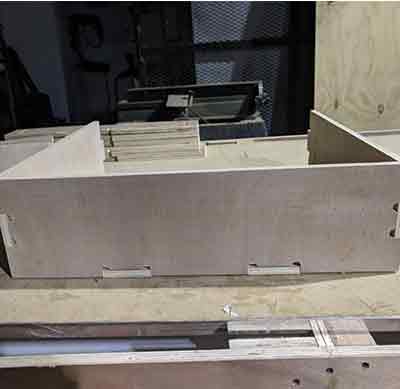
I laid down the pieces for the drawers and popped them into the slots which were cut just to size.
|
|
Using tools that I would later be filling the cabinet with, I assembled the outer frame with a lot of help from our local carpenter.
|
|
Installing the drawers proved to be especially tricky, but there are some tricks for getting a horizontal and smooth slide.
|
|
Video of rotating hinge mechanism:
Cleanup is just as important as making a mess to build a product. With the Fab Lab Mini assembled, I made sure to vacuum and clean the work area so that the next person to work would be able to have a fresh start.
|
|
Conclusion
I had big plans for this week, but the cost of building a large-scale, permanent installation included more than just cutting. In the future I would like to build a full scale blue whale suspended from our ceiling, something like this:Relative to the circuit boards we have been working on, big could be a sheet of 4x8 plywood. So I decided to make a Fab Lab Mini because it is a project that I want to help improve and distribute with local communities.
The CNC machine is an excellent tool and we hope to build an iShelter in August-September.