Week 8
Embedded Programming

assignment
Group Assignment
1- compare the performance and development workflows for other architectures
Individual Assignment
1- read a microcontroller data sheet
2- program your board to do something with as many different programming languages and programming environments as possible
Eagle, Art Cam, Grbl Controller, Adobe Illustrator, Google Chrome, Sublime Text, Photoshop, Git, Arduino


Hello world gcode .GCODE Download
Arduino code button LED .INO Download
Arduino code blink .INO Download

We explored Arduino software and learned about microcontrollers and how information is sent, stored and can be burned and reloaded on them.

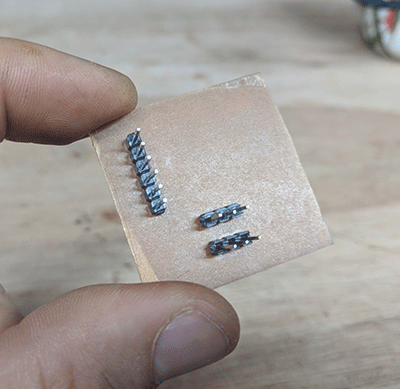
I looked up the data sheet for the ATtiny44 which we would be programming so that I could tell what pin went where and did what.
The ATtiny44 is a popular chip used in the Academy which can perform many of the same functions as an Arduino but in a much more compact form.
We simulated the project we would have to do and went through a workflow connecting a circuit. In this case we connected
- Arduino Uno
- Ground GND
- Voltage VCC
- light LED
- button

In Arduino I learned about using previously existing code to perform a function. I wrote out a text script for when a button is pressed it lights an LED. I placed the components onto a breadboard and lined them up with corresponding ground and voltage circuits. Next I uploaded the code to the arduino and tested changing the blink intervals and reuploading the code.

For my project, I would be using the Arduino interface for programming my board.
In Arduino I burned (cleared previously existing commands) to turn the board into an ISP (in-system programmer). To do this I went to:
File, Examples, 11.ArduinoISP, ArduinoISP
I uploaded this code to the board and next I uploaded a library for Arduino to be able to communicate with the attiny microprocessor. I added a folder named 'Hardware' to the Arduino y and added the ATTINY folder to it. I also had to add the boards.txt file to Variants.


I uploaded the code to my board and at first the file stayed red. I put some pressure on the pins to make sure they were making a solid connection and then the code went through! Keeping the board powered, I was able to get the board to illuminate the LED at the press of the button!
1- compare the performance and development workflows for other architectures
Individual Assignment
1- read a microcontroller data sheet
2- program your board to do something with as many different programming languages and programming environments as possible
Software Used
Eagle, Art Cam, Grbl Controller, Adobe Illustrator, Google Chrome, Sublime Text, Photoshop, Git, Arduino
Tutorial Used
Fab Academy Week 8 - Embedded Programming Fab Academy Week 8 - Embedded ProgrammingFiles used:
Hello world eagle file .BRD DownloadHello world gcode .GCODE Download
Arduino code button LED .INO Download
Arduino code blink .INO Download
Walkthrough
We spoke with our tutor Cesar Cruz who walked us through different symbols and meanings of components and their functions.We explored Arduino software and learned about microcontrollers and how information is sent, stored and can be burned and reloaded on them.
I looked up the data sheet for the ATtiny44 which we would be programming so that I could tell what pin went where and did what.
The ATtiny44 is a popular chip used in the Academy which can perform many of the same functions as an Arduino but in a much more compact form.
We simulated the project we would have to do and went through a workflow connecting a circuit. In this case we connected
- Arduino Uno
- Ground GND
- Voltage VCC
- light LED
- button

|

|
In Arduino I learned about using previously existing code to perform a function. I wrote out a text script for when a button is pressed it lights an LED. I placed the components onto a breadboard and lined them up with corresponding ground and voltage circuits. Next I uploaded the code to the arduino and tested changing the blink intervals and reuploading the code.
For my project, I would be using the Arduino interface for programming my board.
In Arduino I burned (cleared previously existing commands) to turn the board into an ISP (in-system programmer). To do this I went to:
File, Examples, 11.ArduinoISP, ArduinoISP
I uploaded this code to the board and next I uploaded a library for Arduino to be able to communicate with the attiny microprocessor. I added a folder named 'Hardware' to the Arduino y and added the ATTINY folder to it. I also had to add the boards.txt file to Variants.
I uploaded the code to my board and at first the file stayed red. I put some pressure on the pins to make sure they were making a solid connection and then the code went through! Keeping the board powered, I was able to get the board to illuminate the LED at the press of the button!
|

|