What is an Input Device?
An input device is an equipment/Component used to provide data and control signals to an information processing system such as a Micro Controller. Examples of input devices include Sensors, Cameras etc.
Sensors & Transducers
A sensor is a transducer whose purpose is to detect some characteristic of its environments. It detects events or changes in quantities and provides a corresponding output, generally as an electrical or optical signal. Transducers are measurement devices used to change one kind of energy to another. Energy may include electrical, mechanical, electromagnetic, chemical, acoustic, and thermal energy.
Assignment:
Individual
-Measure something: add a sensor to a microcontroller board that you have designed and read it
Group
-Measure the analog levels and digital signals in an input device
Software :
-Eagle
-Mods
-Arduino IDE
Materials :
-FR1
-Eelectronic Components
-Sensors
-Datasheets
Accomplised
-Understood how to connect an input device in a circuit
-Read datasheet of the used input device
-Learnt the difference between analog and digital values
-Designed, milled and soldered a board with 2 Sensors
-Read the data from the sensors
Analogue and Digital Sensors
Analogue Sensors
Analog Sensors produce a continuous output signal or voltage which is generally proportional to the quantity being measured. Physical quantities such as Temperature, Speed, Pressure, Displacement, Strain etc are all analog quantities as they tend to be continuous in nature. For example, the temperature of a liquid can be measured using a thermometer or thermocouple which continuously responds to temperature changes as the liquid is heated up or cooled down.
Digital Sensors
As its name implies, Digital Sensors produce a discrete digital output signals or voltages that are a digital representation of the quantity being measured. Digital sensors produce a Binary output signal in the form of a logic “1” or a logic “0”, (“ON” or “OFF”). This means then that a digital signal only produces discrete (non-continuous) values which may be outputted as a single “bit”, (serial transmission) or by combining the bits to produce a single “byte” output (parallel transmission).
My Input Devices
As its name implies, Digital Sensors produce a discrete digital output signals or voltages that are a digital representation of the quantity being measured. Digital sensors produce a Binary output signal in the form of a logic “1” or a logic “0”, (“ON” or “OFF”). This means then that a digital signal only produces discrete (non-continuous) values which may be outputted as a single “bit”, (serial transmission) or by combining the bits to produce a single “byte” output (parallel transmission).
Passive InfraRed
PIR sensors allow you to sense motion, almost always used to detect whether a human has moved in or out of the sensors range. They are small, inexpensive, low-power, easy to use and don't wear out. For that reason, they are commonly found in appliances and gadgets used in homes or businesses. They are often referred to as PIR, "Passive Infrared", "Pyroelectric", or "IR motion" sensors.
How PIRs Work
The PIR sensor itself has two slots in it, each slot is made of a special material that is sensitive to IR. The lens used here is not really doing much and so we see that the two slots can 'see' out past some distance (basically the sensitivity of the sensor). When the sensor is idle, both slots detect the same amount of IR, the ambient amount radiated from the room or walls or outdoors. When a warm body like a human or animal passes by, it first intercepts one half of the PIR sensor, which causes a positive differential change between the two halves. When the warm body leaves the sensing area, the reverse happens, whereby the sensor generates a negative differential change. These change pulses are what is detected.
The PIR Sensor
The IR sensor itself is housed in a hermetically sealed metal can to improve noise/temperature/humidity immunity. There is a window made of an IR-transmissive material (typically coated silicon since that is very easy to come by) that protects the sensing element. Behind the window are the two balanced sensors.
Lenses
PIR sensors are rather generic and for the most part vary only in price and sensitivity. The lens is just a piece of plastic, but that means that the detection area is just two rectangles. Usually, we'd like to have a detection area that is much larger. To do that, we use a simple lens such as those found in a camera: they condense a large area (such as a landscape) into a small one (on film or a CCD sensor). For reasons that will be apparent soon, we would like to make the PIR lenses small and thin and moldable from cheap plastic, even though it may add distortion. For this reason, the sensors are actually Fresnel lenses:
Phototransistor
A Phototransistor is an electronic switching and current amplification component which relies on exposure to light to operate. When light falls on the junction, reverse current flows which are proportional to the luminance. Phototransistors are used extensively to detect light pulses and convert them into digital electrical signals. These are operated by light rather than electric current. Providing a large amount of gain, low cost and these phototransistors might be used in numerous applications.
How Phototransistor Work
Phototransistors work in a similar way to photoresistors commonly known as LDR (light dependent resistor) but are able to produce both current and voltage while photoresistors are only capable of producing current due to change in resistance. Phototransistors are transistors with the base terminal exposed. Instead of sending current into the base, the photons from striking light activate the transistor. This is because a phototransistor is made of a bipolar semiconductor and focuses the energy that is passed through it. These are activated by light particles and are used in virtually all electronic devices that depend on the light in some way. All silicon photosensors (phototransistors) respond to the entire visible radiation range as well as to infrared. In fact, all diodes, transistors, Darlington's, triacs, etc. have the same basic radiation frequency response.
ATTINY 44- SSU
I decide to go with attiny 44 for this week's assignment. So to get started I had to go through the datasheet and pinouts to understand where to connect my input devices. Since both my sensors were analog in nature, I will have to keep in mind to connect them appropriately.
Analog to Digital Conversion(ADC)
An Analog to Digital Converter (ADC) is a very useful feature that converts an analog voltage on a pin to a digital number. By converting from the analog world to the digital world, we can begin to use electronics to interface to the analog world around us. Not every pin on a microcontroller has the ability to do analog to digital conversions. In an Attiny 44, the following are the analog pins.
The way an ADC works is fairly complex. There are a few different ways to achieve this feat. However, the AVR family microcontrollers use "successive approximation ADC" method.
Relating ADC Value to Voltage
The ADC reports a ratiometric value. This means that the ADC assumes 5V is 1023 and anything less than 5V will be a ratio between 5V and 1023.
Arduino and ADC
analogRead()
Reads the value from the specified analog pin. The Arduino board contains a 6 channel (8 channels on the Mini and Nano, 16 on the Mega), 10-bit analog to digital converter. This means that it will map input voltages between 0 and 5 volts into integer values between 0 and 1023. This yields a resolution between readings of 5 volts / 1024 units or, .0049 volts (4.9 mV) per unit. The input range and resolution can be changed using analogReference().
It takes about 100 microseconds (0.0001 s) to read an analog input, so the maximum reading rate is about 10,000 times a second.
Working of ADC
The following diagram explains the parts and the process involved in converting signals.
Each labeled part is explained in detail below.
1. PINS
These are the ADC pins on an Attiny 44. The analog sensors are connected to these. Attiny 44 has 8 ADC pins
2. Multiplexer
A multiplexer (also sometimes spelled as multiplexor) is a device that can select from several different input signals and transmit either one or more output signals. A demultiplexer is a device that can take a single signal carrying multiple payloads and divide it into several streams.
3. Aref
Another pin which can optionally be used as an external voltage reference pin.
4. Clock
The ADC has two fundamental operation modes: Single Conversion and Free Running. In Single Conversion mode, you have to initiate each conversion. When it is done, the result is placed in the ADC Data register pair and no new conversion is started. In Free Running mode, you start the conversion only once, and then, the ADC automatically will start the following conversion as soon as the previous one is finished.
The analog to digital conversion is not instantaneous, it takes some time. This time depends on the clock signal used by the ADC. The conversion time is proportional to the frequency of the ADC clock signal, which must be between 50kHz and 200kHz.
If you can live with less than 10-bit resolution, you can reduce the conversion time by increasing the ADC clock frequency. The ADC module contains a prescaler, which divides the system clock to an acceptable ADC clock frequency. You configure the division factor of the prescaler using the ADPS bits
5 .Successive Approximations
The algorithm / methodology that converts analog signals to digital signals. This type of conversion is mostly used in AVR microcontrollers.
6 .Register
There are four registers related to the operation of the ADC: ADC Multiplexer Select Register (ADMUX), ADC Control and Status Register (ADCSR), ADC Data Register Low (ADCL) and ADC Data Register High (ADCH).
ADMUX
You can see that it's possible to load a register with the desired input number and write it to ADMUX directly, as the register does not contain any other flags or setting bits.
If these bits are changed during a conversion, the change will have no effect until this conversion is complete.
ADCSR
Design
As I explained earlier I wanted my board to sense motion and light on an object. So I use PIR and phototransistor for that purpose. Additionally, I wanted to add an LED to the circuit. The LED must blink when certain conditions are met. For eg. When the object is at a certain distance from the sensor and is lit to a certain lux level.
To design the components of the circuit I used Neil's board as my reference.
So after sketching out the basic circuit, these are the list of components required.
Component list:
1x ATtiny44
2x 10kΩ resistors
1x 499Ω resistors
1x 1kΩ resistors
1x 1uF Capacitor
1x FTDI Header
1x 6 pin AVRISP Header
1x White LED
Sensors:
1x PIR
1xPhototransistor
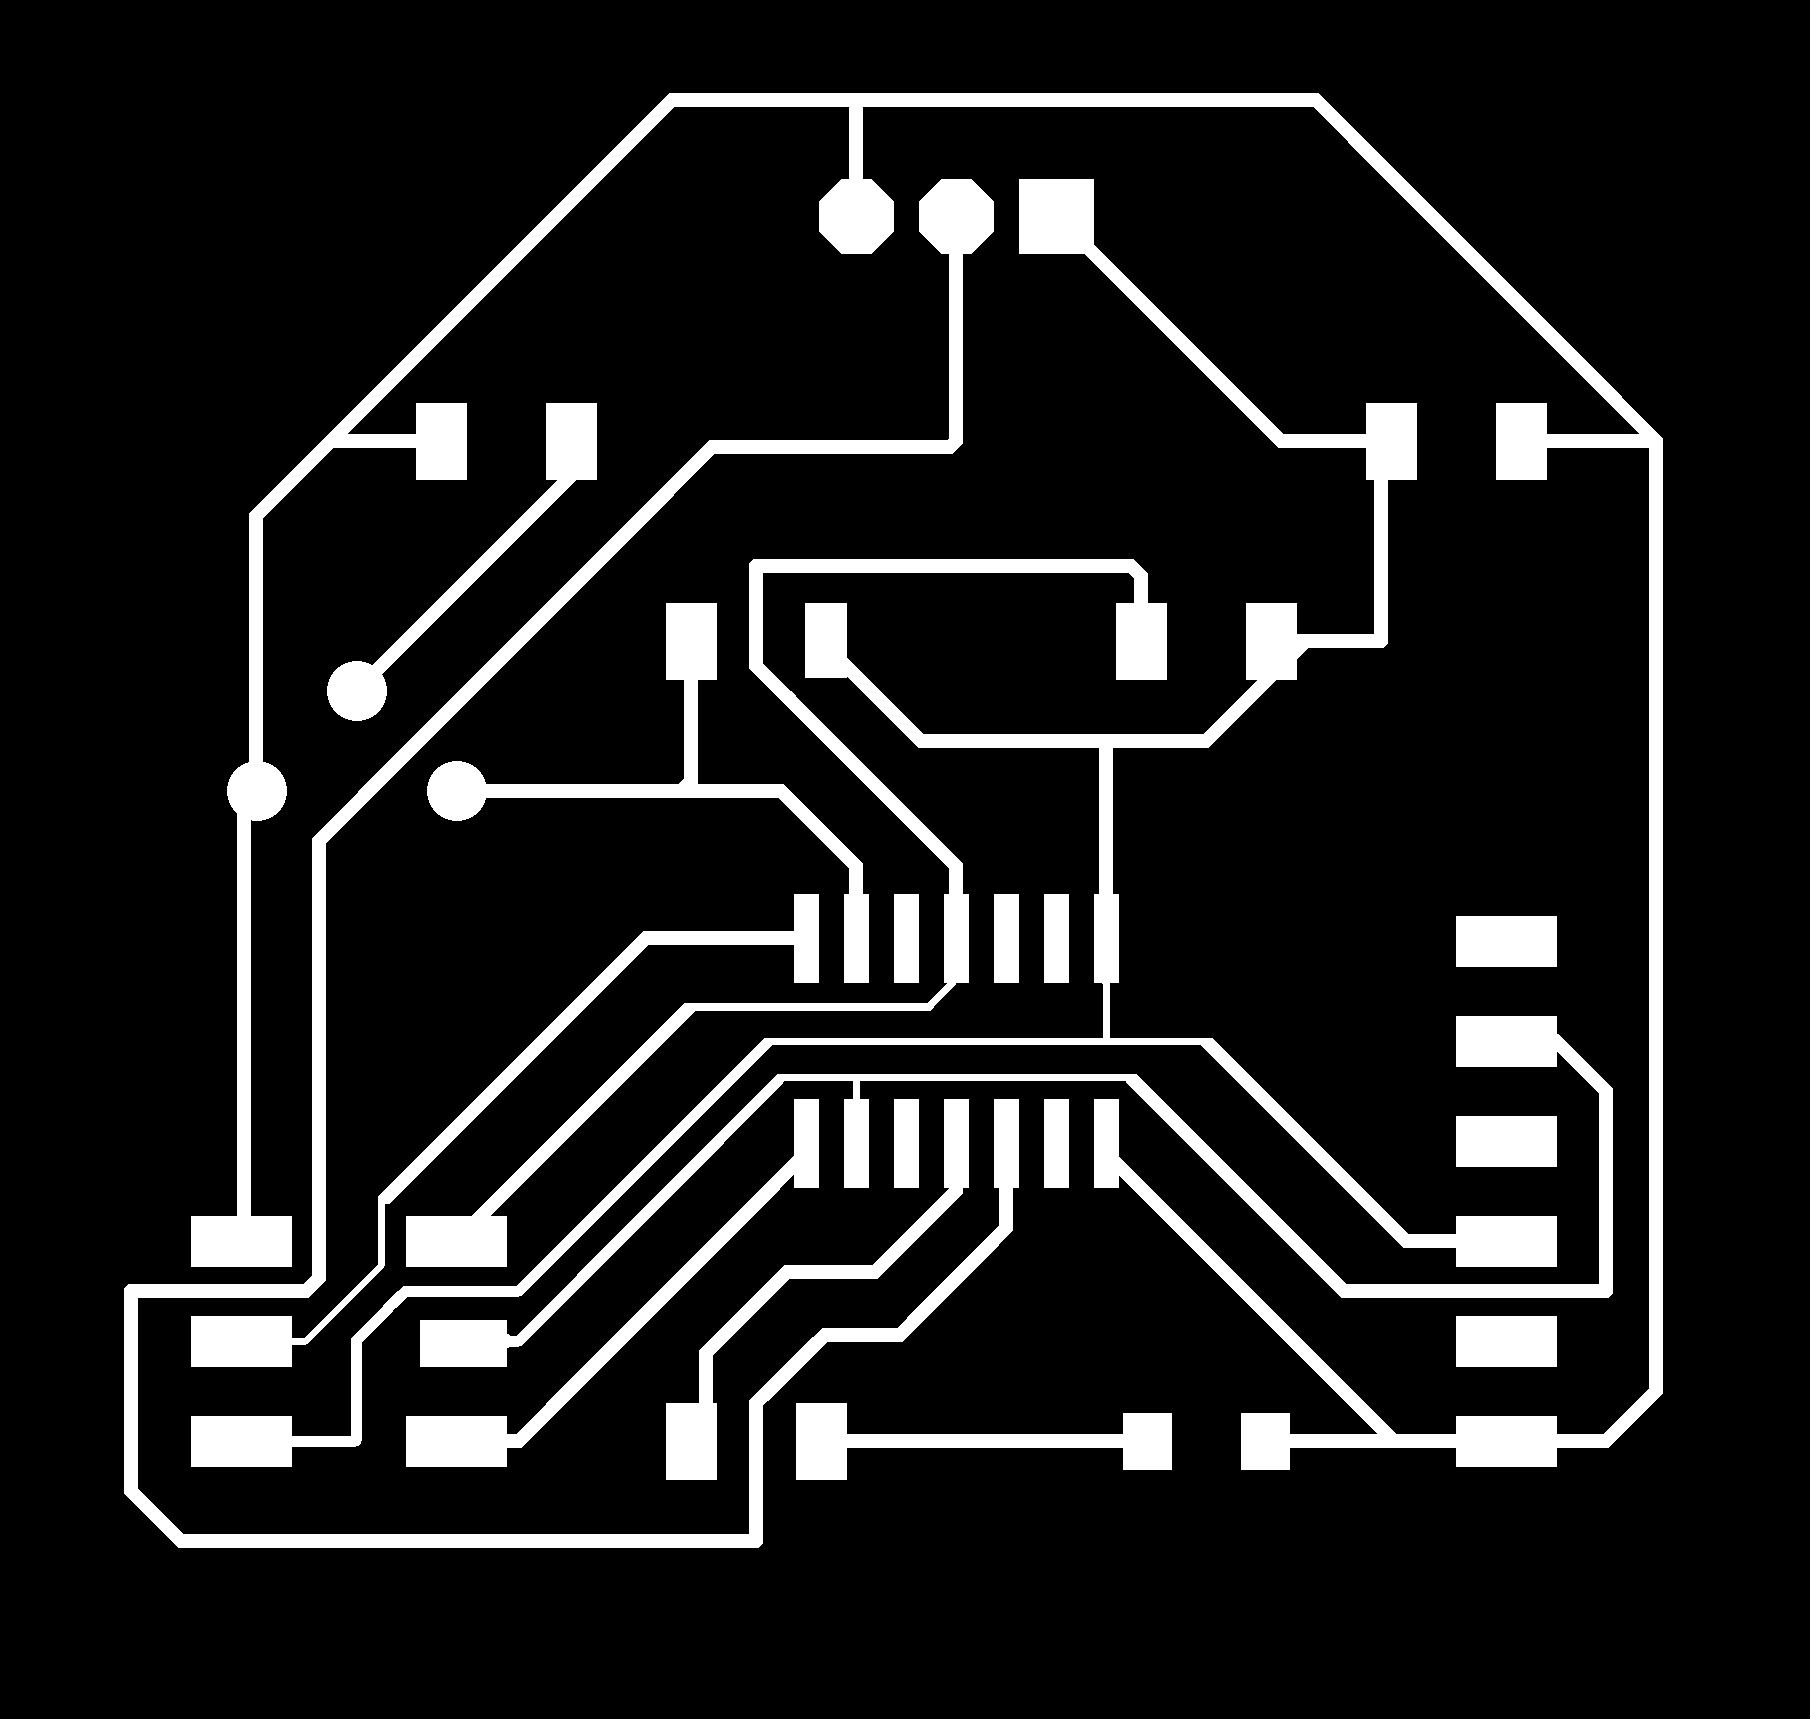
Eagle
Once I had decided the list of components, I started designing in eagle. The following drawing shows the component list and their names


Programming
As I had mentioned earlier the basic idea of the board is to satisfy two conditions. Check for motion and check for light on the object. When two conditions are satisfied the LED is supposed to glow. Having this in mind I went through some of the programs available on the internet and formulated a program for my board with the help of a friend at the lab. The first step is to connect the board to FabISP for programming. The following pinout explains how I connected my ISP
Reading Serial Data
To Read the serial Data from the board an FTDI cable is required. I had soldered the FTDI head for this purpose on the board. J.travis Russett 's input week was very helpul for me to understand and how to use an FTDI cable and also programming the arcduino for this purpose. I followed the instructions provided by him to read the data.
Even so, I had problems reading the data. I changed multiple bands and checked to read yet very unsuccessful. I made a very simple mistake that took a long time to realize and rectify. I did not specify the right pins of the FTDI to read the data from RX and TX.
The assignment was to Measure the analog levels and digital signals in an input device. Electronics is new to all of us and we had to experiment and learn using online tutorials to understand how to complete this assignment. Hence the work was not split but a collective effort. However each one of us had to read about the assignment individually and then we had a discussion on how to go about with the test.
These are some of the articles that I went through, and as shown in the video we used LDR to test but in out case we provided current to LDR and that when light changes the voltage changes resulting in bending of the curve.
Conclusion
The week took me step closer to my final project. Choosing the right sensor was quite confusing in the beginning. Even be it a distance sensor there is a wide variety of them and choosing the right one for your purpose is important. In my case I wanted two sensor that measures distance and light. Also each sensor has a way in which it has to be connected in a circuit. This week had a lot of research and studying to do. Though it was interesting, it was also trying at times as it was difficult to understand why certain things were done the way they were. Overall it was a great week, with lots to learn.