Case design
I have two boards so I will 3D print two cases with these dimensions:
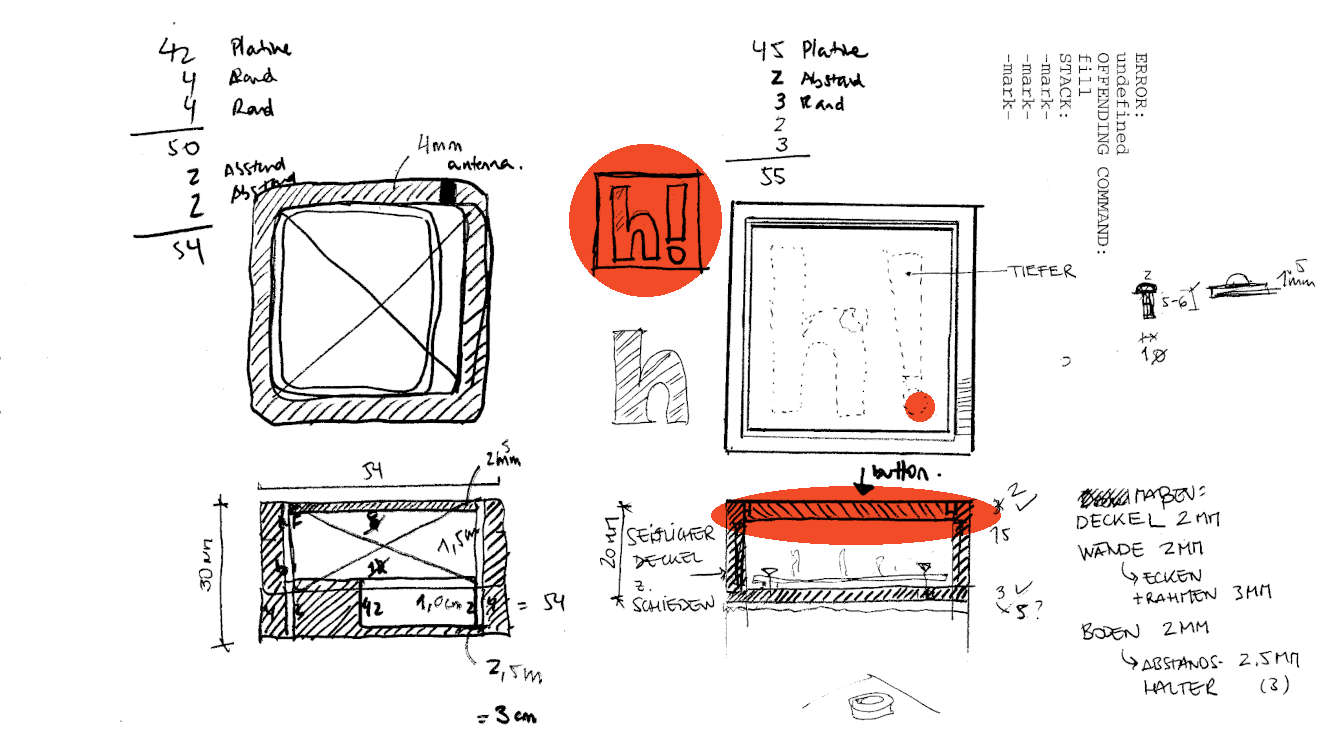
help! button: 48,3 x 48,3 mm, height 20 mm
help! hub: 48,3 x 48,3 mm, height 20 mm
 Case design
Modelling in Rhino
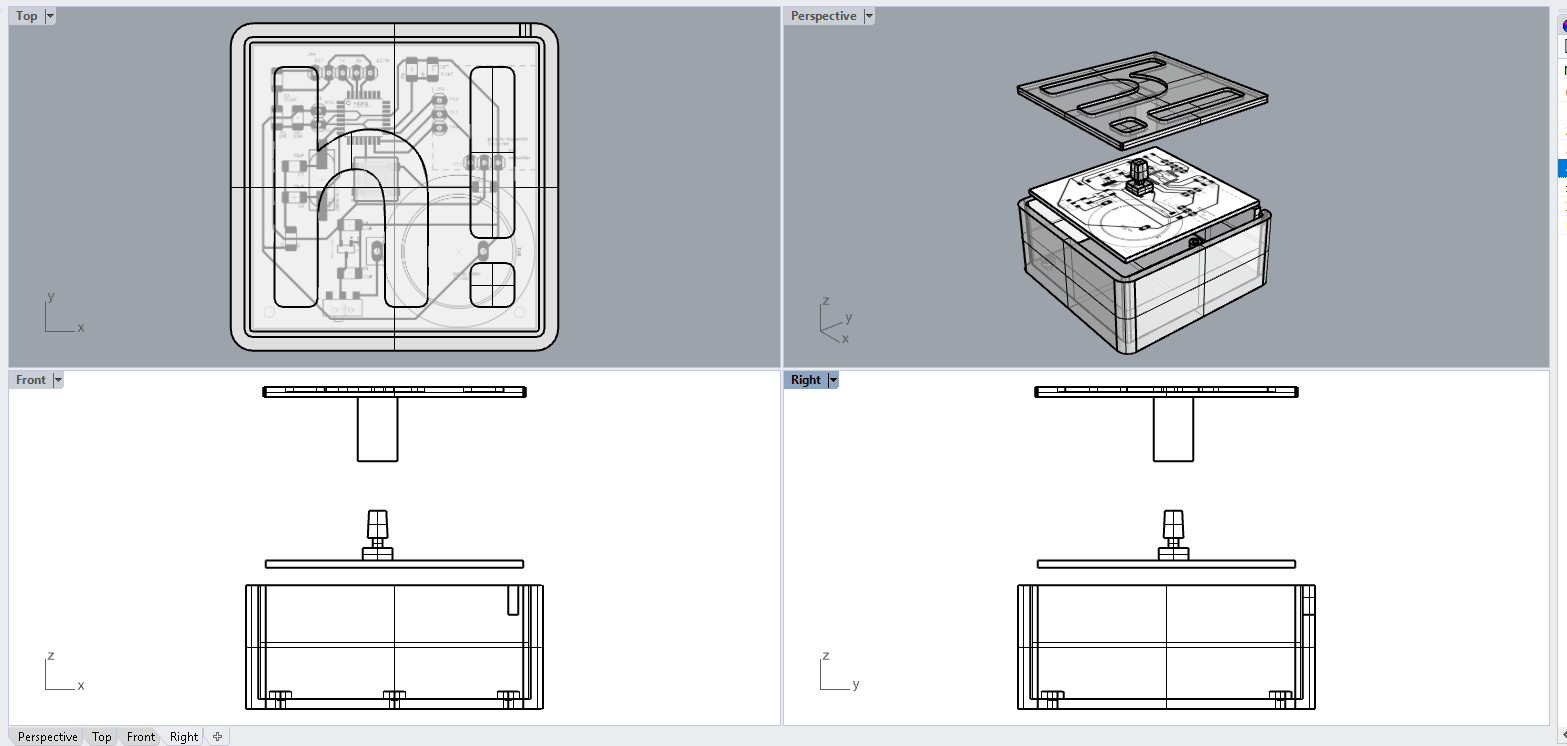
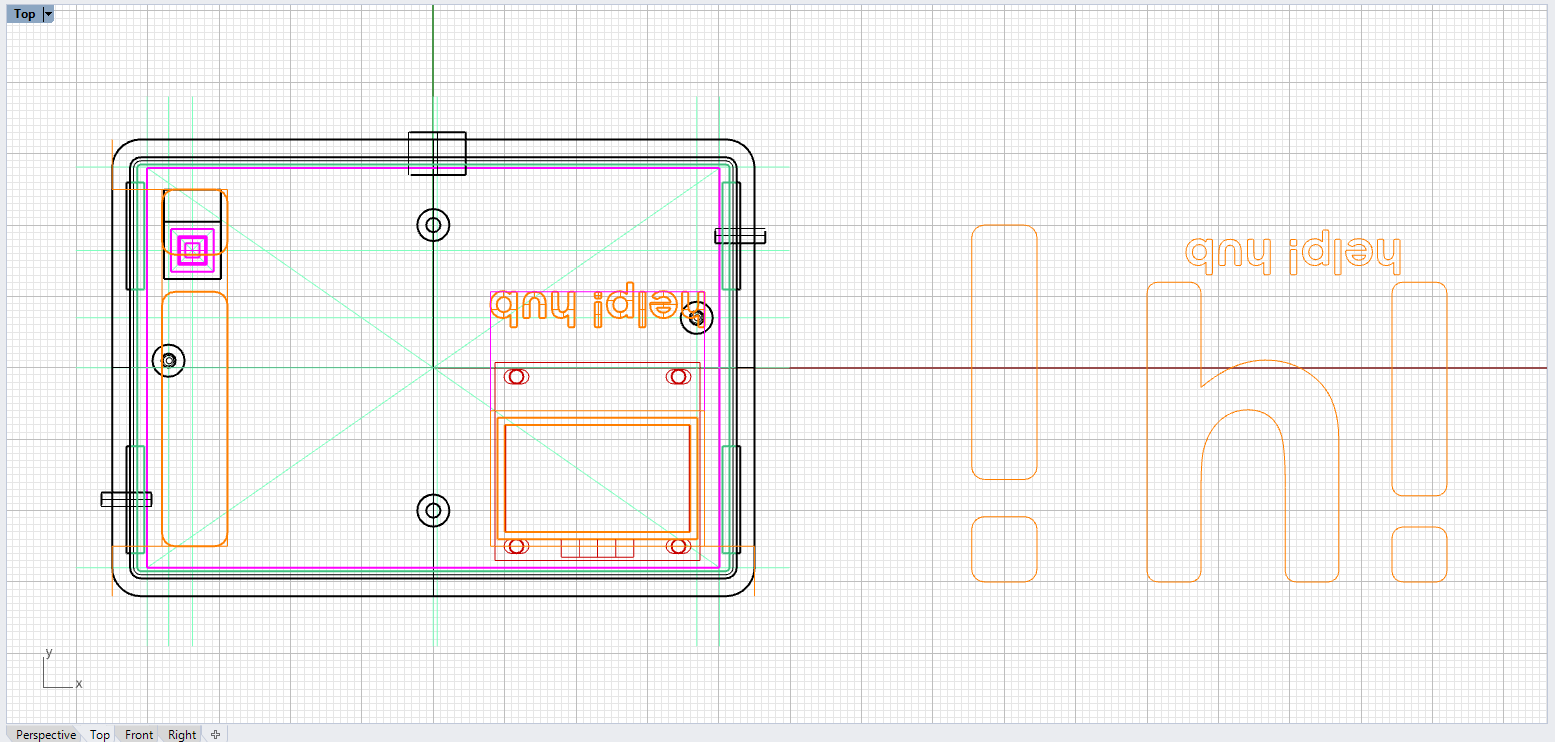
I start exporting the board designs from Eagle and paste the .png file into Rhino to match the position of the SMD button, mounting screws and DC connector. I'll also build the Smd button as a volume and place it in the correct position.
I start exporting the board designs from Eagle and paste the .png file into Rhino to match the position of the SMD button, mounting screws and DC connector. I'll also build the Smd button as a volume and place it in the correct position.
In Rhino I create the volumes. Both cases consist of 3 parts: the body, the lid with the recessed logo and the button adapter.
For this I work with the commands:
Polylinie, Offset und Fillet
→ with them I sketch the volume, check the dimensions as well as distances and heights.
ExtrudeCurve, BooleanUnion, BooleanDifference
→ then I extrude the closed polylines, start subtracting or adding the volumes.
PictureFrame
→ with this command I insert the .png of the board design.
FilletEdge, ChamferEdge
→ The corners are rounded, some edges are chamfered.
PlanarSrf, OffsetSrf, BooleanDifference
→ I had imported the vectorized text and used it to create solids from planar surfaces with cutouts.
 Case design
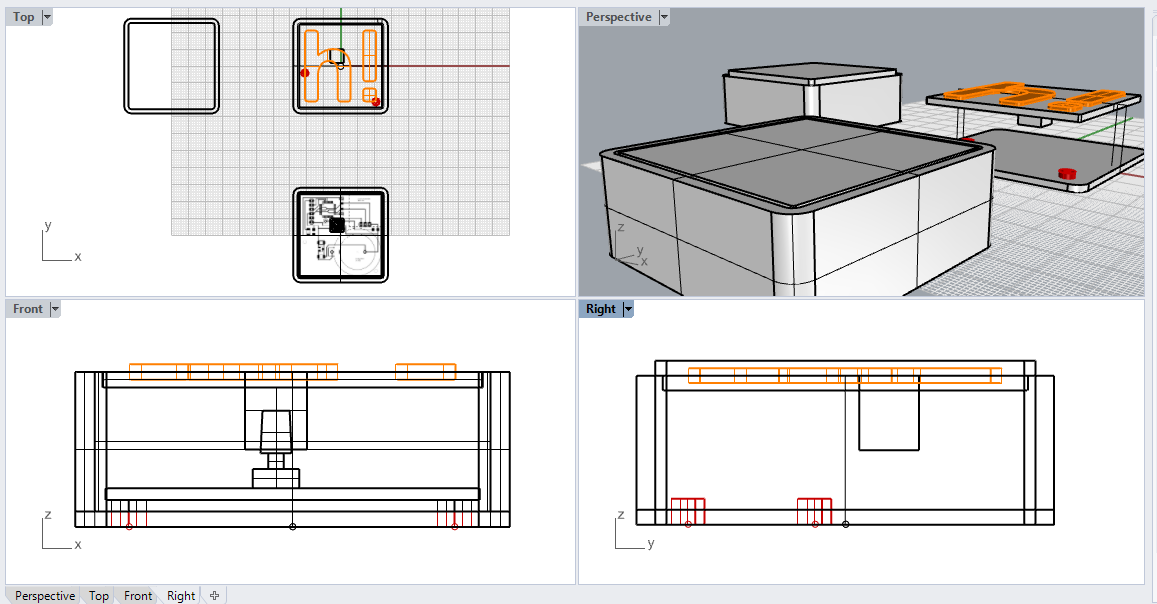 Case design in Rhino
help! button design
Body: suitable spacers for the screws are provided so that the board can be fixed. In addition, there is a cutout in the bottom so that the board can be turned off without removing the lid.
Lid: Here the logo is placed over the whole size, extruded and subtracted. The logo should be 1mm deeper than the surface. The logo is cut on a red sheet with the vinyl cutter and pasted in.
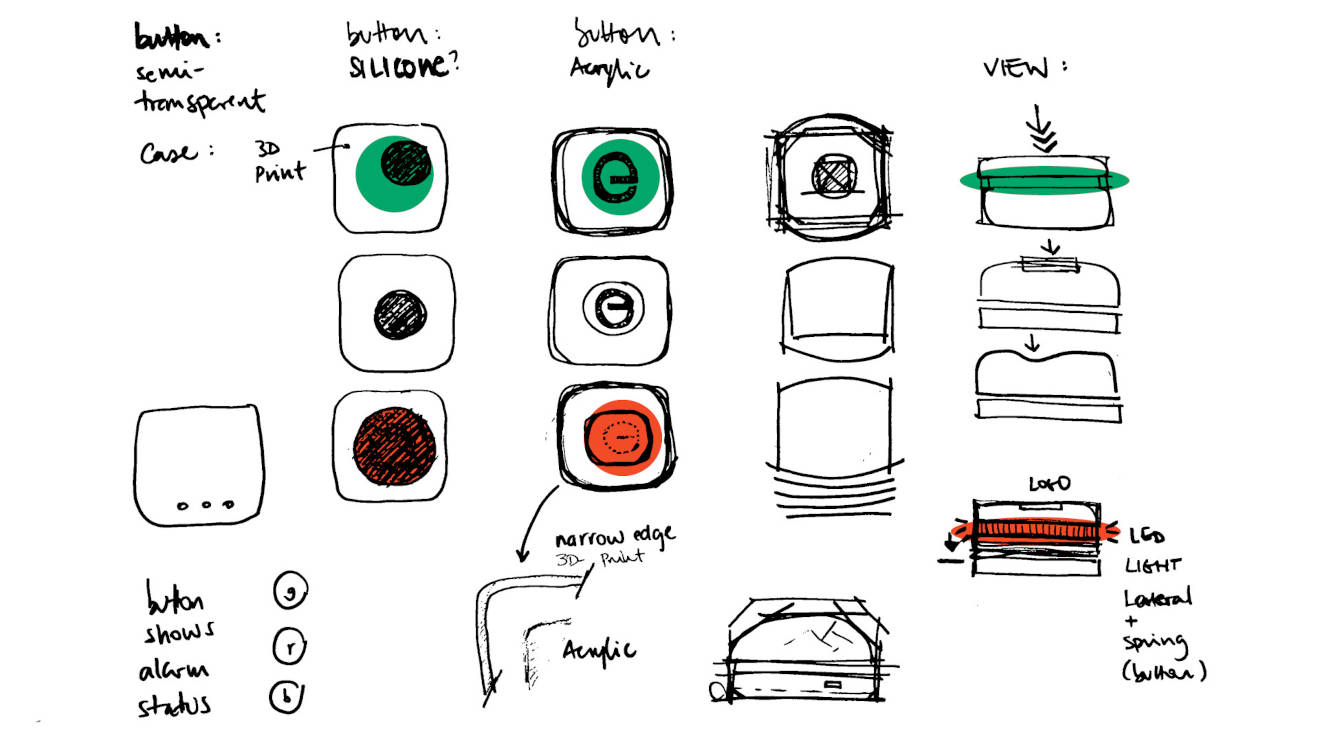
Button Adapter: The SMD button is 6x6mm and has a high profile.On the button comes an adapter for the lid, so that the help! Button can be activated.
 help! button: case design
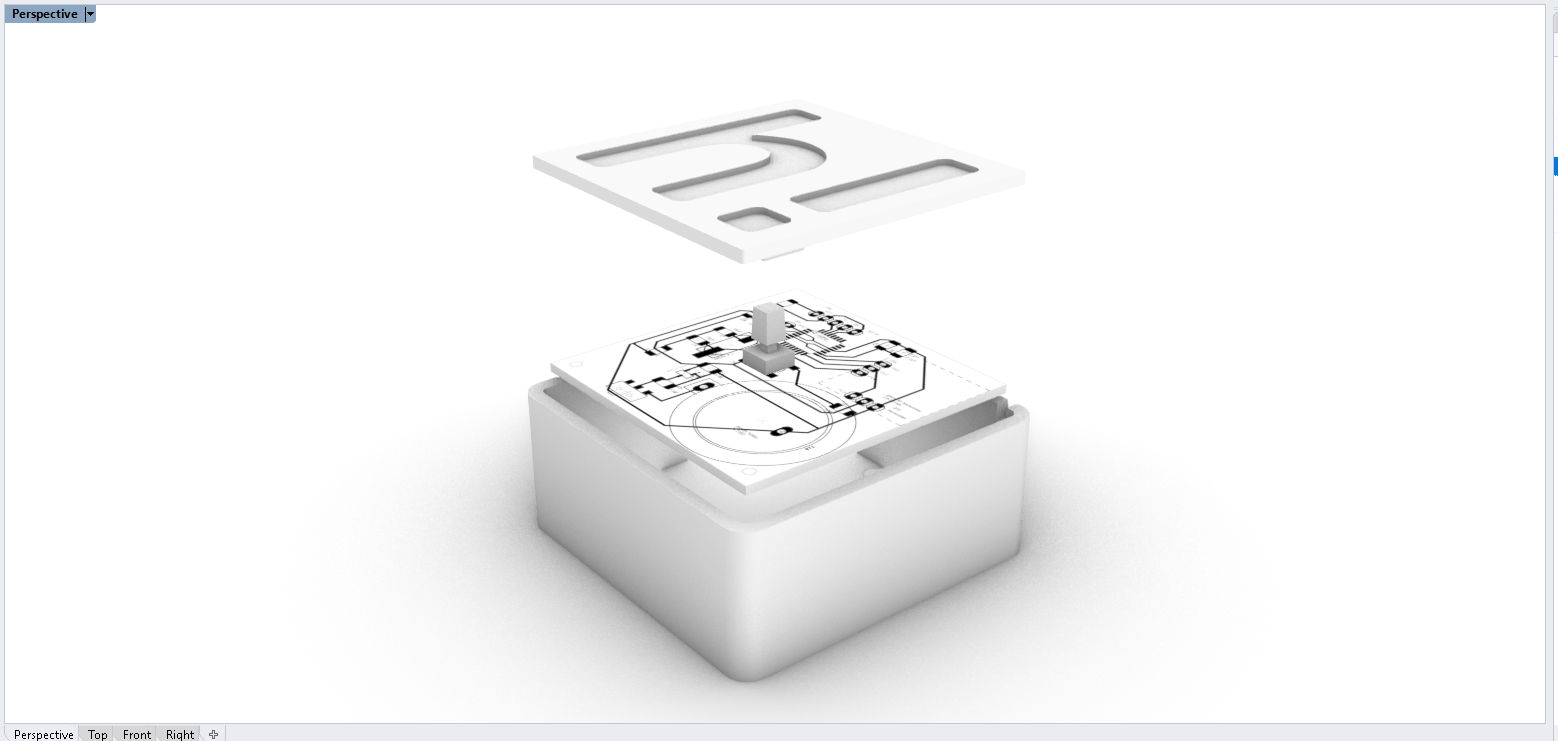 help! button: case design
help! hub design
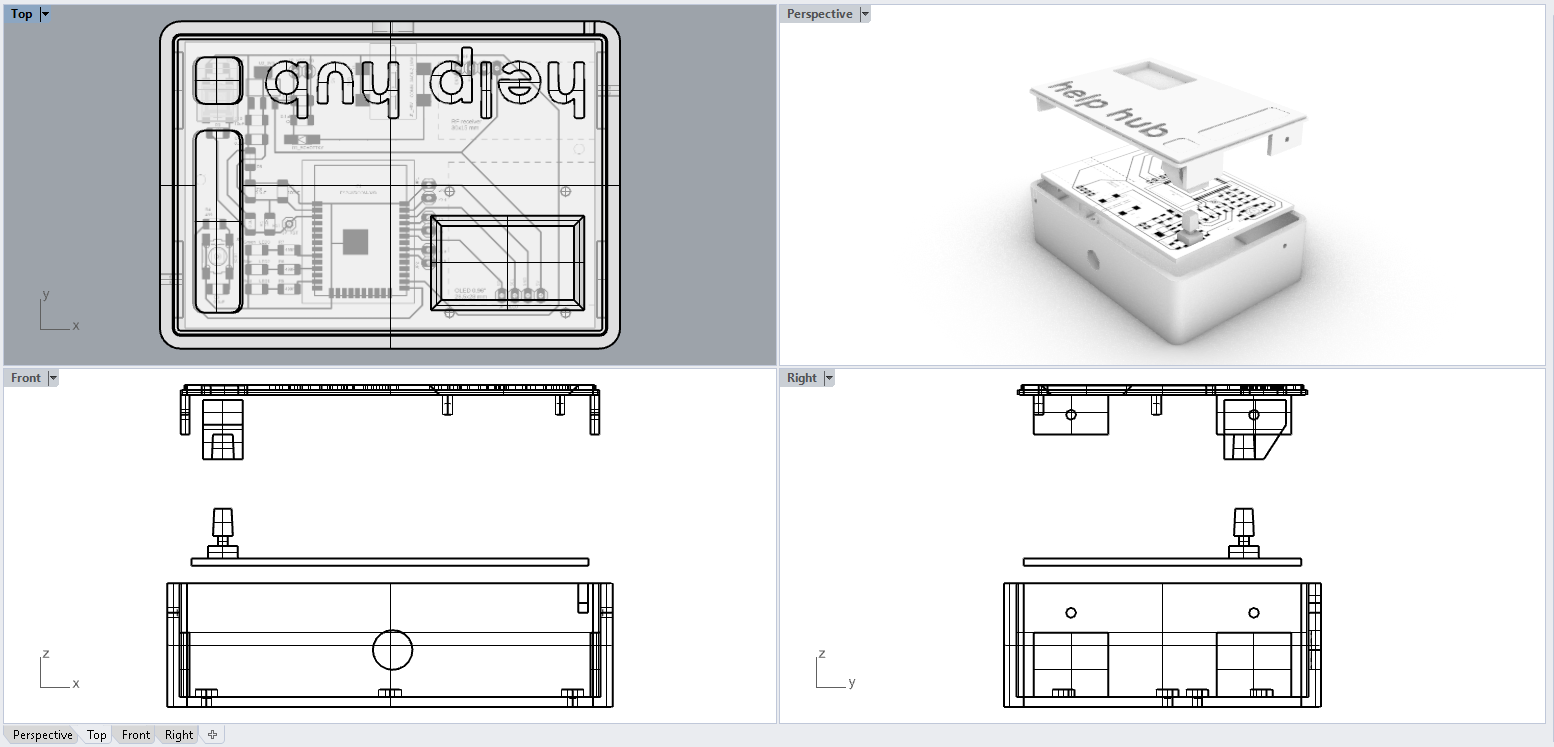
Body: Spacers are provided so that the board is fixed. There are small round recesses on the sides so that the lid can be attached to the body with screws. On one long side there is a larger round cutout for the power supply connection.
Lid: here comes the call sign of the logo and the text 'help! hub' engraved in the surface. Eventually I will cut the text with the vinyl cutter and glue it in. For the mini display I added a cutout with chamfered edges.
Button adapter: On the SMD button comes an adapter to reset the help hub after an emergency.
 help! hub: case design
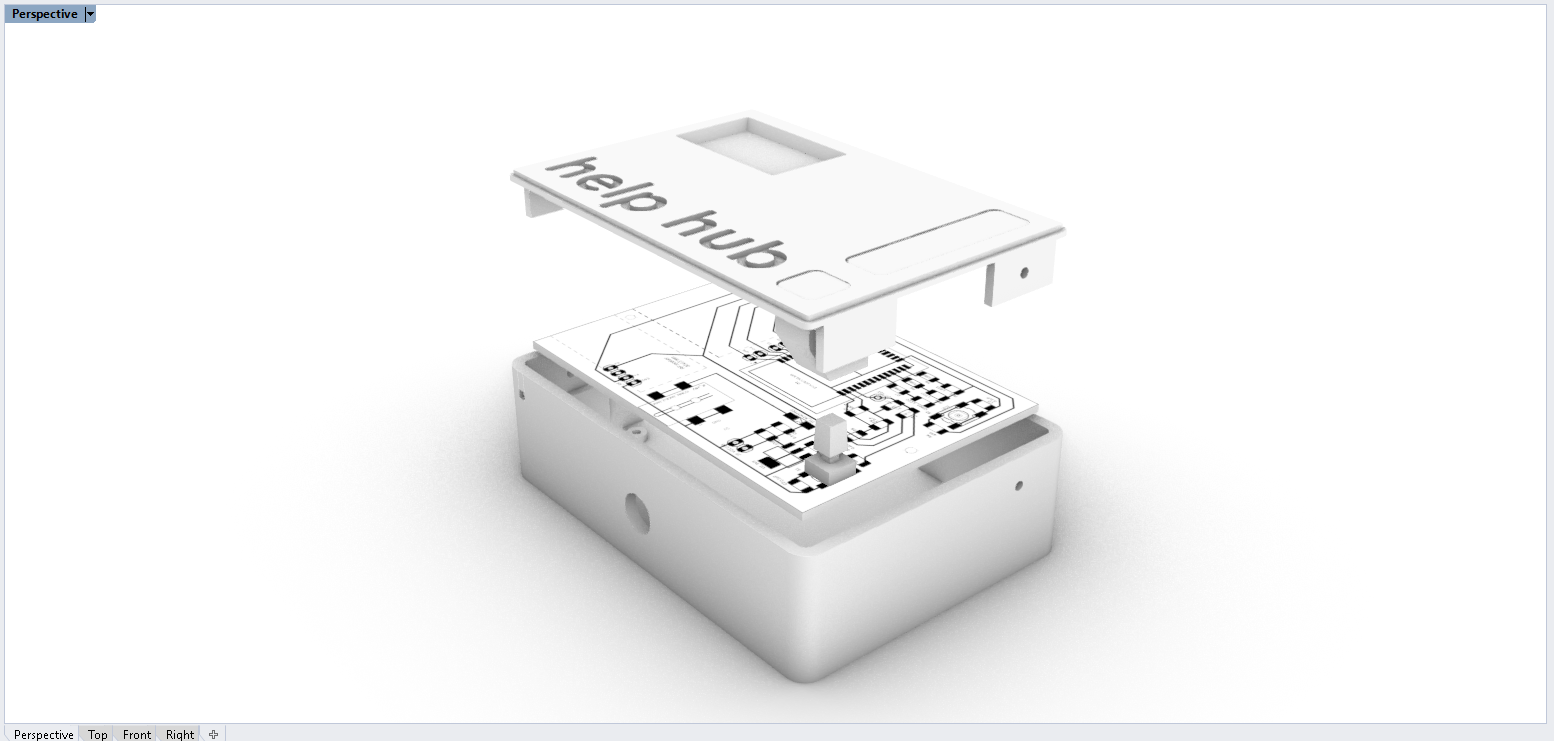 help! hub: case design
Logo
I first convert the text to path in Inkscape and save it as a .dxf file. Then rounded the corners of the logo in Rhino, matched it to the case design and exported it. Using CorelDRAW, I will cut the call sign '!' with the laser cutter. The logo 'h!' and the text 'help! Hub' will be cut using the CutStudio plug-in for the vinyl cutter.
 help! button logo
Fitting
Download
Board 1
- Rhino (.3dm)
- Slicing application (.stl)
Board 2
- Rhino (.3dm)
- Slicing application (.stl)
Board 1 + 2
- Vinyl cutter(.svg)
- Laser cutter (.svg)