Assignment:
Design and produce something with a digital fabrication process (incorporating computer-aided design and manufacturing) not covered in another assignment, documenting the requirements that your assignment meets, and including everything necessary to reproduce it.
What is Vacuum Forming Process?
A plastic sheet is heated until it becomes soft and falls over a mold. A strong suction of air (vacuum) is applied from below, causing the soft plastic to be pulled over the mold and take its shape. Once the mold has cooled down, it can be removed.
The Fab Lab has a Formech 450DT, a desktop forming machine that I will test. Here are some links I find useful for the technical specifications and design the mold:
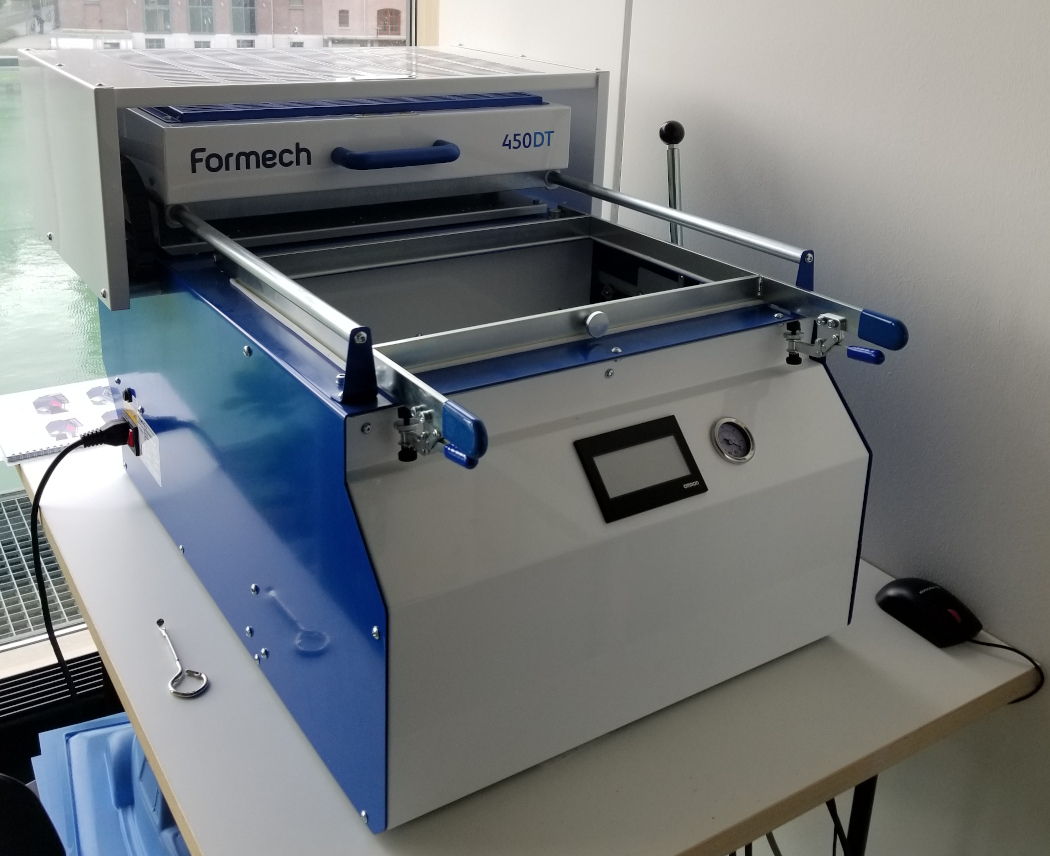 Formech_450DT
MOLD
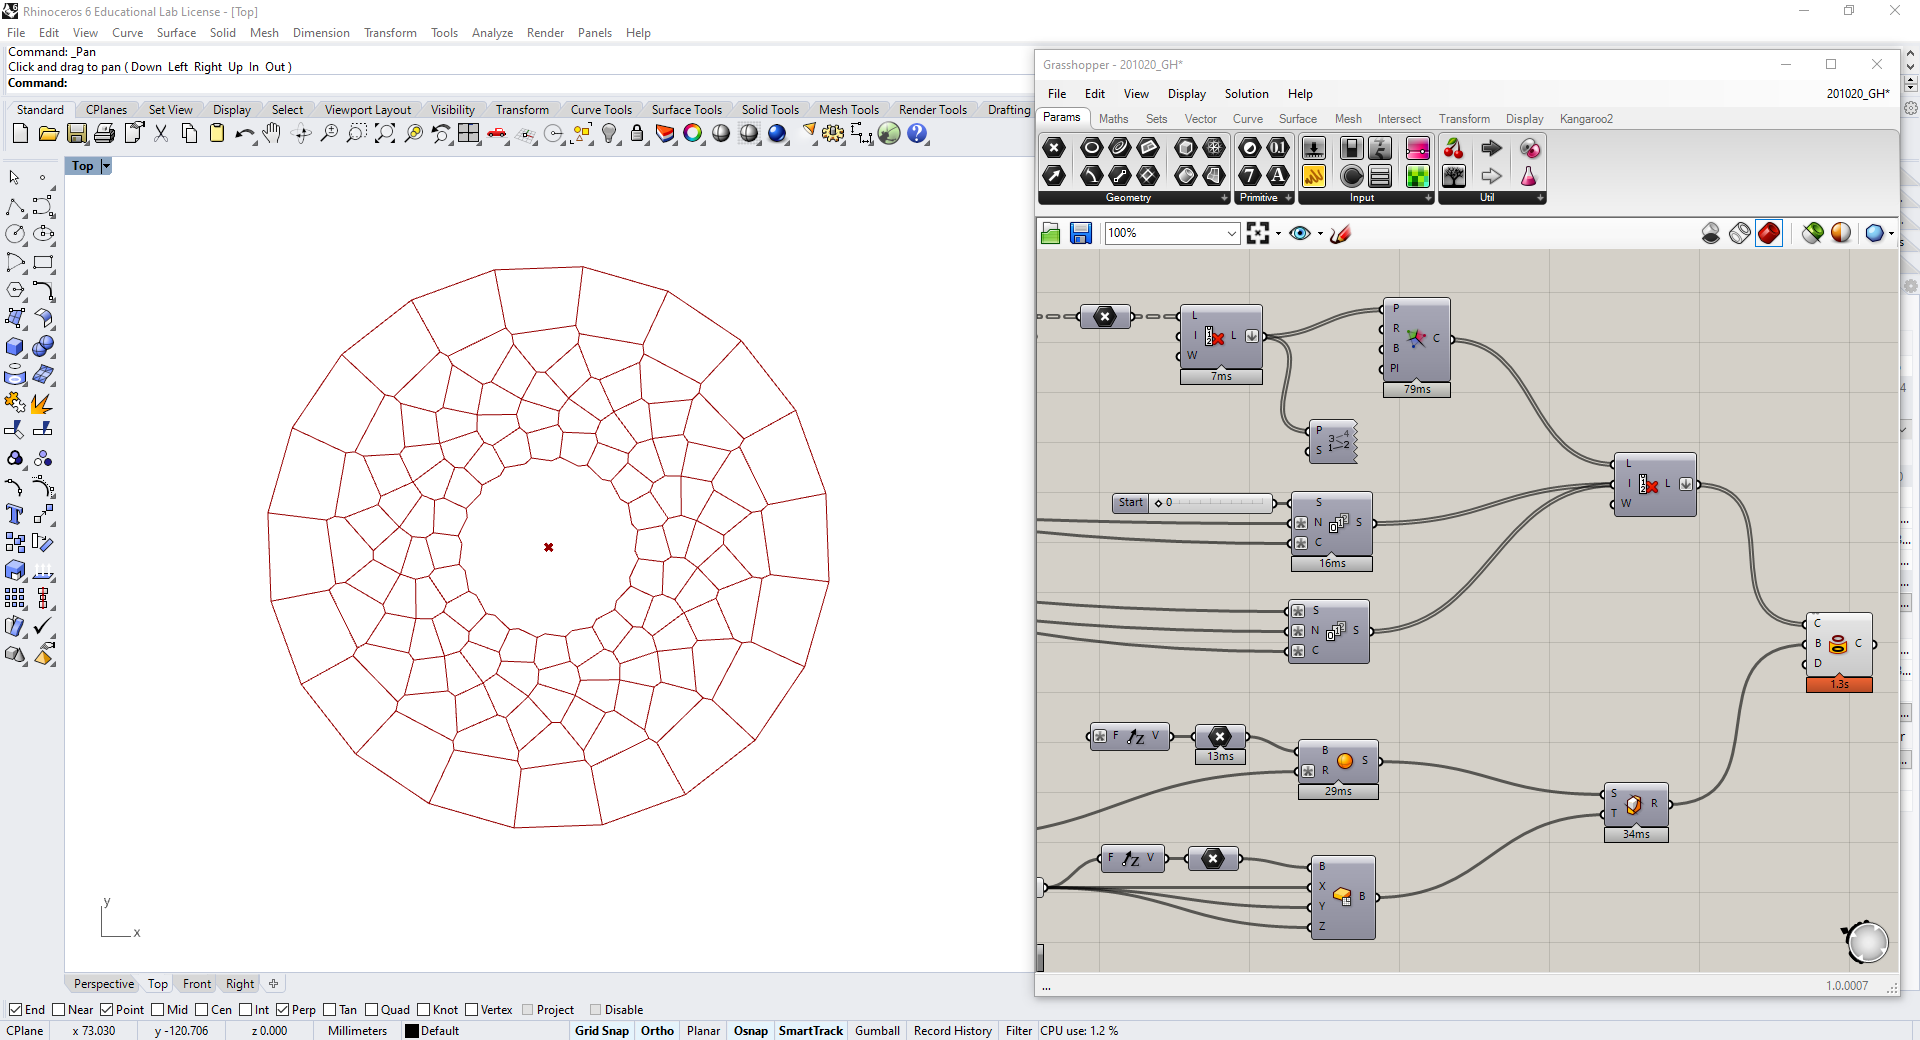
Rhino + Grasshopper
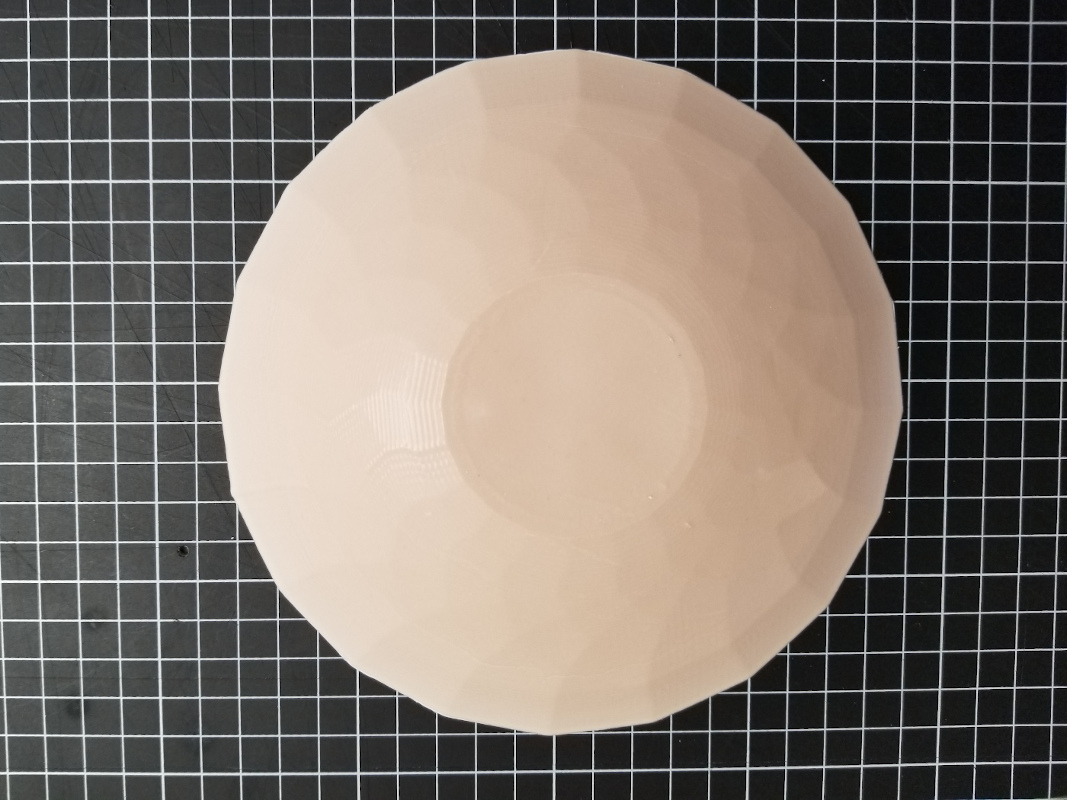
I want to make a faceted bowl and start making the pattern in Grasshopper. The tutorial ‘Voronoi Pattern (Grasshopper Tutorial)‘ was very useful for the beginning. The bowl should be symmetrical, that’s the reason because the voronoi pattern has a central starting point. Once I finished the tutorial, I add some components like ‘Sphere’, ‘Center Box’ to trim them with ‘Trim Solid’. The last component in Grasshopper is ‘Project’: the pattern projects itself onto the bowl geometry.
Then I ‘Bake’ the result into Rhino and create surfaces with the command ‘Surface from 3 or 4 corner points’. The next step is to ‘Polar array’ the surfaces and ‘Joint’ all surfaces to one object. The last step is to close the bowl with a surface (like a lid), 'Join' them to generate a volume and export the closed volume as an STL file. You find the Rhino, Grasshopper and STL files in the download section.
Mold Design
I will design the mold with a CAD program and print it out with a 3D printer. There are some basic considerations for mold design:
- Draft Angels (recommended): draft angles should be a minimum of 3-5 degrees.
- Undercuts: the mold is made of multiple intersecting pieces OR flexible material.
- Venting: you will need venting holes (1mm diameter or less), if the heated plastic needs to be formed within the mold (for pockets or sharp angles on the mold).
For more information on mold design, please refer to the Formech Forming Guide.
 Rhino + Grasshopper
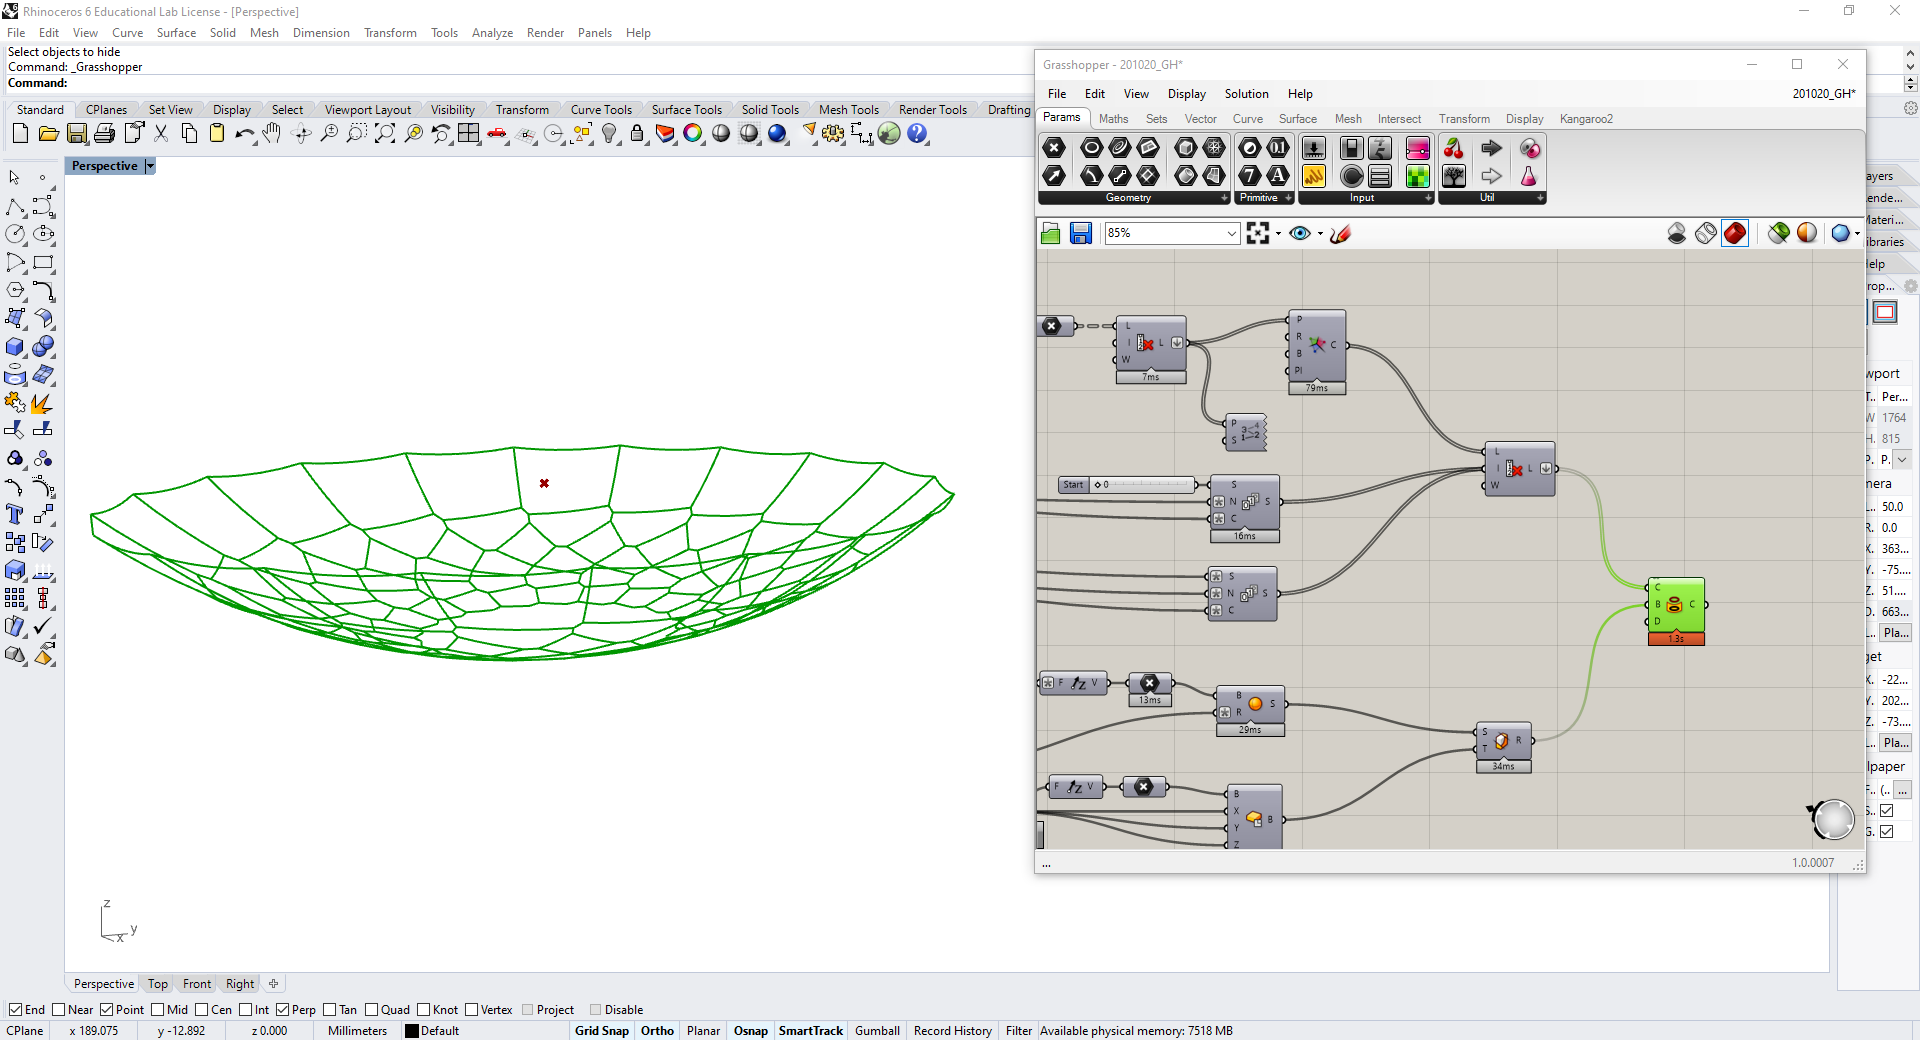 Rhino + Grasshopper
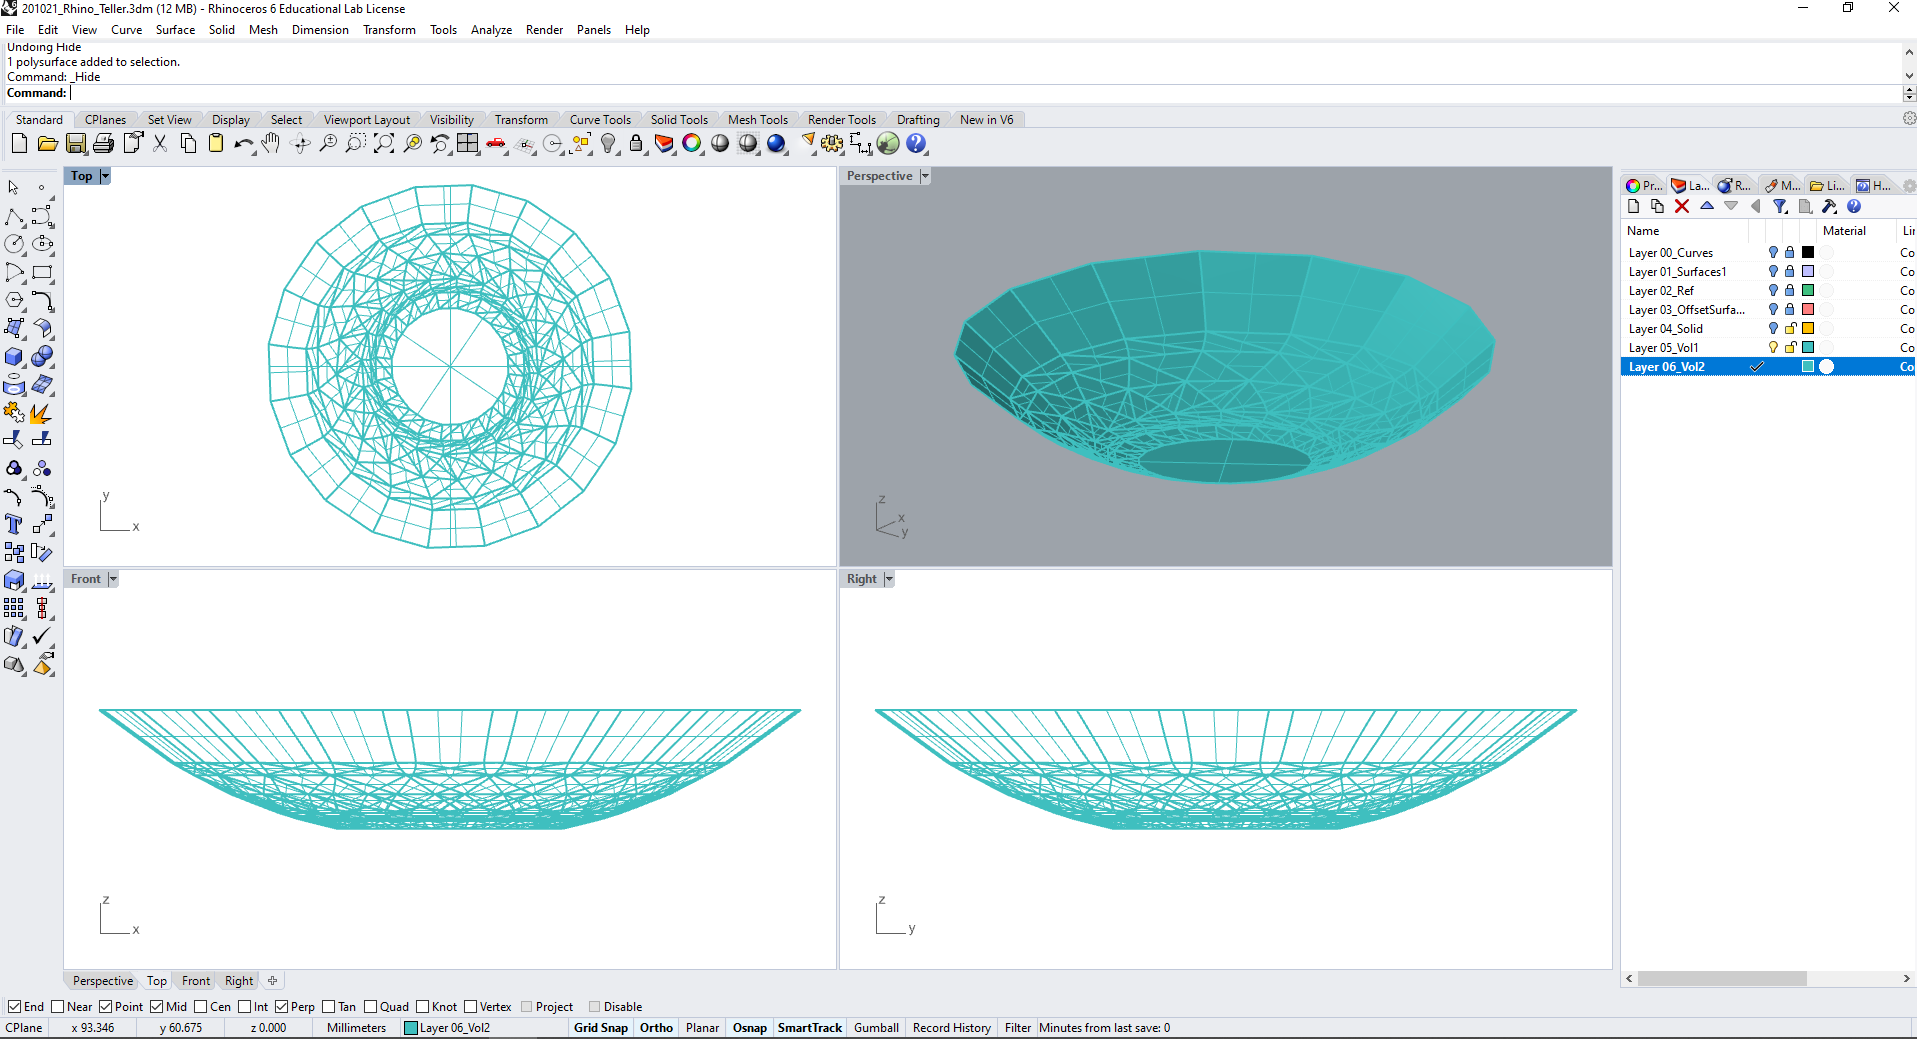 Bowl: surface
3d-Print-Mold
For this assignment, it is important to choose the right 3D print material for the mold. It should be exposed to heat and pressure without loosing its shape.
In the Fab Lab we had good results with the GreenTEC Pro filament, a high-performance biopolymer with optimized properties for technical and mechanical applications. This material offers excellent temperature resistance up to 160° and has also very high optical quality, layers are only marginally visible.
3D-printer | Settings
I print the shape on the Creality 3D-printer with a dense infill and 4 outlines. Take a look at the settings on the screenshot.
The mold should be cleaned up of dust or small parts that can loosen and block the vacuum circuit. You can also use molds made of wood, MDF, aluminum or resins. In the Forming Guide you will find a material list for the materials of the mold.
 Settings in Cura
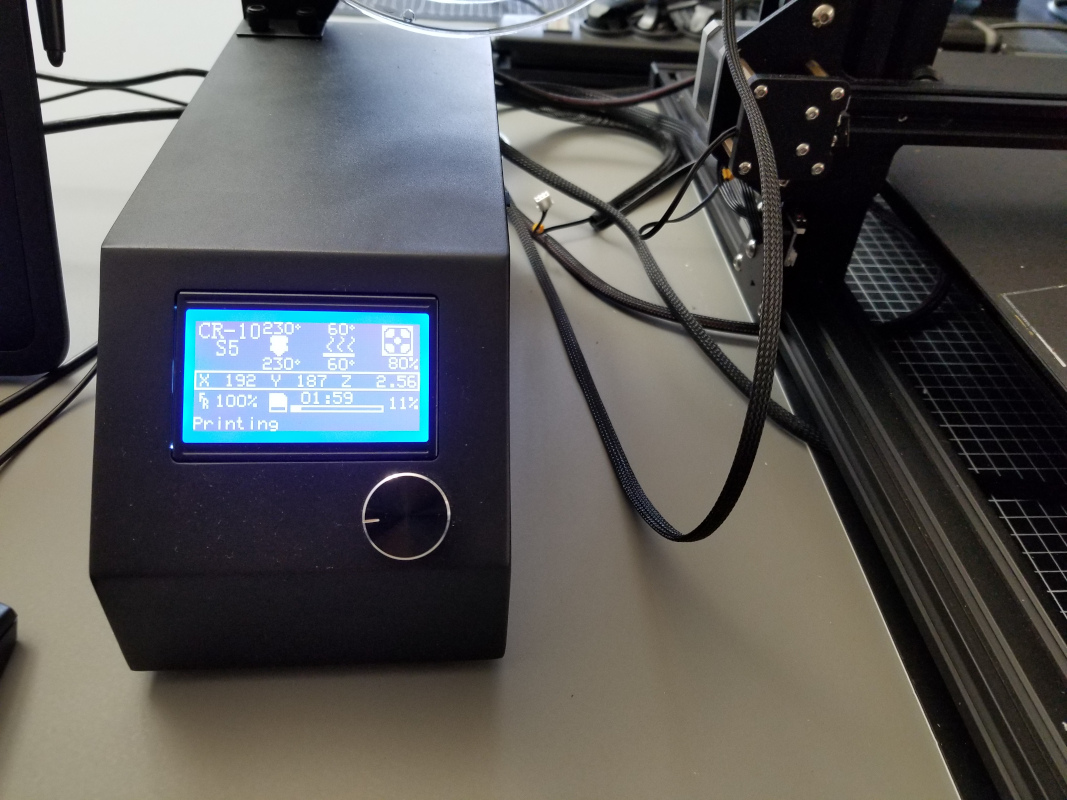 Settings
VACUUM FORMING
Plastic Material | Characteristics:
After reading Formech’s Vacuum Forming Guide, I decided to use Co-Polyester (PETG). PETG has a very good formability with high definition. It is approved for food or medical applications.
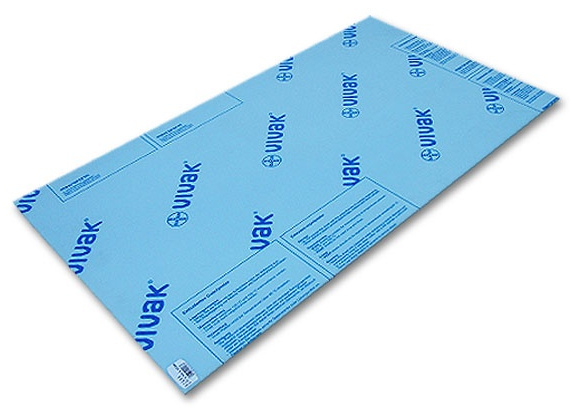
The size of the plastic sheet for the formech450 must be 450 x 300 mm, it covers the white seals for the vacuum process. I order 0,5 mm PETG sheets and cut them into the right size.
The recommended plastics and their approximate heating time are listed in the Forming Guide: the length of heating time depends on the type of material, its thickness and color.
Steps
You basically need 2 things: a mold and a sheet of plastic. Pull the lever towards you to raise the table and it clicks, the mold can be placed in the middle. The table can be slowly lowered by pushing the table lever away from you. The mold go inside the vacuum forming machine.
Before you place the plastic sheet, open the material clamps and raise the clamp frame. The plastic sheet will be placed over the aperture plate (it should cover the white seals) as a kind of lid that will be fixed with the clamp frame. Adjust the toggle clamp screws to fix the plastic sheet and create an airtight seal for the vacuum forming process (Watch the video).
Now, I have to switch on the machine and turn on the heaters (button in the main menu) and wait 15 minutes until the machine has reached its operating temperature. The heater has to be in its back position to heat up. The next step is to select the 'OPTIONS' button (in the main menu) and then MANUAL MODE on the display to open the operating screen in manual mode. I enter the recommended heating time in seconds:
PETG plastic sheet: thickness 0,5 mm: heating time about 20 seconds.
NOTE → After a few tests I added 5 seconds, because the countdown starts as soon as you pull the heater forward. The PETG sheet is exposed to the heat for 25 seconds.
When the operating temperature is reached, the heater can be pulled forward and the plastic sheet can be exposed to heat in the appropriate length. Wait until the plastic sheet curves slightly and evenly. Check again and again by carefully pushing back the heating element to see how far the process has progressed. Do not push the heating element back too far, otherwise the heating process is interrupted.
As soon as the plastic plate has heated up evenly, push the heating element back completely. The heating process is automatically terminated. The table will be fully raised until the mold slides into the heated plastic sheet from below. Now you must switch on the vacuum pump (VACUUM button). Check if all corners are well formed and if necessary press on with an object without sharp edges.
Finally, the plastic has to cool down sufficiently and the vacuum pump can be switched off. Otherwise it can deform back again. Then press the RELEASE button to separate the mold and the plastic. The release pump pushes air once or twice to separate the plastic from the mold.
Lower the table slightly, tap on the plastic material and the mold will fall onto the table. Now you must lower the table completely, unclipp the clamp frame and raise it. Finally, you can remove the molding for finishing or trimming. I cut off the excess of material with a sharp blade.
 PETG
PETG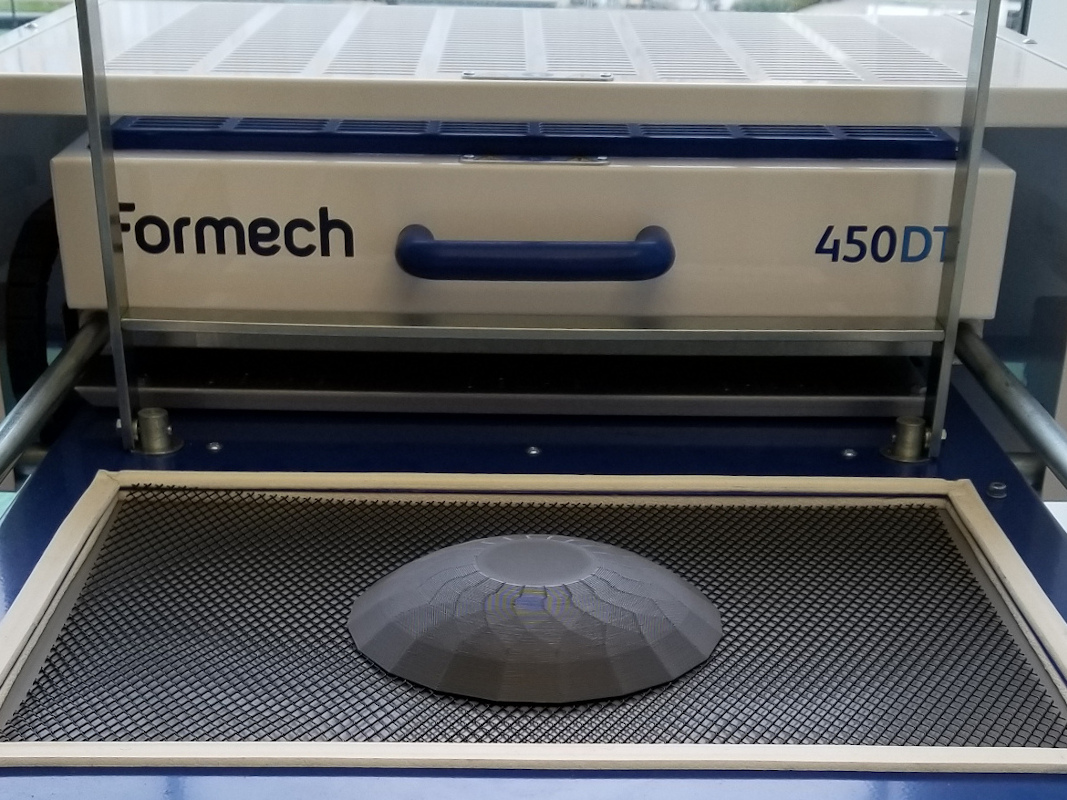 Mold
Mold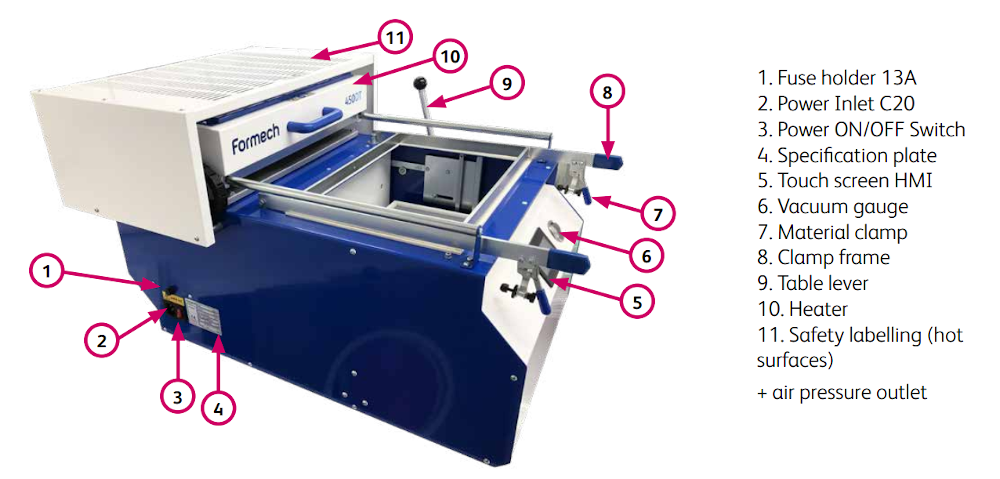 Parts (©Formech)
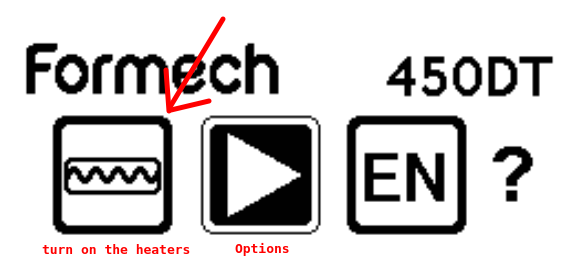 Main Menu
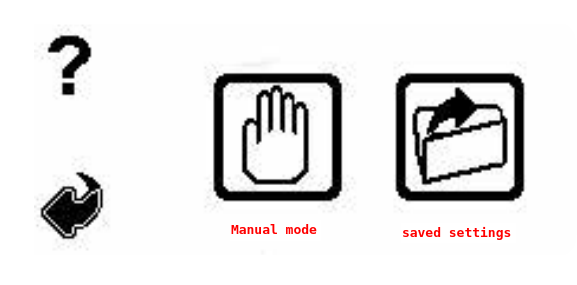 Options
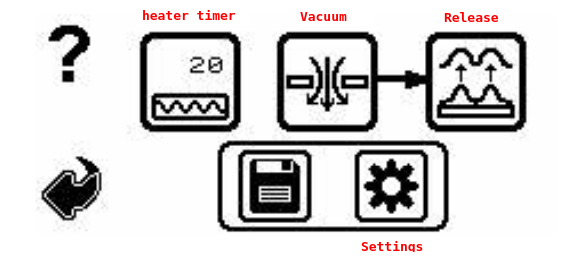 Basic Operation
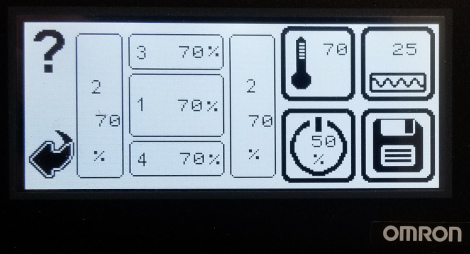 Settings for 0.5 mm PETG
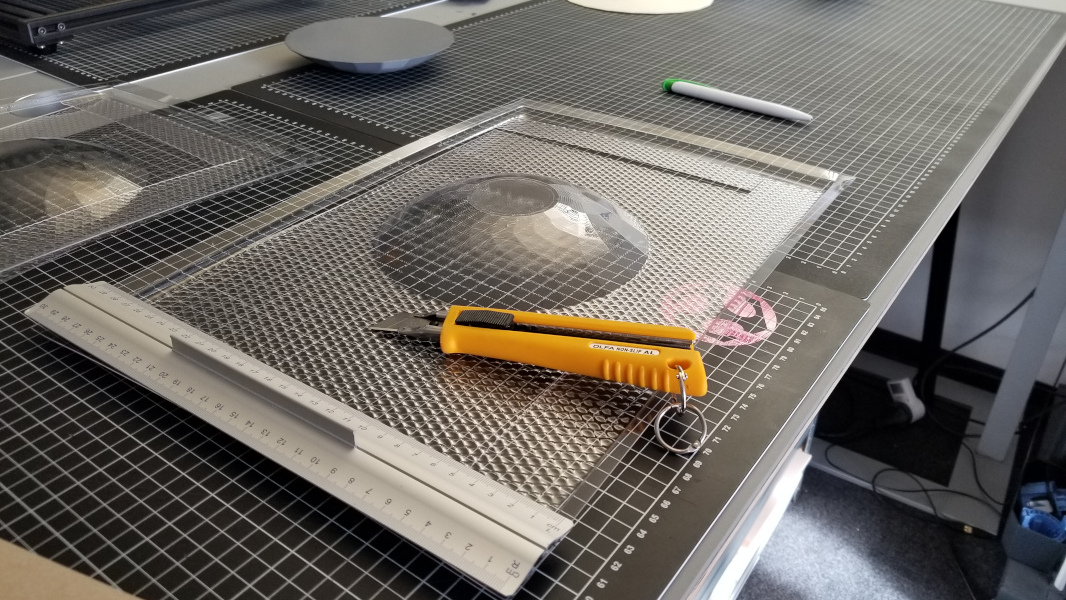 Molding
Vacuum Forming Process: Molding Part 1
Vacuum Forming Process: Molding Part 2
The bowl
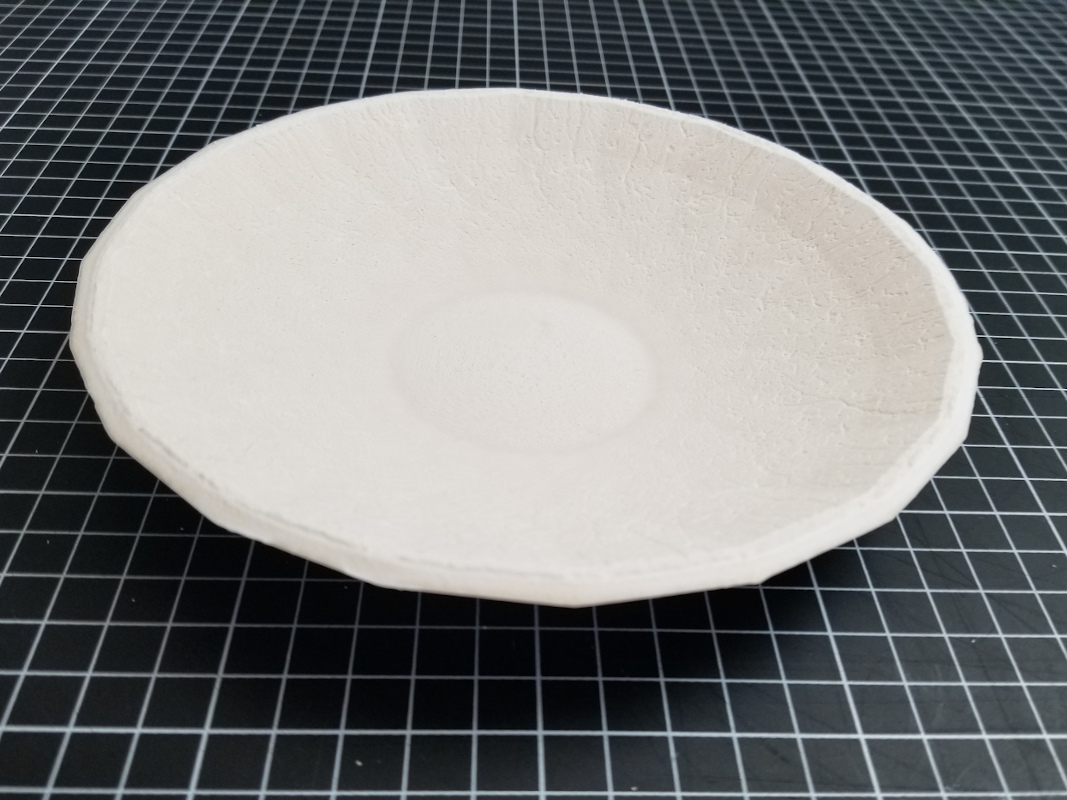
Now I have two molding parts: the outside and the inside (smaller) of a bowl. After I place the two molding in the middle of each other, I cut off the excess material with a a sharp blade and fix them with adhesive tape. The next step is to pour the acrylic resin into the cast and let the air out.
In the week ‘Molding and Casting’ you will find a detailed description of the acrylic resin, how it is mixed and also its safety data sheet.
Vacuum Forming Process: bowl
Download
| Bowl: Rhino and Grasshopper files | Download |
| Bowl: STL files | Download |