Final Project
You can read more about the development of the final project in the Final Project Development page.
Since a longer while I have been building an open source projection mapping tool that runs the Raspberry Pi. ofxPiMapper is built as an addon for the openFrameworks creative coding library which is written in C++. Many artists use it to make interactive installations.
ofxPiMapper is available as source code on GitHub and one can download a Raspberry Pi image file from the website. The open source option provides experts with the possibility to modify code and integrate ofxPiMapper in their own projects. The image file option is beginner friendly and allows one to set up a simple projection mapping project quickly. However, there is one more option missing for the ultra-beginner or someone who needs the very basic option of warping a quad surface to match a box.
For that I want to create a device called uMap as my Fab Academy project. It would be a pocket-size device with a 2-axis push-button joystick. It would look good and consist of bio-degradable materials. A dream in the hands (and the pocket) of the perfection savvy projectionist. Below you can see a diagram of the project.
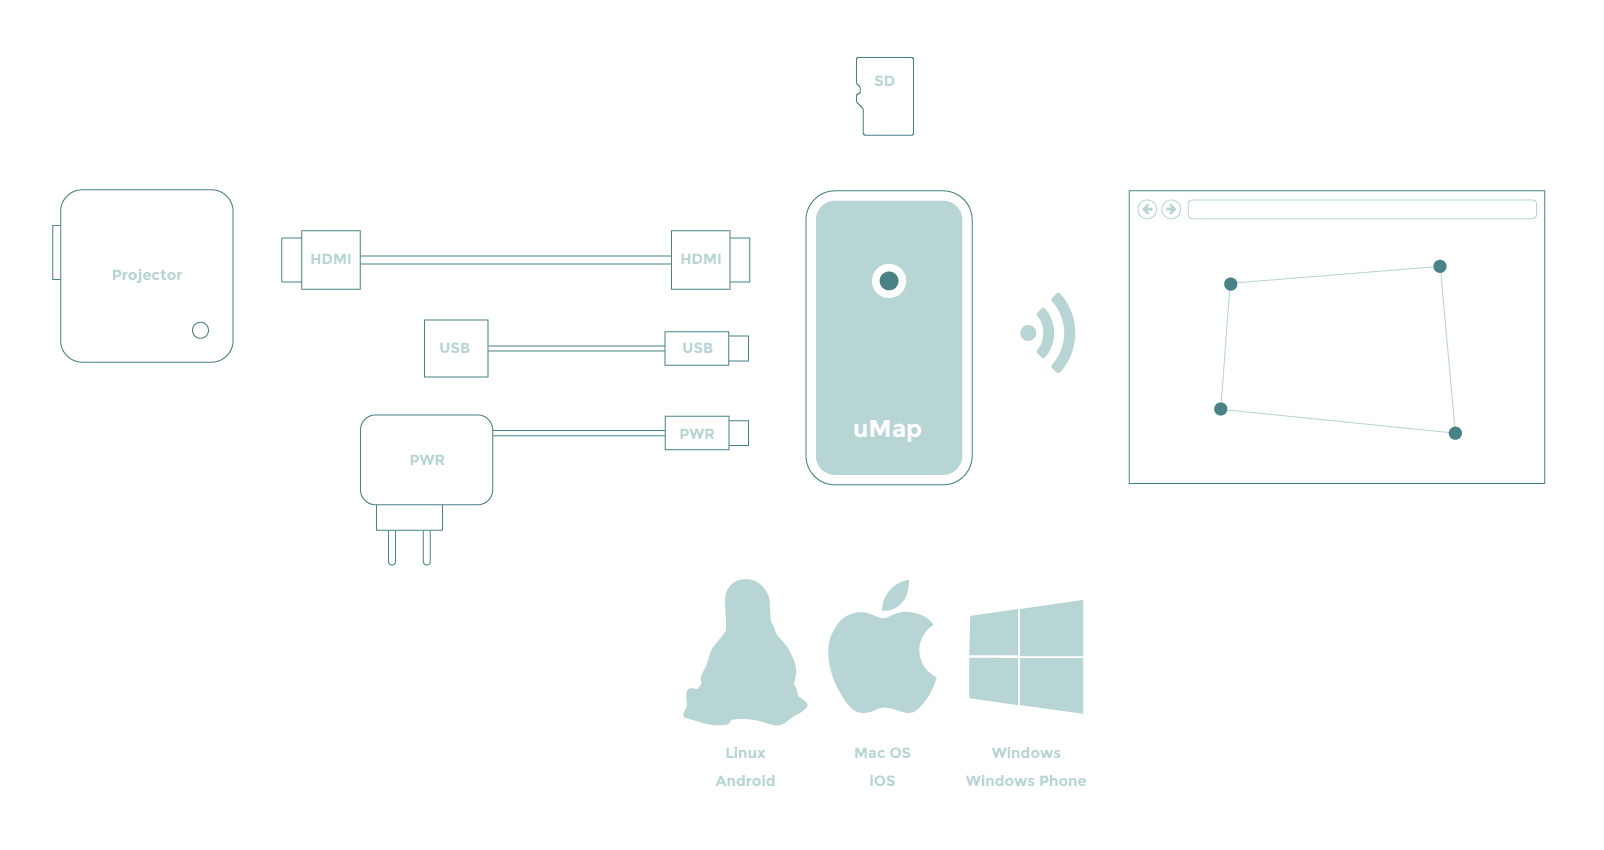
The first prototype would be build by using a Raspberry Pi Zero W board with an extension module that would translate the 2-axis push-button joystick signals into a standartized set of events for the Raspberry Pi to capture through its GPIO pins. The 2-axis joystick would support the following gestures.
- Single press in all directions
- Double press in all directions
- Press and hold in all directions
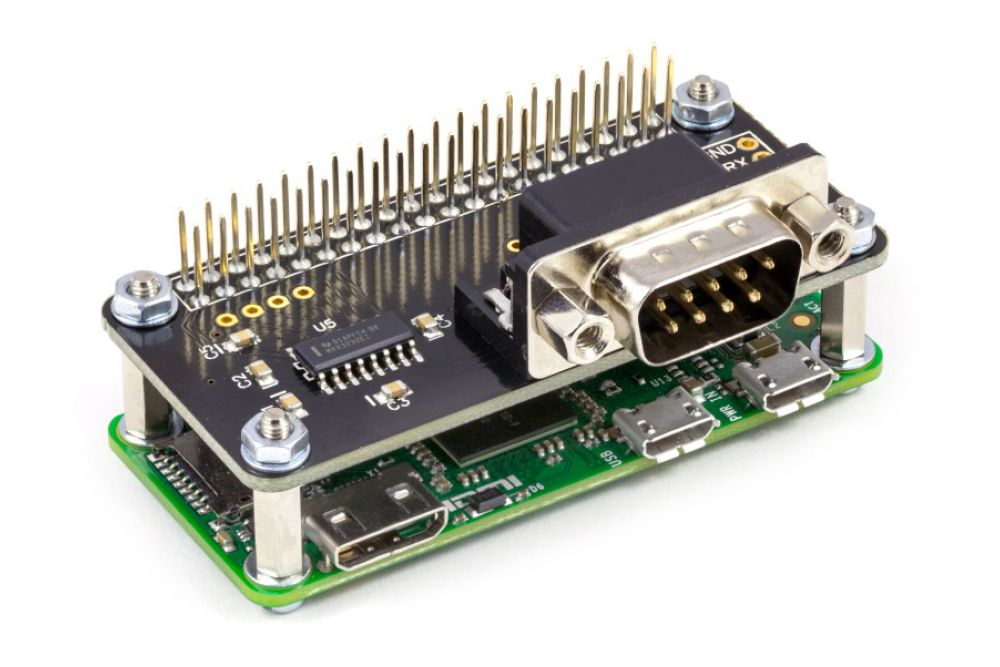
The Raspberry Pi extension (or HAT) would contain a microcontroller which would work out which controller events to trigger on the Raspberry Pi side. The software on Raspberry Pi side would know exactly what to do on each event, without the need to decipher whether the button has been pressed once, double-pressed or being held. You can see an image of an example HAT in the image below.
Development Steps
First I would need to order all the parts to build the prototype. The parts are as follows. I will mark as bold all the things that I have never done before and expect to learn in the following text.
- Raspberry Pi Zero W
- SD card (Class 10, 8 GB)
- Power supply (DC, 5V, 2A, micro USB B connector)
- Mini HDMI to HDMI adapter
- Micro USB B to USB A adapter
- 2-axis push-button joystick
- ATtiny44 or similar microconroller
- Basic electronics parts for interconnections
Second, I would build a solderless breadboard prototype of the joystick shield. I would write the ATtiny code to interpret the gestures and forward them to the GPIO pins of the Raspberry Pi. I would learn how to use the I2C protocol for this.
Third I would try to write a simple Linux driver to intercept the messages and make usable by any other programs on the Raspberry Pi. What I would expect is to create a virtual input device under /dev/input
Fourth I would create a stripped-down version of the ofxPiMapper software by editing the souce code of it and assign joystick events to commands in the software.
At this point, if everything works, I would start working on the first version of the case. I would use the Fusion 360 CAD software. I have used it before, but I would like to get deeper into it and figure out the integrated Fusion 360 CAM part of it. I would like to create the machine code for the parts I need to make by using Fusion 360 only.
Once I would get the right form of the case, I would try to find the most environment-friendly way to make it. It might me that I will find something at the Green Fab Lab.
Advanced Challenge
At this point I would have a working first prototype. What I would like to do is to replace the Raspberry Pi with something smaller and speciffic. In the best case scenario I would like to make a cut-down version of the Raspberry Pi or at least find an alternative that would be easier to get in bigger amounts.
If I manage to get this far and create the second prototype with the cut-down version of the Raspberry Pi, I would be 200% sattisfied with my participation in the course. However, the pace of the course and the amount of work to be done for the first prototype will postpone the exploration of this topic to some time in the future.