Fabacademy 2015 05.20B Review15: Final projects Pt 1
Fabacademy 2015 05.20D Lesson16: Mechanical Design
Fabacademy 2015 05.20B Review15: Final projects Pt 1
Fabacademy 2015 05.20D Lesson16: Mechanical Design
Lesson15: Applications and Implications
Fabacademy 2015 05.06B Review13: Networking and Communications
Fabacademy 2015 05.06D Lesson14: Interface and Application Programming
Lesson 13: Networking and Communications
Assignment….
design and build a wired &/or wireless network connecting at least two processors
Went backwards this week to other projects as I spent the early part of career designing a 2.048Mhz G.703 voice card adopter for FibreNet – plan to plat with Fab Networking modules at some point
Booked into Trotec to use the Flexx laser to cut PCB’s – worked really well. Took the learning from Amsterdam.
Set up was the same except we used a 30W laser, one difference is we used layers in Coral Draw to raster in a cross hatch pattern which meant we could do two less scans to achieve the same results.
electrical test – 100% isolation. Now to try a double sided board
Results – amazing.
Notes, tutorials, Video : Composites
assignment : design and make a 3D mold (~ft2), and produce a fiber composite part in it
Design of a leaf Spring for Fab
Research…..
Bike http://www.hypercoils.com/leaf-springs
http://www.compositesworld.com/articles/composite-leaf-springs-saving-weight-in-production-suspension-systems
Looking to hot bend with an cloths iron 3mm ply into a forming / core shape and then cover with strips of Hessian (burlap) and resin (composite) to form a leaf spring……
Course notes, Tutorial index, Video Lesson 11: Output Devices
This weeks assignment
add an output device to a microcontroller board you’ve designed and program it to do something
—-
Had our week on the ShotBot booked this week. Used an open Desk design for a table and modified it for different joints and size.
Course notes, Tutorial index, Video Lesson 10: Input Devices
Assignment. Measure something: add a sensor to a micro-controller board that you’ve designed and read it
—-
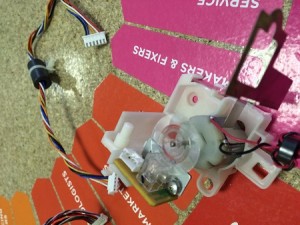
In line with Fab Lab London ideals – we have been pulling apart old tech and seeking re-cycled input devices rather than just all new sensors. Most fun has been optical sensor from printers. Plan is over this and next week to control the motors speed using feedback loop controlled by the optical sensor. All developed on a FabKit

reminder to self: Need to set up a GitHub for code store…
Milling process now established which makes life easier but supplier delivered 0603 and not 1206 SM resistors which are too small for the milled pads. So some development was on breadboard and not FabKit…really annoying
Also used the lathe to make a new collet for the new 0.4mm end mills – which gives far better stability and accuracy. All the 1/64 have broken and all new 0.4mm have 6mm shanks.
Also been playing with Mach3 to go direct from RS DesignSpark/ Eagle to Milling. Appears a more flexable solution and one that others who are not on fab academy can use.
Played with this amazing light sensor – works out time of day and location from the sunlight – after a few days – if set up facing North …
Selection of new sensors – noise, speed and position, IR, field effect, stress, light, magnetic.
Class notes for Week 9 Content
Lesson 09: Molding and Casting video
Assignment
Design a 3D mold, machine it, and cast parts from it.
This week FAB LAB London team has tied two things – making our own Milling / machinable Wax using this instructable and making Oogoo – the write up is with Toby and Nat. Then using this to mold and cast.
—–
This week decided to go for a simple Fab Lab London single side mold and add chocolate as the method for casting. Nat is doing two sided so we can plan with alignment pins.
Leanings – the wax needs a final finish after a final cut after the air blow to re-smooth any loose wax, you need to force the silicon casting fluid into the mold to push out the air, use a silicon release agent, the food safe silicon really does take 5 days to dry.
Took time to work out but used partial cut on the mill and as shape on first mold was too close to the block size the larger 3mm mill left a shop end, which a 1mm could cut through – but it did not know it was there so would fail….. make sure on partial cut that it has a clear cut run.
There should be a picture of the finished item but they all went before i got a picture – will do some more when some spare post Easter Chocolate comes into the lab! Happy Easter.
Our Fab Lab made machining Wax reuse works!
Class notes and Week 8 Content
Lesson 08: Computer-Controlled Machining
This Weeks Assignment – Make something big
Down to a diary conflict our time booking on the shotbot for our own designs will have to wait a week or two. Open Desk has taken over every shotbot in London to deliver a large new office.
We started ooking at designing a skpe phone both for the lab as a team London project and picking up on ideas from Dylan Tonkin – but realization is too big for a week.
However the design ended up as an open desk coffee table that we plan to make interactive in the Fab Lab reception area.
But we have had some time to focus on our very un-CNC milling machine and lathe.
We did go over for the training and setup of the Shopbot in use – looking forward to seeing if the layering and tooling changes work…..
Fabacademy 2015 03.11B Review06: Electronics Design
Fabacademy 2015 03.11D Lesson07: Embedded Programming