Composites (Page 1 of 2)
Week 11 Overview
This week Fab Academy covered making composites using a mold.
Materials, the various mold options, different processes involved in casting the final object and safety were
covered.
The assignment for the week was to
- design and make a 3D mold (~ft2)-
- and produce a fiber composite part in it
Making a Kneeling Stool
The coffee table in my sitting room is very low so I'd like to make small kneeling stools to
use at the table. These are based on meditation seats which get to you kneel on the ground and
the stool supports the weight of your body. An example of these meditation stool is shown here on the image
to the right.
The plan is to create the positive form in low density foam of the stool and then use the vacuum bagging technique
to create the stool.
Step 1: Making the 3D model
I made the 3D model of the stool in solidworks. The stool is roughly 150mm in height which means I needed to use
3 sheets of foam. So I made the 3D model of the stool in 3 parts.
The 3 piece are all individual parts. I saved these as individual STL files for machining individually.
Download the STL files for the 3D model here
Step 2: Milling the Low Density Foam on the CNC machine
The CNC I used to mill the foam is a Denford MRC40.
I didn't trust the double sided tape to hold down the foam
securely on the bed of the machine so I made a second bed and screwed the foam to this bed. Then I secured this
to the bed of the machine with double sided tape for putting down carpets, the really strong stuff.
You can see an image of this shown on the right. As I wanted to cut right down through the full depth of
the material 50mm I used a 1/4 inch ball nose bit with a 40mm long flute. As there was not steep angles on the model
using a 40mm flute to cut a depth of 50mm worked but caution would be needed for steeper angles.
A second reason
to have a second bed. If I am cutting the whole way through the material I need to be sure that if the bit
starts to cut the top of the bed it should be the second bed instead of the machine bed.
The software I used to communicate with the Denford MRC40 machine is called
'Virtual Reality CNC Milling’ and 'QuickCAM pro'.
I've created detailed a step by step pdf that shows the setting up the machine physically, importing
the STL 3D model and creating the tool paths to mill the piece.
Link to the pdf for 'Using
the Denford CNC for milling
Download the FNC files for milling

Some images of milling the 3 pieces of foam for the meditation stool
Step 3: Preparing the piece for casting
The next step is preparing the foam to cast the composite onto. I used the vacuum bag technique which means
the exterior of the resin and material that touches the vacuum bag will be the actually exterior of the final
composite piece.
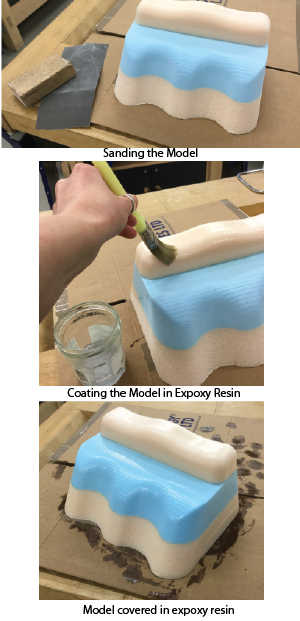
To prepare the model I attached the 3 pieces of foam together using industrial double sided carpet tape. Next
I sanded down the foam to give it a better finish and make sure all 3 pieces didn't have any undercuts that
would make it hard to take out the foam after casting.
We got some advice on how to prep the mould before casting. 2 options are:
1) coat the mold in epoxy resin. Then apply one coat of the release agent
2) cover the mould in parcel tape. Then apply one coat of the release agent
I opted for number 1 and coated the mold in epoxy resin. Then 5 layers of wax.
Next step was to cover the model in Meguiars Mirror Glaze #8 as my release agent. I was very liberal in applying
the layers of this. I applied 5 layers waiting 15 minutes between each application of the Glaze. Each coat needs to
be rubbed on the mold and then after 15-30 minutes buffed off before the next layer of wax.
For new molds it actually recommends applying 3 to 5 coats. The epoxy resin seemed to raise the
pieces in the foam making the surface very rough. If I was doing this again I'd sand the surface again
after applying the epoxy. This would make the surface much smoother before applying the mirror glaze and the
final composite would be much smoother.
Step 4: Test piece before casting the real composite
Looking at other people's projects it seems like the cling film and polyehtuane
works well together instead of release agent but it didn't seem to work well for people
with epoxy resin.
A link to some useful information for vacuum bag technique . I pretty much used
this as a core guide along with looking at other people's projects and advice too.
Layers of Material for the Composite
- First layer is burlap material
- second layer of carbon fibre (unnecessary but there was some material going to waste in the lab so I decided to use it)
- Final layer of material was the aesthetic one. Since it was going to be a seat for the sitting room I decided to use a material decorated with a pattern
- Next was a breather layer which I used Burlap.
- Then layer over a layer of cling film with holes in it to let the air through
- Push the resin right into the material for each layer of material
I took some inspiration from
here . Where they didn't coat the outer layer of material in epoxy. Decided to to do the same
with my stool to try and get a nice material finish on the outside. The hope was that the stool
might end up with a less plastic looking outside and look more like fabric.
I also took some inspiration from
here . Where they used baking paper instead of cling film as a perforated film layer with holes
in it. Most people used cling film for this layer. She also used Vaseline between the mold and the material.
Although the resulting surface finish isn't perfect I thought I'd try it so I could
take the male foam from the mold. Fingers crossed it works
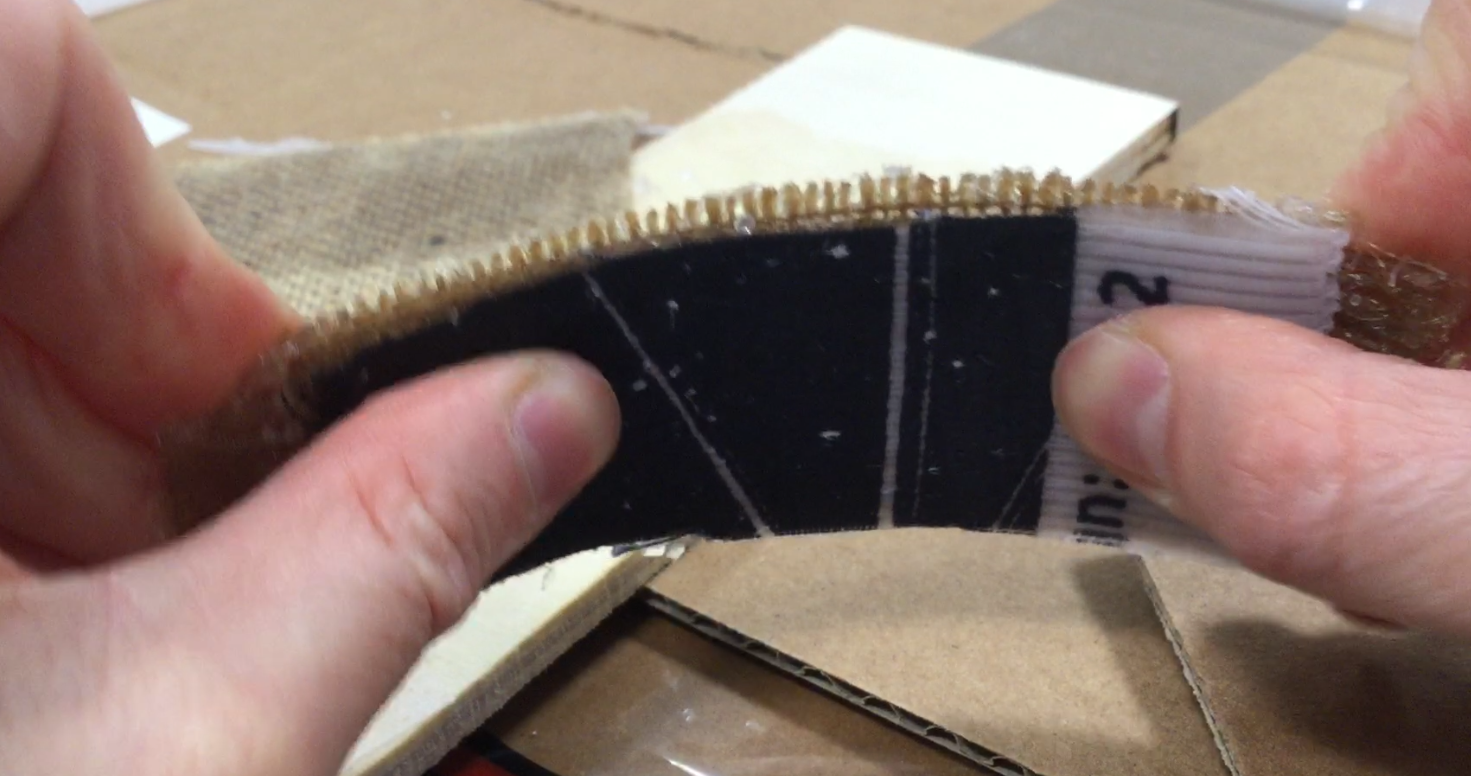
Next I made a tester piece with the following layers :
- Vaseline - on the model
- Burlap soaked in Epoxy resin(Layer 1 of final composite)
- Burlap soaked in Epoxy resin(Layer 2 of final composite)
- Cotton Fabric not soaked in Epoxy resin to let the other epoxy soak into it(Layer 3 of final composite)
- Grease Proof Paper with holes in it to let the air through
- Burlap with no epoxy to act as a Breather Material letting the epoxy soak out
- Vacuum-Bag
The process for this is shown in the below images.
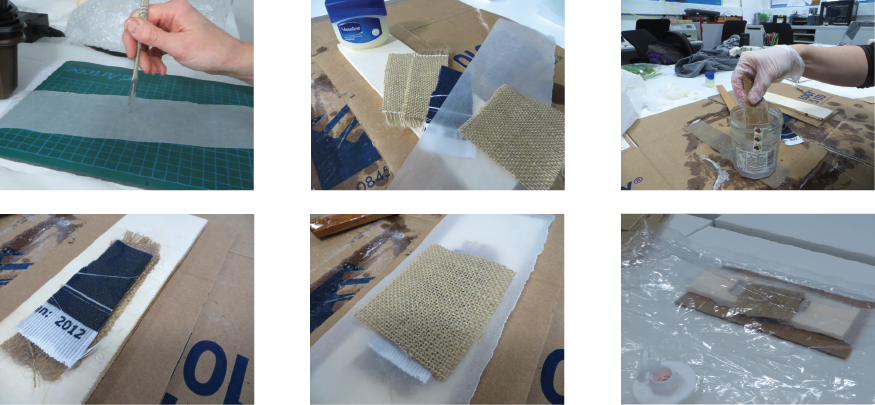
The test piece worked so well. It came away from the wood without any problem so the Vaseline worked well. The greaseproof paper also came away from the epoxy with no problem. Other people had lots of problems with the clingfilm getting stuck to the epoxy.
Write up Continued ....
Composites Write up - Part 2

Week 11, Apr 3

Example of a knelling meditation stool
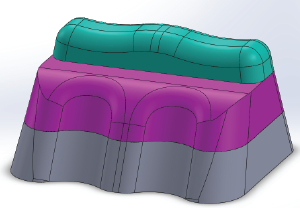
3D model in 3 parts
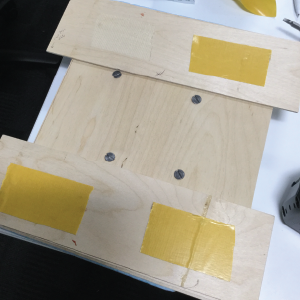
Securing the foam to a base plate