What I'm gonna do this week?
Probably this is one of my favorites assignments, I decided to redesign an armchair that I won a young student design prize in Brazil. A few weeks after the Fab Academy beginning I’ve been invited to show this project at the Salone del Mobile Milano but the first version of the project was made to assemble with some glue and then, as I will need to travel to Milan with it, I decided to improve the project and make it only with wood joints in order to take it disassembled.
Design and prototype
Software used:First I used SolidWorks (we have some student licenses) to design it. I started making a kind of frame to fit each part on the right position.
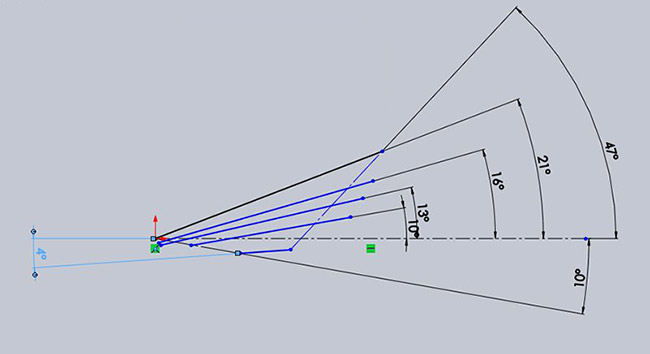
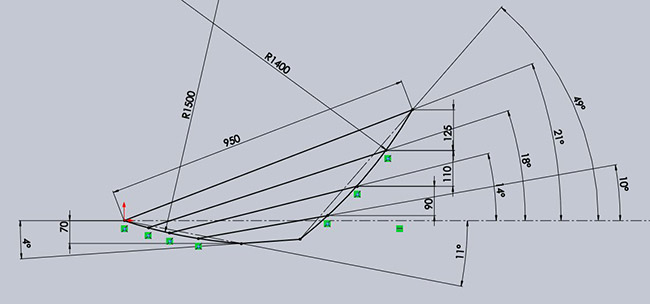
I used some plans and axis as geometry reference elements.
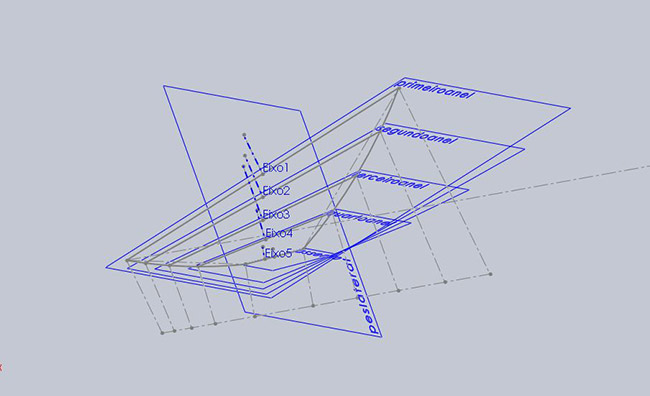
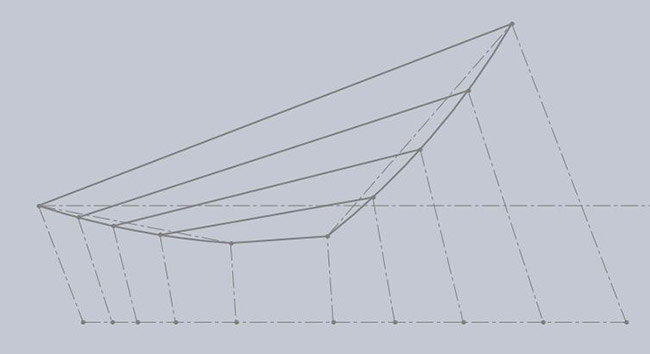
And then each ring at the right position.
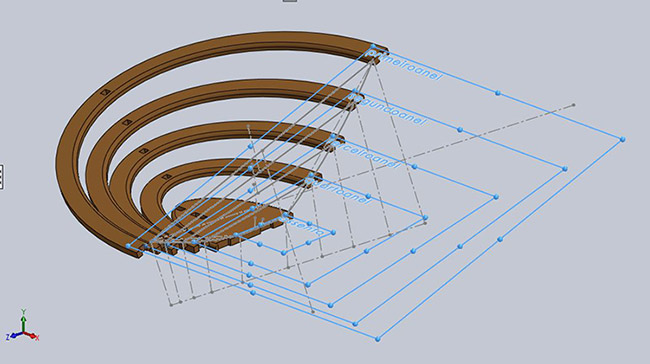
I used the assembly file to draw the feet taking as reference the other part where it should fit.
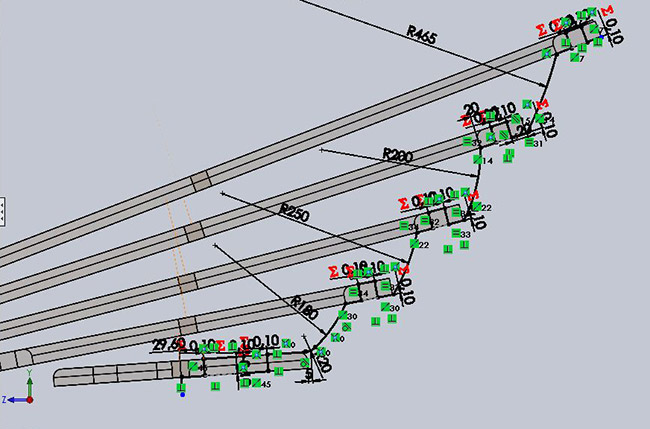
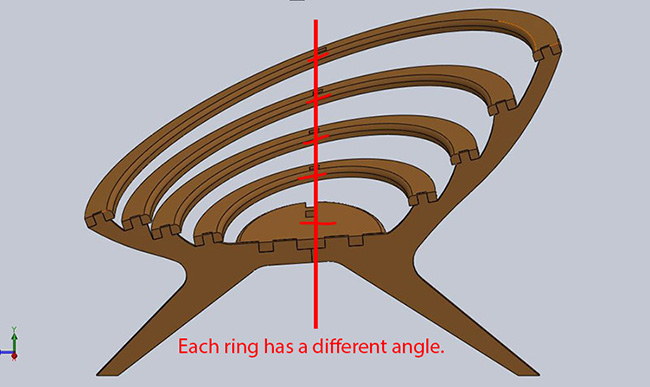
As each ring has a different angle the holes to fit the side feet has a different angle as well, so if I make a straight cut it’s not gonna fit. Therefore I decided to make a angled cut on the rings. To do it is necessary mill it on both sides.
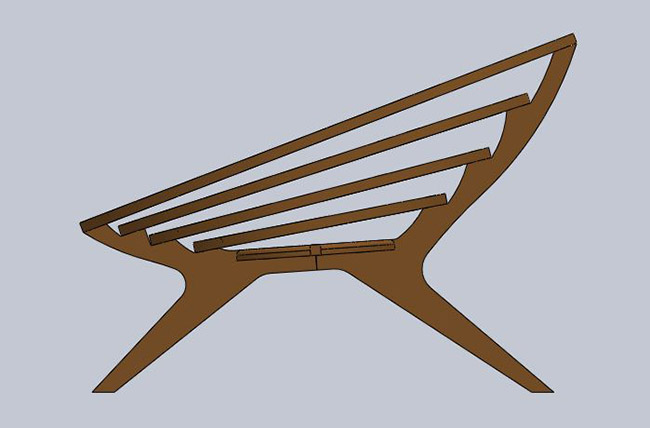
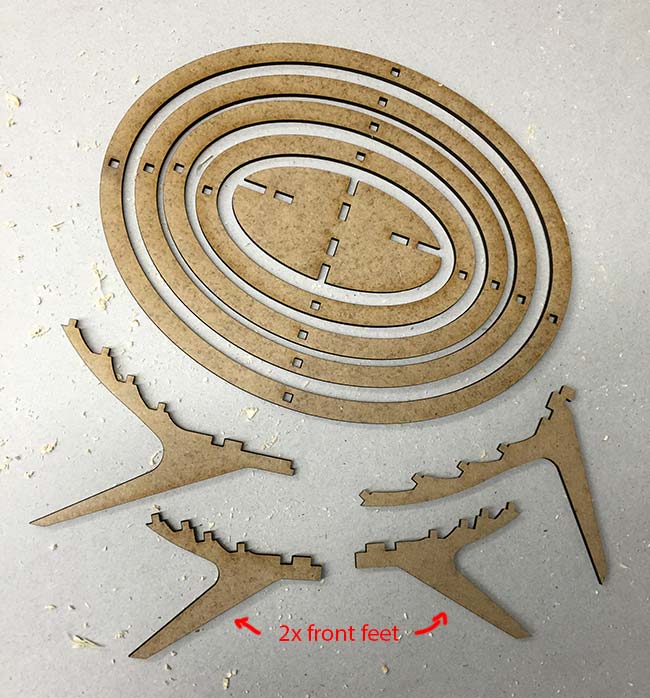
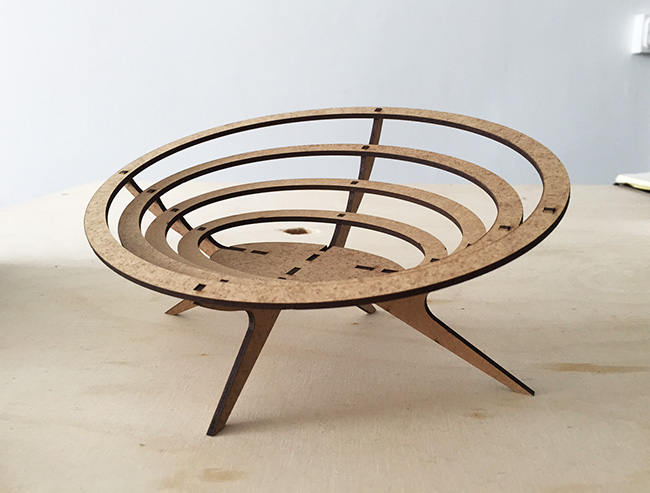
After finish the first version of the chair I saved each part as DXF file to scale and cut it on Laser with 3mm MDF just to evaluate a prototype before use my final wood sheet. As I chose a 21mm wood sheet to make the final chair and I had a 3mm MDF to prototype I scaled it in a 1/7 ratio.
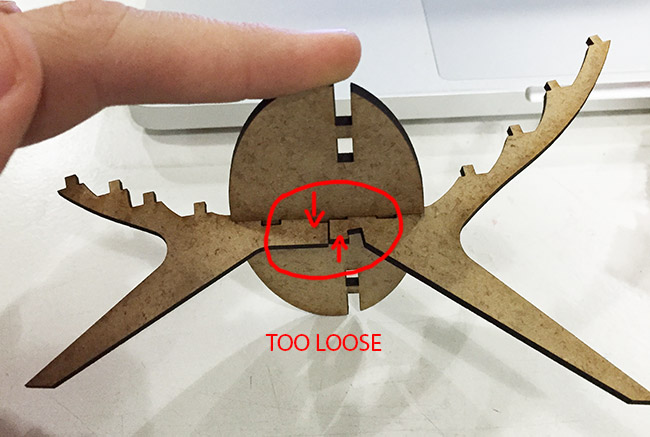
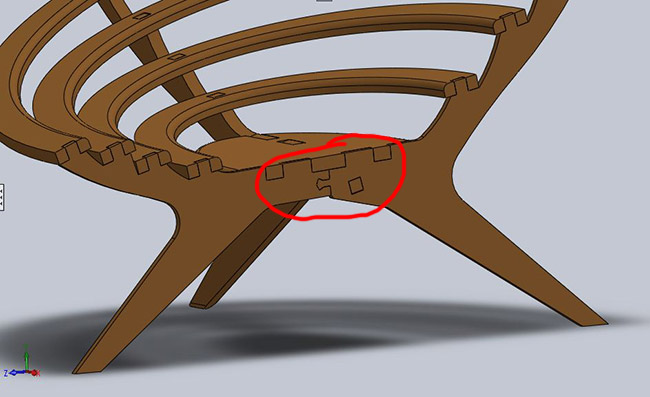
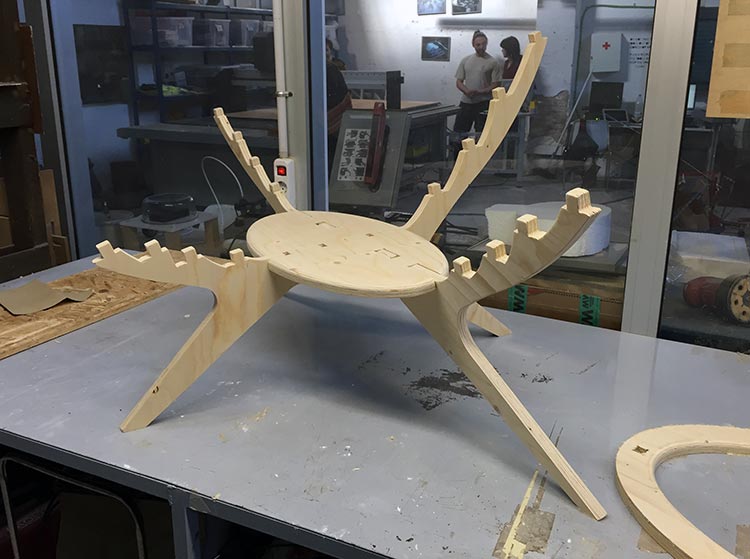
FAIL: I made some mistakes in the first cut. First I cutted two front feet and one side feet. Second I didn’t measure the sheet thickness and it has 2,6mm instead 3,0mm so the joints were loose. Besides, I realize that the feet will need more joints between itself to become more stable.
This is the second prototype with some improvements:
Milling
Software used:For this project I'm using a 20mm Fir Plywood. The next step was to make some tests with my joints. I designed two pieces that basically has all the joints that I need to test.

Then after tree trials I realize a couple of thing:
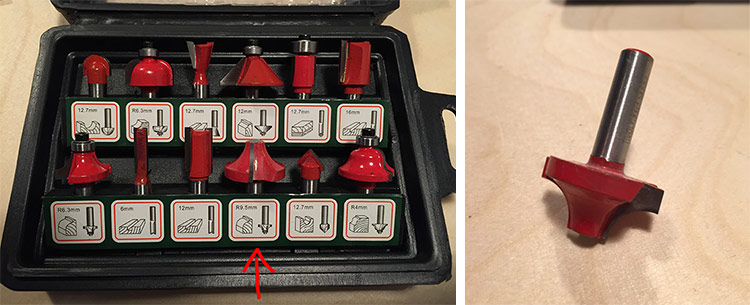
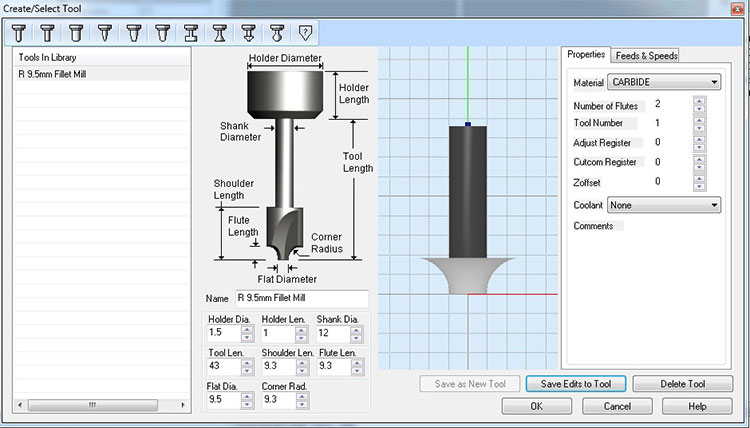
After that I bought a R9.5mm Round Corner Milling Bit to make fillets. But I made some changes to use it, because it came with a bearing, so I took it off and also I had removed the neck where the bearing was fixed.
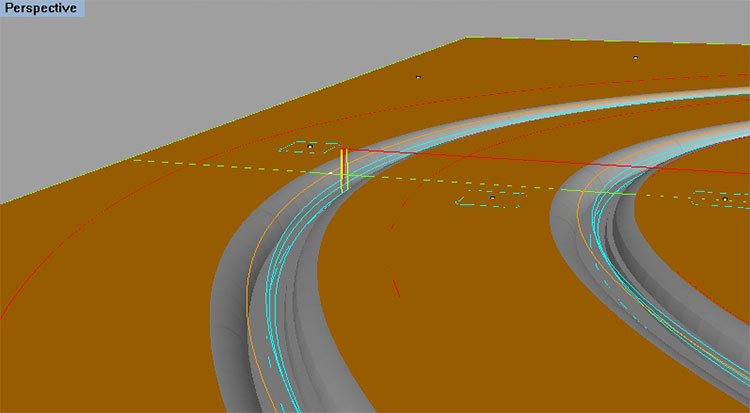
This tool doesn’t have a cutting edge to get in the material, so I made some offset cuts to open space for the tool. Then I created a new tool in RhinoCam using a caliper ruler to take the dimensions. After some tests using this tool in Shopbot, I realize that I should use on the cut strategy the same cut depth of the tool, otherwise the RhinoCam doesn’t make it right
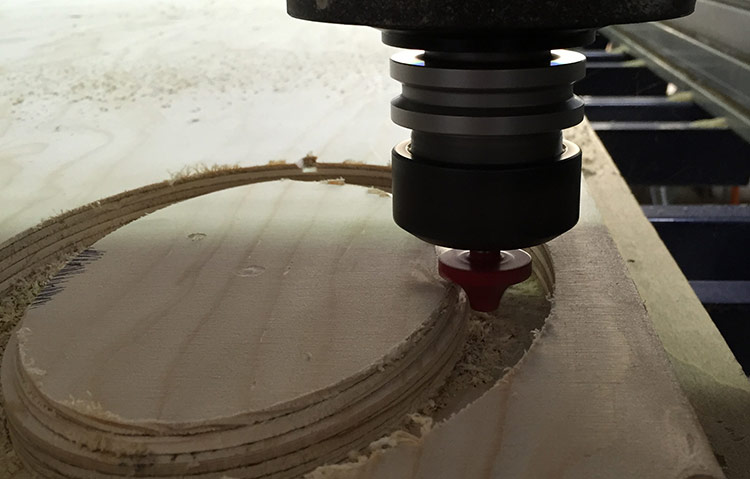
Started to mill with 6mm tool, but I realize that the offset cuts to open space for the round bit will take ages with 6mm bit, so I stopped the cut and changed to a 12mm bit.
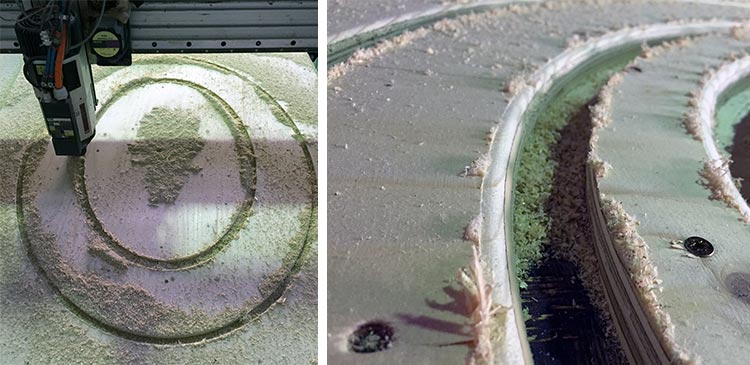

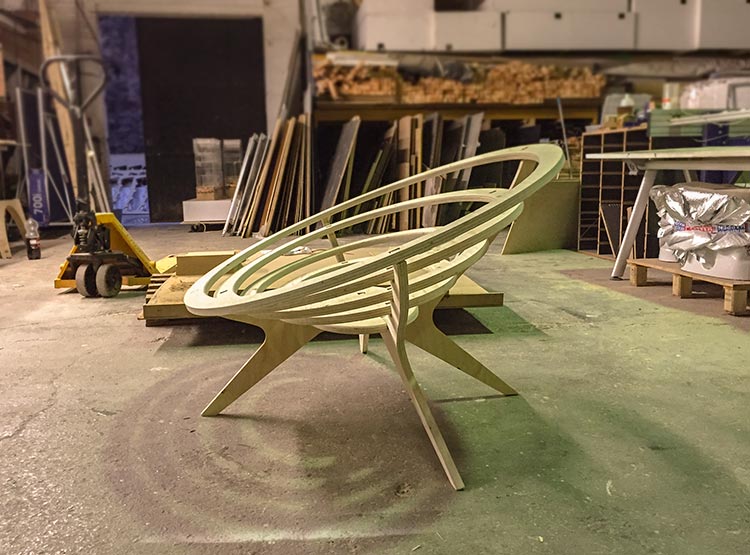
The milling result was not so bad, it took about 5:30 hours, and still need a lot of sand paper work to get a really nice finishing. Also I’m gonna use some varnish. But the joints are working fine and the structure are strong, the only thing that I would like to change is the wood because this is so much flexible and soft.
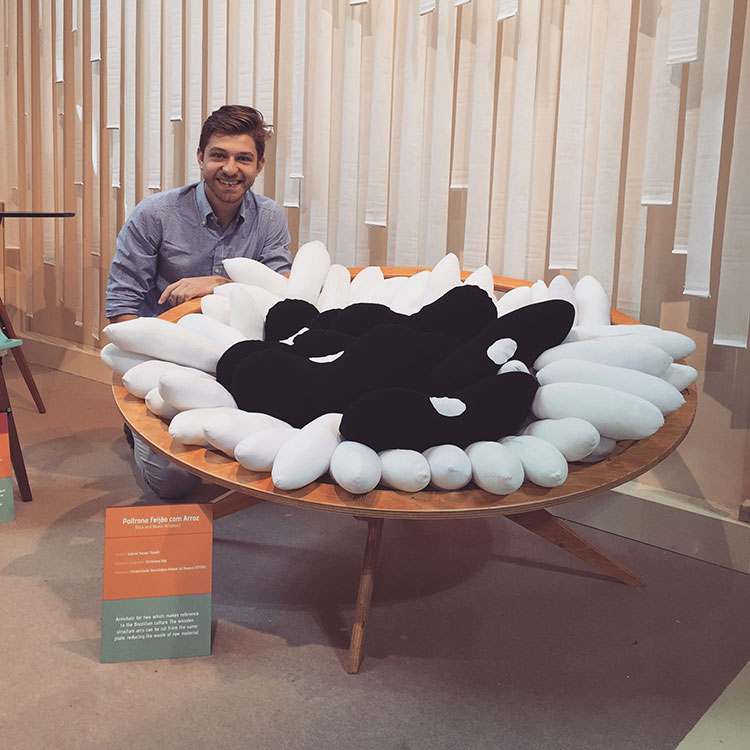
And finally the chair with varnish finishing and the rice and beans cushions at SaloneSatellite 2015
| File | Material | Machine |
|---|---|---|
| armchair-assemb.STEP | 20mm Plywood | ShopBot |
| ← week 7 / embedded programming | week 9 / molding and casting → |
|---|