What I'm gonna do this week?
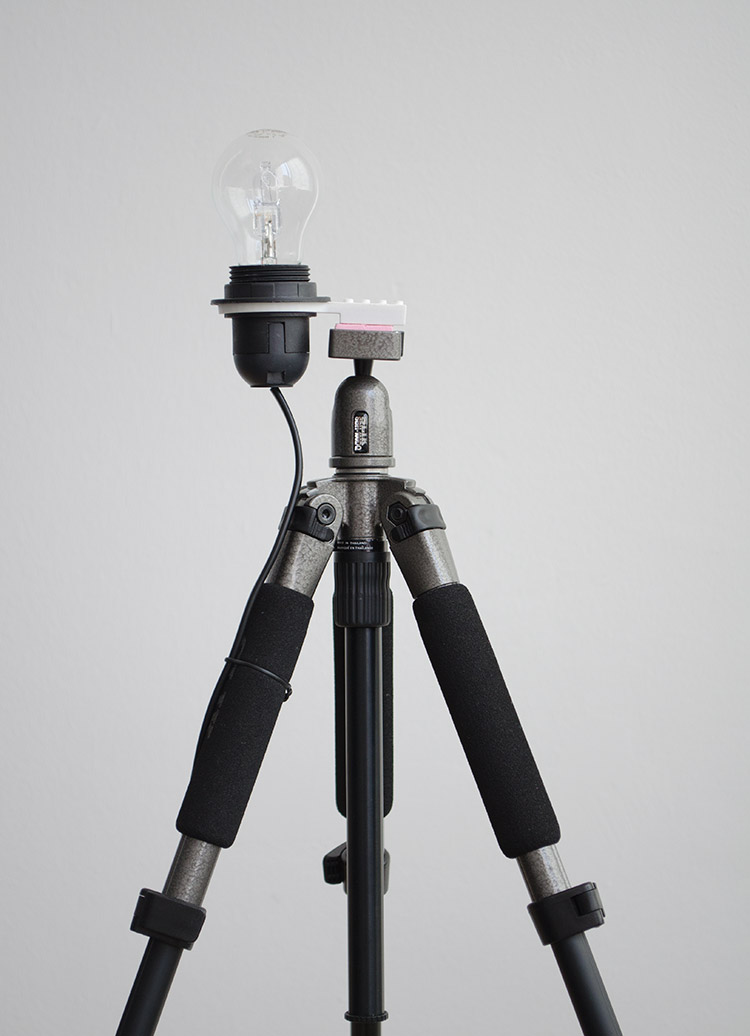
The idea for this assignment is to make a piece that fits in cameras tripods, and on top of it instead a camera standard screw will be a Lego design, and another regular Lego piece that has a place to fit a light socket. This project has tree steps:
Design
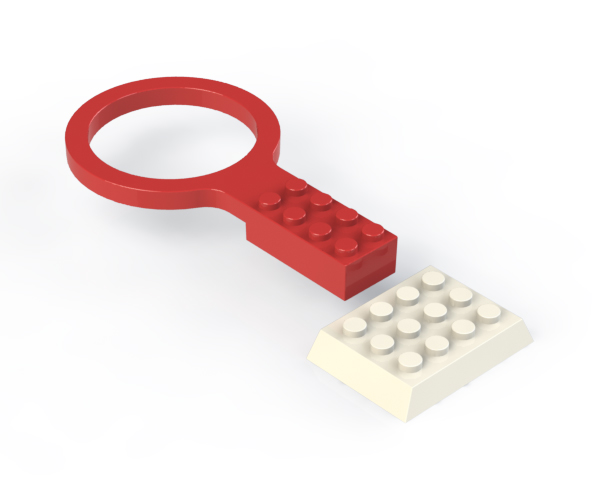
Software used:To make it, first I took the dimensions of a regular tripod head adapter. Then I designed it on SolidWorks with the Lego standard on top. But also I created another Lego piece to use with the tripod adapter that has a ring to fix a light socket. The nice thing about this piece is the endless possibilites to construct different lamps, as it is basically Lego:
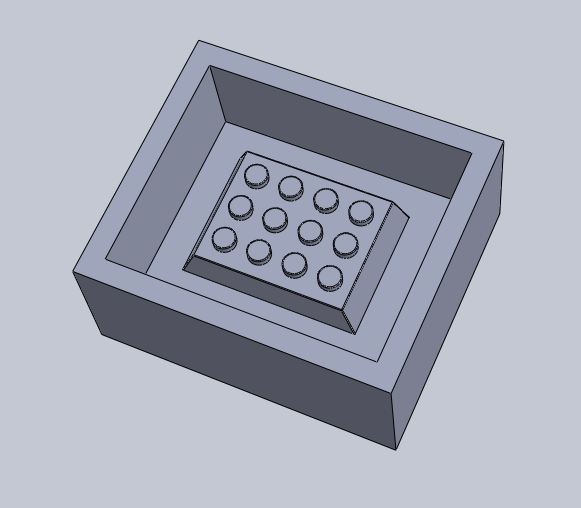
I made the both molds on SolidWorks as well, the first one is only one side, easier to design and to make. And the second one has two parts and more complex geometry, so it took more machining time.
Mill
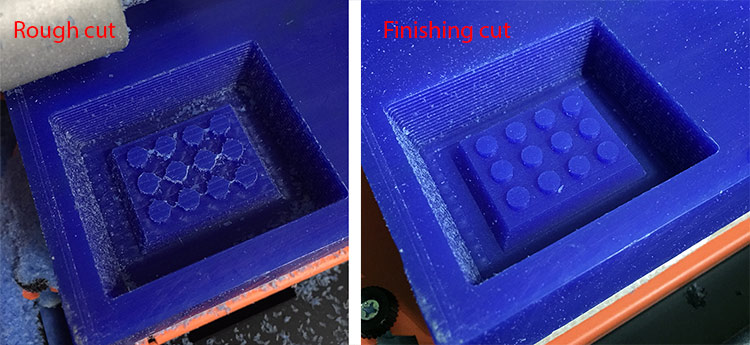
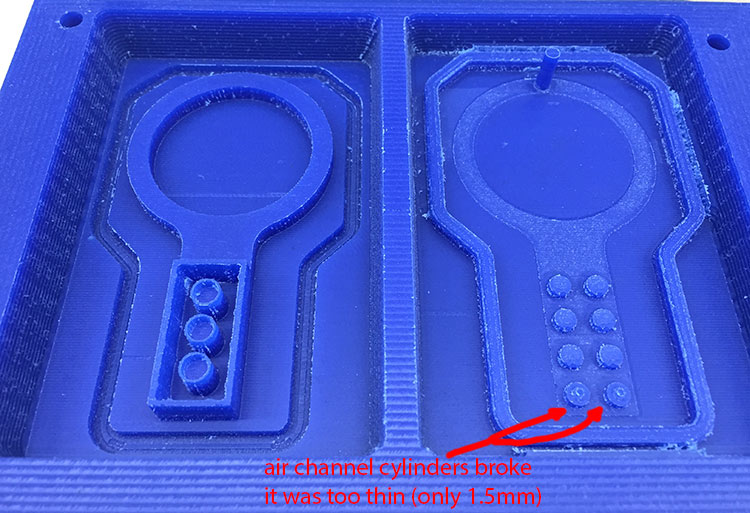
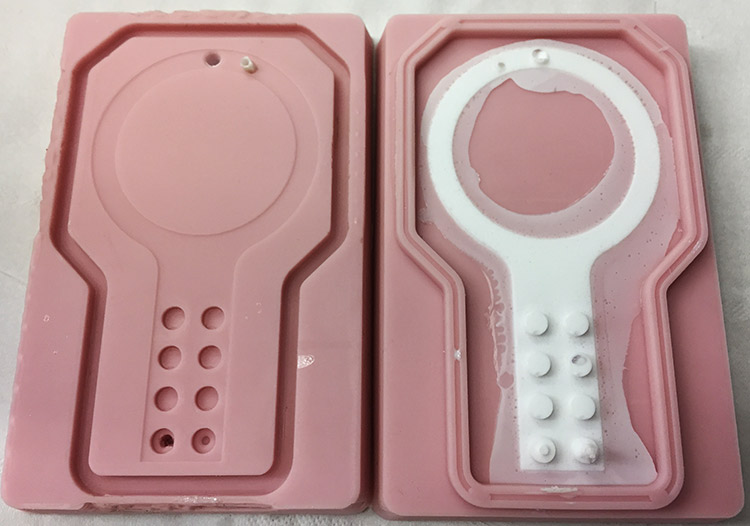
Software used:For both molds I used wax block to get a negative part from it. To mill it, first I did a rough cut with a 3mm flat milling bit, and then a finishing cut using a 1/32pol bit for the one side mold, and for the two side mold a 1.5mm (handmade) milling bit, because we didn’t have a thin bit with long neck, so I made one using a bench drill + rasp and a Dremel + cutting disc to make the fludes.

Casting
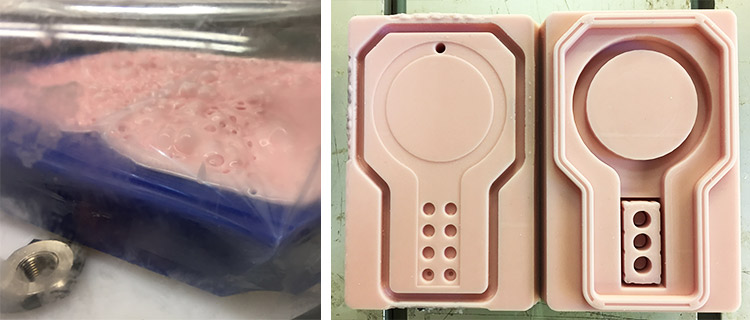
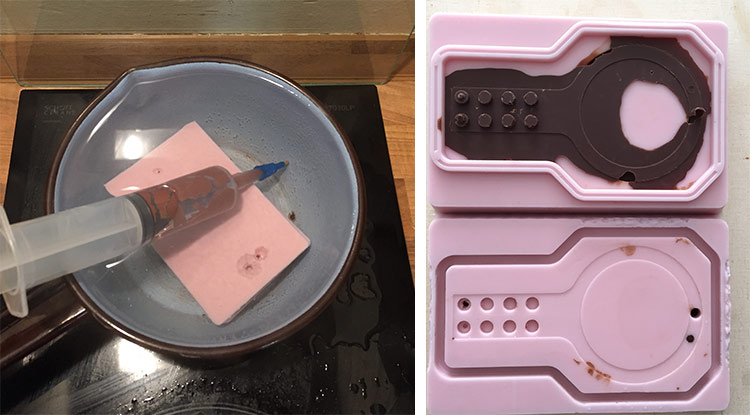
For the two parts mold I made the silicone casting with food safe material so I can make chocolate Lego. We have a vacuum chamber that makes everything easier with the bubbles problems. So, I used it a lot of times before cast and after cast, first vacuum only the mix after mixing, then I putted a thin layer of silicone on top of the mold surface and vacuum it again a few times, and finally after cast all the material I putted the mold on the vacuum chamber for a few more times.
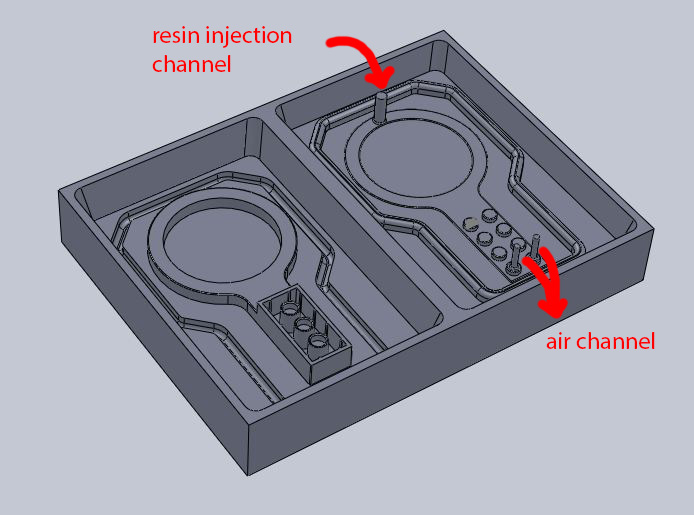
I had to do some improvements on my material injection channel, and add one more air channel next to the injection:

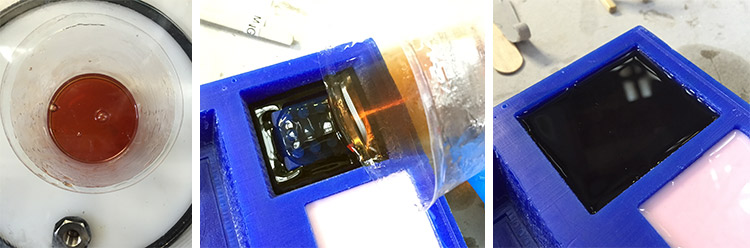
Then I made the second mold for the tripod adapter piece, but I this one doesn't work so nice, maybe I didn’t mix it enough, so the result was a stick and gelatinous consistency. And of course, the resin piece got stucked:
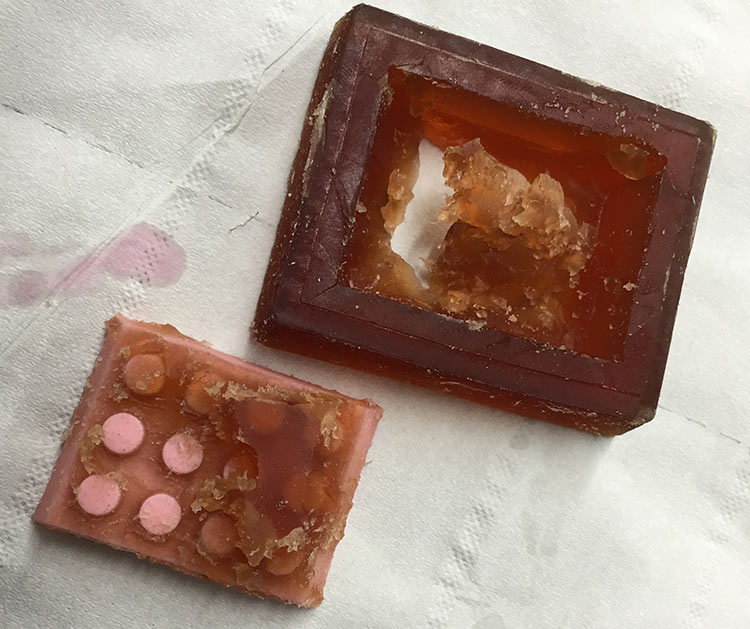
And finally took off some sucessfull plastic pieces:

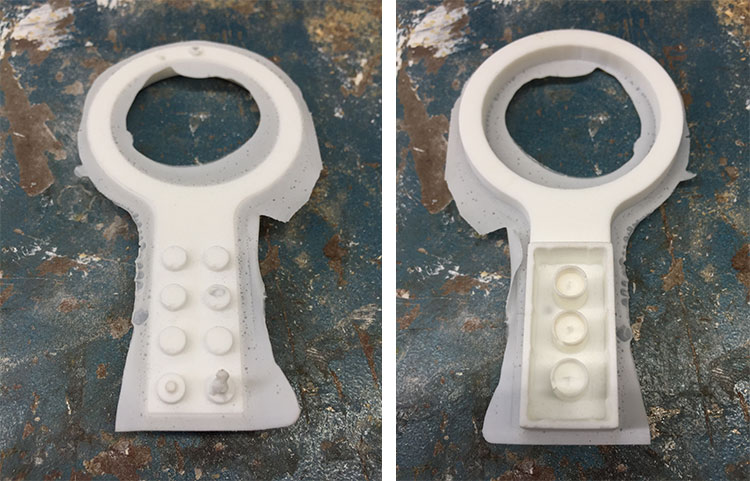
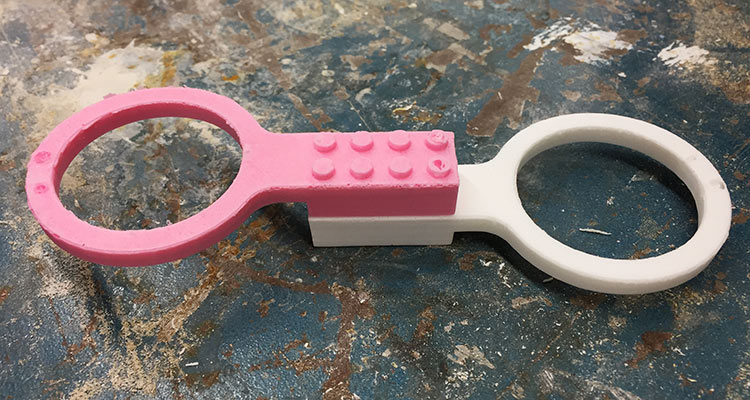
The pieces are a little bit loose, it's not like Lego fit but it's ok for the first try. I really liked the food safe silicone quality, it looks like more flexible and resistant.
And this was the final goal:
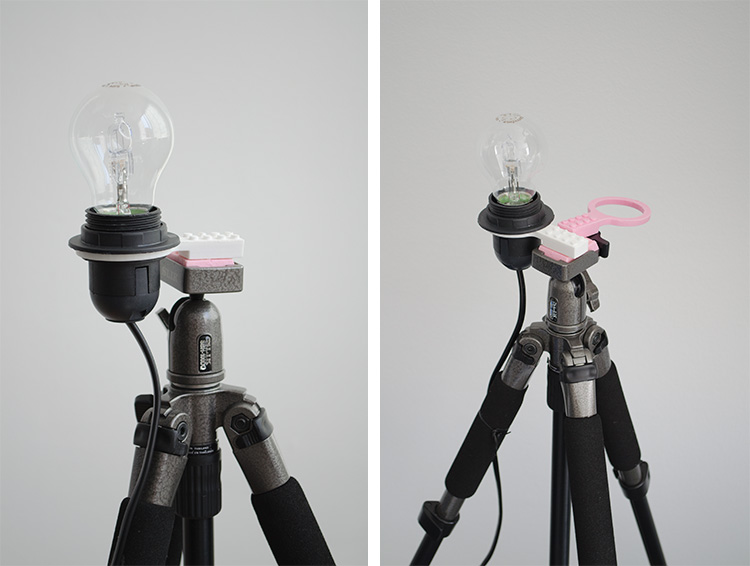
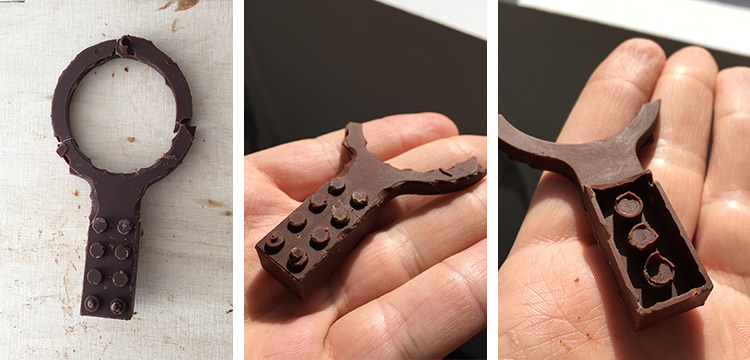
The Lego chocolate pieces as well. Ferdi taught me a nice and very clean technic to cast chocolate using a syringe. It’s very simple, just take a big syringe and put the chocolate pieces inside, close the tip and put it in boiled water, wait until the chocolate get’s melted and cast it! And after cast you can just put the syringe with leftover chocolate in the fridge to reuse it
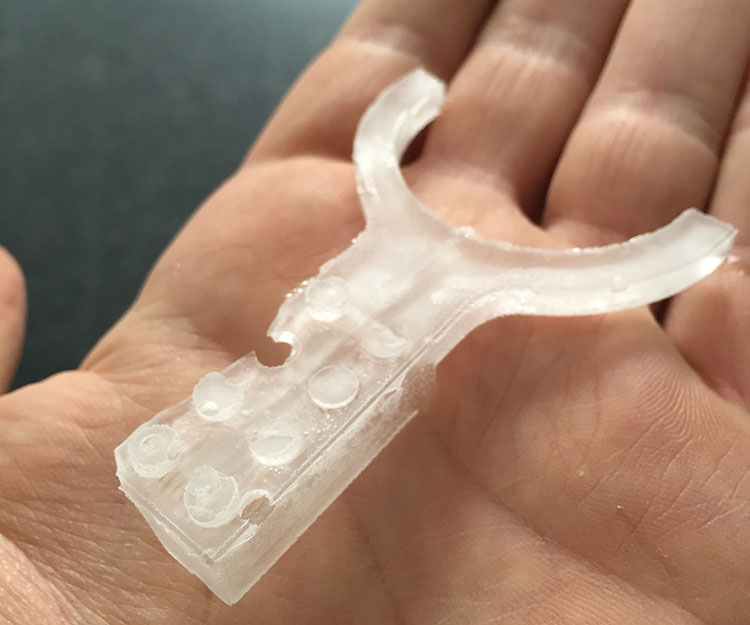
And also some ice pieces:
| File | Material | Machine |
|---|---|---|
| Lego lamp brick (part model) | - | - |
| Tripod lego support (part model) | - | - |
| Lego lamp brick two side mold | Machinable wax | Roland SRM 20 |
| Tripod lego support one side mold | Machinable wax | Roland SRM 20 |
| ← week 8 / computer-controlled machining | week 10 / input devices → |
|---|