What do I need to do this week?
This week assignment was program our hello board. First thing to do is to test if your LED is blinking. I did it using the Arduino software. So make sure that your board is fine and has all the connections working. After that you just need to follow this steps to prepare your computer and your board and then start to program it: Tutorial
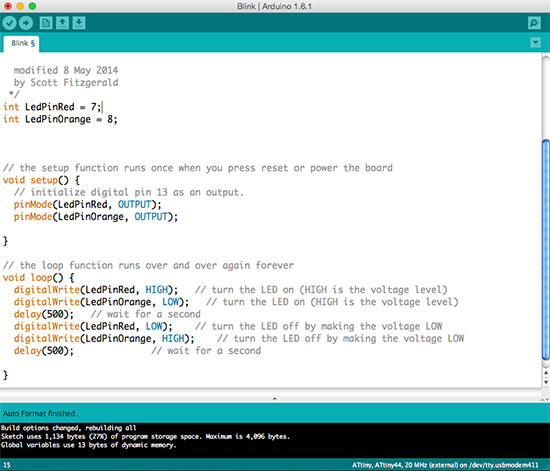
This is my board blinking, but the button is not programmed yet, it is just the Blink example of Arduino software, but with some modifications because I have two LEDs:
So, the code for this example looks like this:
Playing with Arduino
After that we started to learn some basic commands (but very useful) to put in an Arduino Board. We used an Arduino Sidekick Basic Kit. Using the examples of Arduino software, that you can find in Menu>File>Examples, we made things like this:
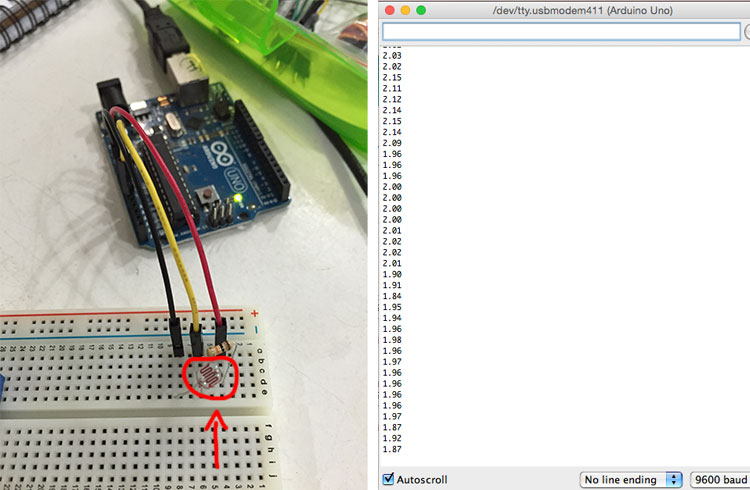
This is a resistor that can change his value according to the light that the sensor on top receive. If you put more light more resistance it will have. And besides there's a screenshot of the "Serial Monitor", that you can find on top right corner of your Sketch window in Arduino, it is getting all the feedback of these resistor in real time according to the light changing. To do this we used the "ReadAnalogVoltage" example.
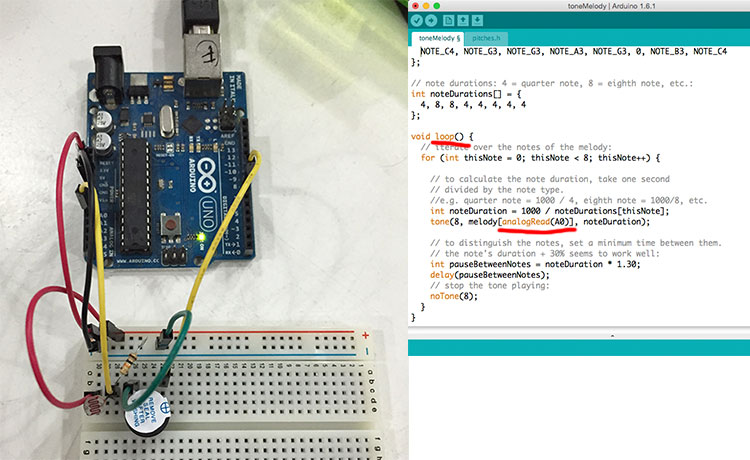
And then we added a speaker and using the variable light resistor the speaker sounds change according to the incident light on the resistor. To do this we used the “toneMelody” example with two modifications, as you can see in red underlined above. Basically we putted it in loop to keep reading the light sensor and said that the melody notes inputs comes from A0 port, where the light resistor is connected.
Programming the board
Software used:I started to understand more or less the Arduino language, that is basically C language, so I applied those commands in my Hello board. But as this board design doesn’t have any kind of output or input connections it’s not possible to make the same things that we made in Arduino. In this case what we have is a LED to output and a Switch Button to input.
This is the result of my hello board programming, you can download the arduino file below. I used the "Button" example to do it.
| File | - | - |
|---|---|---|
| button-animation.ino | - | - |
| ← week 6 / eletronics design | week 8 / computer-controlled machining → |
|---|