Classes and Final Project
week1 : principles and practices, project management
week3 : computer-controlled cutting
week4 : electronics production
week5 : 3D scanning and printing
week8 : computer-controlled machining
week13 : networking and communications
week14 : interface and application
week15 : applications and implications
week5 : 3D scanning and printing
Since my University got the 3D printers, I usually use it to make prototypes. So I already know how to use it and what we should take care about the digital model.
Assignments: Print a small 3D model and scan something (optional: and print it).
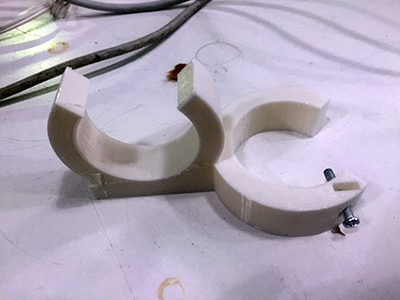
When I arrived at Barcelona, I realized my bathroom didn't have any showerholder. Actually I can use it, but it's a lot of efforts for me to hold a shower head in the right hand during whole time. Then I wanted to make a shower head holder that can attach on the shower curtain.
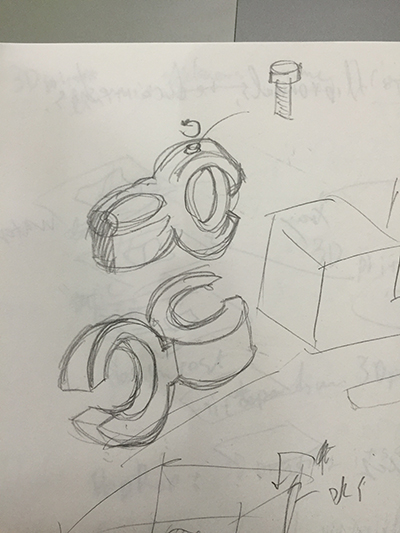
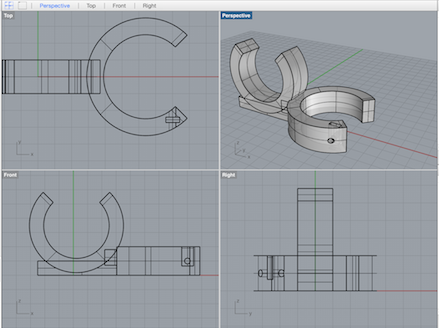
Modelling
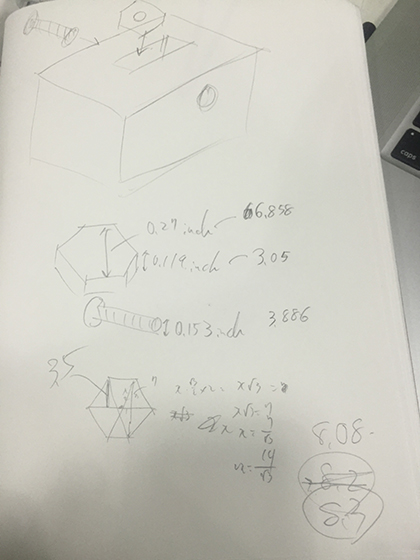
First, I measured the diameter of the curtain rail and the shower head. These values are 2cm so I made the 3D models that have 25 mm diameter of holes. I used rhino for modelling it, exported stl files and fixed it by blender. Because of some reasons (boolean, surfaces...), the rhino sometimes can't export the 3d model that will be failed to print by 3D printer. So before printing the 3d model, I strongly recommend to use Blender and check your the model is good condition for printing. For example, if it has any surfaces that normal is opposite side, or if it has overlapping surfaces, it will be failed. Additionally a 3D model from scanning has such problems, so you need to fix it by Blender or MeshLab.
Printing
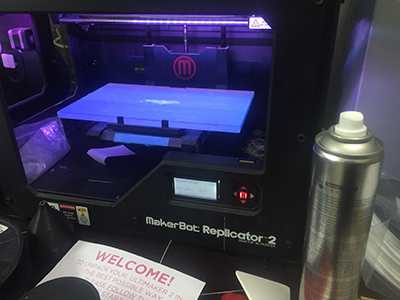
In FabLabBarcelona, there are many kinds of 3D printers and materilas, I'd like to try all of these but we didn't have enough time so just we used PLA one. About 3D printer, I think it is not like a machine that can make everything as you want, but it is like a machine that can make everything within its limitation rules. If you obey rules and make 3D models, then it would print the 3D models as you want. Also we need to take care about a hangover and supports. Basically it can print a model that has any hangovers with supports, but the model will be dirty. About this 3D printer, to take off models from the printer easily we put the tapes on the base and use a spray adhesive on the surface of base.
I made the model that didn't have any hangover so it didn't need supports. The maker bot application estimated the time as 2 hours, but indeed it took 2hours and half. Here is the result. The printed model is really acurate and it works well. I slided the bolt and nut into it in order to fix with the curtain rail.
Scanning
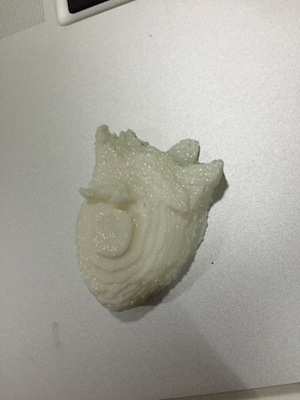
There are many ways for scanning objects. The usual way is using kinect that has a camera and a depth sensor. Nowadays we can scan from only photos by a smartphone. The technology is so awsome and easy. But I want to use the really basic scanning way: milk scanning.
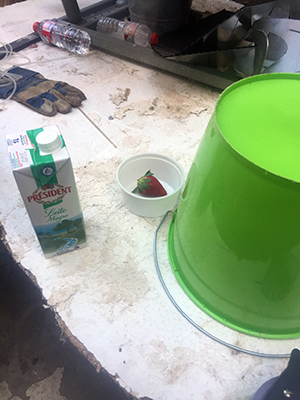
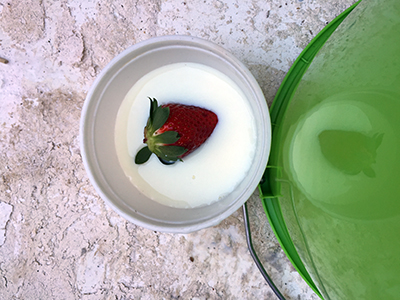
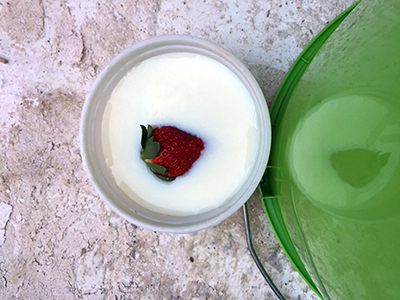
Milk scanning is really simple. Put the object that you want to scan and fix the camera above it. Then repeat this process: pour the couple of spoons of milk and take a photo until the object totally sinks in the milk. After that you can get the photos, then change these to monochrome images then you can get the images that show only taken objects of each depths. We can use FabModules and convert it to 3D model. After converting it, I fixed the model little bit with blender, then I printed it. The milk scanning can only scan from one direction, so it doesn't look like as the strawberry, but it ensures even if I don't have any such machines that are good to scan, I can scan the obejcts.
Printing complex object (Failed)
The 3D printer is good not only for printing the accurate objects but also for printing comlex objects that can't be made by other fab machines. So I'd like to try to print the voronoi 3D model.
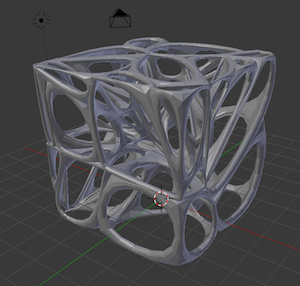
I made this model by Blender. Here is the tutorial.
- Go to "User Preferences" and click addon. Then find the add on that the name is "Cell Fracture".
- Make the model (should be simple) and add the particules on it. Change the "number" in the Emisson to 20 and "End" that is under the "Number" (default value is 200) to 5.
- Push the "Cell Fracture" (left side of tool bar, if you don't find it, push "t"). Then "OK".
- Then, it cuts the model to 20 parts. You can find it next to the layer. Joint it to one object, push"w", then choose remove doubles.
- Push space bar and type "wire frame" and click it. Then it looks like the wire model. On your under left screen, there are some parameters, you can change the thickness. The thickness should be 0.2, turn on "offset even".
- change it objectmode, add a subdivision surface modifier.
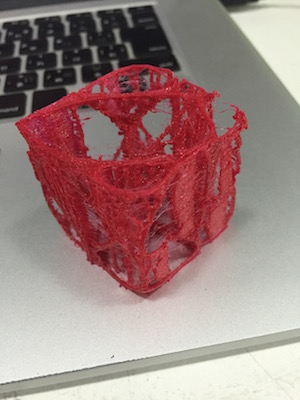
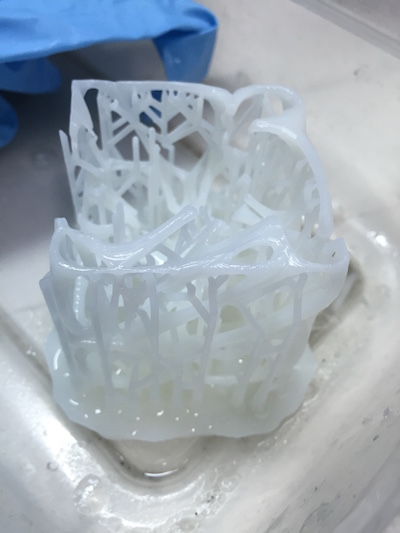
But actually I tried to print it and it couldn't be printed perfectly. I think the reason is that there are some overlapping surfaces. Once I tried to boolean union it, but it didn't work. Here is the result.
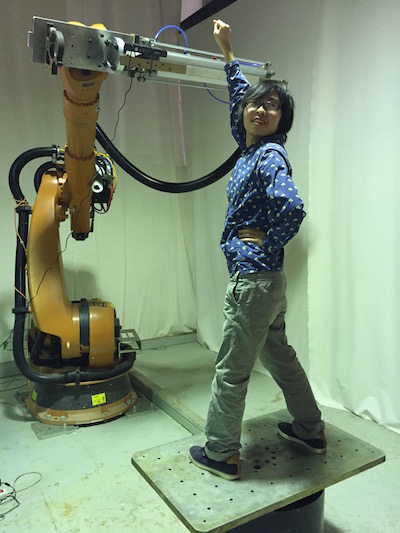
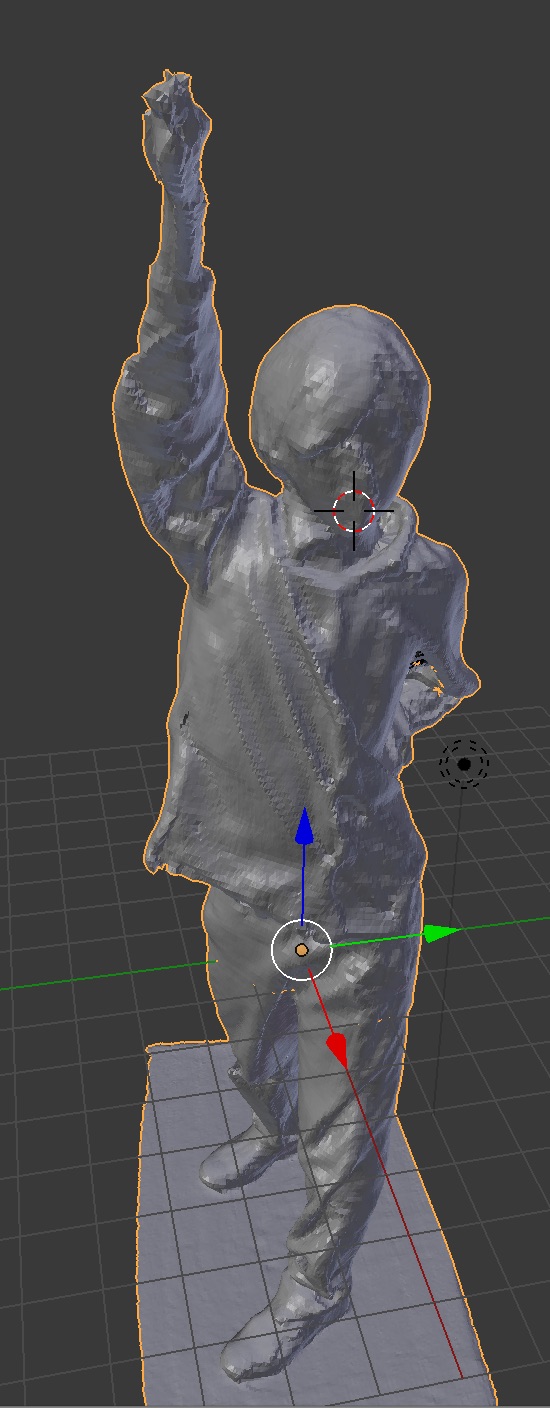
Scanning myself
FabLab Barcelona has a big robot arm which name is "kuka". We scaned ourself by it. After scanning myself I got myself object, but it has some lack of verticles, so I will fix it.
All files you can download here.
Shower Holder Rhino file , stl
milk scan Strawberry file monochrome gif movie , stl
scanned Me with Kuka and Kinect .stl