Final Project |
Proposal
| Defining a final Project design in less than a week was a very complex task. After leaving Brazil and 5 days before our first Fab Academy lecture, I was cultivating an idea of developing a kind of public lightning generated by solar power. Very soon after our first session, I've placed my expectations on a more feasible level (but still comprehensive), since beyond conceiving the idea, I should also create ways to implement so, while achieving what I came here for: to learn! That trajectory kept evolving: from a chaise to a sculpture to a modular hut. First Idea | A Chaise Long |
At the second week I've had to design what was already supposed to be my final project. At that time A "Chaise Long" seems to be the right choice. Week 02 Changing My Mind... | An Interesting Sculpture |
After a while, I became more confident about the possibilities that I could find on digital fabrication, and felt absolutely in love with these methods: scanning, molding and casting, composites and especially putting all these new knowledge together on something that could be "alive". I decided then to change my final project and started to work on a sculpture of a mouth... Week 09 Last Call... | Following The Sun |
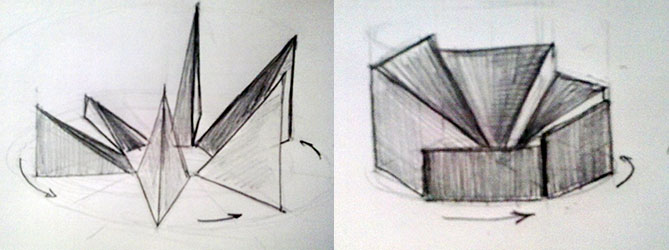
Four weeks before the end of the course, I had so many new things happening at that moment that made me change my mind again and thinking of going a little further (or just connected the dots). I went back to my aspirations in architecture and decided to do this time something that was actually part of the subject. At this time was born the idea of the "Cabana Girassol". Concept- A simple shack that moves multiplying its own characteristics while opening itself to the Sun. Operation- The Sun Follower Cabin consists of six mobile modules that open and close using rails and motors to deal with times of day, seasons and weather conditions change, providing lighting and ventilation according to owner's desire/demand. The main idea is "playing with the sunlight". Sketches
Making A Long Story Short | Working Hard |
I've tried to be simple and at least deliver what I had intended to do, and after an intense job of making a machine with my colleagues, I had no more than a week and a half to design, think about the materials and make my project work. In some of those days I was totally exausted on the 15, 18, sometimes 20 hours working days, running against time. Here follows every step of what I've experienced working in my final project: The Design | Dealing With Geometry Issues |
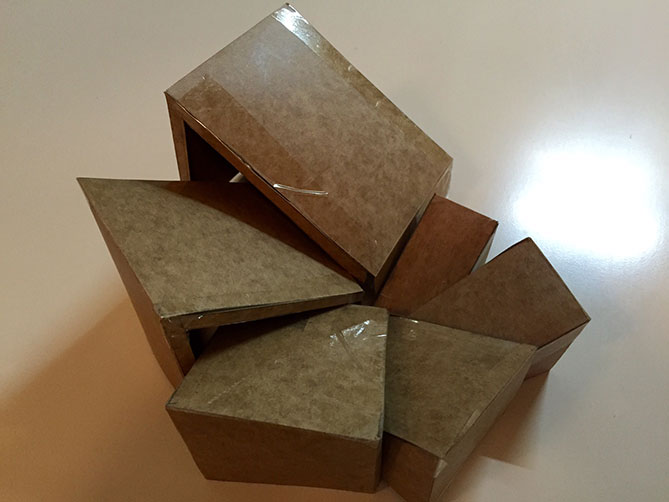
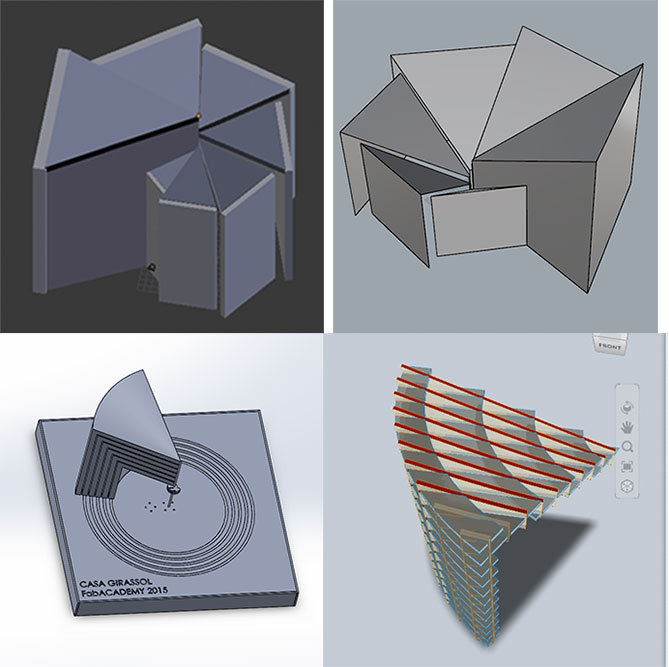
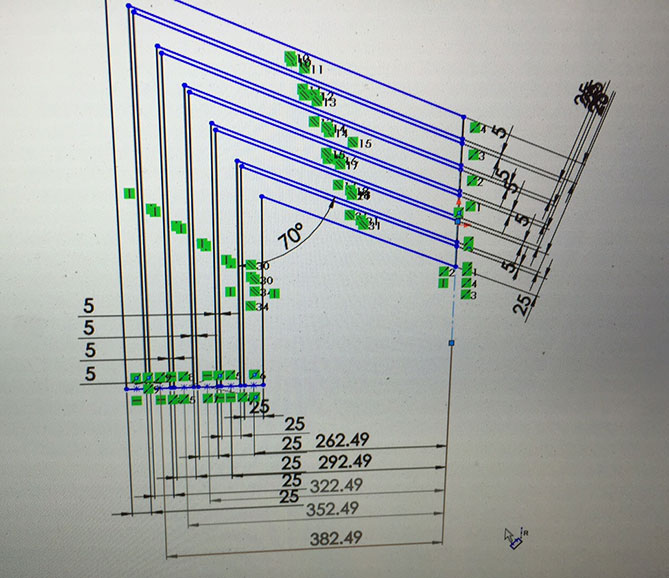
After mannualy sketching what I wanted, it seemed easy to make it work. At least that's what I thought. Besides all the issues, the design was the biggest challenge I've had. Conceiving something in this case was more than showing pleasure or beauty to the eyes, I also (and mainly) had to think about how this project could rotate clockwise and its reverse smoothly, without problems. To solve those questions I first made a cardboard model and then used four programs, in this order: - Blender: to have an idea how the hut could rotate; - Rhinoceros: to see the axes and rotation, to make geometry possible; - SolidWorks: to size all parts, validating fittings procedures and connections; - 123D Make: to design the parts and fittings and give "character" to the cabin allowing light to enter through their partitions. Model By Hand
Programs
Problems Start | Time Flys |
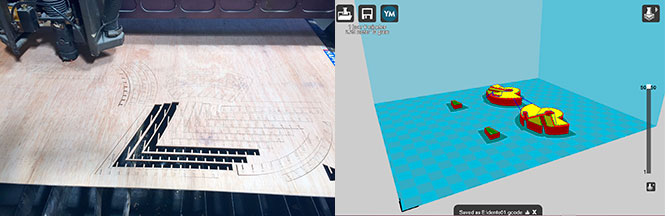
Running from a program to another was not a choice that I've made just because I wanted to achieve a better outcome. It happened in a way to solve my own technical limitations and to save a precious element: time. All the programs that I chose to make my final project were quite new for me and I had to quickly figure it out how to make something complex using the tools that I had in my hands. When I switched from Rhino to Solidworks everything seemed right until I jumped to 123D Make. In 123D Make, I exported the STL files into PDF sheets. It was okay, but my first mistake was to send only a portion as a test, not the overall design. I've gone directly to the laser cut (multicam) and made just the first module. When I tryed to finish them all I had many problems to make them fit to each other (without telling that I started to design the rotation piece in SolidWorks based in the test). I lost many precious days with this tests. Many ... First Tests
Running Out Of Time | How Am I Going To Do That??? |
At that time, I was literally going crazy. In addition to my difficulties with the project, all of us at FabAcademy had to struggle sharing the machines in IAAC. The schedule was tight both for us and for graduate students working for their presentations. We had to share three 3D printers (one and a half to be true) with more than 30 people. The same for laser cutting, milling machines and floor space! After hours, days, with not so much time left, I finally solved the problems with the design and ran to find out how the mechanism should/could work. Back To SolidWorks
Next Step | Thinking About The Connection Pieces |
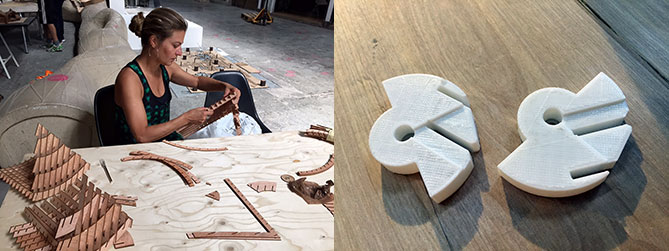
I finally realized that the pieces had different measures (stupid or naive not being able to understand it before). I sent all six modules for Lasercut and began to assemble them. At SolidWorks I designed the first test of centerpiece that should allow the cabin to turn on an axis. I've sent the file to Cura and made a piece in the 3D Printer. One Step Forward
From Virtual To Real
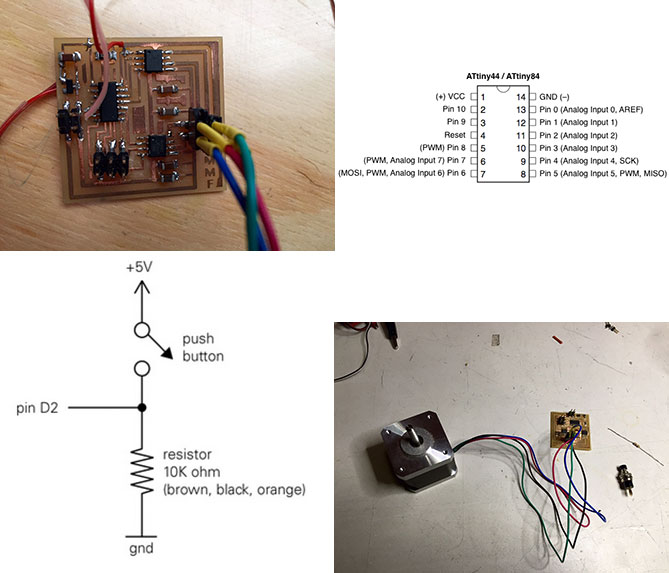
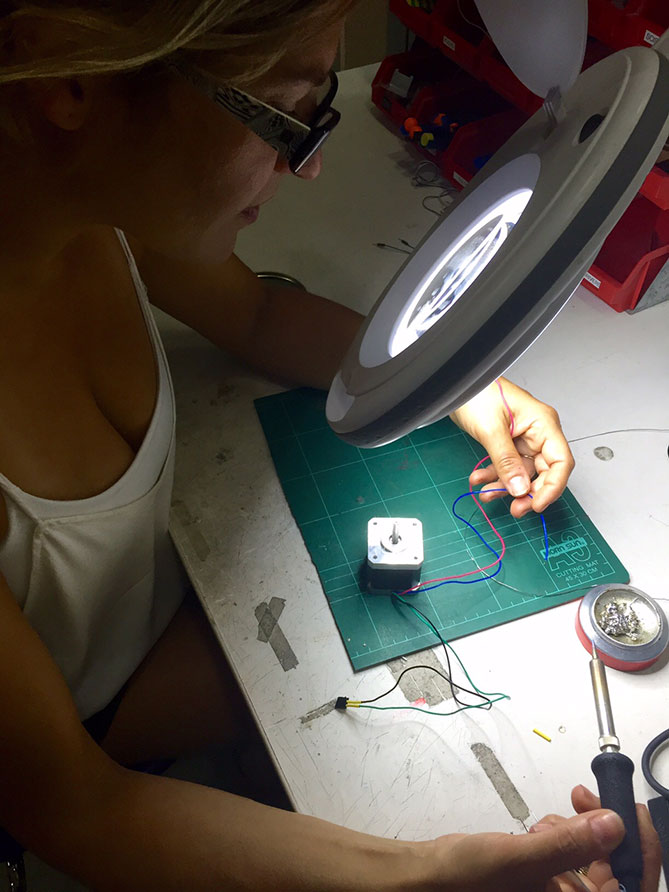
It Must Work | Moving Pieces | Part of the cabin was almost ready, I was running against time. Sleeping 4 hours each night, eating sandwiches and feeling grumpy. Spending so much time designing was a way of procrastinate. The truth was that I was scared of working with the input and output. Surprisingly it wasn't that bad. First I sought the connections between the cables, the colours and their correspondence. After that I've tried the combinations to find out wich one works best to make the axis turn. Next step was to find out the correspondence of the pins on Arduino, insert the button and a LED as inputs, weld the 10k resistor in Pin 2 and 5V. This was the scheme: PB2 - Button PA7 - LED LED PORT A LED Direction DDRA. Engine And Related
Welding
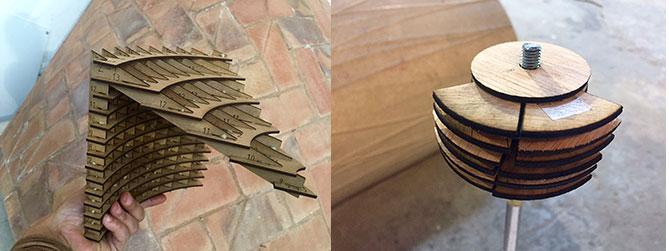
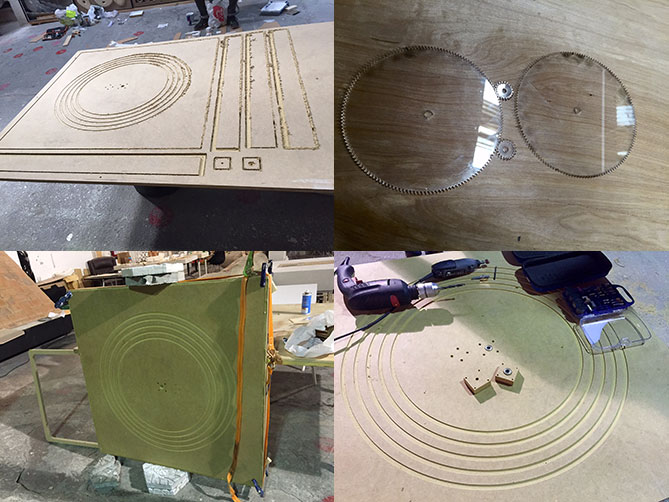
Back To The Piece | The Base | After having the cabin and part of the electronics completed, I went back to SolidWorks and Rhino to design the base of the hut, the connection pieces and the gears. I used the Multicam to cut the gears and the Shopbot to cut the base. Almost Ready
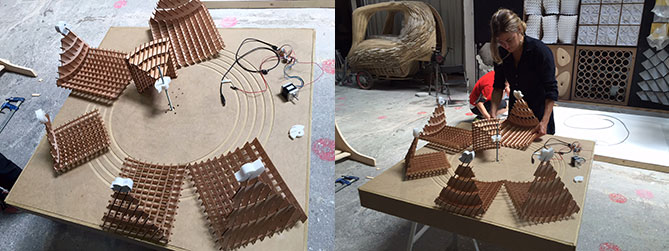
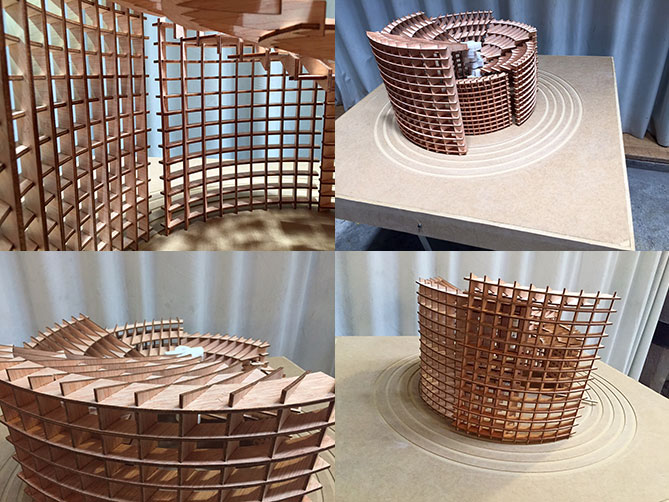
Assembling | All The Parts | The pieces were ready for assembly after cutting the parts. I had problems with the centerpiece, which made me give up 3 modules. It was sad to see only part of the job done. But I wanted to see my cabin working, even if I had to figure out why I couldn't program it properly. I guess, I mean, this will be my next step after all. Open Hut
Final Final | Last Minutes | Besides all the hard work and all fear that I felt about failing, accomplish something like this is a humble victory for me. I must thank my colleagues, who helped me finishing my work, giving me confidence to keep going and helping me with ideas and hands when I needed. I must thank my instructors, the inspirational Ferdi who was too patient and kind, always available to help and Santi, who was always trying to understand my crazy ideas... Going back to my country I'll seat and discover the mistakes, and eventually the "Cabana Girassol" will open towards to the Sun! Ready!
|