3D printing is one of the techniques I was most eager to learn. For sure, it is not as fast as other methods, but the versatility and the shapes that can be created are infinite. Particularly, I would like to apply 3D printing to fix small pieces that are not sold separately or are really expensive.
Modeling 3D objects to be printed
I've been looking around for good 3D bone meshes, but I couldn't find any for free with enough detail to be printed and used by a medicine student to study anatomy.
As known, bones don't have smooth shapes, in fact they have a lot of holes, irregular corners and textures. These characteristics would hinder creating a good replica.
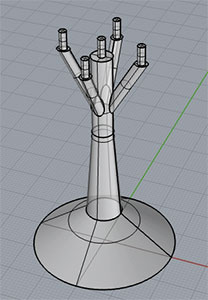
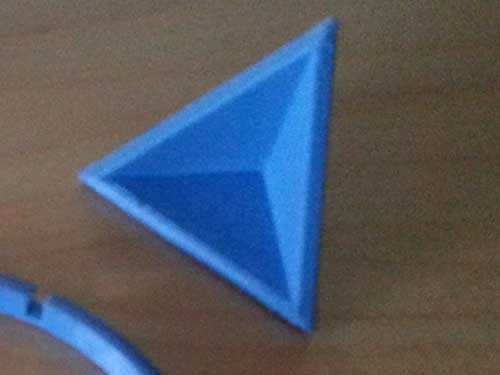
Anyhow, this analysis gave me an excuse to design a small base to hold small and irregular pieces. One of its characteristics is that the surface in contact with the figure to be scanned must be as small as possible.
Inspired by a cloth hanger and taking into consideration the minimum measurements that can be printed by the MakerBot Replicator 2, I designed the pedestal using Rhino.
The thinner parts are the 5 top cylinders with a radius of 1mm. This will allow us to maximize the visual area of the object that is being scanned. On the other hand this base will only be able to hold lightweight objects.
Once designed, I checked that it was a closed surface, converted it to a mesh and checked if it was a good mesh.
3D printing
Now it's time to print the designed object. In the FabLab Madrid CEU we are using a MakerBot Replicator 2.

Before printing, the 3D object must be saved as a *.stl file. The object must be converted into a closed mesh with enough resolution to be printed without losing its shape.
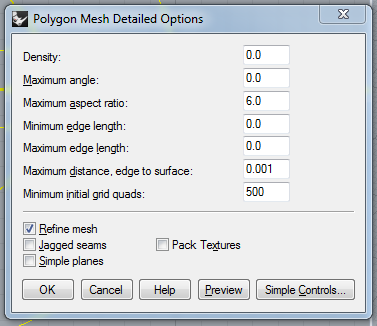
The resulting mesh should be a good closed mesh. Otherwise, it wouldn't be a valid prototype for 3D printing. Once checked that everything was fine, I exported the resulting mesh into a *.stl file.
Printing time! Once imported the base into the MakerBot program, I was asked to move the object to the platform. This was the first time I was 3D-printing any object, so once I saw the printing estimated time, I decided to use the lowest quality possible in order to get a first prototype as quick as possible (which is a questionable decision...):
- Profile: Low
- Infill: 10%
- Number of shells: 2
- Layer height: 0.40mm
- Supports: No [Supports weren't supposed to be necessary because the arm angle was less to 45º, the maximum accepted by the printer]
- Raft: Yes
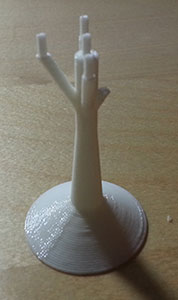
Once I revised the layers that were going to be printed, I ordered the figure. 25 minutes later I was unsticking it from the base of the printer.
The printed object was more robust than I thought it would be. After playing around with the base, it fell to the ground an broke one of its five arms.
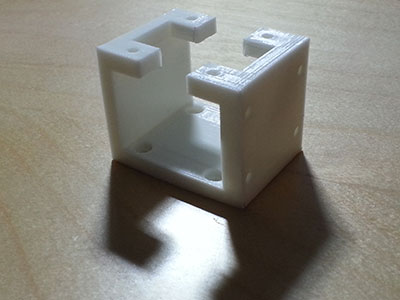
I was also thinking over the mechanism to tilt the bed of the incubator. Using the measures of the datasheet of the Nema 14, I designed a piece to hold it to the incubator structure. This time I tried a new approach and designed the supports by hand, removed the raft and used a layer height of 0.20mm.
As seen, I made another mistake, I didn't use the hairspray properly. Thus, the first plastic layers to bent a little bit. Once I restarted the printing task and it finished, I removed the supports and got a very strong Nema 14 base.
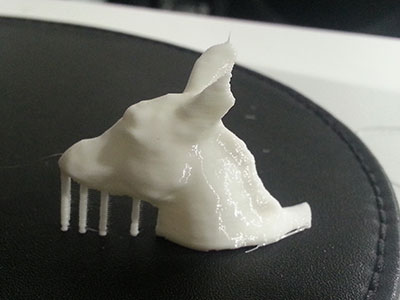
Going a step further I decided to design a "one piece" hinge. OK, it is not literally a one piece hinge, but it is printed as one object. The first attempt was a complete failure. I didn't give the pieces enough clearance. When I tried to break the supports, it broke (above). On a second attempt I increased the clearance and reduced the supports sizes. As seen in the picture (below) it worked perfectly and it is pretty solid.
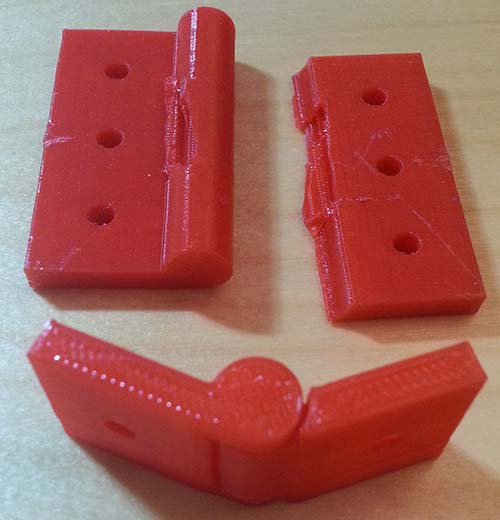
That design was done using Rhino. Anyhow, in order to improve my skills using parametric programs, I also designed and printed a similar hinge using antimony.
3D scanning
Pretty much everyone I talked to about 3D scanning told me that it was a tougher job than it might seem at first glance. After a few tries I couldn't agree more.
The first tool I used to generate a 3D model was 123D Catch. I chose this tool because everyone told me it was really good and simple to use. The first few tries didn't result as expected, the program was crashing a lot using either the Android or Windows application. The errors that were shown were connection and processing errors.
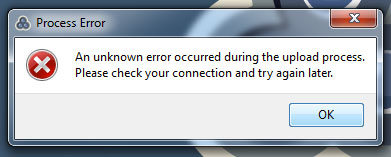
I didn't know exactly what to do, because every pack of photos was returning errors. The next day and a few attempts later, I started getting some acceptable results.
Lessons learnt:
- Discard blurred, overexposed and underexposed photos.
- Do not use photos with unfocused areas.
- Avoid scanning transparent or translucid objects.
- If you are taking indoor photos, use several light points to reduce shadows.
- Be patient, it could take a while until you get the desired results.
- Matching points manually could save your day.
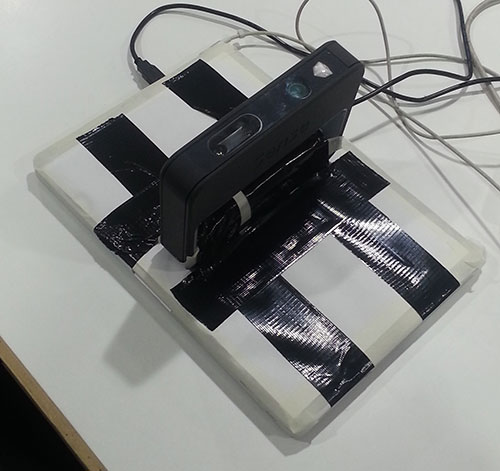
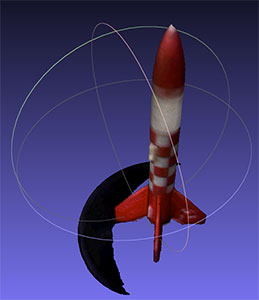
Once I learned how to use 123d Catch, it was time to use another 3D scanner method: the Sense 3D scanner. I was told it was a little bit tricky to scan an object using this tool. A really accurate pulse is necessary, but after a few tries (less than using 123d catch) I got a model of a small rocket we have in the FabLab.
Duplicating an object
Unfortunately, every scanned object generated a bad mesh, so it could not be printed directly. Now it's time to fix the meshes.
Repairing a mesh is a really tough job. At first, using the rhino commands unweld(0), explode and boolean unions, I removed quite easily all the surplus regions of the models, and oriented them. Later on, in order to close the holes of the mesh, I tried different programs:
At first I used Rhino. The problem was that the automated algorithm only closes the mesh properly if it's a hole that can be easily filled with straight faces. When the hole has a complex shape, it creates messy polygons not always closing the mesh.
After using several programs, as MeshLab, I discovered a windows script called PolyMender that did a really fine job. It fixed all the meshes pretty quickly and with a relatively small amount of memory usage.
Finally in order to get a perfect mesh to print, I imported the resulting models into Rhino again to fix non manifold edges, duplicate faces, etc.
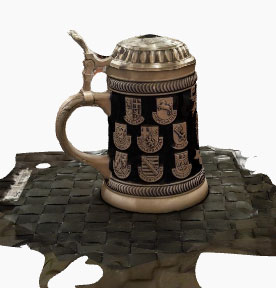
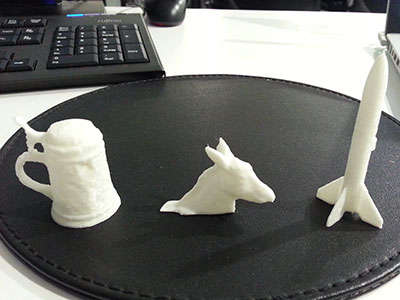
I applied this procedure to three objects of different sizes: a half a meter rocket, a german jar of beer of about 20cm height and a small donkey of less than 3cm height. After adding some supports to the donkey's head and scaling all three to the same dimension, I printed them.
Building a Prusa i3
I decided to build a Prusa i3 Hephestos. The construction process can be found in the "machine building" section.
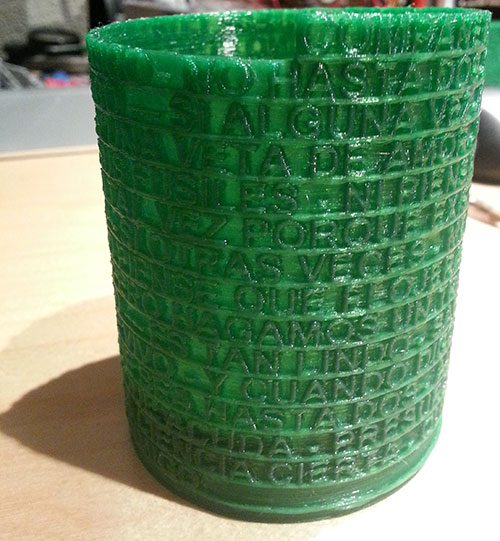
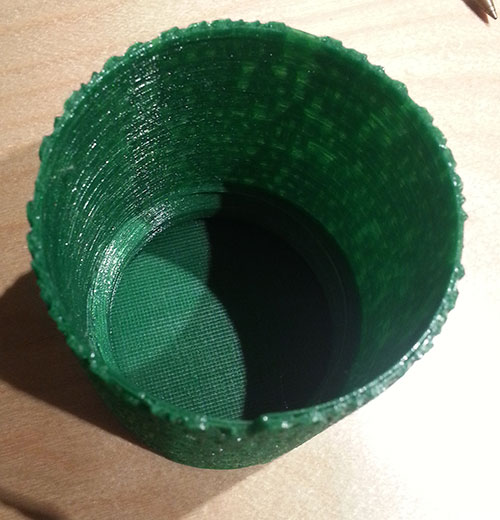
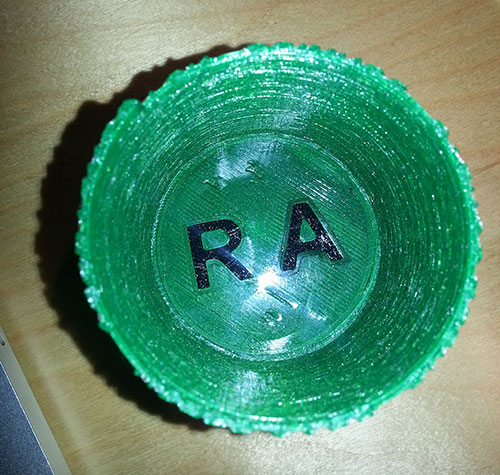
Once built I made some calibration work and printed some tests. It is still not perfectly calibrated. In spite of that I decided to create a complex object and print it using this machine.
The object I decided to print is a cup with text all around it (a poem called "Hagamos un trato"). This design has a second part which is used to close the bottom inner side of the glass.

The incubator final design has some 3D printed parts, too.
The ceiling of the incubator box is made of rigid plastic. This part needs to be easily placed and removed each time the baby placed inside the incubator. Therefore I designed a 5x5x5cm part that holds the ceiling on place.
The wall holes allow the medical stuff to deal with the baby without opening the entire box, therefore, the "environmental" conditions inside the incubator don't change.
These are made of PLA and consist of two rings. Those plastic rings fit one inside the other with the wall plastic between them.
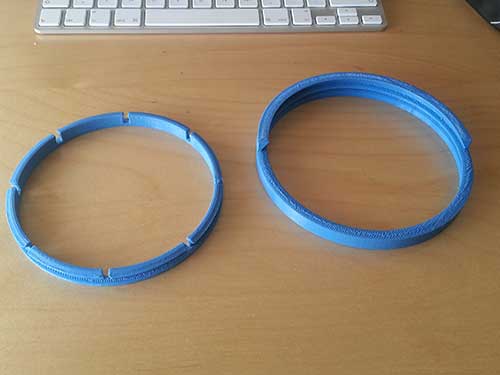
Once placed, the plastic wall inside the ring can be cut and removed if desired.
In the outer side of the ring there is a notch to hold a piece to cover the hole if desired.
It is worth mentioning that these 12 pieces were printed using the 3D printer I built during the FabAcademy.
Files
The rendered files have been compressed to deal with the ~1MB constraint. If you want to print any of those, please, use the meshes hosted on github.
3D printing
- Download nema14_base.stl or view
- Download hinge.stl, Download the antimony file or view
- Download base.stl or view