
Fabacademy2015 work by Loes Bogers is licensed under a Creative Commons Attribution-NonCommercial-ShareAlike 4.0 International License.

In-System Programming (or in-circuit programming) is a technique to program a microcontroller after you solder it into a circuit board. The In-System Programmer is the interface between the computer and your system. You can buy them (eg. AVRISP mkll) but why not make them yourself?
Arduino has something comparable inside (the bootloader), but the downside of doing that is that it takes space on your microcontroller. Also, working with the Arduino and breadboards is less desirable because working with jumpers (loose wires) creates very flimsy systems that break easily. If you have access to a milling machine it's better to create real PCBs, they're stronger, reliable and still editable once you get to know them a bit.
There are several ISPs developed in fablabs, with slight differences:
I got a leftover piece of copperplated board, only just big enough to get the model out of it. As you can see in this picture, if I got the orientation point super on point it would just be possible.
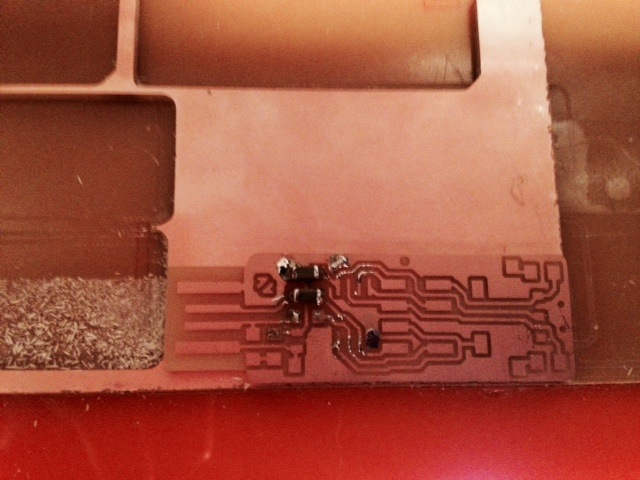
I fiddled with the starting point in hundreds of a mm (finally placed the origin in 71.53 x and 22 y. And it worked beautifully! I left the rest of the settings on default.
Funny mistake: I spent 5 minutes trying to get the hexkey into the endmill to replace it but couldn't open it....What happened? The endmill has two openings, one has a screw, one doesn't. So yeah, turn it 180 degrees and try the other hole :)
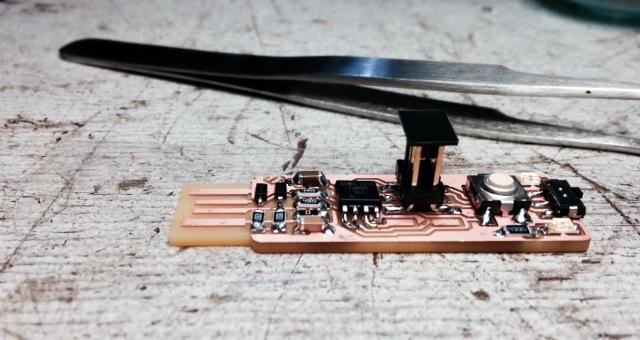
So I soldered with a magnifying glass and a good iron which made all the difference with the simple ones. The components are so teeny tiny! But after a little practice I got on quite well and didn't have to redo components. Zaercs documentation was really clear, also about orientation of the components etcetera.
And I love the look of the final thing. Proud! I tested all the connections with a multimeter and the LED lights up when I put it in a USB port (handy those LED components).
First step was to make a 6-wire wire to connect my ISP to a second ISP that I will use to program mine. Second, I went through these steps in the documentation of Zaerc's FabTiny*ISP. Then I went into the programming chapter. When we first tried to make the terminal command, AVR Dude replied that it couldn't find the USBtiny. But we checked in system information and actually under USB it showed up. When wiggling a bit with the USB to make a better connection at some point it showed up and we were able to run the command. I didn't have to modify any of the files in the vusbtiny-fabtinystar.zip. The tutorial is for when you use an Arduino to program the ISP, but I was using another FabISP and all the settings matched already.
When the USB kept giving bad responses we checked with another board. Which did show up. Then I made a better connection by adding solder to the USB connection on the ISP and adding some cardboard. It turned out that my ISP was off, I just had to flick the switch to turn it on. The confusion arose because the LED was on regardless of whether it was on or off. Finally I went through all the steps of the tutorial but at the end of it my ISP didn't show up still. Same problem Joe seemed to be having last week. He made a new board altogether. Oh no...Then Emma suggested to try just replacing the microcontroller. And that actually worked! Success!
----------------------------------------In some cases you'll want to terminate a job from the machine's cache while it's running. For example when you see the mill isn't going deep enough. On this page, under FAQ you can see the shell commands to delete the job. In short: press the up and down bottom on the machine until there's a blinking light. Then open a terminal window and give in the command ps -aux | grep cat. Look in the list and locate your two files, find the 4 digit number in the second column. Tehn type kill 0000 0000 [insert the numbers]