
Project development
Goal of this final week is to document and build our final project
Table of contents
I used many pages for documenting my project, so you will need to look at those pages first:
Project results
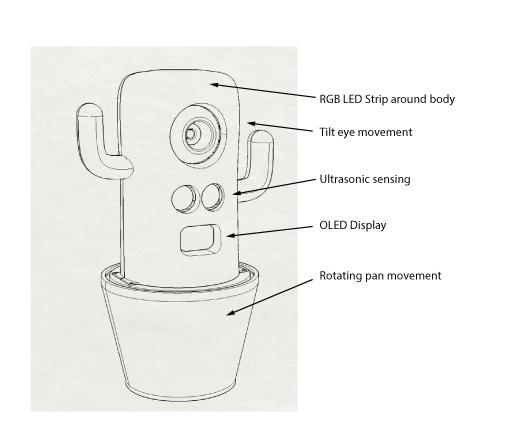
For the final project presentation I managed to build a basic version of PACO with the following functionality:
- Pan-tilt camera
- Live video streaming
- Snapping pictures
- Web interface
- 9 RGB led strip control
- OLED display showing graphics and text
- Ultrasonic sensing of the user distance
- Speech synthesis
- Basic Python API for controlling the above.
Architecture
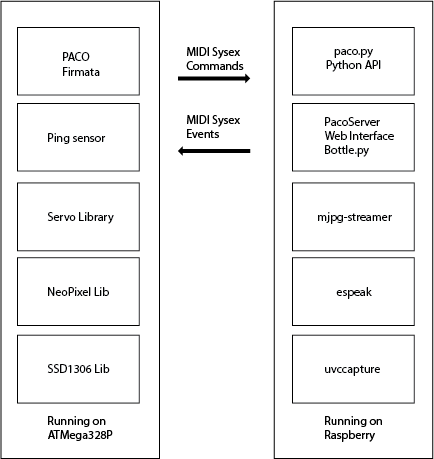
The current prototype has the following architecture:
While the electronics components and protocols used can be summarised by the following diagram:
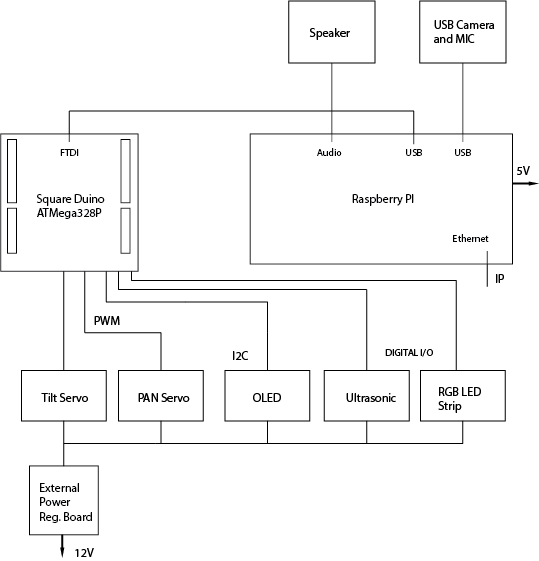
Components used and BOM can be found at the applications and implications page.
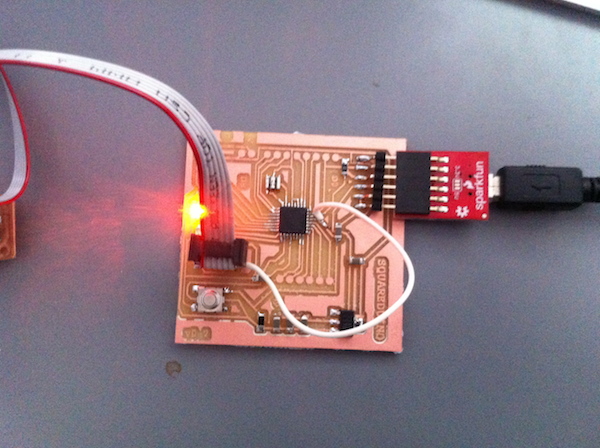
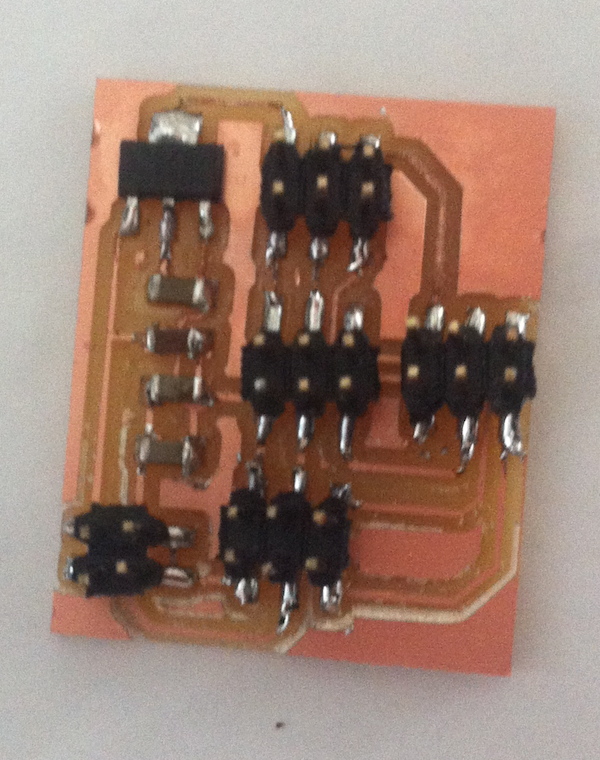
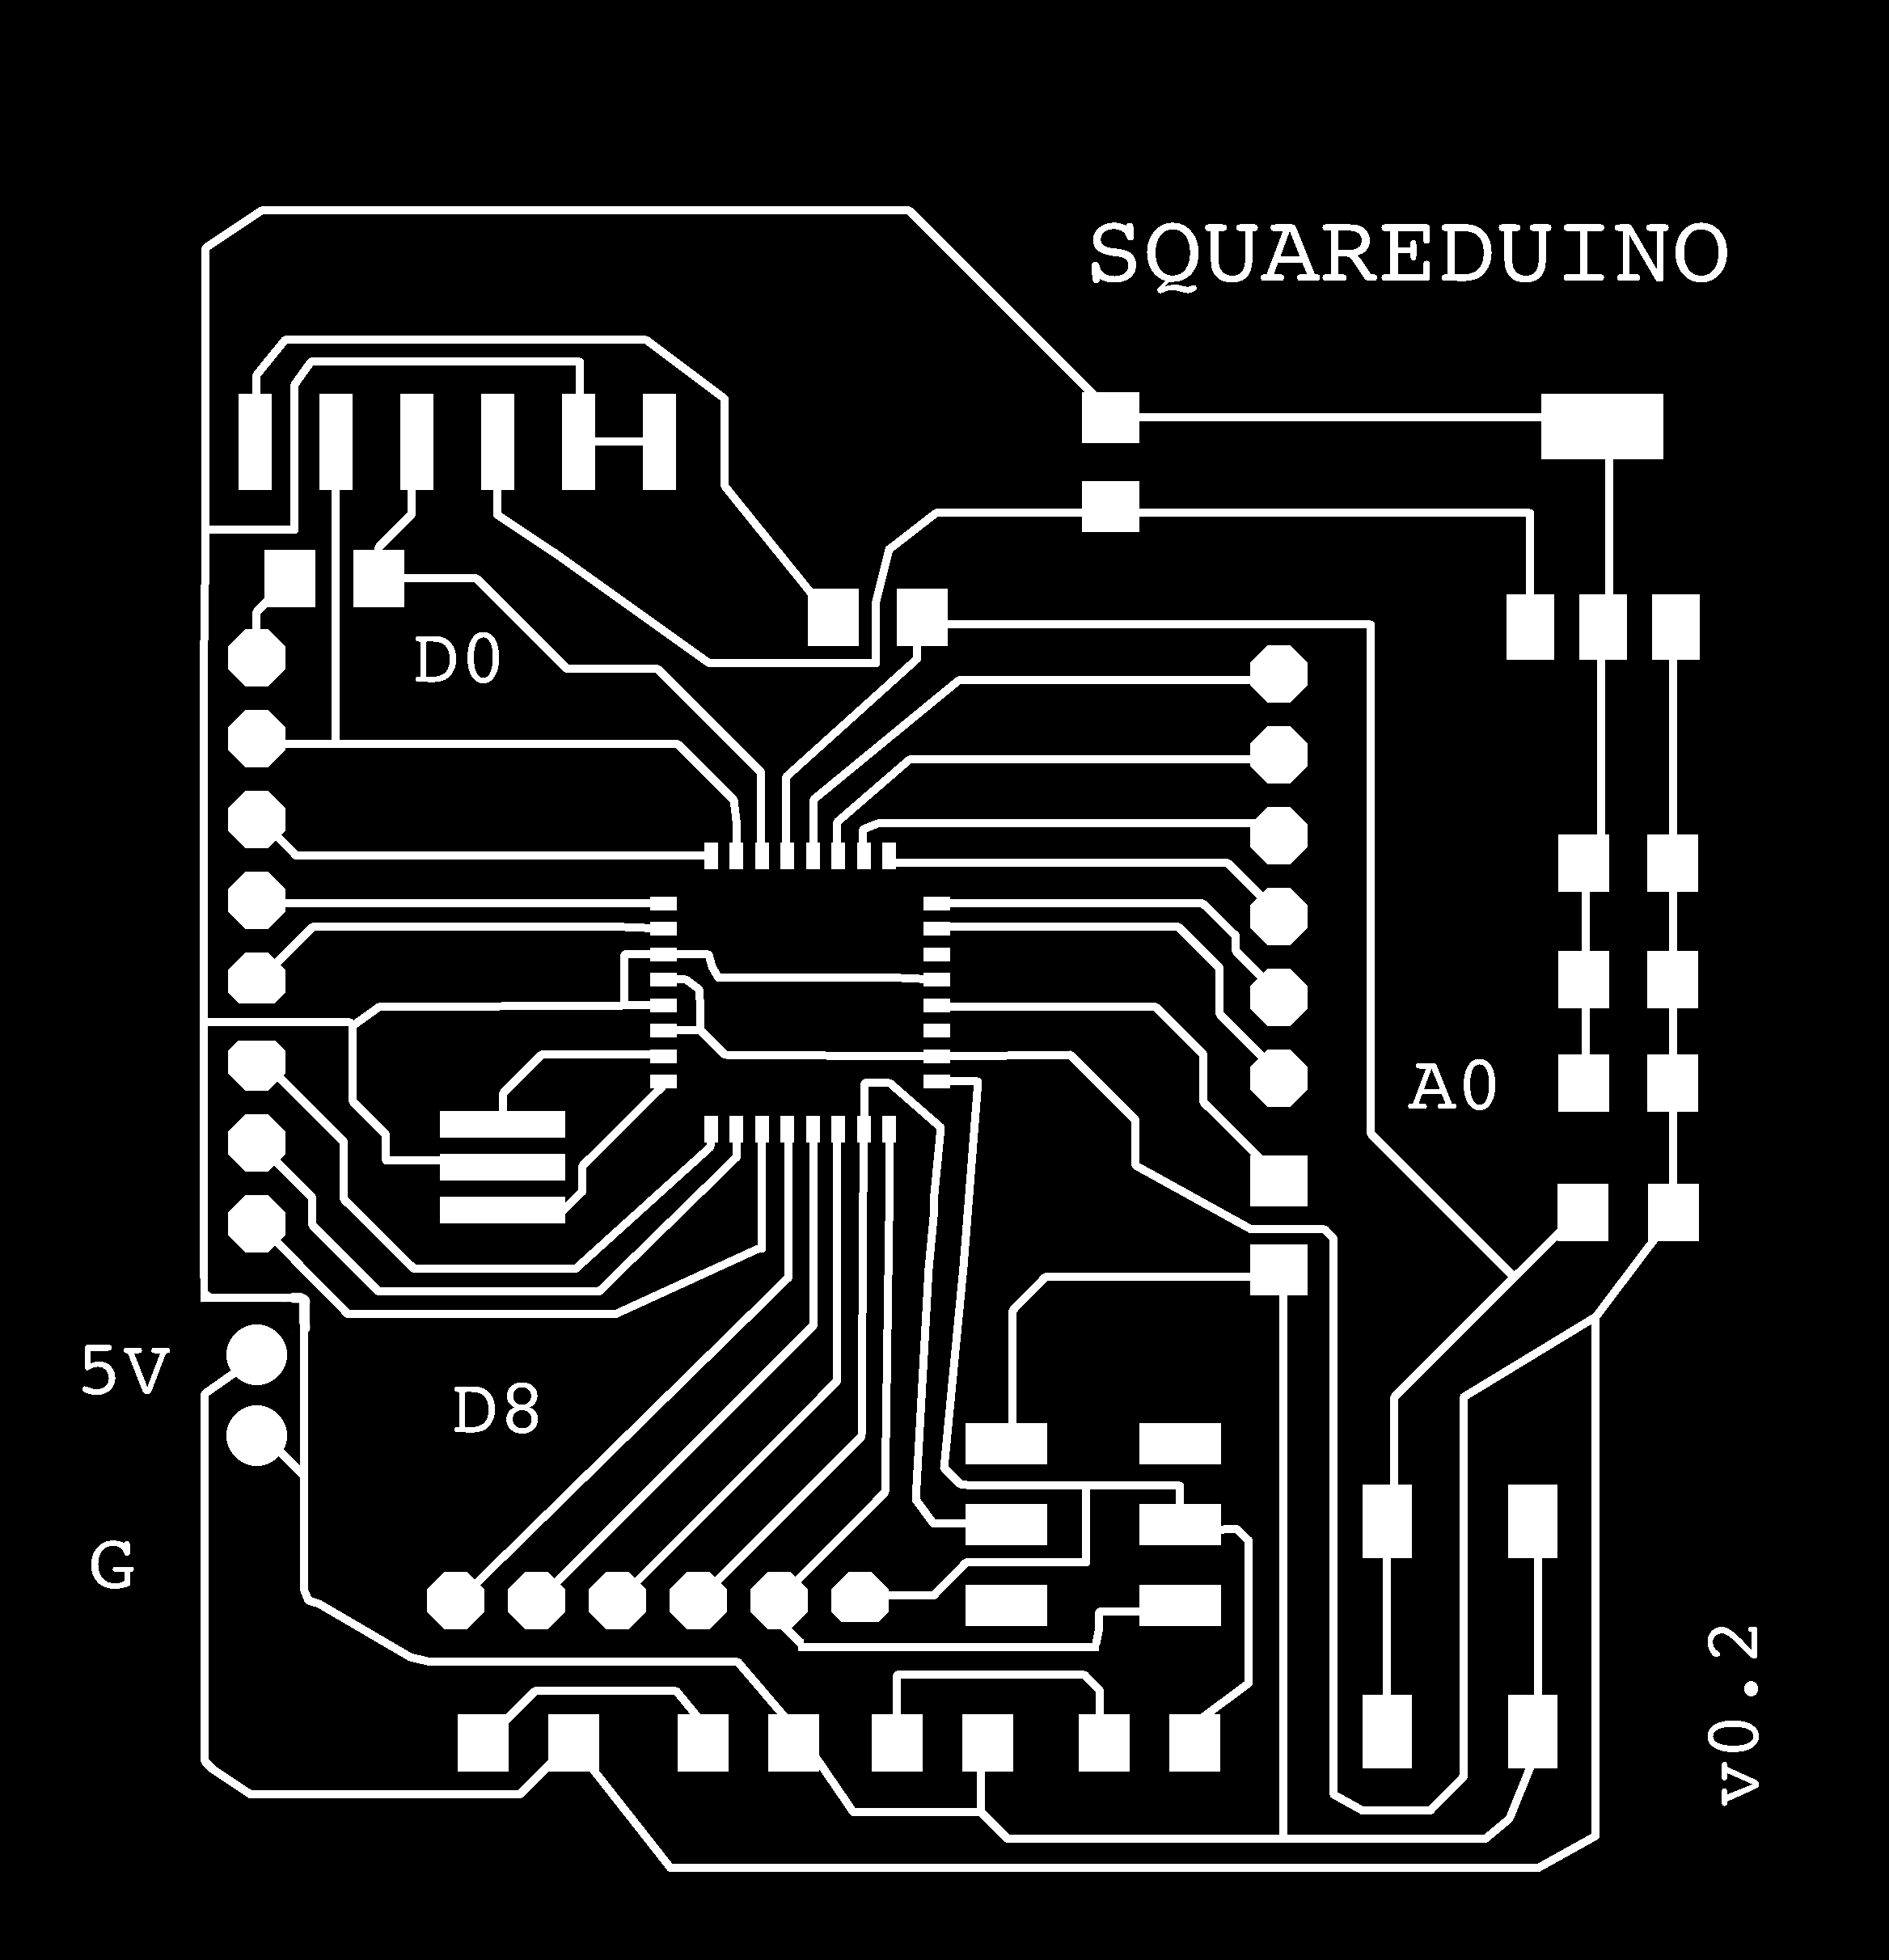
As the final project focus was integration, I didn't build new electronic boards specific for the final project, but used the ones I built during the semester. The SquareDuino board, an ATMega328p board, programmed with the Optiboot bootloader customized to run at 20 Mhz, and a separate power regulating board, used to power all the servo motors and other components, reducing draw from the Raspberry PI USB which powers the Squareduino, USB Camera and optionally a Wifi dongle.
I would have loved to make more components by myself, but when the project will be released to the public this will allow to make it easy for people to build their own PACO from a standard Arduino.
On the software side the architecture is organized in layers. Code is running both on the ATMega328P and Raspberry. The communication between them is done using the FTDI port via a small subset of the Firmata protocol, which in turn is based on Midi. The ATMega receives "Sysex" commands and emits events using the same format for example for the ultrasonic sensor.
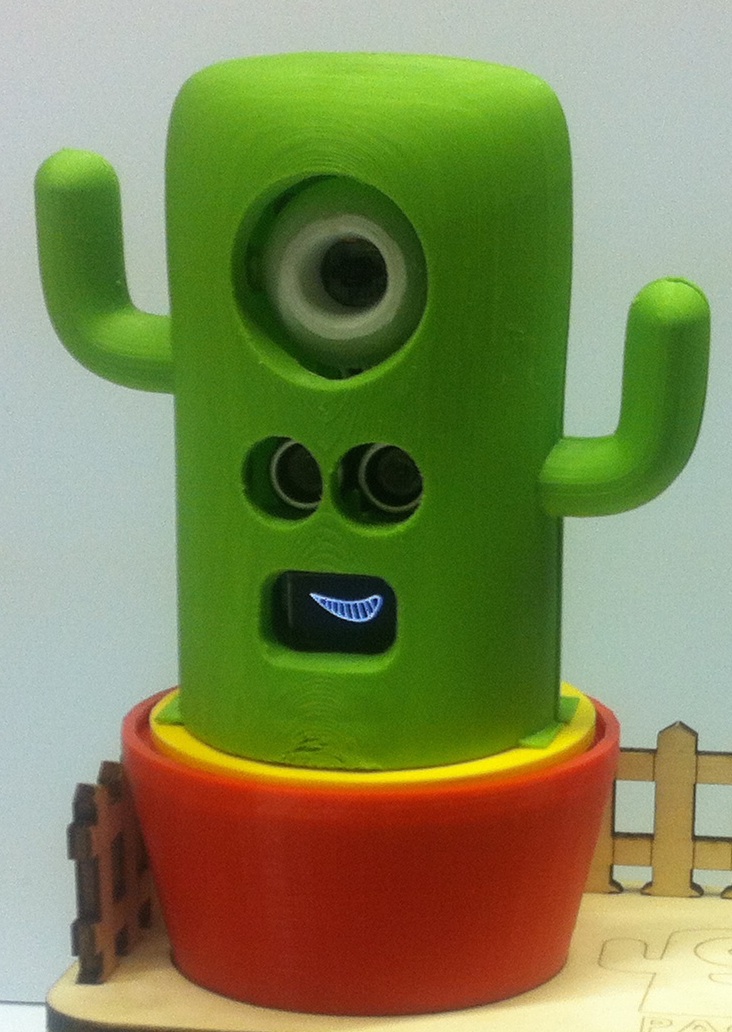
Parts, Case and Raspberry Encolsure
The mechanical part of the project is built with 3D printing and split in several parts which should be printed in different colors. Some parts, especially the external "cactus case" need to be printed at slow speeds and with support material. Other parts don't have any special requirements to be printed. Expect about 12 hours of printing to build the whole set at reasonable speed settings (i.e. 50mm/s)
The components to be printed are:
- Case front and back sides
- Eyeball
- Holder for electronics
- Pan servo mount
- Vase
- Tilt servo mount
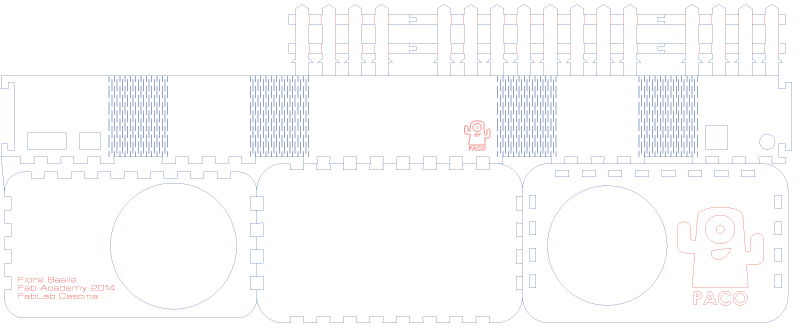
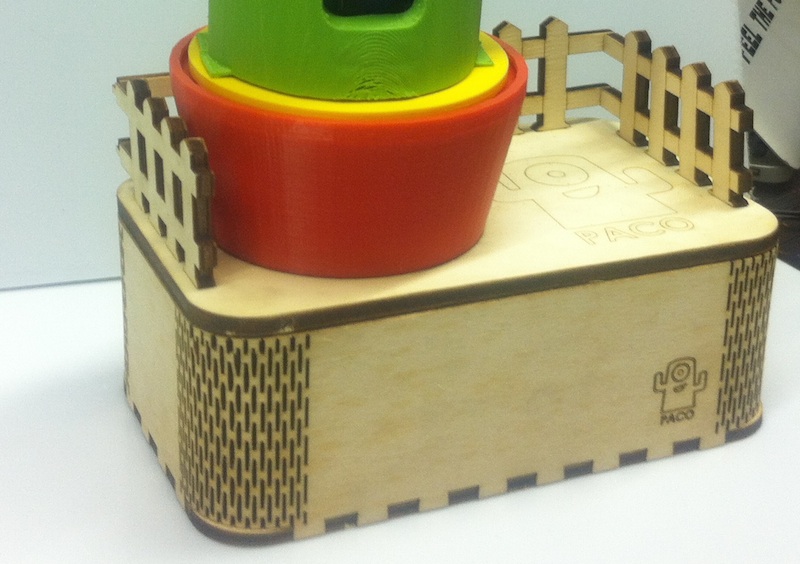
The Raspberry Enclosure is built using the laser cutter, and fits a 90x30 cm board. I used 50mm thick birch plywood, and design must be adjusted for different materials. The cutting power I used on the FullSpectrum 90W laser cutter is 40% power 100% speed.
In order to assemble the box after cutting it is recommended to wet the wood to make it more flexible, allowing to bend it around the shape. The final result looks like the following:
To decorate PACO I also prepared some stickers, allowing to customize the cactus case and have a personalized look.

Programming API
PACO programming is made in Python. Only if you need to add new sensors or outputs editing the PacoFirmata is necessary.
In order to explain the API I think it is useful to look at an example, the demo script used for presenting PACO during the final project presentations:
from paco import Paco
from time import sleep

SERIAL_PORT='/dev/ttyUSB0'
To use Paco you just need to import the Paco class and identify the serial port where Paco is connected to the RaspberryPI.
p = Paco(SERIAL_PORT)
sleep(5)
Some delay is necessary to allow PACO to boot as the ATMega328P is reset automatically each time you open a serial connection.
p.say("Hello I'm PACO")
p.say("A digital companion")
p.say("And a Fab Academy final project")
p.beachlab()
p.say("I come from Sitges Beach Lab")
p.say("I'm a funny guy! My dad taught me many tricks!")
p.smile()
p.say("I can smile")
p.grin()
p.say("I can grin")
p.sad()
p.say("I can also look sad")
p.say("But I'm so happy!")
p.smile()
The say() method allows to activate the speech synthesis, the beachlab(), smile(), grin(), sad() show bitmaps on the display. These bitmaps are encoded as byte arrays in PROGMEM, and created as XBM bitmaps from the tool I built during the CAD week.
dist = p.readDistance()
p.say("I know you are %d centimeters away" % dist)
The readDistance() method allows to access the latest reading from the ultrasonic sensor and speak it out.
p.say("I can look at you up and down")
p.tilt(20)
p.tilt(60)
p.tilt(20)
p.tilt(60)
p.smile()
p.tilt(40)
p.say("I can rotate my body")
p.pan(45)
p.pan(120)
p.pan(90)
The pan() and tilt() methods control the camera pan and tilt movement, smoothing out it to the desired degree.
p.say("I can light your desk too")
p.setBrightness(255)
p.setLed(9,0,255,0)
p.say("Ok, you like yellow?")
for i in range(0,9):
   p.setLed(i,255,180,0)
   sleep(.3)
The setBrightness() method set the leds brightness, the setLed() allows to control both the single 9 leds or all together (specifying 9 instead of a number between 0 and 8).
The complete demo looks like the following:
PACO Digital Companion Platform
Software setup
The software setup on the ATMega328P can be easily done using the Arduino IDE, by flashing the PacoFirmata sketch. The pins used can be customized using in the PacoConfig.h header file.
On the Raspberry PI the software setup is a bit more complex. I plan to make a pre-installed Raspberry PI distro image to make things simpler for users.
In the meanwhile to setup mjpeg-streamer and espeak I provide easy scripts in the PacoServer scripts folder:
- build_mjpgstreamer.sh installing dependencies and checking out mjpeg-streamer from subversion
- install_mjpegstreamer.sh which installs the files built in the appropriate folders
- install_espeak.sh to install speech synthesis libraries
You will also need to install the uvccapture utility using apt.
Install python dependencies for PACO server is as easy as running:
pip install -r requirements.txtwhich will setup bottle.py and pySerial.
Finally in the PacoServer folder you find two scripts to test things out:
- demo.sh which starts a demo of PACO functionality described above
- webconsole.sh which starts the mjpeg-streamer and web interface, which becomes accessible on the Raspberry IP address at port 5000
Downloads
Electronics:
3D Printed files:
Laser cut box SVG
Stickers:
Software snapshot:
Github Project
All the files will be hosted on Github and improved there
