WEEK 1
[Collaborative Technical Development]
The very first assignment for the FabAcademy was to create a shared folder for each of us where we will upload our website files containing the progress during the course. Our folders will later be pushed by the MIT-CBA repository for online publishing.
So, for sharing our documents we installed a Source Configuration Management software, something like "Dropbox" but more powerful, called "Mercurial". Here's the link to the download page http://mercurial.selenic.com.
Opening the Ubuntu's terminal (these configurations are for UNIX systems only), I installed mercurial using the following shell command:
apt-get install mercurial
Then I downloaded the keys for entering the Barcelona hg network, created an hidden directory called "ssh" in my "root", moved those keys to this new dir and changed its permissions. Then I configured the ssh communication protocol and was ready to roll!
mkdir ~/.ssh

      mv ~/Downloads/academy ~/.ssh

      mv ~/Downloads/academy.pub ~/.ssh

      sudo chmod 600 ~/.ssh/academy

      echo -en "host fab.cba.mit.edu\nport 846" > ~/.ssh/config

      mkdir ~/Desktop/Archive

      hg clone -e "sshi~/.ssh/academy"ssh://hg@fabacademy.org/academy.2013.sn.bcn~/Desktop/Archive

    echo -en "\n\n[ui]\nusername = First Last <email@mit.edu>\nssh = ssh -i ~/.ssh/academy -C\n\n[extensions]\nconvert =\nfetch =\n\n[hooks]\n\nchangegroup = hg update >&2"  >> ~/Desktop/Archive/.hg/hgrc
After that, I was finally ready to use Hg! At first all these lines might seam a little scary, but soon you'll start playing with the terminal and understanding its basics. No big deal! ;-)
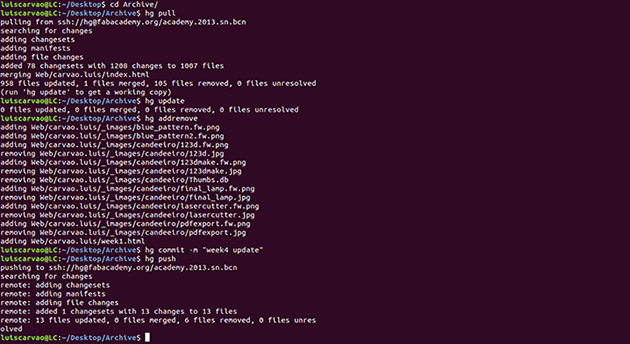
Now I have to follow this specific workflow:
hg pull

    hg update

    hg addremove

    hg commit -m "describe your changes"

    hg push
so that I can update the Archive directory in my pc and send my website files to FabLab Barcelona. Just remember not to paste all these codes at once. Between each line you'll need to press Enter. Also you can't paste in the terminal with Ctrl+V, you can shortcut it by pressing the scroll button.
[Documentation and Project Management]
After establishing the FabAcademy network, it's time to create a webpage for documenting my progress in the course.
First, I chose Dreamweaver as the main platform to help me write html, css and javascript files. It's an amazing and very automated platform where you can always compare what you are typing with the end result in real time. Also you can make changes in the design view and Dreamweaver will automaticly write in your code view. It's not the best practice to do it in the design view, so my advice to you is always check the code view to see if Dreamweaver is typing it right.
Working together with Dreamweaver it's always recommended to use Photoshop or GIMP for image manipulation, Illustrator or Inkscape for vector drawings and Fireworks for webgraphics and layout proof of concept. You can also play with Flash, but as everybody says with the new HTML5 "Flash is dead".
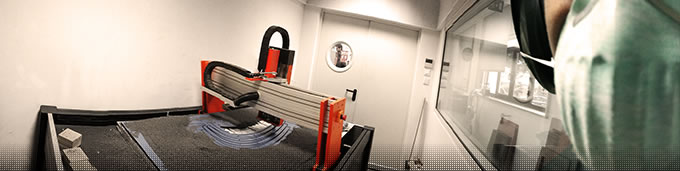
I started designing my webpage with Photoshop. Chose an emblematic image for the header and regulated some levels for a nice publishing quality. Important adjustments that you may consider when treating your image:
Image > Adjustments > Brightness/Contrast... for 90% of your images;
Image >
Adjustments > Curves for the critical ones;
Image > Adjustments > Hue/Saturation... for controling lightness, vibrance and colors or
Image > Adjustments >Vibrance if you want to be lazy;
Obviously there are a lot more powerfull options but, the ones I selected are vital for a good start. Take a look at the example above. Some of the main changes were generated with these options.
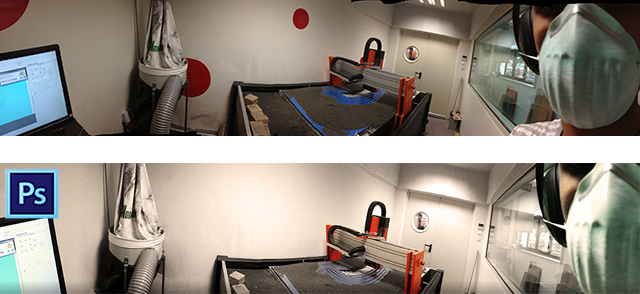
I know, you noticed that the red circles are gone. There are also some features for removing unwanted things... or persons. :-P
Well, the design language used in Fablab EDP is a bit childish and I don't want it in my pictures, so, in this case, I used the "Patch Tool", located in the left toolbar under "Healing Brush Tool". It's perfect because is content aware and blend the patch with the rest of the image. I also gave it a soft and uniform orange tone by using Image > Adjustments > Photo Filter.
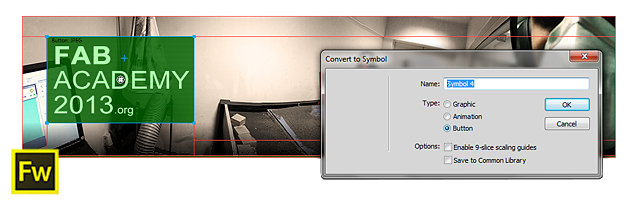
Now that I have a stylish header image it's time to give it some mouse interaction. Start your Fireworks!
So, after changing my software I created two boxes inside the header image, one with the main icon FabAcademy 2013, introducing the visitor to the webpage content, and the other with my name and FabLab location carvao.luis@fablabedp. Usually when we have a main icon or header icon it's an hyperlink that brings us back to the index page. Well, that is exactly what I want to do. So I picked this box and converted it into a button, by right clicking inside the box and selecting "Convert to Symbol".
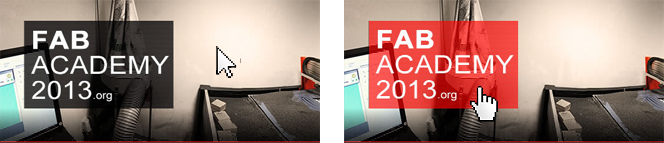
As you see, the image is now sliced according to the size of my button box and if I double click on top, it will show me three states. I'll just use the mouse over state, because I only want a short transition when someone passes their cursor over my FabAcademy2013.org button.
Another interesting feature of Fireworks is the gradient tool. It comes with some interesting patterns. I used it for smooting a bit the bottom of my header image.
Now it's time to export
my header image to Dreamweaver for integration in my final web layout.
First, I created a folder in My Documents called "FabAcademy 2013" where I'll put all my website files, and right now, I'm going to save my Fireworks file there. So
I exported my FW file File > Export and chose the option Copy to Clipboard so that I can make Ctrl+V in Dreamweaver.
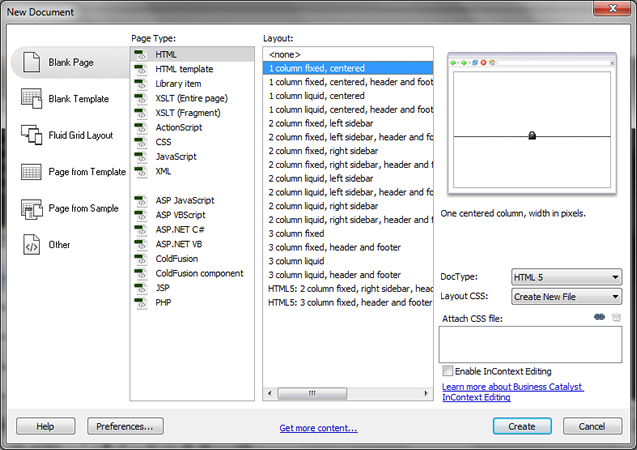
Then I ran Dreamweaver and chose the right template for me. I opted for the 1 column fixed, so that I can have the freedom to decide my page organization on the proper time, not being limited to a complex template. I Hitted "create" and DW asked me where should it storage the styles file, so I created a folder inside FabAcademy 2013 directory called "_css" to contain all the css files for this page.
Now Dreamweaver presents me with the design layout that I chose. If you look at the code, on the top left corner hit "code", you'll see some very simple lines of html. First the main lines of any html file:
<!doctype html>

      <html>

      <head>

      <meta charset="utf-8">

      <title>Untitled Document</title>

    </head>
      <body>

        </body>

    </html>
There will be more than these lines on your code, but only because DW is giving you some tips on how to start manipulating your page.
Second, the link to the stylesheet, so that this html file knows where the stylesheet is:
<link href="file:///C|/Users/Administrador/Desktop/oneColFixCtr.css" rel="stylesheet" type="text/css">
And obviously the famous "div section" with fixed dimmension inside the <body> of your html. These divs will help you to create the structure of your webpage. If you are newbie, you probably should see some DW Lynda tutorials before going any further on this software, and also learn some basics about html on W3Schools.
Right now I still have on the clipboard my FW file, so now I have to "paste special" this header and it will create some more lines of code at the beginning, that for now we don't need to understand. Just understand that for this action a new div was created.