NODO

Face Scanning, Mold Design, 3D Printing and Casting Process
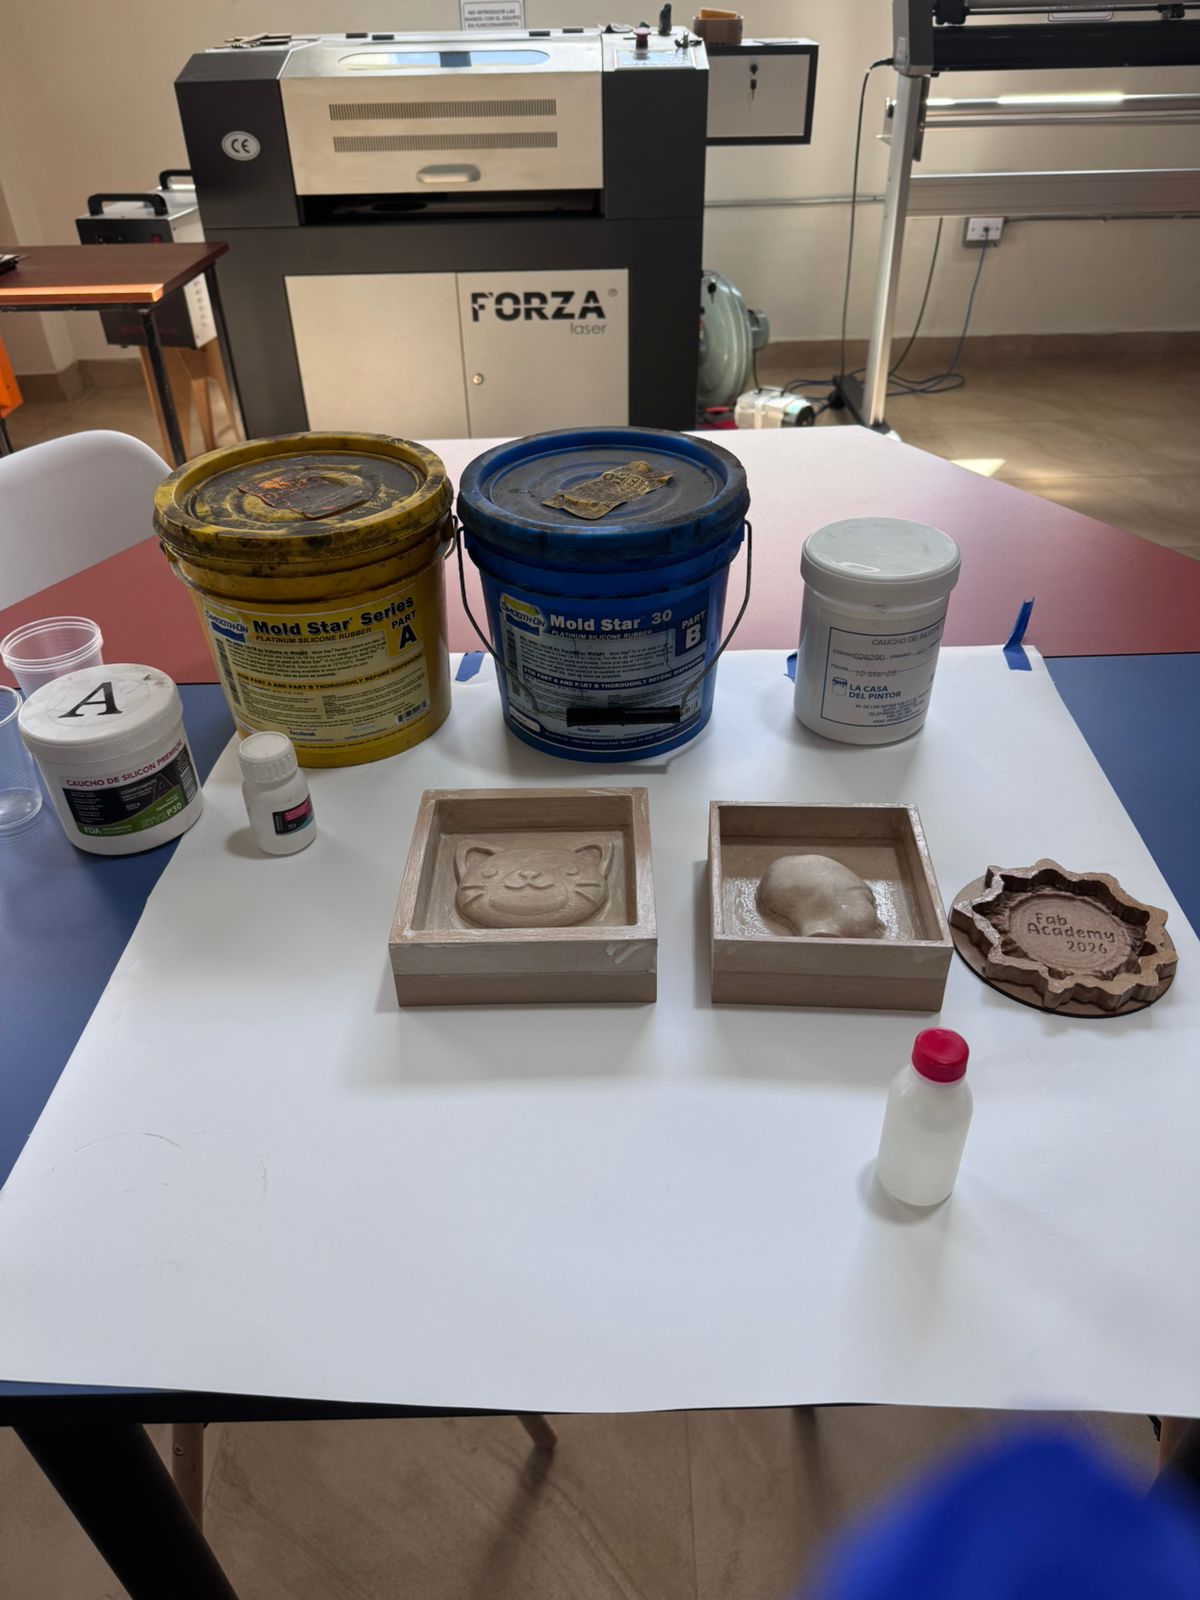
The group assignment was documented in detail on the lab page. In this personal page I include a short summary of the work: we reviewed the safety information for the molding and casting materials, made small test casts, and compared CNC milling, TPU printing, and resin printing as mold-making technologies.
| Material | Safety Focus |
|---|---|
| Silicone rubber | Use gloves and clean containers, mix the two components correctly, avoid contamination, and respect curing time. |
| Photopolymer resin | Use nitrile gloves, eye protection, ventilation, careful cleaning, and UV post-curing before handling the final part. |
| Plaster and wax | Avoid plaster dust inhalation, control heat when using wax/paraffin, and clean spills before they harden. |
| MDF and 3D printing materials | Use dust extraction for CNC milling, avoid hot printer parts, and work in a ventilated area. |
| Technology | Result |
|---|---|
| CNC milling | Best option for a rigid master mold; it requires dust extraction, machine setup, and PPE. |
| TPU printing | Useful for flexible molds and easier demolding; layer texture can transfer to the cast. |
| Resin printing | Best surface detail; it needs strict chemical handling, cleaning, drainage, and UV curing. |
The conclusion was that the best technique depends on the priority of the part. CNC milling is more stable for master molds, TPU helps with flexible demolding, and resin gives better surface detail but demands stricter chemical safety.
View Full Group Assignment PageDesign a mold according to the selected manufacturing process, produce it with a smooth surface finish, and use it to cast parts.
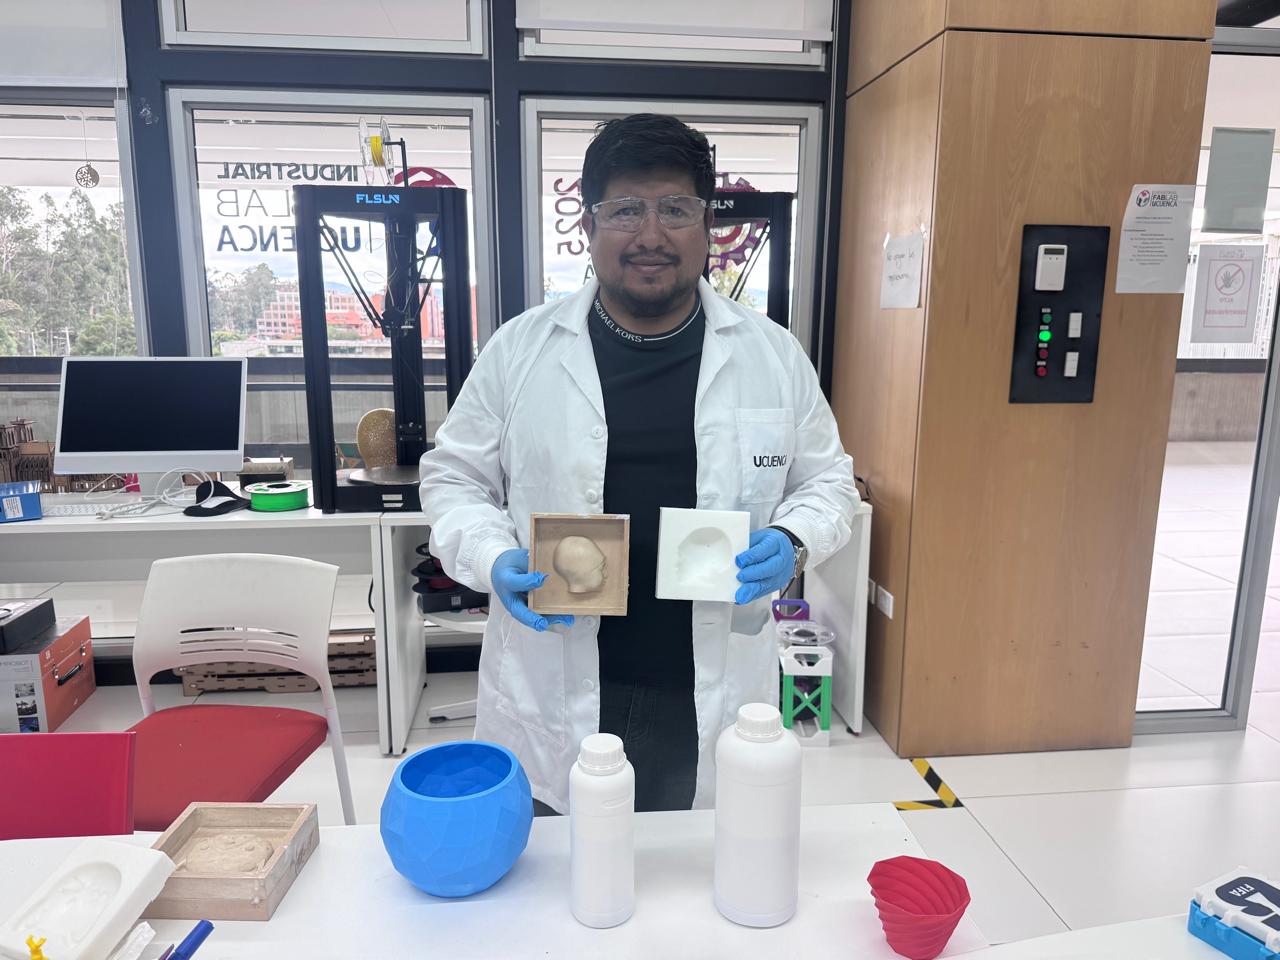
This project focuses on the complete process of molding and casting using a human face as the main model. The workflow starts with a digital scan of a person's face, followed by 3D model correction, mold design, 3D printing, and finally casting using wax and paraffin.
The objective was to understand how digital fabrication tools can be combined with traditional molding and casting techniques to create a physical reproduction of a scanned face.
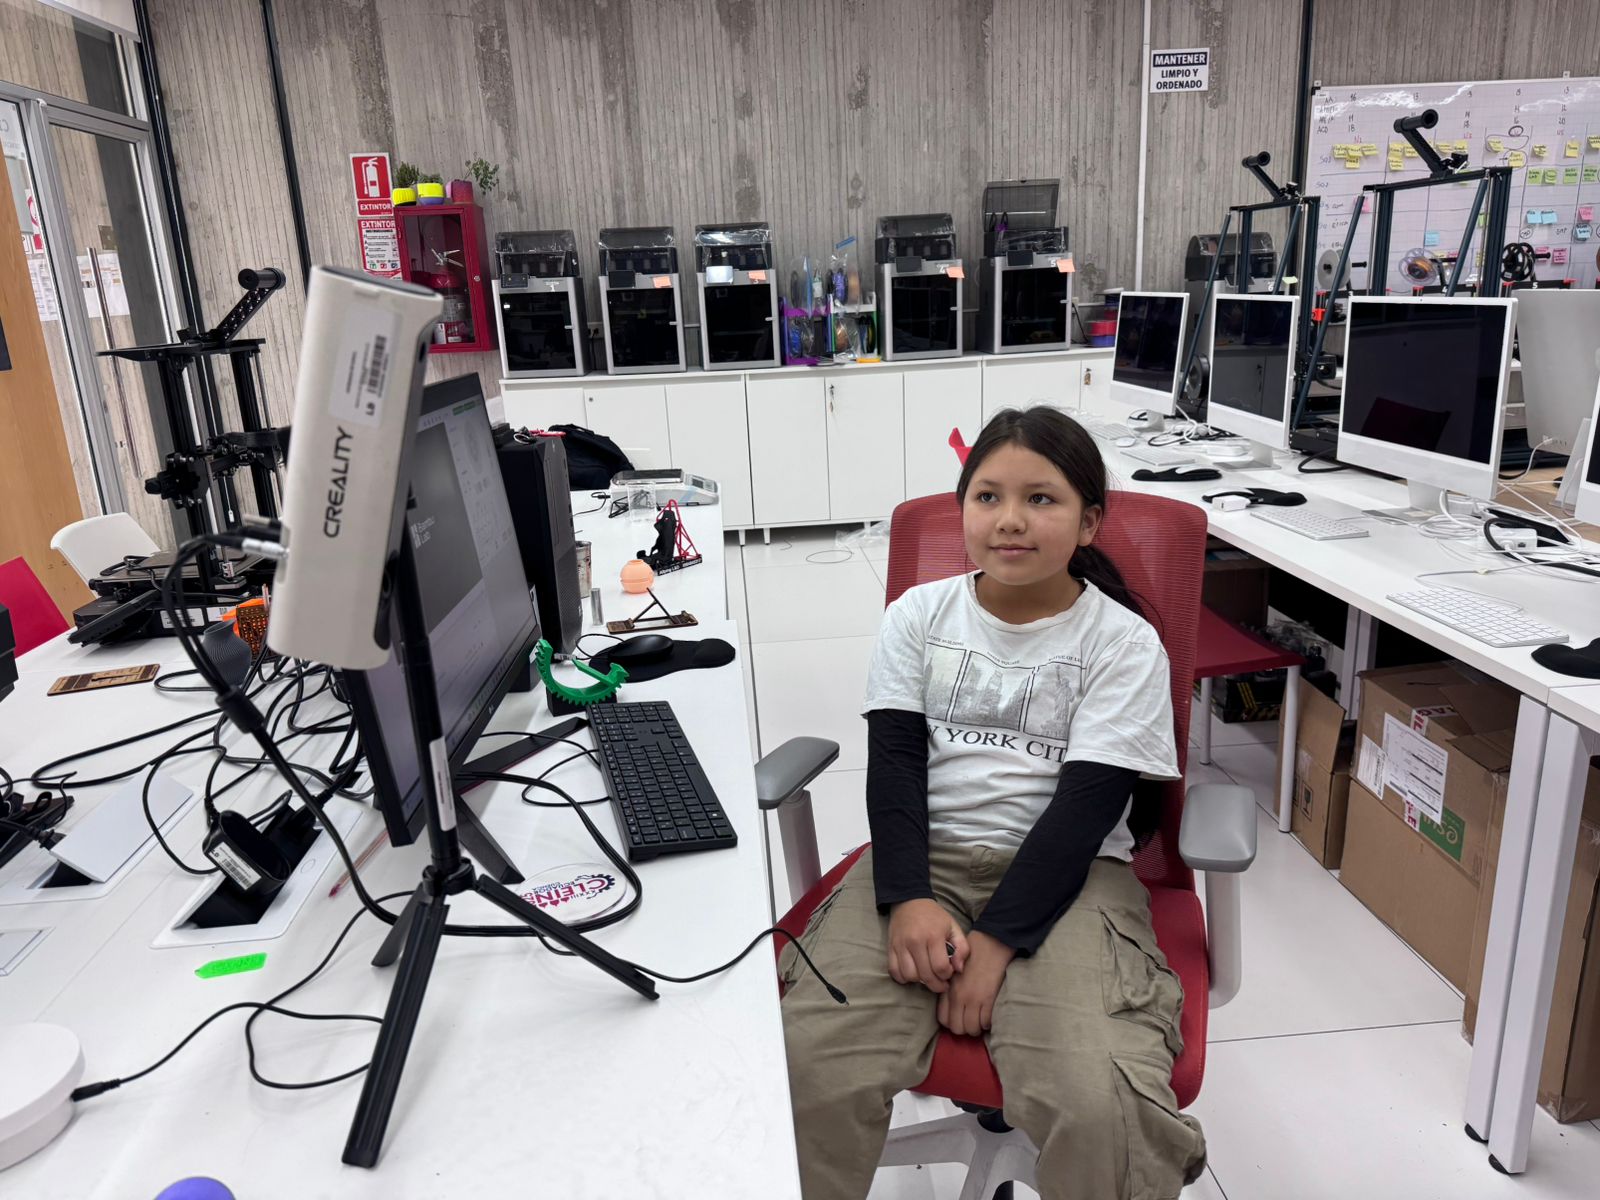
As the first step, the face of a person was scanned using a Creality 3D scanner. Creality is the brand of the scanner, while the software used to capture and process the scan was CR Studio.
The scan was made with a Creality 3D scanner connected to a computer running CR Studio. This type of scanner is an optical 3D scanner: it captures the surface of the object using a projected light pattern and camera-based depth detection. The software compares the reflected light and the camera images to calculate the distance to different points on the face, generating a digital point cloud that is later converted into a mesh.
The technology is useful for scanning organic shapes because it does not require physical contact with the person. Instead of measuring with mechanical probes, the scanner records the facial geometry through light reflection and image processing. This makes it suitable for capturing curved surfaces such as the forehead, nose, cheeks, and chin before creating the mold model.
The scanner was mounted on a small tripod so it could remain stable during capture, while the person stayed seated in front of the sensor. This setup helped keep the distance and angle more controlled during the scan.
The scanning software used in this process was CR Studio. This program receives the data from the Creality scanner, shows the live capture, and helps convert the scan into a usable 3D model. During the process, CR Studio was used to monitor the capture, review the reconstructed face geometry, and prepare the model for export.
After the capture, the model generated in CR Studio was checked for missing areas, rough surfaces, and general shape quality. The exported file was then taken to Blender, where the mesh was cleaned and corrected before designing the mold.
Before starting the capture, the workspace was prepared with enough light and the face was positioned directly toward the scanner. The person remained as still as possible to avoid movement errors, and the scanner was oriented at face height to capture the main facial geometry. After the scan, the digital model was reviewed in the software and exported for later correction in Blender.
The scan captured the general shape of the face, but like most 3D scans, the model presented some imperfections, rough areas, and small geometry errors that needed to be corrected before producing the mold.
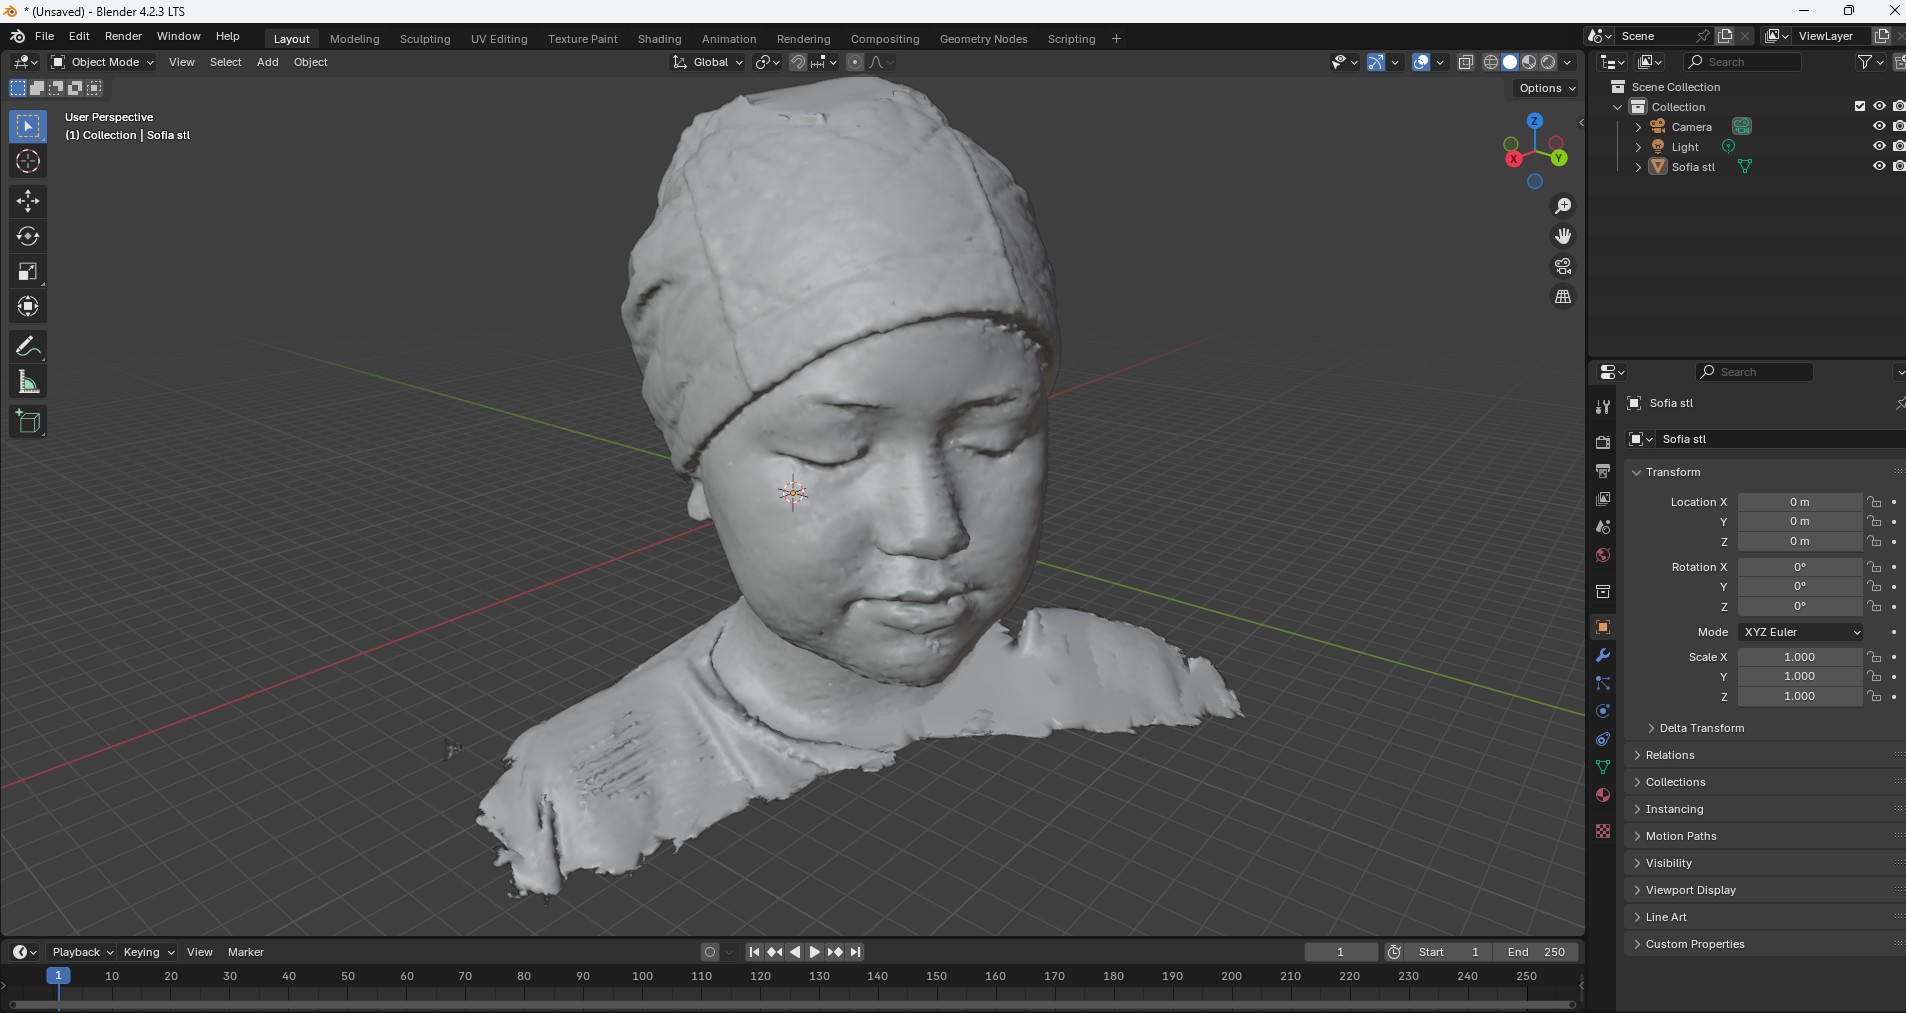
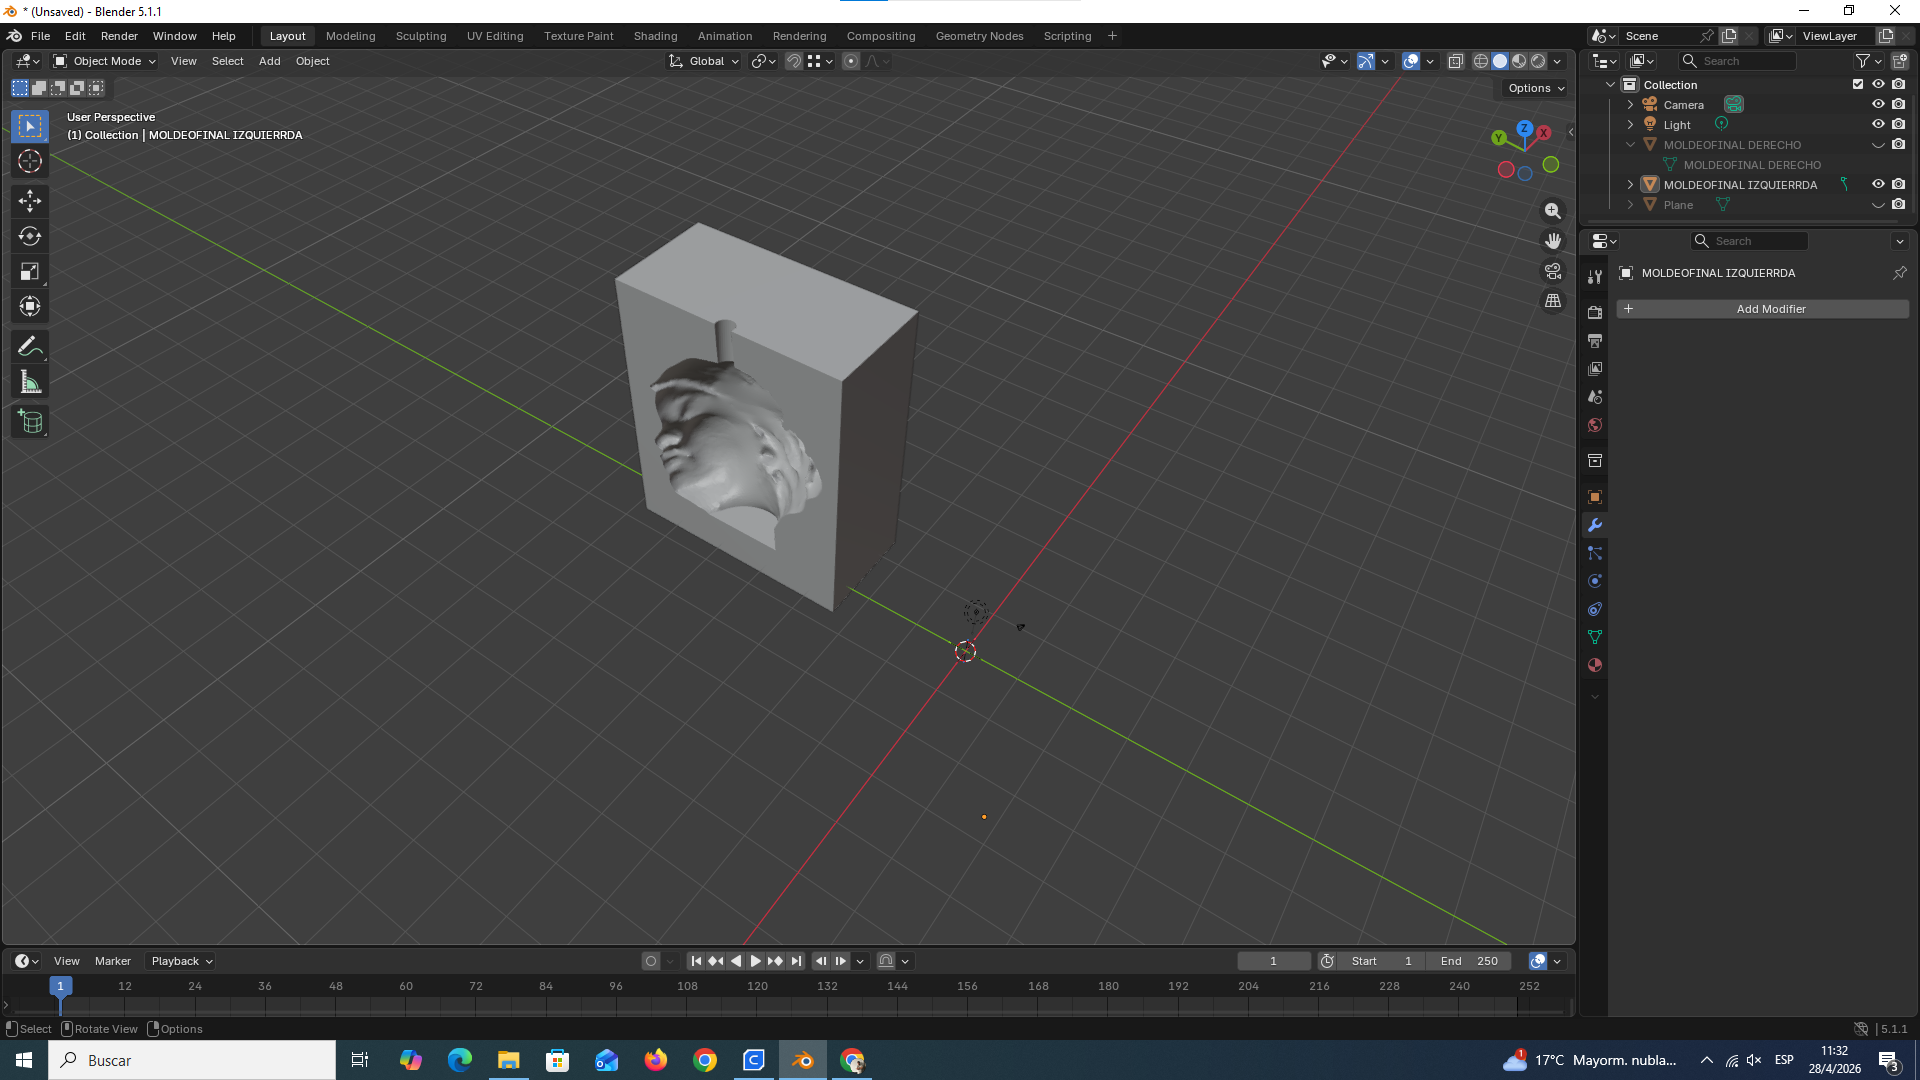
After obtaining the scanned model, the file was imported into Blender. In this software, the imperfections of the scanned face were corrected. The main purpose of this step was to clean the geometry, improve the surface, and prepare the model for mold creation.
Blender was used to adjust the shape, repair irregular areas, and improve the final appearance of the face. This step was important because any error in the digital model could appear later in the printed mold or in the final cast.

Once the face model was corrected, the next step was to design the molds in the same software, Blender. The mold was created around the face model, considering the shape, parting line, and the way in which the cast material would be poured.
The mold design had to be strong enough to keep the shape of the face and also allow the material to be removed after casting. For this reason, the design considered the mold parts and the container that would later hold them firmly during the casting process.
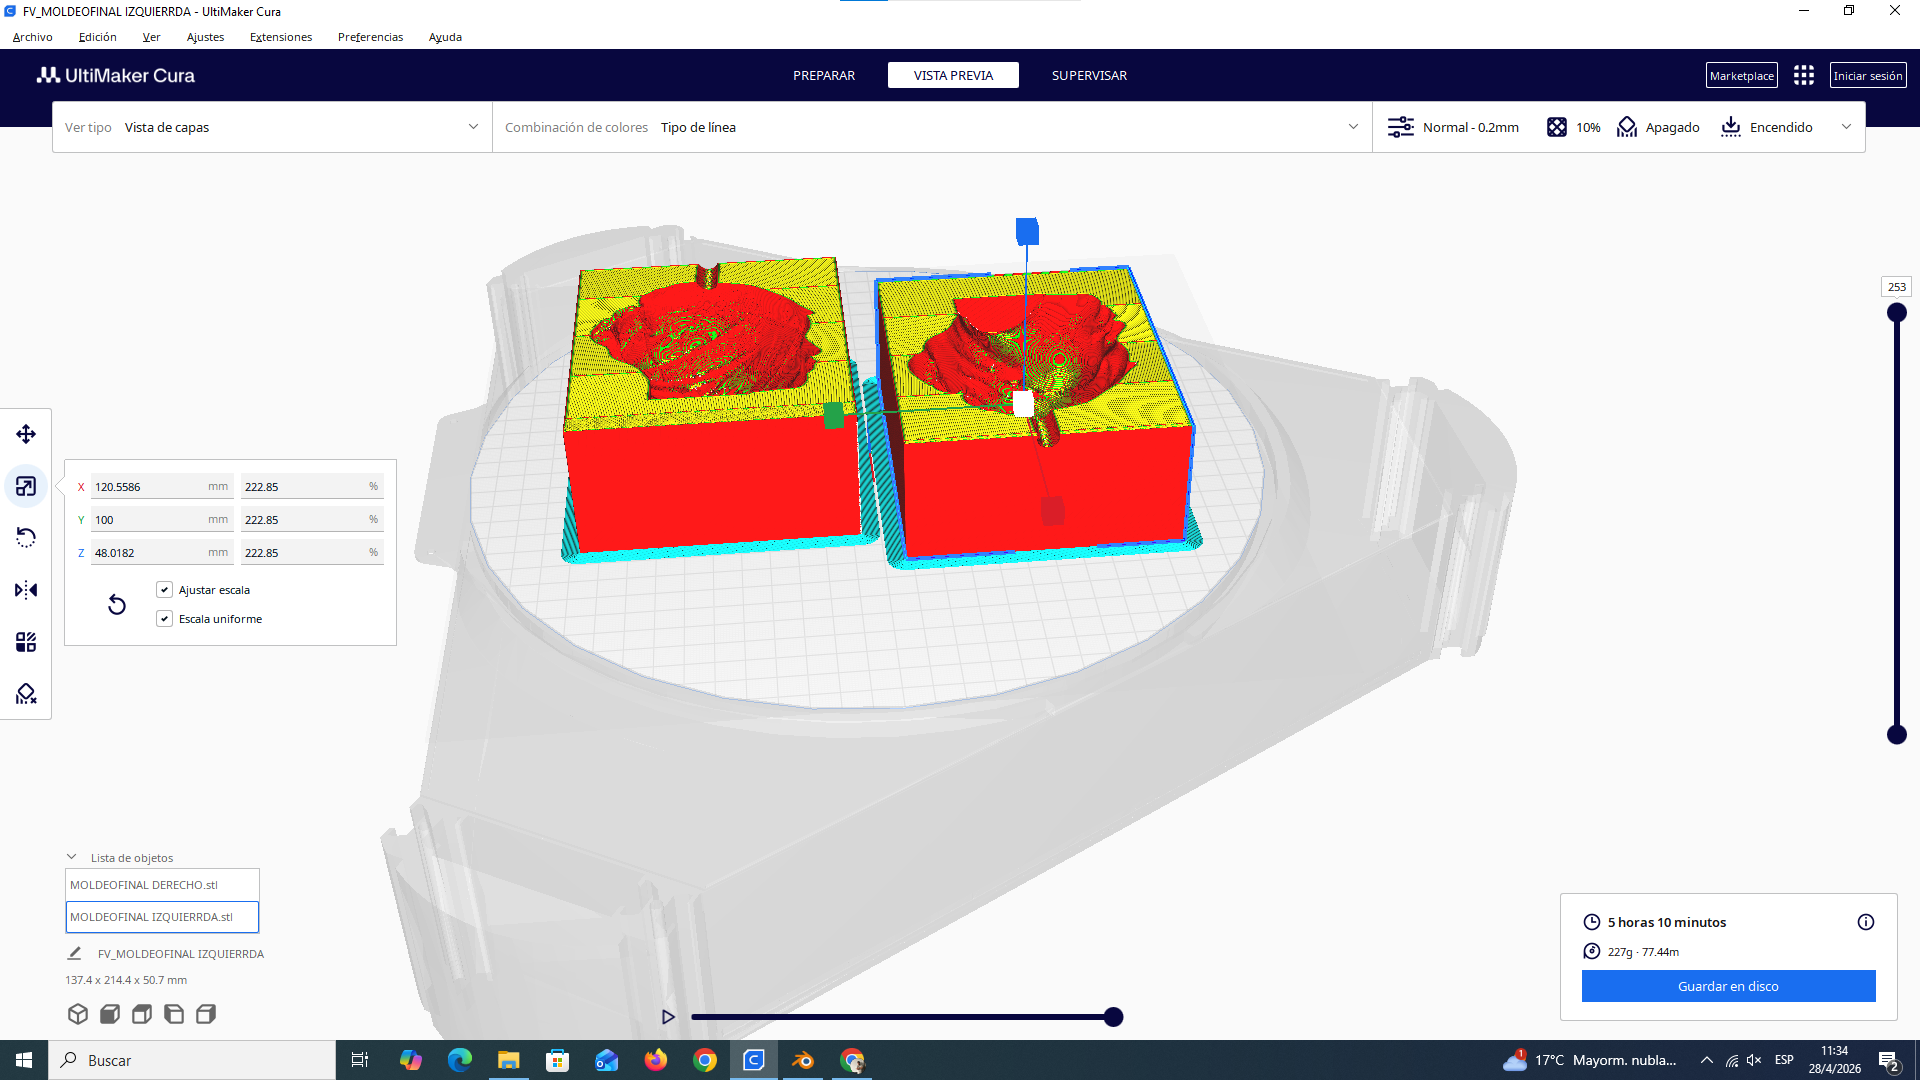
After finishing the mold design, the files were exported in STL format in order to prepare them for 3D printing.

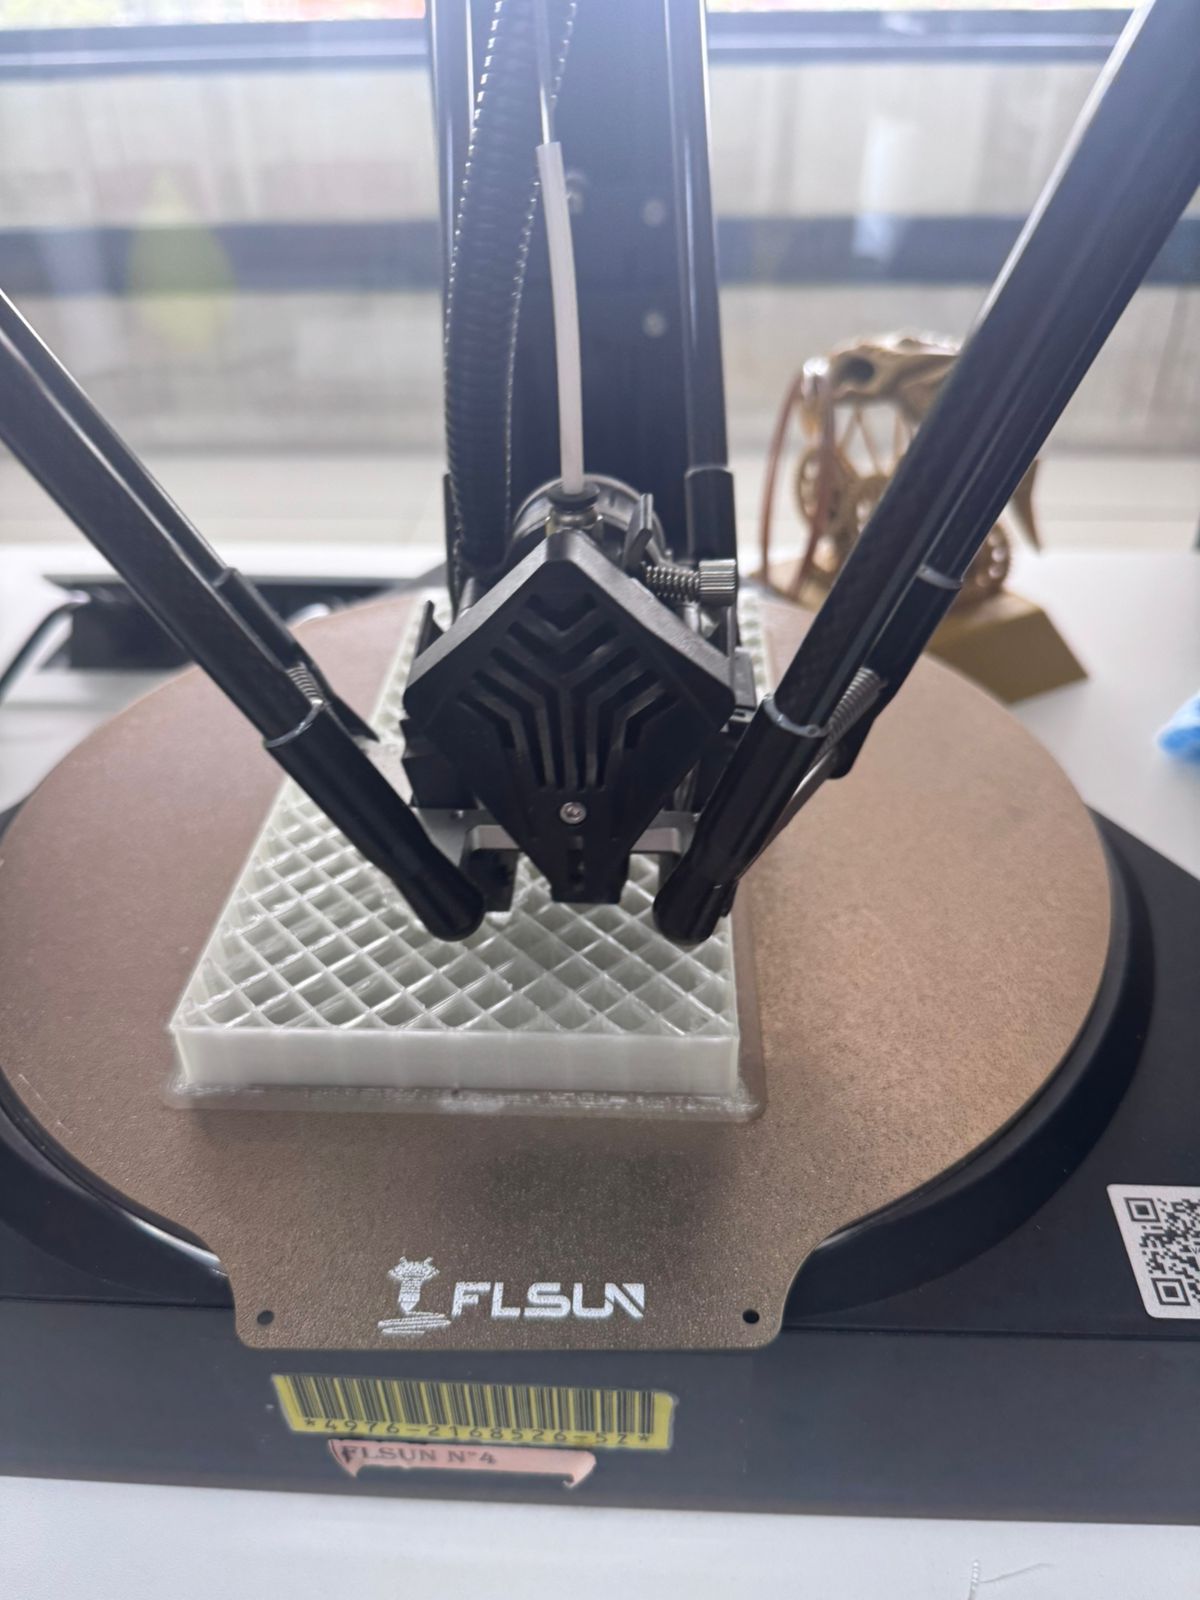
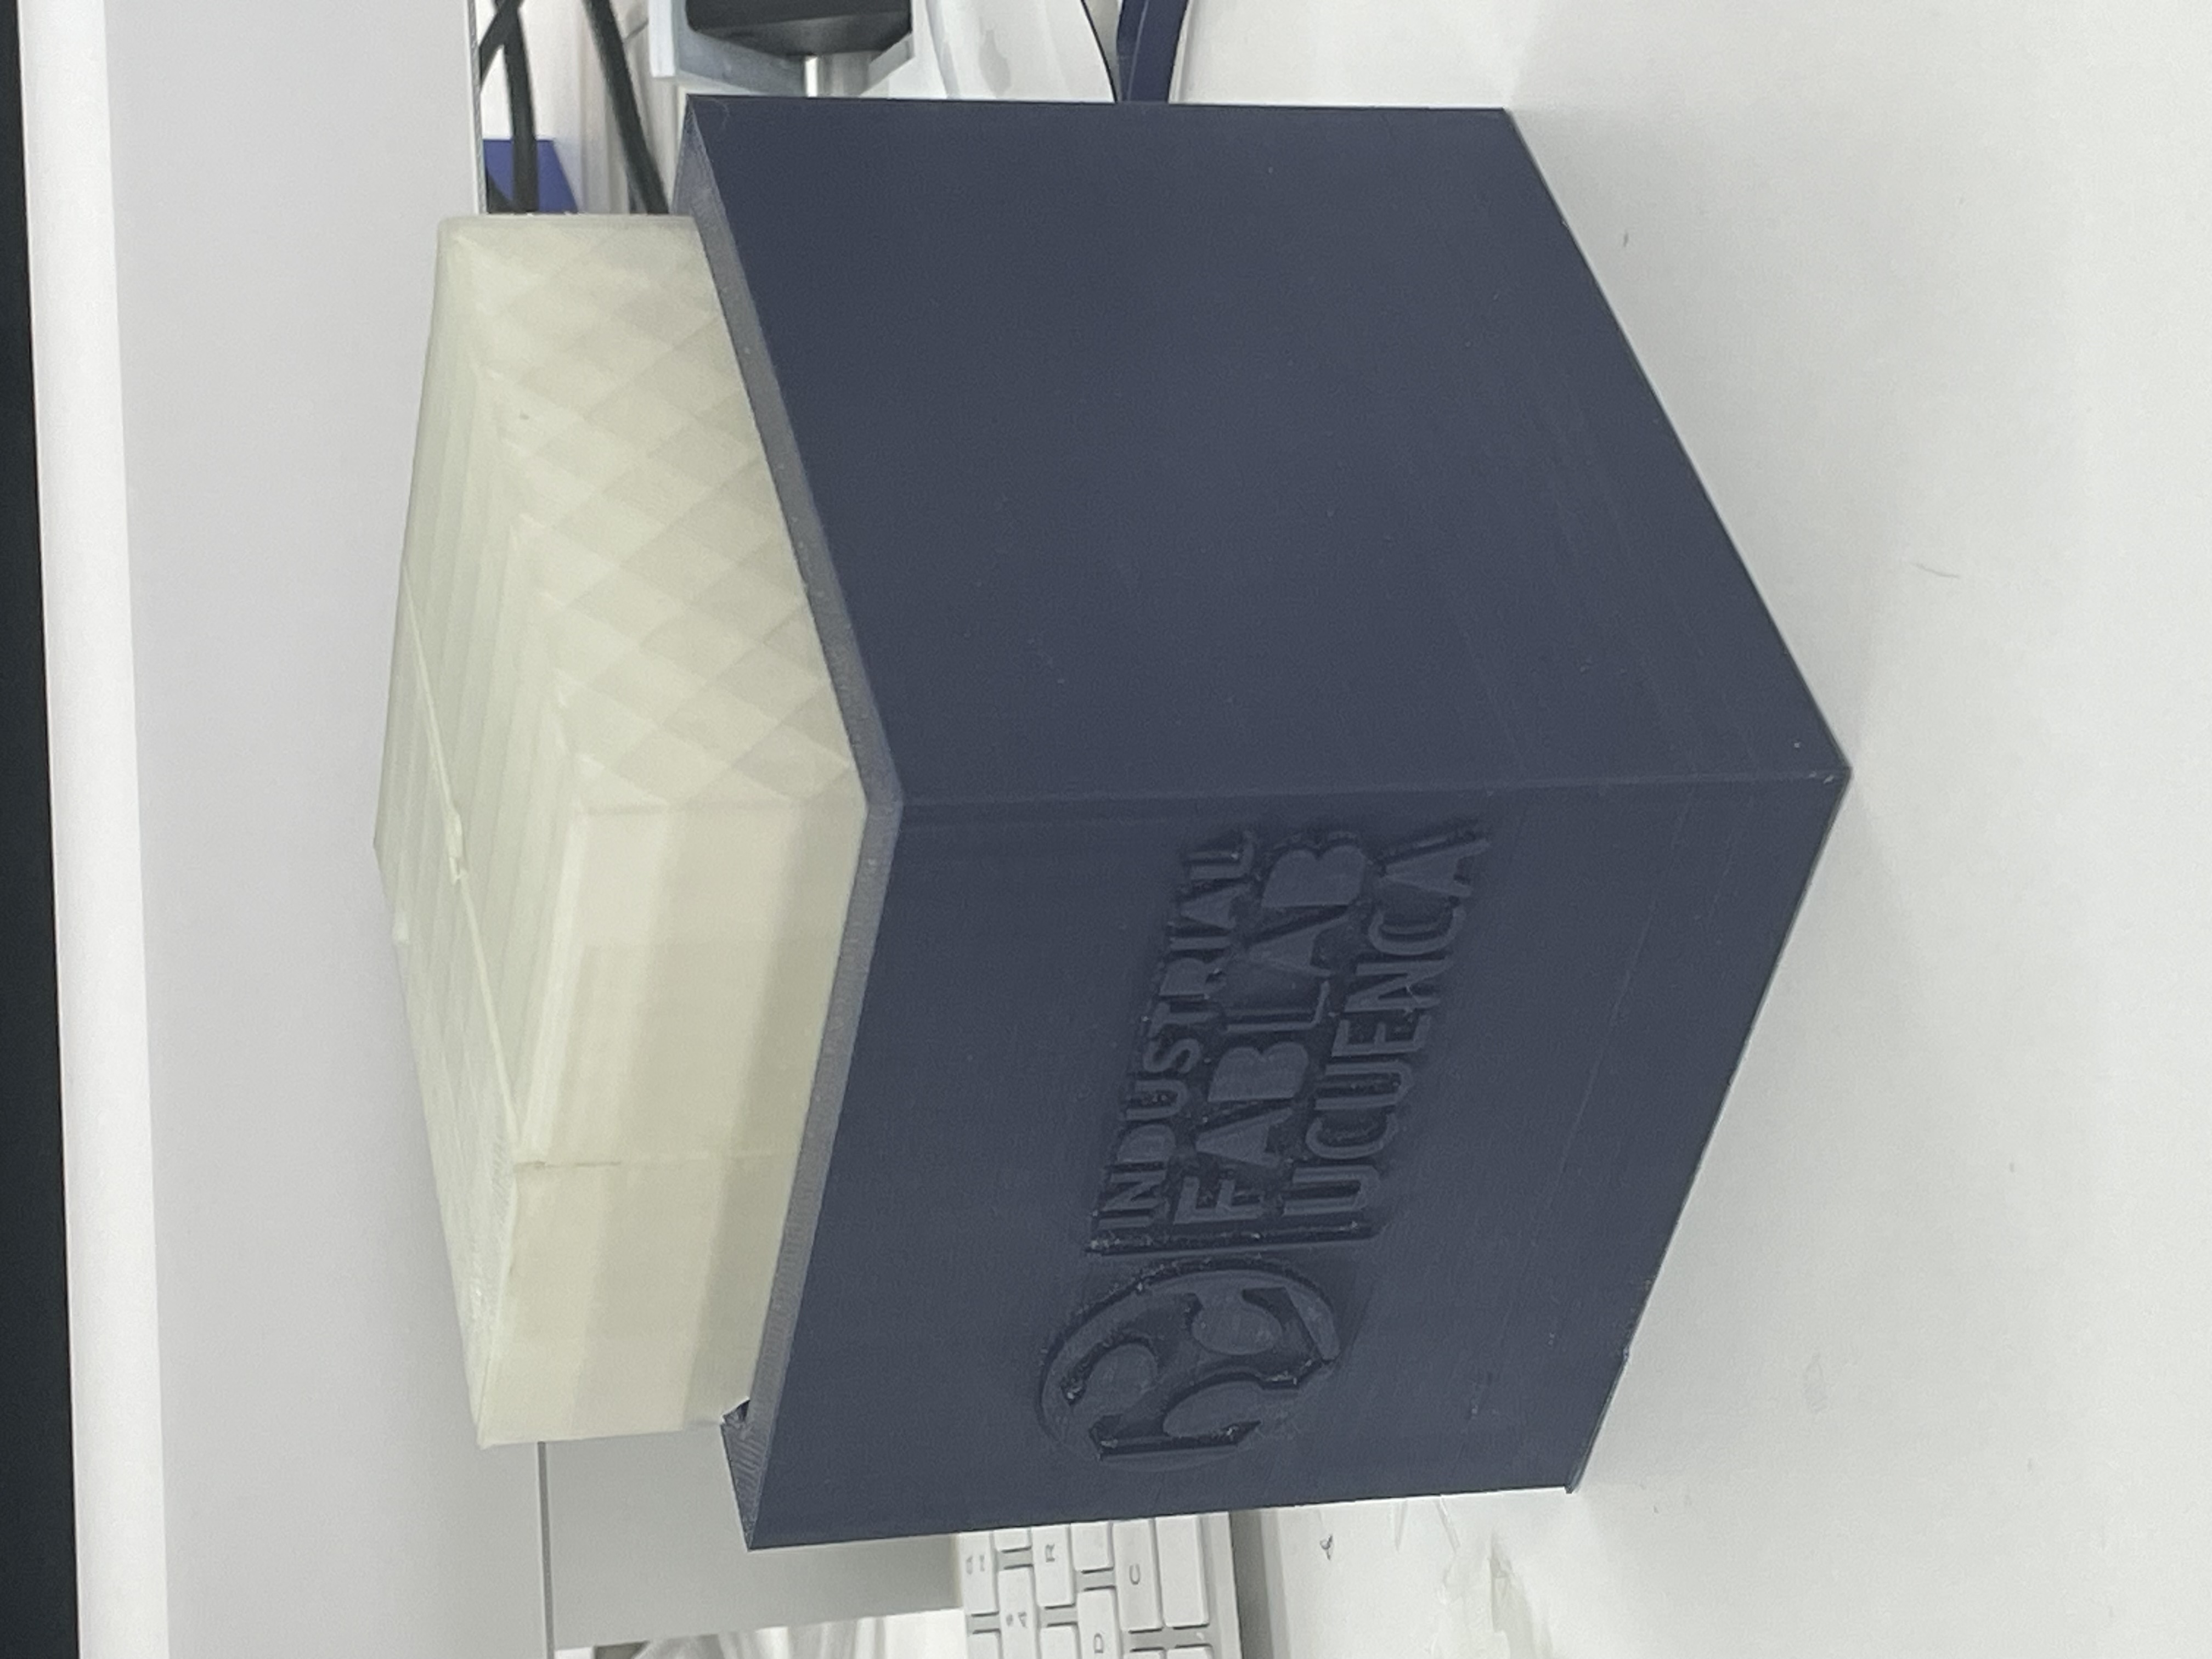
The following images show the manufacturing process of the 3D printed molds using FLSUN printers. The Face mold was manufactured using TPU, a flexible material that helps with demolding without damaging the final piece. The Mold container was produced in PLA, providing a rigid and stable structure to support the mold during the casting process. All three parts were fabricated using FLSUN 3D printers.
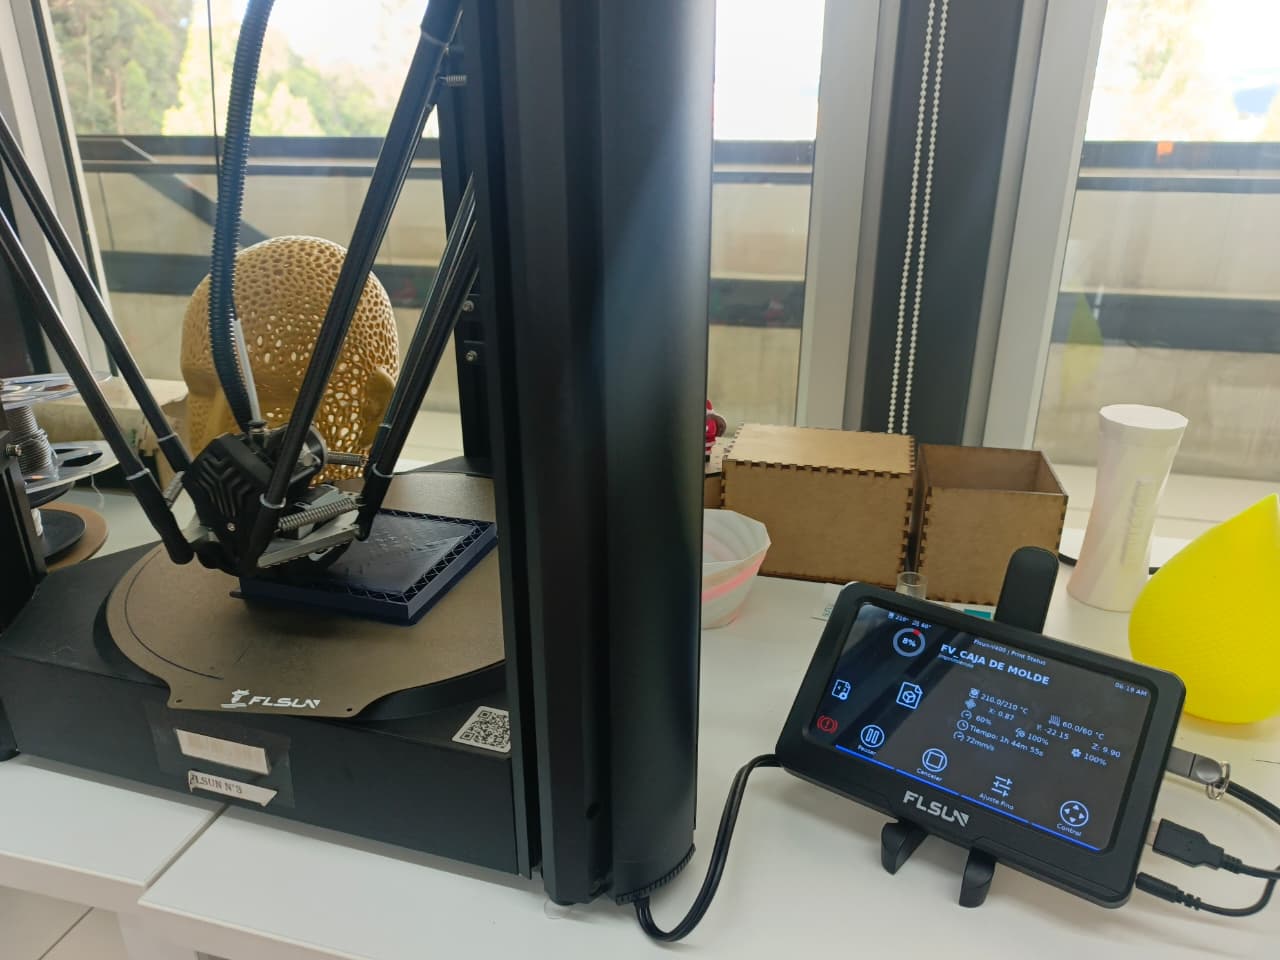
The mold files were printed using a FLSUN 3D printer. The flexible mold parts were printed using TPU, a flexible material that is useful for demolding because it allows slight deformation without breaking the mold.
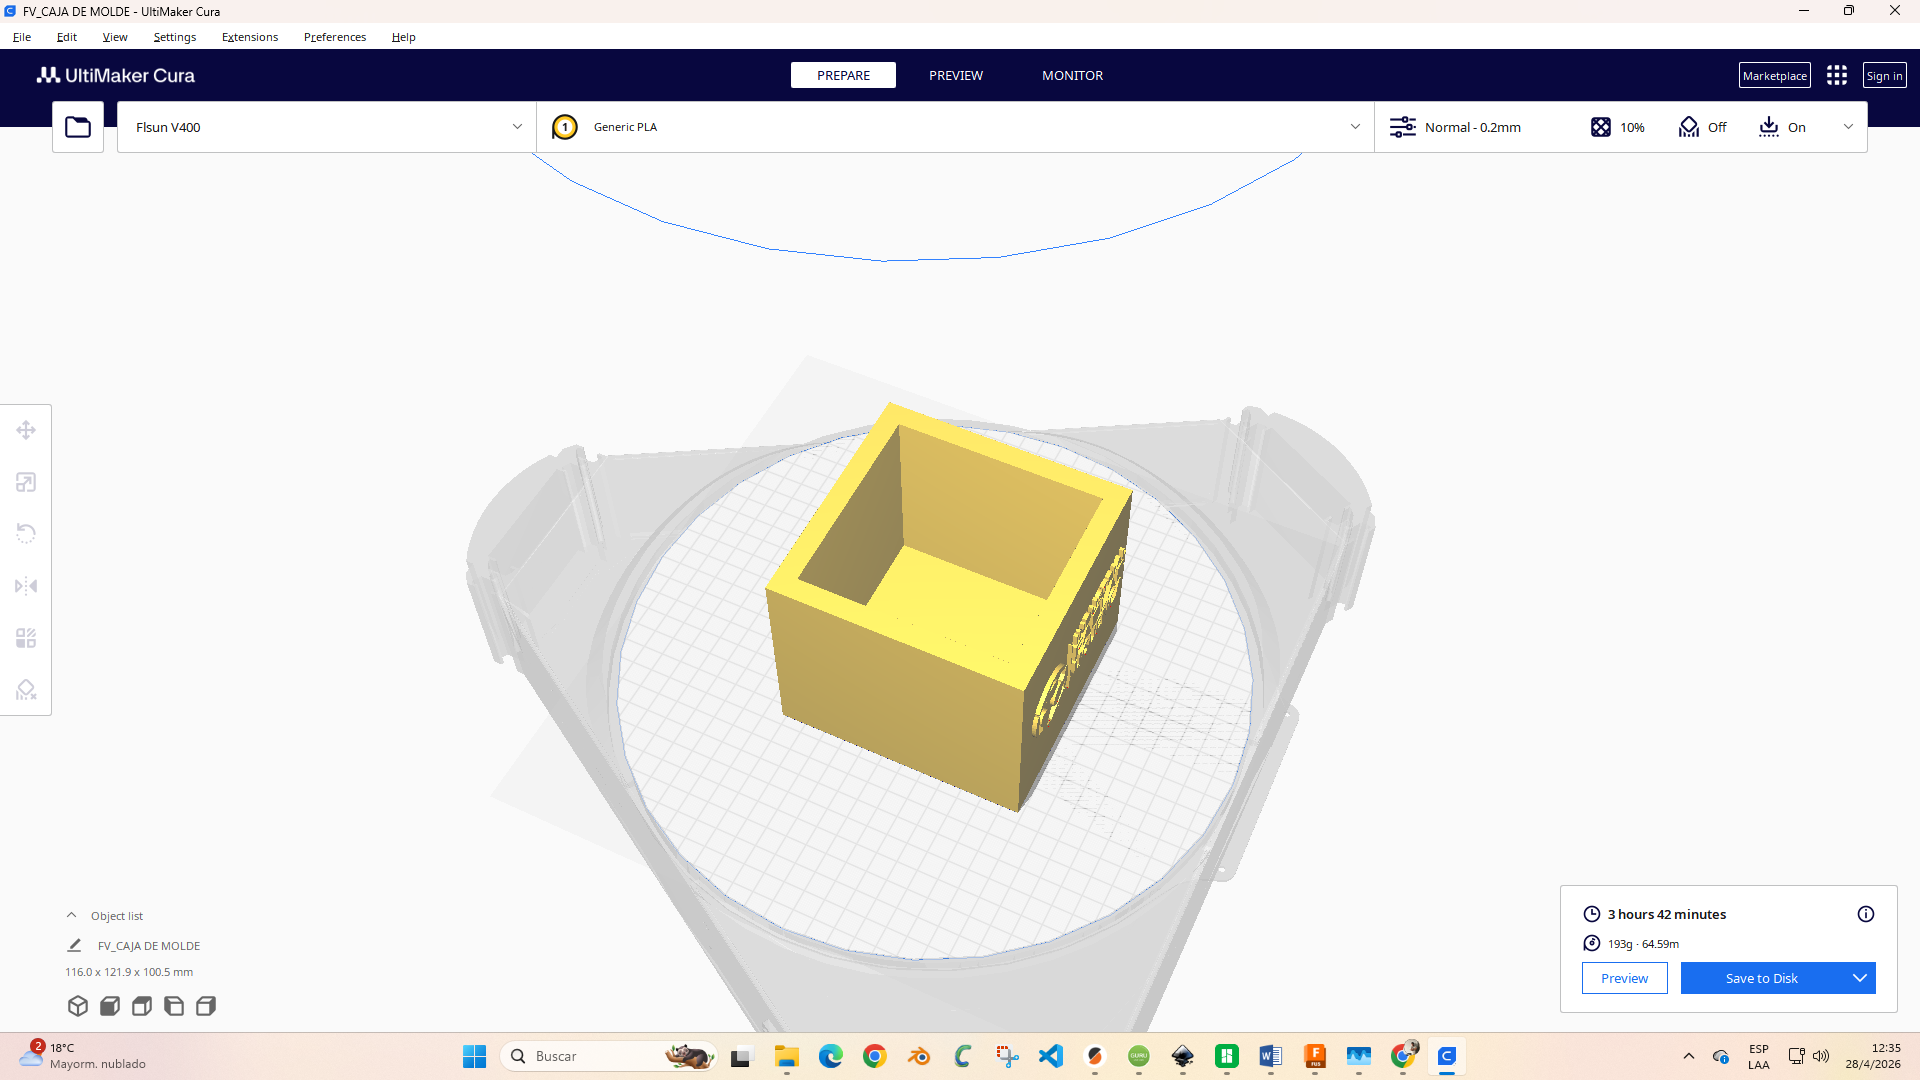
In addition, a rigid box or container was designed to hold the flexible mold parts firmly. This container was printed in PLA using the same FLSUN printer. The PLA container provides stability and prevents the TPU mold from moving during the pouring process.
| Printed Element | Material | Printer | Function |
|---|---|---|---|
| Face mold | TPU | FLSUN | Flexible mold for demolding |
| Mold container | PLA | FLSUN | Rigid support for the mold |
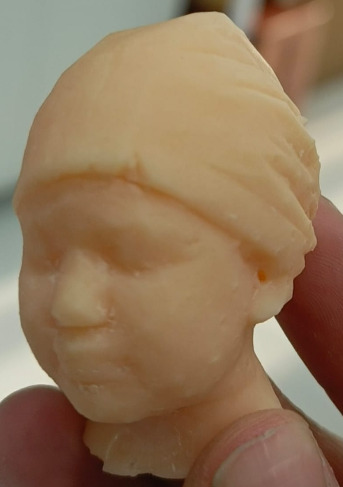
Once the TPU molds and PLA container were ready, the casting process was carried out using candle wax and paraffin. These materials were melted and poured into the mold to reproduce the shape of the person's face.
The container helped keep the molds stable during pouring. After the material cooled and solidified, the cast was removed carefully from the mold.
This process made it possible to obtain a physical reproduction of the scanned face using a combination of digital manufacturing and casting techniques.
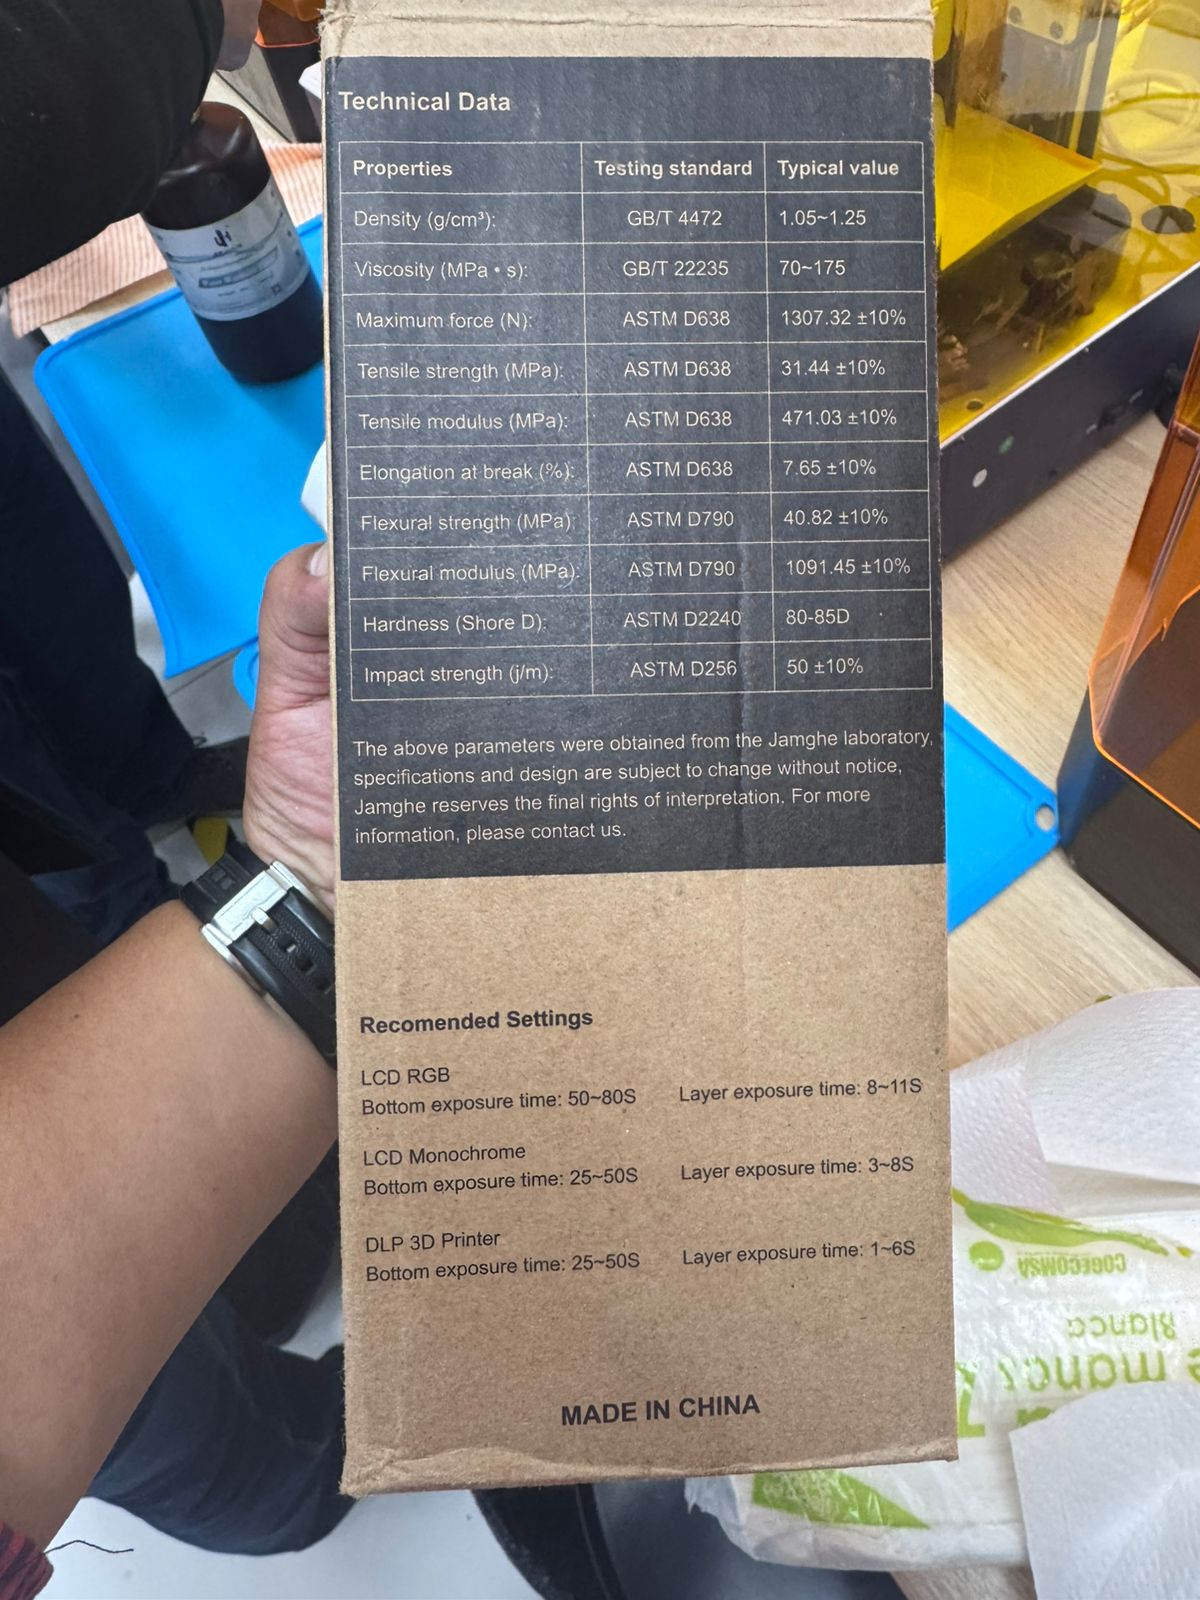
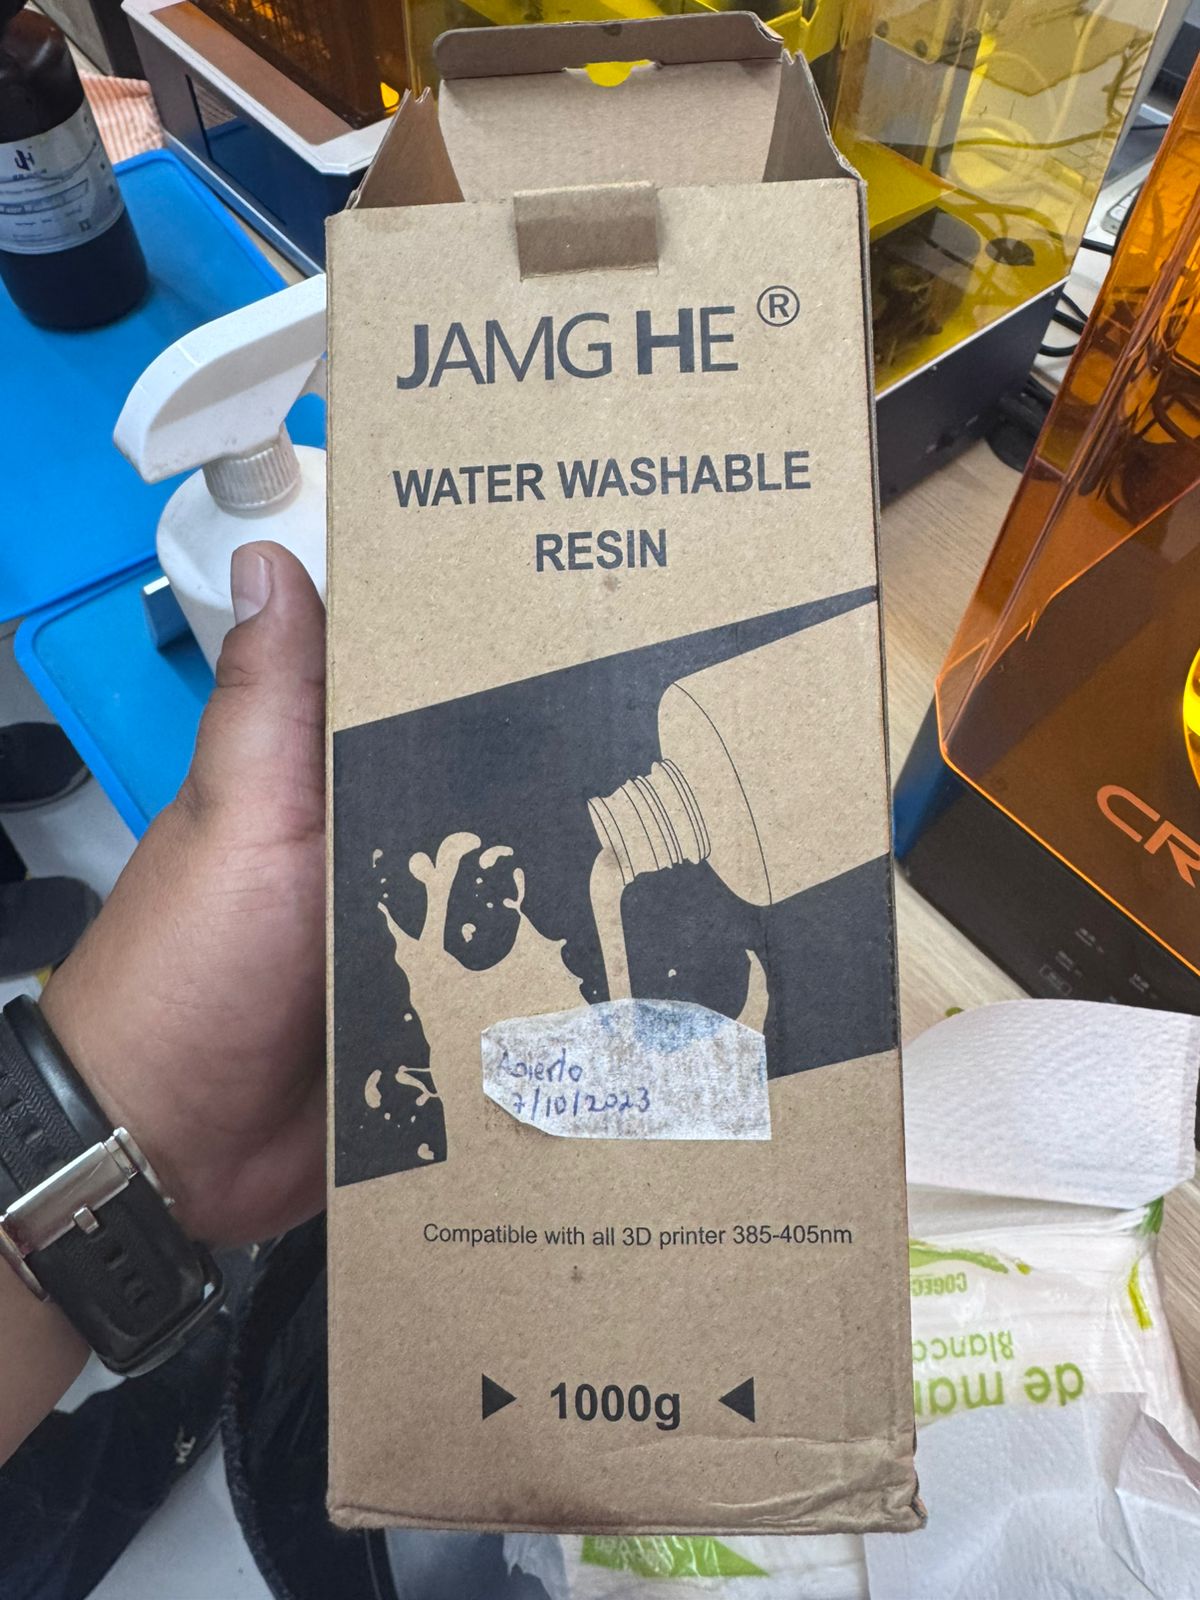
For the fabrication process, a UV-curable resin material was selected due to its high surface quality, precision, and ability to capture fine details. The resin used provides a smooth finish and high dimensional accuracy, making it suitable for molding and casting applications. Additionally, the material offers good rigidity after curing, although the process requires careful handling because of the chemical components involved.
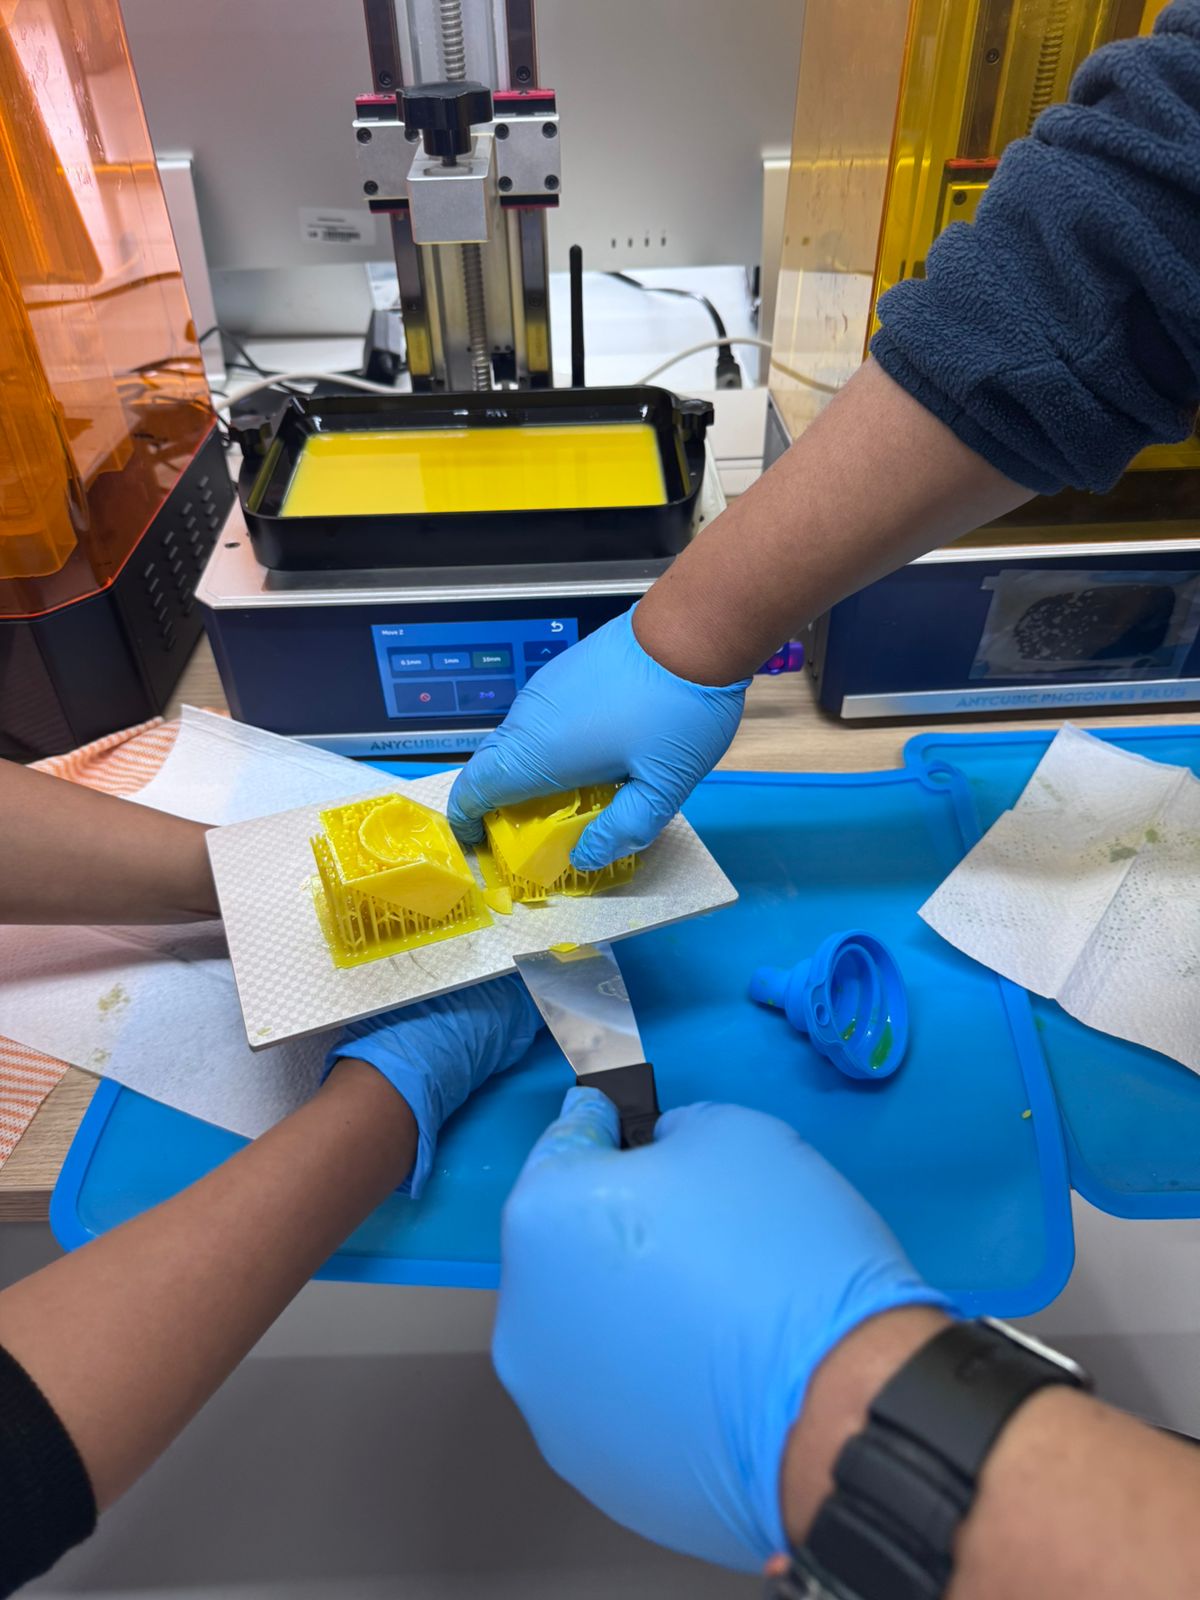
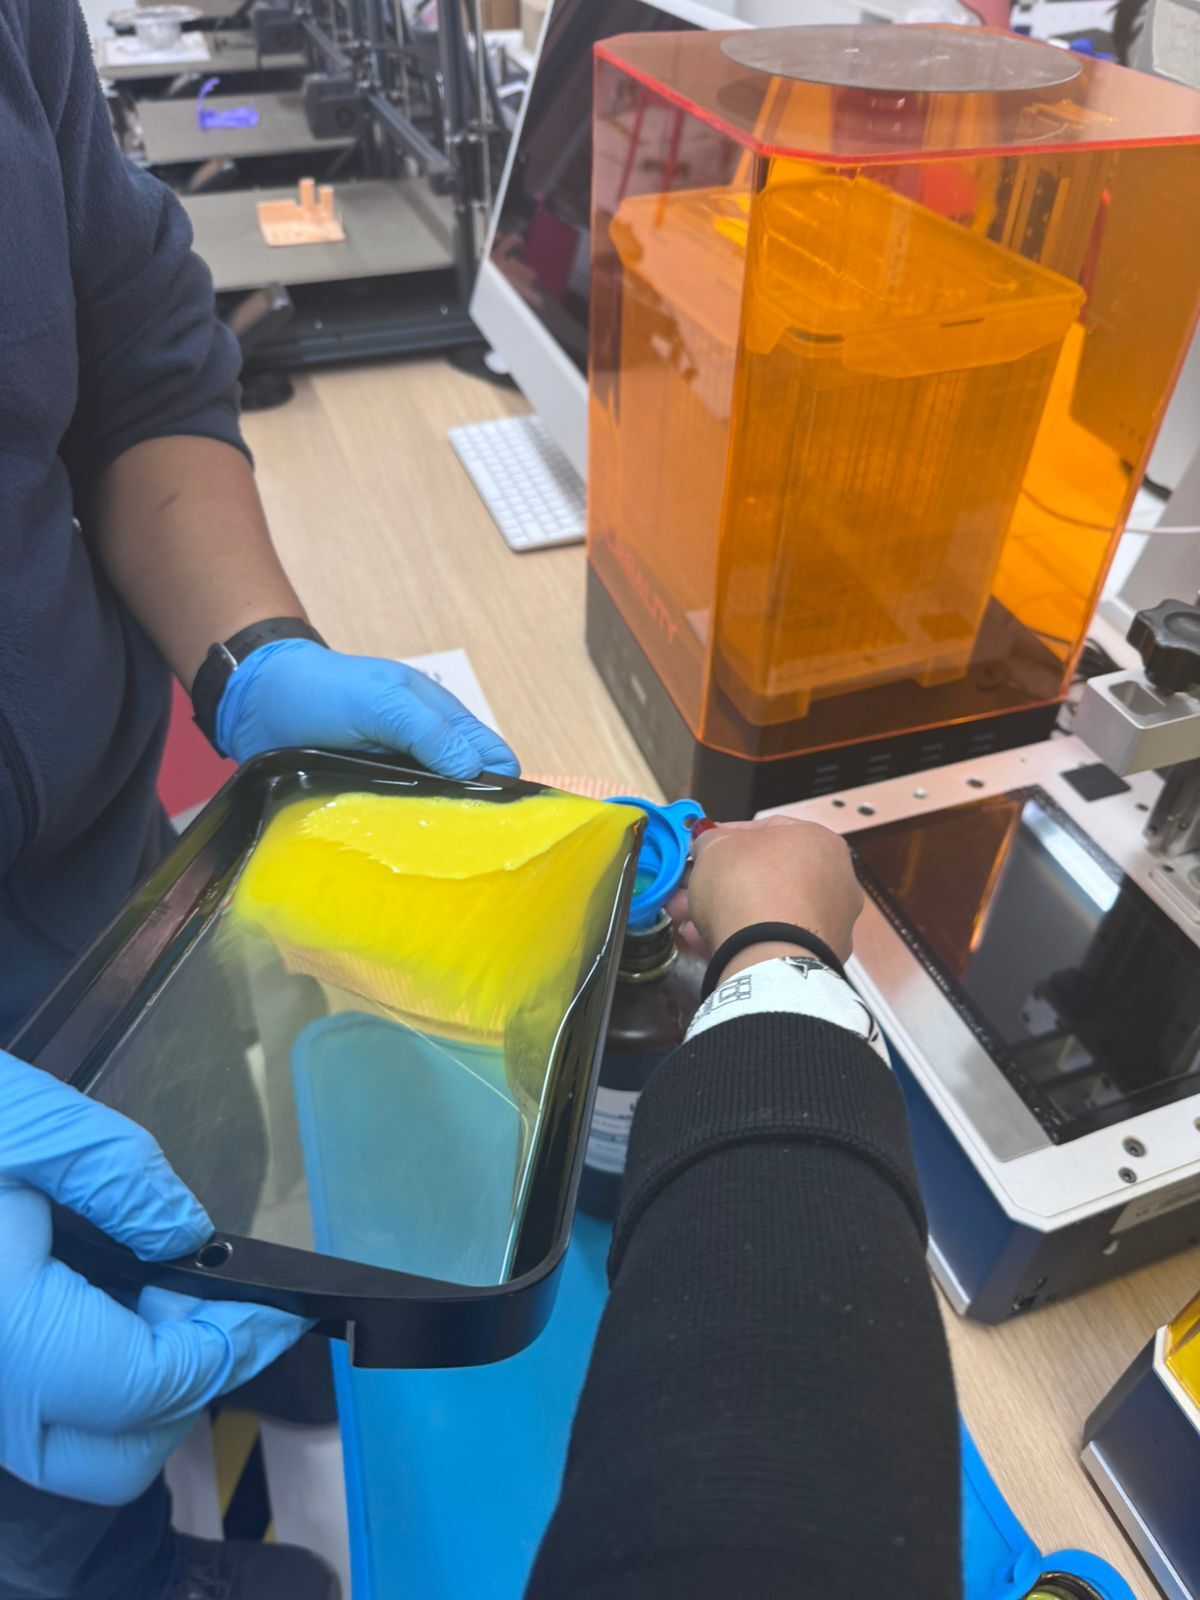
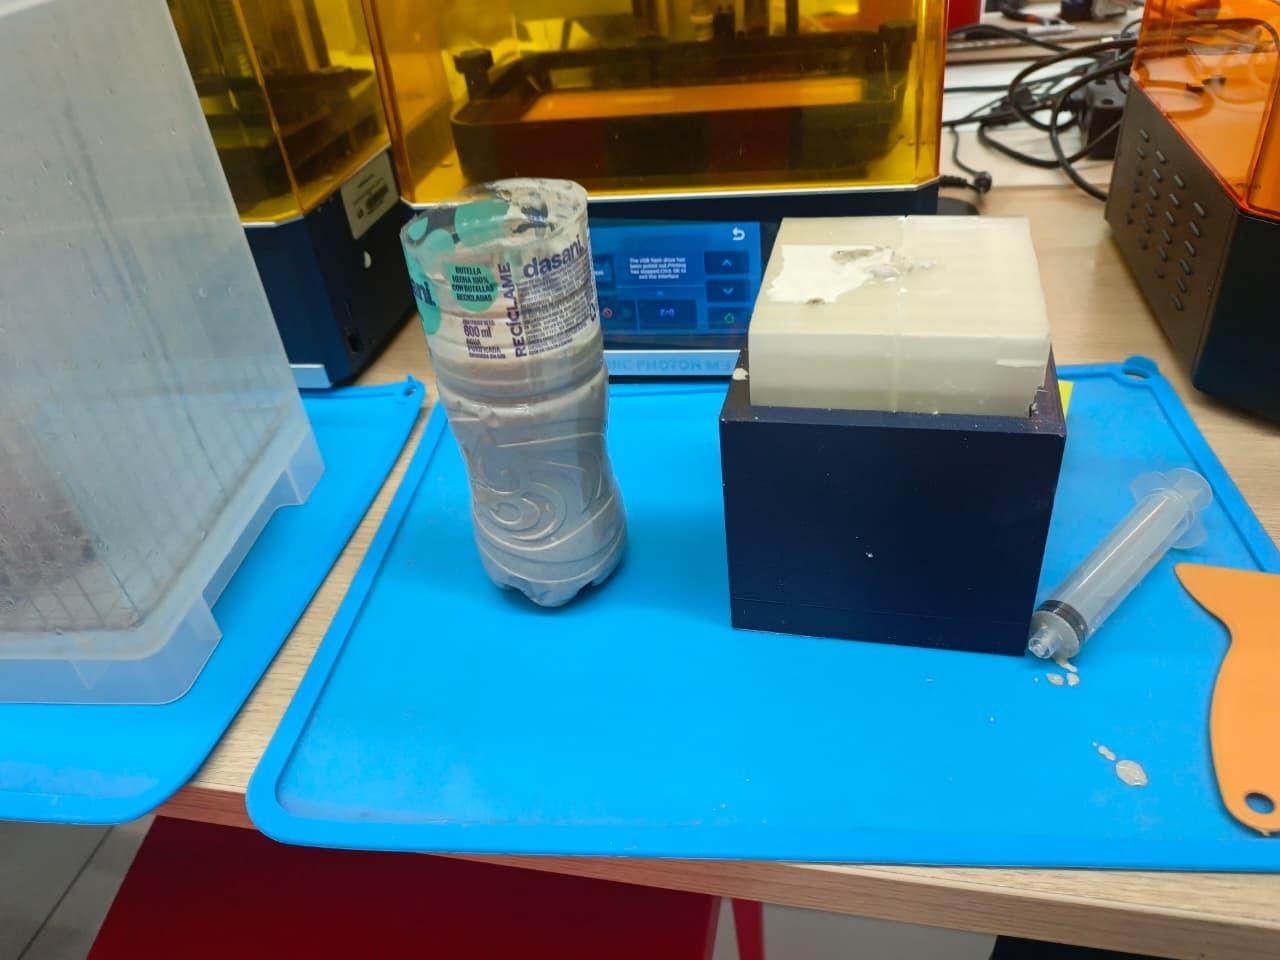
The printing process was carried out using the FLSUN 3D printer. First, the digital model was prepared and configured in the slicing software, where parameters such as layer height, exposure time, and support structures were adjusted. Then, the resin was poured into the printer tank, and the printing process began layer by layer until the final part was completed. After printing, the piece was cleaned, post-cured under UV light, and inspected to ensure proper quality and detail definition.

.jpg)
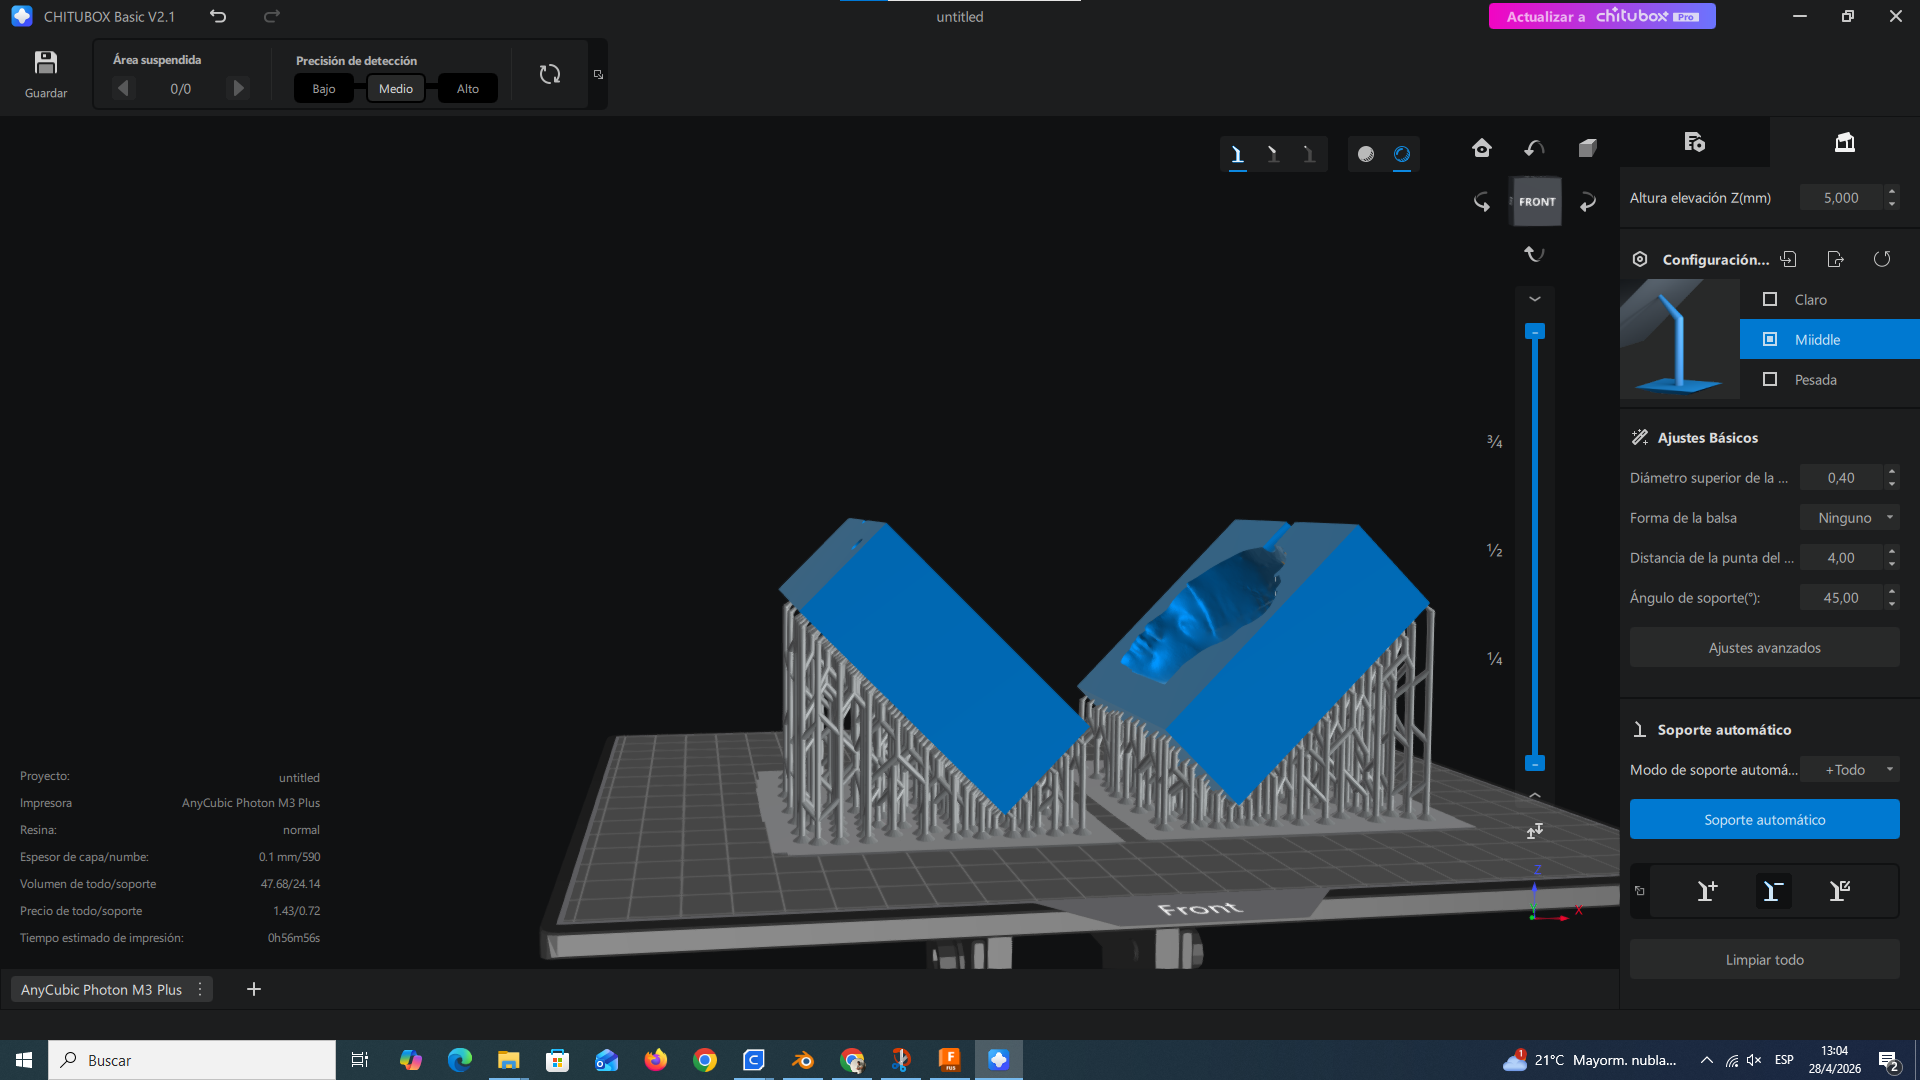
In addition to the FLSUN printing process, the molds were also printed using a resin 3D printer. For this process, the file was prepared in Chitubox Basic.
In Chitubox Basic, the mold was configured for resin printing. The process included hollowing the model, placing supports, and preparing the correct print orientation. The printing format used for the resin printer was PWMO.
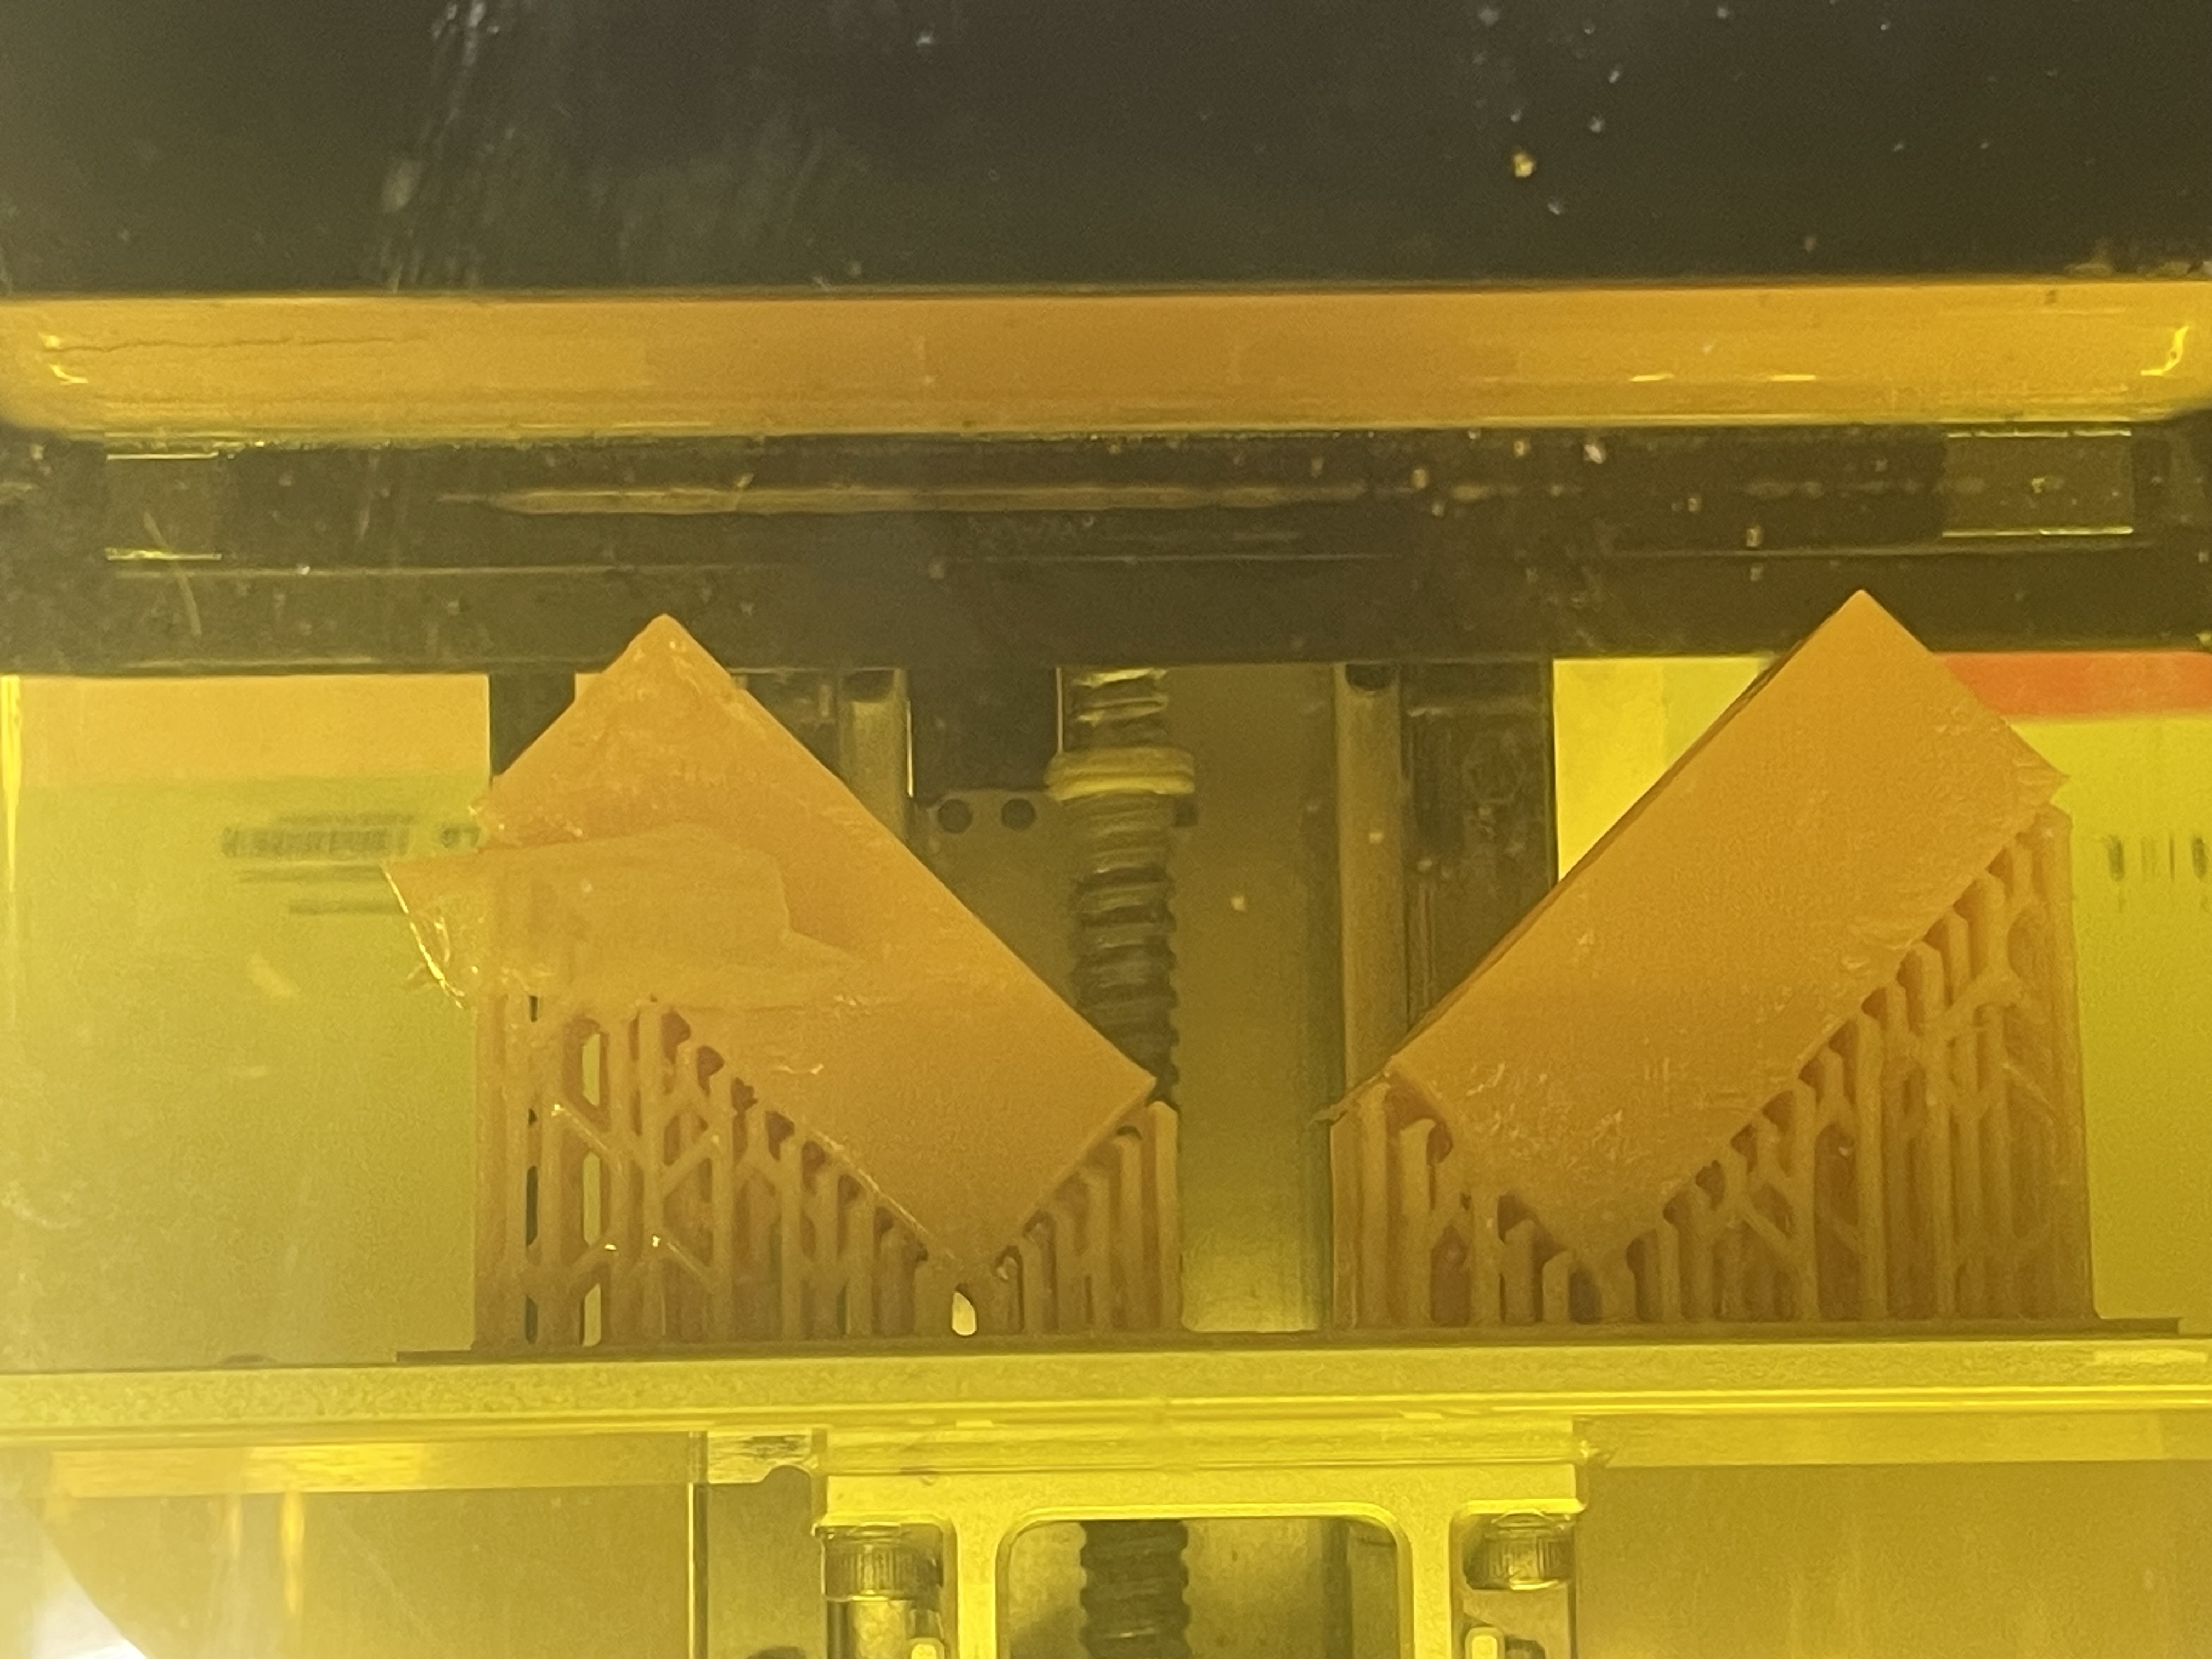
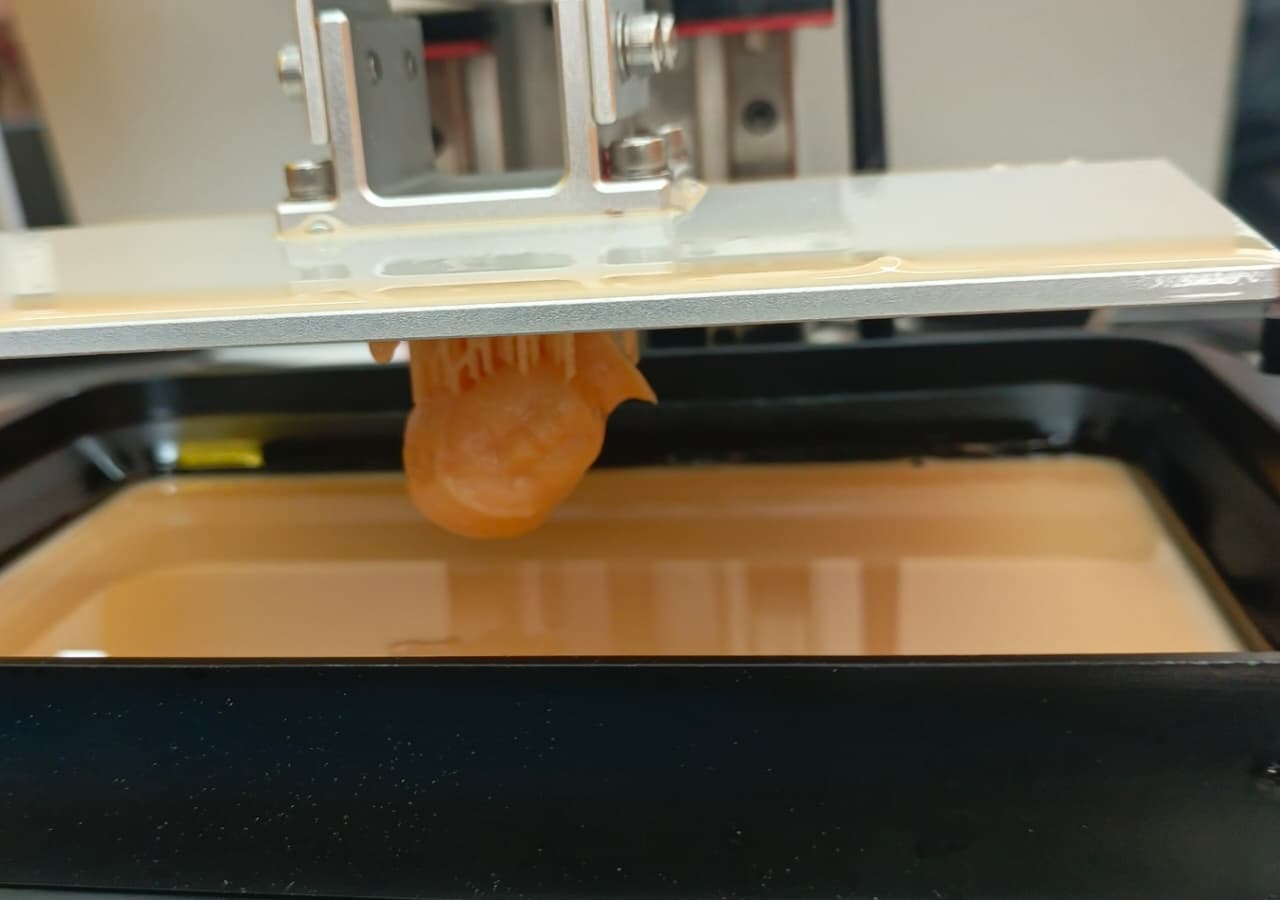
The resin molds were printed in an ANYCUBIC resin printer. The mold was positioned vertically to improve printing quality and allow proper support distribution.
The face model was also printed directly in resin using the ANYCUBIC resin printer. This allowed a more detailed physical version of the scanned face to be obtained.
Resin printing provides a smoother surface finish compared to FFF printing, which is useful when the project requires fine details and better visual quality.
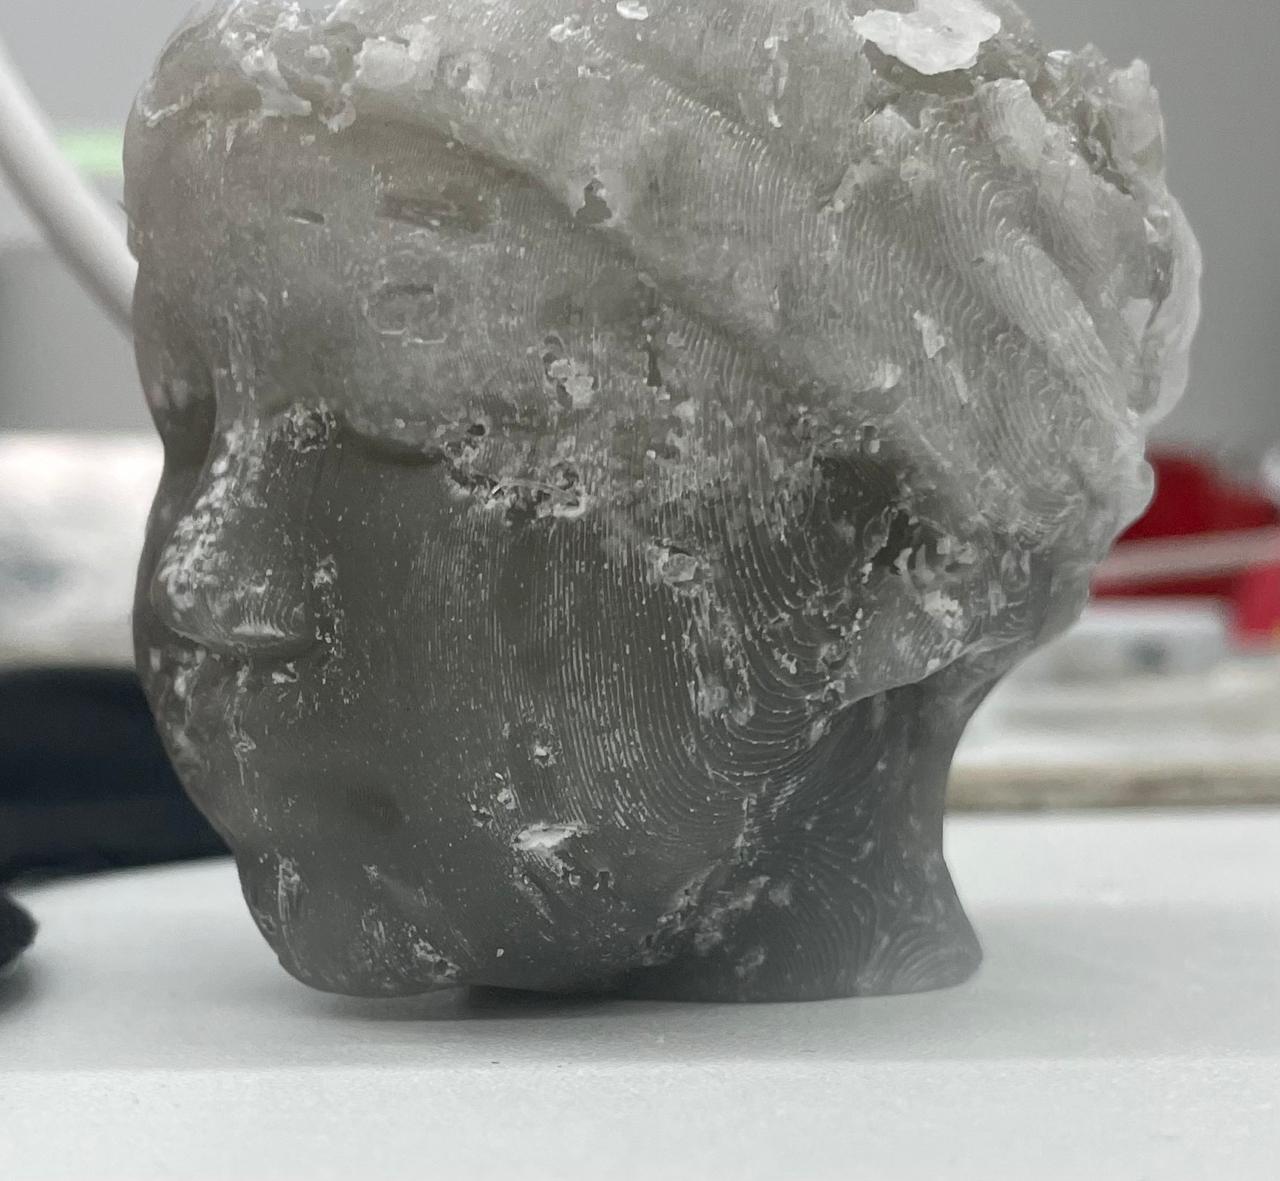
A casting process using plaster was carried out to reproduce the facial mold obtained from the 3D printing stage. Plaster was selected because of its easy preparation, low cost, and ability to capture fine surface details after hardening.
During the process, the plaster mixture was prepared manually and poured carefully into the mold cavity. After the curing stage, the final piece was removed and inspected to verify the surface quality and dimensional accuracy of the cast.
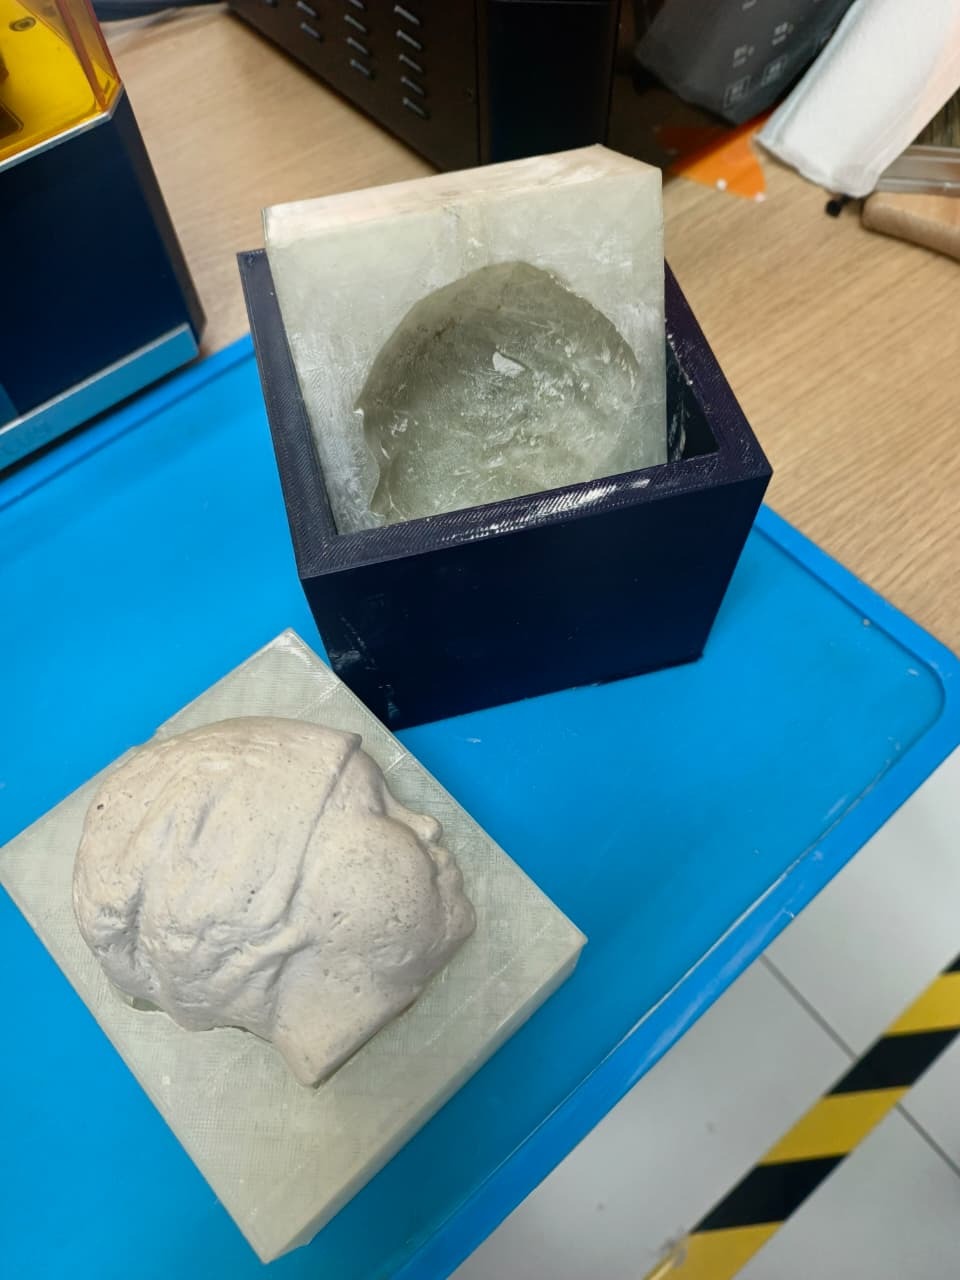
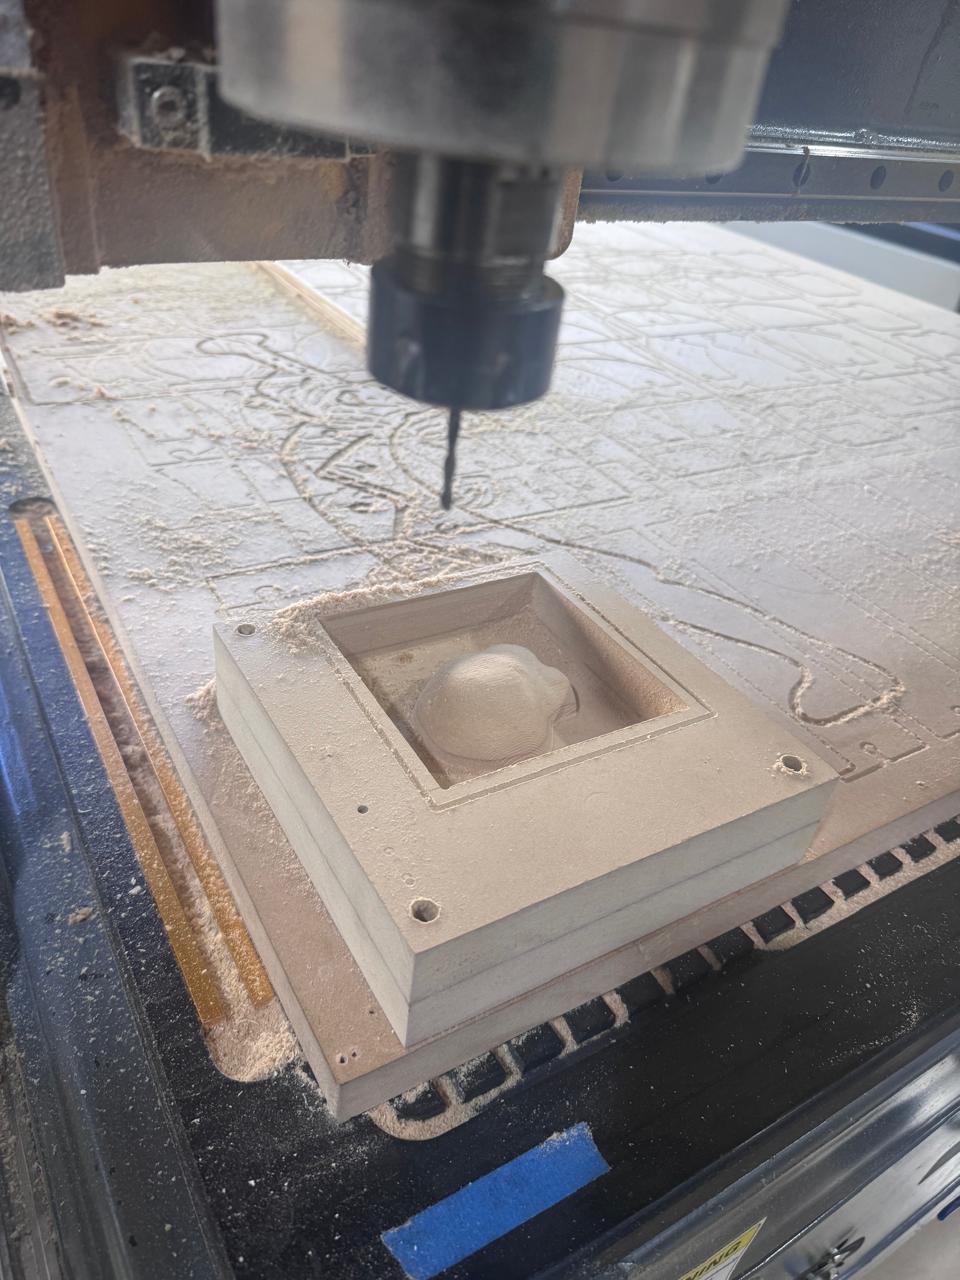
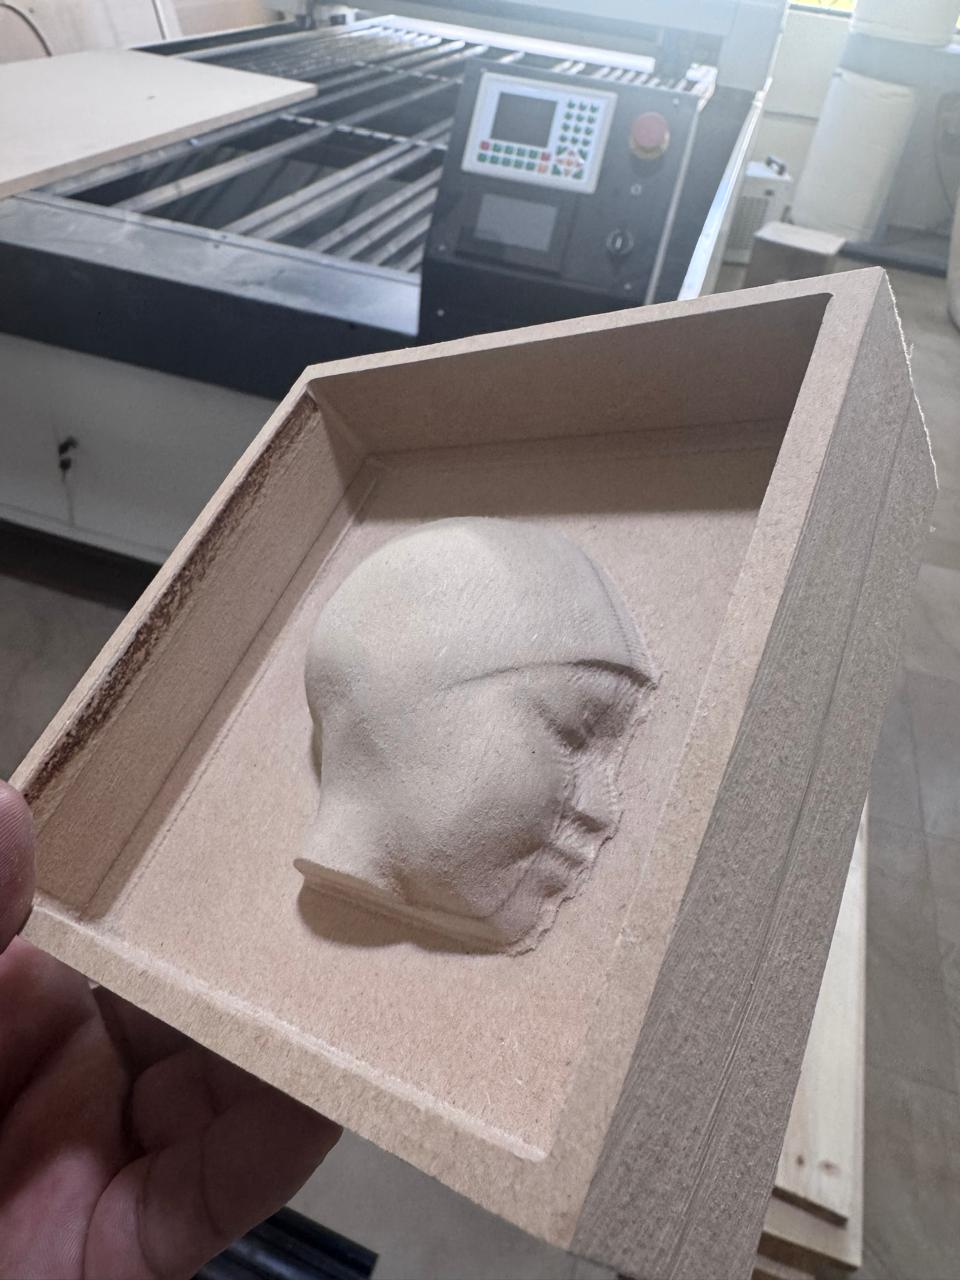
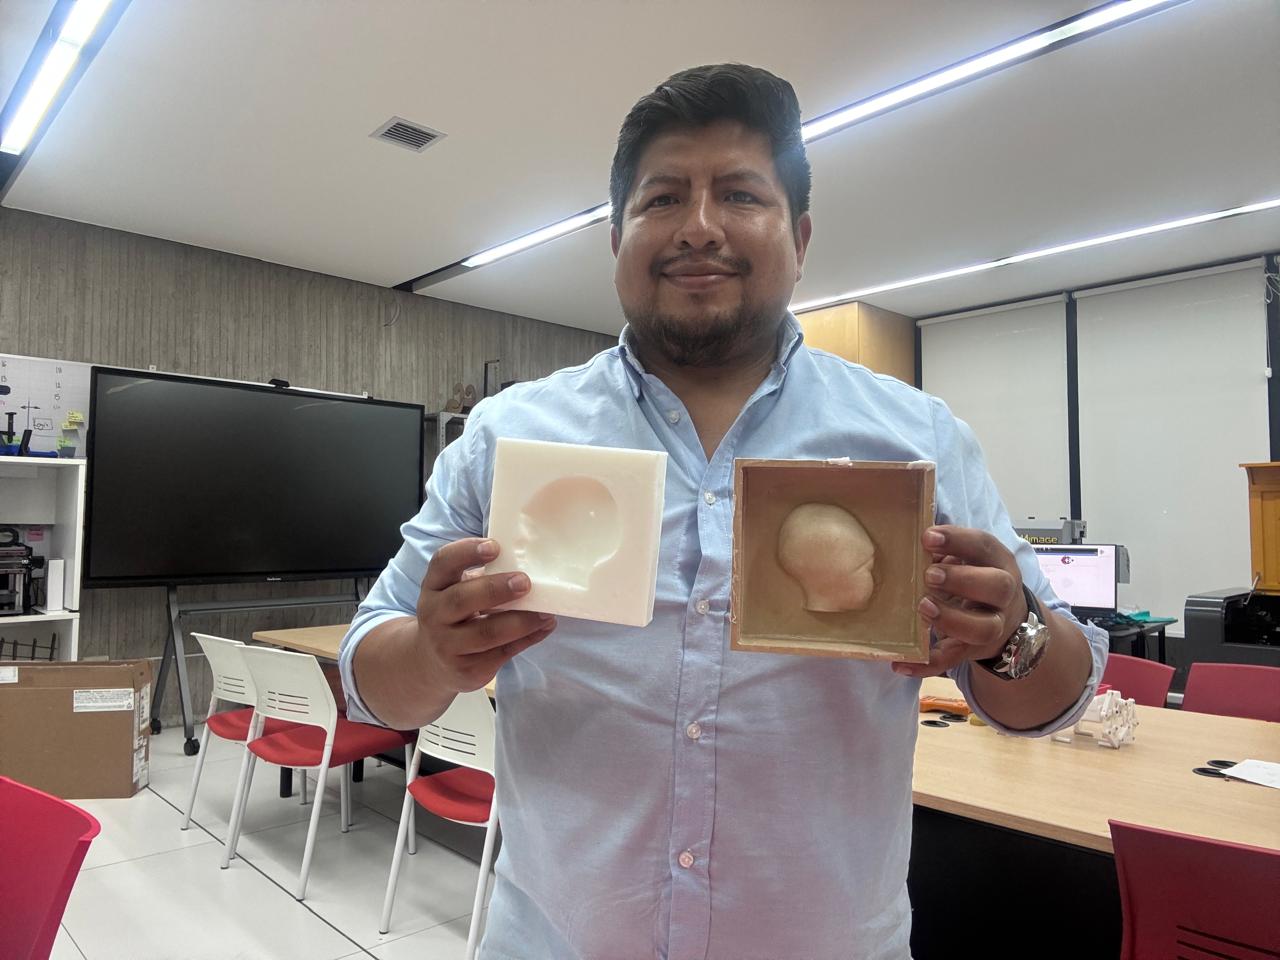
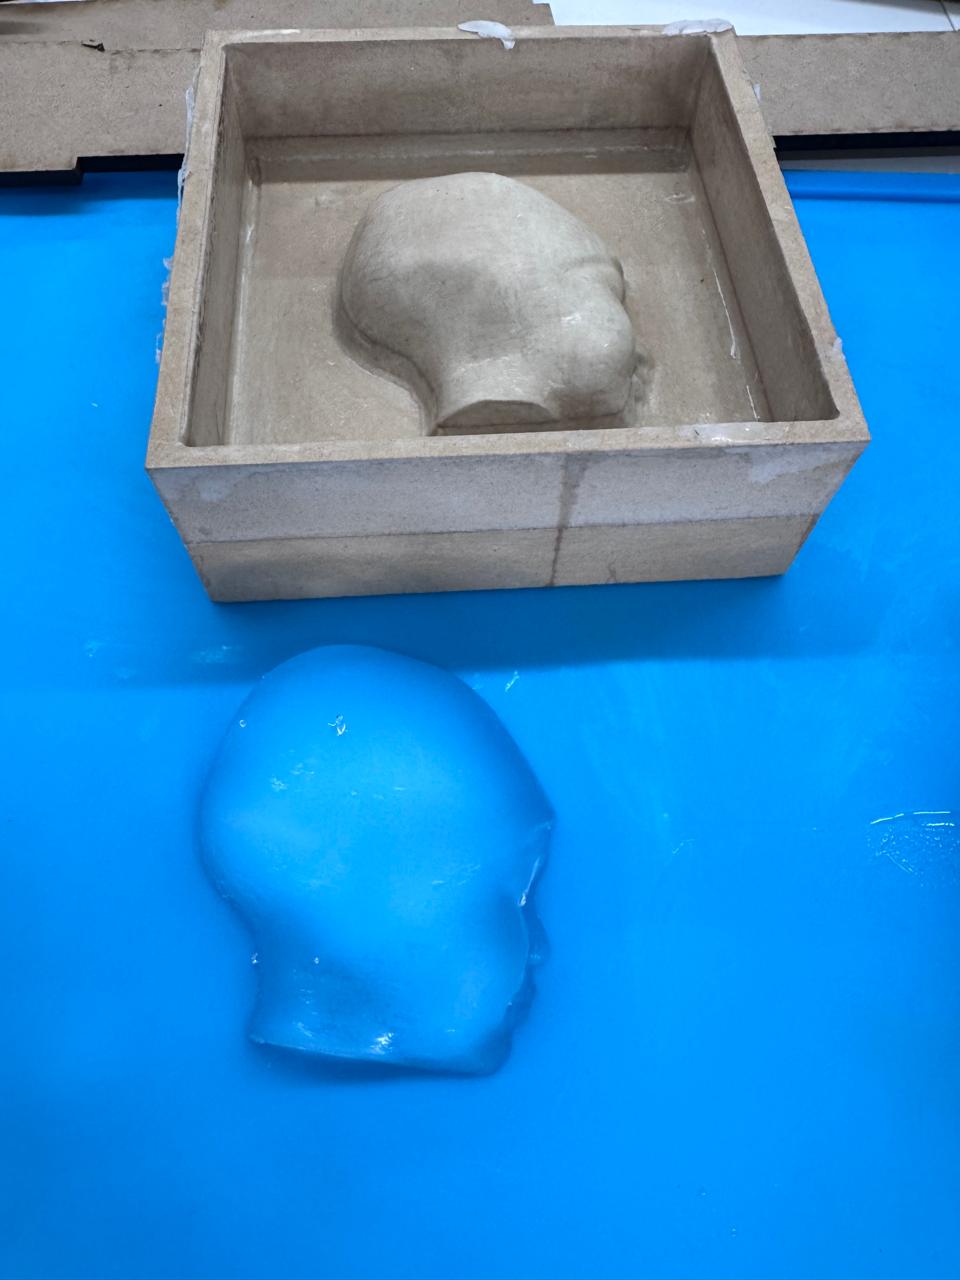
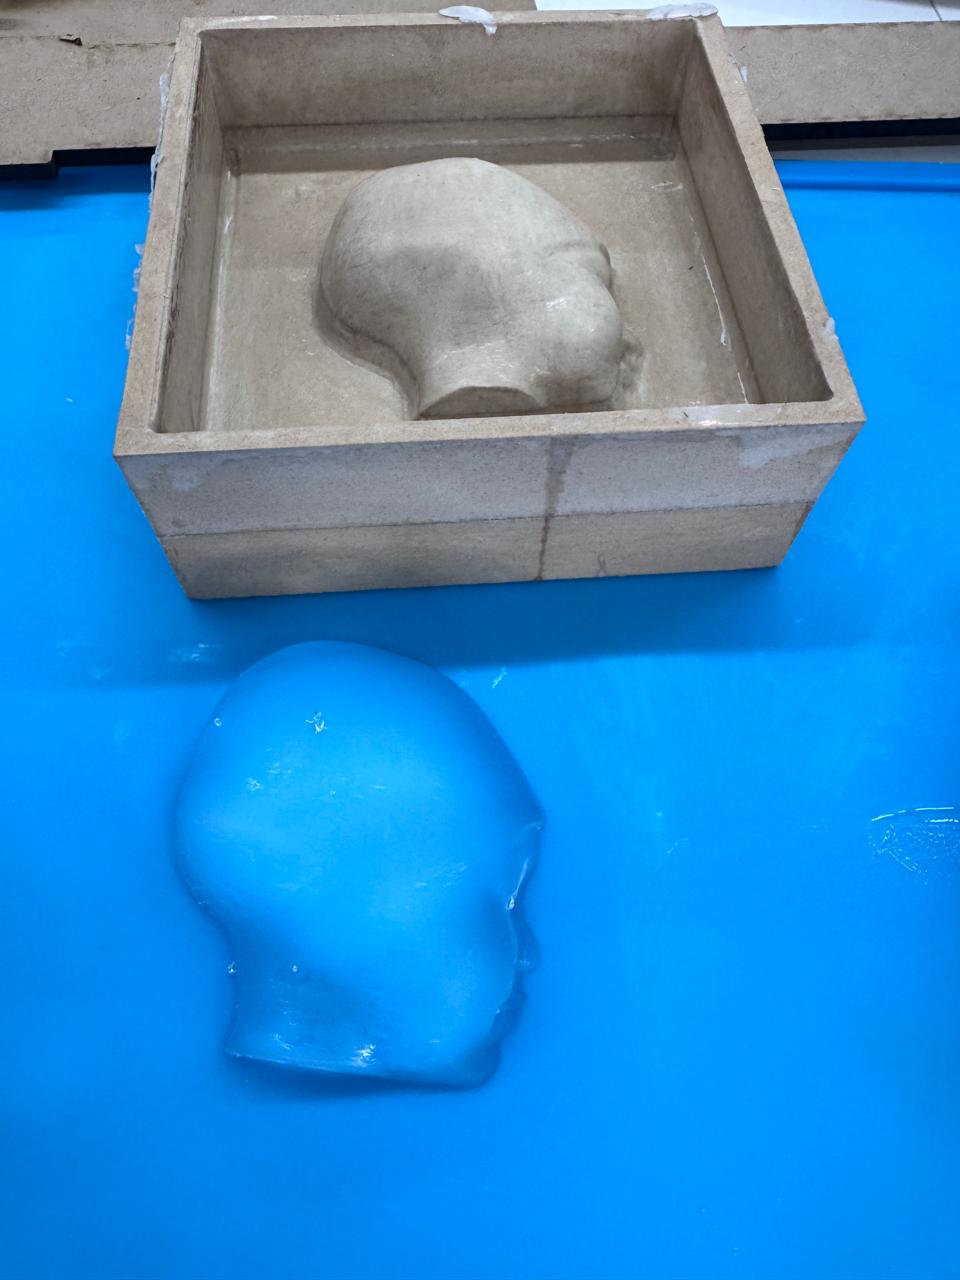
As an additional molding technique, a silicone rubber mold was produced from the same scanned face model. Instead of printing the mold directly, the digital model was used to create a rigid base mold through CNC machining. This allowed the face geometry to be reproduced in a stronger master mold before pouring the silicone.
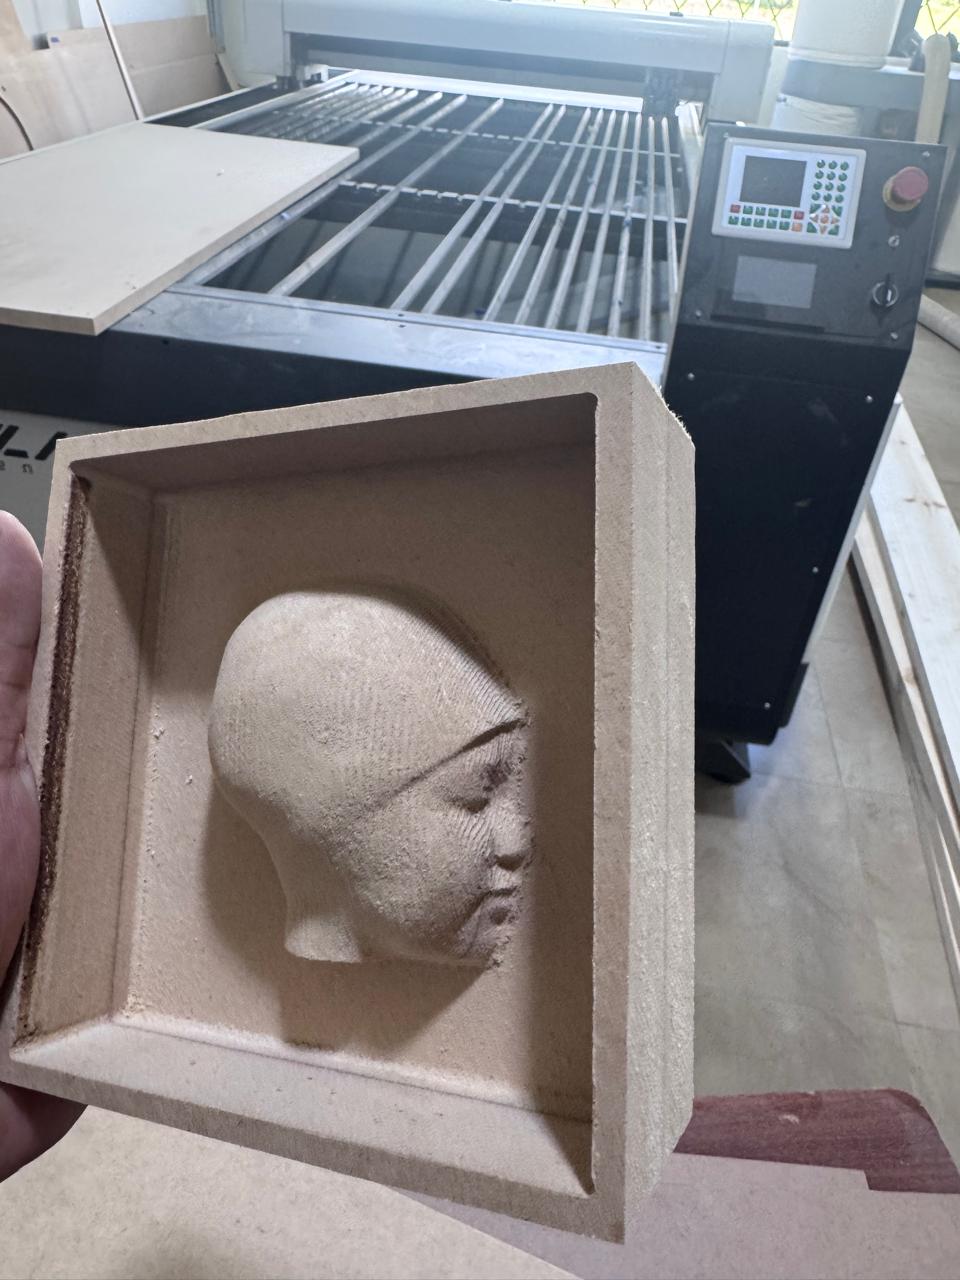
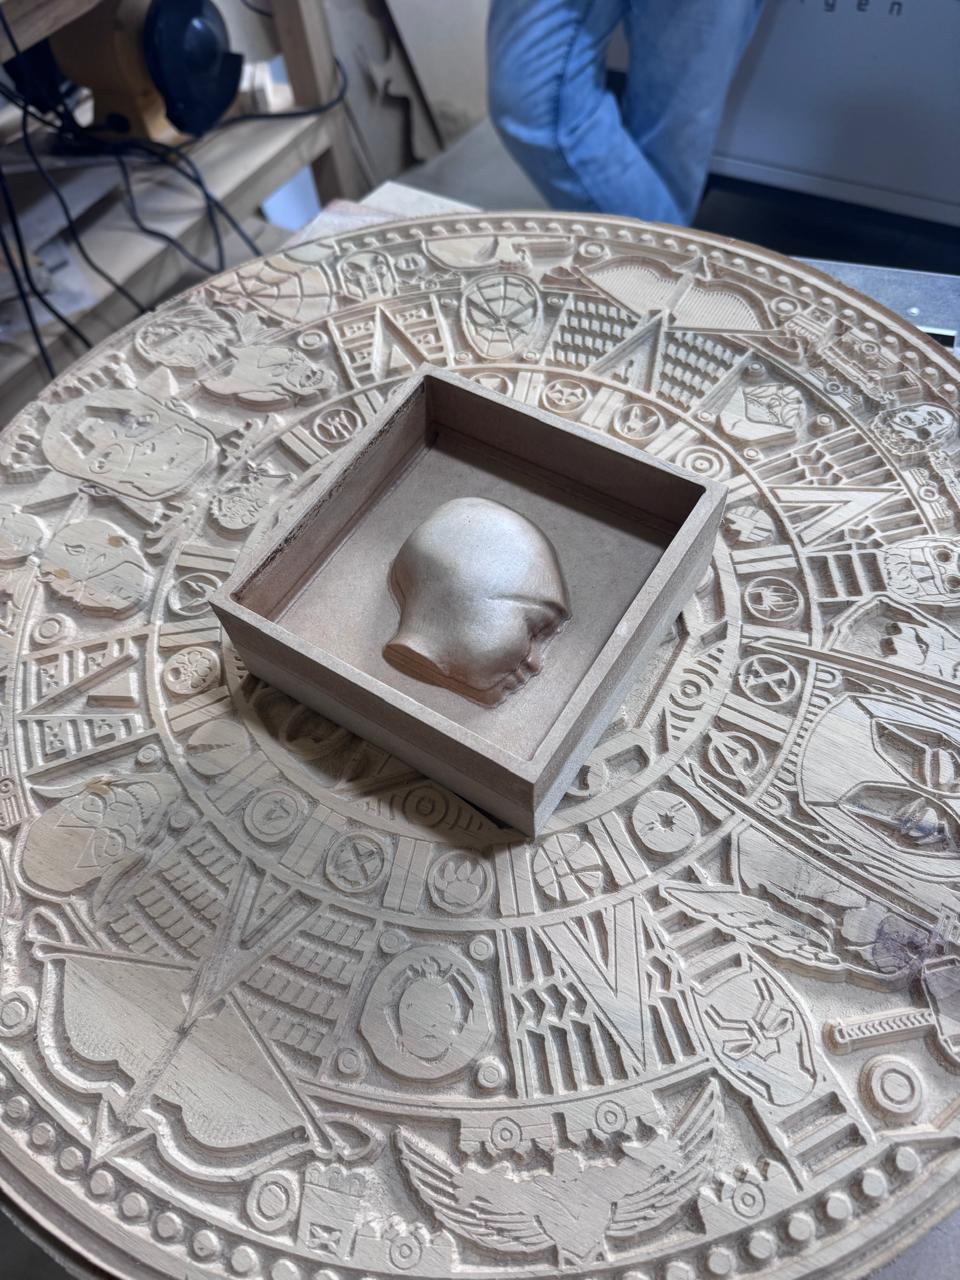
The base mold was generated from the same face scan used in the previous molding process. The geometry was prepared for CNC machining and milled into an MDF block. The objective was to create a positive face relief inside a rigid box that could later receive the silicone.
During machining, the CNC removed material around the face geometry and produced the cavity walls needed to contain the silicone. The photos show the machined surface after the operation.
Download CNC Face Base Mold STL

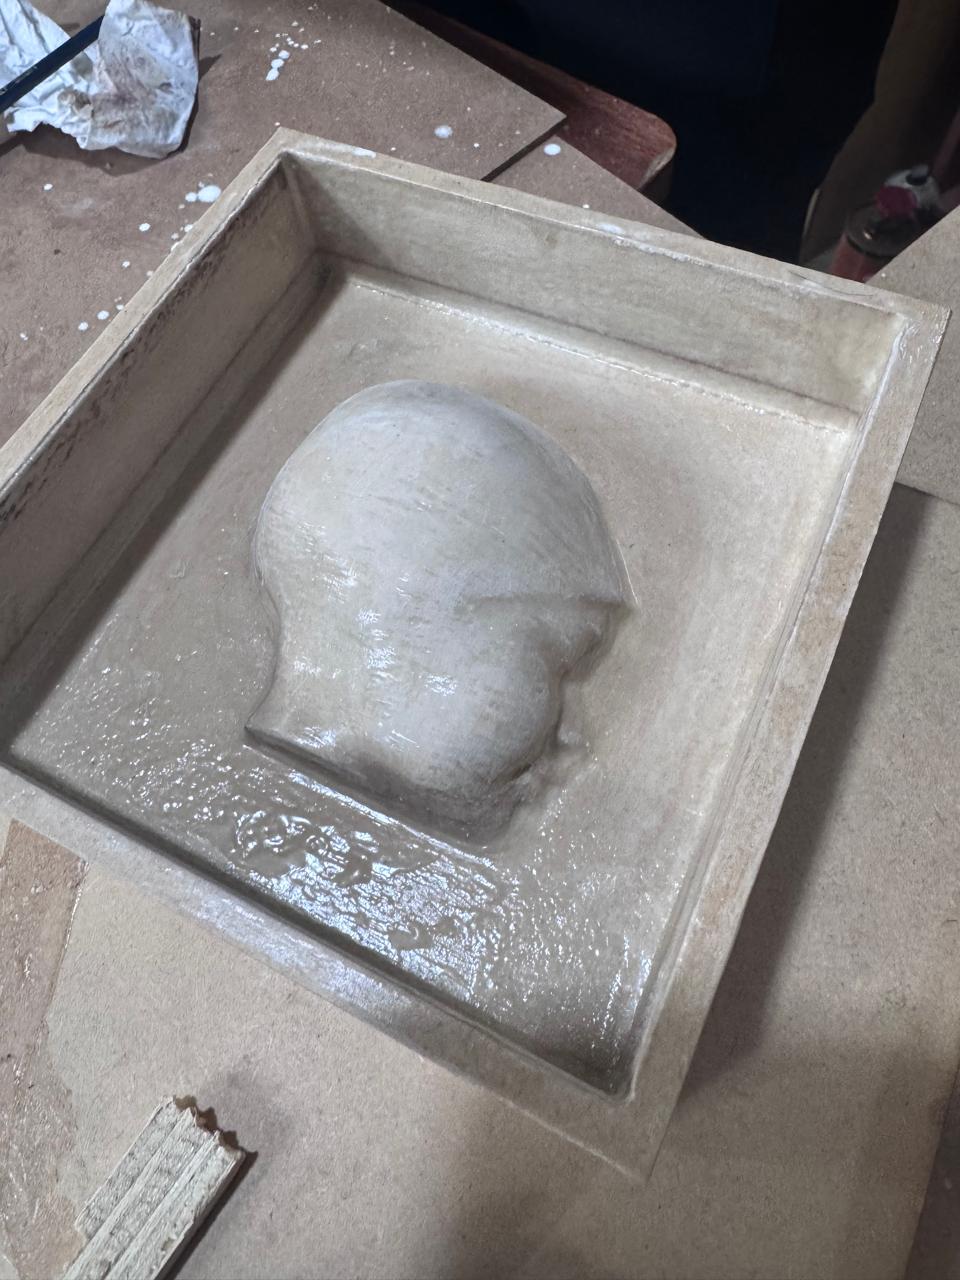
After machining, the MDF surface was cleaned and prepared. The surface was sanded to reduce rough machining marks, and the base was sealed to prevent the silicone from sticking strongly to the porous wood. This stage was important because an unsealed surface can absorb material, create bubbles, and make demolding difficult.
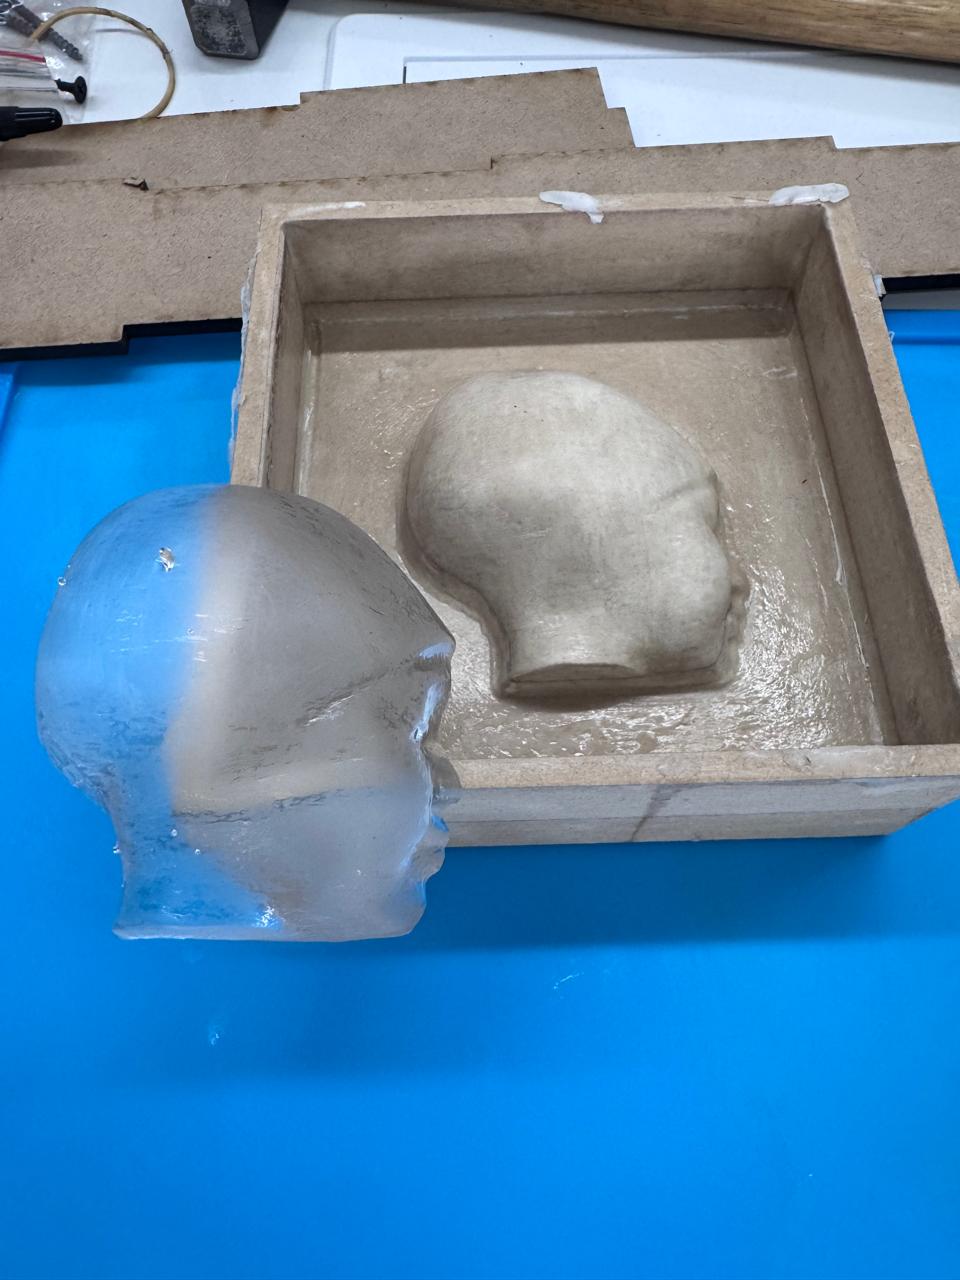
Once the base was sealed and prepared, silicone rubber was poured into the CNC-machined mold. The silicone was selected because it is flexible, captures surface detail, and allows easier demolding than a rigid material. Care was taken to fill the cavity slowly and avoid trapping air around the face geometry.
After pouring, the mold was left to cure. The curing stage allowed the silicone to become stable and flexible enough to be removed without damaging the face shape.
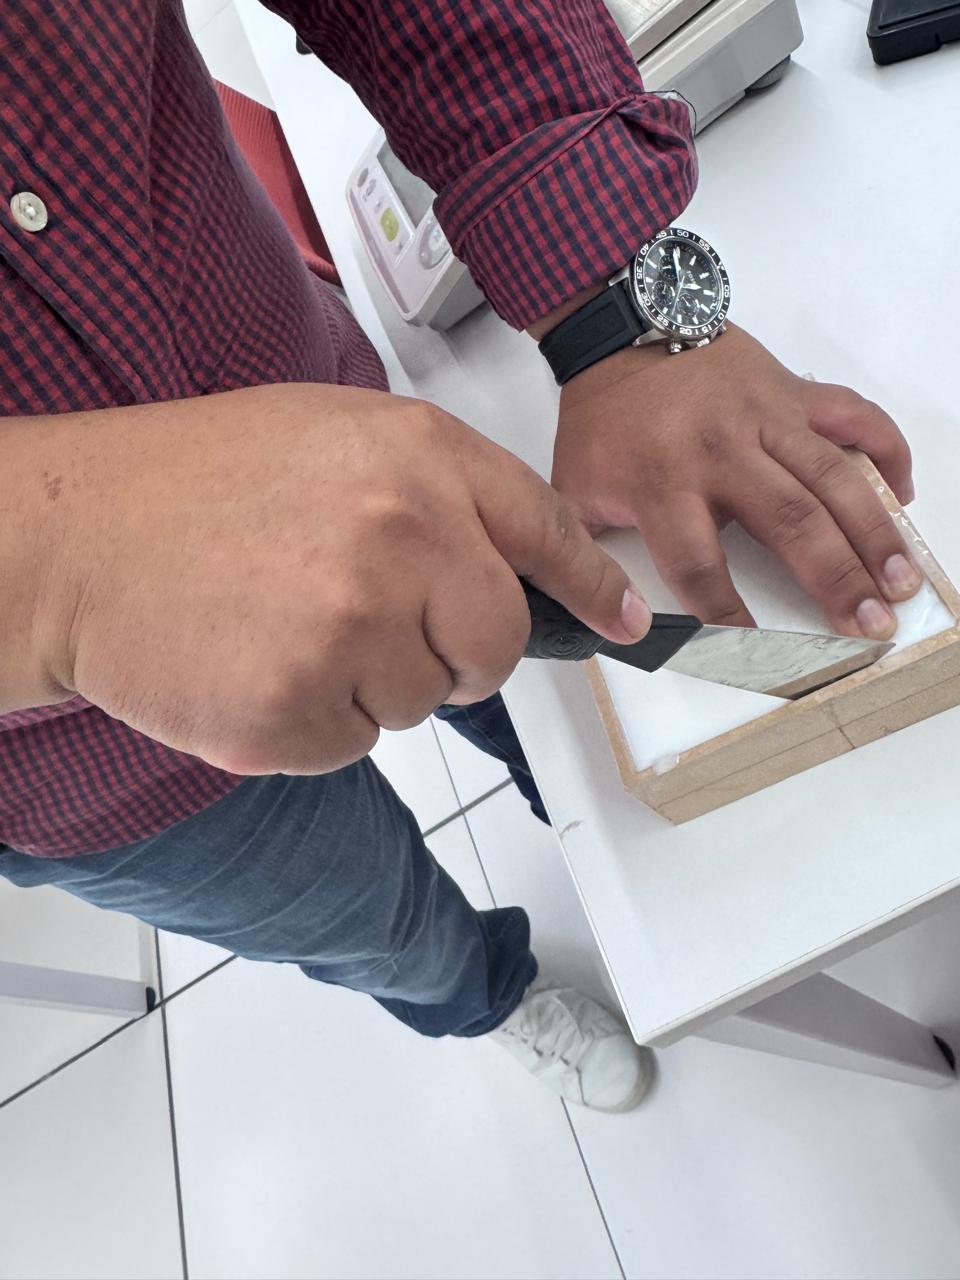
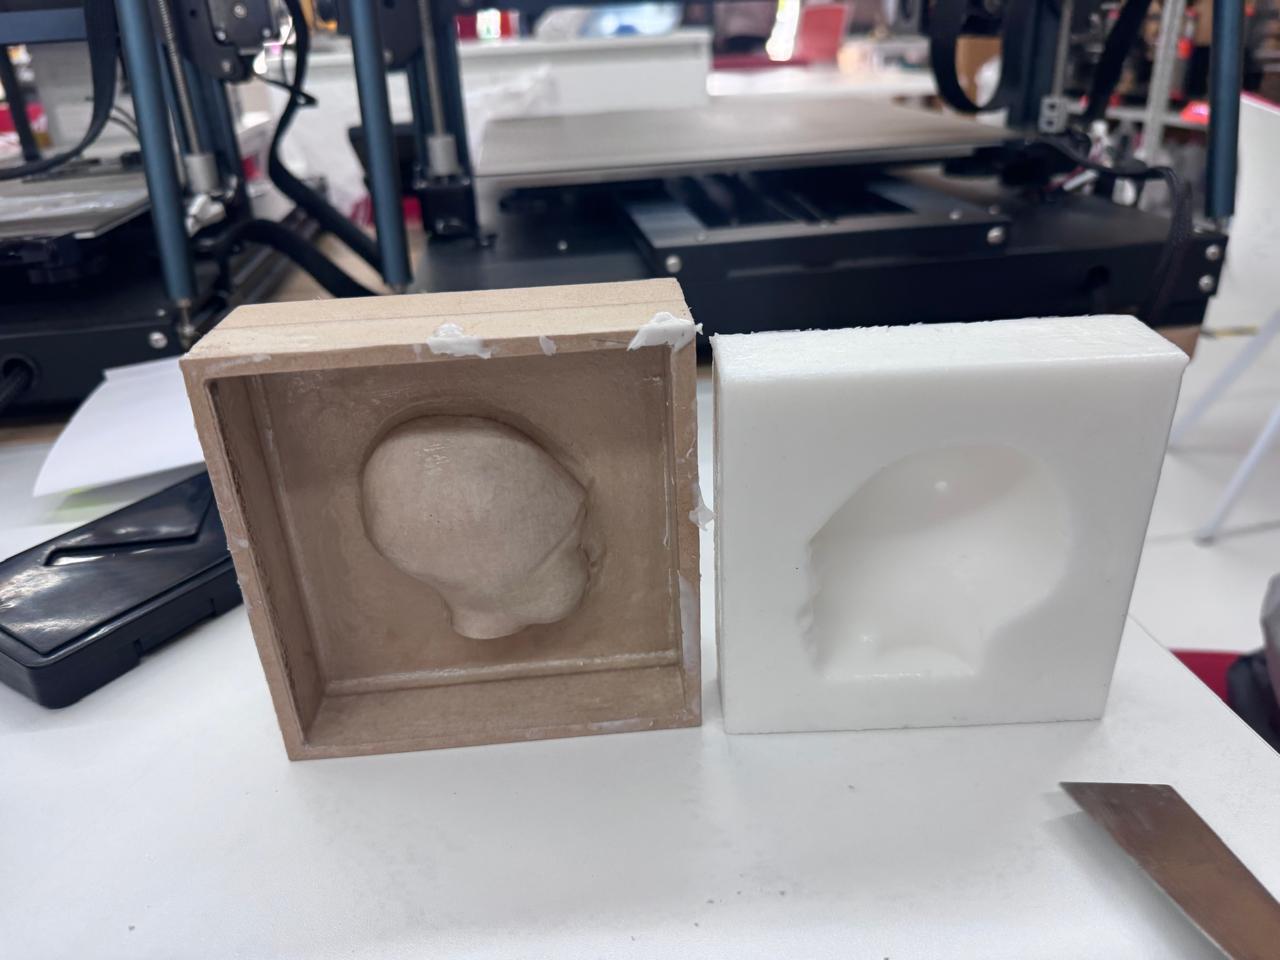
The final result was a flexible silicone negative mold and a rigid CNC-machined base mold. This workflow showed another way to combine digital fabrication and molding: first creating a precise rigid master with CNC machining, then using silicone to obtain a reusable flexible mold for future casting tests.
To make the molding workflow easier to understand, it is important to identify the two main geometries used in the process. The positive master is the solid shape that represents the final object or relief. The negative mold is the cavity that receives the casting material and reproduces the positive shape.
| Element | Identification |
|---|---|
| Positive master | The MDF face relief protrudes outward and defines the geometry to be copied. |
| Negative mold | The silicone contains the hollow cavity that receives the casting material. |
| Final cast | The casting material fills the negative cavity and becomes a new positive part after curing. |
| Material | Use | Reason for Selection |
|---|---|---|
| Candle wax | Casting material | Easy to melt and useful for testing the mold. |
| Paraffin | Casting material | Allows the face shape to be reproduced after cooling. |
| PLA | Mold container | Provides rigidity and structural support. |
| Plaster | Casting and mold material | Provides a rigid structure and allows detailed reproduction after hardening. |
| Resin | Resin molds and face print | Provides better detail and smooth surface finish. |
| TPU | Flexible mold | Allows easier demolding due to its flexibility. |
| MDF | CNC-machined base mold | Provides a rigid master mold for the silicone rubber casting process. |
| Silicone rubber | Flexible negative mold | Captures surface details and allows easier demolding after curing. |
| Wood sealer and catalyst | Surface sealing | Reduces material absorption and improves demolding from the MDF base. |
The materials used in this assignment were selected not only for their technical performance, but also because they are among the most common and accessible options in the Ecuadorian market. For a molding and casting workflow, availability is important because the process requires testing, repeating, and adjusting the design without waiting for specialized imported materials.
PLA and TPU were chosen because they are widely available filaments in local 3D printing suppliers and university fabrication labs. PLA was used for rigid support parts because it is easy to print, low cost, and dimensionally stable enough for a mold container. TPU was used for flexible mold parts because it improves demolding and can be purchased more easily than specialized flexible mold-making materials.
MDF was selected for the CNC-machined positive master because it is inexpensive, easy to machine, and commonly sold in Ecuadorian hardware stores and wood suppliers. It allowed the master mold to be fabricated quickly with standard CNC tools. The wood sealer and catalyst were used because MDF is porous, so sealing the surface helped reduce material absorption and improved the release of the silicone.
Silicone rubber, plaster, candle wax, paraffin, and epoxy resin were also selected because they can be found through local construction, craft, art, and hardware suppliers. These materials made the experiments more reproducible in Ecuador: they are affordable, easy to replace, and suitable for testing different casting behaviors such as flexibility, rigidity, transparency, and surface detail reproduction.
| Selection Criteria | Application in This Project |
|---|---|
| Local availability | Materials were chosen because they can be found in common Ecuadorian suppliers. |
| Accessibility and cost | The selected materials allow several tests without making the project too expensive. |
| Compatibility with lab processes | PLA, TPU, MDF, silicone, wax, plaster, and resin work with the machines and tools available in the lab. |
| Reproducibility | Using common materials makes it easier for other students in Ecuador to repeat or improve the process. |
Safety was an important part of the molding, casting, and resin printing process. Each machine and material had to be used carefully in order to avoid accidents, equipment damage, or failed prints.
The project successfully combined 3D scanning, digital modeling, mold design, 3D printing, and casting. The use of TPU allowed the creation of flexible molds, while PLA provided a rigid structure to hold the molds during casting.
The resin printing process also made it possible to obtain molds and a face model with better surface detail. The casting with candle wax and paraffin demonstrated that the mold could reproduce the shape of the scanned face.
Candle wax/paraffin mold of the scanned face
Resin mold of the scanned face
Plaster mold of the scanned face
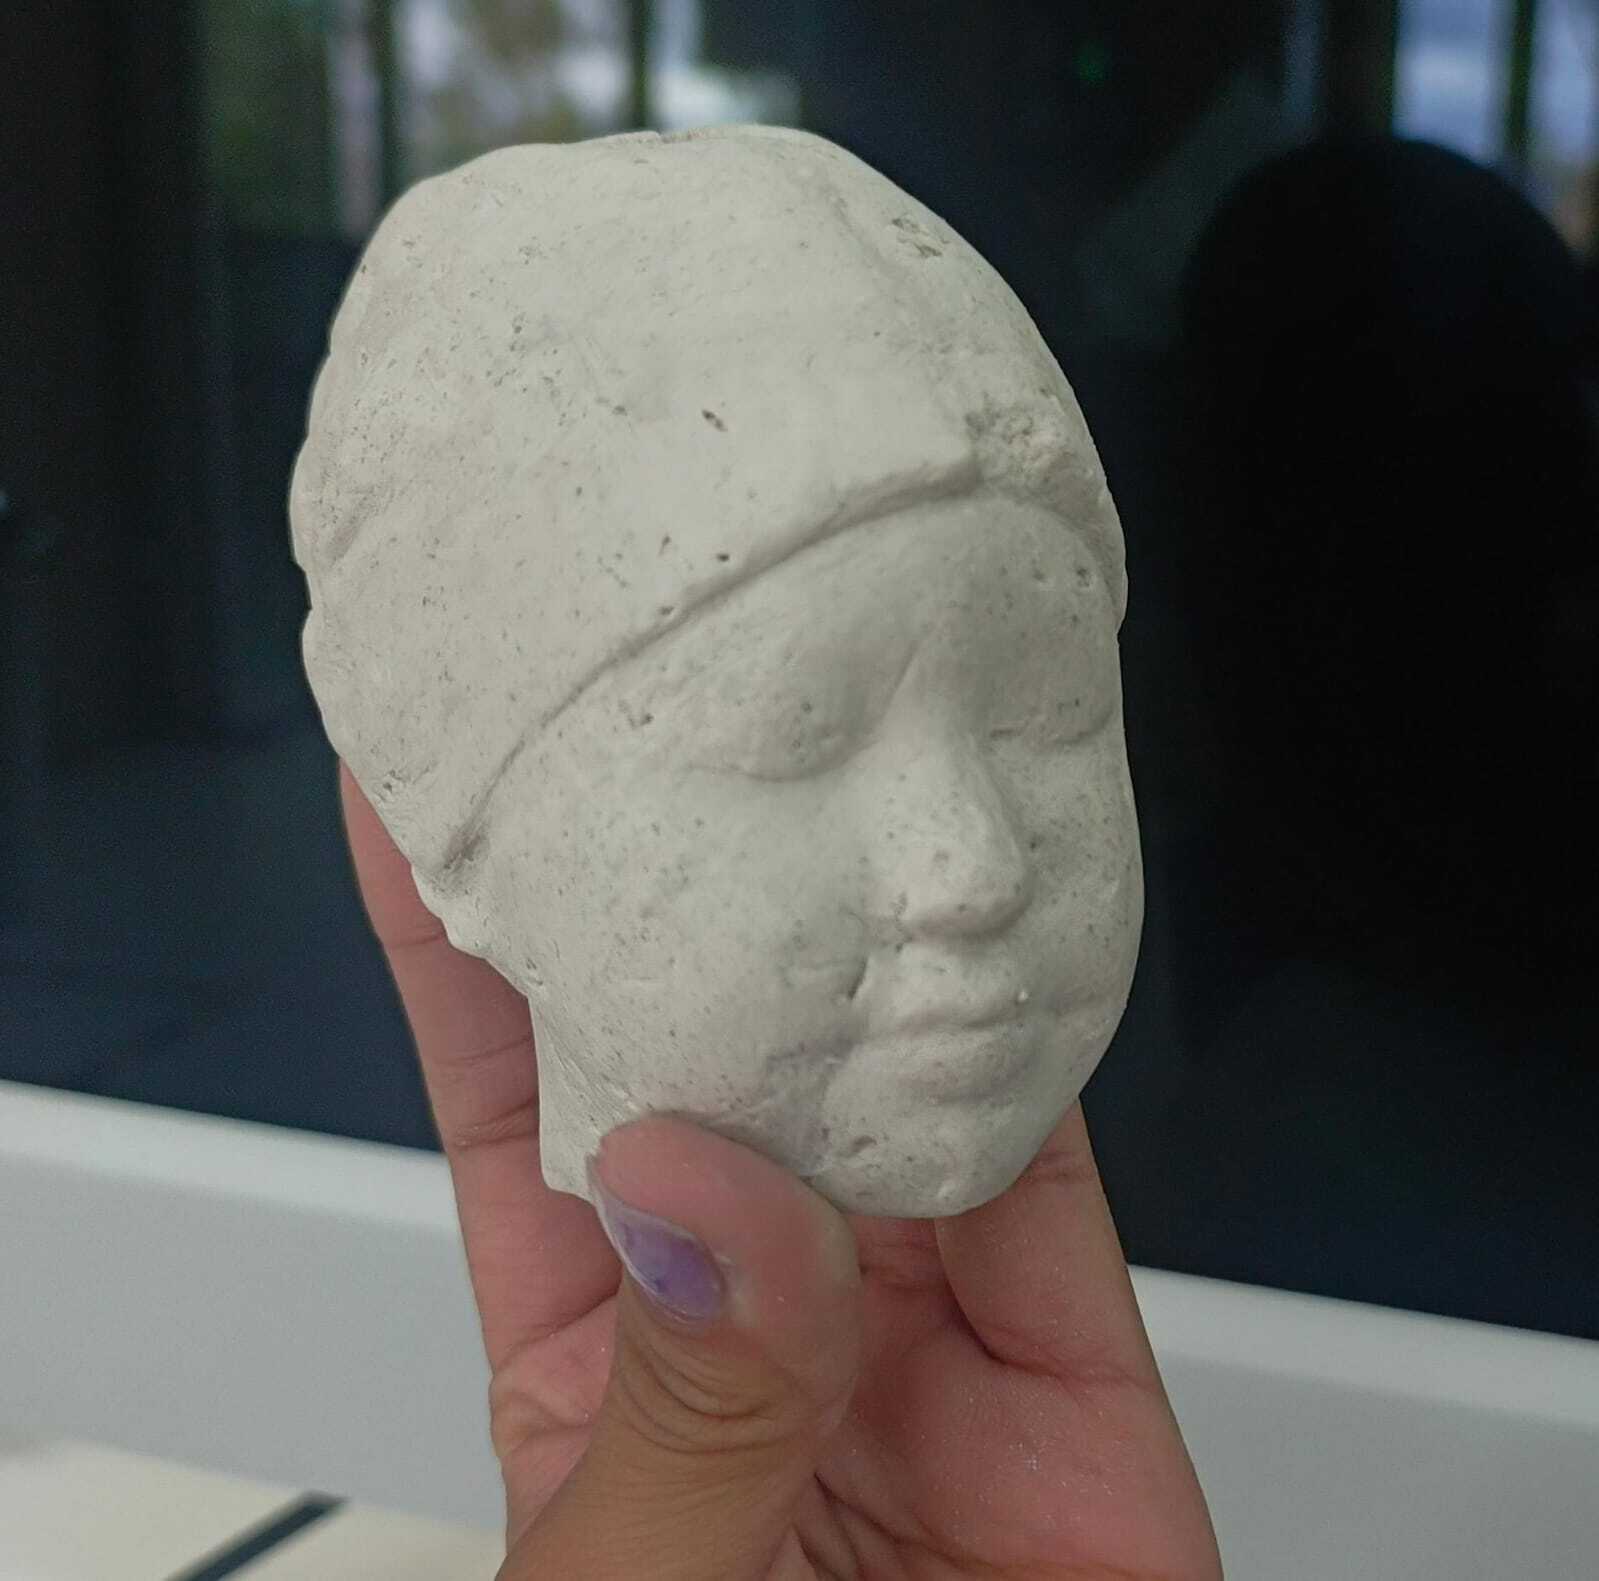
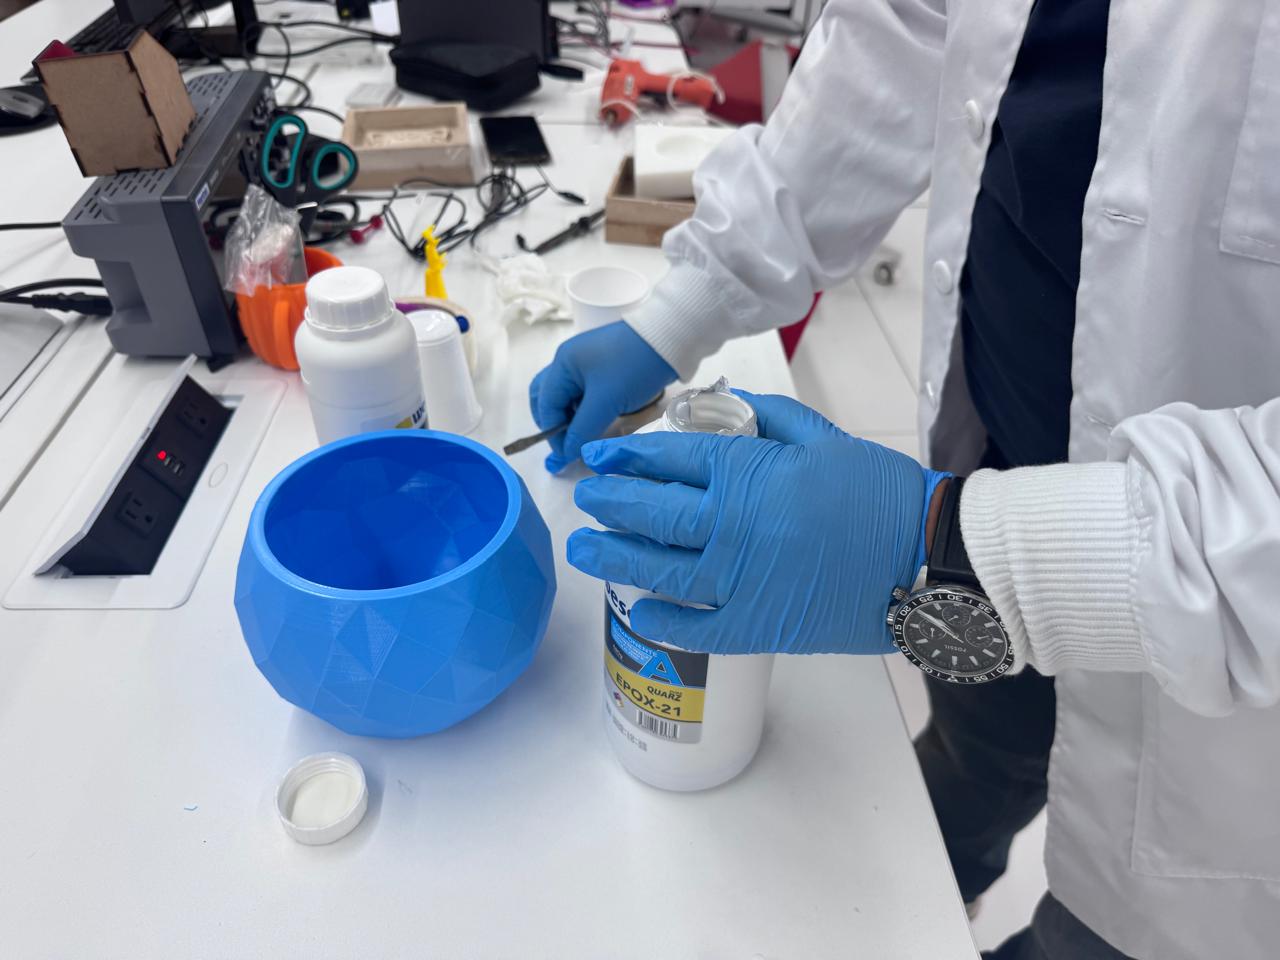
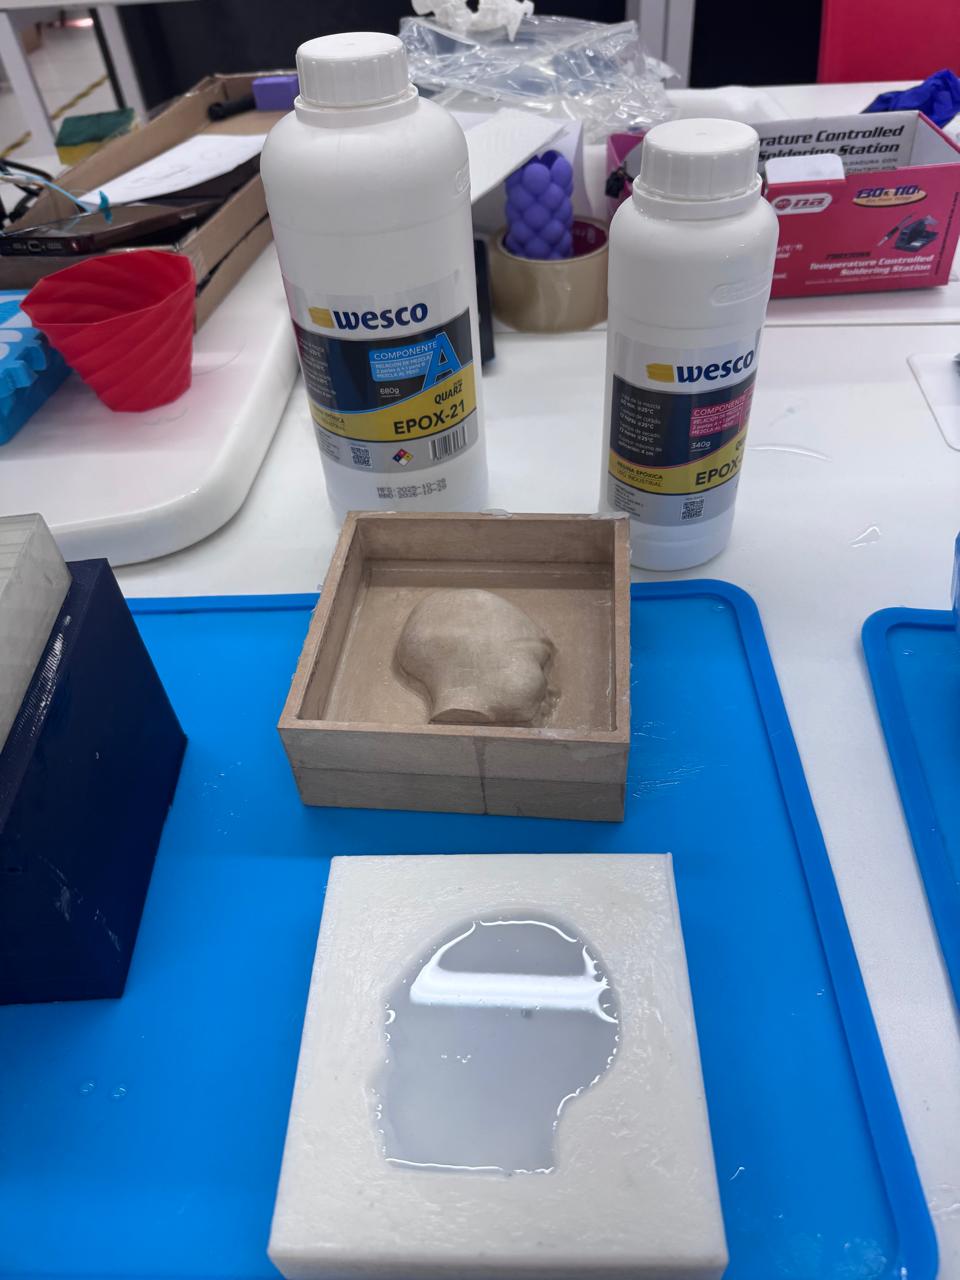
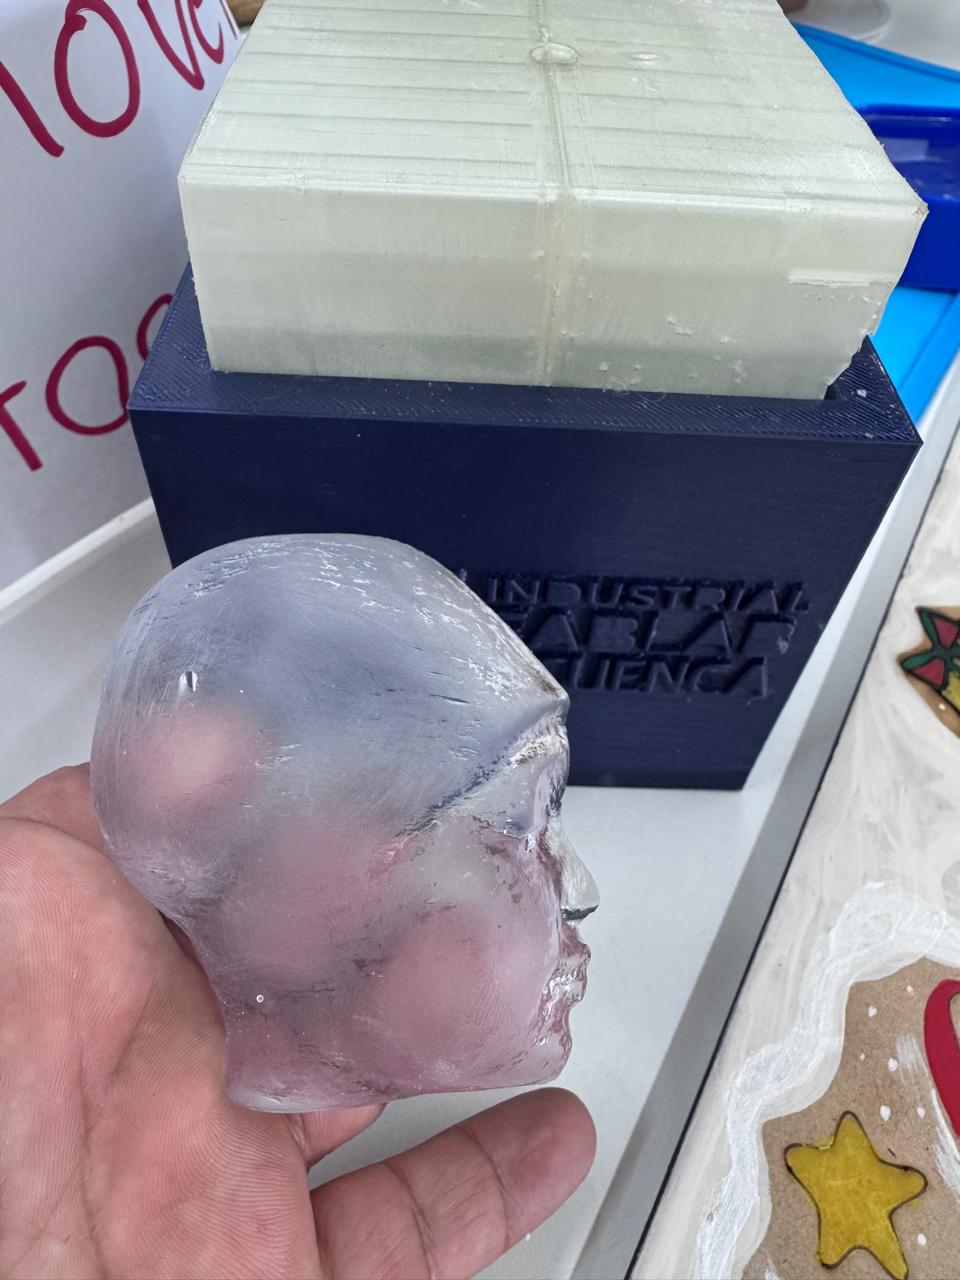
In this final casting test, I used a transparent epoxy resin to reproduce the scanned face using the mold system. The objective was to test a material with a different behavior from plaster, wax, and paraffin. Epoxy resin was useful because it flows into the mold cavity, cures as a rigid solid, and creates a translucent result where small bubbles, surface marks, and mold details can be clearly observed.
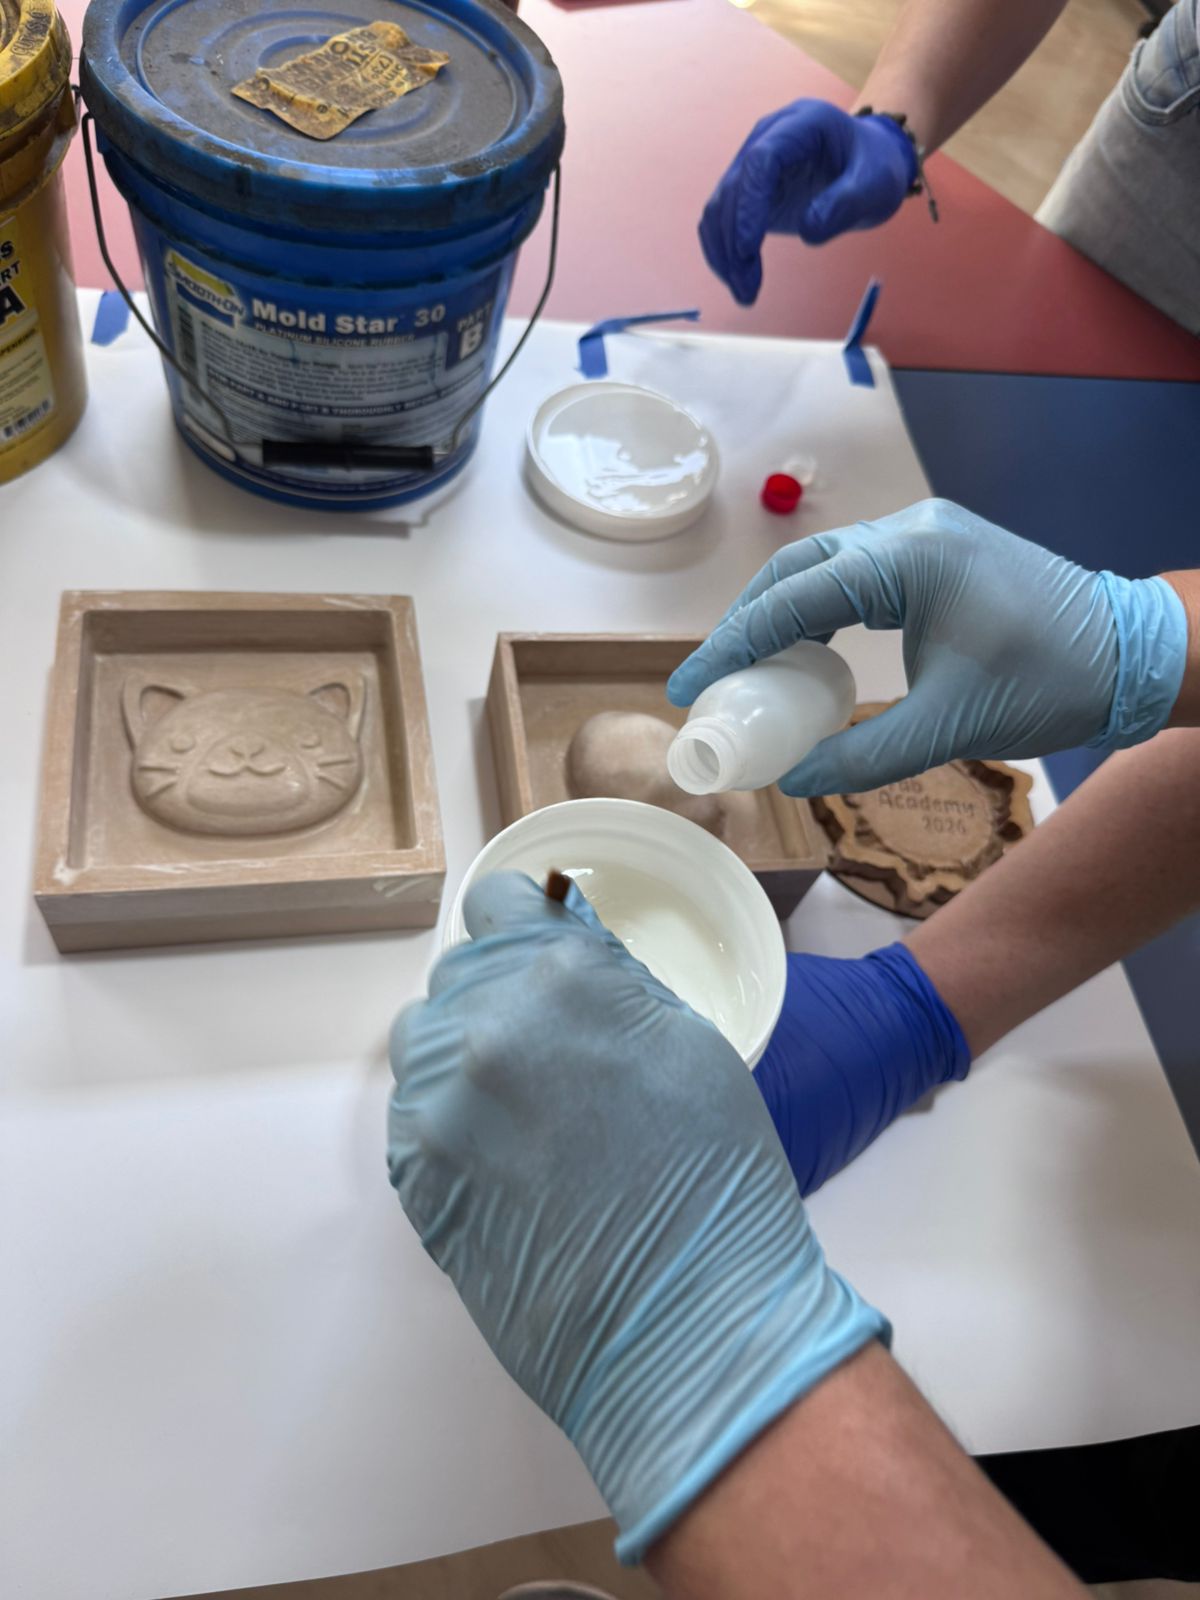
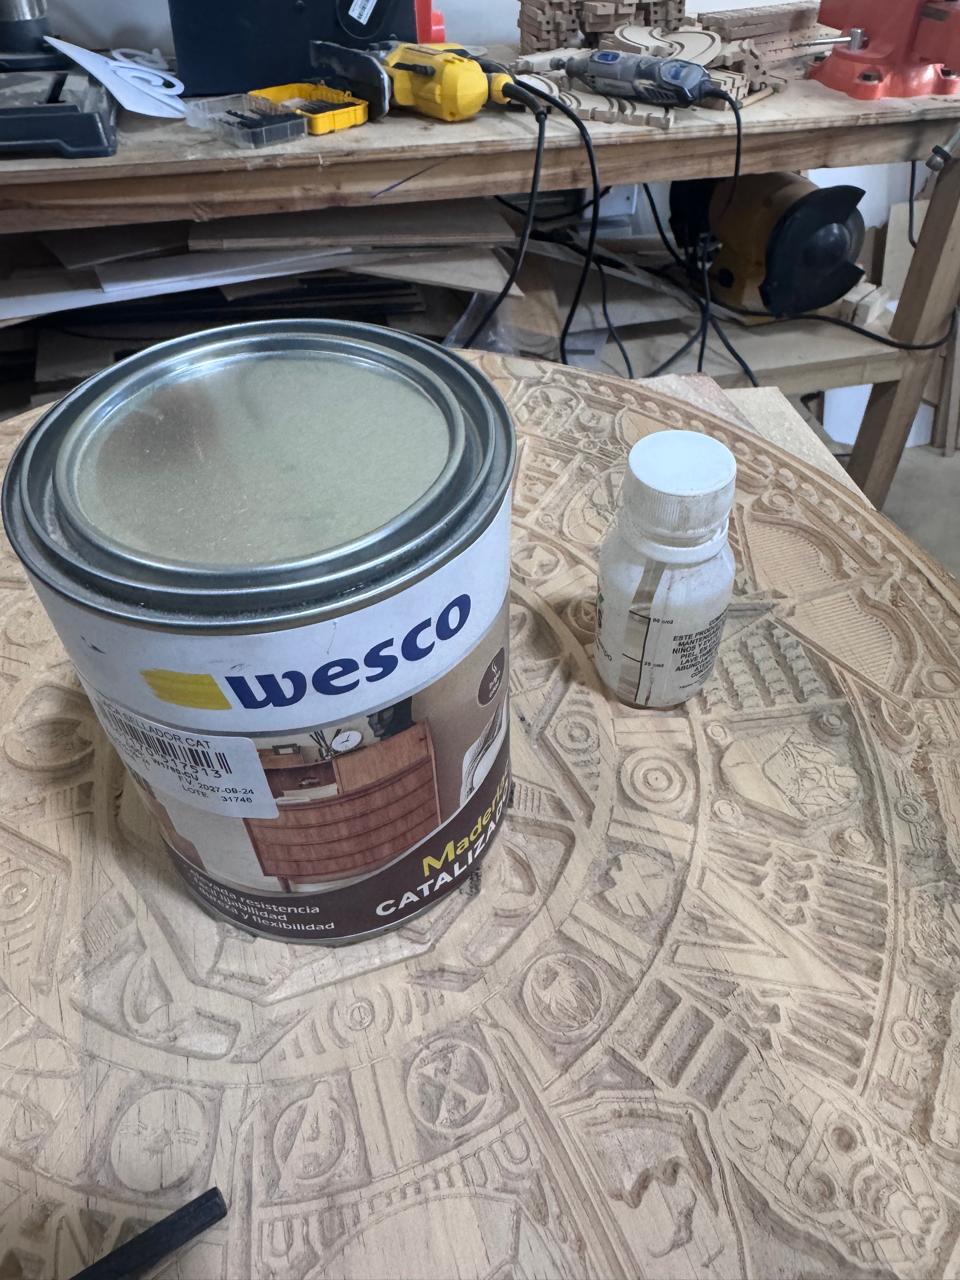
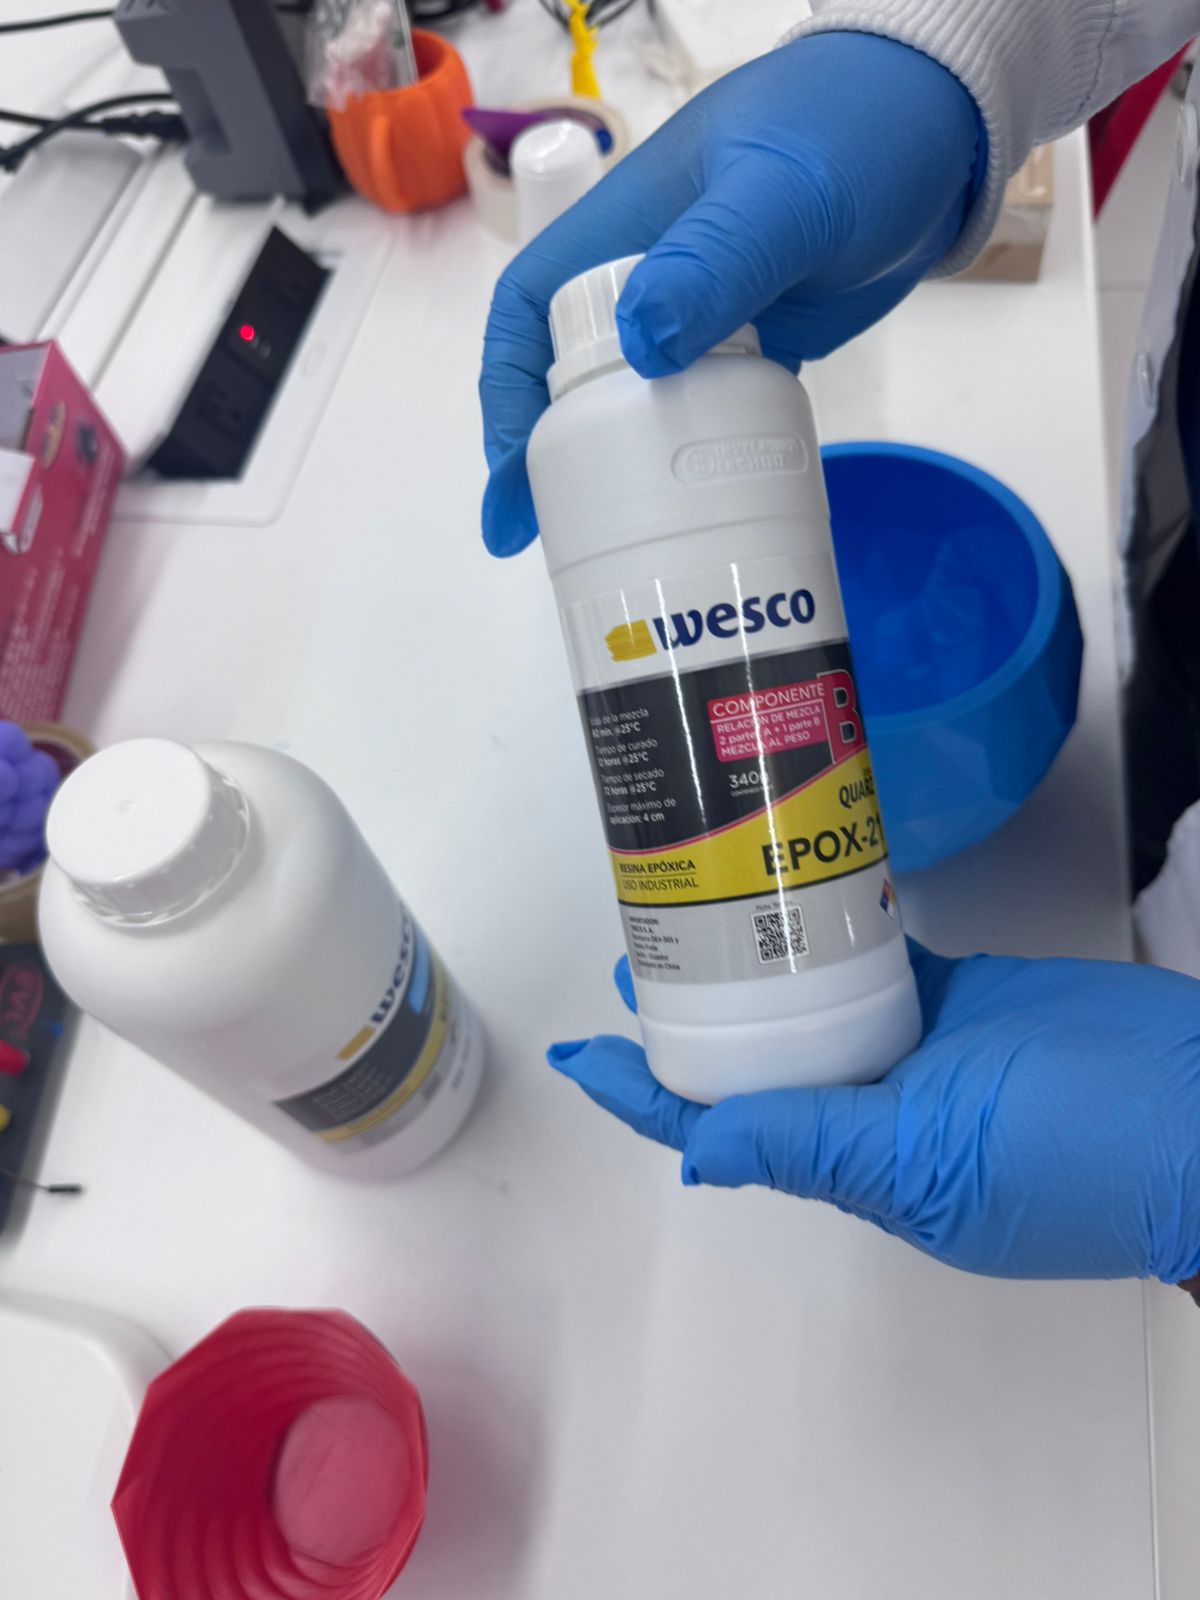
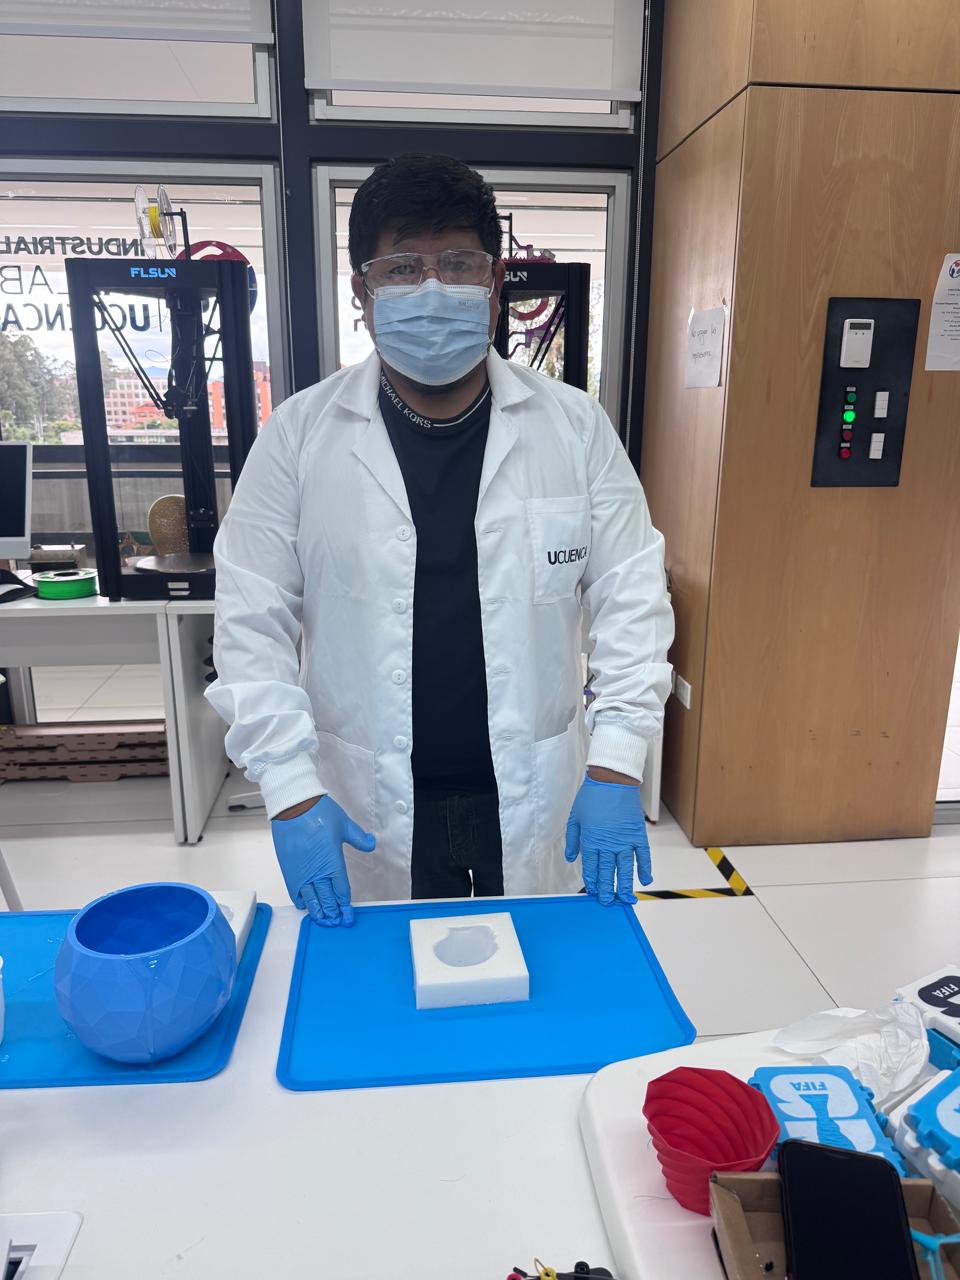
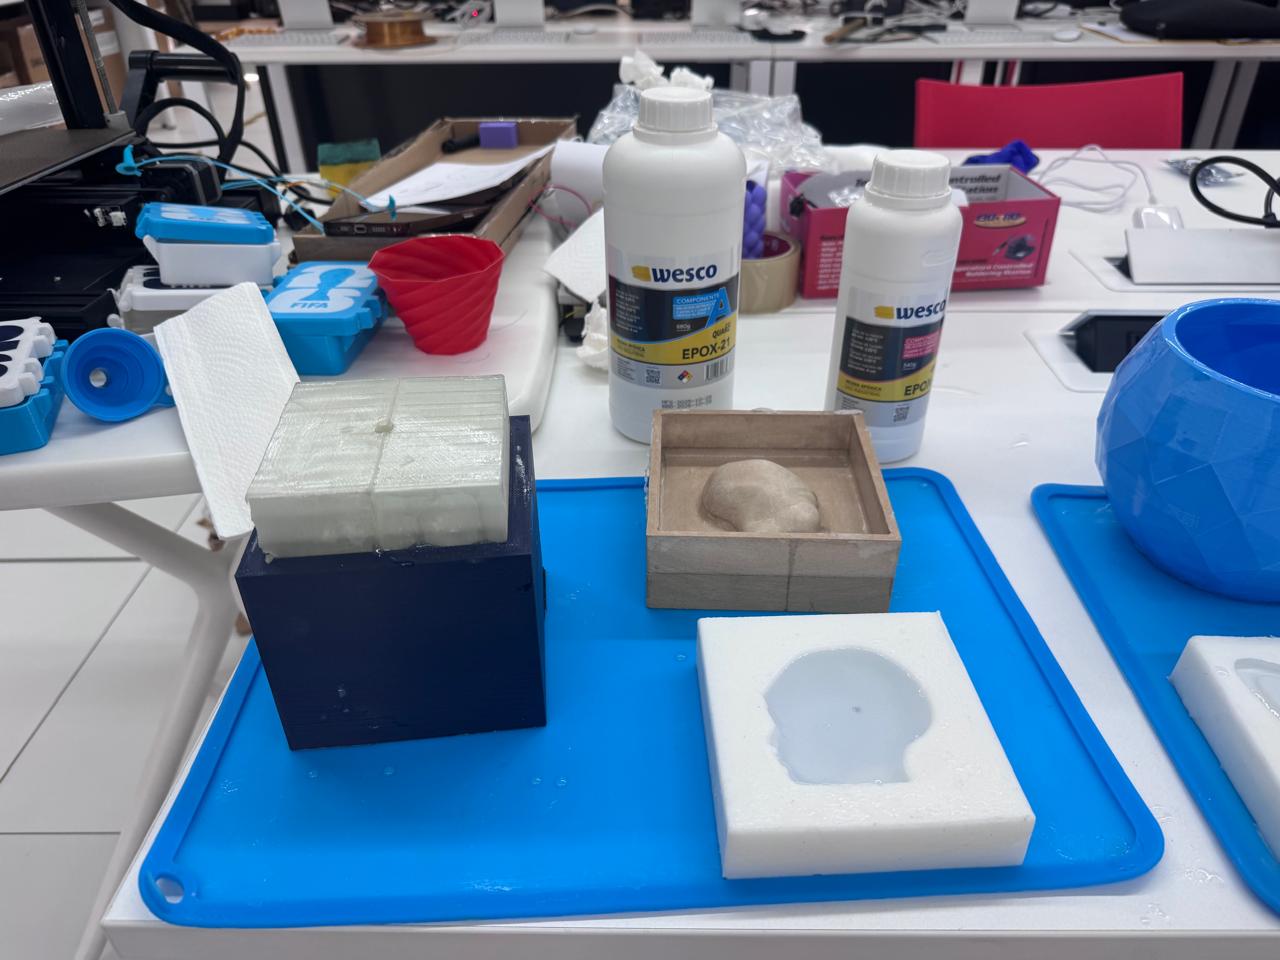
Before mixing the resin, the workspace was prepared with a silicone mat, disposable cups, spatulas, gloves, safety glasses, and the two epoxy components. The mold was cleaned and placed on a flat surface so the resin could settle evenly during curing. The resin used was Wesco EPOX-21, composed of Component A and Component B.
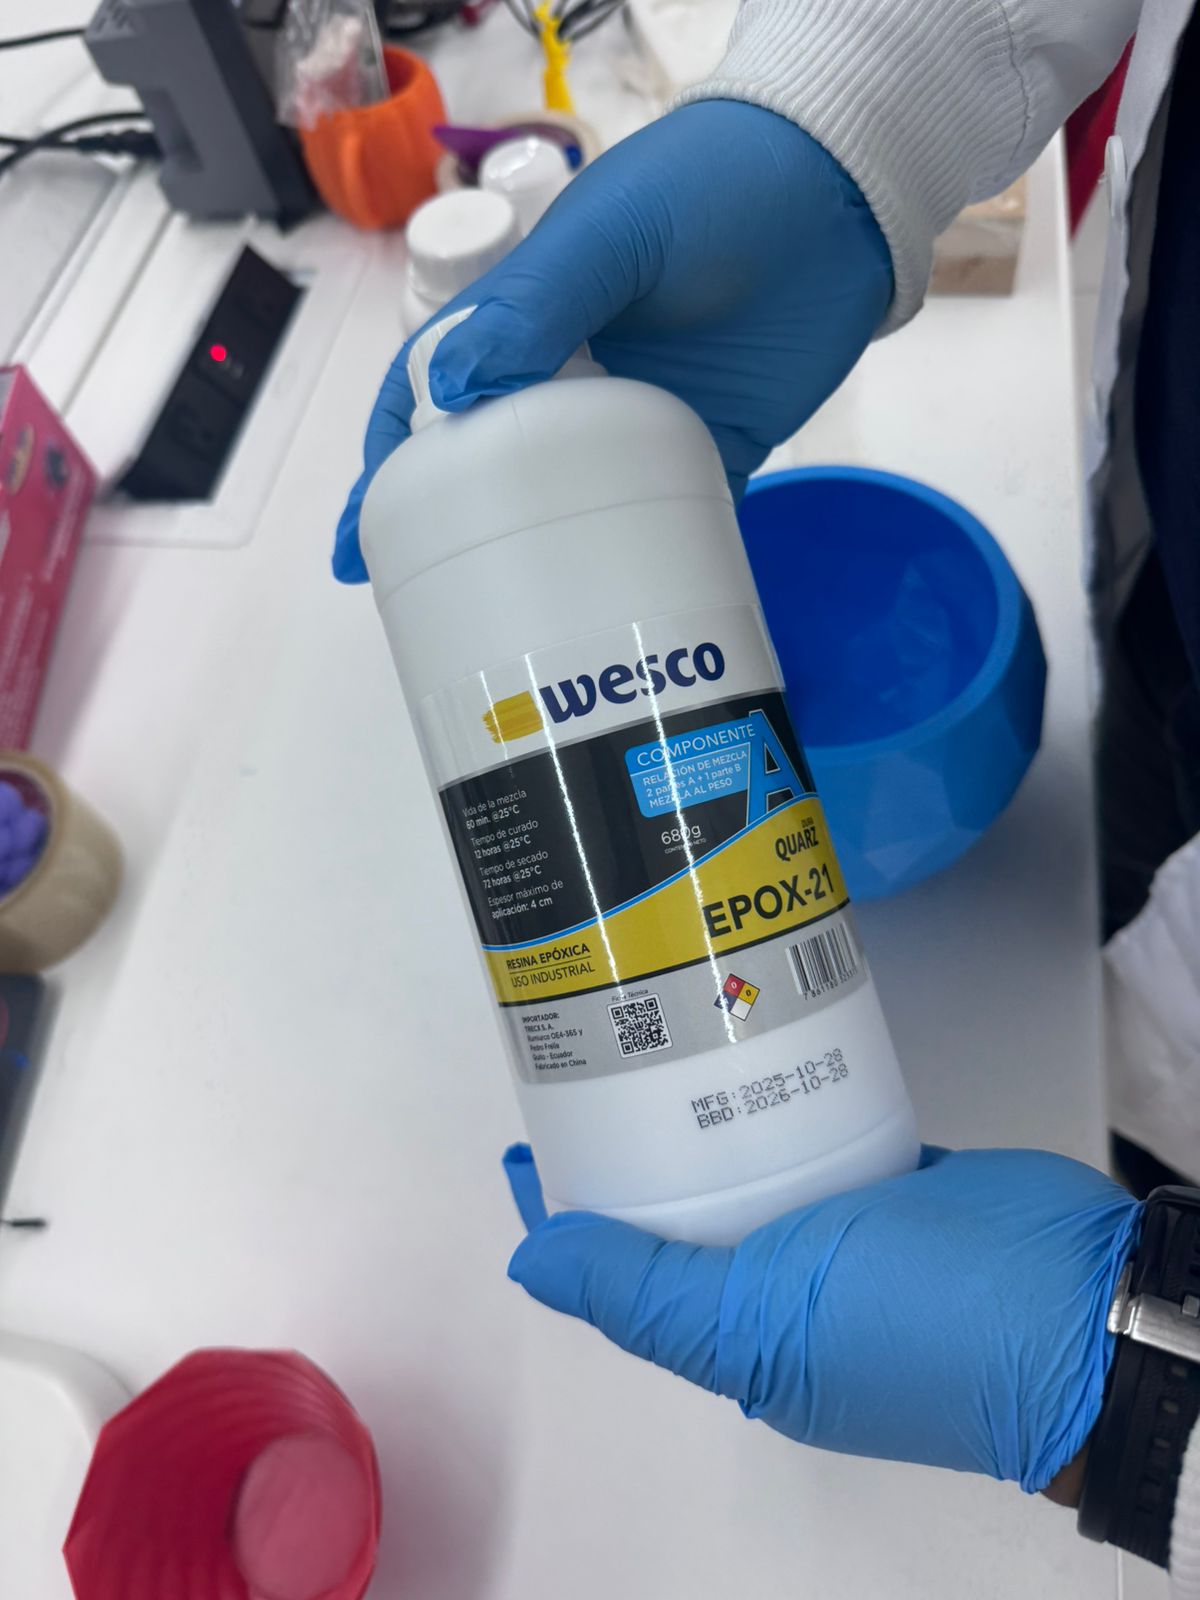
The casting material used in this section was the Wesco EPOX-21 Dura Quarz epoxy resin kit. I documented it as an independent technical subsection because the final quality of a casting depends directly on the correct resin selection, mixing ratio, working time, curing time, thickness limit, and safety handling. The information below combines the data observed on the product label used in the lab, the attached technical datasheet, and the commercial reference from Pintulac for the 2:1 Dura Quarz kit.
This resin was selected because it produces a rigid and transparent casting, which made it suitable for reproducing the face geometry and inspecting the internal quality of the result. Since the material is a two-component system, the process required measuring both components carefully before mixing. An incorrect ratio can cause incomplete curing, excessive softness, sticky surfaces, or loss of transparency.
| Technical Item | Product Information | Application in this Casting Test |
|---|---|---|
| Commercial product | Kit Resina Epoxica 2:1 Dura Quarz de 1 kg - Wesco | Used as the transparent casting material for the face reproduction. |
| Brand / line | Wesco EPOX-21, Dura Quarz epoxy system | The resin was handled as a two-component casting system. |
| Supplier reference | Pintulac product page: EPOX-21 Dura Quarz 2:1 kit | The link was included to identify the exact commercial kit used for the experiment. |
| Components | Component A resin + Component B hardener | Both bottles were prepared before starting, so the mixing and pouring could be done within the working time. |
| Mixing ratio | 2 parts A : 1 part B by weight | The ratio was followed to obtain a complete cure and avoid sticky or soft areas. |
| Working time / pot life | Approximately 60 minutes at 25 °C | The components were mixed and poured before the viscosity increased. |
| Curing time | Approximately 10 hours at 25 °C | The mold was kept level and undisturbed during curing. |
| Dry-to-handle time | Approximately 12 hours at 25 °C | The cast was handled carefully after the cure, allowing additional time for surface stabilization. |
| Maximum application thickness | 4 cm | The face cavity was filled below this limit to reduce overheating, bubbles, and curing defects. |
| Expected appearance | Clear or translucent glossy solid after curing | The transparent finish allowed visual inspection of bubbles and surface marks. |
| Recommended PPE | Nitrile gloves, safety glasses, clean containers, spatula, and ventilated workspace | PPE was used during measuring, mixing, pouring, and demolding preparation. |
| Main process risks | Incorrect ratio, air bubbles, skin contact, contamination, and incomplete curing | The process was controlled by slow mixing, clean tools, careful pouring, and keeping the mold still. |
The technical datasheet was stored with the assignment files so that the material selection can be reviewed later. This is important for reproducibility: anyone repeating the casting process can check the product version, ratio, curing behavior, and handling precautions before using the resin.
Download EPOX-21 Technical Datasheet PDF| Property | Specification Used | Observation |
|---|---|---|
| Material | Wesco EPOX-21 epoxy resin | Two-component transparent resin for casting applications. |
| Components | Component A + Component B | Both parts must be mixed before pouring. |
| Mixing ratio | 2 parts A : 1 part B by weight | This ratio was taken from the product label. |
| Pot life | Approximately 60 minutes at 25 °C | Working time available after both components are mixed. |
| Curing time | Approximately 10 hours at 25 °C | The piece was left undisturbed while the resin hardened. |
| Drying time | Approximately 12 hours at 25 °C | Additional time helps the surface become more stable before handling. |
| Maximum application thickness | 4 cm | The face mold was filled below this limit. |
The following technical sheet was prepared specifically for the EPOX-21 casting section. It summarizes the practical information needed before mixing and pouring the material into the face mold. The values were taken from the product label and were used as the reference for this casting experiment.
| Technical Item | EPOX-21 Data | How it was applied in this project |
|---|---|---|
| Product name | Wesco EPOX-21 | Used as the transparent casting material for the scanned face reproduction. |
| Material type | Two-component epoxy resin system | The resin cures through the reaction between Component A and Component B. |
| Components | Component A + Component B | Both components were prepared before starting the mixture to avoid delays during the working time. |
| Mixing ratio | 2 parts A : 1 part B by weight | The ratio was respected to avoid incomplete curing, sticky areas or a soft final piece. |
| Working time / pot life | Approximately 60 minutes at 25 °C | The resin was mixed and poured within this time window before viscosity increased. |
| Curing time | Approximately 10 hours at 25 °C | The mold was kept level and undisturbed while the resin hardened. |
| Dry-to-handle time | Approximately 12 hours at 25 °C | Extra waiting time was considered before handling the piece more firmly. |
| Maximum application thickness | 4 cm | The face cavity was filled below the maximum thickness recommended on the label. |
| Expected finish | Transparent or translucent glossy solid | The final casting made it possible to inspect bubbles, surface marks and mold detail reproduction. |
| Recommended mixing method | Slow and continuous manual mixing | The spatula was moved slowly while scraping the cup walls and bottom to reduce unmixed zones. |
| Pouring method | Controlled pour from one side of the mold | The resin was poured gradually so it could flow through the cavity and reduce trapped air. |
| Personal protective equipment | Nitrile gloves, safety glasses and ventilated workspace | PPE was used during component handling, mixing, pouring and demolding preparation. |
| Main process risks | Incorrect ratio, bubbles, skin contact, contamination and incomplete curing | The process was controlled by measuring components, using clean cups and keeping the mold still during curing. |
| Storage and handling | Keep containers closed and avoid cross-contamination | Separate tools and disposable cups were used to prevent premature reaction between components. |
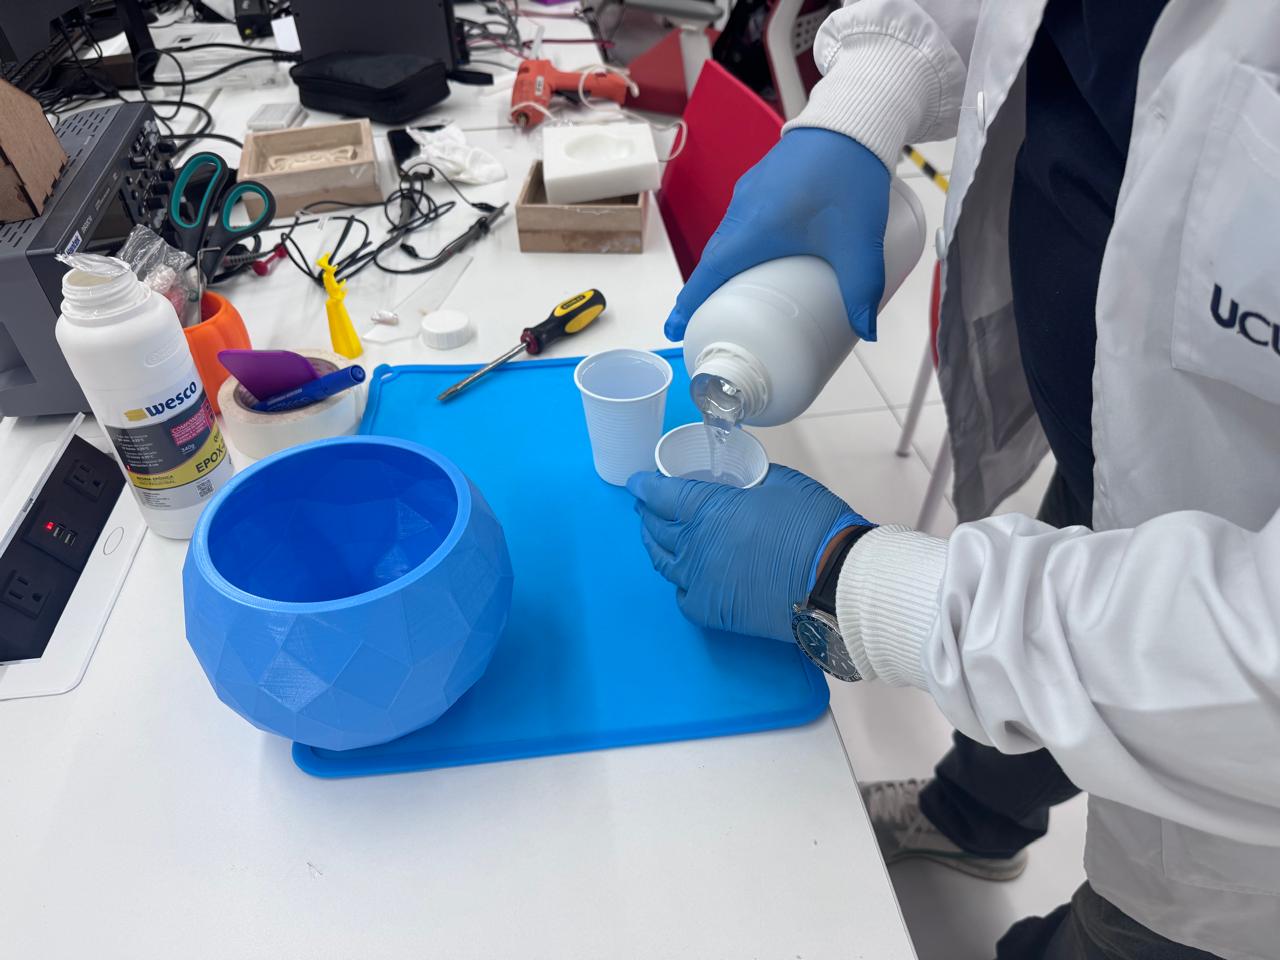
The first step was to estimate the amount of resin needed to fill the face cavity. After that, Component A was poured into a disposable cup and Component B was added following the 2:1 ratio by weight. This proportion was important because an incorrect mixture can leave the piece soft, sticky, or incompletely cured.
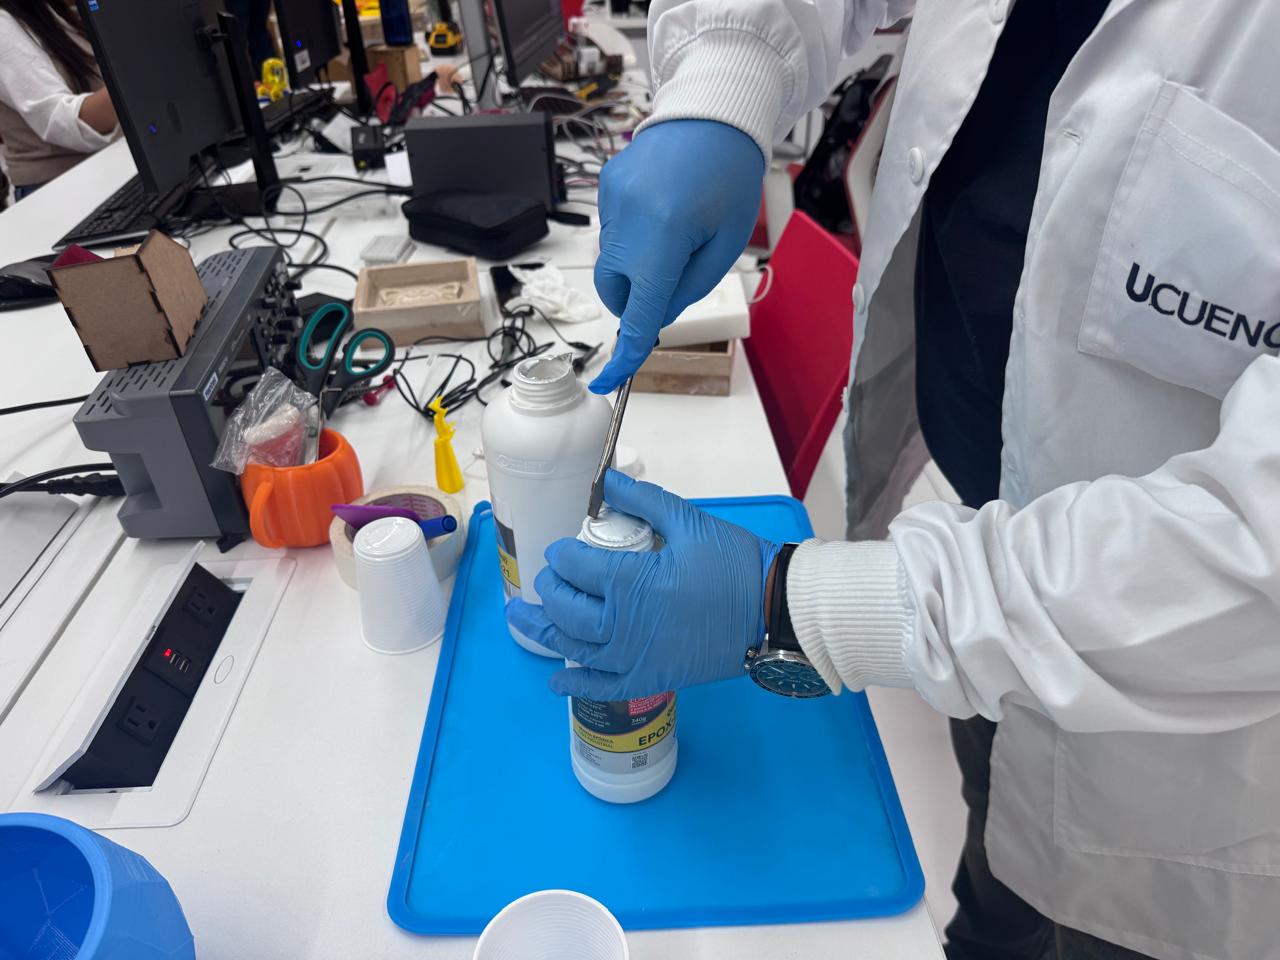
The two components were mixed slowly with a spatula. I scraped the sides and bottom of the cup to make sure both liquids were fully combined. The movement was kept slow and continuous because fast stirring introduces many air bubbles. Once the mixture looked uniform, it was poured carefully into the mold from one side, allowing the resin to flow across the cavity instead of trapping air inside the face details.
After pouring, the mold was kept level and was not moved during curing. The resin was left to cure for approximately 10 hours at 25 °C. After this curing period, the piece was demolded carefully from the flexible mold. A longer resting time was useful before final handling because the surface continued stabilizing after the first cure.
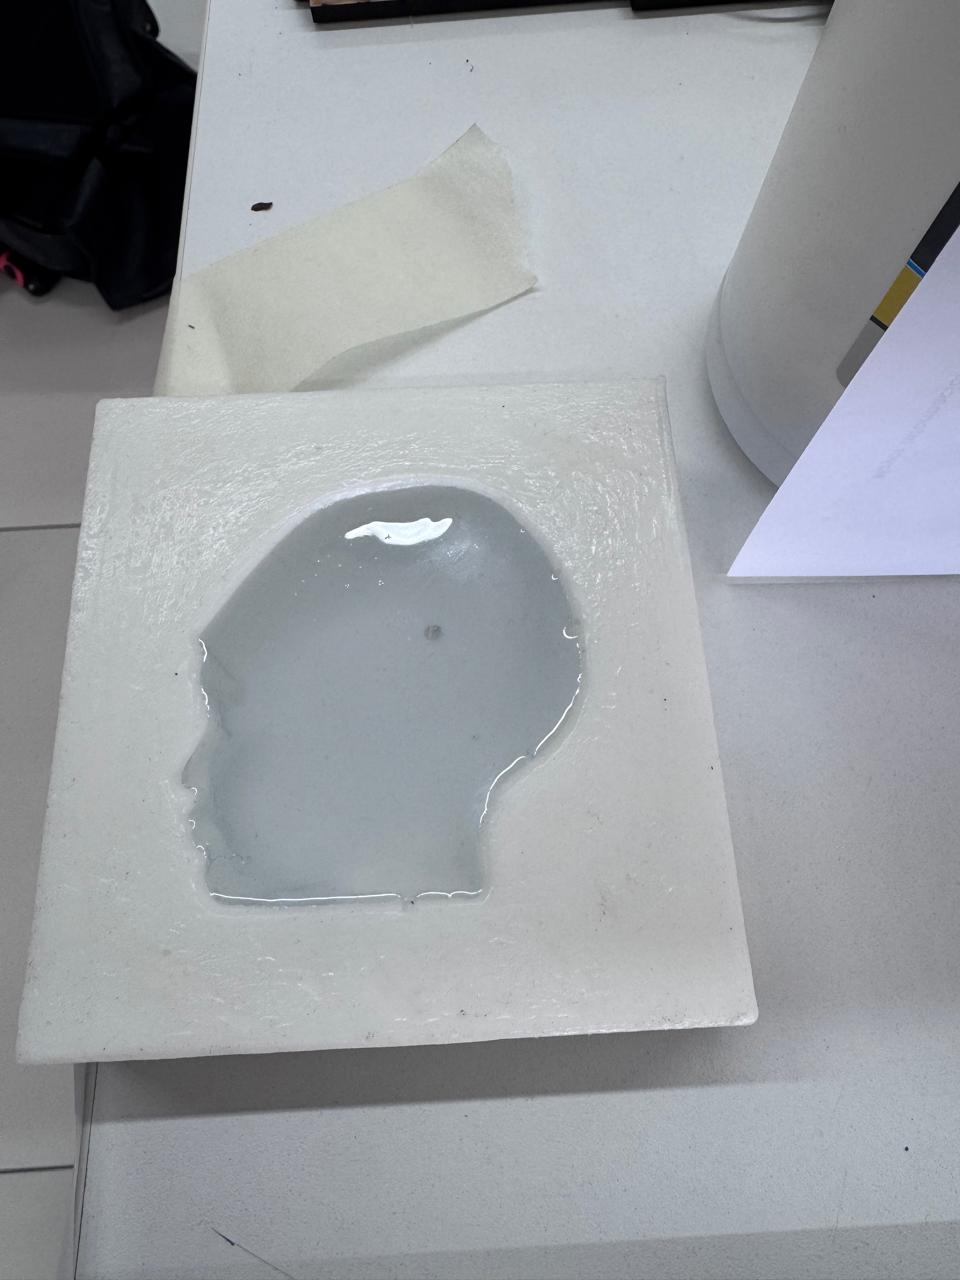

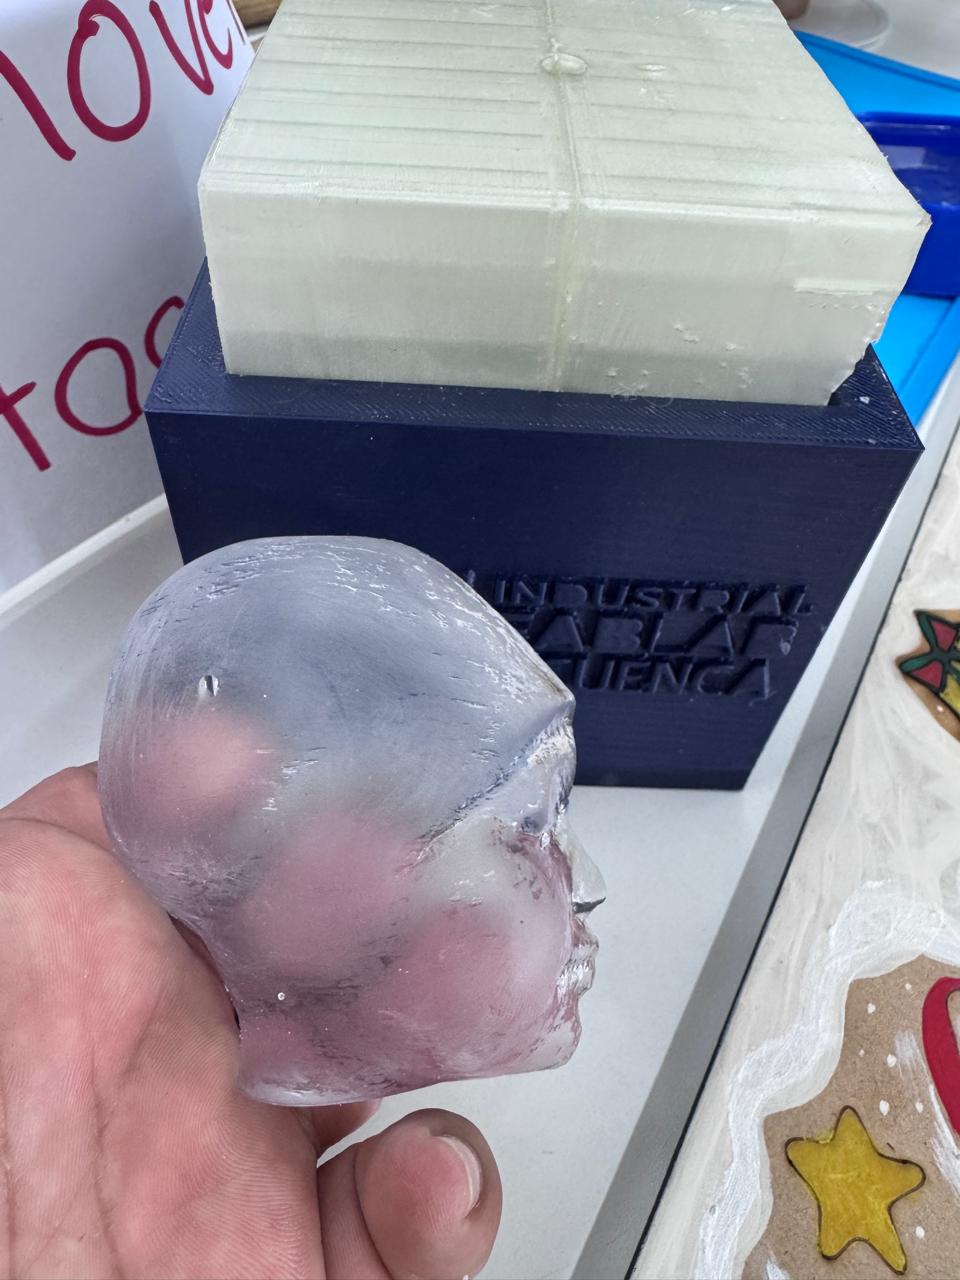
The final cast had a translucent and glossy appearance. The face profile was reproduced correctly, and the transparent material made it easy to inspect the internal volume of the casting. Some small bubbles and surface marks were visible, especially in the curved areas of the head and near the facial profile. These marks show how sensitive epoxy casting is to mixing speed, pouring direction, and mold surface quality.
For a future iteration, the finish could be improved by mixing more slowly, letting the resin rest briefly before pouring, vibrating the mold gently to release trapped air, or using a vacuum chamber if available. Even with these imperfections, the result was useful because it confirmed that the mold can reproduce the scanned geometry using a rigid, transparent casting material.

This molding and casting project demonstrated how digital fabrication tools can be used to transform a real human face into a physical object. The process started with face scanning, continued with model correction and mold design in Blender, and ended with 3D printing and casting.
The use of different materials such as TPU, PLA, resin, candle wax, and paraffin allowed comparison between flexible molds, rigid containers, resin molds, and casting materials. This experience helped to understand the importance of material selection, mold design, surface finish, printer configuration, and safety protocols.