Week 14 - Molding and Casting
Face Scanning, Mold Design, 3D Printing and Casting Process
Personal Contributions
| Name | University | Activities carried out |
|---|---|---|
| Rodrigo Guamán | Universidad de Cuenca |
|
| Jenny Rojas | Universidad de Cuenca |
|
| Diego Zhindón | Universidad Politécnica Salesiana |
|
Group Assignment
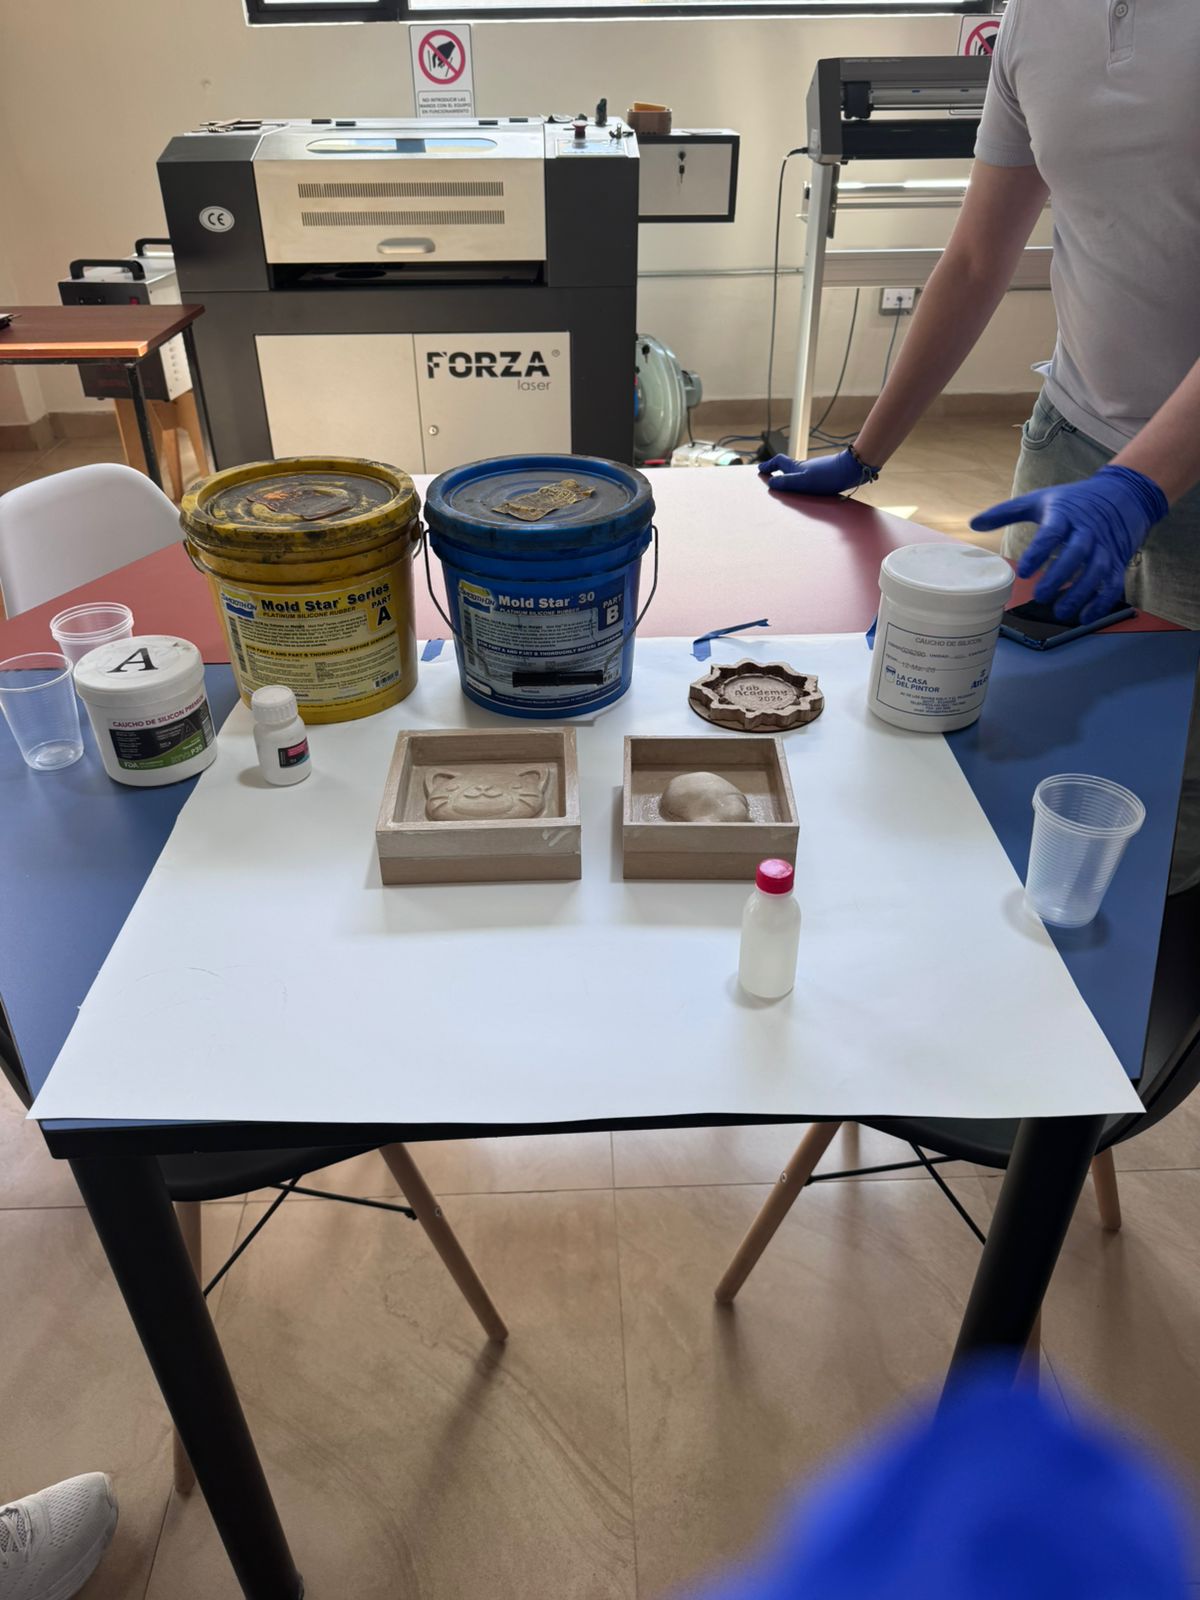
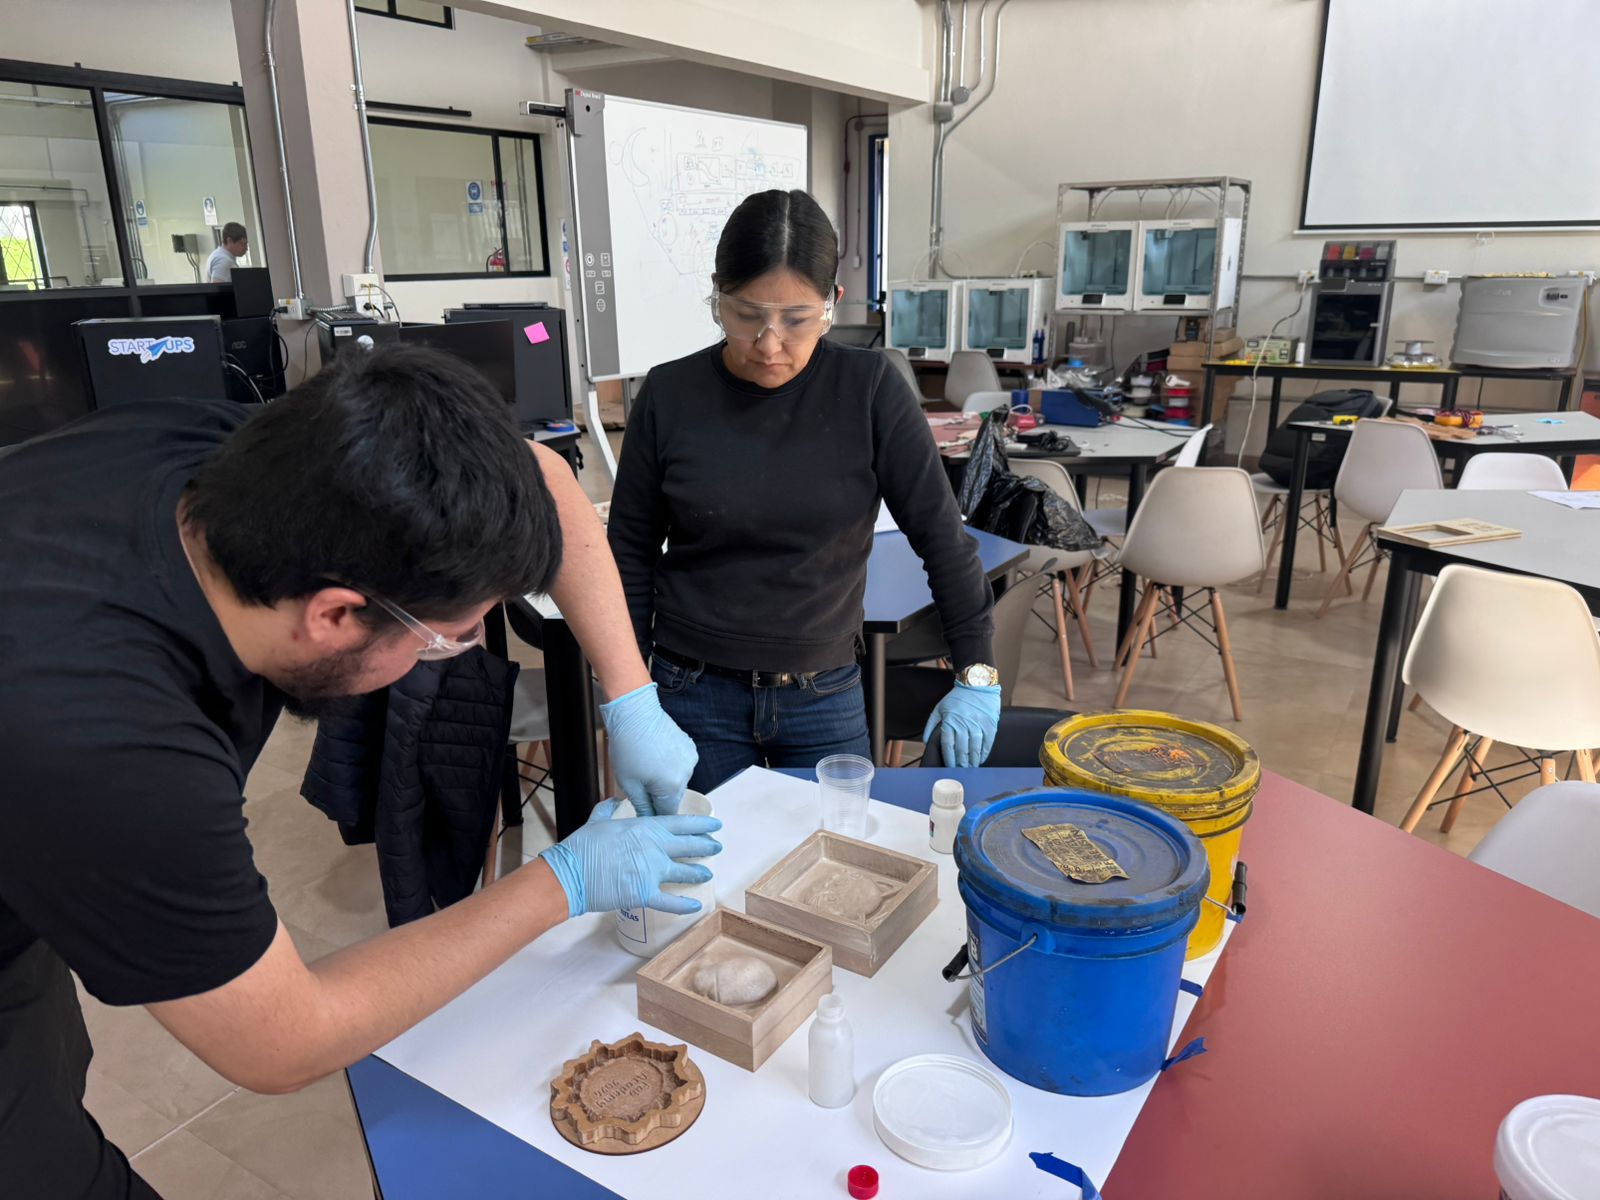
The group assignment focused on safety, material behavior, and process comparison for molding and casting. As a team we reviewed the available safety information for each material, made small test casts, and compared three mold-making technologies: CNC milling, TPU 3D printing, and resin 3D printing.
Group Assignment Requirements
- Review the safety data sheets for each molding and casting material.
- Make and compare test casts with each material.
- Compare printing molds versus milling molds.

Safety Data Sheet Review
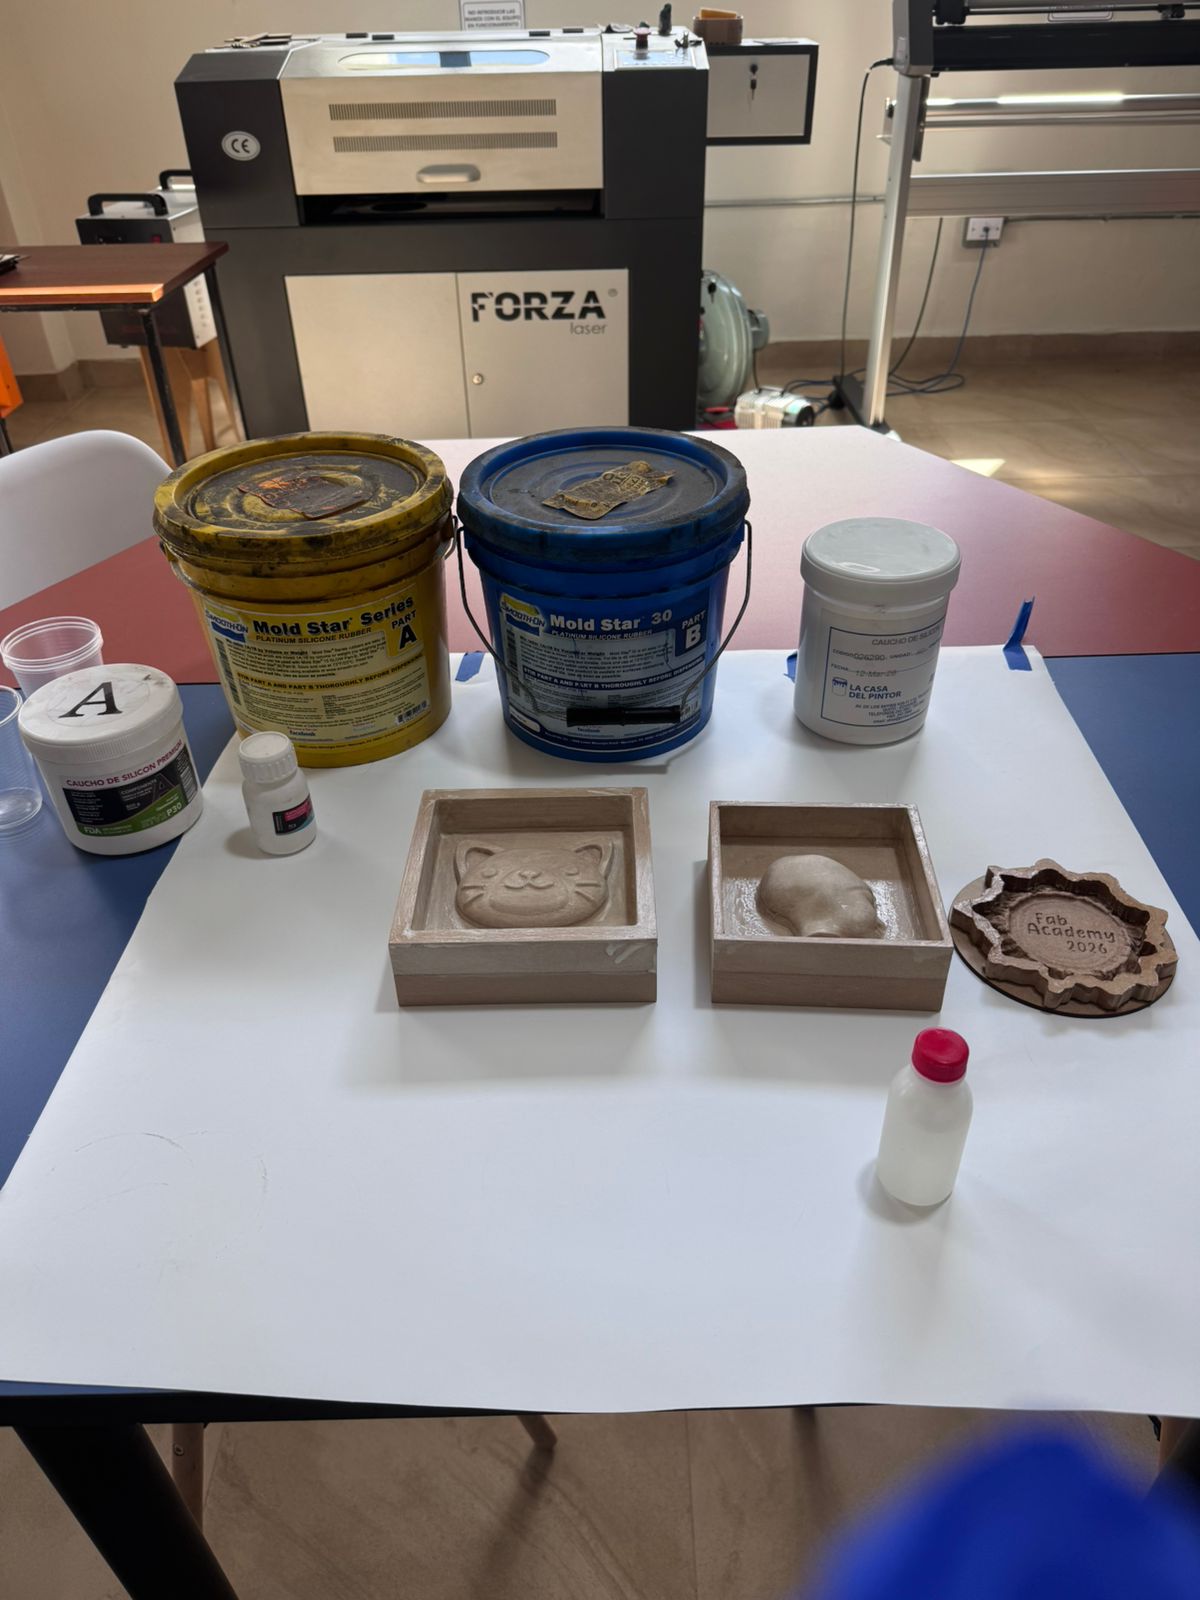
Before mixing or casting, the team reviewed the information available on the containers, labels, technical data, and product safety notes. The review focused on contact risk, ventilation, dust, heat, curing time, chemical residues, and safe disposal. The safest workflow depends on both the material and the technology used to make the mold.
| Material | Main Risks | Safety Conditions |
|---|---|---|
| TPU filament | Hot nozzle, hot bed, and fumes during printing. | Use the printer in a ventilated area, avoid touching hot parts, and wait before removing parts. |
| PLA filament | Hot surfaces and minor fumes during printing. | Use normal 3D printer safety procedures and keep the work area clear. |
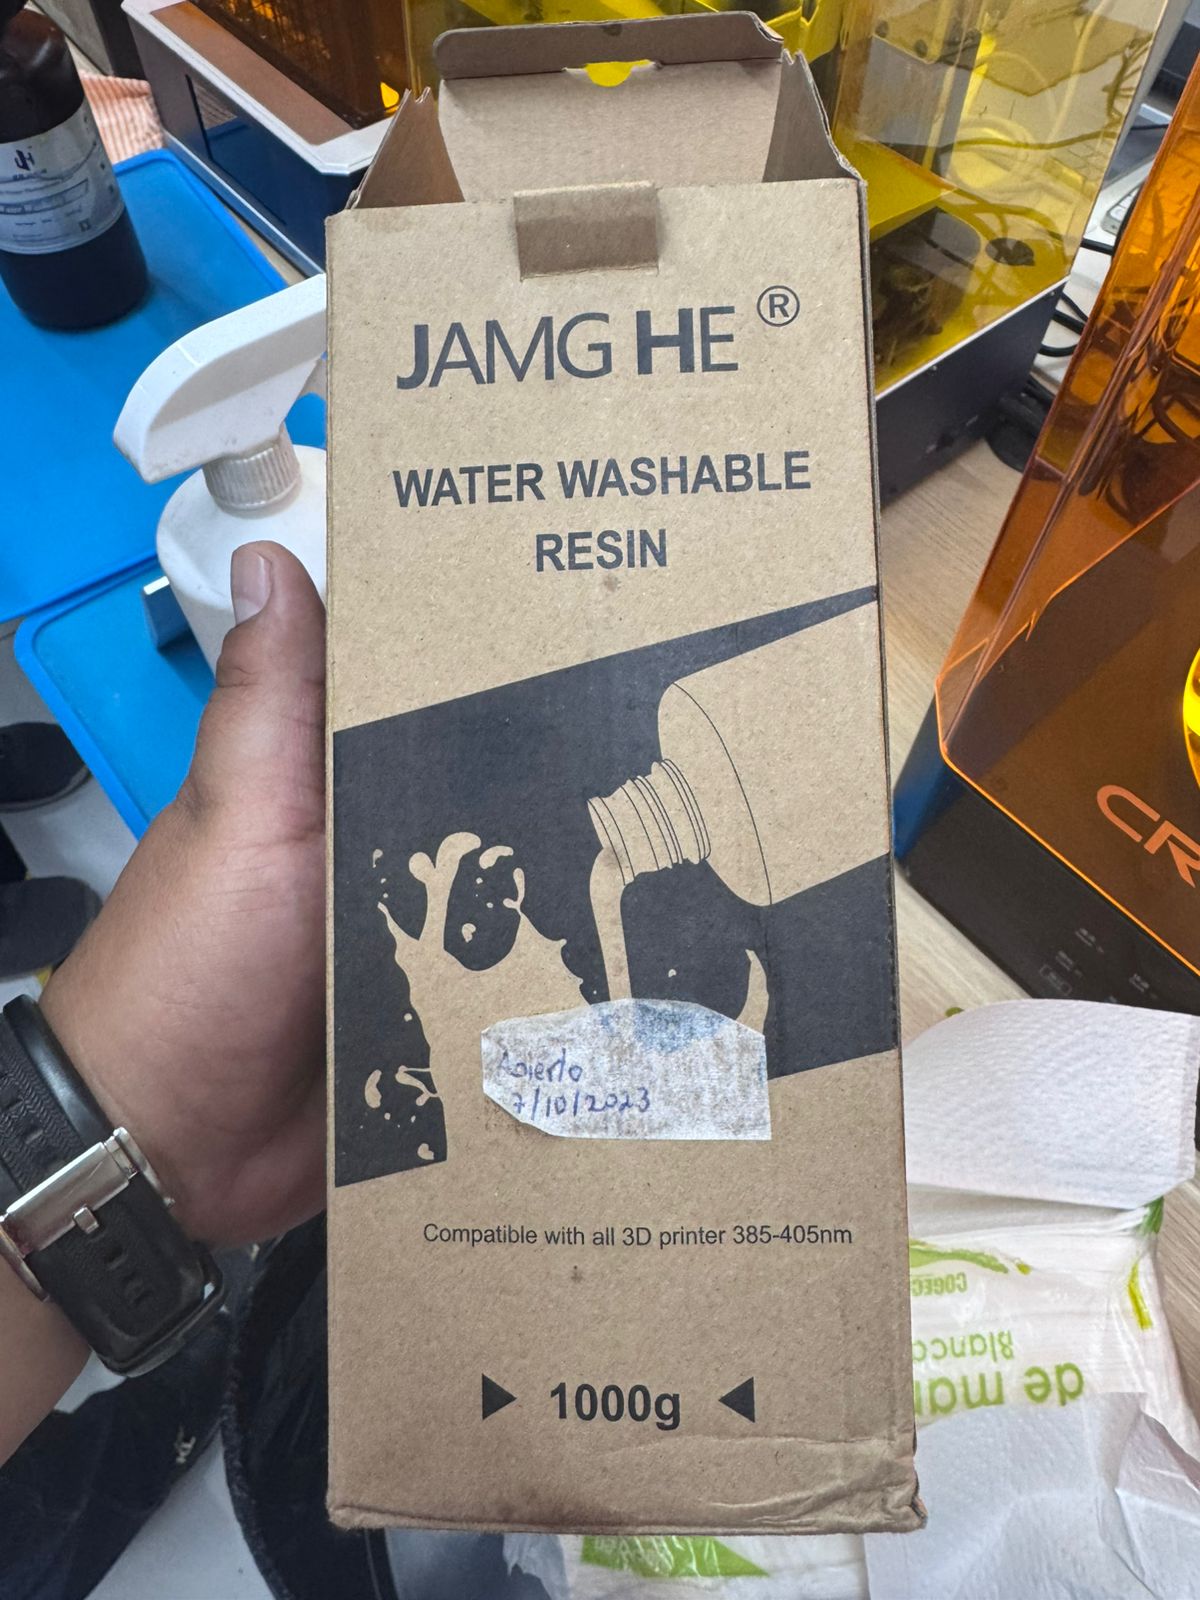
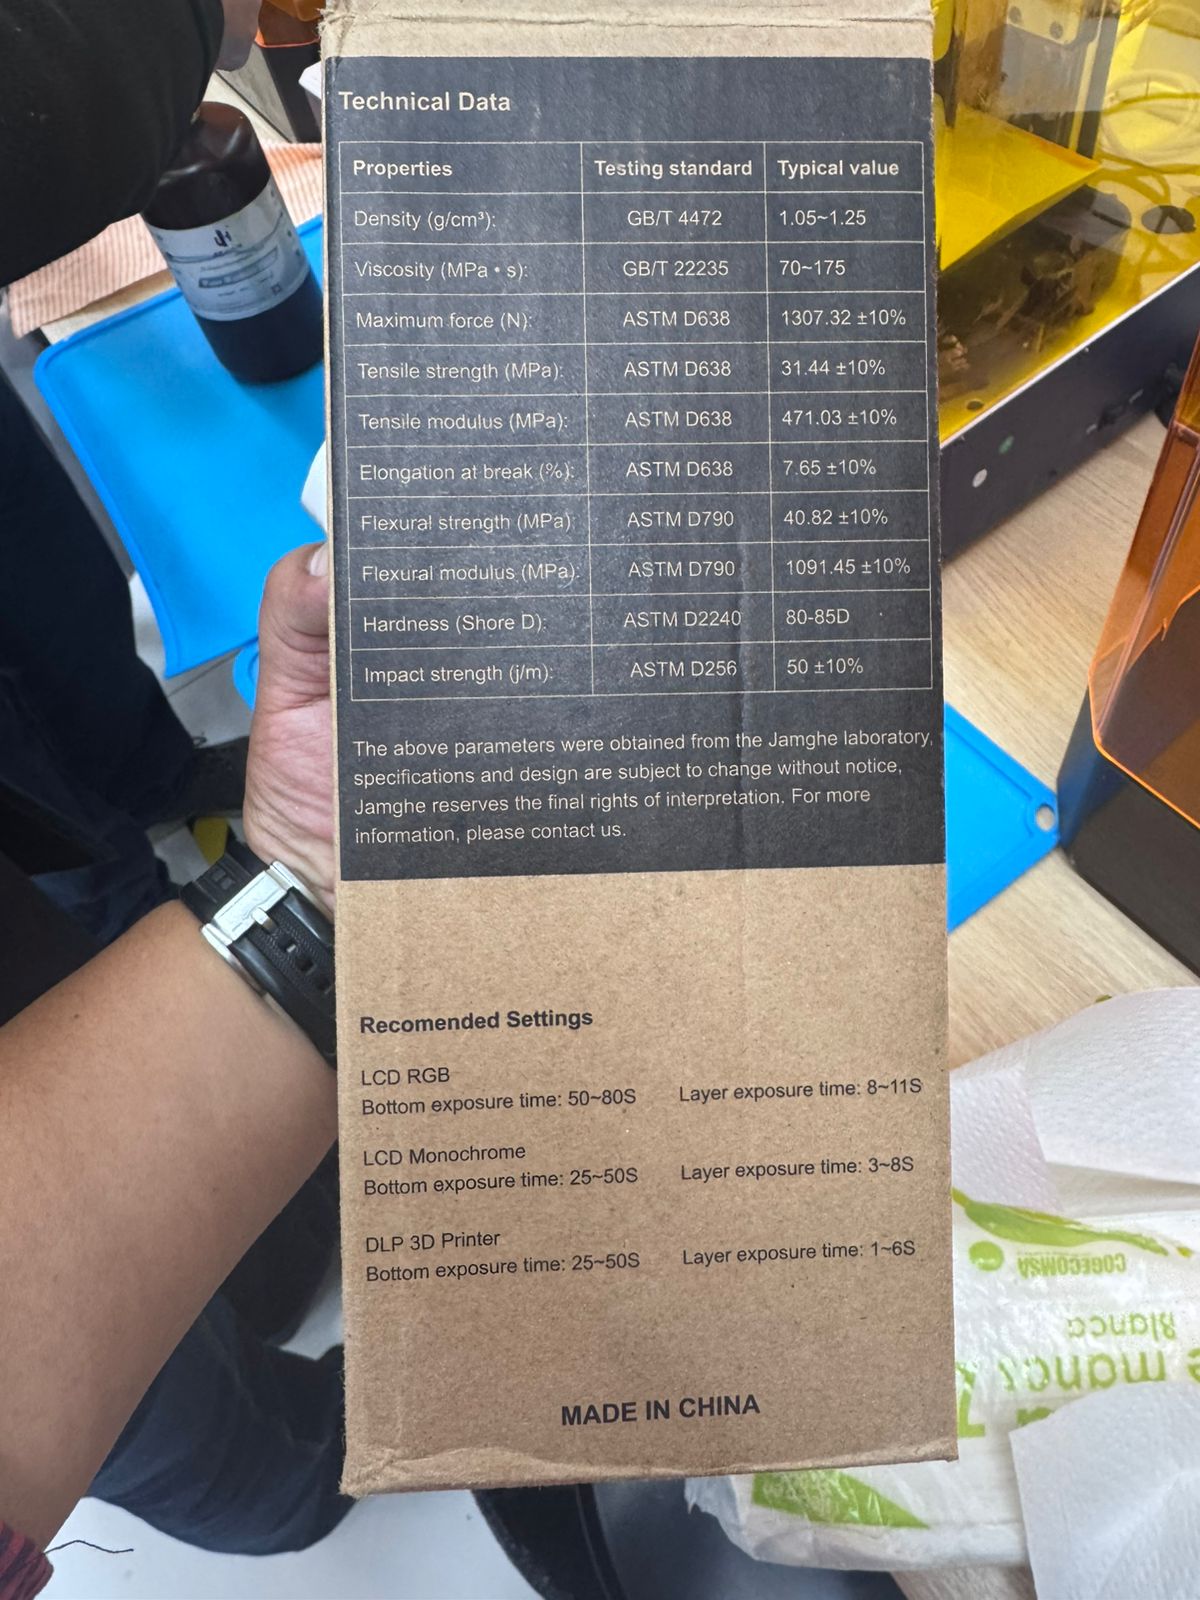
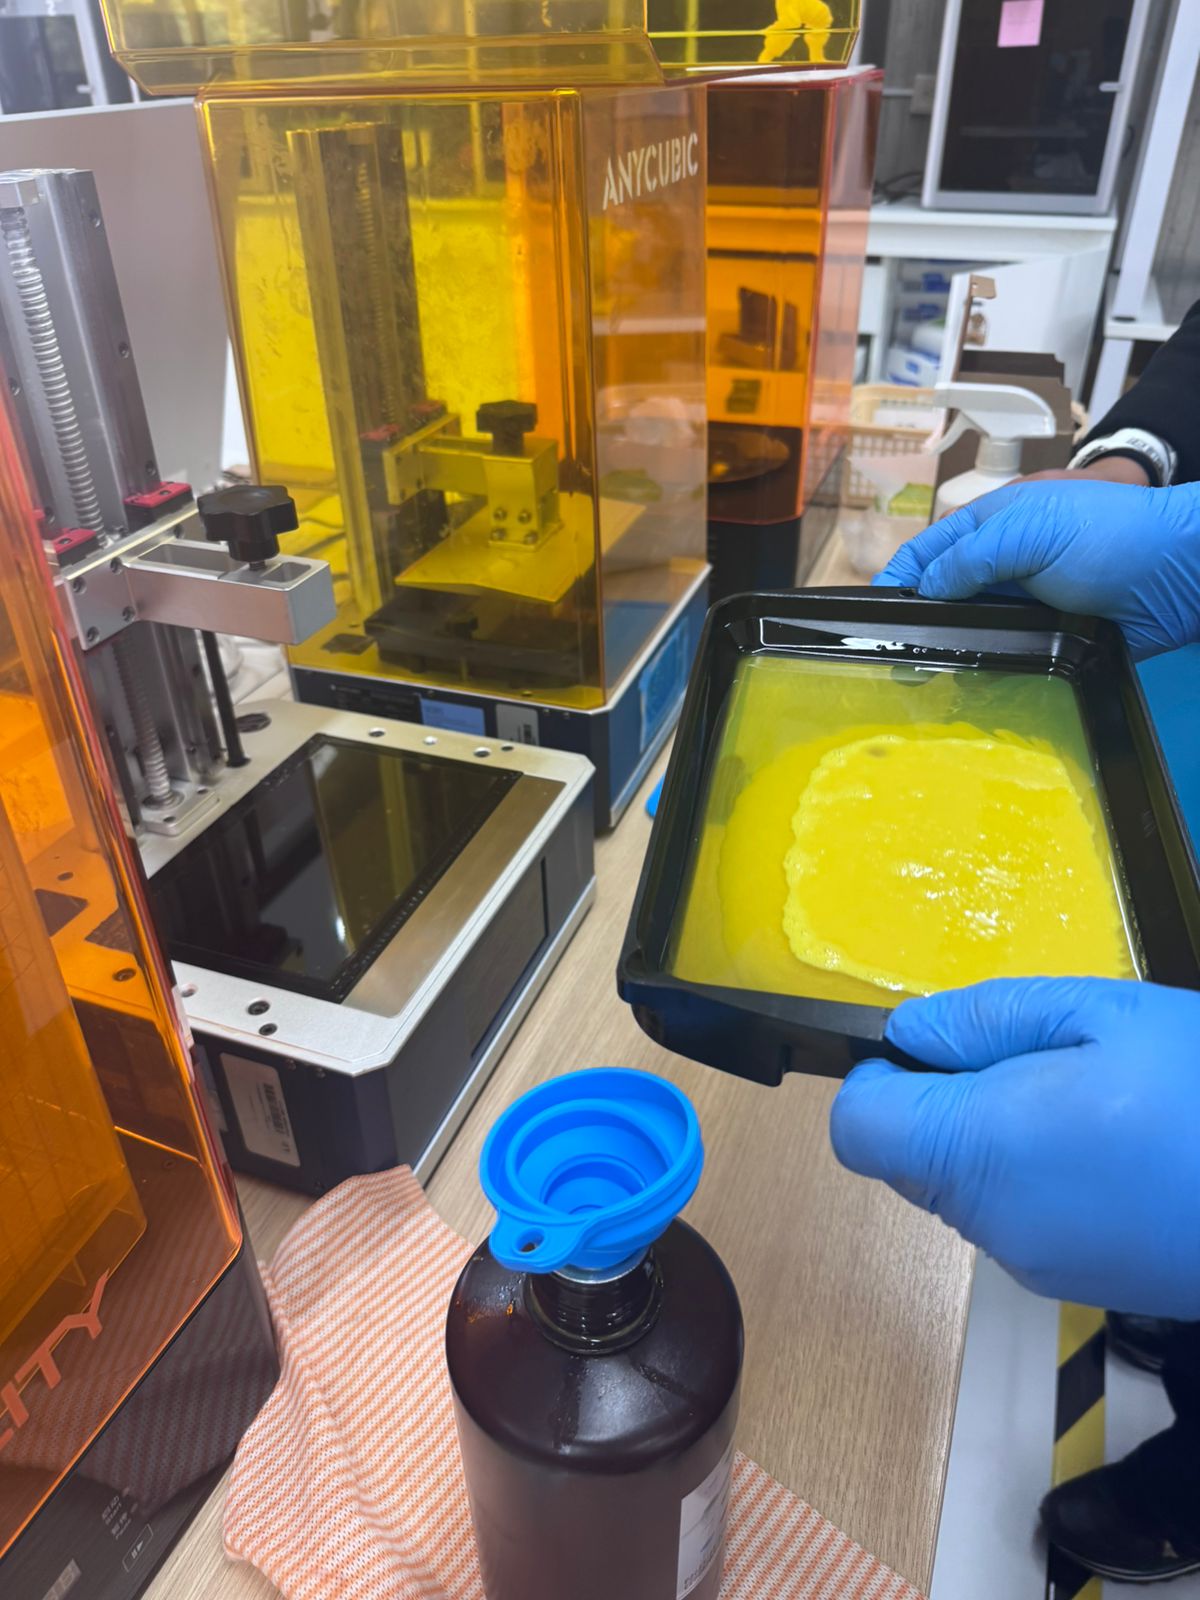
| Photopolymer resin | Skin irritation, eye irritation, odor, uncured chemical residue, and UV exposure during curing. | Use nitrile gloves, eye protection, ventilation, covered resin handling, washing, UV post-curing, and no direct skin contact. |
| Candle wax / paraffin | Burns from melted material and fire risk if overheated. | Heat slowly, avoid open flame, use thermal gloves, and pour carefully. |
| Plaster | Dust inhalation during mixing and heat during curing. | Use a mask when mixing powder, avoid breathing dust, and clean spills immediately. |
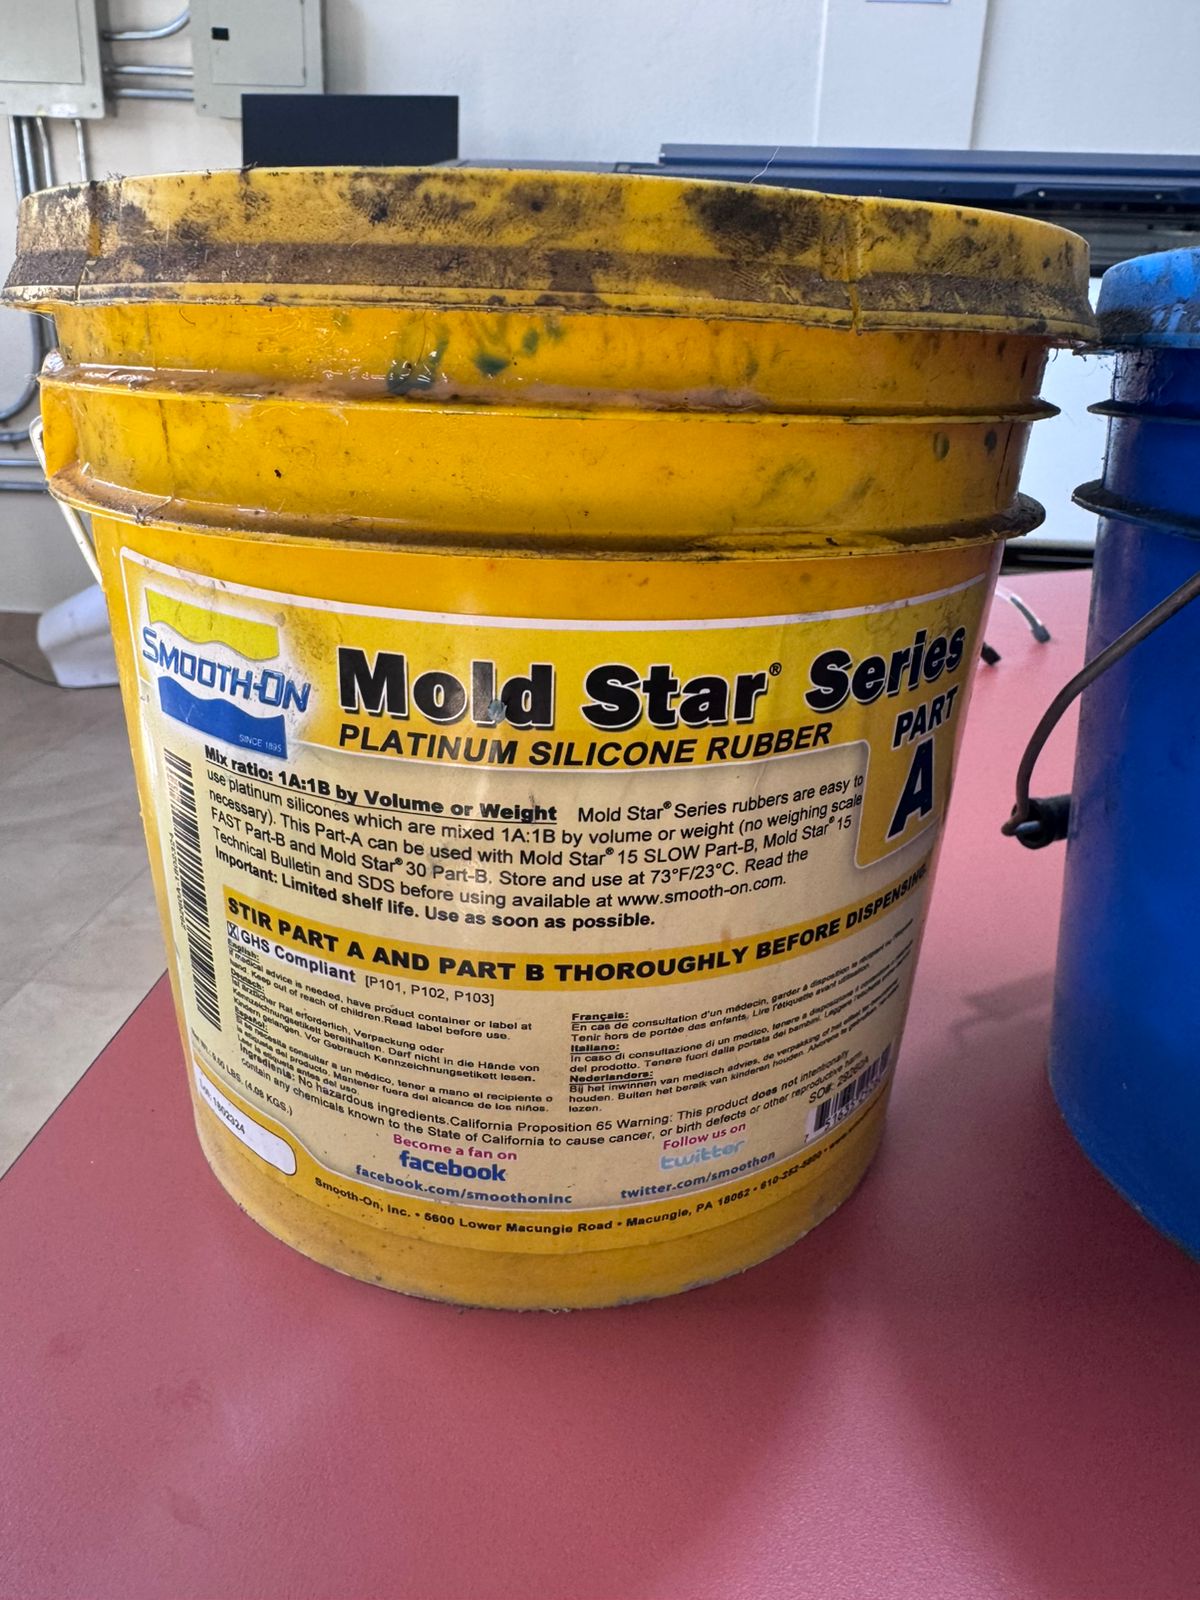
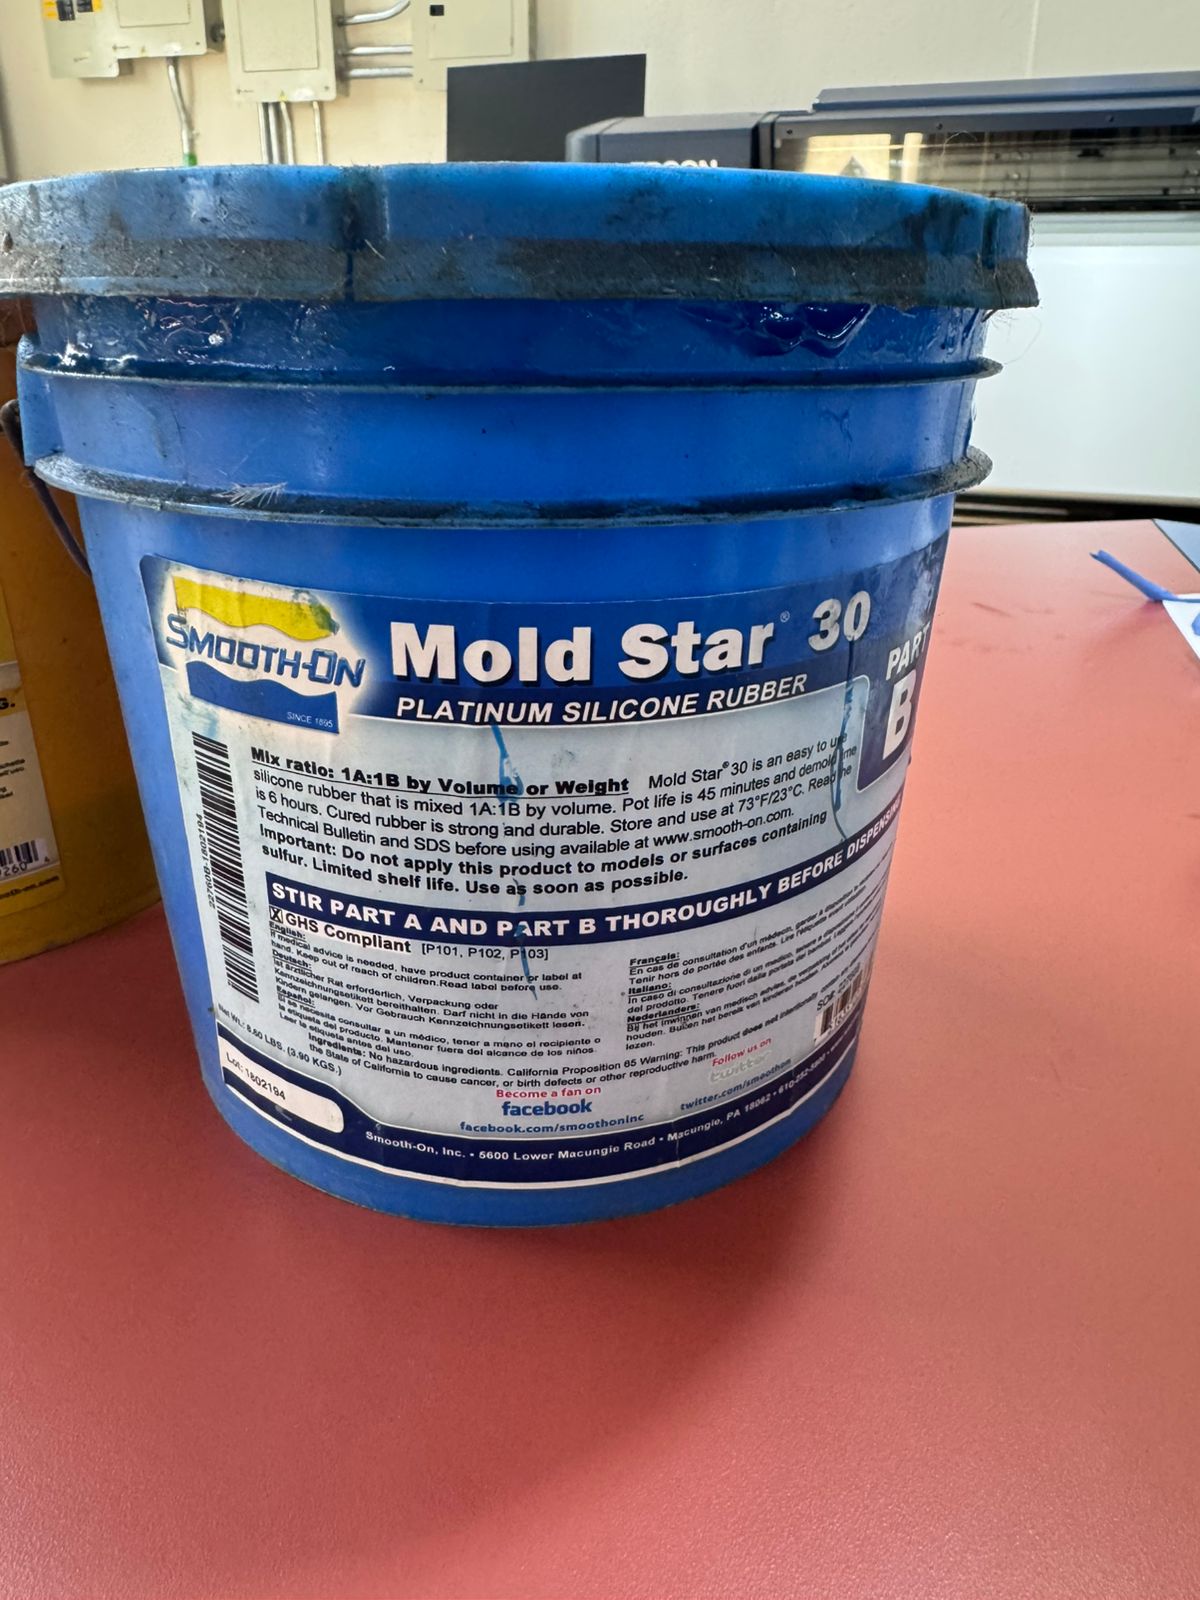
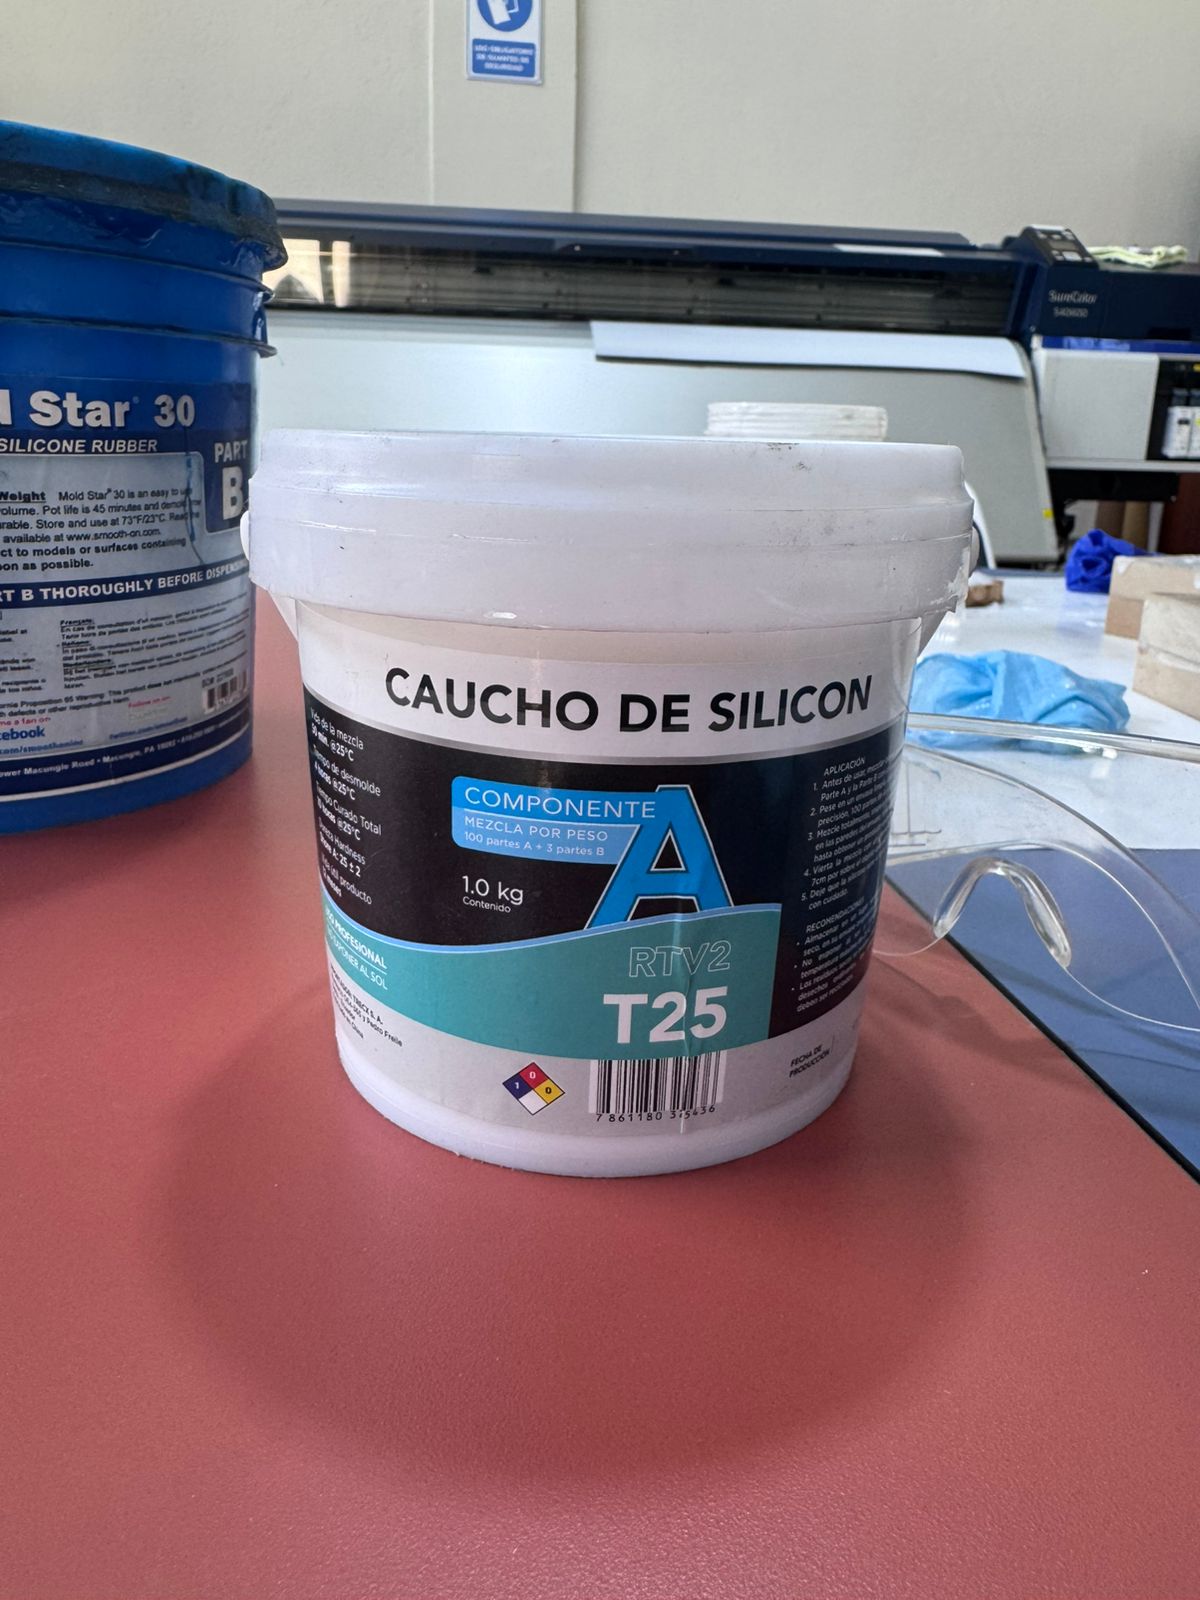
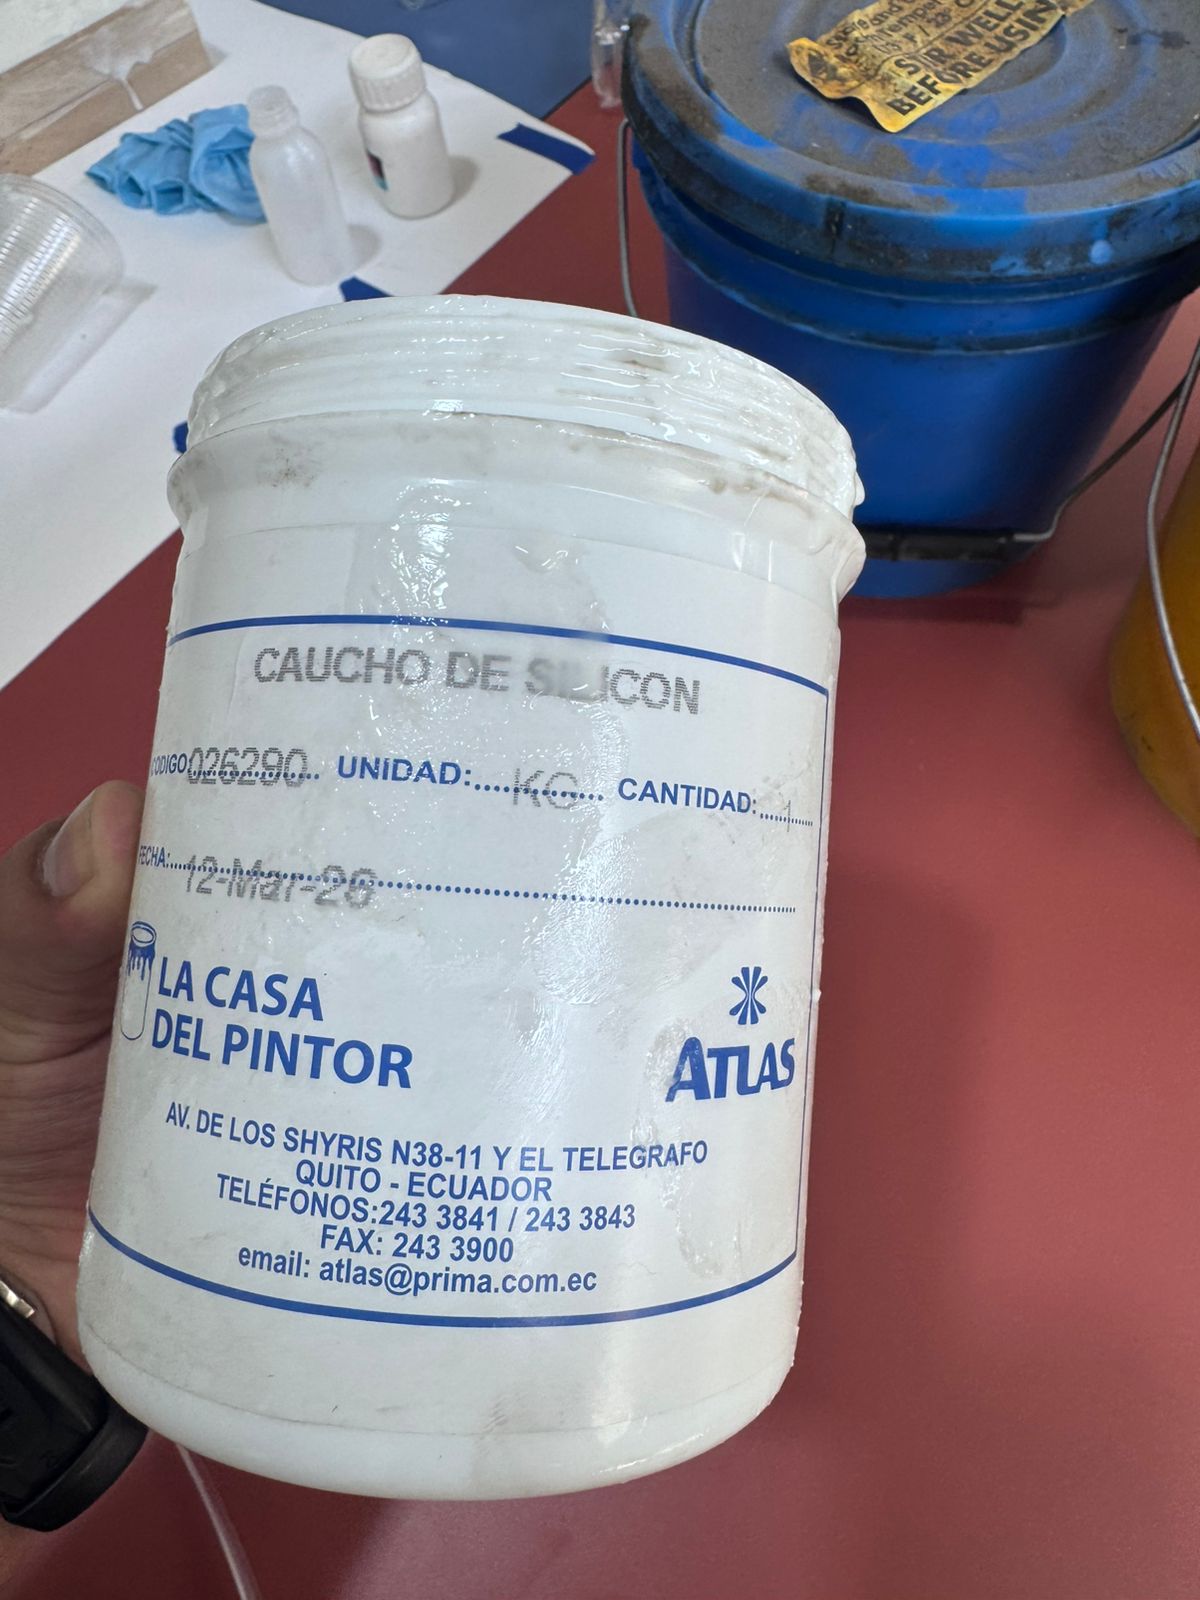
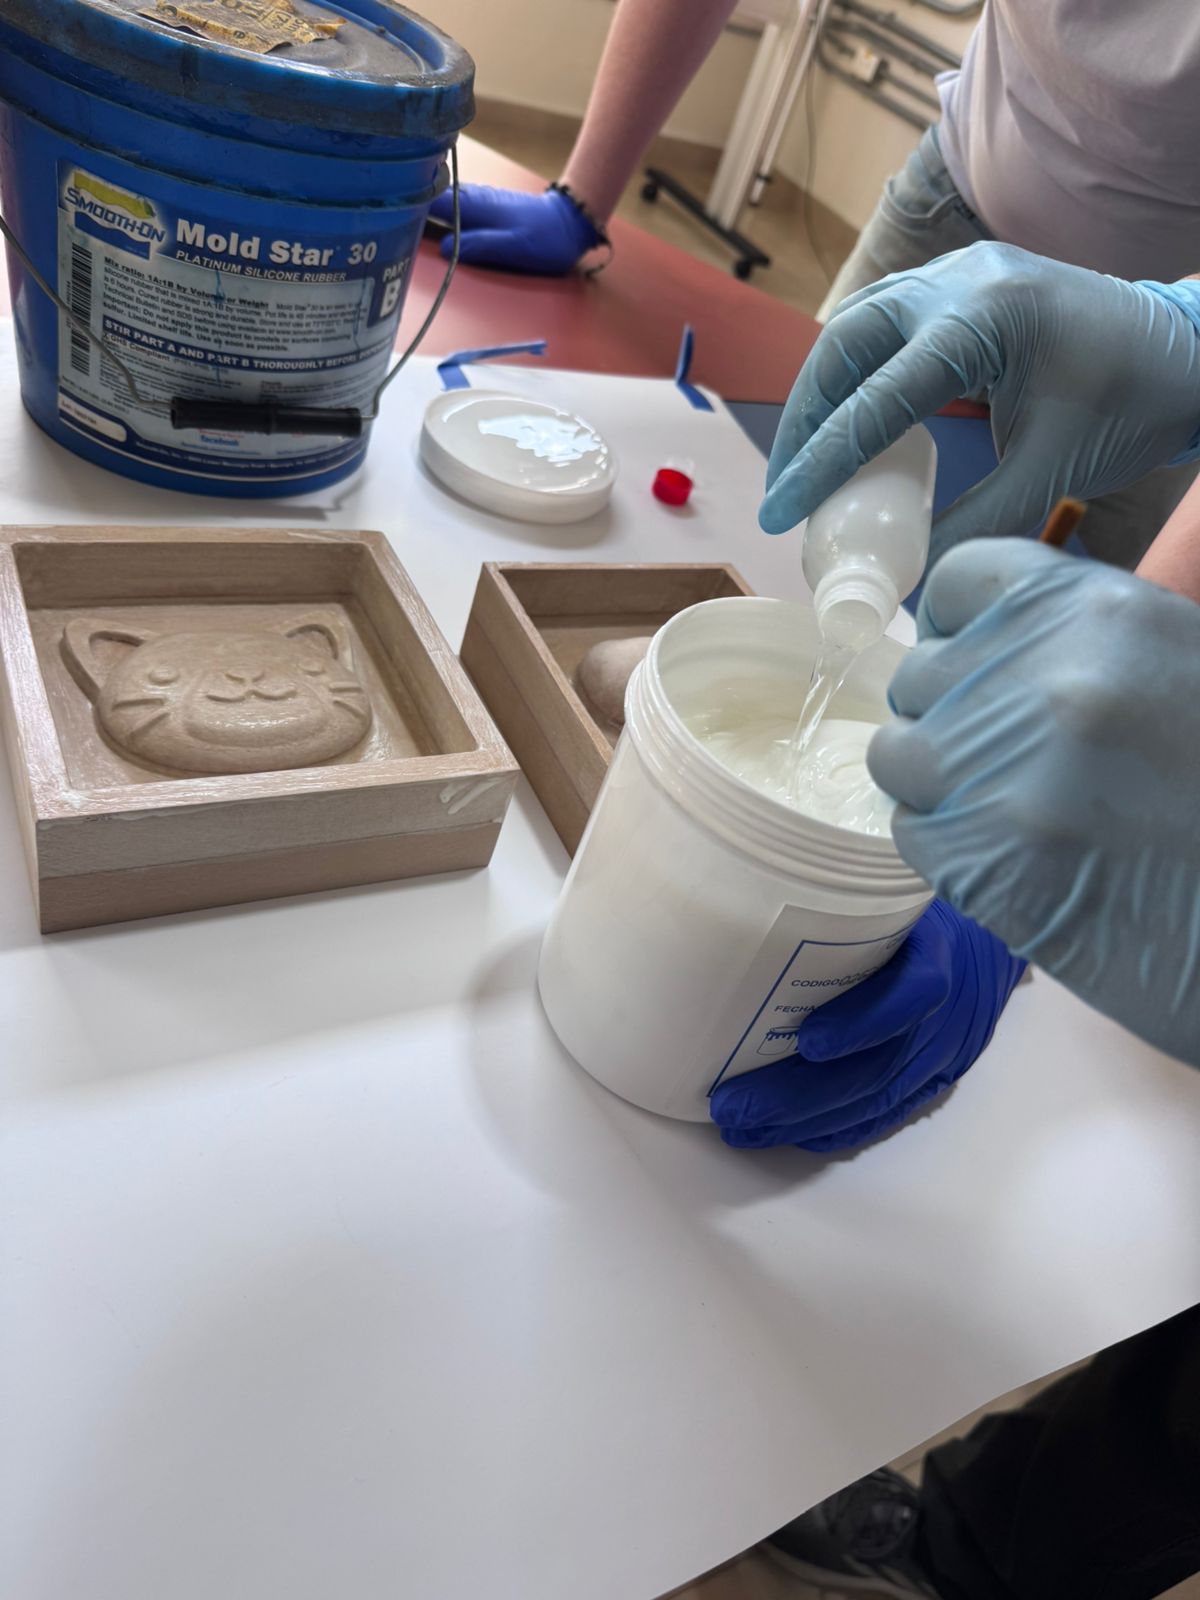
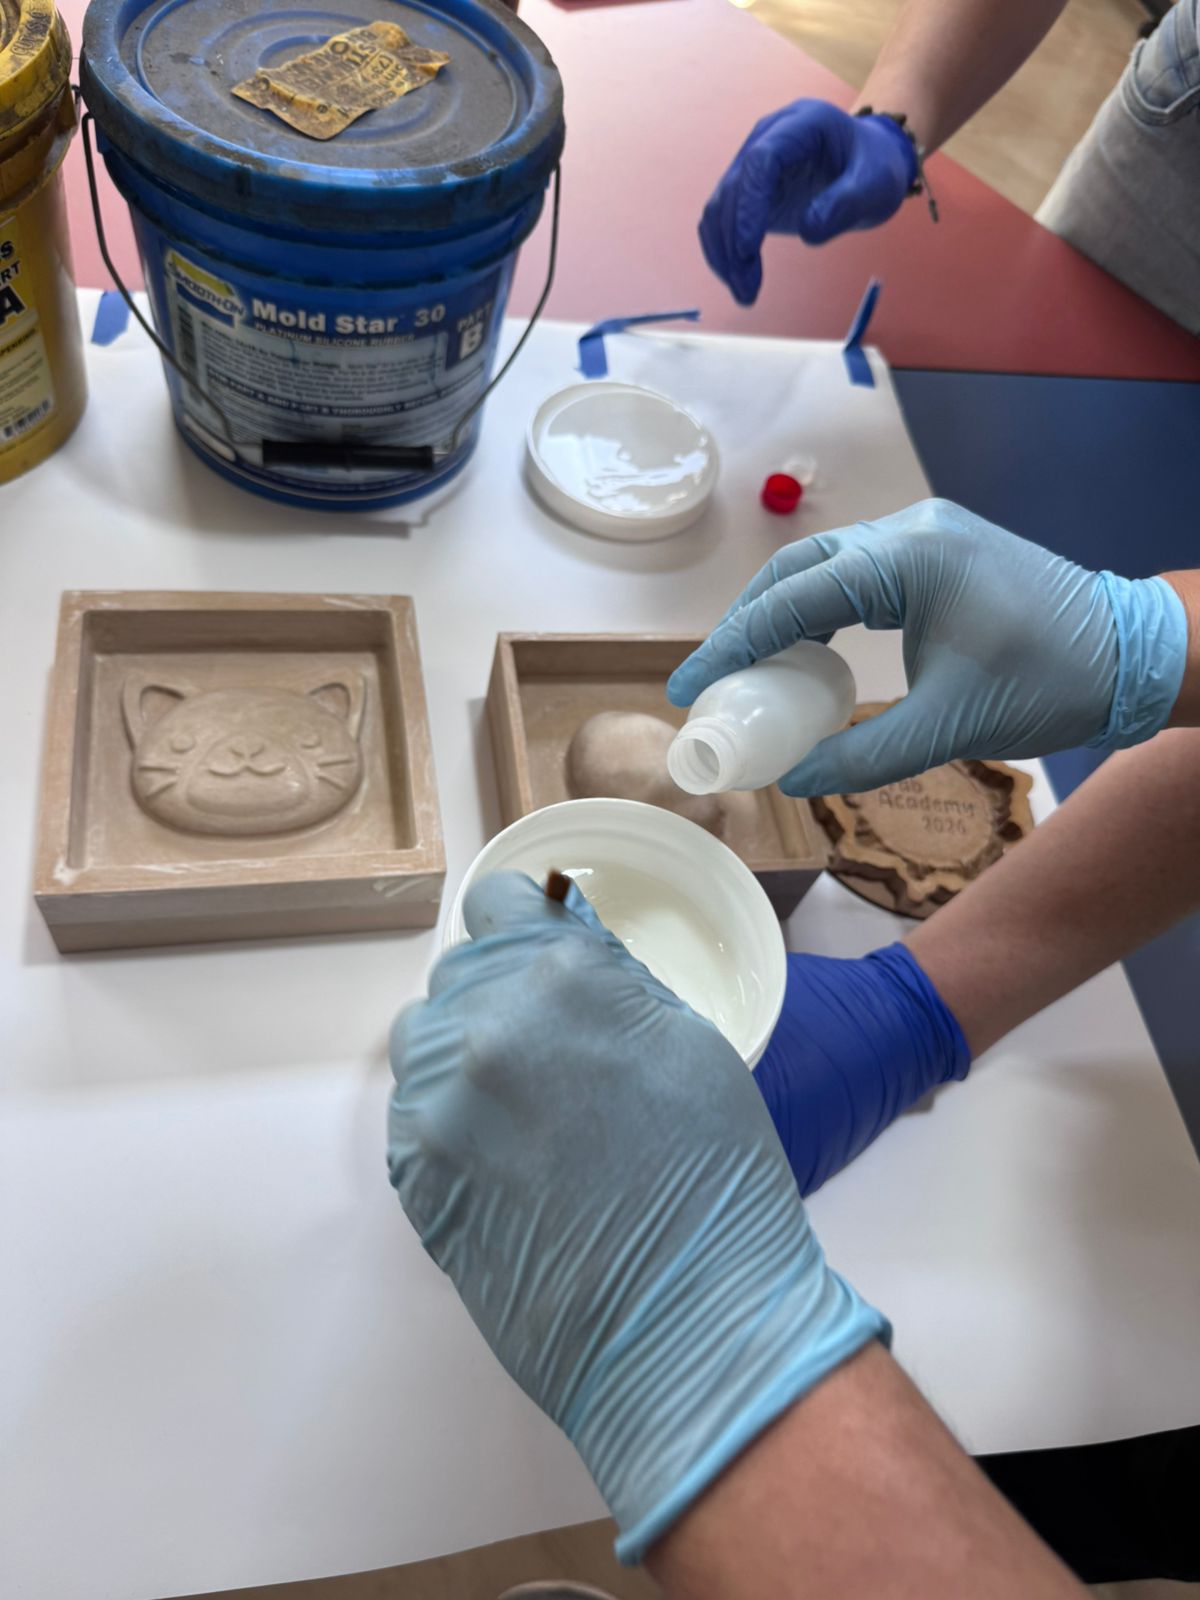
| Silicone rubber | Skin contact with uncured silicone, catalyst exposure, contamination, and incomplete curing if mixed incorrectly. | Use gloves, safety glasses, clean cups, accurate ratios, ventilation, and respect pot life and curing time. |
| MDF for CNC milling | Fine dust, machine movement, cutting tools, and noise. | Use dust extraction, mask, eye protection, hearing protection, and keep hands away from the toolpath. |
Material Safety Evidence
Test Cast Comparison
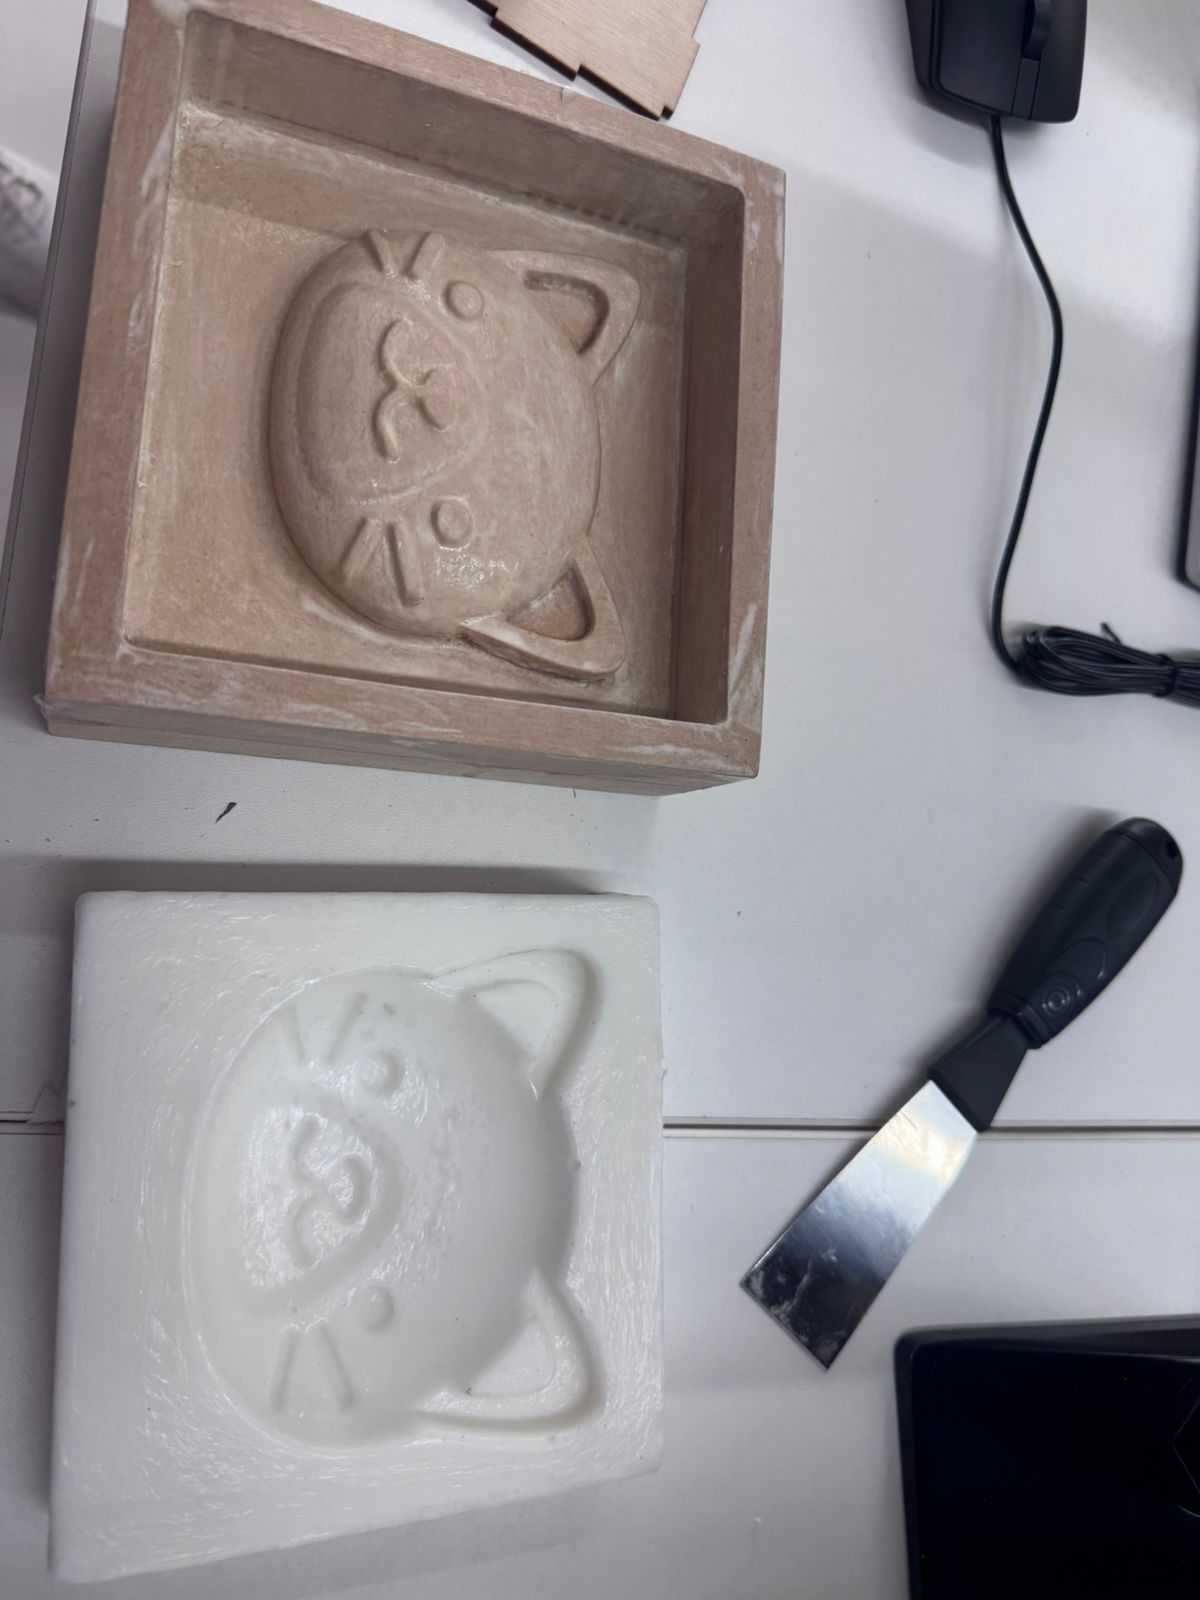
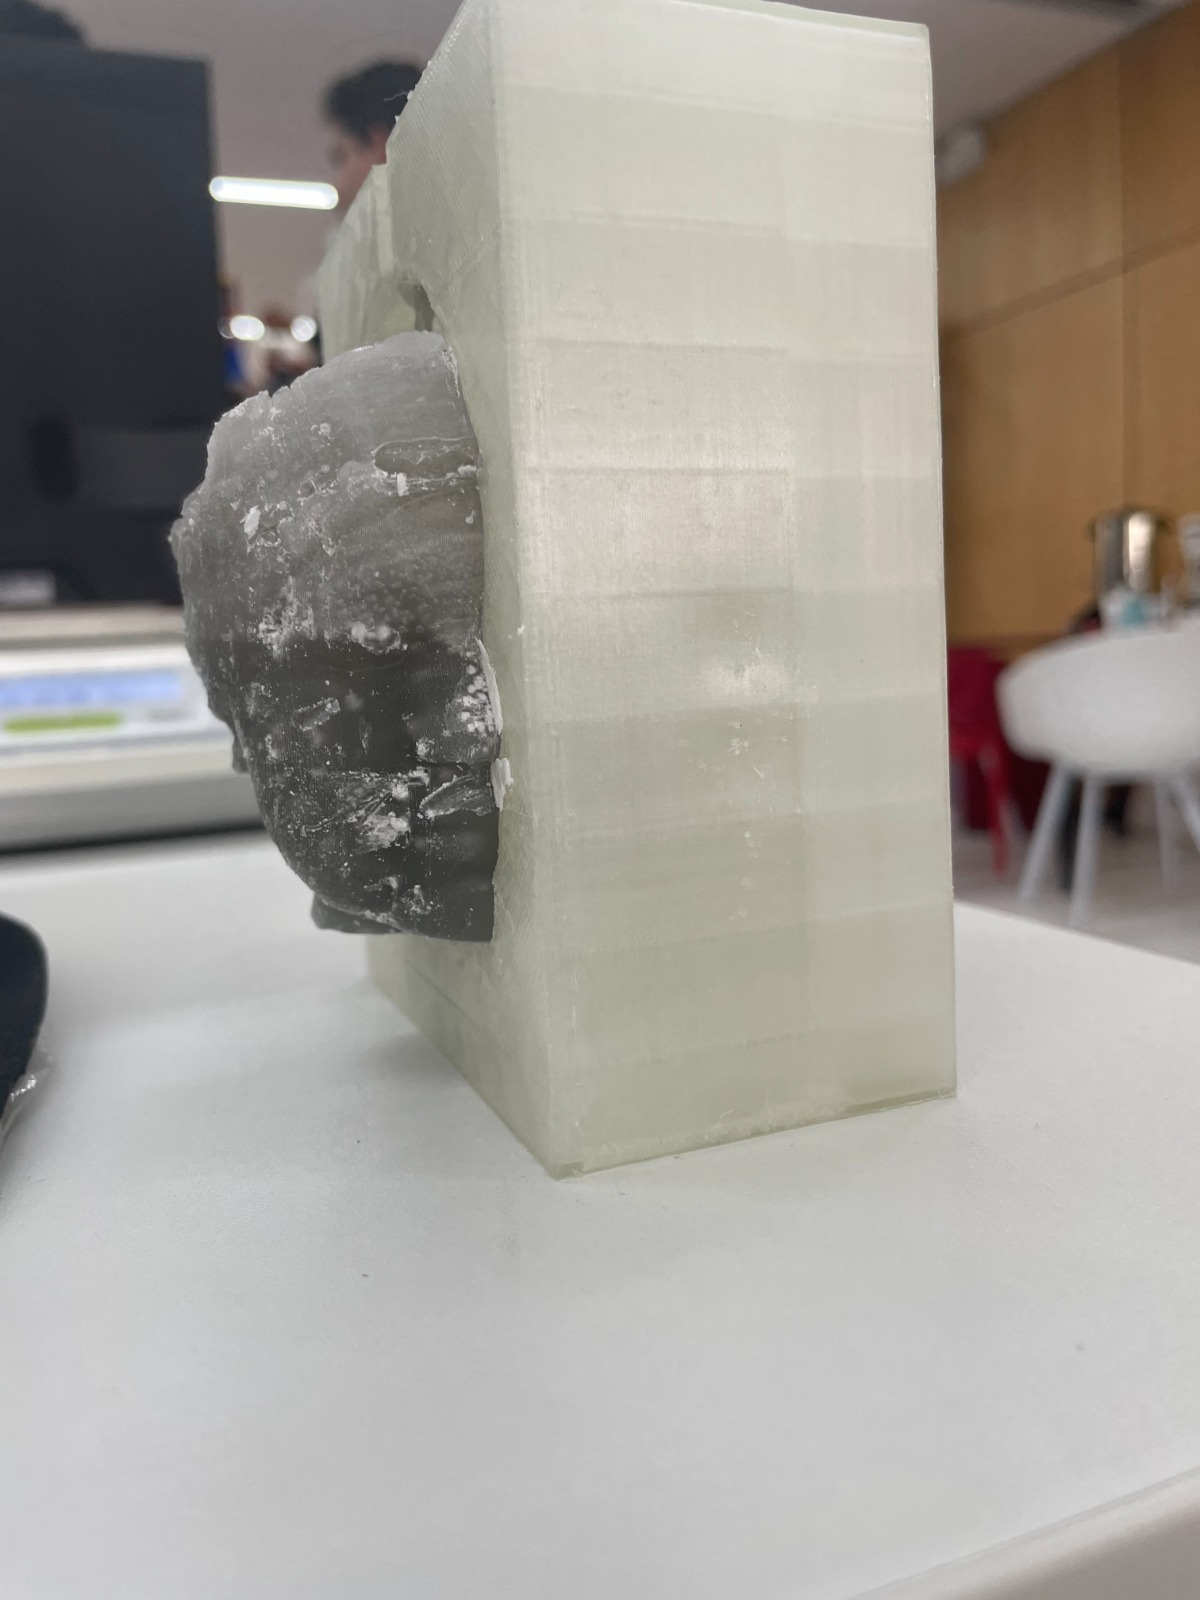
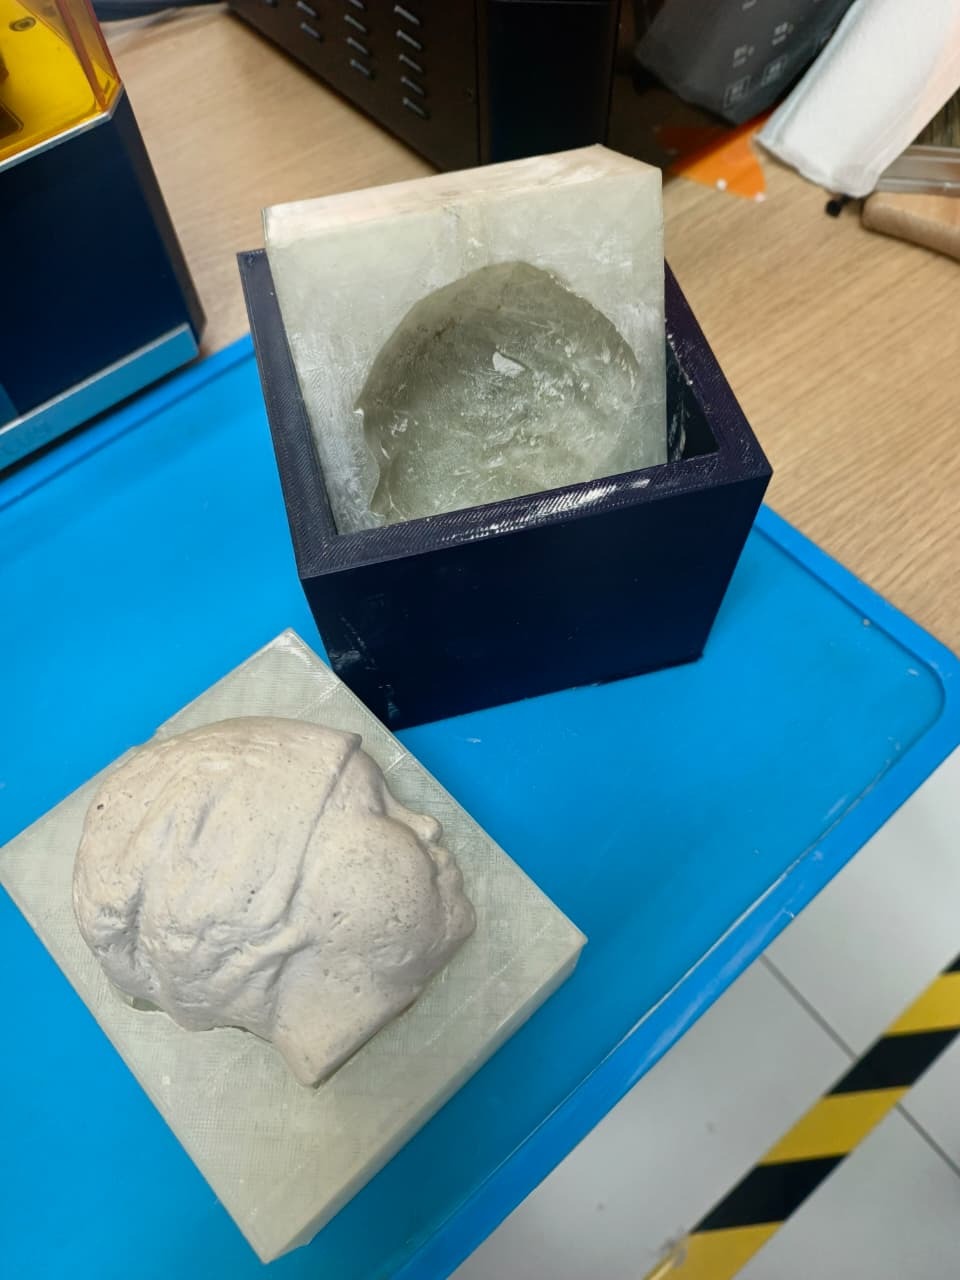
Different casting materials were tested to compare handling, surface finish, demolding, detail reproduction, and safety requirements. The same face geometry helped compare how each material reacted with different mold fabrication technologies.
| Test Cast | Behavior | Result |
|---|---|---|
| Wax / paraffin | Easy to melt and pour, but requires heat control. | Useful for quick tests and visual validation of the face shape. |
| Plaster | Easy to mix, captures details, and cures into a rigid piece. | Good low-cost option, but powder handling requires respiratory protection. |
| Silicone rubber | Flexible after curing, reusable, and useful for demolding complex shapes. | Best option for a reusable flexible negative mold from the CNC master, but sensitive to mixing ratio. |
| Resin printed mold | High detail and smooth surface, but needs chemical safety controls. | Best surface definition, with stricter PPE and post-curing requirements. |
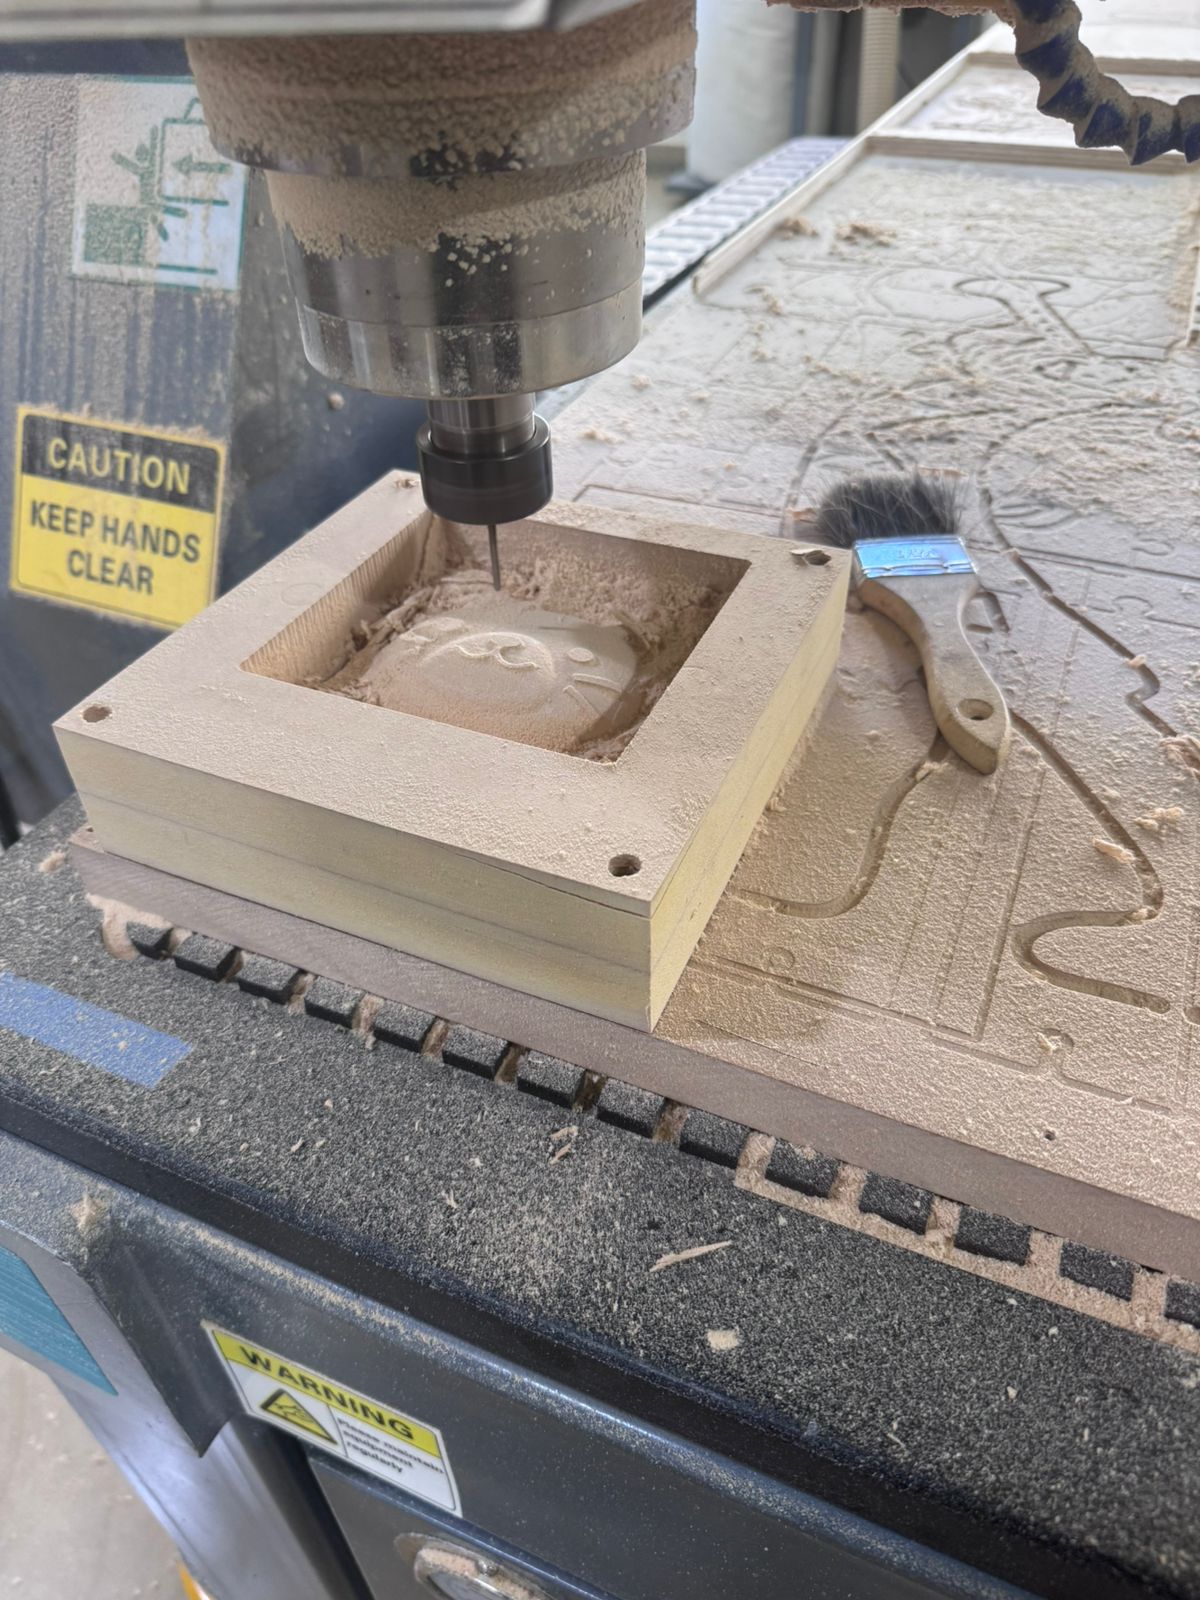
Milled Mold vs 3D Printed Mold
The group compared two mold-making approaches used during the casting workflow: a mold produced by CNC milling and molds produced with 3D printing. The comparison focused on surface finish, fabrication time, demolding, material limitations, and the type of geometry each method can reproduce.
| Mold Type | Pros | Cons | Best Use Case |
|---|---|---|---|
| CNC milled mold | Strong and dimensionally stable mold; good for flat bases and rigid master molds; surface can be improved with toolpath settings, sanding, and sealing. | Generates dust and requires extraction; needs machine setup and safe tool handling; internal corners are limited by tool diameter; machining time can increase with fine details. | Best when the group needs a rigid mold, a reusable master, or a controlled surface made from MDF, wax, foam, or machinable board. |
| 3D printed mold | Faster to iterate from a digital model; can create complex shapes without CNC tool access; flexible materials can help demolding; useful for quick tests and custom geometries. | Layer lines can transfer to the cast; material may deform with heat or pressure; resin printing requires chemical safety; FDM prints may need sealing to prevent leaks. | Best for quick prototypes, organic shapes, flexible molds, or geometries that are hard to machine. |
| Result comparison | CNC produced a cleaner rigid reference for the cat-face mold, while 3D printing allowed a direct comparison of printed texture and demolding behavior. | Neither method is automatically better: CNC requires machine safety and setup, while 3D printing requires post-processing and attention to surface texture. | Choose the method according to the casting material, desired detail, mold flexibility, and available equipment. |