
Week 17
Wildcard Week
Biofabrication of a train-shaped biomaterial using a TPU flexible mold, cacao derivatives, controlled heating, viscosity characterization and dehydration.
1. Checklist
- ✅ Documented the workflow and processes used
- ✅ Explained how the selected process is not covered in other assignments
- ✅ Described problems encountered and how they were fixed
- ✅ Included original design files and process documentation
- ✅ Included a hero shot of the final result
2. Assignment Goal
For Wildcard Week I explored a process that was not covered in the other Fab Academy assignments: biofabrication with biomaterials. The objective was to design and produce a train-shaped biomaterial by combining digital fabrication, flexible mold making, laboratory equipment and an experimental biodegradable formulation.
The process started with the design of a train mold in Autodesk Inventor. The mold was then fabricated with TPU 95A using 3D printing. After that, I prepared a biomaterial mixture based on water, corn starch, unflavored gelatin, glycerin, cacao powder and powdered cacao husk. The material was poured into the TPU mold and dehydrated under controlled conditions.
The final result connects this assignment with my final project, Fab Train, because the biomaterial was shaped as a train. This allowed me to explore a new material process while keeping visual and conceptual continuity with the rest of my Fab Academy work.
3. Biomaterials and Bioplastics
A biomaterial is a material produced from biological, natural or bio-based components. In this assignment, the material can also be understood as an experimental bioplastic-like material, because it uses a polymeric matrix made from starch and gelatin, with glycerin as a plasticizer.
In conventional plastic fabrication, the material is usually obtained from petroleum-based polymers. In this case, the material was created from ingredients that are easier to access and that can be related to biodegradable or more sustainable fabrication approaches.
The formulation does not behave like industrial plastic. Its final properties depend strongly on the recipe, temperature, mixing time, viscosity, mold geometry, dehydration time and moisture content. This made the assignment very different from simply printing or machining a part.
4. Why This Process Is Different
This process fits Wildcard Week because it uses a digital fabrication workflow that was not covered in the other assignments. In previous weeks, I worked with CAD, CNC machining, laser cutting, 3D printing, electronics and embedded programming. In this case, the main workflow focused on biofabrication, formulation and laboratory processing.
The final piece was not produced directly by a machine from a standard material. Instead, the machine was used to fabricate a flexible mold, and the final object was created through a material transformation process: mixing, heating, viscosity change, casting and dehydration.
This assignment also introduced different process variables and equipment, including an analytical balance, a magnetic stirrer with heating, a viscometer, a dehydrator and a refrigerator. These tools are more related to laboratory experimentation than to conventional mechanical fabrication.
5. Cacao Husk and Sustainability
One of the most interesting parts of this experiment was the use of cacao derivatives. I tested two versions of the biomaterial: one with cacao powder and another with powdered cacao husk.
Cacao husk is a by-product generated from cacao processing. Instead of treating it only as waste, it can be explored as a natural filler, pigment and textural component in biomaterial development. In this assignment, the husk was reduced in particle size and incorporated into the biopolymeric matrix.
This is important because digital fabrication today is not only about making objects faster. It can also be used to explore new relationships between design, local materials, circular economy and sustainability. A digitally fabricated mold can be combined with a bio-based formulation to create objects from materials that are closer to local resources and agro-industrial by-products.
6. Concept of the Experiment
The concept was to create a small train-shaped biomaterial. The train geometry was selected because it connects directly with my final project, Fab Train, but the fabrication method was completely different from the final project parts.
Instead of making a rigid train in PLA, MDF or acrylic, this experiment used a biodegradable mixture that had to be cast and dehydrated. This made the same visual object become a material research exercise.
The two material variants were:
- Cacao powder formulation: darker brown color.
- Cacao husk formulation: reddish brown color.
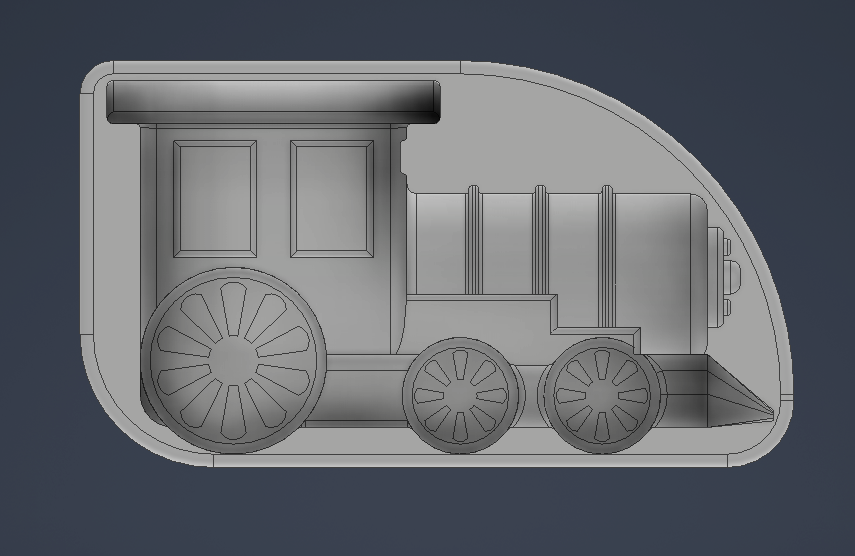
7. Mold Design in Inventor
The mold was designed in Autodesk Inventor. I started from the 3D model of the train and adapted it to a molding process. To make the mold easier to fabricate and demold, the train was divided into two halves.
For the first side, I generated the negative shape of the train by using a subtractive operation. For the second side, I used a mirror operation so that the other half matched the geometry correctly.
This design decision was important because a one-piece mold would have made demolding more difficult. By dividing the geometry, I could also test two different biomaterial formulations in two separate mold halves.
To calculate the amount of biomaterial needed, I measured the volume of one half of the train. The result was approximately 31 mL. This volume was used as a reference to prepare the mixture and avoid making too much or too little material.
8. 3D Printing the Flexible TPU Mold
The mold was fabricated using a Bambu Lab X1E 3D printer with TPU 95A. TPU was selected because it is flexible and makes the demolding process easier than a rigid mold.
This flexibility was very important because the biomaterial is more fragile than plastic or resin, especially after dehydration. If the mold were too rigid, the demolding force could break the final piece.
| Parameter | Value used |
|---|---|
| Printer | Bambu Lab X1E |
| Material | TPU 95A |
| Wall thickness | 2 mm |
| Infill | 15% |
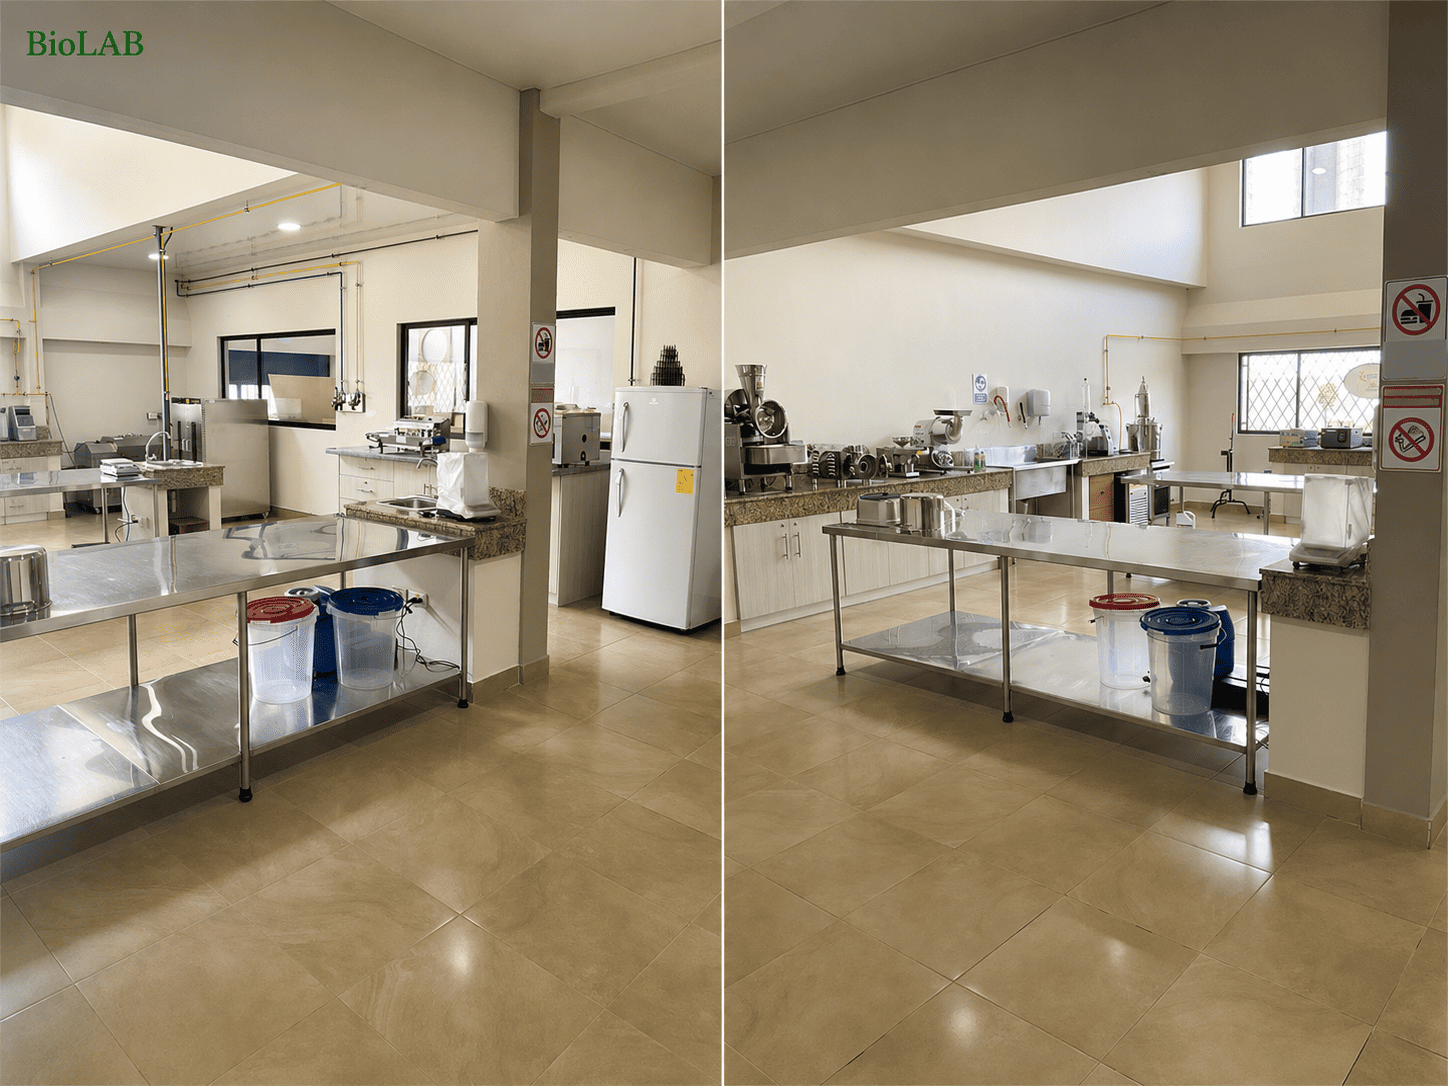
9. BioLab Equipment Used
The experimental stage was developed in the BioLab. This allowed me to use equipment for weighing, mixing, heating, viscosity measurement and dehydration.
| Equipment | Use in the process |
|---|---|
| Analytical balance | Precise measurement of ingredients in grams. |
| Digital balance | General weighing support during material preparation. |
| Magnetic stirrer with heating | Controlled mixing and heating of the biomaterial. |
| Viscometer | Measurement of apparent viscosity before casting. |
| Industrial dehydrator | Controlled dehydration of the molded biomaterial. |
| Refrigerator | Cooling and temporary stabilization support. |
10. Biomaterial Formulation
The biomaterial was developed from a biopolymeric matrix composed of water, corn starch, unflavored gelatin, glycerin and cacao derivatives. The final successful formulation was prepared with the following quantities:
| Ingredient | Quantity | Function in the mixture |
|---|---|---|
| Distilled water | 35 g | Solvent and base liquid for the mixture. |
| Corn starch | 4 g | Biopolymeric structure through gelatinization. |
| Unflavored gelatin | 2 g | Helps form the gel-like matrix. |
| Glycerin | 3 g | Plasticizer that improves flexibility and reduces brittleness. |
| Cacao powder or powdered cacao husk | 1 g | Natural filler and colorant. |
The quantities were measured carefully because biomaterials are very sensitive to changes in formulation. If the amount of water, starch, gelatin or glycerin changes too much, the viscosity, flexibility and final drying behavior also change.
11. Replicable Workflow: Step-by-Step Biomaterial Process
To make the process easier to reproduce, I documented the complete workflow as a step-by-step procedure. This workflow corresponds to the successful test, where the biomaterial was correctly molded, dehydrated and demolded.
11.1 Mold Preparation
- Design the train mold in Autodesk Inventor using the train geometry as the reference model.
- Divide the train geometry into two halves to simplify casting and demolding.
- Generate the negative cavity for one half of the mold using a subtractive operation.
- Create the opposite half using a mirror operation.
- Measure the internal volume of one train half. In my case, the volume was approximately 31 mL.
- Export the mold file and print it in TPU 95A using the Bambu Lab X1E.
- Use approximately 2 mm wall thickness and 15% infill for the flexible mold.
11.2 Biomaterial Formulation
The following formulation was prepared for an approximate final volume of 35 mL. This quantity was enough to fill the mold cavity with a small safety margin.
| Ingredient | Quantity | Function |
|---|---|---|
| Distilled water | 35 g | Base liquid of the mixture |
| Corn starch | 4 g | Biopolymer structure through gelatinization |
| Unflavored gelatin | 2 g | Gel formation and matrix support |
| Glycerin | 3 g | Plasticizer to reduce brittleness |
| Cacao powder or powdered cacao husk | 1 g | Natural filler and colorant |
I prepared two variations using the same base formulation: one with cacao powder and one with powdered cacao husk. The cacao powder produced a darker brown result, while the cacao husk produced a more reddish brown tone.
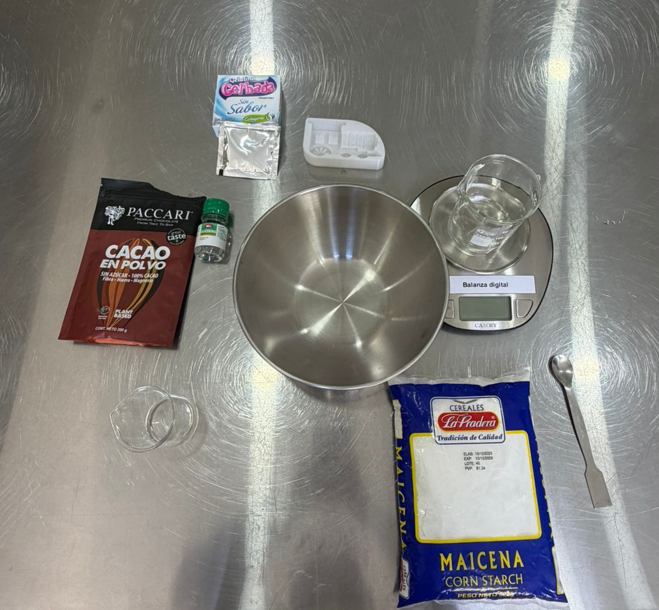
11.3 Material Preparation
- Clean the workspace and prepare the BioLab equipment.
- Prepare the analytical balance, beakers, spatula, magnetic stirrer and mold.
- For the cacao powder test, use the powder directly as the filler.
- For the cacao husk test, reduce the particle size first using a blender or grinder until obtaining a fine powder.
- Weigh all ingredients separately. This is important because small changes in mass affect viscosity, drying and final strength.
11.4 Mixing and Heating
- Place 35 g of distilled water into a glass beaker.
- Add 4 g of corn starch.
- Add 2 g of unflavored gelatin.
- Add 1 g of cacao powder or 1 g of powdered cacao husk.
- Mix manually until the dry components are dispersed in the water.
- Place the beaker on the magnetic stirrer with heating.
- Heat the mixture to 90 °C for approximately 6 minutes with constant agitation.
- Observe the increase in viscosity. This happens because the starch starts gelatinizing and the gelatin begins to activate.
- Add 3 g of glycerin.
- Continue stirring for 2 additional minutes.
- Stop heating when the mixture is homogeneous and has a fluid-viscous consistency suitable for pouring.
11.5 Viscosity Check
- Take a sample of the hot mixture before casting.
- Measure the apparent viscosity using the viscometer.
- The successful mixture reached approximately 5,000 cP.
- This viscosity was adequate because the material could flow into the mold but still had enough body to form a stable gel after cooling.
11.6 Mold Release and Casting
- Apply a thin layer of release agent to the internal surface of the TPU mold.
- Pour the hot biomaterial into the mold while it is still fluid enough to flow.
- Fill the cavity slowly to reduce trapped air and incomplete filling.
- Distribute the mixture until the train half is completely filled.
- Allow the material to cool enough to form the initial hydrogel structure.
11.7 Controlled Dehydration
- Place the filled TPU mold inside the industrial dehydrator.
- Set the dehydrator to 50 °C.
- Keep the mold inside for approximately 10 hours.
- The purpose of this step is to reduce moisture, improve dimensional stability and transform the hydrogel into a more solid biomaterial.
11.8 Demolding and Evaluation
- Remove the mold from the dehydrator after the drying time is complete.
- Let the mold cool before demolding.
- Gently flex the TPU mold to release the biomaterial part.
- Remove the part slowly to avoid cracks or tearing.
- Check if the train geometry was reproduced correctly.
- Compare color, surface finish, flexibility and structural stability.
11.9 Key Observations for Reproducibility
- The quantities must be measured by weight. Estimating by eye changes the behavior of the mixture.
- The material must reach enough temperature for starch gelatinization and gelatin activation.
- Glycerin should be added after the first heating stage to improve flexibility.
- The mixture should be poured while hot, before it becomes too viscous.
- A flexible TPU mold makes demolding safer than a rigid mold.
- The first failed test showed that 40 °C for 4 hours in the dehydrator was not enough.
- The successful dehydration condition was 50 °C for 10 hours.
12. Material Preparation
The first material variant used cacao powder directly. This gave the biomaterial a dark brown color and worked as a natural filler.
The second variant used cacao husk. Before incorporating it into the mixture, the cacao husk was reduced in particle size. This was necessary because large particles could affect the flow of the mixture and reduce the quality of the detail reproduction inside the mold.
The difference between the two variants was visible in the final result: the cacao powder produced a darker brown material, while the cacao husk produced a more reddish brown tone.
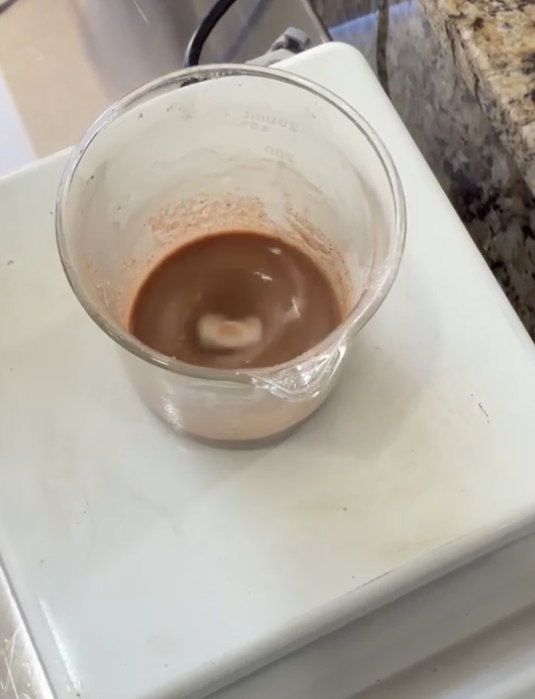
13. Mixing and Heating Process
The measured ingredients were mixed until reaching a homogeneous condition. The mixture was then placed on the magnetic stirrer with heating.
In the successful test, the mixture was heated to 90 °C for 6 minutes with constant agitation. This stage was important because the starch gelatinized and the gelatin activated, increasing the viscosity of the mixture.
After that, 3 g of glycerin were added and the mixture was stirred for 2 additional minutes. The final result was a homogeneous fluid-viscous material that could be poured into the TPU mold.
14. Viscosity Characterization
The viscosity was measured before casting to understand whether the biomaterial had the correct flow behavior. The mixture reached an apparent viscosity of approximately 5,000 cP.
This value was useful because it indicated that the mixture could flow into the TPU mold while still maintaining enough body to form a stable gel structure after cooling.
- The mixture was fluid enough to be poured.
- It could fill the mold cavities.
- It had enough viscosity to avoid behaving like water.
- It could form a gel-like structure before dehydration.

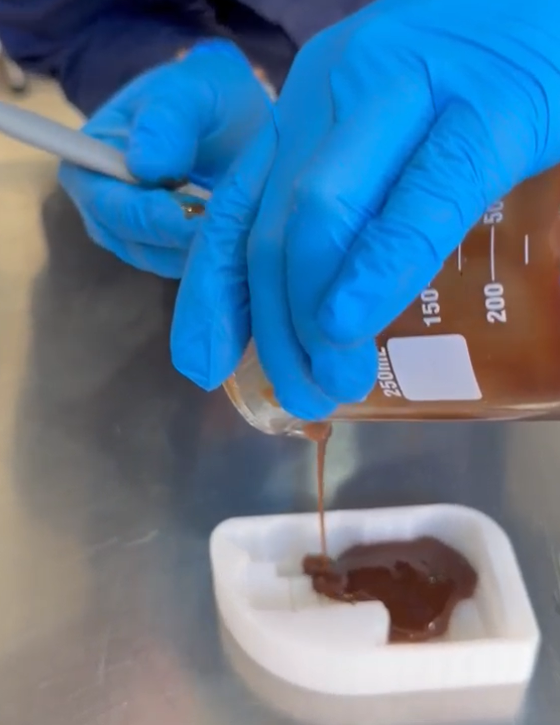
15. Casting into the TPU Mold
Before pouring the material, a thin layer of release agent was applied to the internal surface of the TPU mold. This step was important because the biomaterial becomes more delicate after dehydration and can break if it sticks strongly to the mold.
The hot mixture was poured into the mold halves while it was still viscous enough to flow. The flexible TPU mold helped distribute the material and later reduced the stress during demolding.
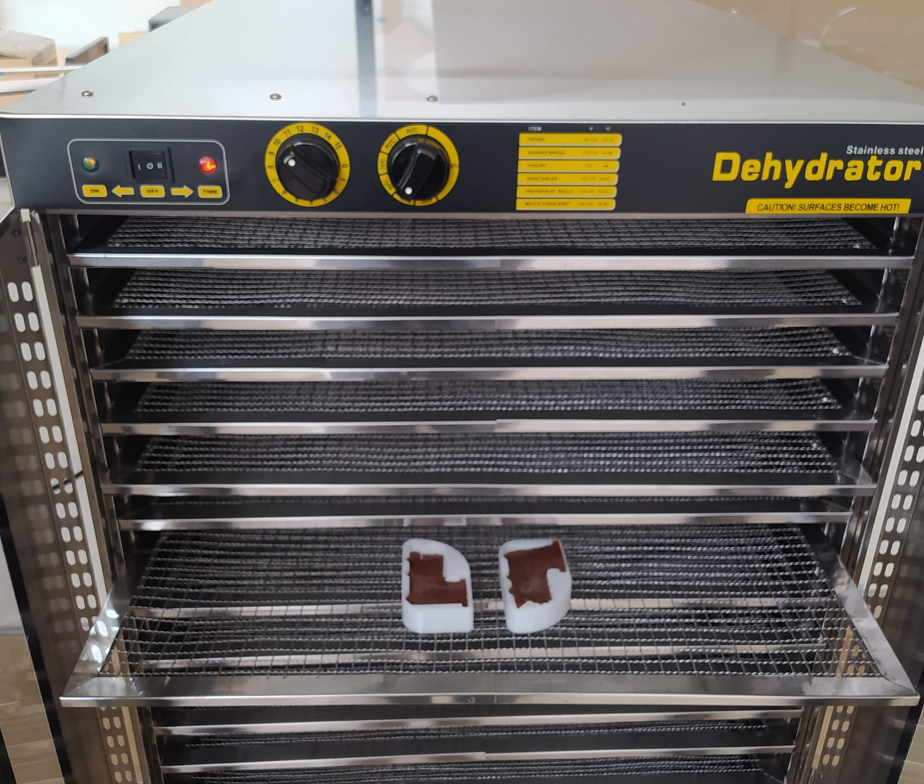
16. Controlled Dehydration
After casting, the biomaterial was dehydrated in an industrial dehydrator. This step was essential because it reduced the moisture content and helped transform the initial hydrogel into a more stable solid piece.
The successful process used:
| Condition | Value |
|---|---|
| Temperature | 50 °C |
| Time | 10 hours |
The objective was to improve dimensional stability and allow the train shape to remain after demolding.
17. Problems Encountered and Fixes
The first trial failed because the process conditions were not strong enough to complete the material transformation. In that test, the mixture was processed with different conditions and the dehydration was done at 40 °C for 4 hours.
The result did not obtain enough structural stability. When I tried to demold the piece, it broke and the geometry was not preserved correctly.
To fix the problem, the process was adjusted by controlling the formulation, temperature and dehydration time more carefully.
- The ingredients were measured more precisely by weight.
- The successful mixture was heated to 90 °C for 6 minutes.
- Glycerin was added after gelatinization and mixed for 2 additional minutes.
- The dehydration process was increased to 50 °C for 10 hours.
- The flexible TPU mold and release agent improved demolding.
After these corrections, the final result was much better. The pieces could be demolded, the train shape was visible and both cacao-based formulations were successful.
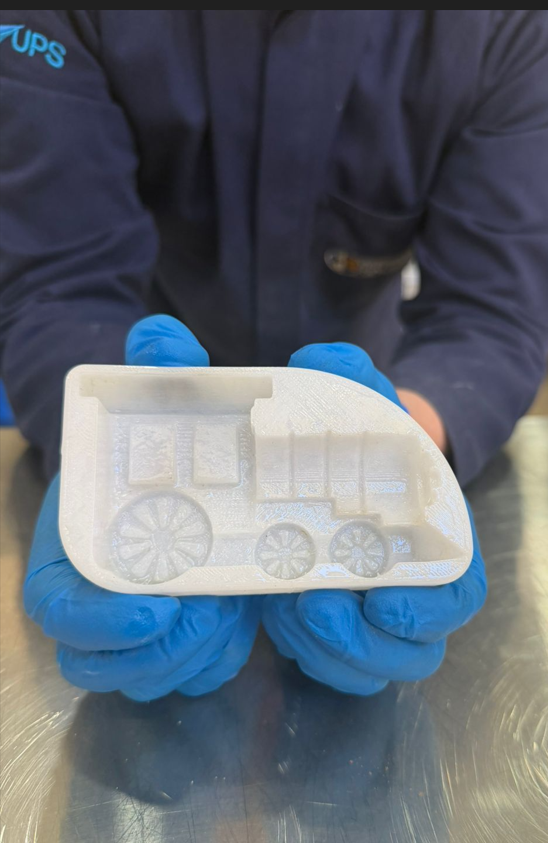
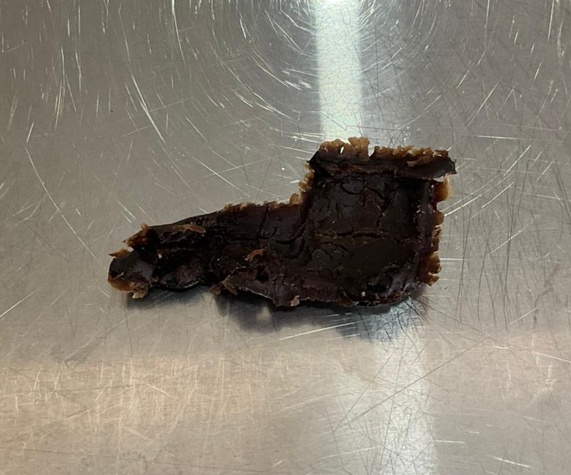
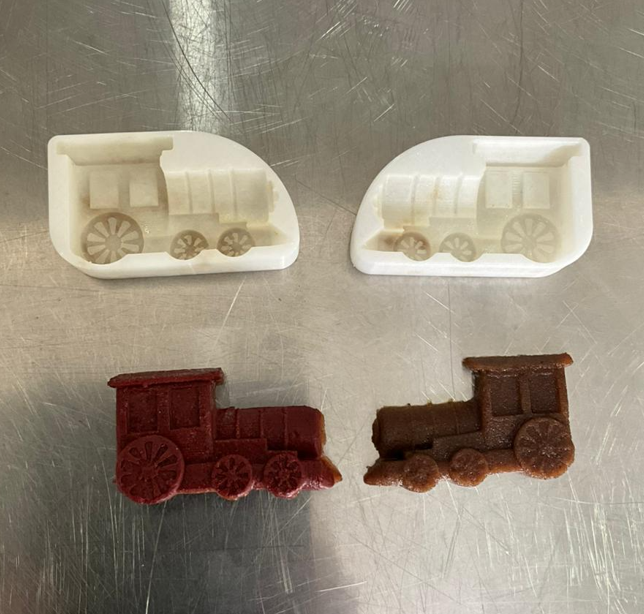
18. Final Result
The final result was a train-shaped biomaterial obtained in two halves. One half was produced with cacao powder and the other with powdered cacao husk. The difference between the two materials was visible in the color.
- The cacao powder formulation produced a darker brown tone.
- The cacao husk formulation produced a more reddish brown tone.
- Both materials were able to reproduce the train mold geometry.
- The flexible TPU mold helped the demolding process.
This result demonstrated that a digitally fabricated mold can be combined with a bio-based formulation to produce a small object with a defined geometry.
18. Process Video
The following video documents the main stages of the Wildcard Week process: mold fabrication, material preparation, mixing, casting, dehydration and final result.
20. Design Files and Process Documentation
This assignment does not use source code because the process is based on CAD, 3D printing and biofabrication. However, the design file of the TPU mold and the improved BioLab route sheet are included so the process can be reproduced.
The BioLab route sheet was rewritten in a cleaner format after the experiment, because it is important that the process documentation is clear, professional and reproducible.
21. Reflection
- This assignment helped me understand that digital fabrication is not limited to cutting, printing or machining conventional materials. It can also be connected to experimental material development.
- Working with biomaterials showed me that the process is much more sensitive than standard fabrication. In 3D printing, the machine controls many parameters, but in biofabrication the formulation and preparation directly affect the final result.
- Exact measurements are essential. The quantities in grams and the volume in milliliters must be controlled carefully because a small change in the recipe can affect viscosity, flexibility, drying and final strength.
- Temperature and time were critical variables. The first test failed because the heating and dehydration conditions were not sufficient to complete the process correctly.
- The second test showed that following the process route with more control produced a much better result. This confirmed the importance of a clear and reproducible laboratory workflow.
- Designing the mold in Inventor was important because the geometry had to be adapted to the material process. Dividing the train into two halves made casting and demolding more practical.
- TPU was a good material for the mold because its flexibility reduced the risk of breaking the biomaterial during demolding.
- Measuring viscosity gave the assignment a more technical dimension. It was not only about making a mixture, but also about understanding if the material had the correct flow behavior for casting.
- Using cacao powder and cacao husk helped me reflect on the value of local by-products. Materials that are usually treated as waste can become part of new fabrication experiments.
- The process also connects with sustainability. Digital fabrication can help design molds, structures and systems that allow new materials to be tested with less waste and more control.
- The final result is not a commercial bioplastic, but it is a valuable prototype that demonstrates how bio-based formulations can be shaped with digitally fabricated tools.
- This week expanded my idea of what fabrication means. Fabrication can be mechanical, digital, electronic or material-based, and each process has its own rules, risks and opportunities.