3D Printing — Scanned Model (Bambu Studio)
Printing a scanned model using Bambu Studio, documenting preparation, slicing settings, printing, and results (Actual Printing is not done due to learning process only :) ).
Input
Scanned STL/3MF
Slicer
Bambu Studio
Printer
Bambu A1
Material
PLA
Goal: The main goal was to understand the printing functionality but actual printing was not done due to time and requirements.
🧠 Learning Objectives
- Prepare a scanned mesh for 3D printing (repair, scaling, orientation).
- Slice the model in Bambu Studio using appropriate settings (layer height, supports, infill).
📌 Documentation Requirements (Checklist)
-
Show the full workflow
Model import → repair/prep → slicing settings → print → results.
-
Document parameters
Material, nozzle size, layer height, infill, supports, temperatures, speeds.
-
Include evidence
Screenshots from Bambu Studio + photos of printed part.
-
Provide downloadable files
Final Bambu Studio project (3MF) and notes.
🛠️ Tools & Materials
- Slicer: Bambu Studio
- Printer: Bambu Lab (A1)
- Filament: PLA
- Nozzle: 0.4mm
- Input file: scanned model exported as STL
Tip: Scanned meshes often contain holes and non-manifold edges. Repairing the mesh before slicing improves print success.
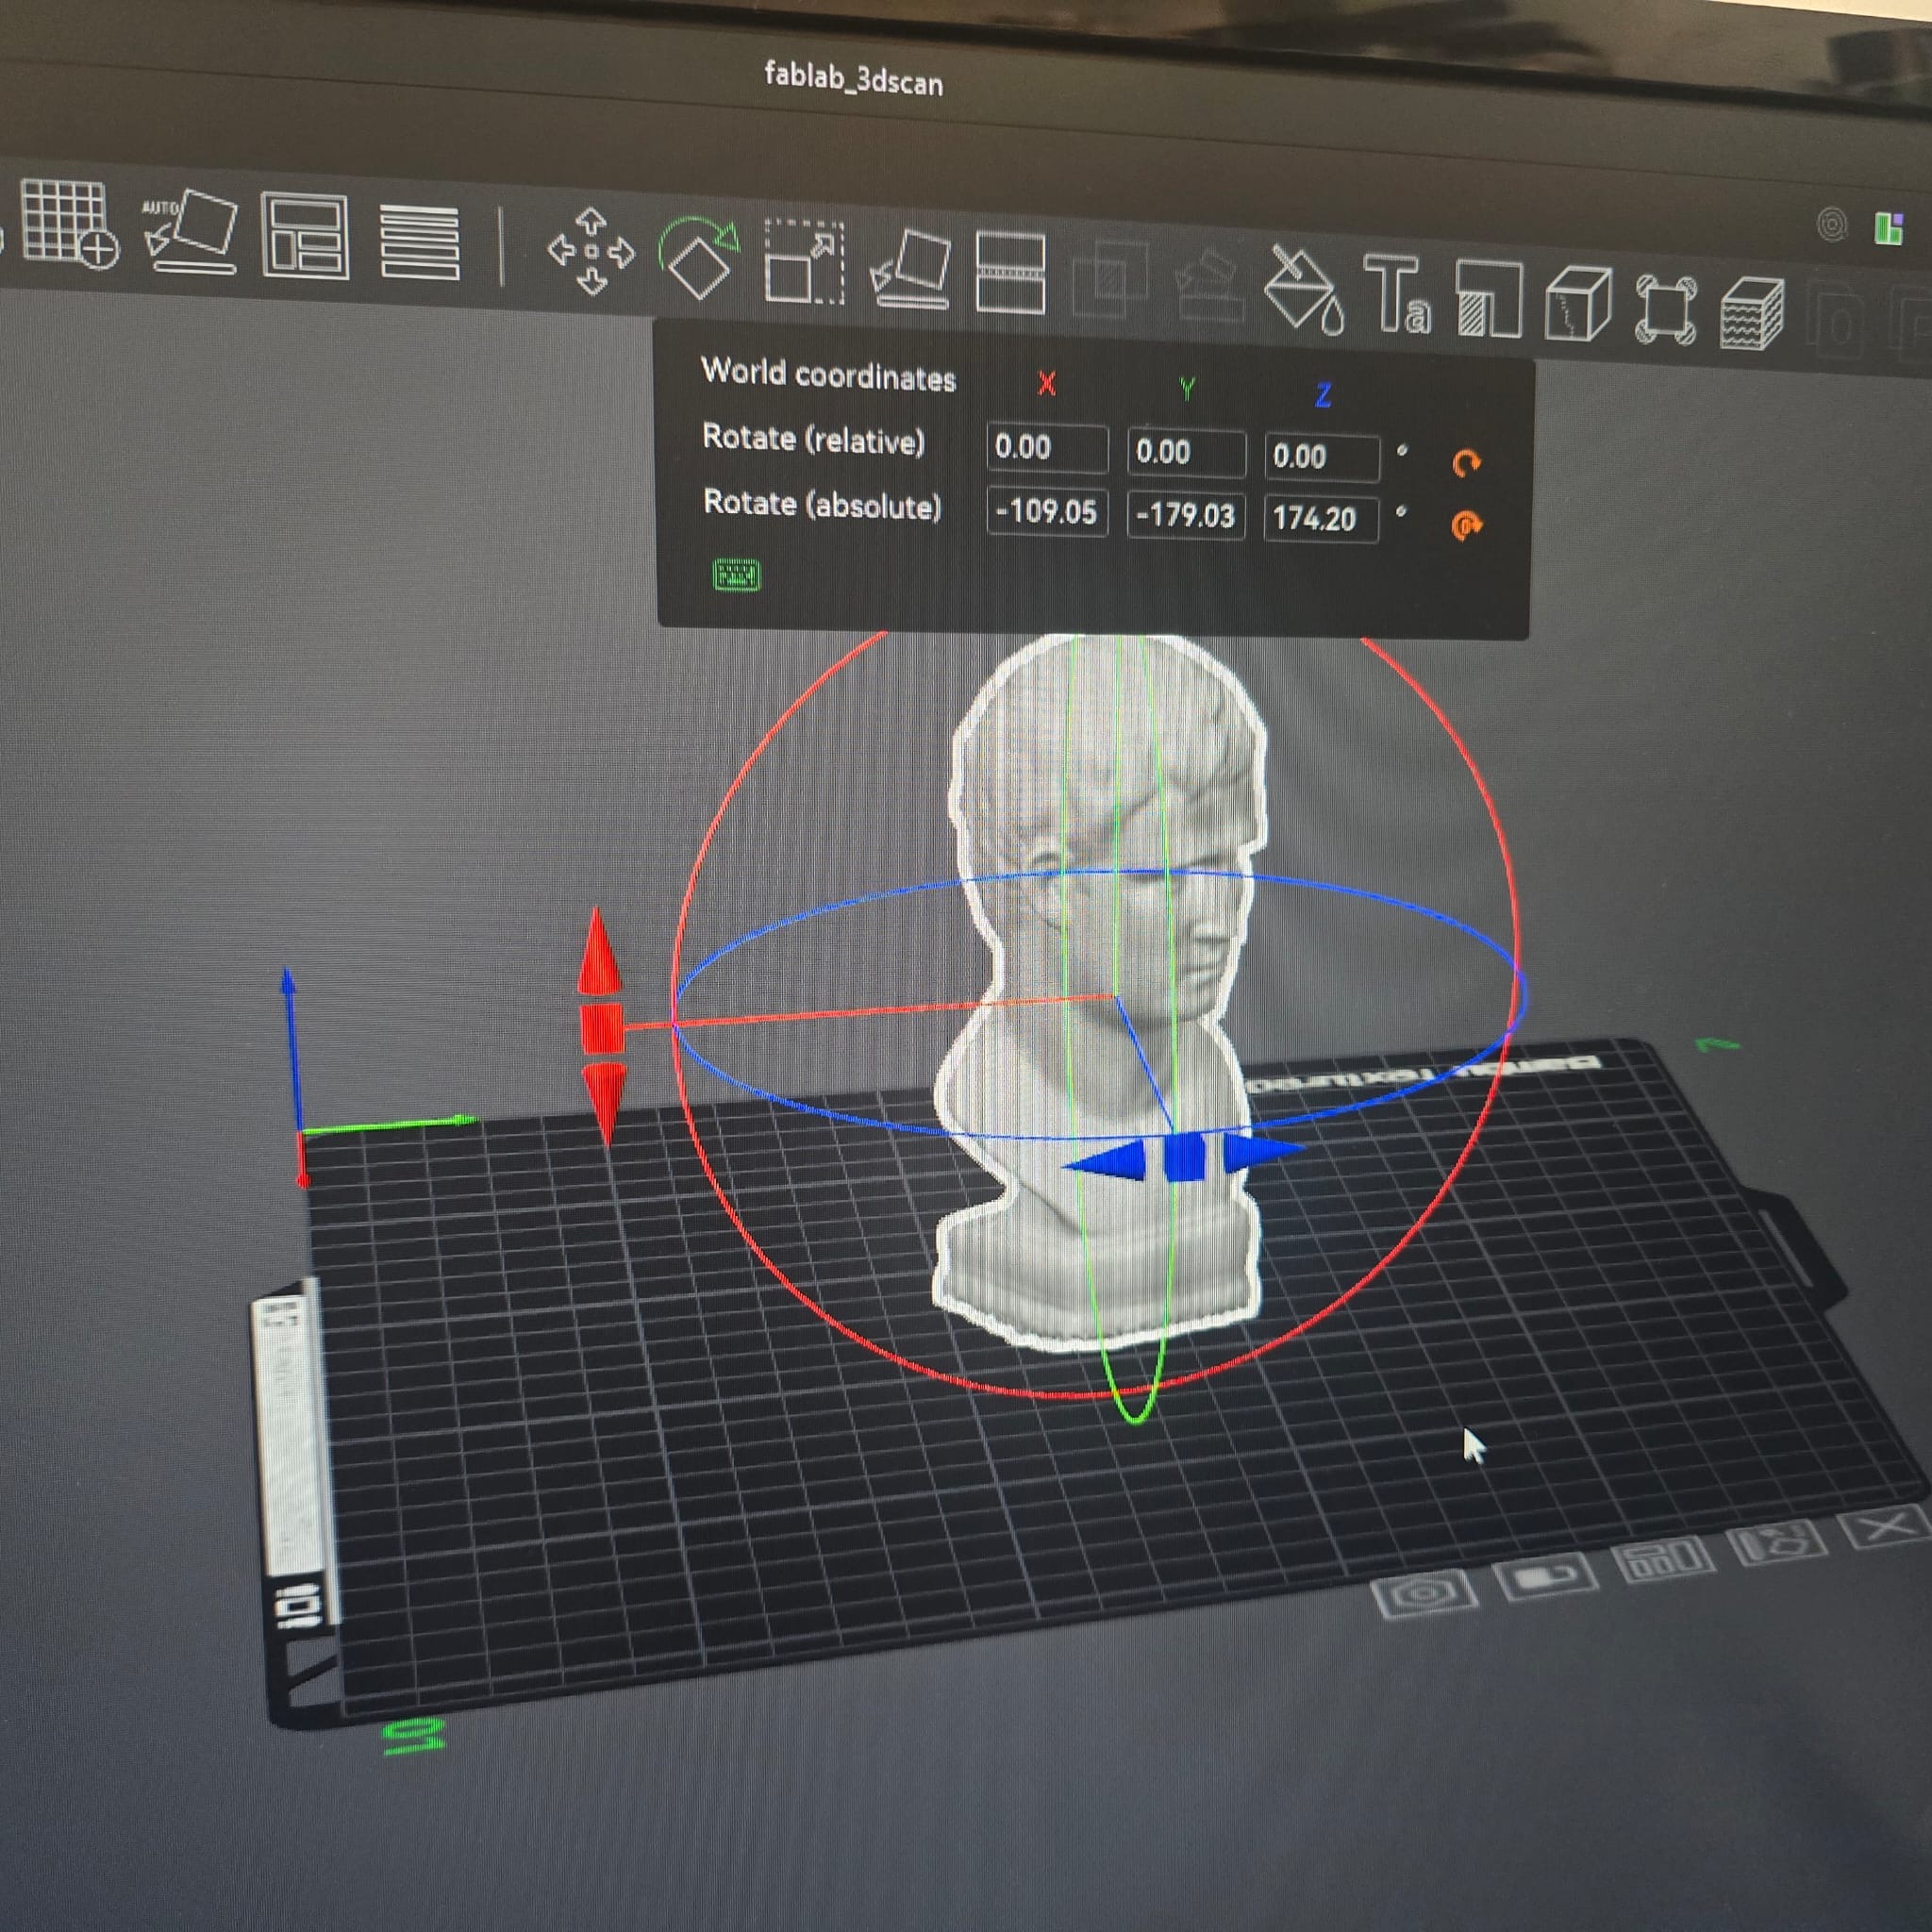
🧩 Model Preparation (Before Slicing)
My scanned model required preparation before printing. I focused on:
- Scale check: confirm the model size is correct (mm units).
- Mesh repair: fill holes / fix non-manifold edges (if needed).
- Orientation: place the flattest side on the bed to reduce supports.
- Wall thickness: ensure thin areas are printable (not too fragile).

🧷 Slicing in Bambu Studio
I selected settings to balance quality and print time. Below are the key parameters I used:
| Setting | Value (Example) | Reason |
|---|---|---|
| Layer Height | 0.20 mm | Good balance between detail and speed. |
| Infill | 15% (Gyroid) | Enough strength without wasting material. |
| Walls / Perimeters | 3 | Improves surface quality and strength. |
| Supports | On (Auto) / Tree | Supports overhangs from scanned geometry (if needed), My model didn't require any support. |
| Bed Adhesion | Brim (Usually good to have to maintain the model bottom surface) | Helps prevent lifting on small contact areas. |
| Temps | Nozzle 200–220°C, Bed 55–60°C | Typical PLA range. |
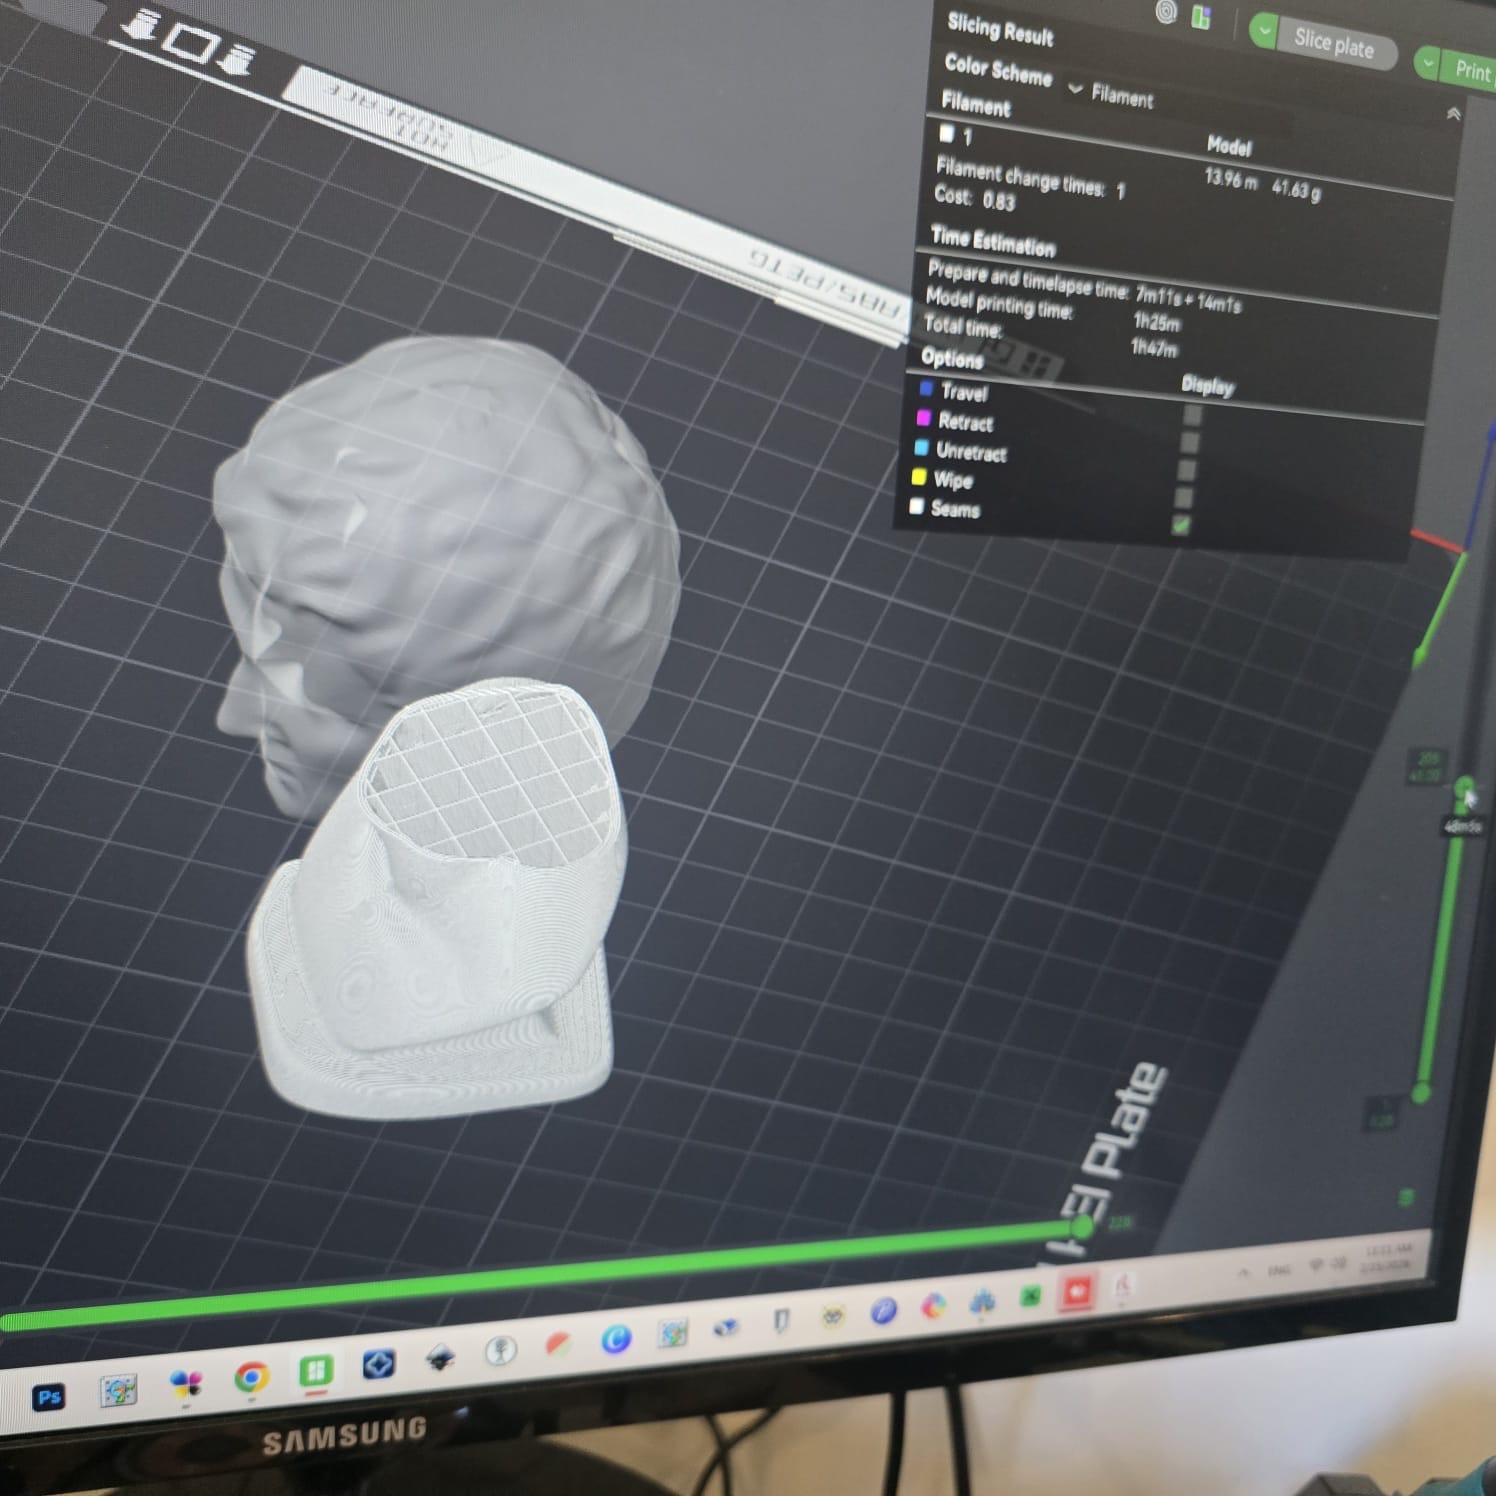
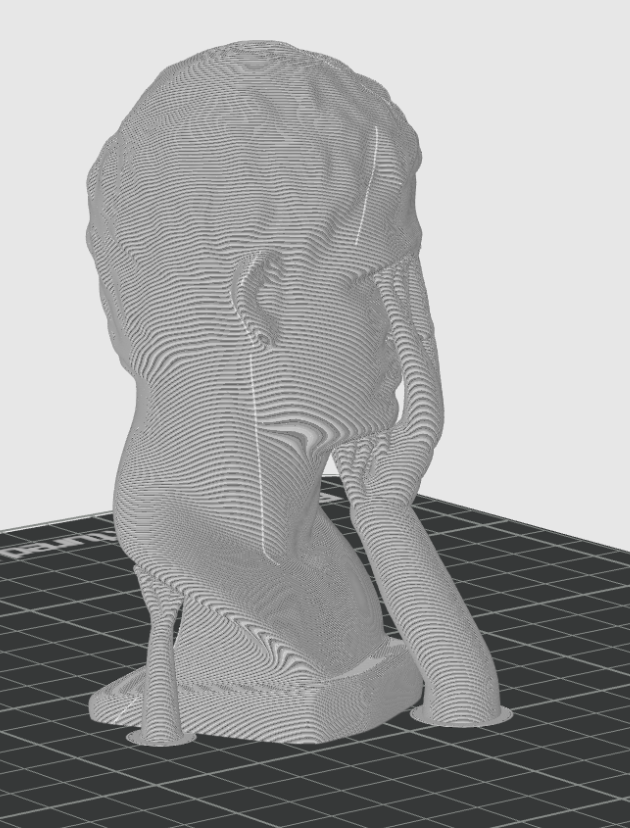
Validation step: I inspected the layer preview to ensure there are no floating sections, missing walls, or weak overhangs.
🖨️ Printing
- Loaded filament and confirmed nozzle/bed temperatures.
- Cleaned the build plate and ensured good first-layer adhesion.
- Started the print from Bambu Studio / printer interface.
- Monitored the first layers for adhesion and support stability.
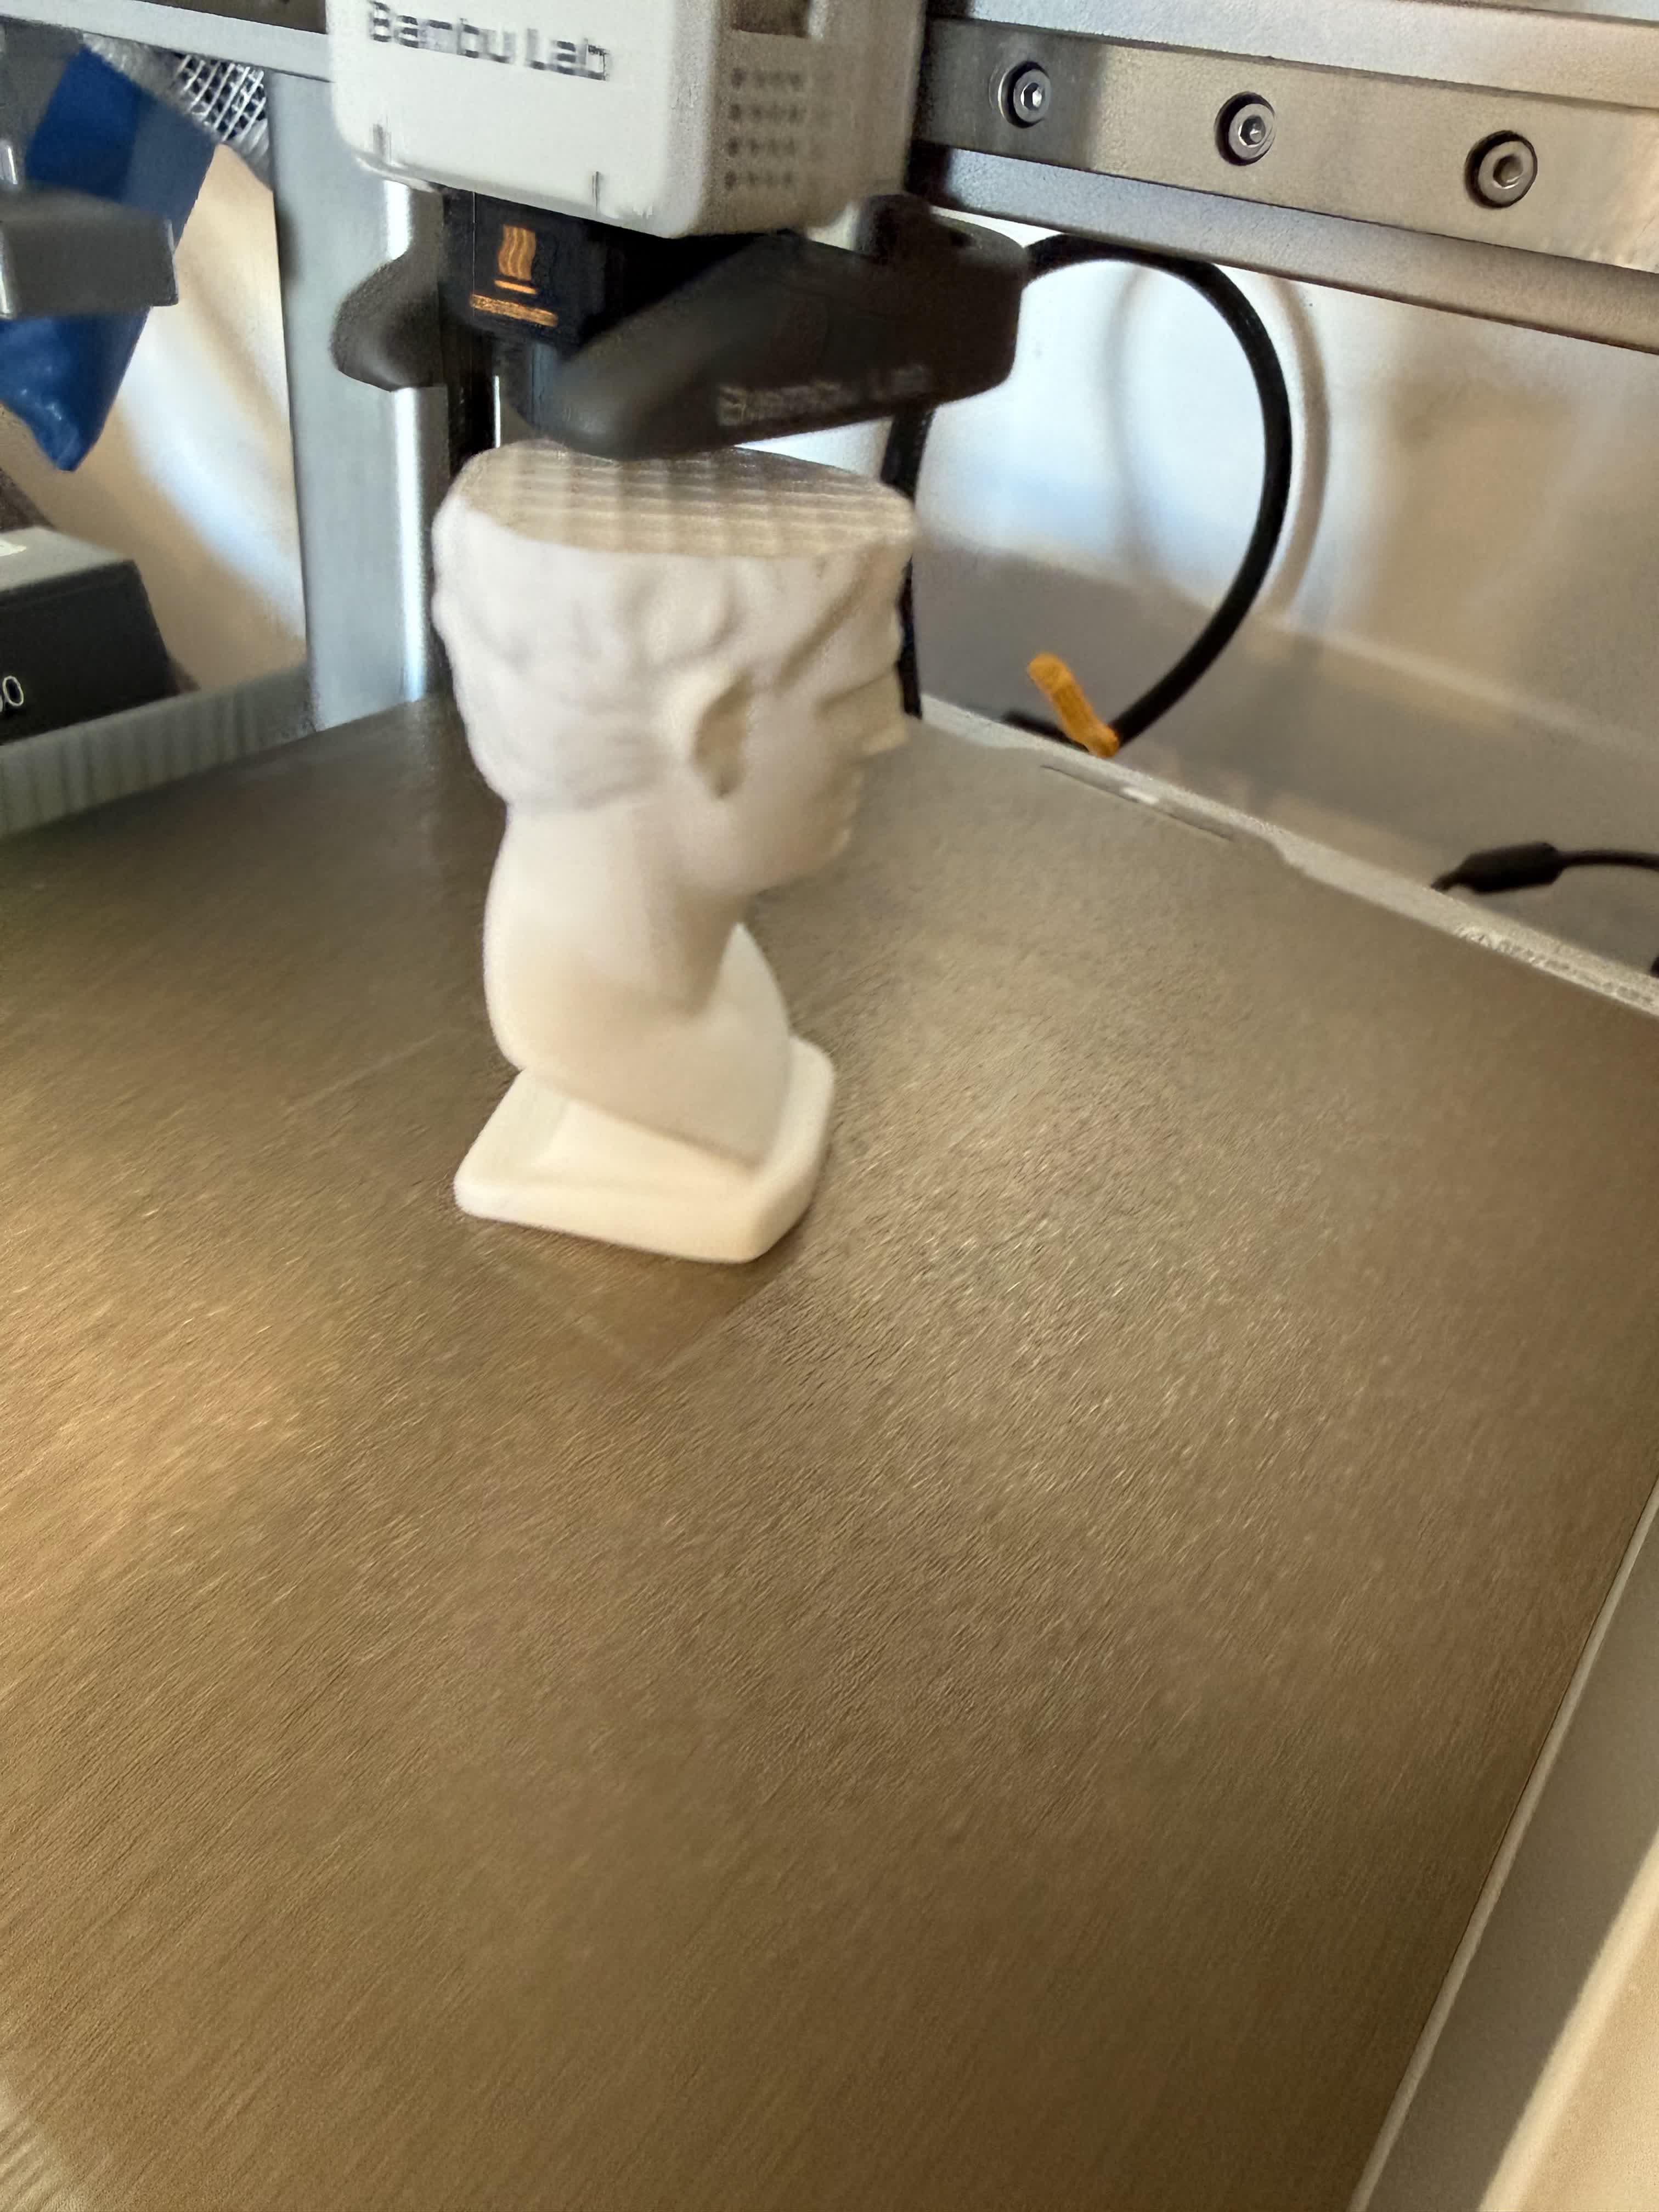

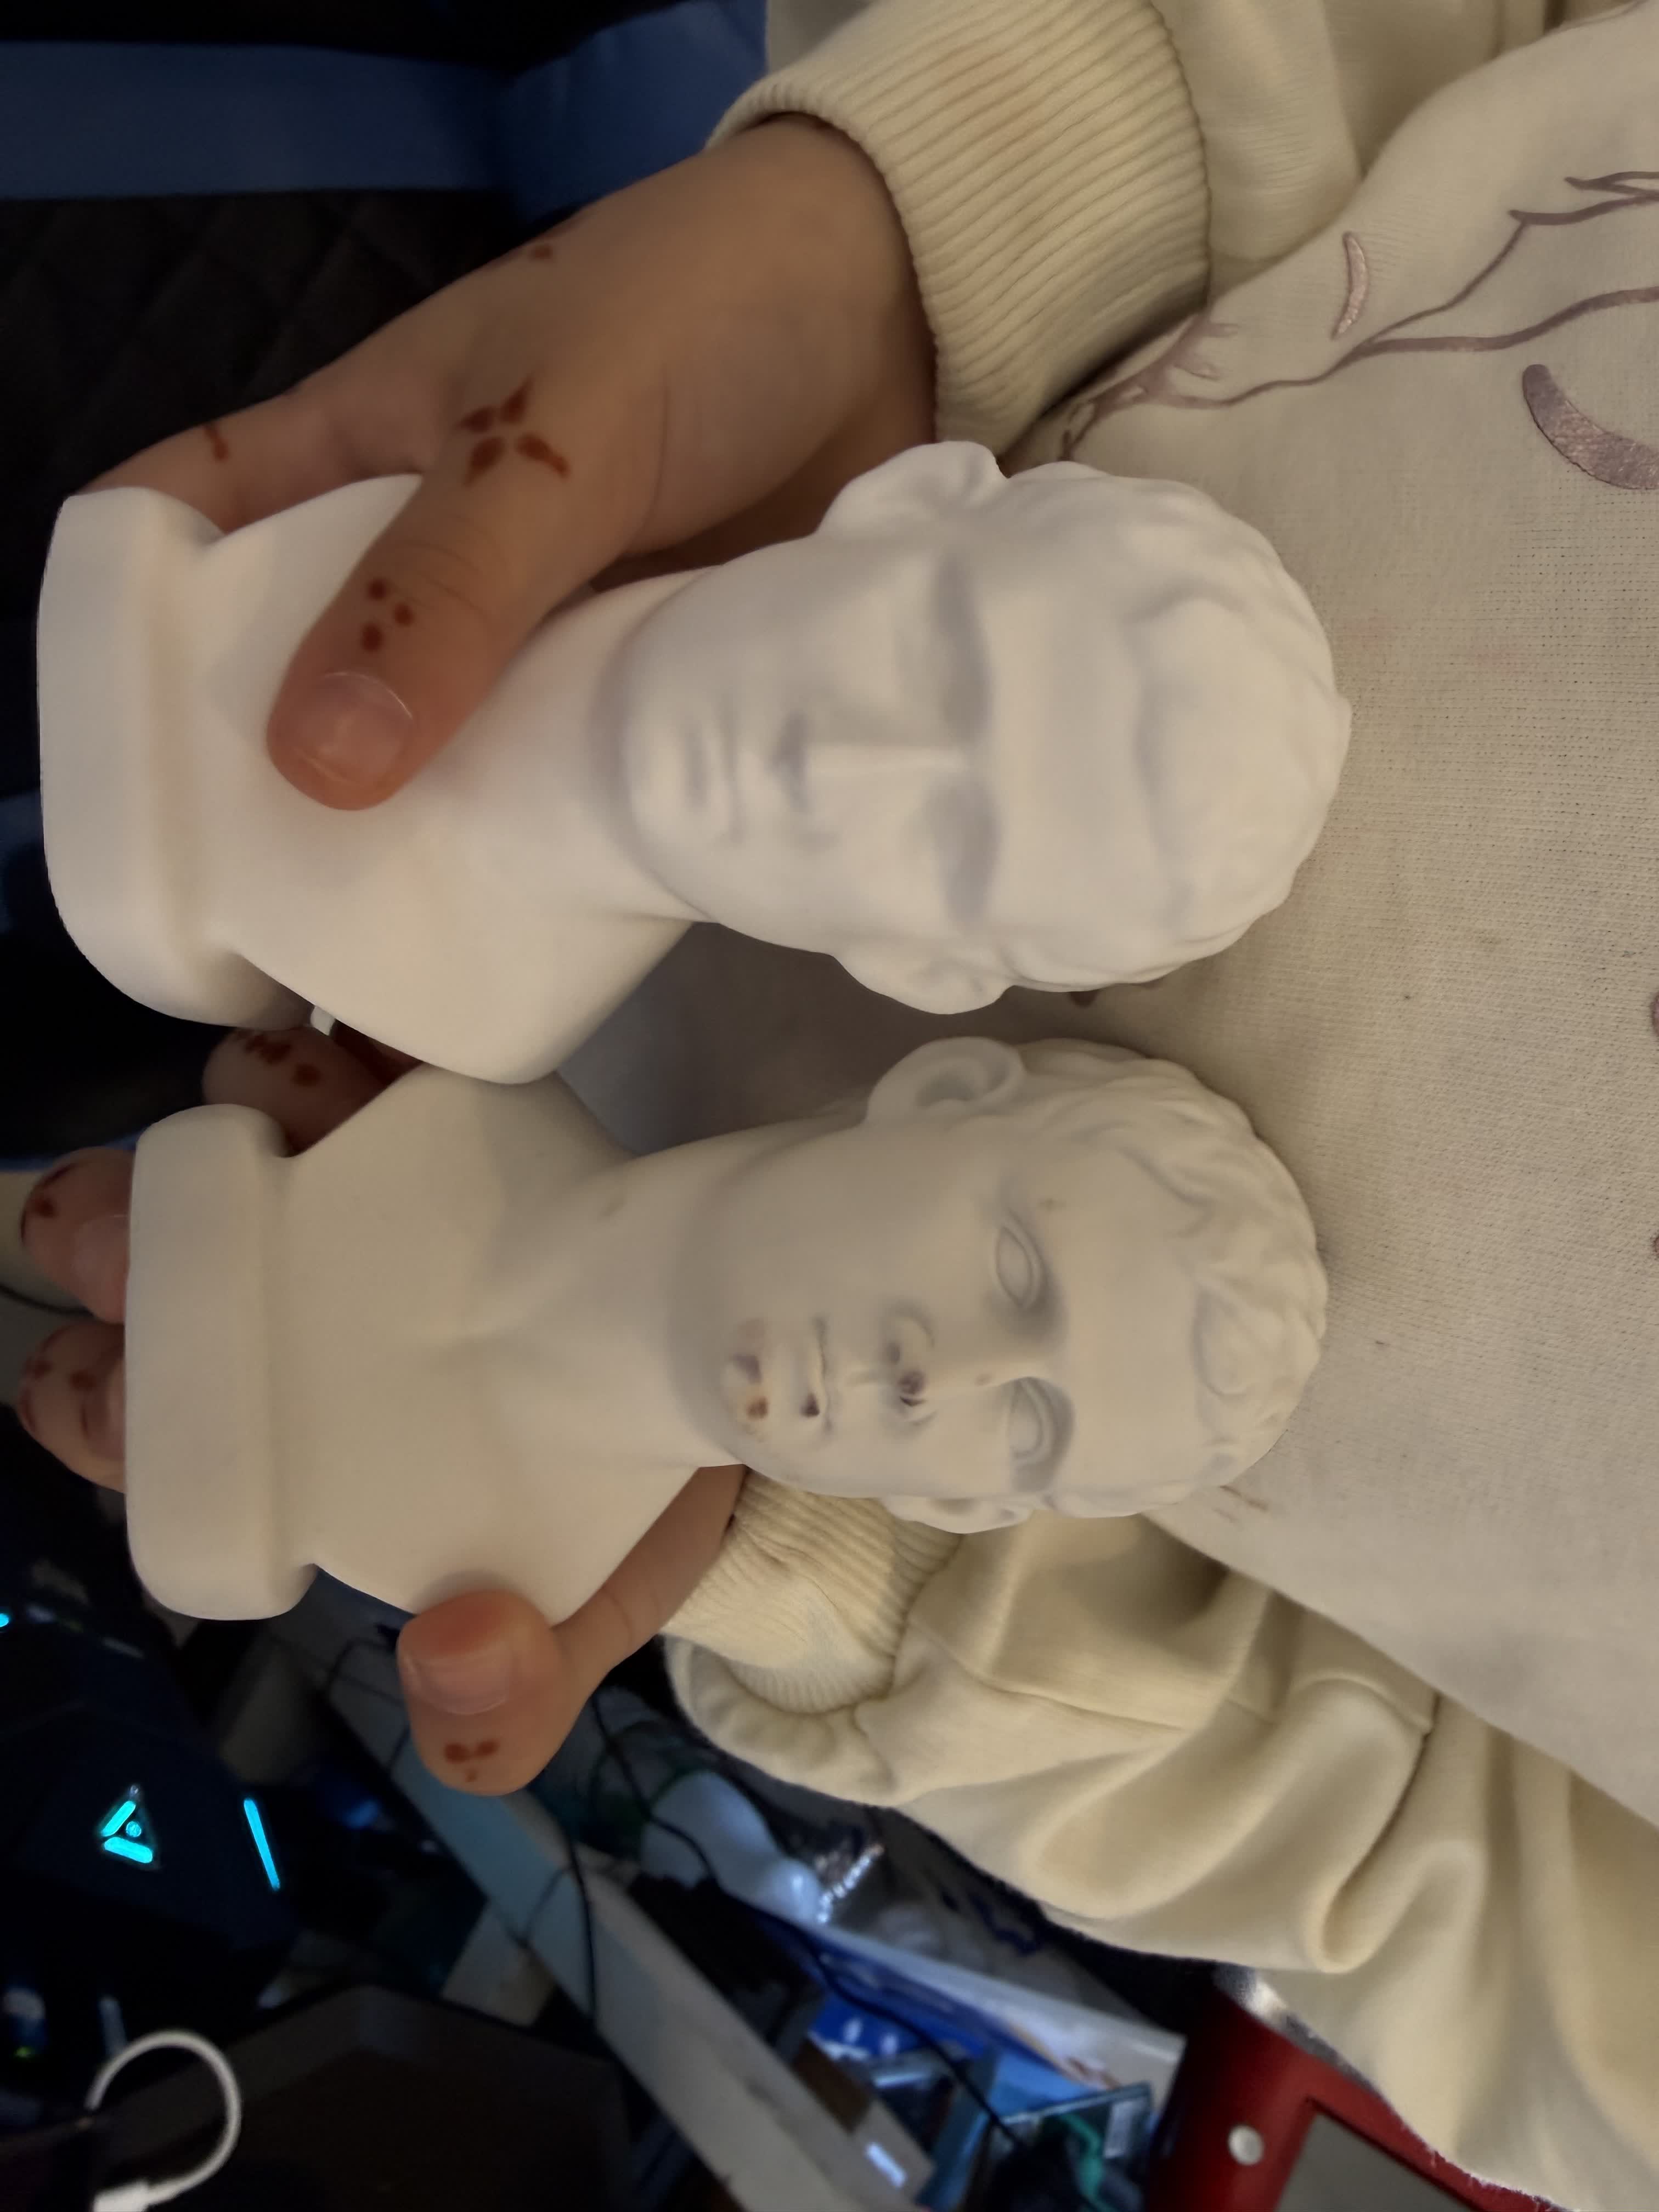
✅ Results
Add your photos and compare the printed part to the scan/original object.
⚠️ Issues & Fixes
- Rough surface / noise from scan: fix by smoothing/decimating the mesh before slicing.
- Support scars: reduce supports by reorienting model or using tree supports.
- Warping/lifting: Didn't encounter any! but we can add brim, clean bed, and confirm correct bed temperature.
- Thin walls: increase wall count or slightly scale model up.
📦 Downloads
Place these files in the same folder as this page and update filenames below.
Reflection — What I Learned
- Scanned meshes usually need repair/cleanup before printing.
- Orientation and support strategy strongly affect surface quality.
- Previewing layers in the slicer prevents many printing failures.
- Documenting settings makes it easier to reproduce successful prints.