The process
Group assignment
The main challenge of this assignment was that in Week 7 there was a curfew in Kuwait as a result of the escalation and war in the region — I couldn't travel to the centre that has the big CNC machines to do the testing. I followed my colleagues at the VujaDé Lab in Saudi Arabia virtually. The group assignment is documented in detail on my colleague's page: Sarah AlDosary — Week 7 CNC.
Individual assignment:
Even though it was difficult to complete the project on time — and I knew I'd have to redo it later in the course when I had lab access — I started working on the small CNC machine I have at home using cardboard. This is that test.
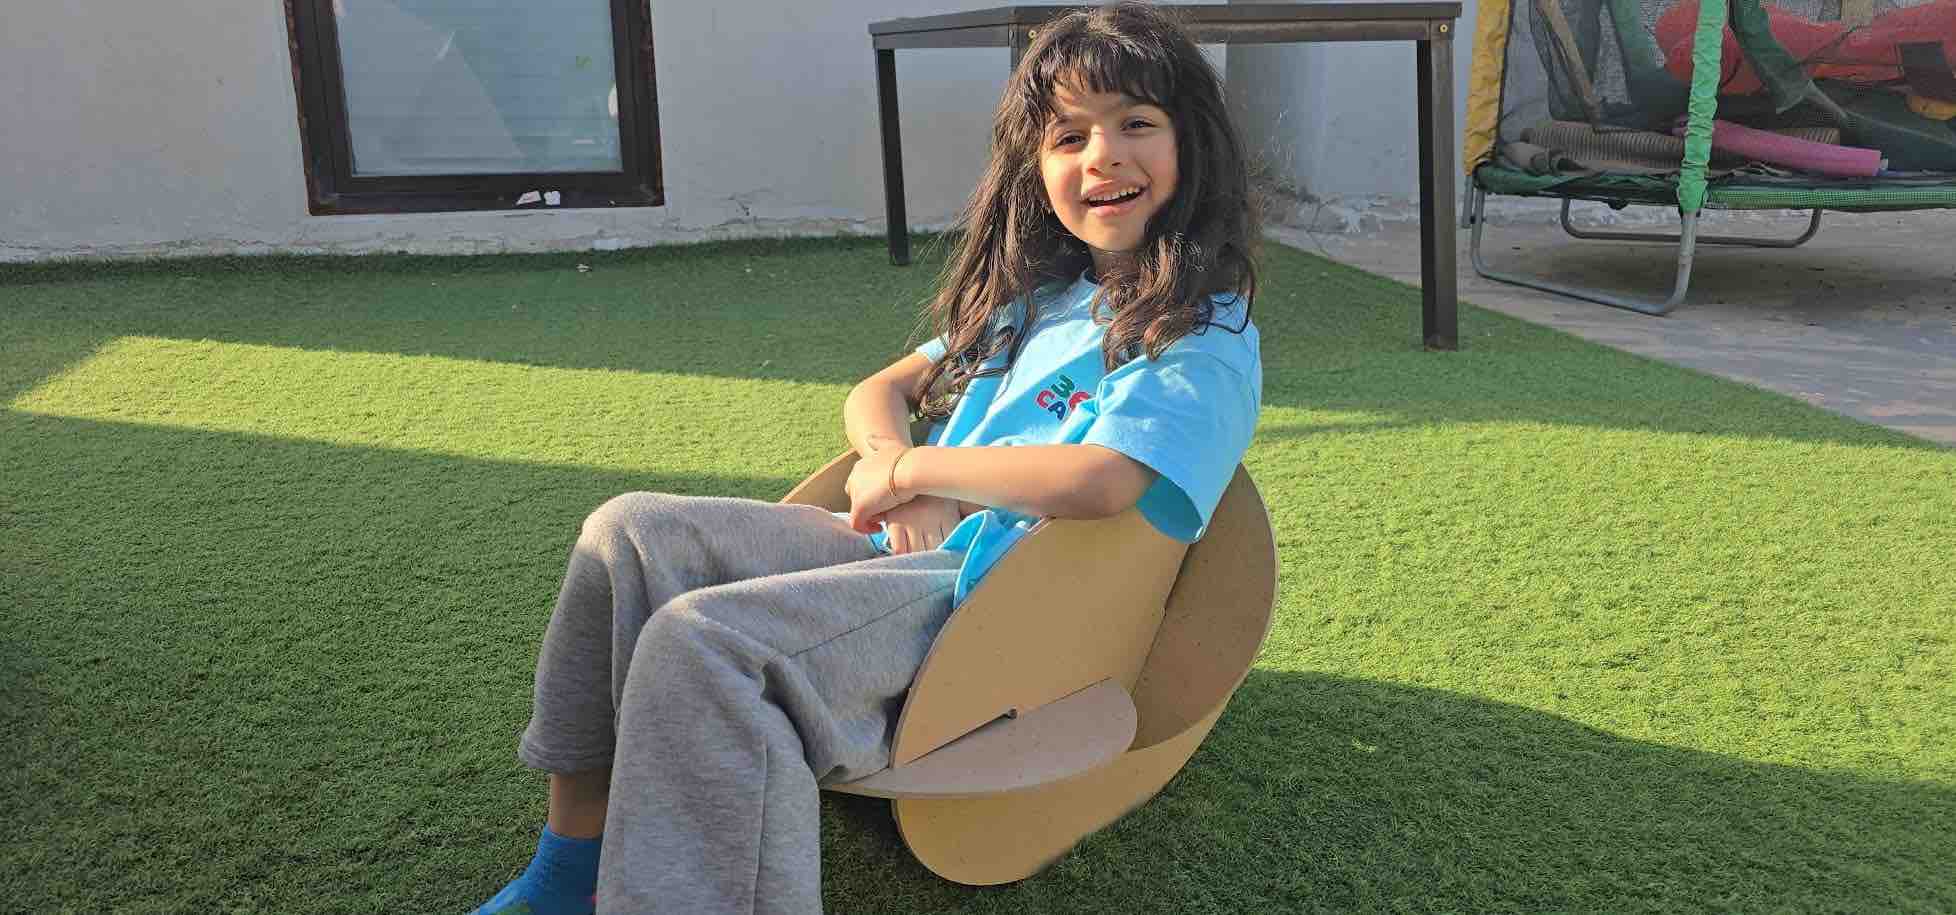
01: Make balancing toy

01 | I wanted to do something I could use at home, so I decided to make a toy for my daughter
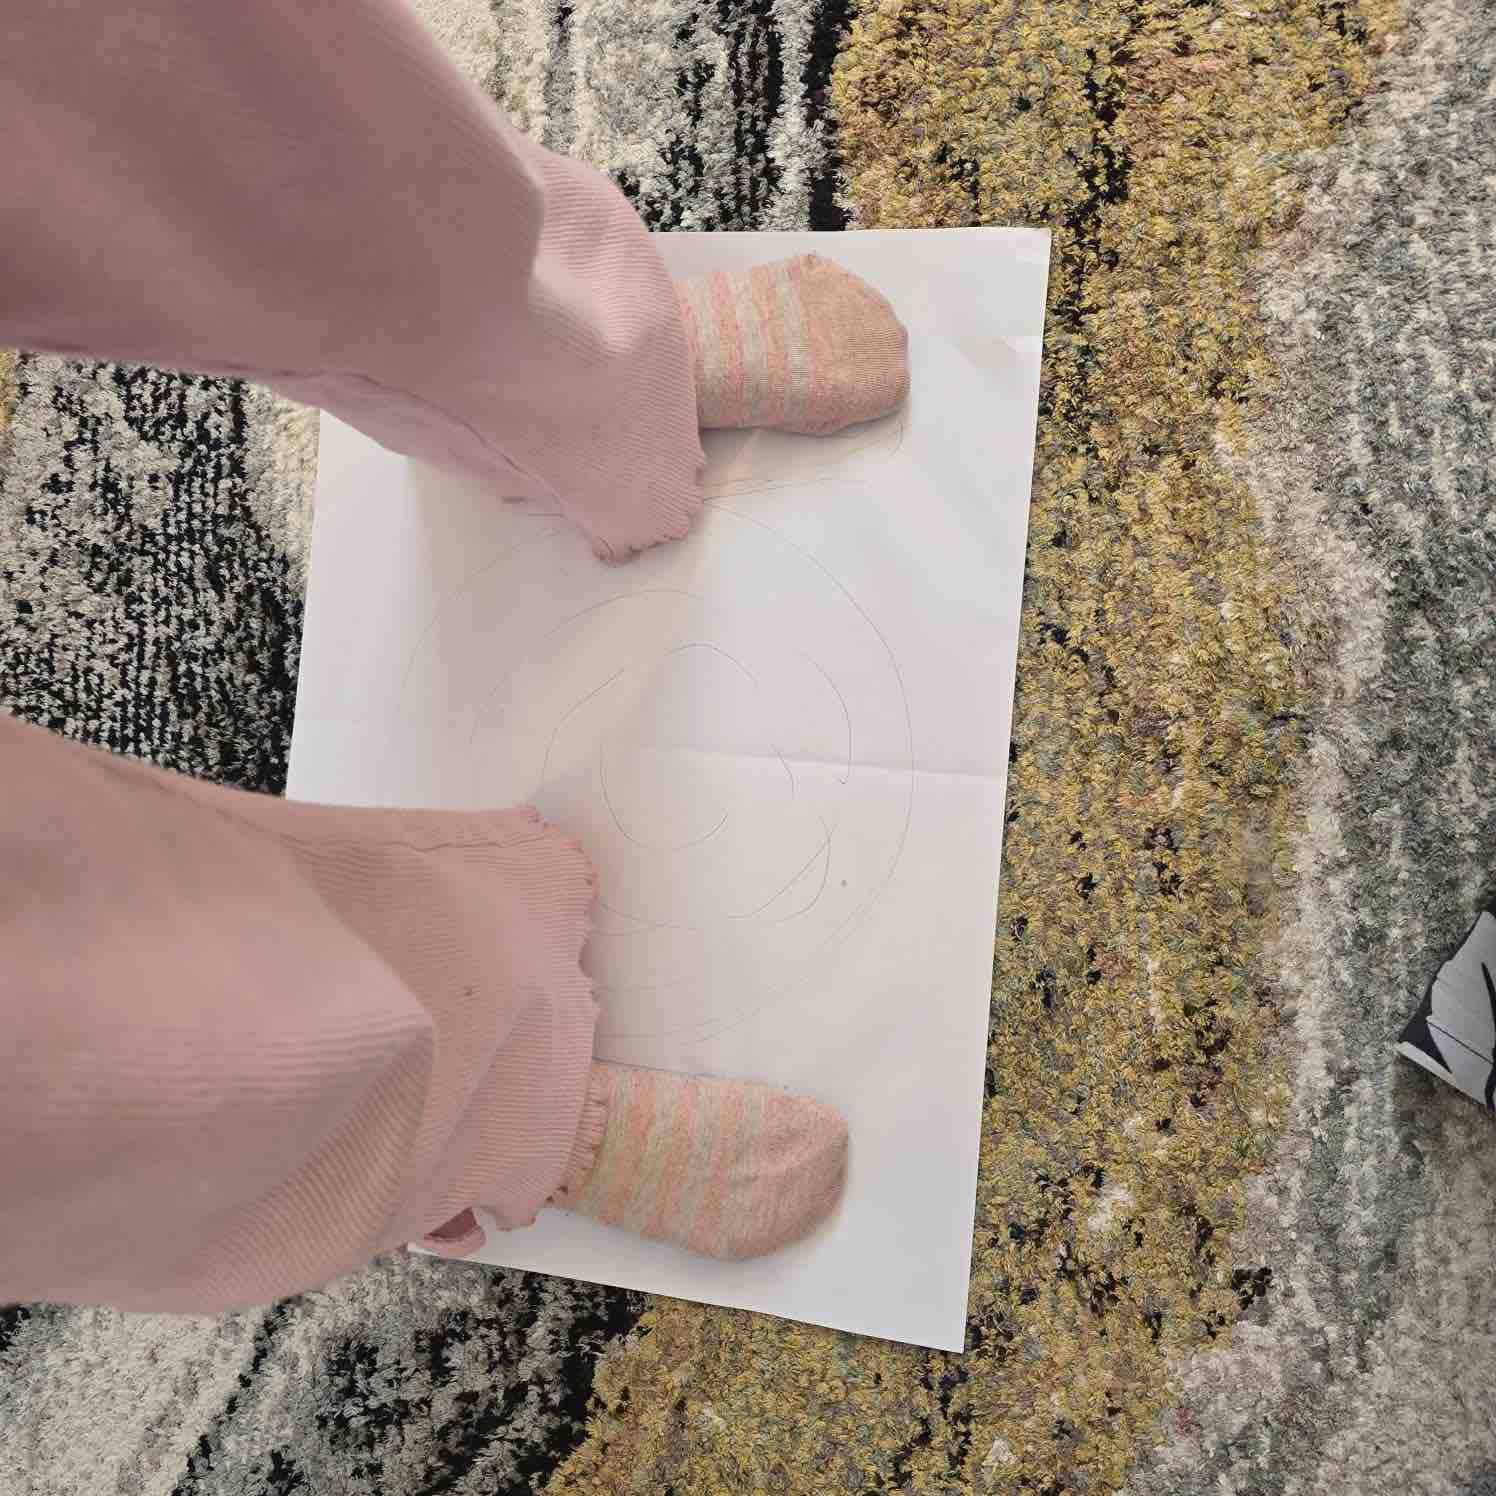
02| I asked my daughter to stand on an A3 paper to take the measurements.
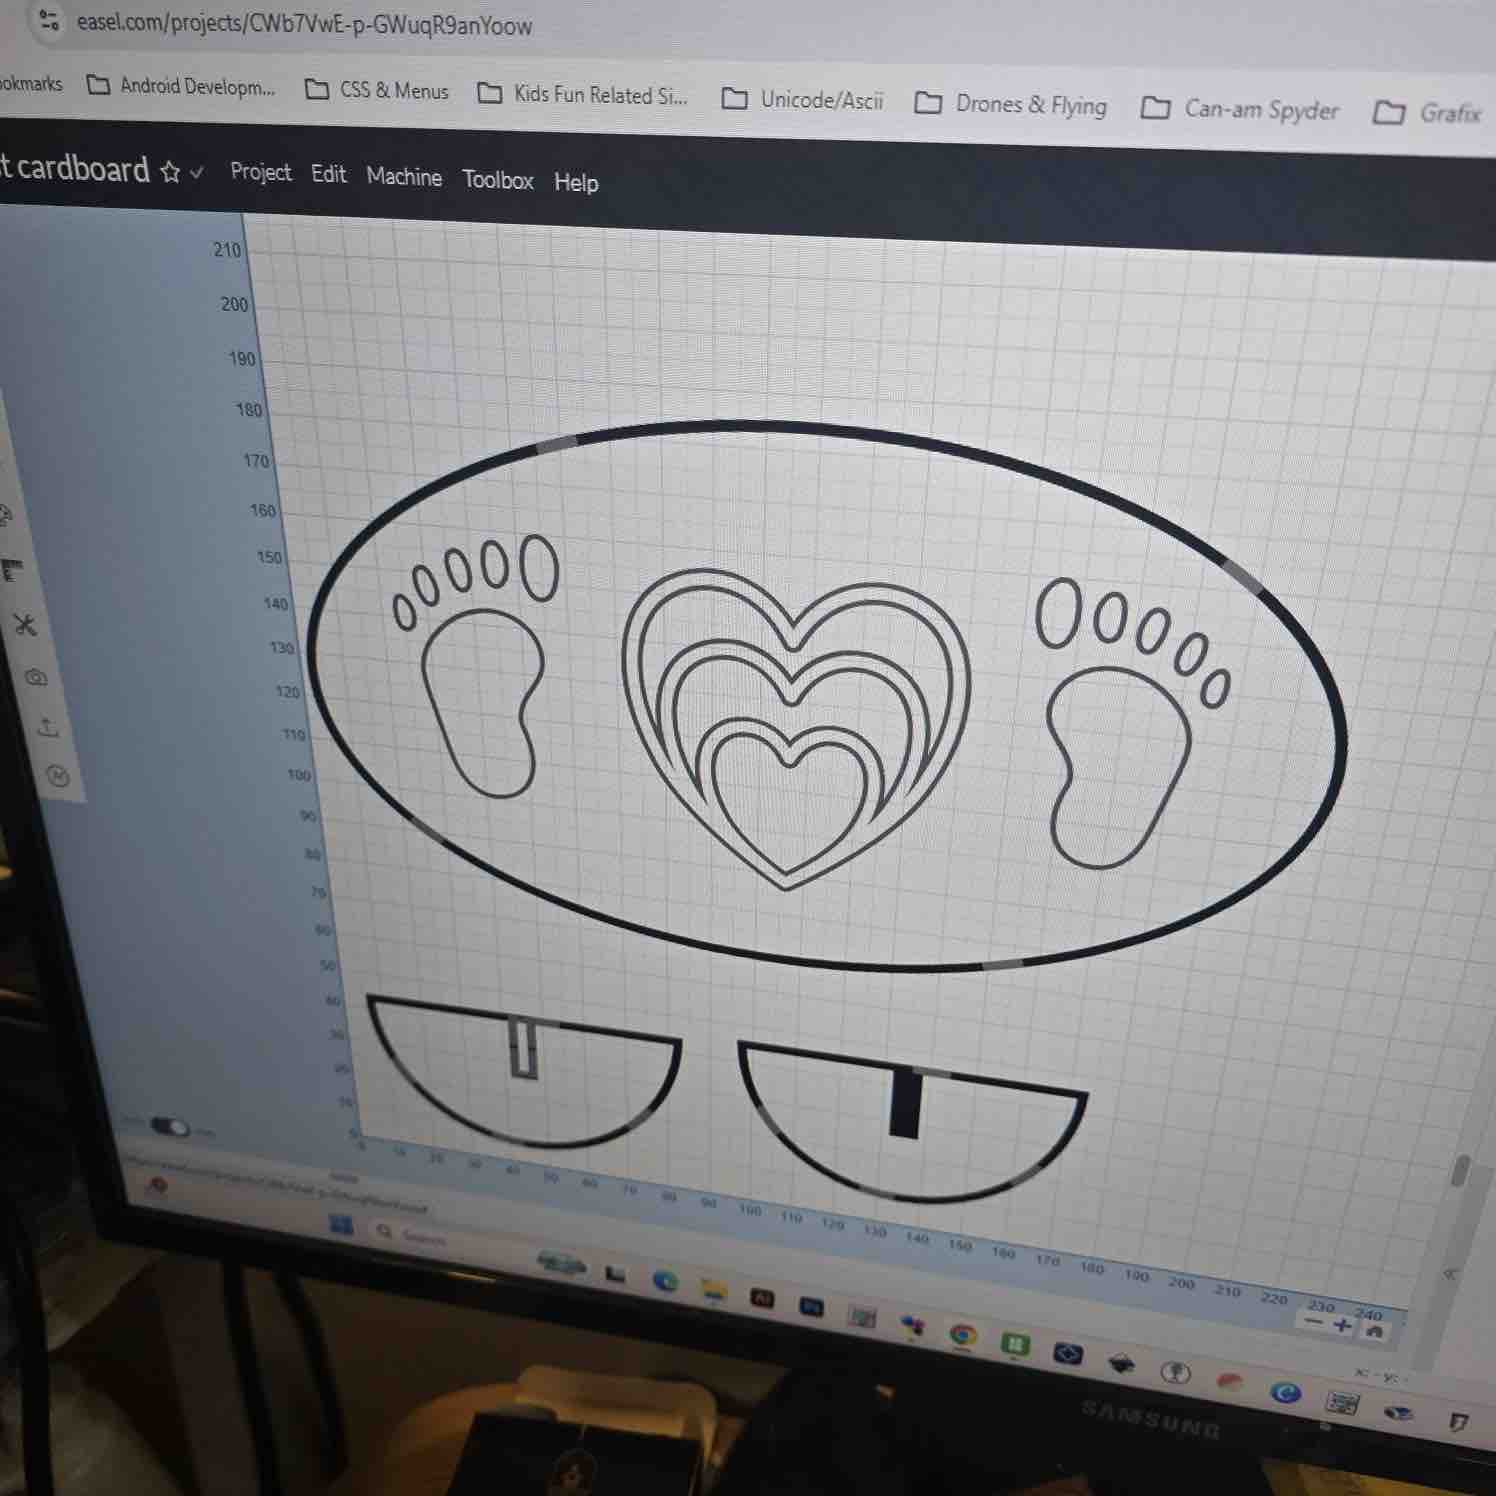
03| I made the design on https://easel.com
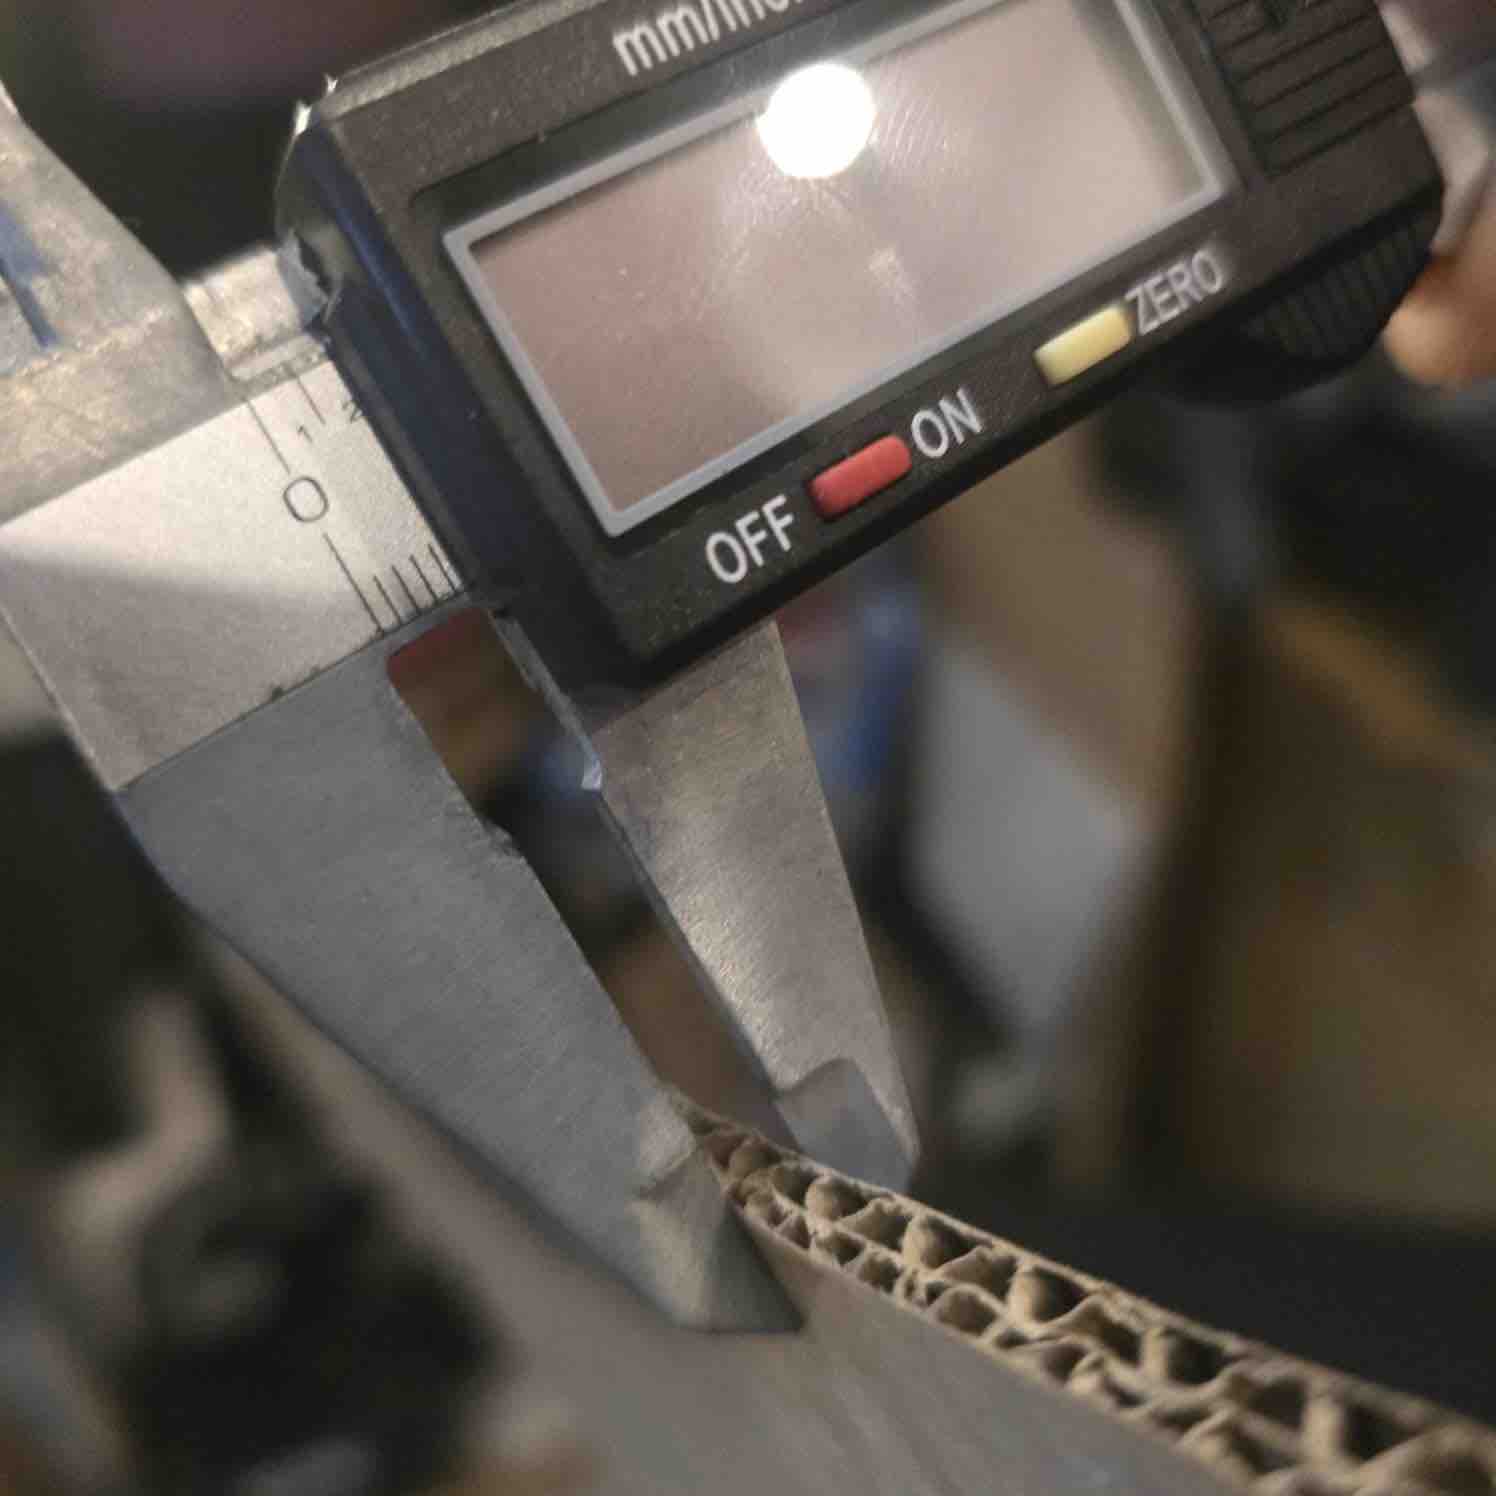
04 | Used 6 mm cardboard as the stock material. Given the situation in Kuwait and the wider Gulf, wood sheets weren't available in time to cut actual-size pieces.
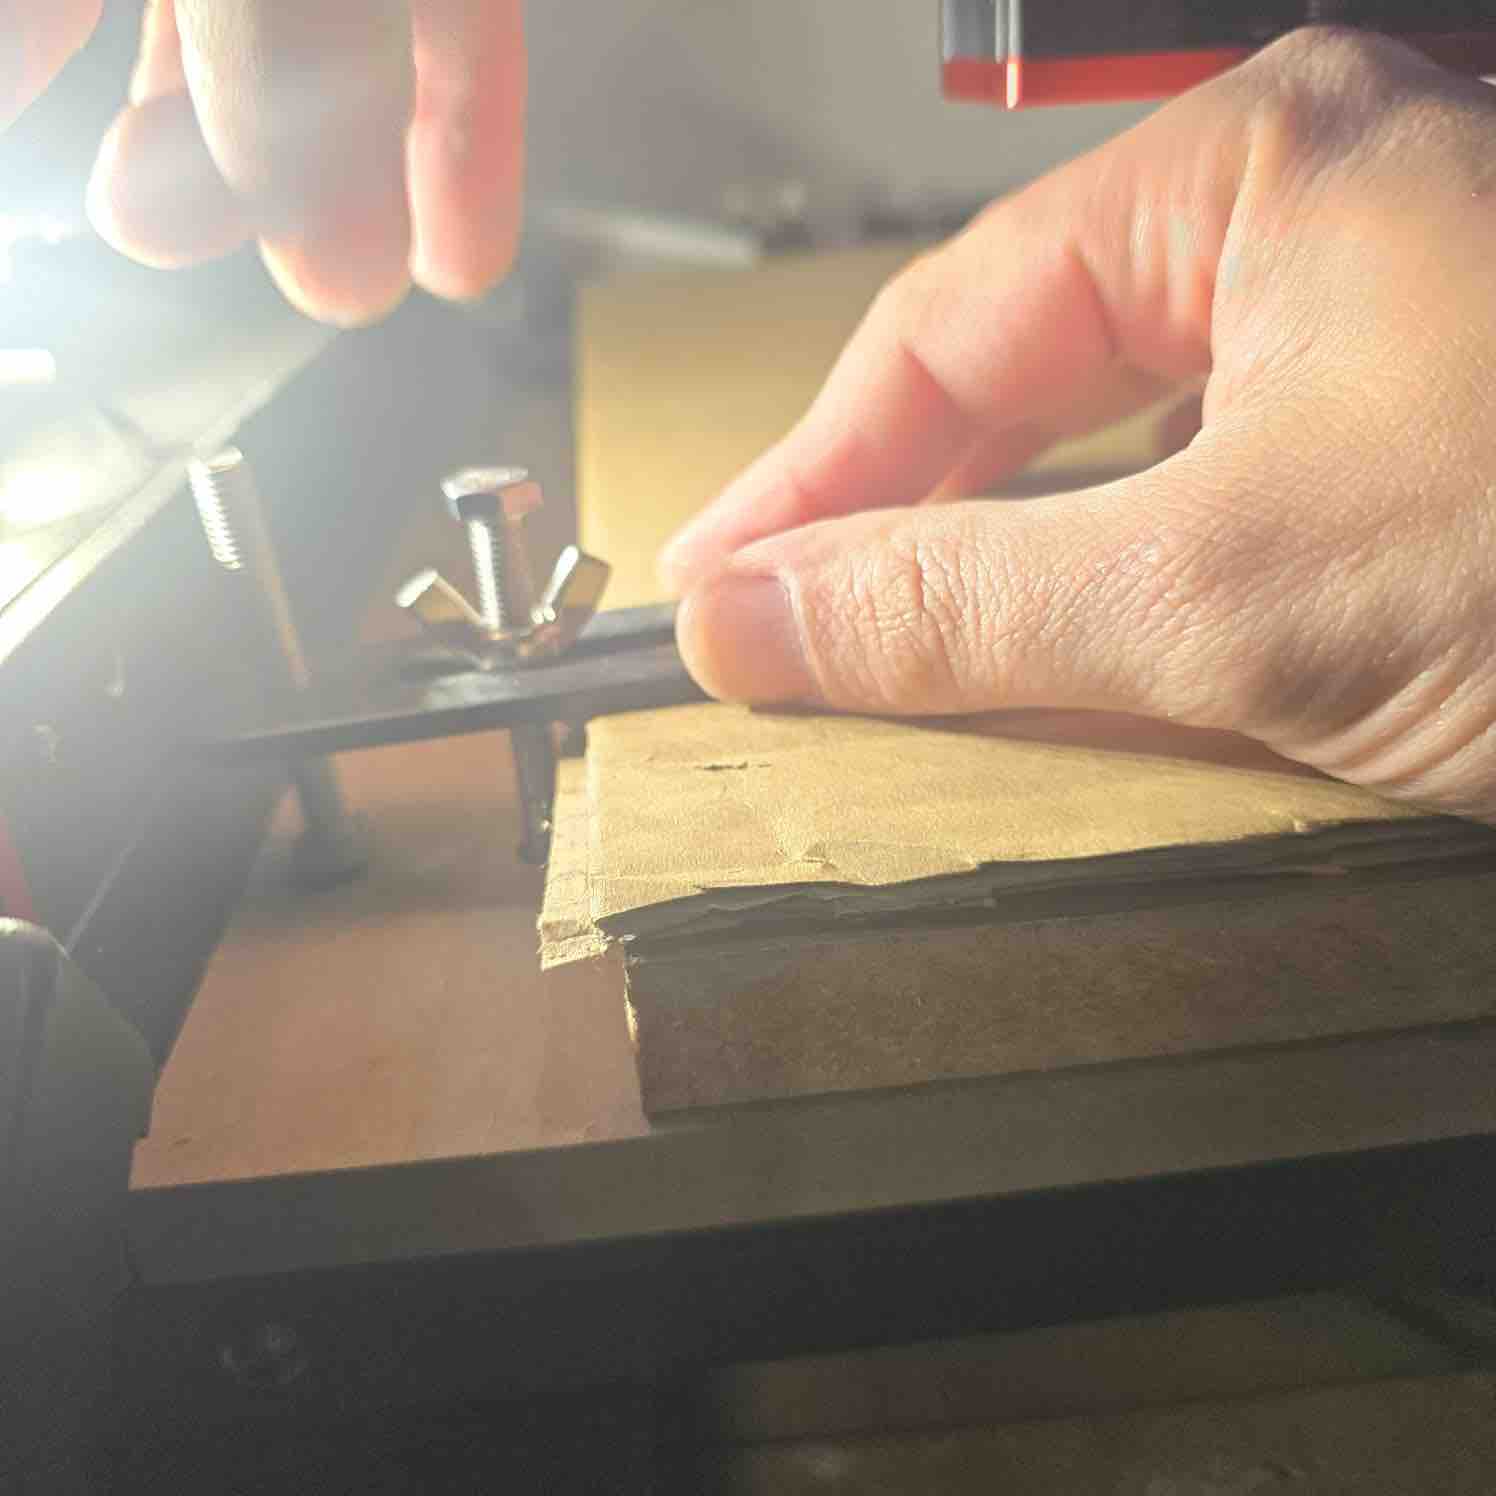
05 | Fixed the cardboard flat onto the CNC bed and clamped the edges so it wouldn't lift or shift during the cut.
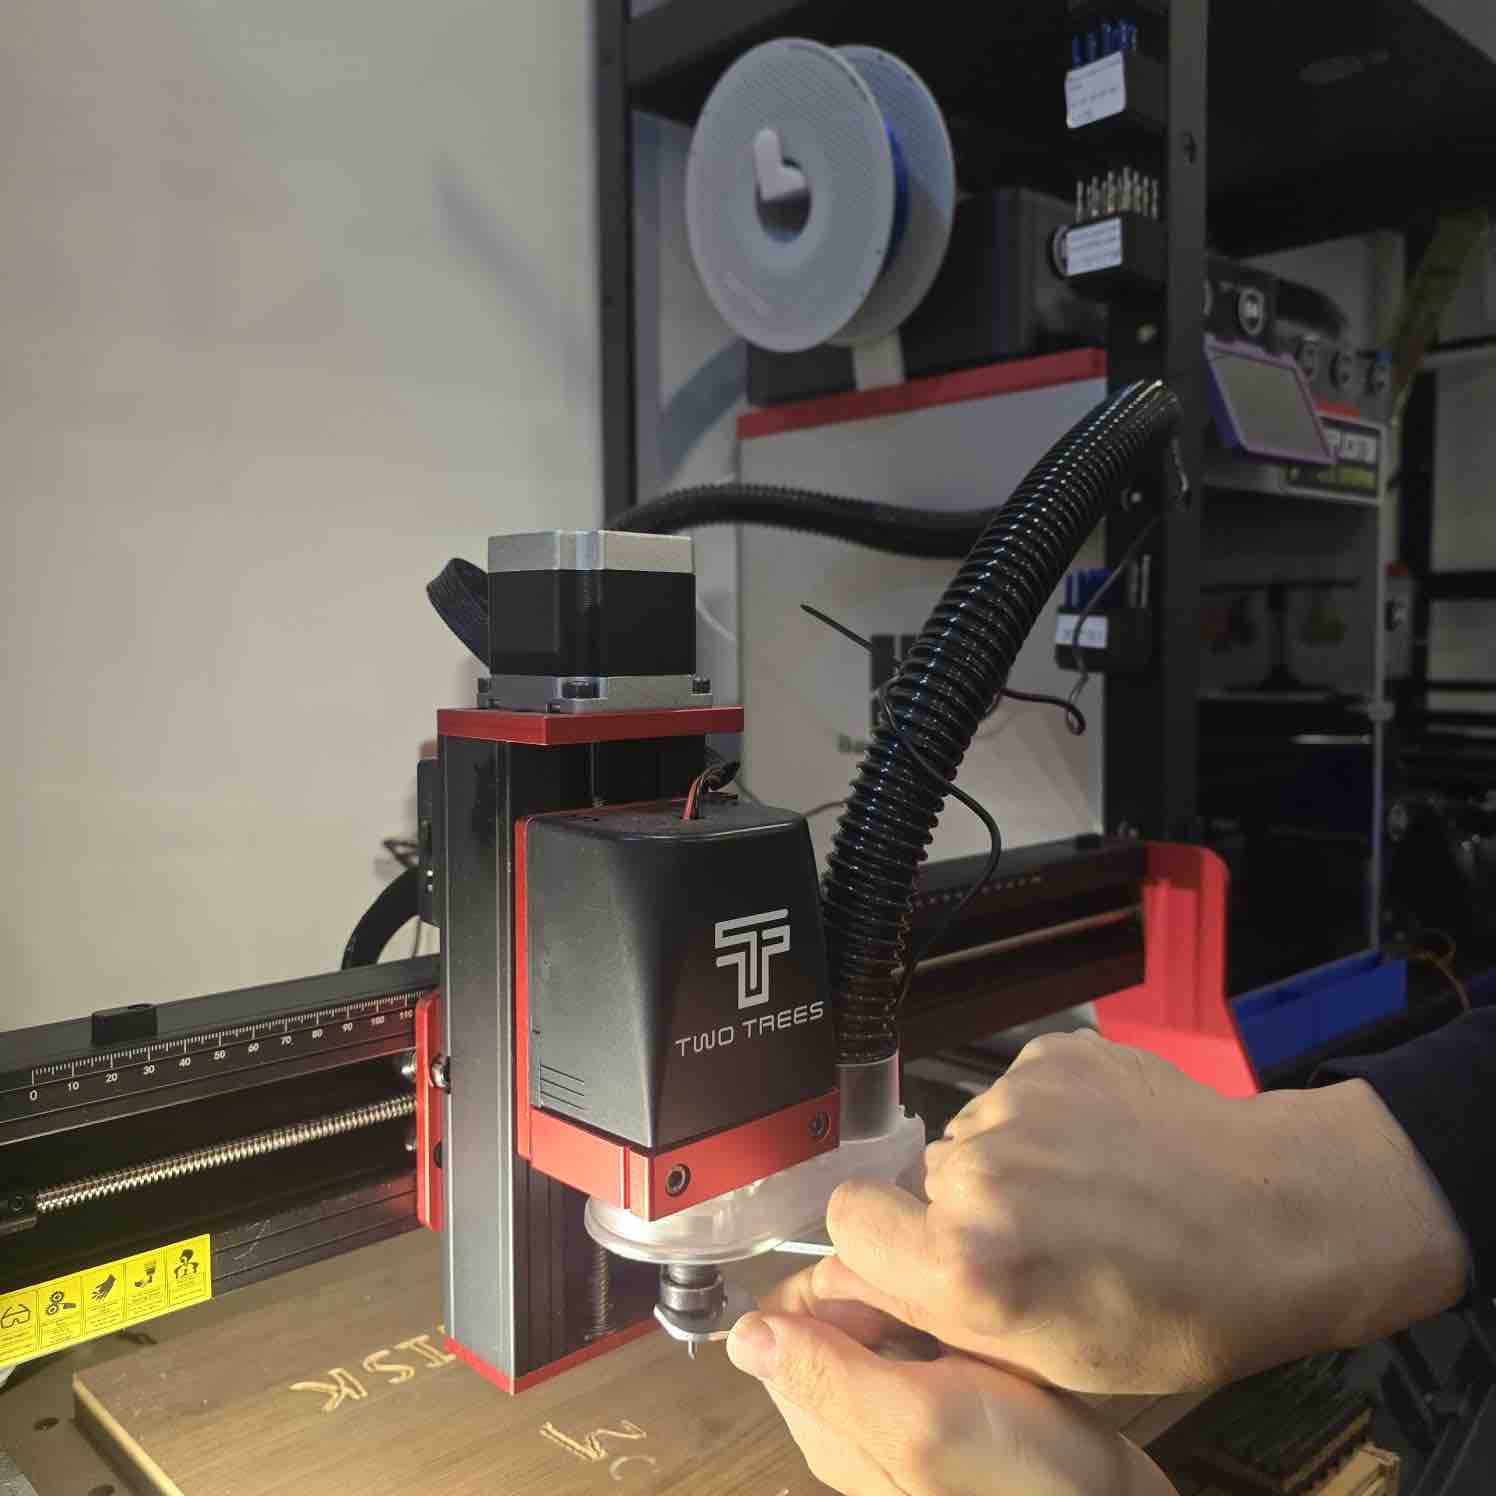
06 | I started setting up the machine — loaded the tool, homed the X / Y origin, and mounted the end mill.
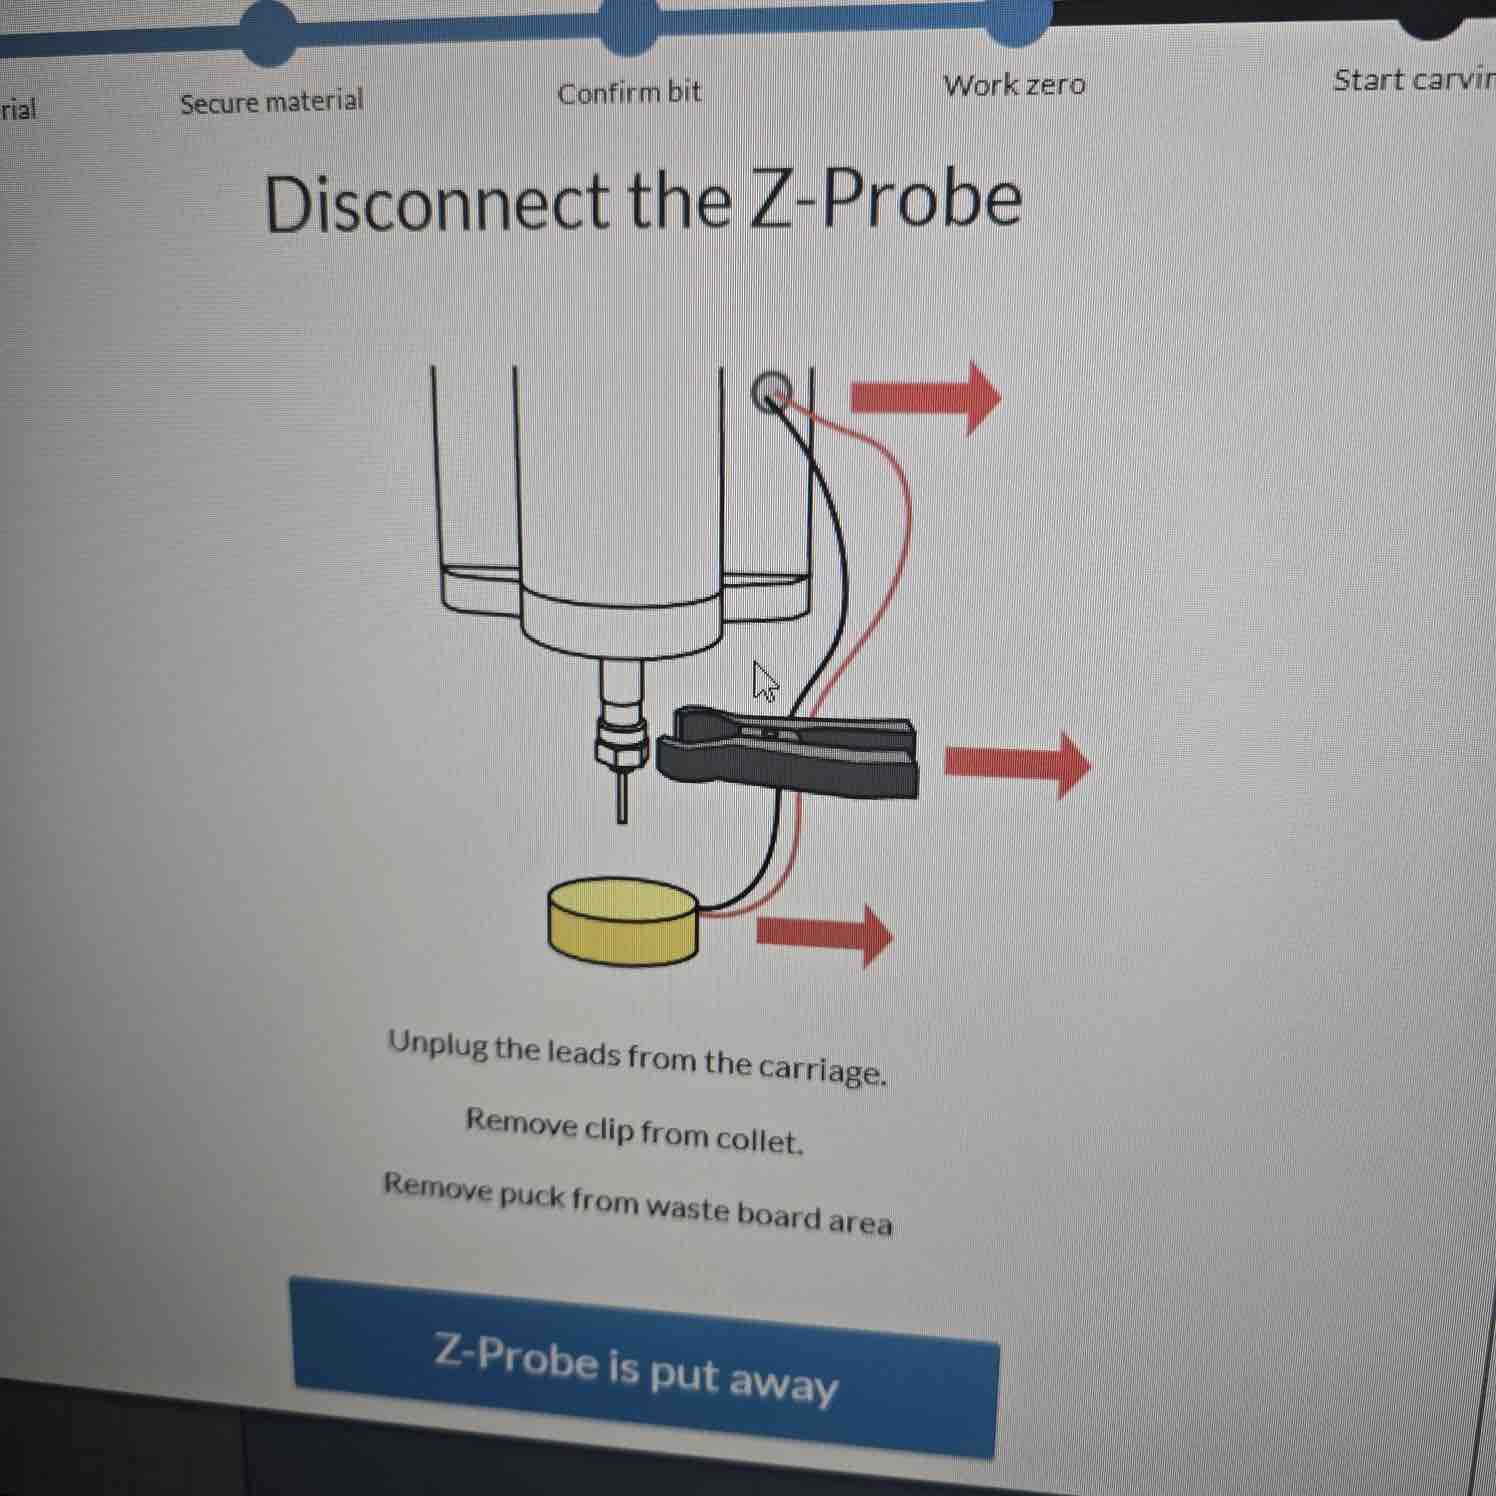
07 | Loaded the toolpath from Easel on the sender and did a dry run to confirm the design would fit on the stock.
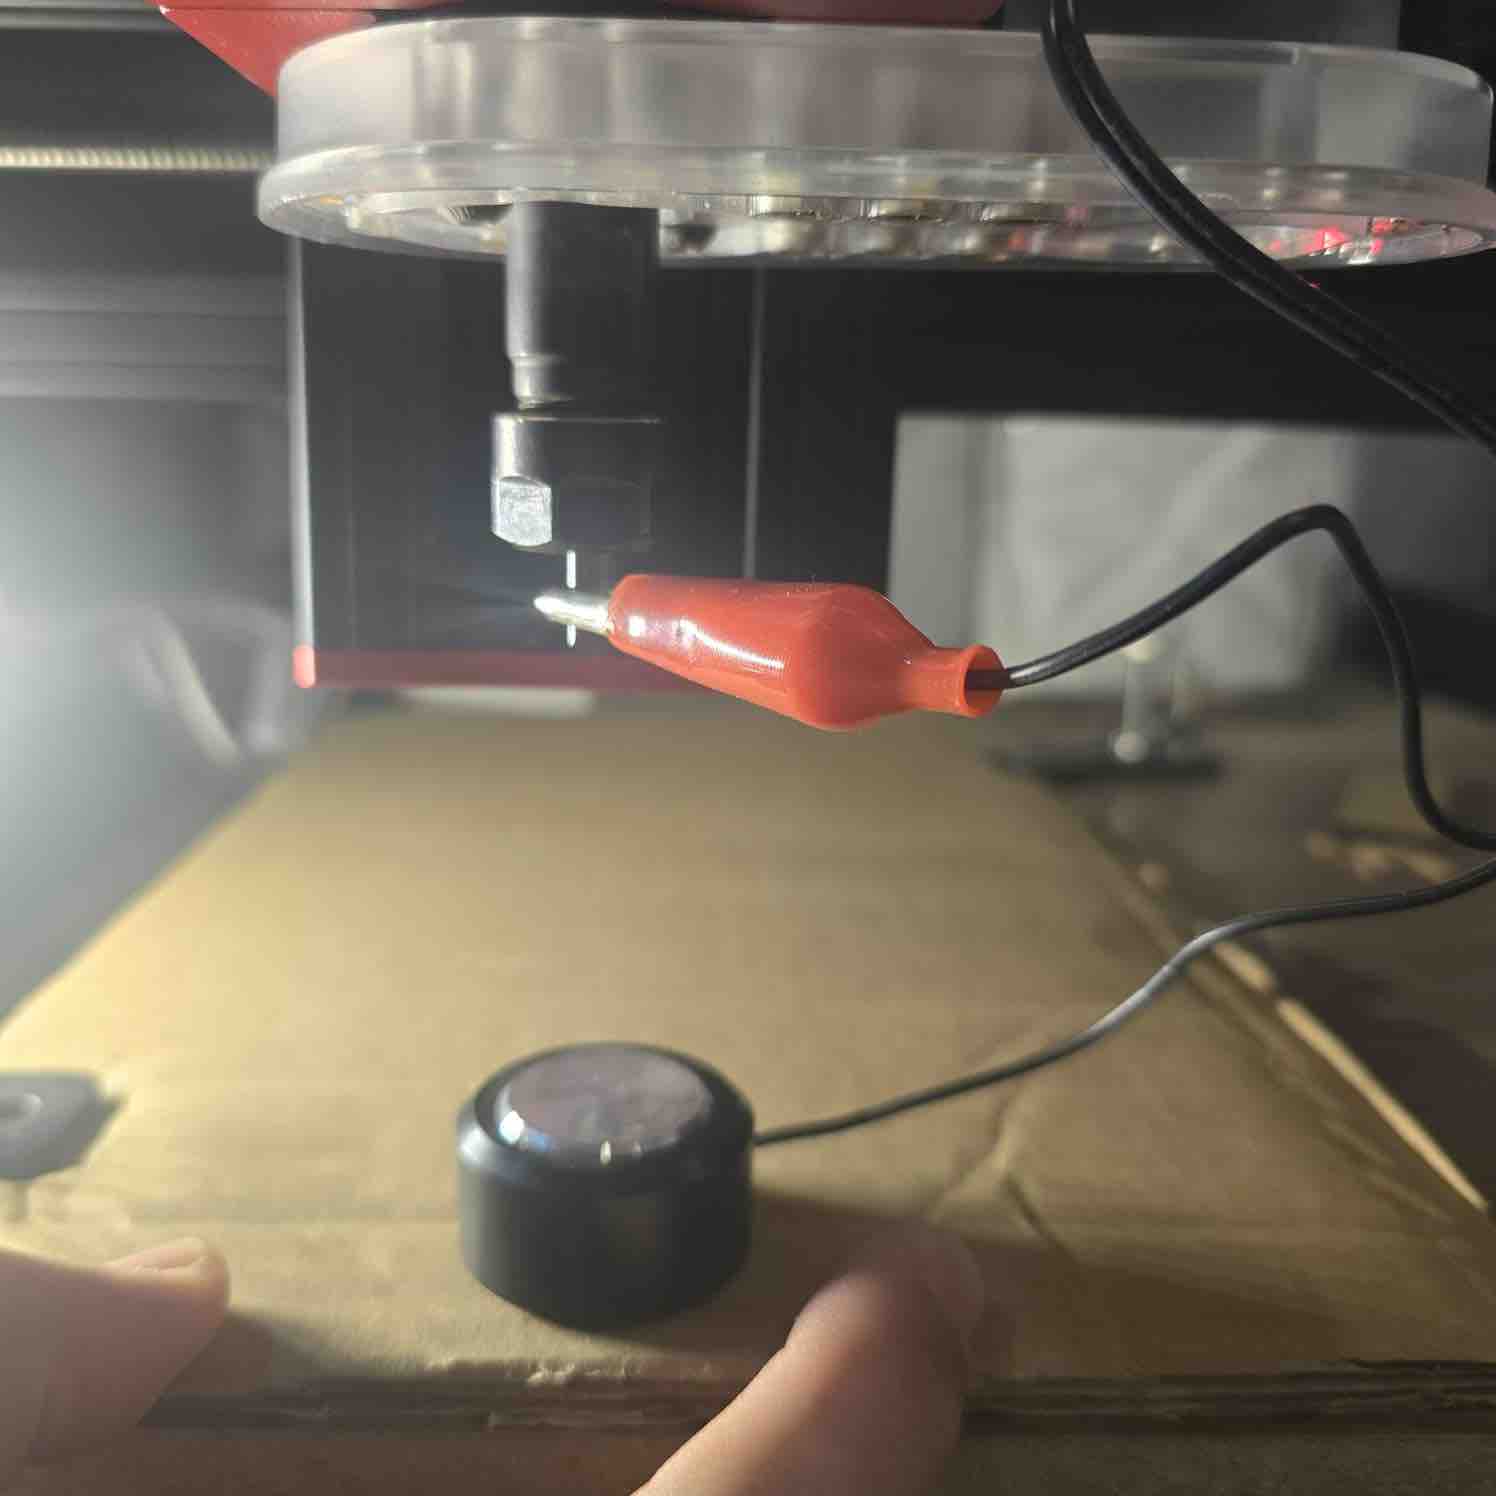
08| I used the sensor to calibrate the height of the cardboard sheets
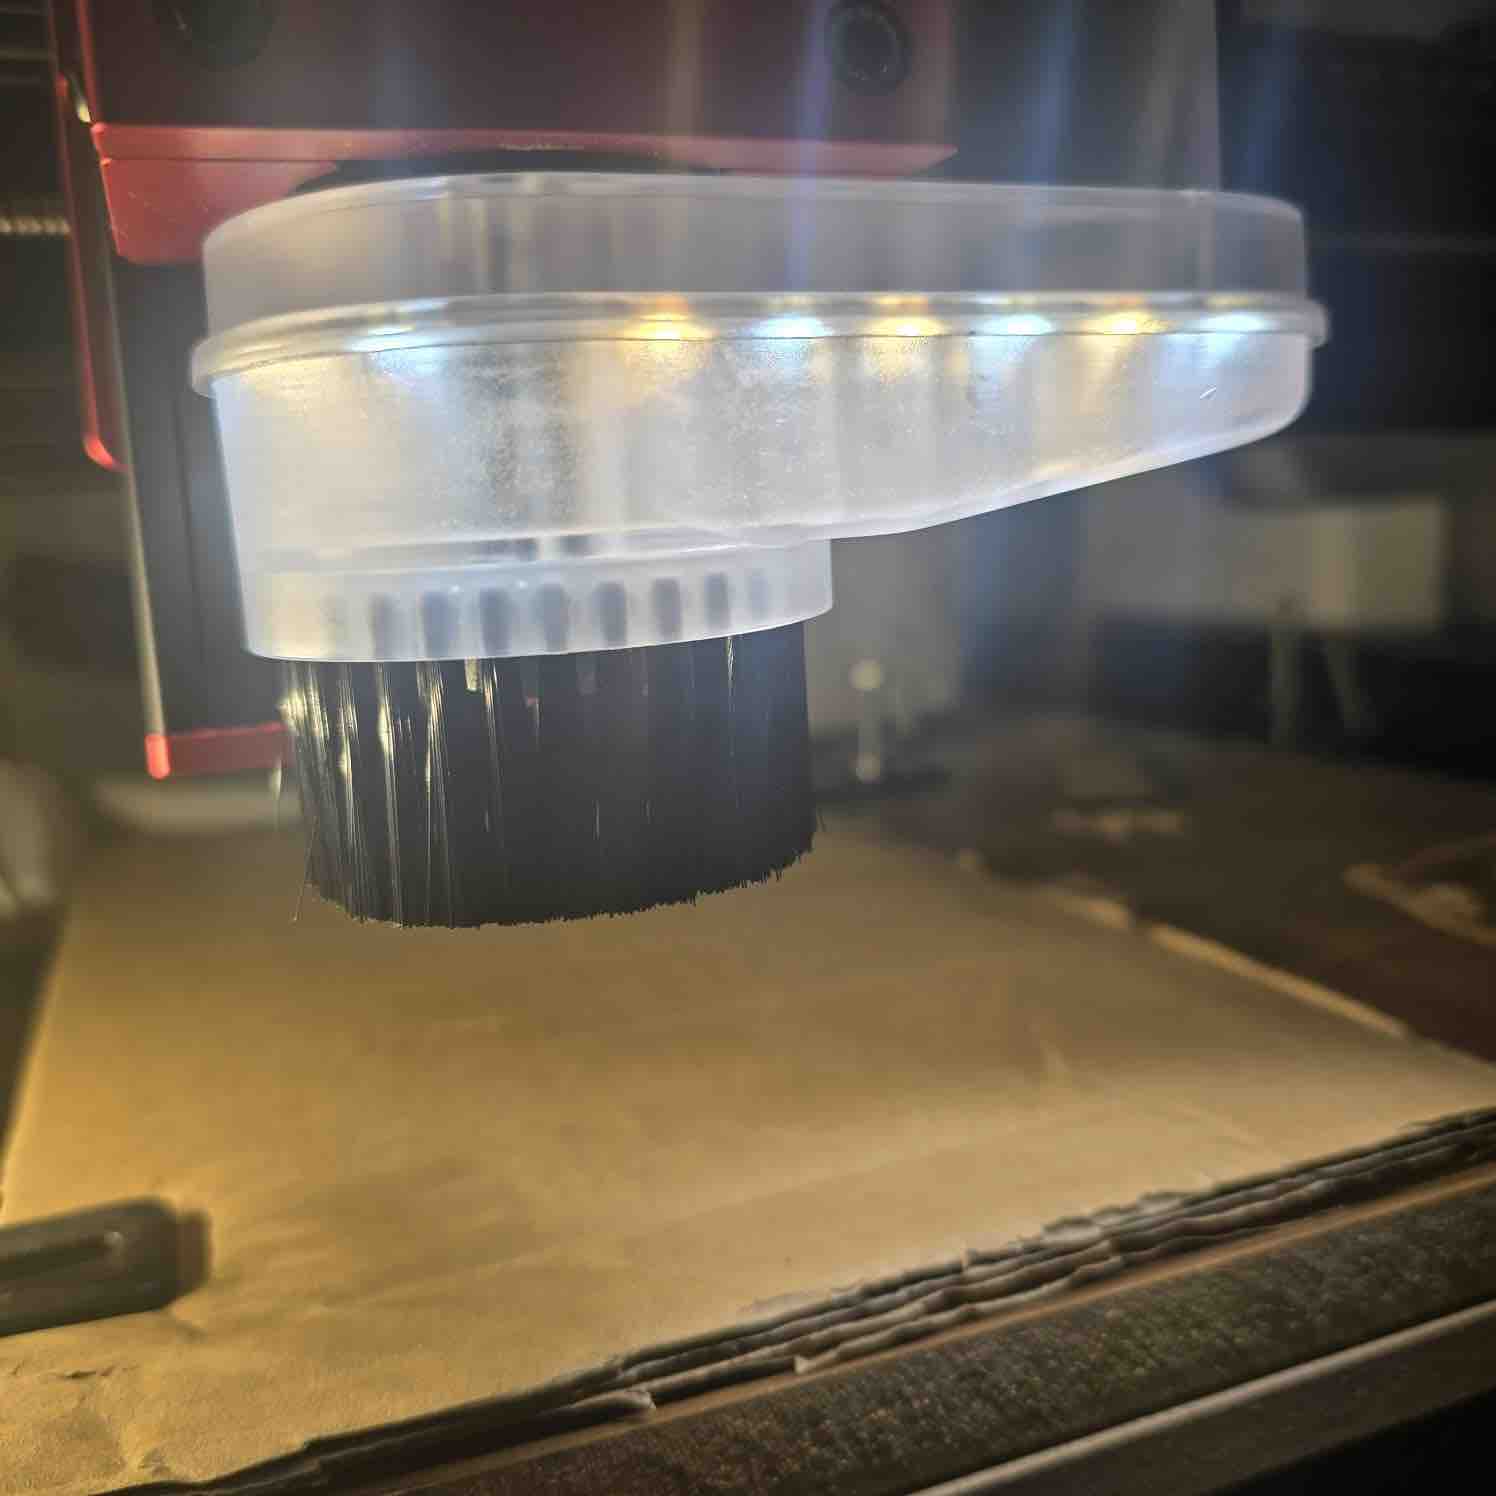
09| I connected the brush and vacuum dust collector
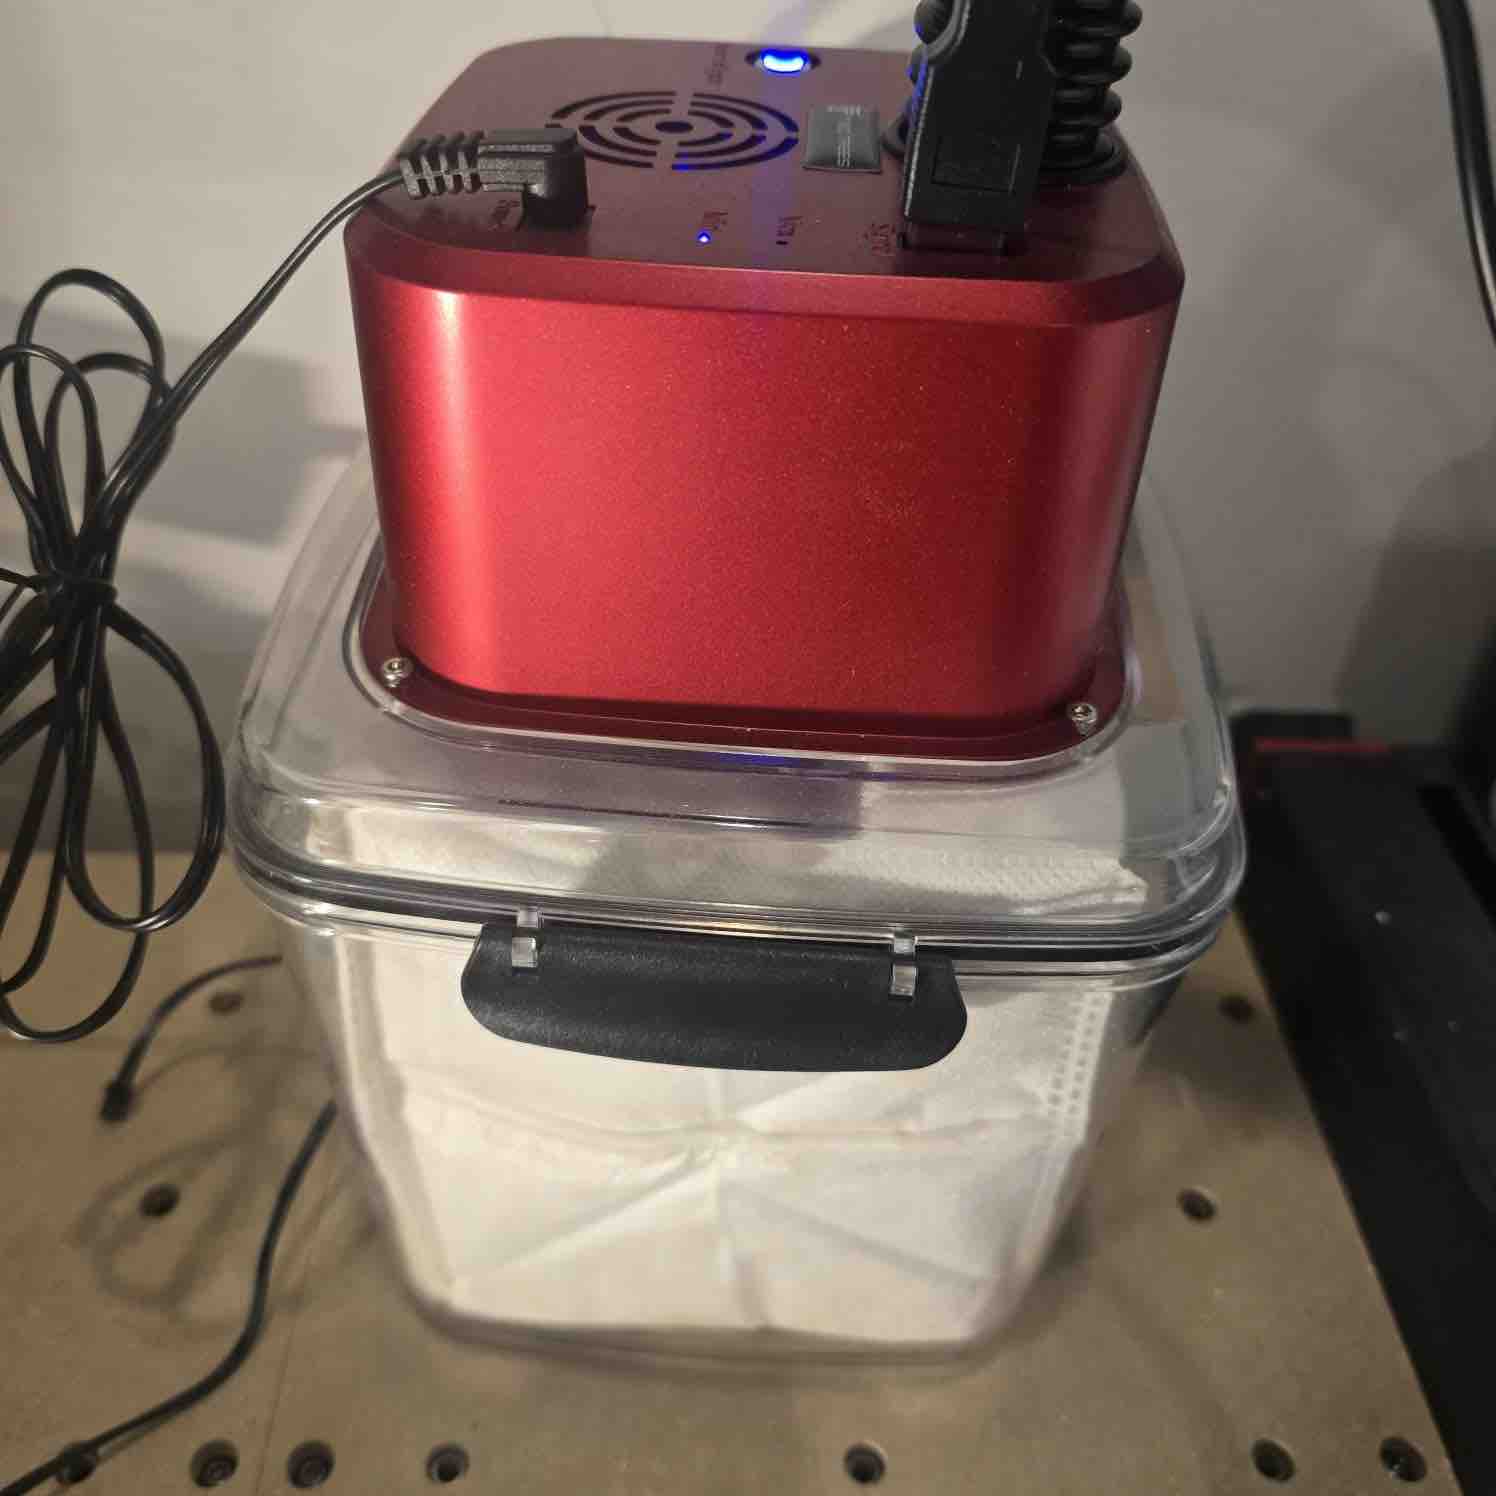
10| Turned the vacuum on
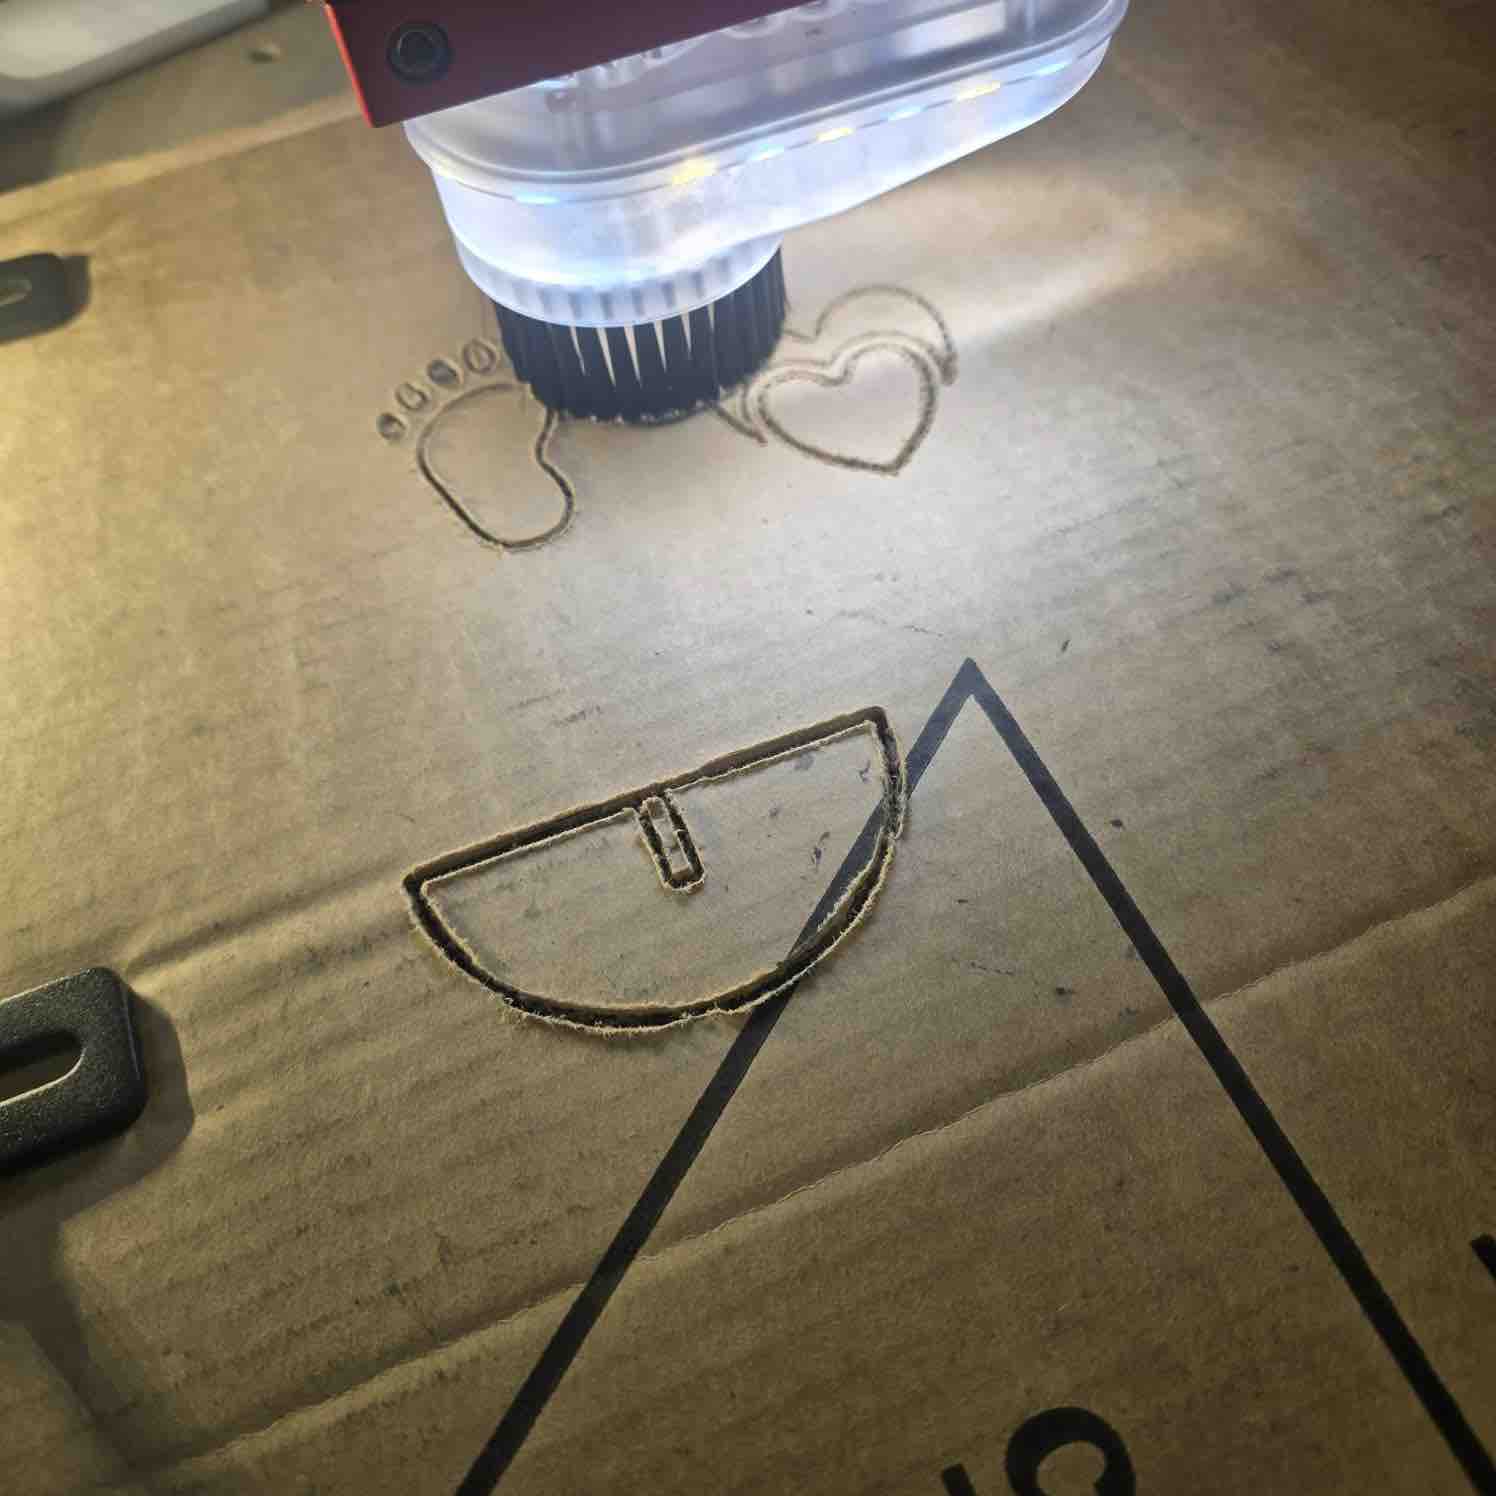
11| Then I started cutting my first prototype
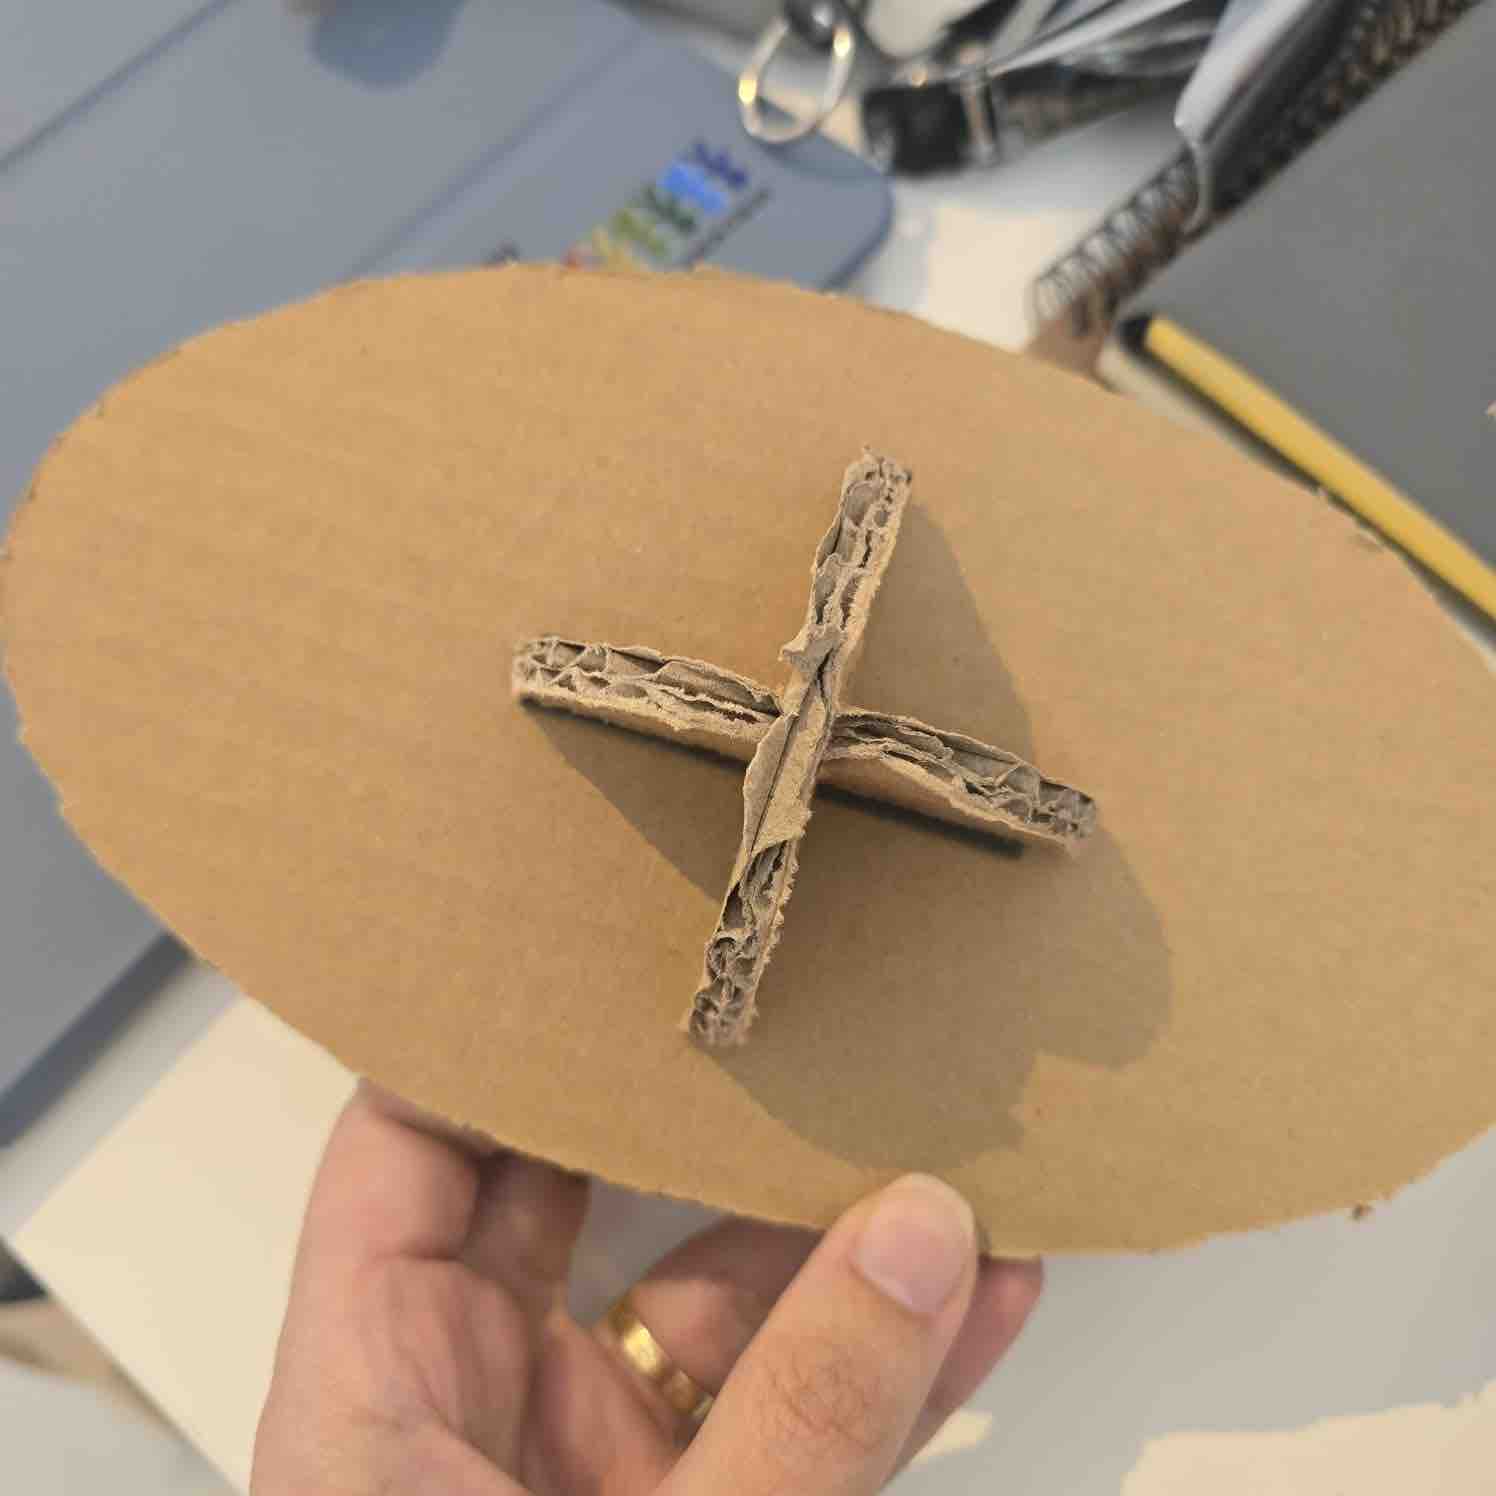
12| The pieces connected at the back
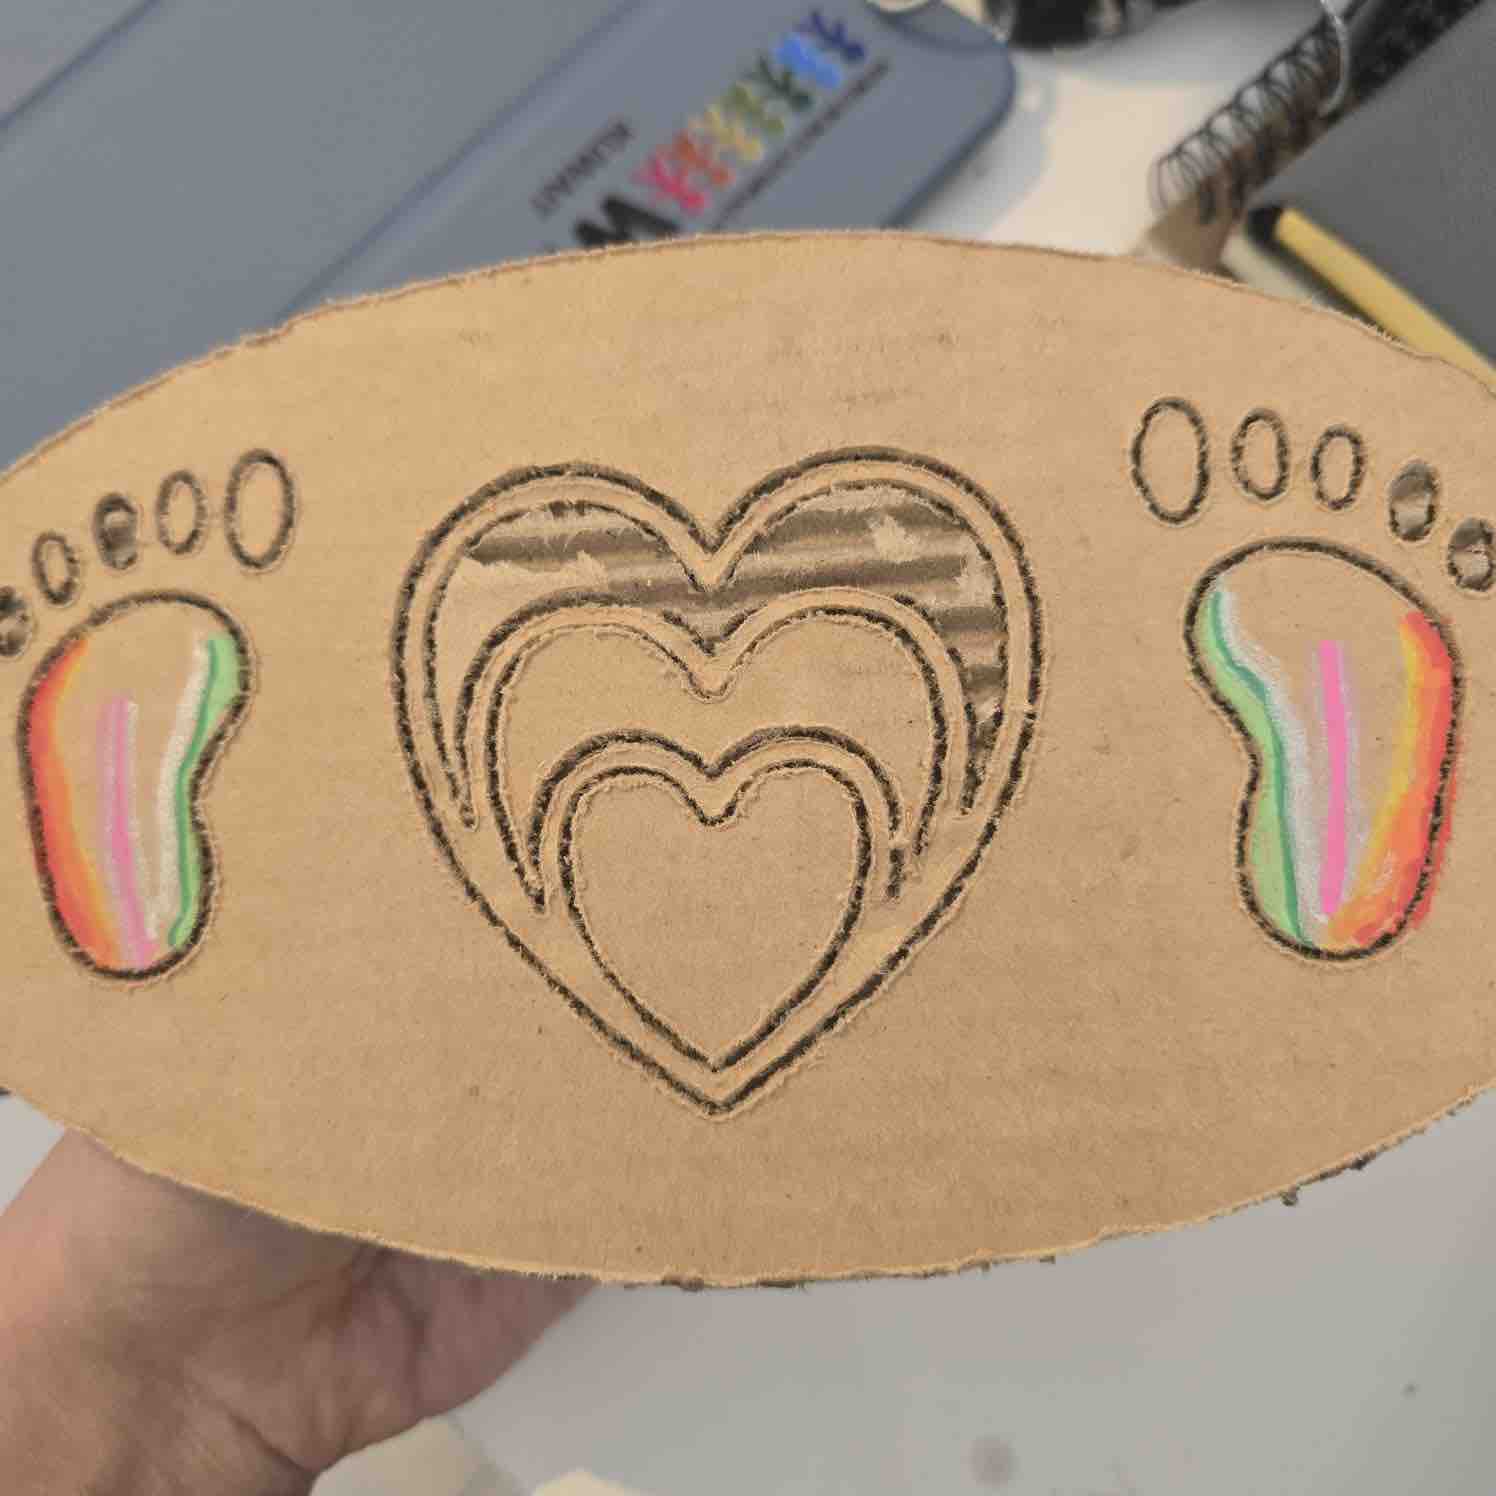
13| From the front, those shapes were engraved
- Feedback: A good start and a taste of how the assignment should feel. The balancing toy came out proportioned to my daughter, and the small home-CNC workflow (Easel design → Z-zero → vacuum on → send job) went smoothly end-to-end.
- Challenge: Time, time, time. Because I couldn't reach the lab with the full-size CNC, I fell back to 6 mm cardboard on the home machine — so this is a scale prototype, not the meter-scale build the assignment asks for. I plan to redo it in wood at full scale in a later spiral.
02: Make a rocking chair
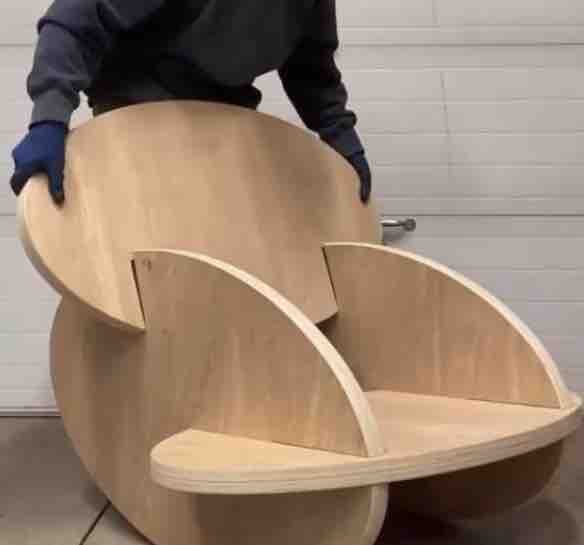
01 | I wanted to fabricate something I'd actually use at home and also start experimenting with waffle-style furniture, because I'm aiming to make bigger pieces later. So I picked this simple rocking chair I saw on Pinterest as a starting point.
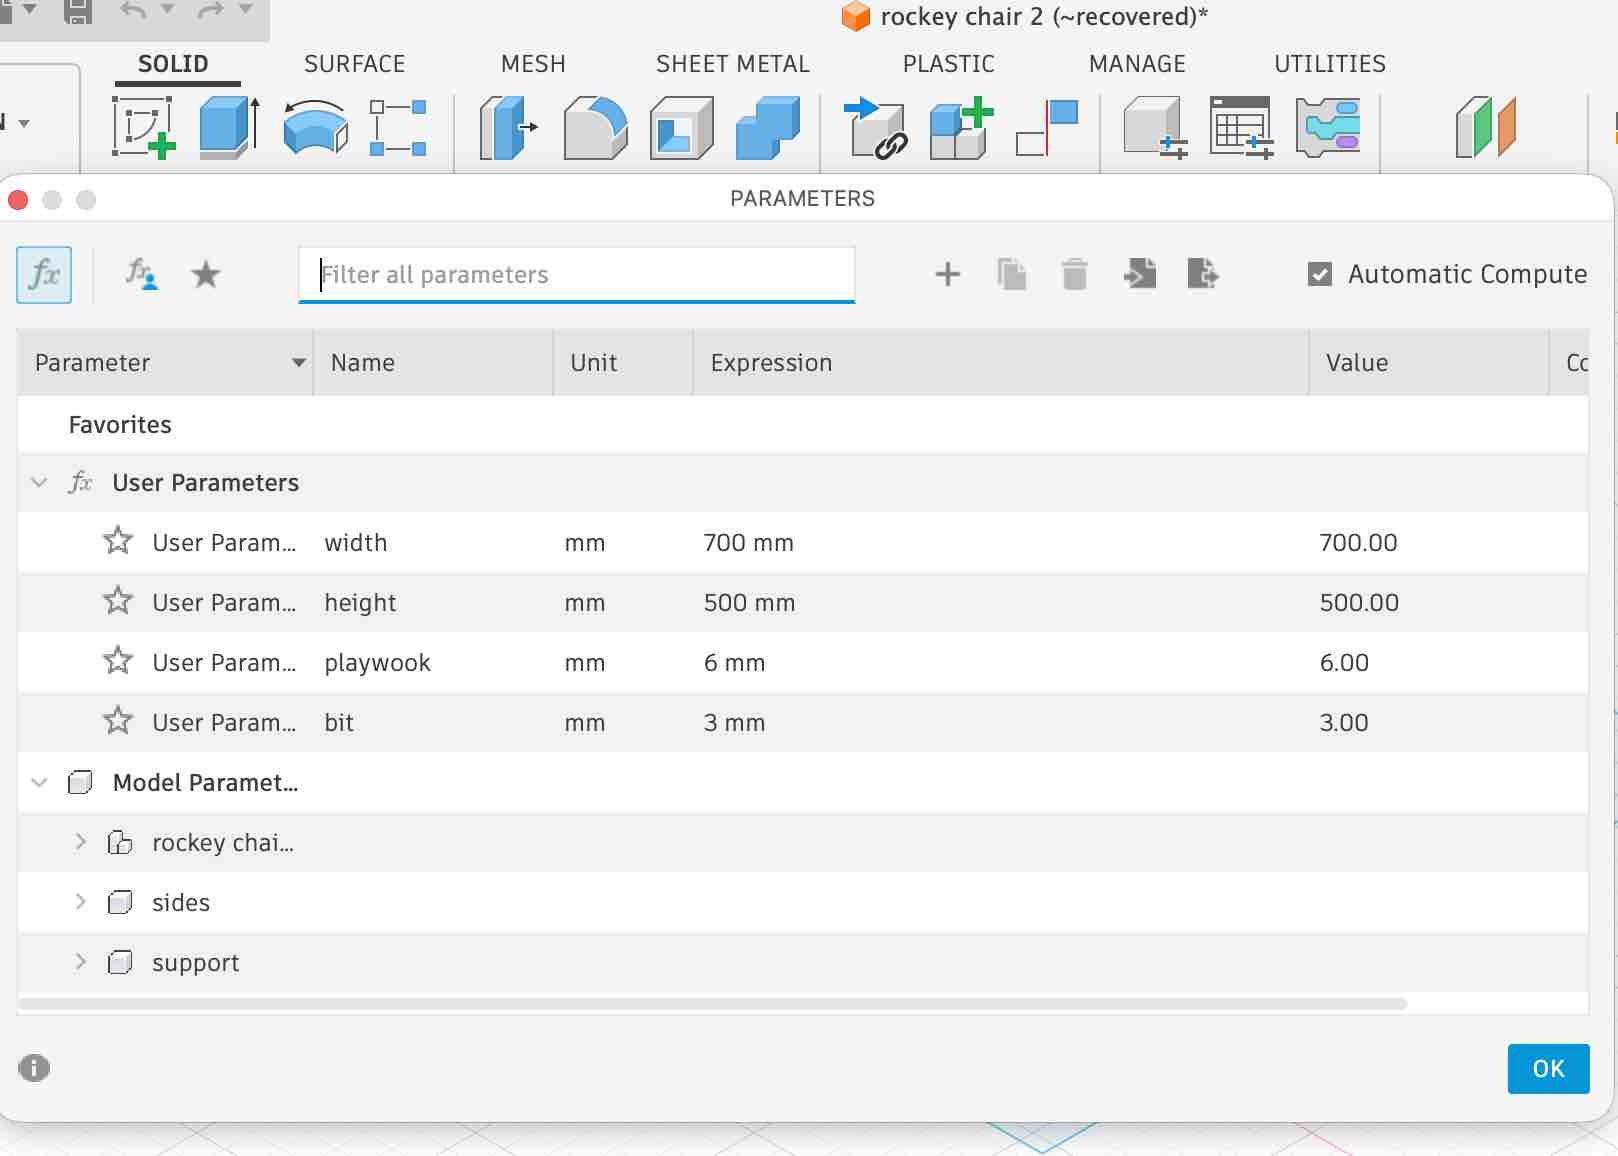
02 | I modelled it in Fusion 360 and made sure to use parametric values so changing the size later would be easy — at this point I didn't know which wood I'd find or what thickness, and the chair's overall size had to follow from that.
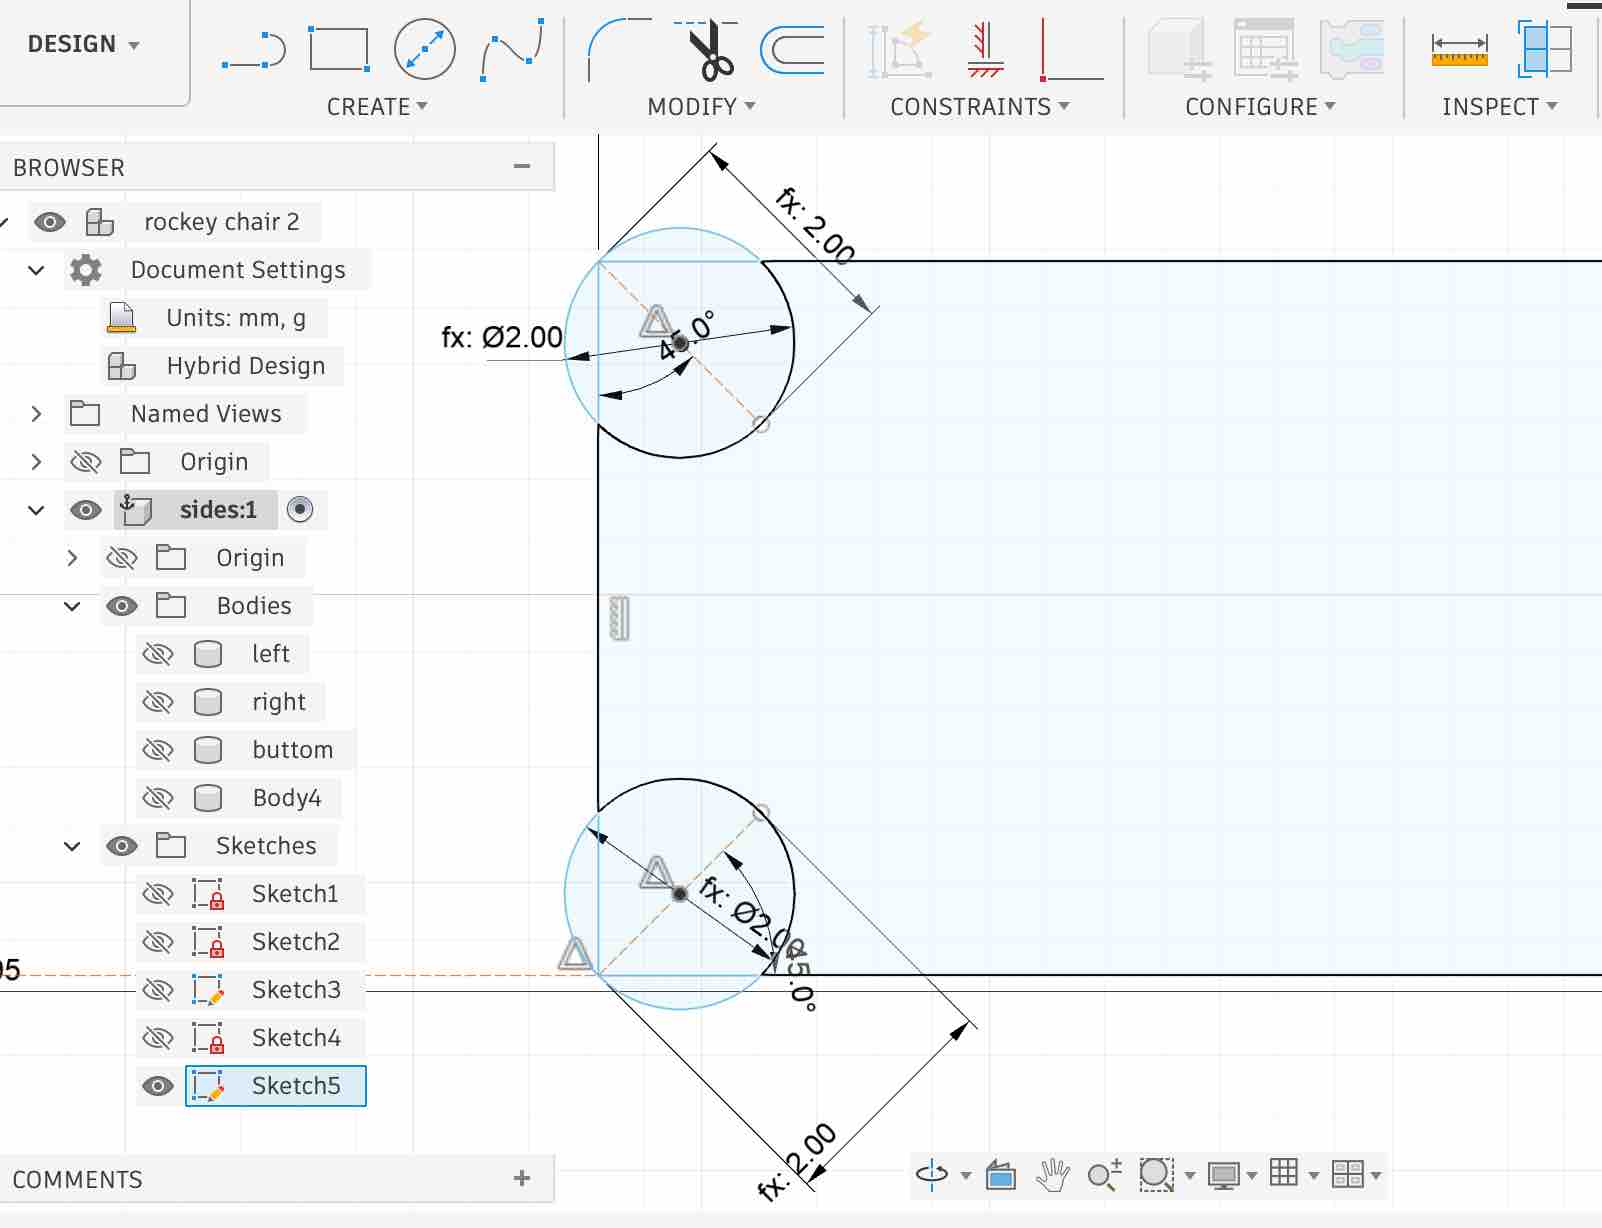
03 | Designing the dogbone fillets was important — the CNC's round bit can't produce a sharp inside corner, so the dogbones ensure the joint still fits. I drove them from parametric values too. Each joint cut goes half the thickness of the intersecting body on either side, so the two parts nest flush when assembled.
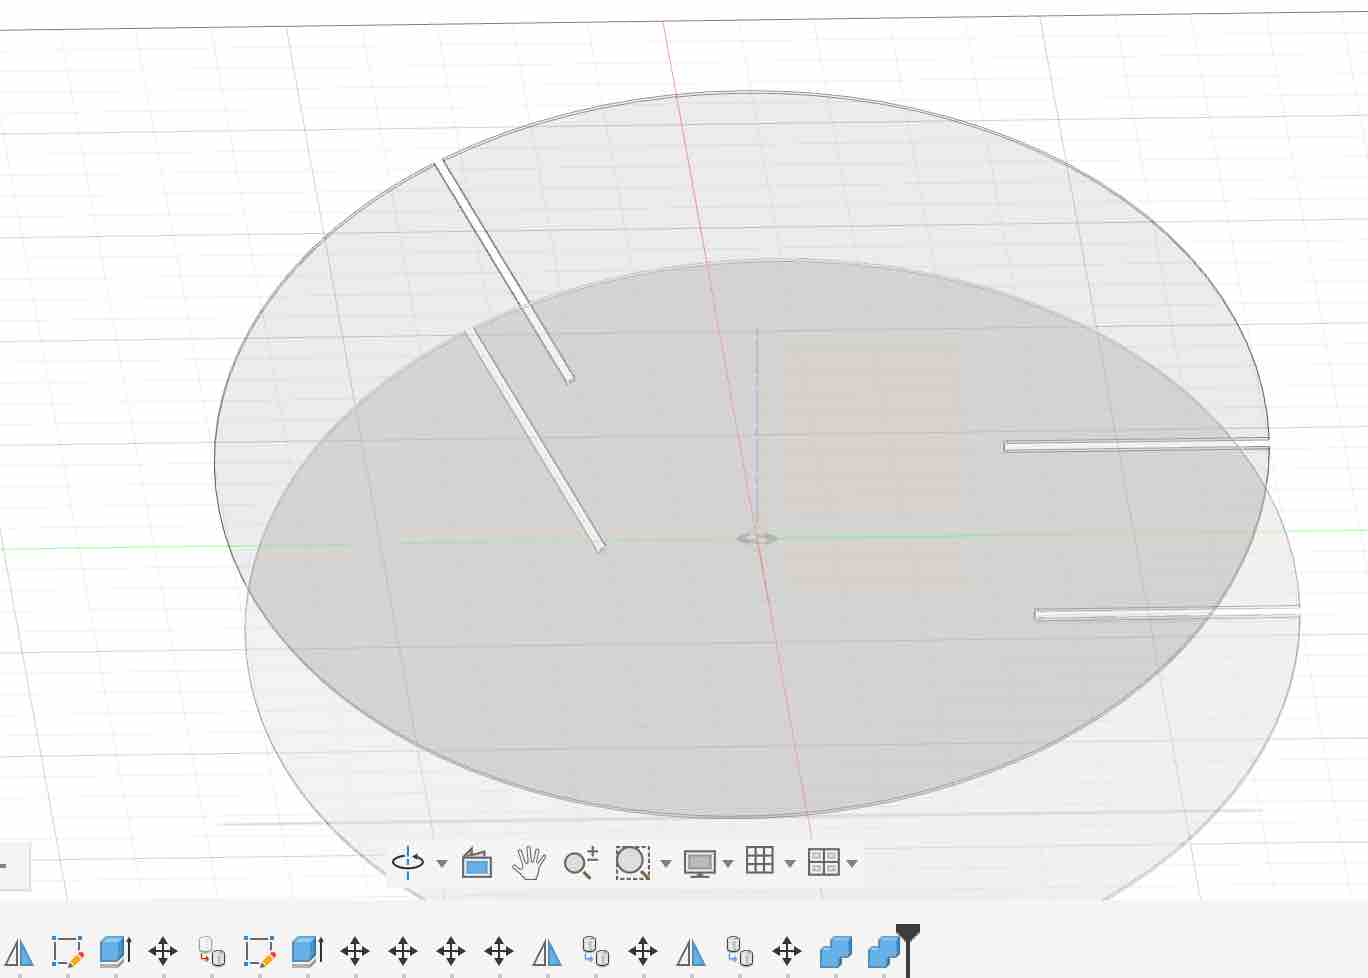
04 | I used the mirror feature to create identical bodies and place the joints in symmetrical positions. Because it's a rocking chair, weight on one side would tip the balance — the geometry had to stay symmetrical left-right.
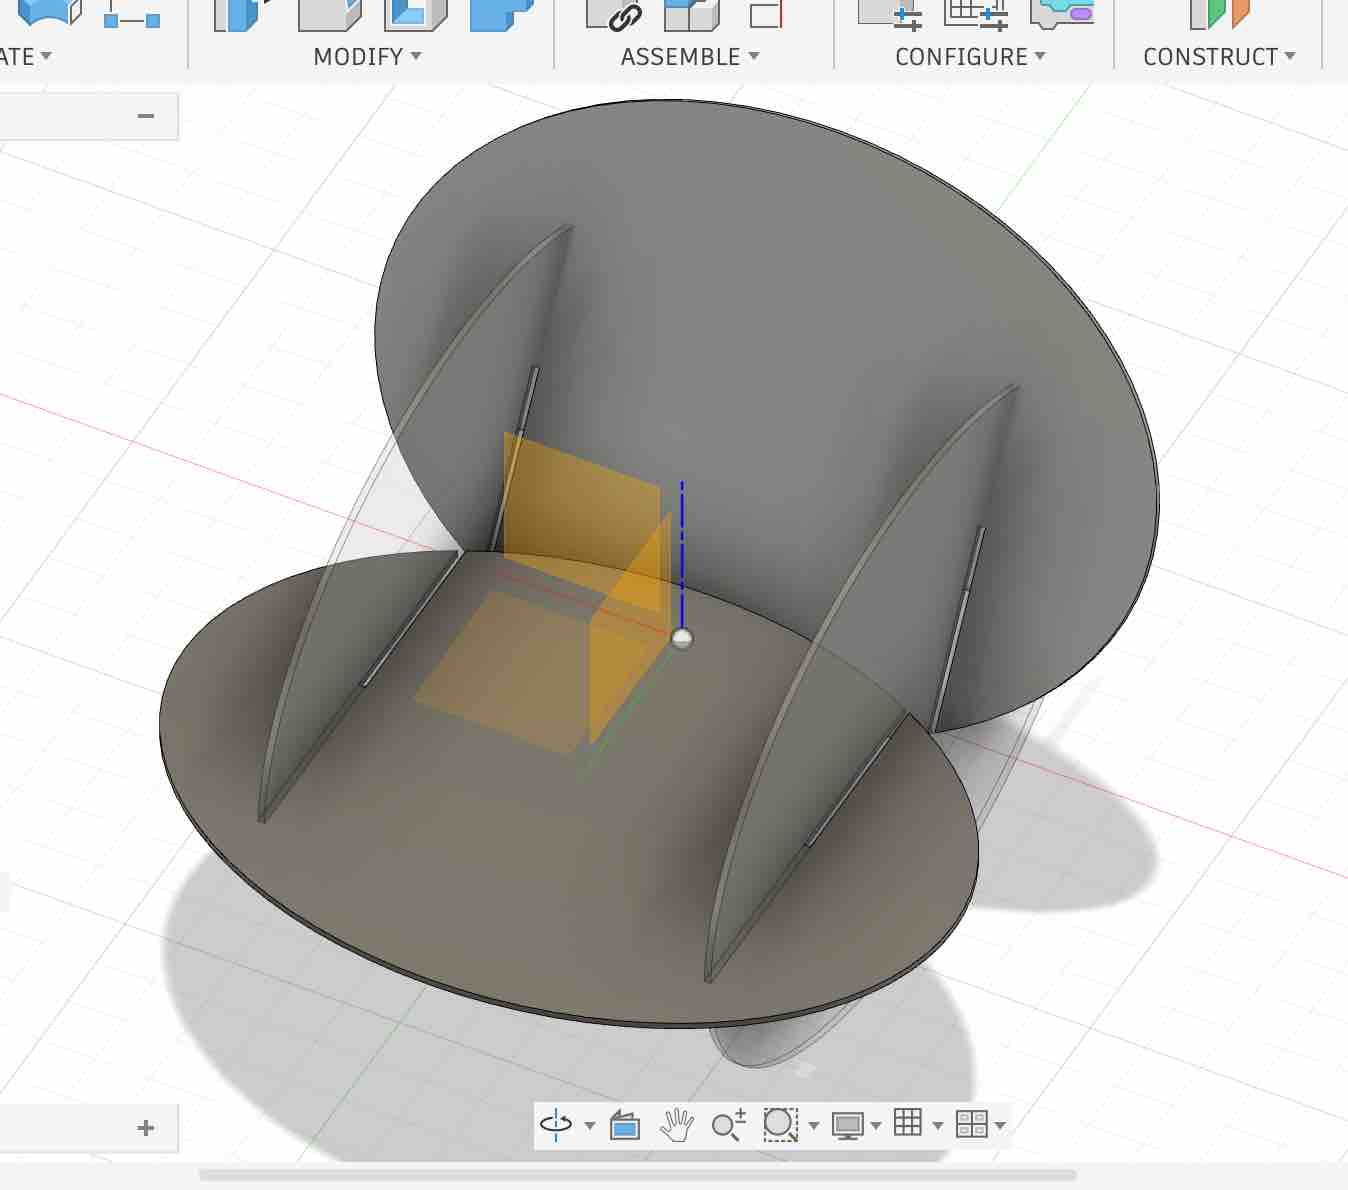
05 | After applying the joint bodies as combine-cut tools on the surfaces they pass through, I inspected the chair from every angle to catch clashes and confirm the fit before exporting.
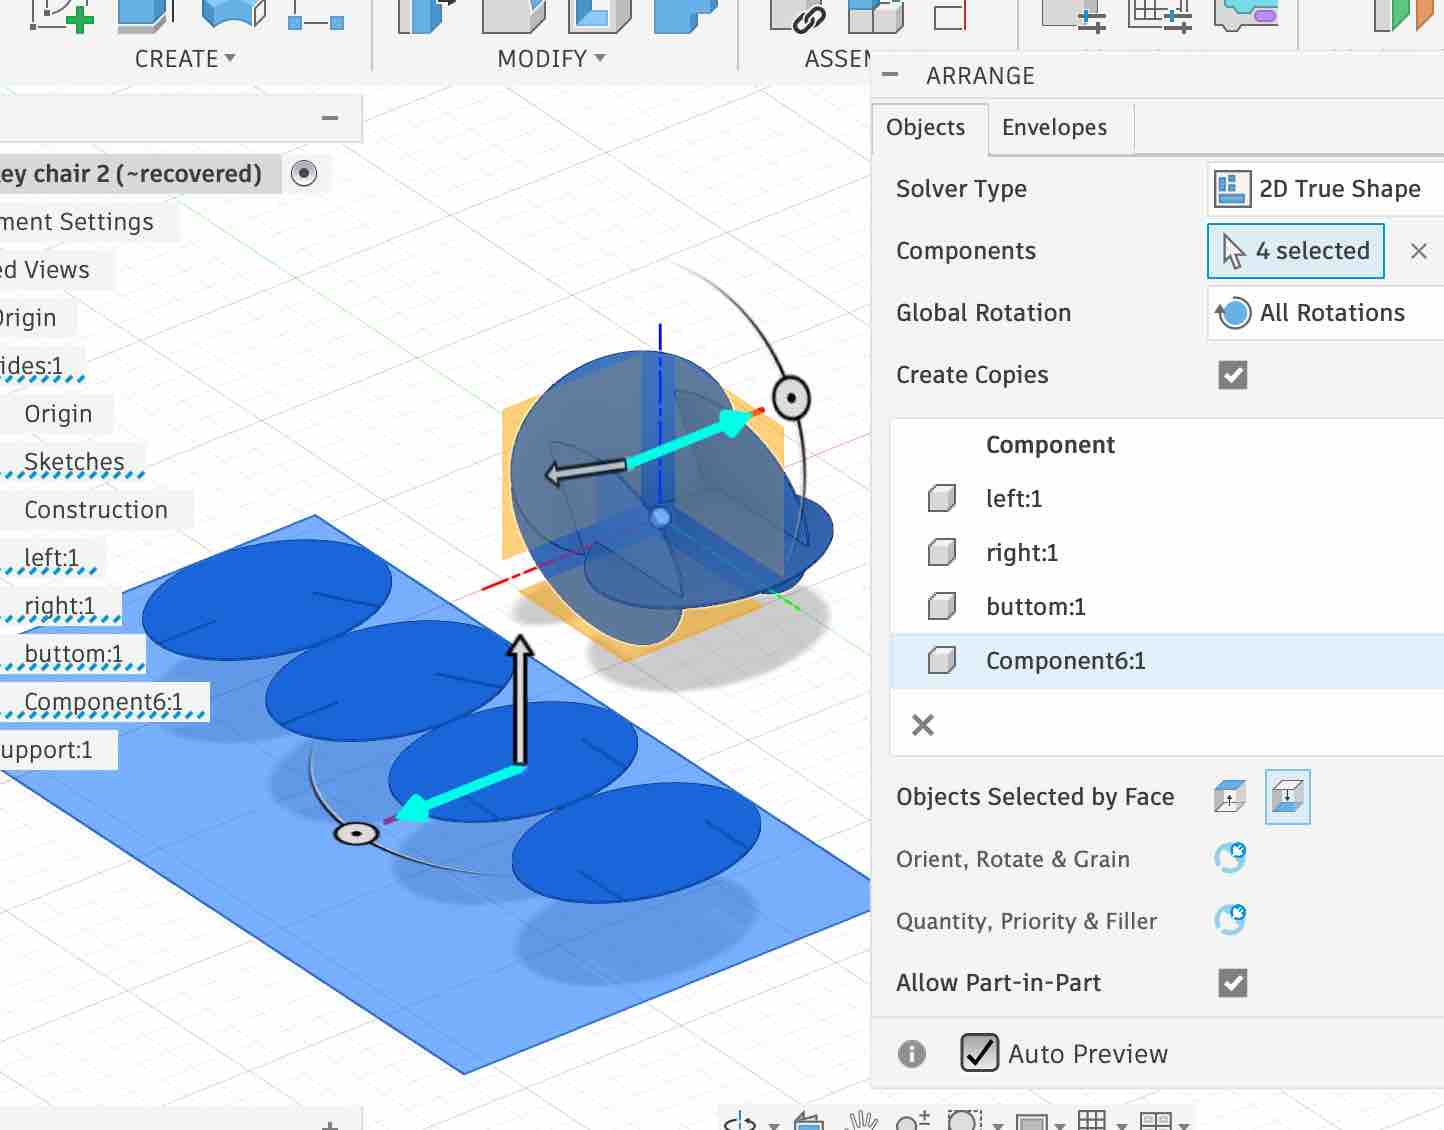
06 | Finally, I nested the components on a sketch representing the wooden stock sheet I'd be using, then exported the layout as DXF for the CNC. Final original file used for CNC cutting (.step).
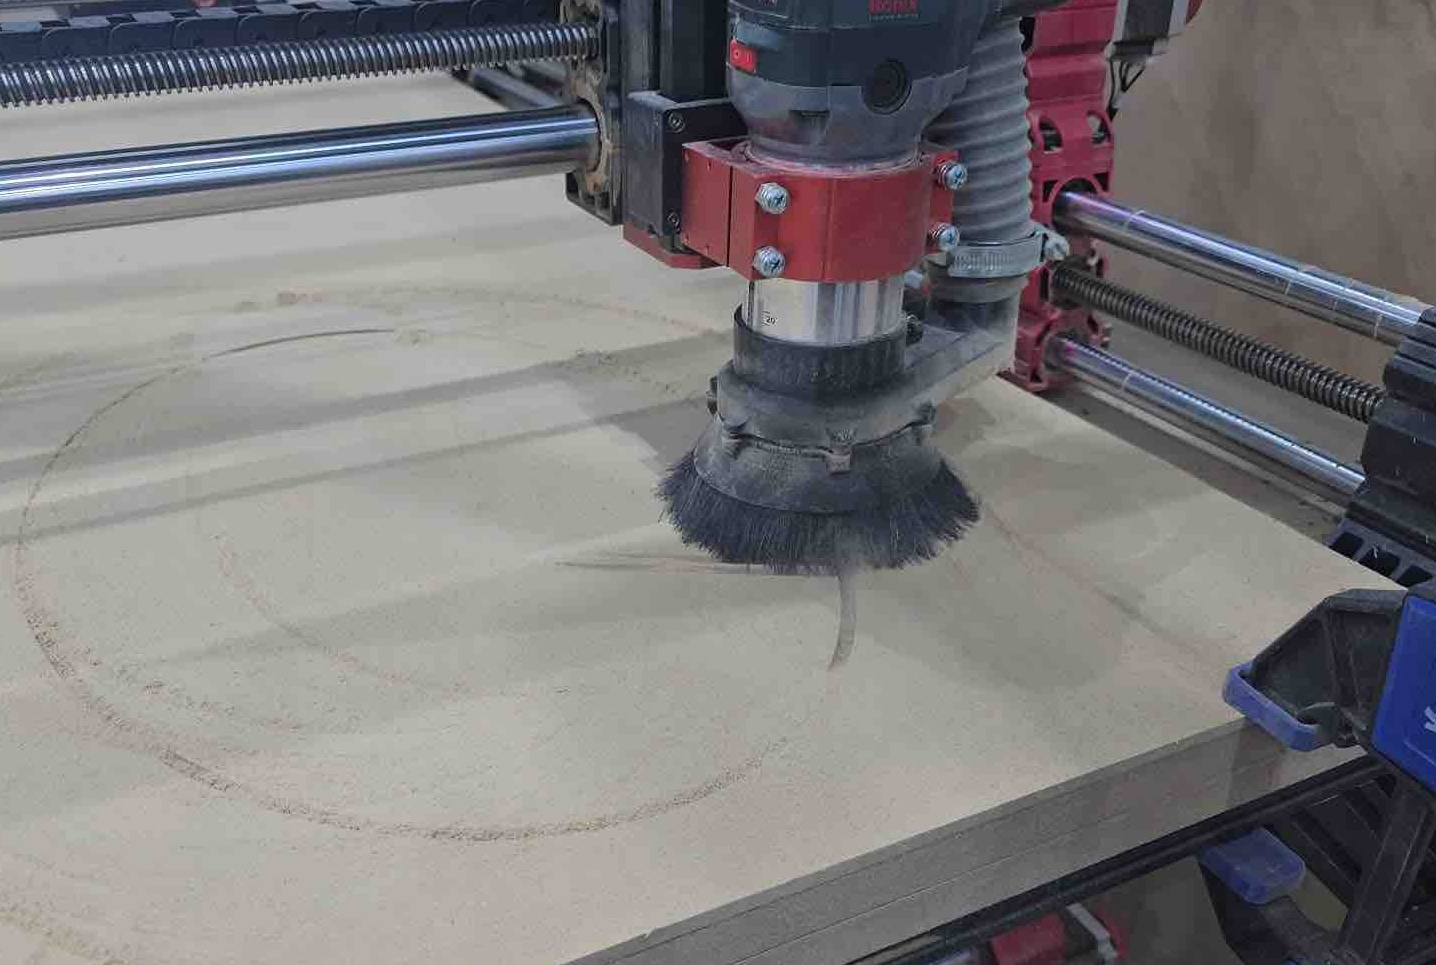
07 | I wasn't able to spend much time at the Sawback centre in Kuwait — they were busy and I only booked 1 hour of their machine time. One of their engineers guided me through the process. For the cut I used 6 mm plywood with a downcut end mill (1/4"), 2 flutes, pass depth 3 mm, stepover 2.4 mm (40%). Spindle speed 1200 r.p.m, feed rate 2500 mm/min, plunge rate 500 mm/min.
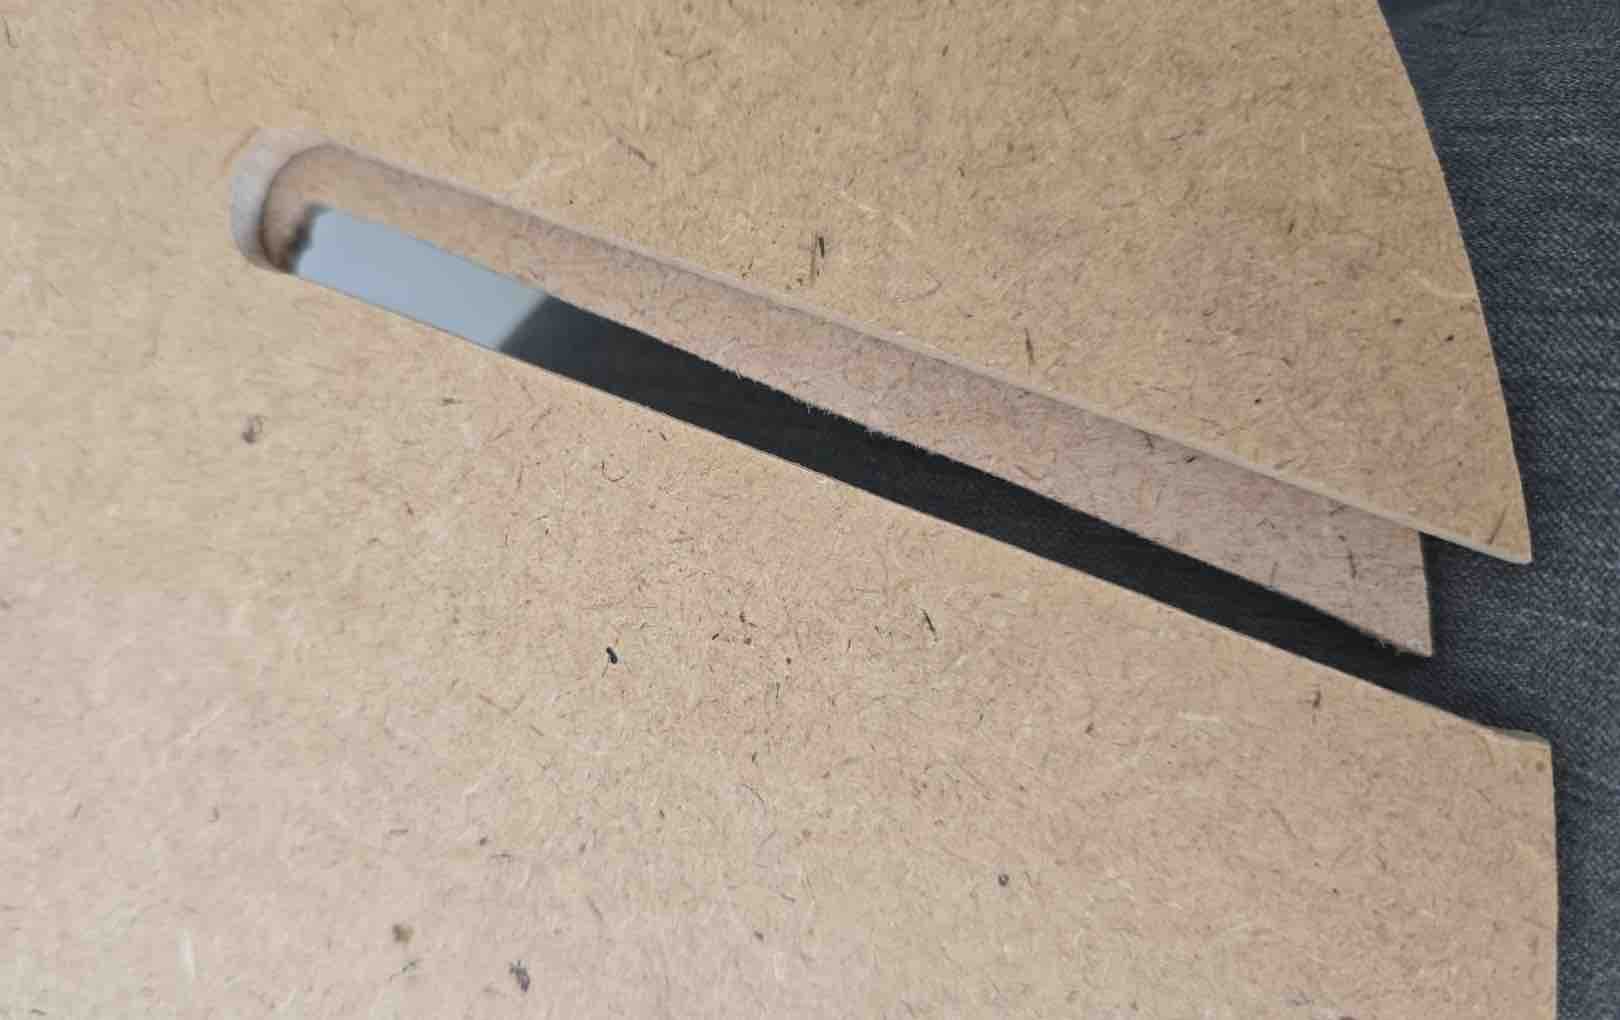
08 | After the cut, I spotted many errors between what was supposed to be cut (see step 06) and what actually came off the machine. There was a big difference in the joint geometry — the plates were loose and didn't fit, even though the joints had been mirrored in the CAD to make sure exactly this wouldn't happen.
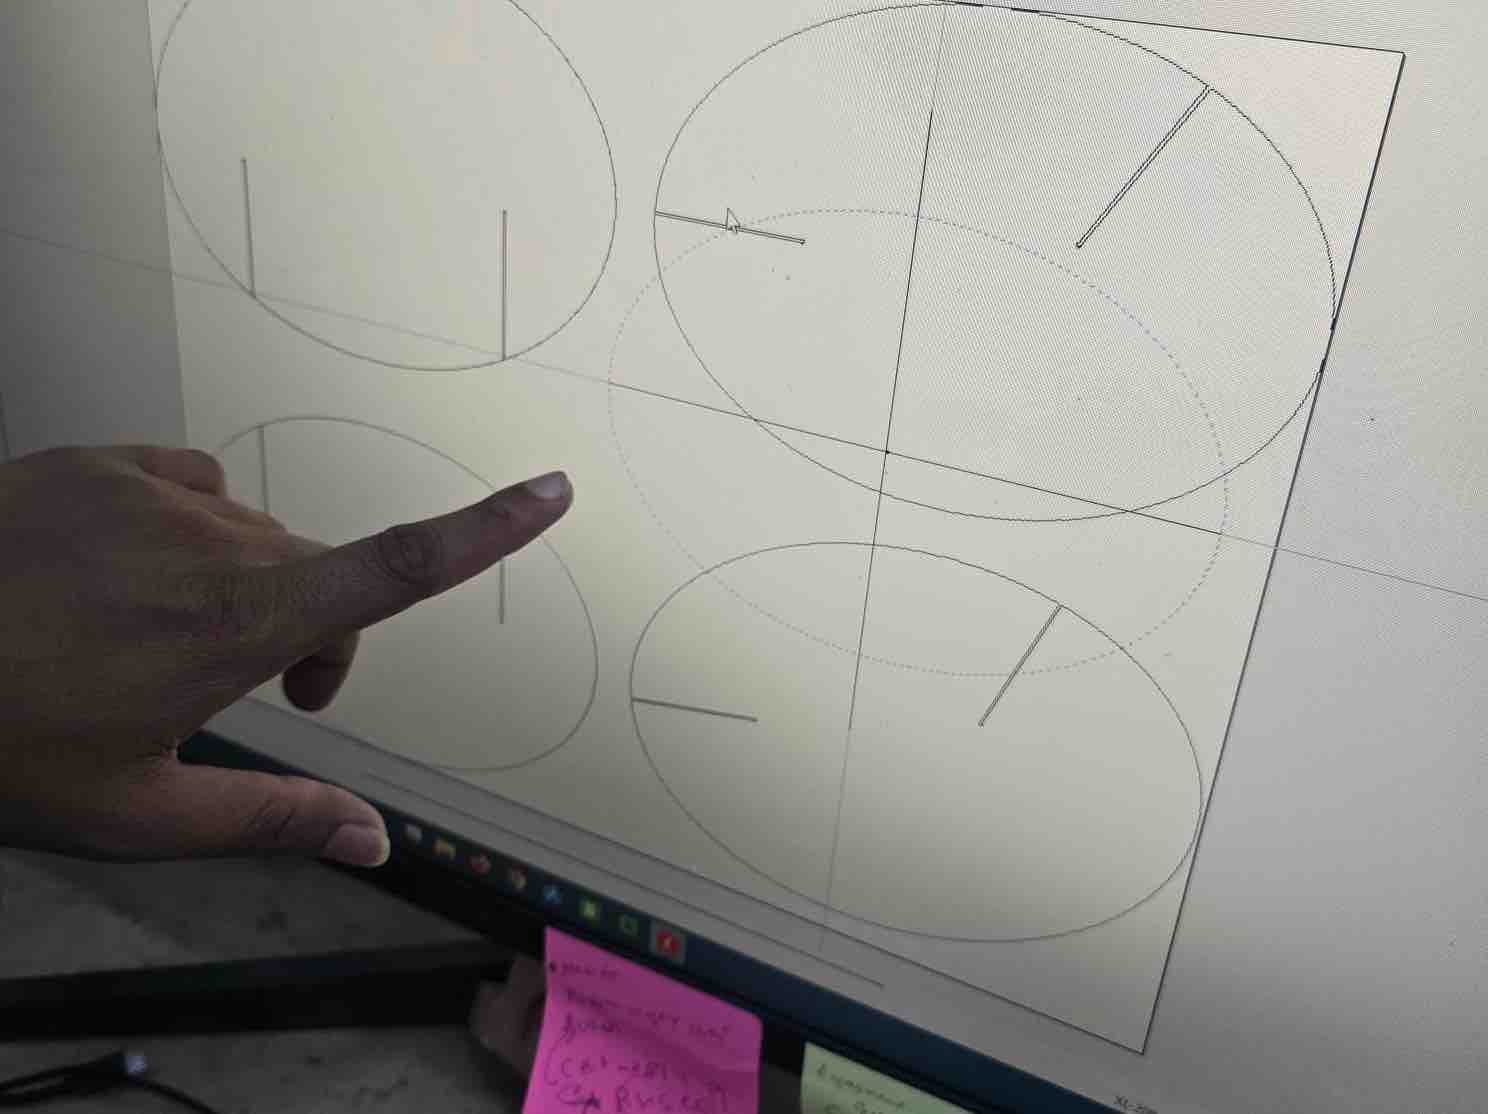
09 | Reviewing the file with the engineer, he told me he'd changed the scale of the design, which caused the mismatch. The root cause was communication: he hadn't asked me about a stray body object I'd forgotten to delete before exporting, and he wanted the whole design to fit the sheet — so he scaled it down, thinking the stray body was important, without checking with me even though I was standing right next to him, busy with the file on my laptop. A good lesson on cleaning the CAD file before hand-off and on double-checking scale before the machine runs.
10 | I assembled all the pieces, checked the stability of the main chair, and how it rocks. One set of joints ended up overcut, which caused the base to slide off the chair if it was rocked too hard — something to tighten up in the next spiral.
11 | My daughter tried the chair. She was a little scared to sit on it at first because it doesn't look like the chairs she's used to — but once she was on it, she really enjoyed rocking it. The loose joints on the base sheet were sliding under her as she rocked, which confirmed that the overcut joints from step 10 need tightening in the next spiral.
- Feedback: The chair came together and it rocks — and my daughter's reaction sitting on it was very satisfying. The parametric-joint workflow proved out as a pattern I'd want to reuse on bigger waffle pieces.
- Challenge: The joints didn't fit properly because the engineer at the Sawback centre scaled the design down without asking me, thinking a stray body object I'd forgotten to delete was intentional. On top of that, one set of joints came out overcut, so the base slides off if the chair is rocked too hard. Two lessons: clean the CAD file before hand-off (no orphan bodies), and verify scale on the machine sender before pressing start — regardless of who set it up.
03: Misk — a sanctuary for my daughter
One of the things my daughter loves is making herself small houses and tents out of cushions, blankets, and sometimes boxes she can fit into — like a little cat. For her, that's her space, her sanctuary, and I wanted to build her something she'd love. I came across this egg-shaped waffle structure made of interlocking ribs, and I fell for it immediately — so I challenged myself to design it from scratch, without any tutorial and without AI help.
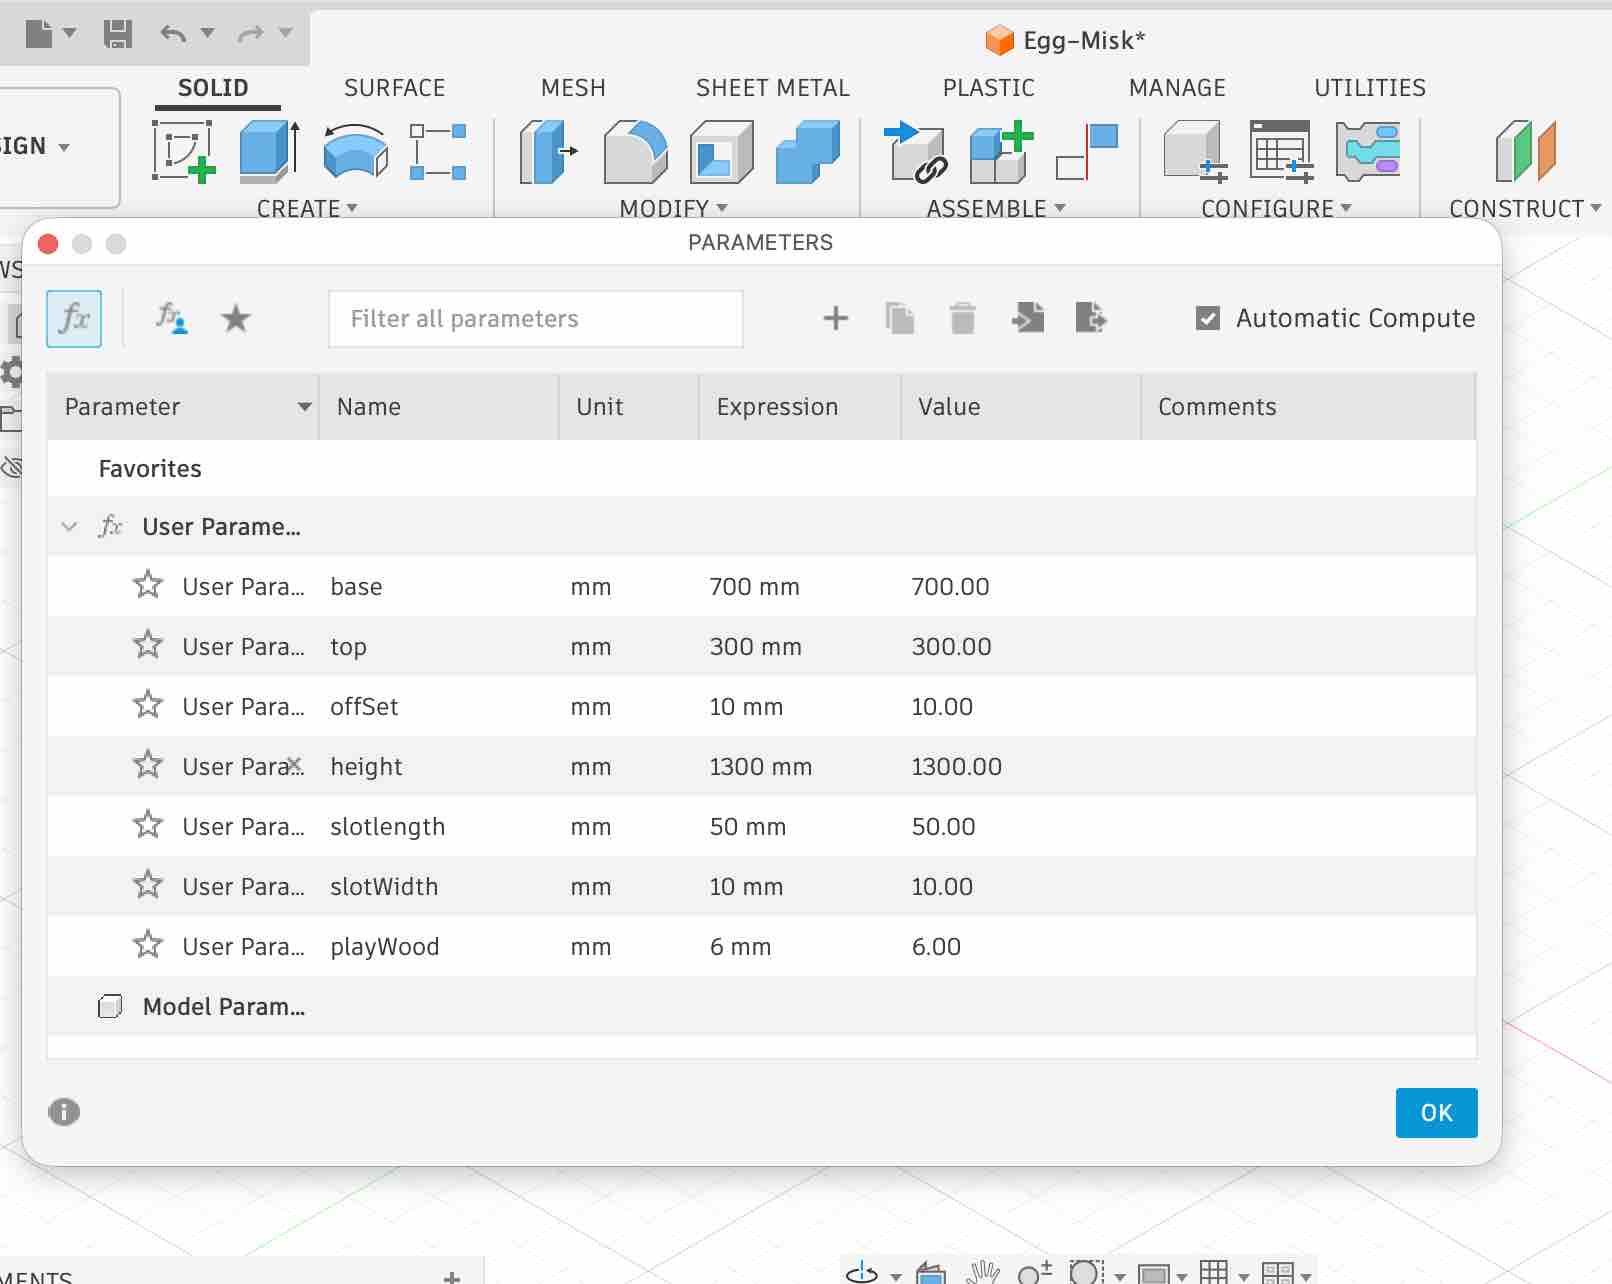
01 | I started by setting up my parametric values. This was crucial so any size adjustment later would ripple through the whole model — no matter which stage I was in.
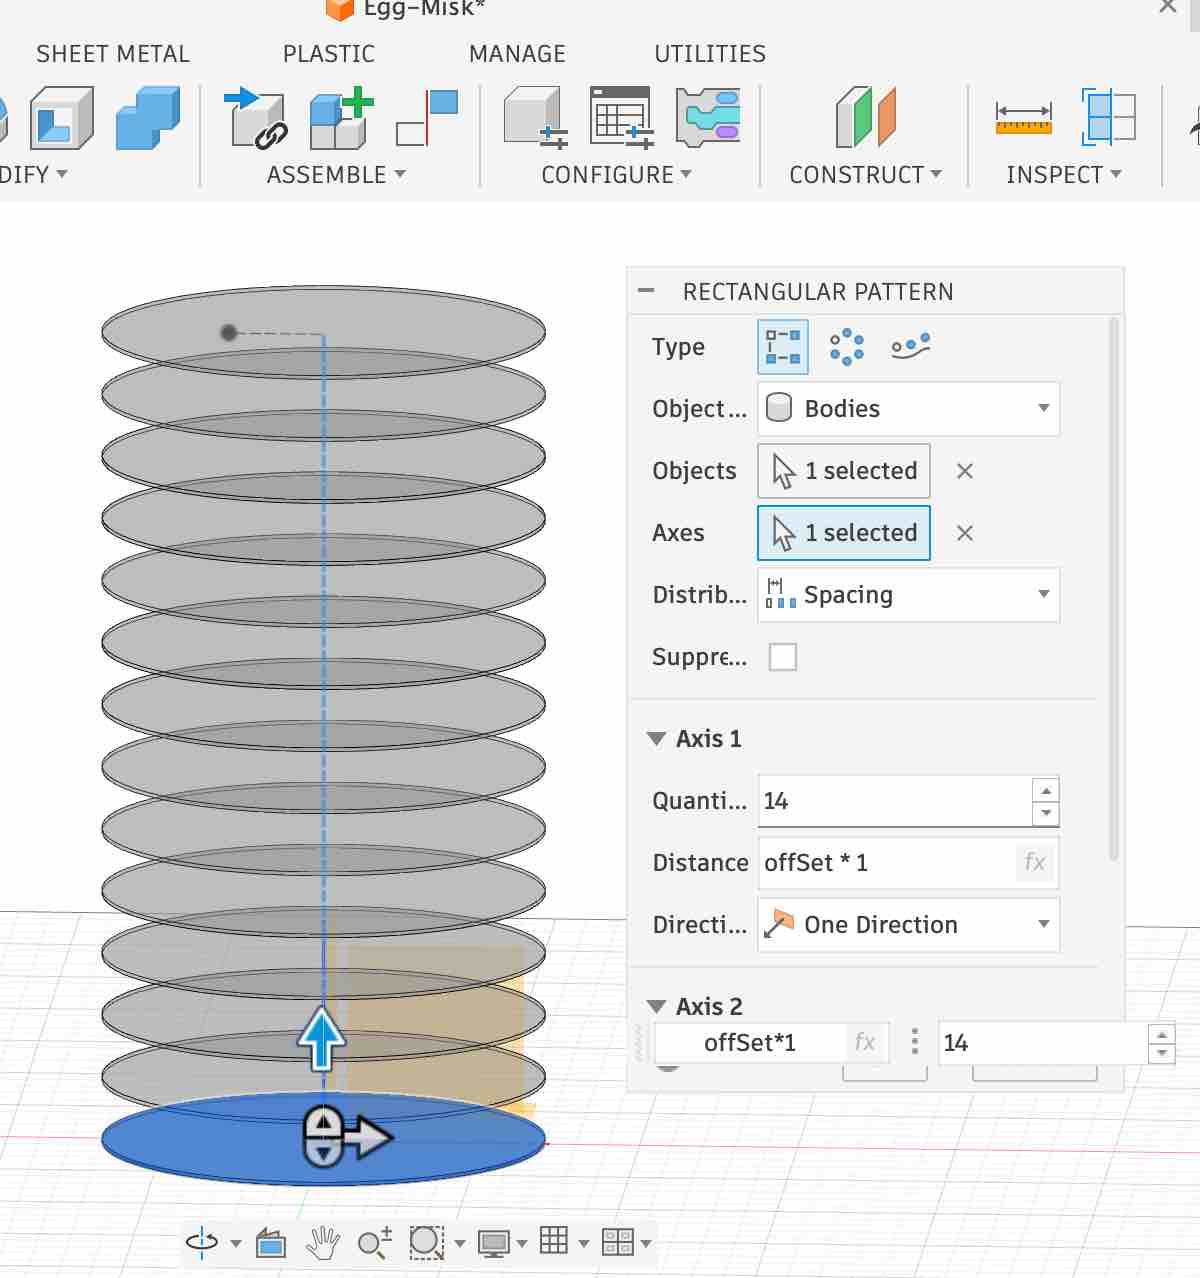
02 | I started by stacking sketches along the Z axis, keeping a 10 cm offset between the different round bodies. These would form the horizontal ribs of the egg.
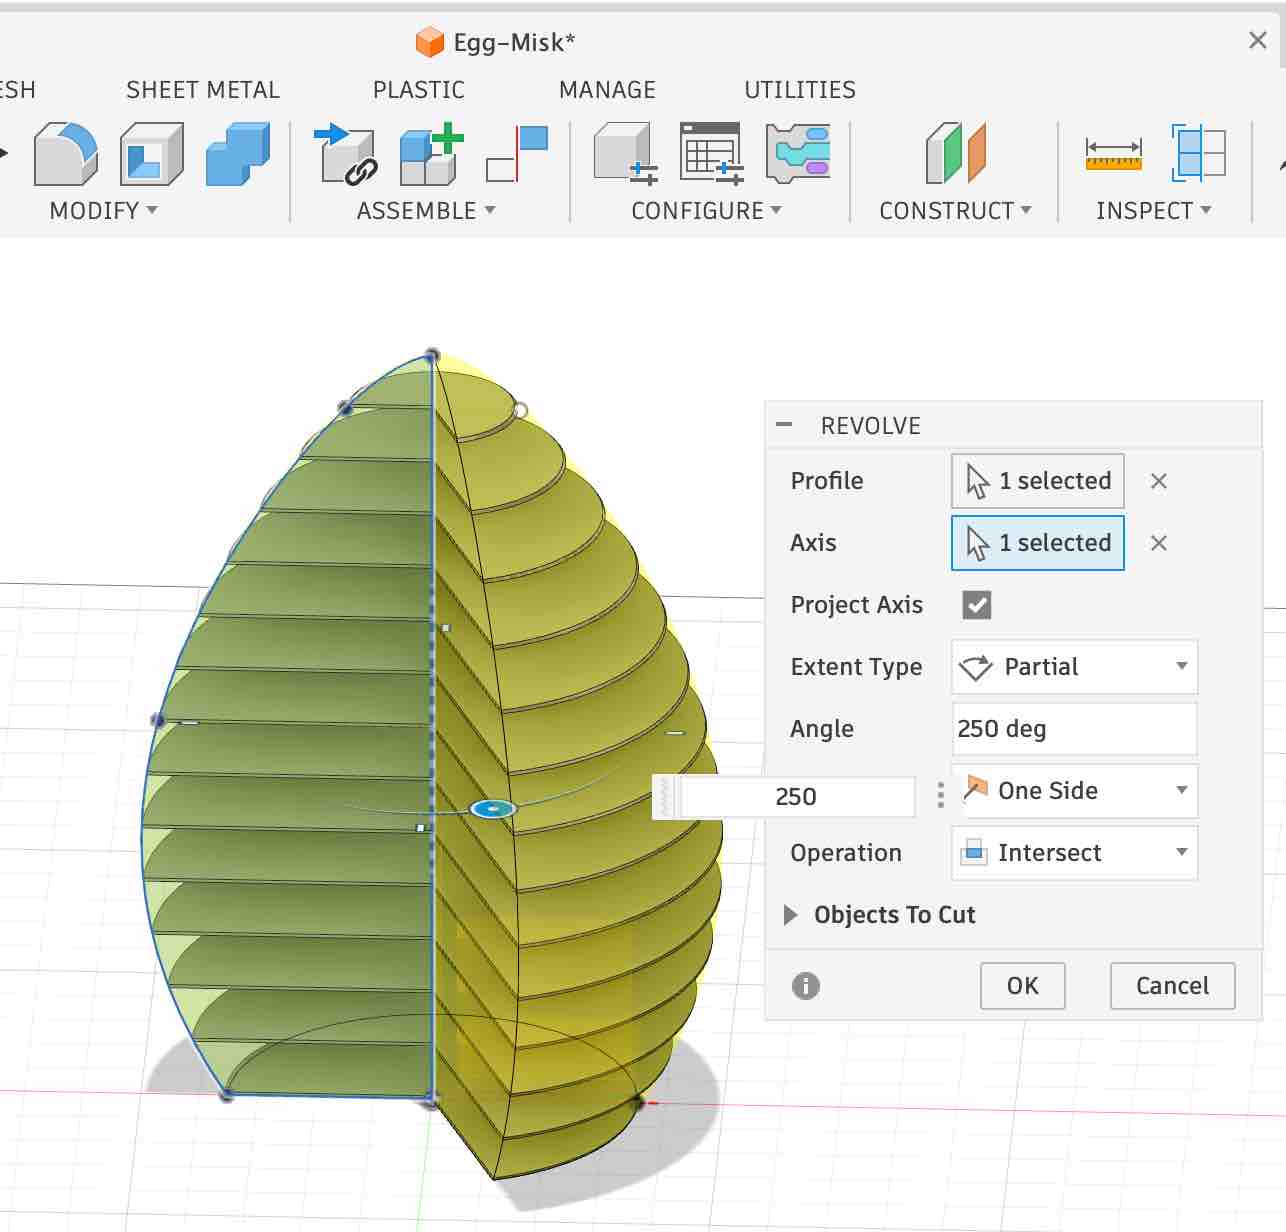
03 | Then I sketched the outer egg-shape boundary and revolved it around the Z axis, leaving a 120° opening on one side (the entrance) and intersecting with the existing rib bodies to define their outer edge.
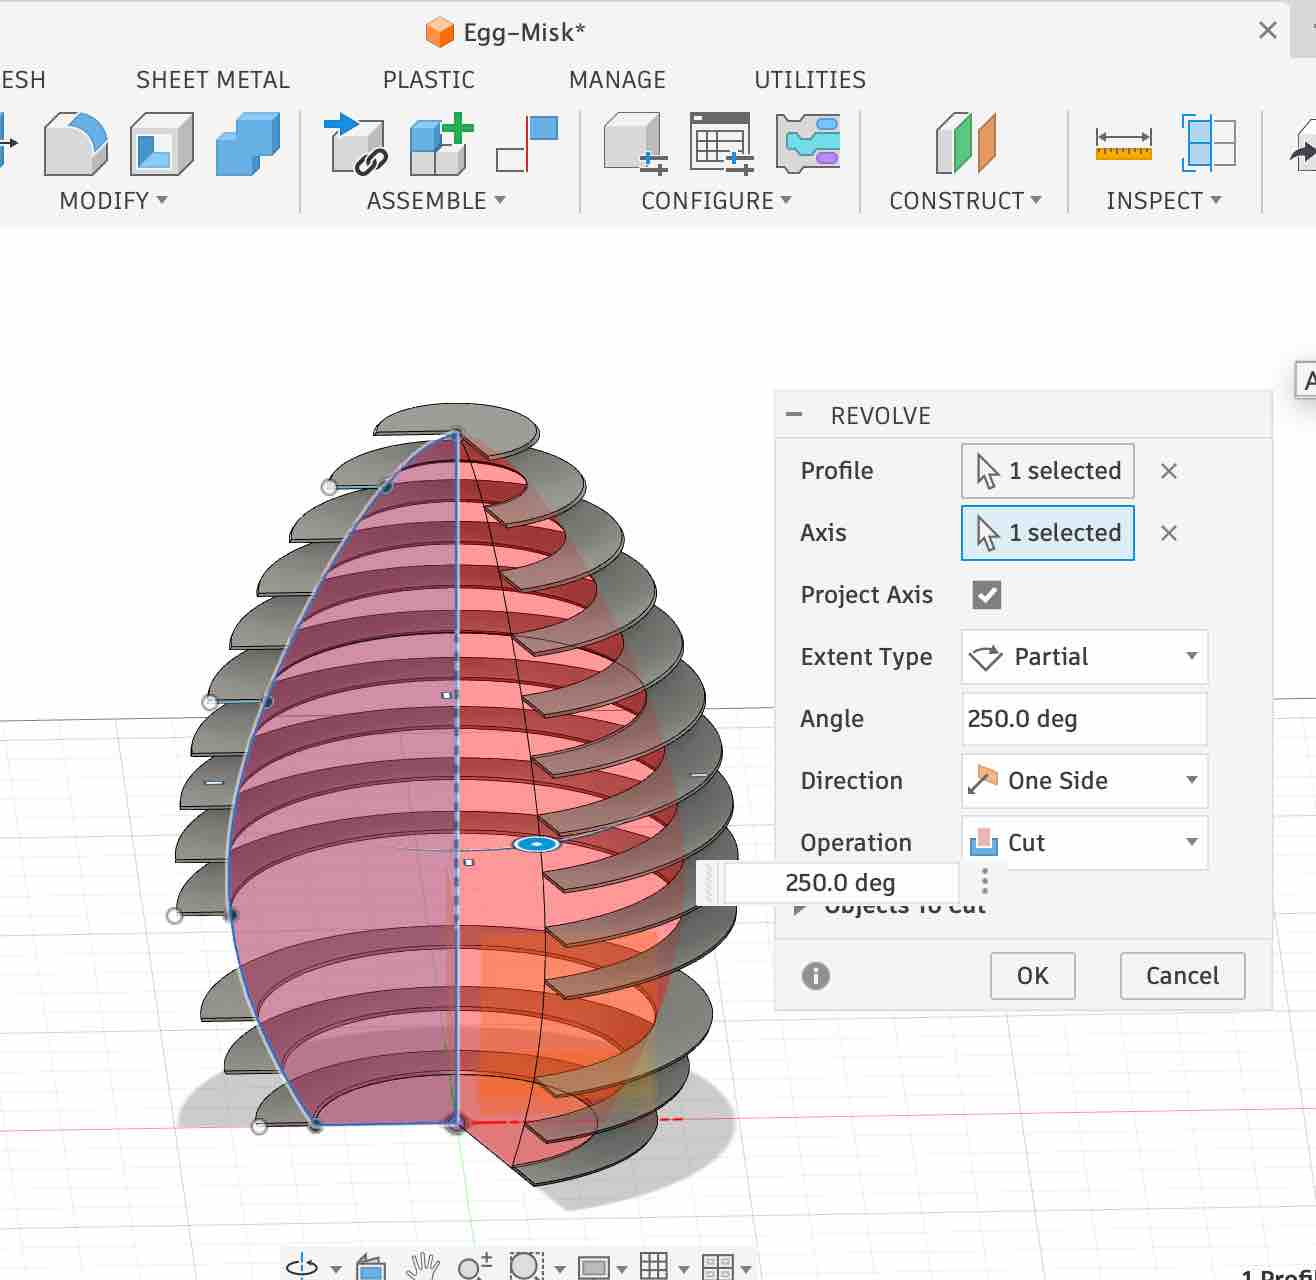
04 | I repeated the same operation but this time drew a smaller egg exactly 10 cm inside the outer edge and used it as a cut on the existing bodies to hollow the ribs into shells. I hid the 4th (bottom) layer so it wouldn't be affected by this cut and could stay solid for stability on the floor.
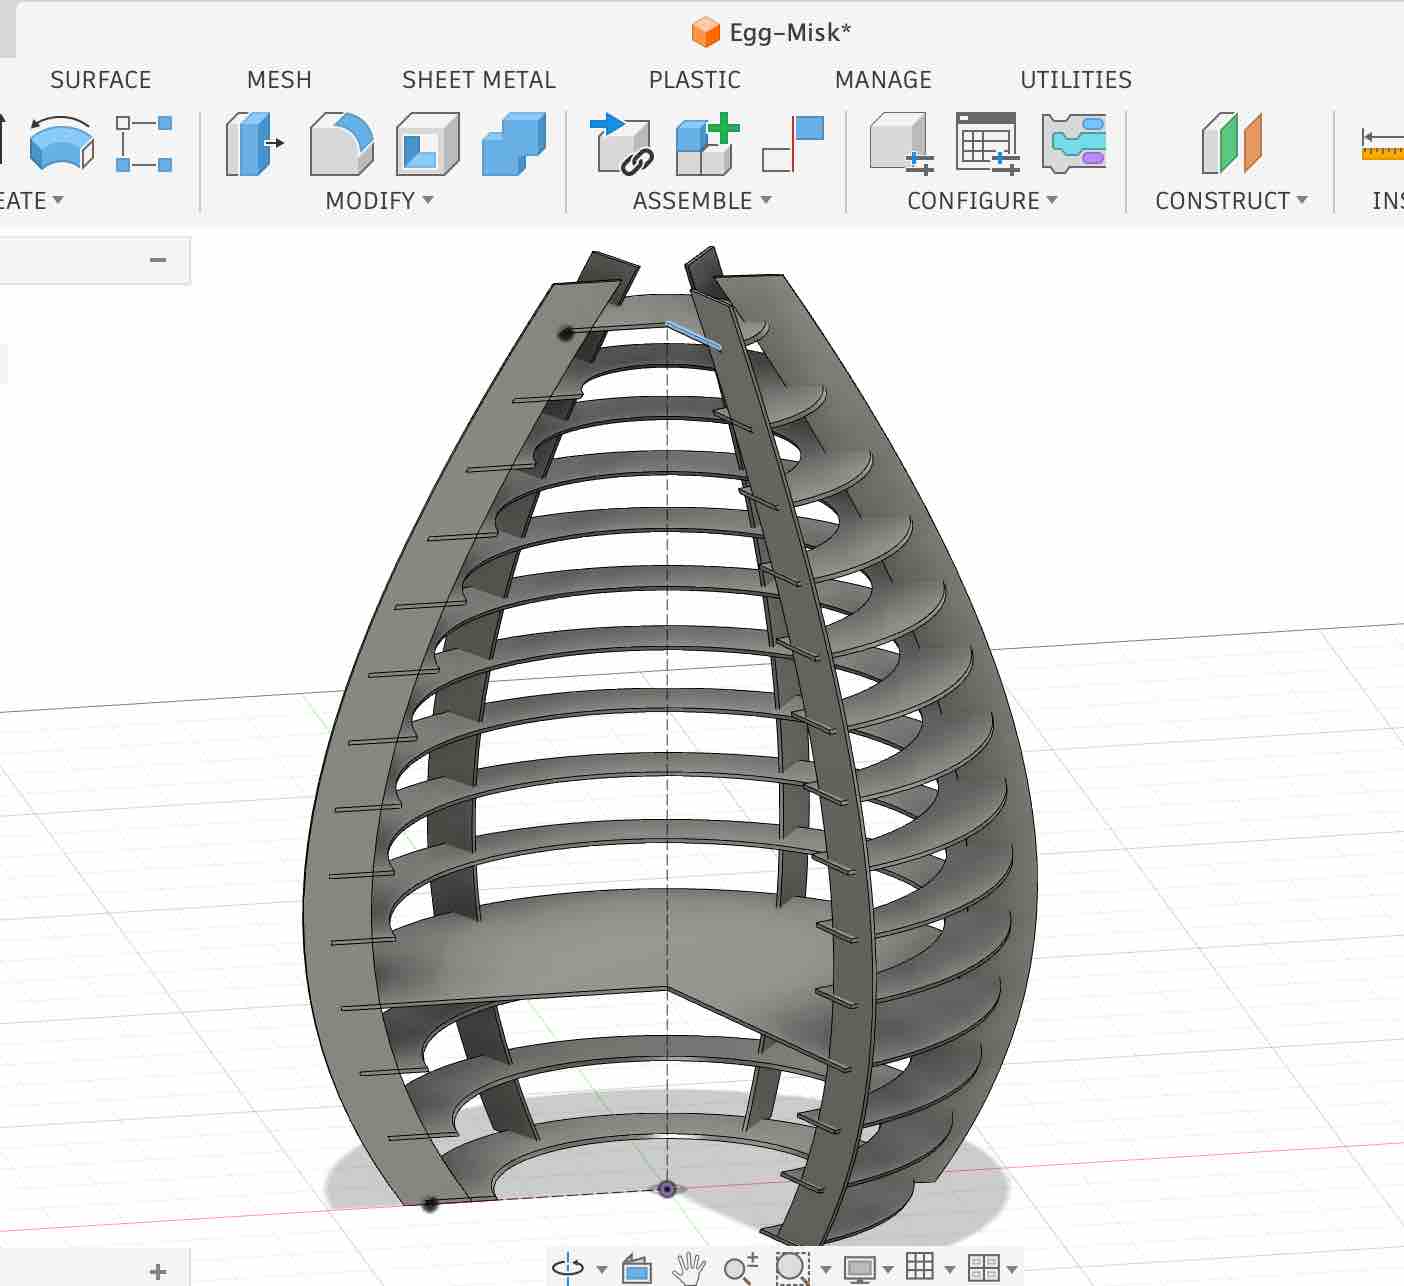
05 | Then I sketched the vertical ribs, extruded them to the plywood thickness, and created a circular pattern around the Z axis. Five vertical ribs were enough to hold all the horizontal ribs in place and keep the whole egg-sanctuary stable on the floor.
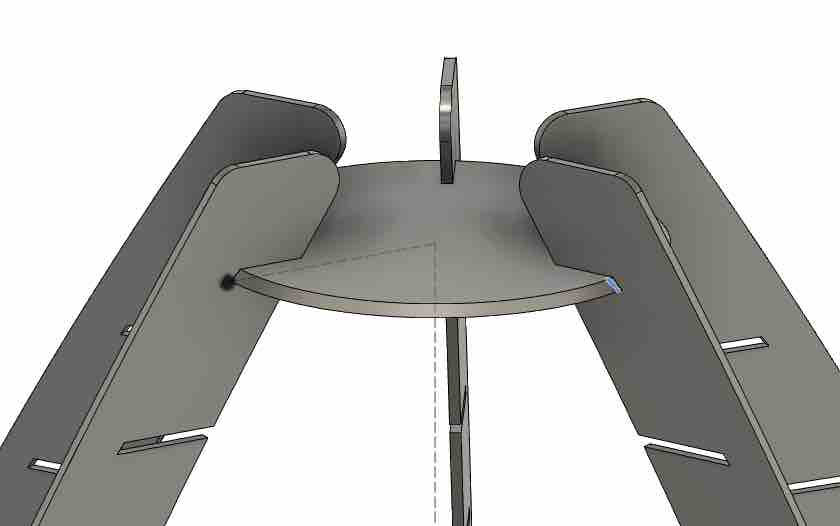
06 | I filleted the cut edges — CNC cuts always leave sharp corners, and rounder edges are both easier to machine and safer for my daughter to climb into.
07 | I ran out of time before I could add the dogbone slots that let the horizontal and vertical ribs interlock into the stable waffle structure — that's carried over to the next spiral of the project. Original file at this stage (.step).
- Feedback: I'm really proud of being able to reach this stage of the design on my own — parametric-driven waffle geometry, revolved outer shell, patterned vertical ribs, filleted CNC edges. Looking forward to closing the loop in the next spiral by adding the dogbone slots and cutting it.
- Challenge: The challenge was not having access to a lab to actually cut it. Ironically, that gave me more time on the CAD side — and I'd say the time paid off. I'm genuinely satisfied with what I got out of this assignment on the design front.
Reflection
What worked
- Choosing pieces I'd actually use at home — a balancing toy, a rocking chair, and a sanctuary for my daughter — made every hour of CAD feel worth it.
- Measuring her on an A3 sheet gave me real, personal dimensions to design around for the balancing toy.
- The small home CNC + Easel workflow (height calibration, dust collection, sender) went smoothly end-to-end.
- Building the rocking chair fully parametrically in Fusion 360 — with dogbone fillets driven from the same variables — meant the design could adapt to whatever wood and thickness I ended up finding.
- The rocking chair came out assembled and rocking — press-fit only, no glue or fasteners, hitting the extra-credit criteria.
- Getting real machine parameters (1/4" downcut, 2 flutes, 3 mm pass depth, 40% stepover, 1200 r.p.m, 2500 mm/min feed, 500 mm/min plunge) at the Sawback centre gave me a concrete baseline for future plywood cuts.
- The Egg-Misk sanctuary pushed me to design a waffle shell from scratch — parametric horizontal ribs, revolved outer boundary, patterned vertical ribs, filleted edges — without any tutorial or AI help.
What didn't
- Week 7 fell during a curfew in Kuwait — I couldn't reach the centre with the big CNC machine, so I had to fall back to my small home CNC in cardboard for the balancing toy.
- Wood sheets were unavailable in time due to the regional supply situation, which capped the balancing toy at prototype scale rather than the meter-scale build the assignment asks for.
- The Egg-Misk sanctuary didn't reach the cutting stage — I ran out of time before adding the dogbone slots to interlock the ribs.
- The rocking-chair joints didn't fit at first: the engineer at Sawback scaled the design down without asking me, thinking a stray body I'd forgotten to delete was intentional — a pure communication failure during hand-off.
- One set of joints came out overcut, so the base slides off if the chair is rocked too hard.
What I'd do differently
- Source the material earlier so the meter-scale balancing toy can actually be cut at scale, not just prototyped in cardboard.
- Add the dogbone slots to the Egg-Misk sanctuary in the next spiral and cut it in plywood so my daughter can actually use it.
- Test joints and fit on scrap plywood before committing the full stock sheet.
- Clean the CAD file before hand-off — delete stray bodies, hide construction geometry, name the export layer clearly — so no one has to guess what's intentional.
- Verify scale on the sender (bed dimensions, part dimensions, DXF units) before pressing start, regardless of who set the job up.
Key learnings
- CNC machining starts well before the cut — parametric CAD, dogbone fillets, joint tolerances, nesting, and machine setup are most of the work.
- Material availability shapes what's possible; a prototype in cardboard still proves the design even when the meter-scale wood isn't there yet.
- Dust collection and Z-zero calibration aren't optional — they affect both safety and cut quality.
- Parametric modelling pays for itself: the rocking chair could rescale to whatever plywood I ended up finding, and the Egg-Misk sanctuary can regenerate around any stock thickness.
- Hand-off is a process, not a hand-over — being physically next to the operator isn't the same as being consulted. A clean file plus explicit "do not change scale / do not modify" note prevents silent edits.
- This same Easel CNC mill became my fallback PCB process in Week 08 — Electronics Production when copper-clad FR1 finally arrived — the toolpath / origin / Z-zero workflow learned here transferred directly to milling boards for the final project.