Introduction
Computer controlled cutting means cutting materials using a machine that is controlled by a computer. First, a design is made on the computer using CAD software. This design is then sent to a computer controlled cutting machine. Machines like laser cutter and vinyl cutter are used for this work. The machine cuts the material exactly as shown in the design. This makes cutting easy, clean, and accurate.
This assignment was done as a group assignment. Working in a group helped me understand how to work together with others. We learned how to divide the work in a team and support each other.
In this assignment, we learned scanning and cutting on different materials using a laser cutter. We also used a vinyl cutter for cutting thin materials. I learned about the Cricut machine and how it is used for precise cutting. This assignment helped me understand machines, teamwork, and digital fabrication in a simple way.
 |
 |
Group assignment
This week, we worked on a group assignment related to laser cutting and scanning. We performed different trials on the laser cutting machine. The main aim of the assignment was to understand the laser cutting machine, learn how to operate it safely, and find the best speed and power settings. We also calculated the kerf value for different materials so that these values can be used later in our individual assignments and projects. Knowing the correct speed, power, and kerf helps us modify our CAD designs parametrically. I was part of the team working with plywood, MDF and acrylic materials. We shared the work among ourselves, where I handled the engraving process from designing to machine operation and documentation.
MDF and Plywood Scanning
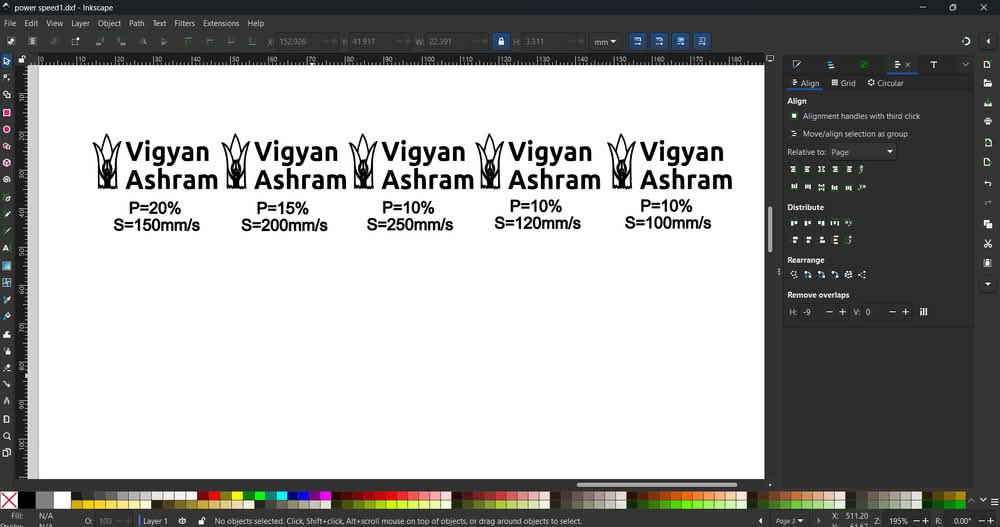
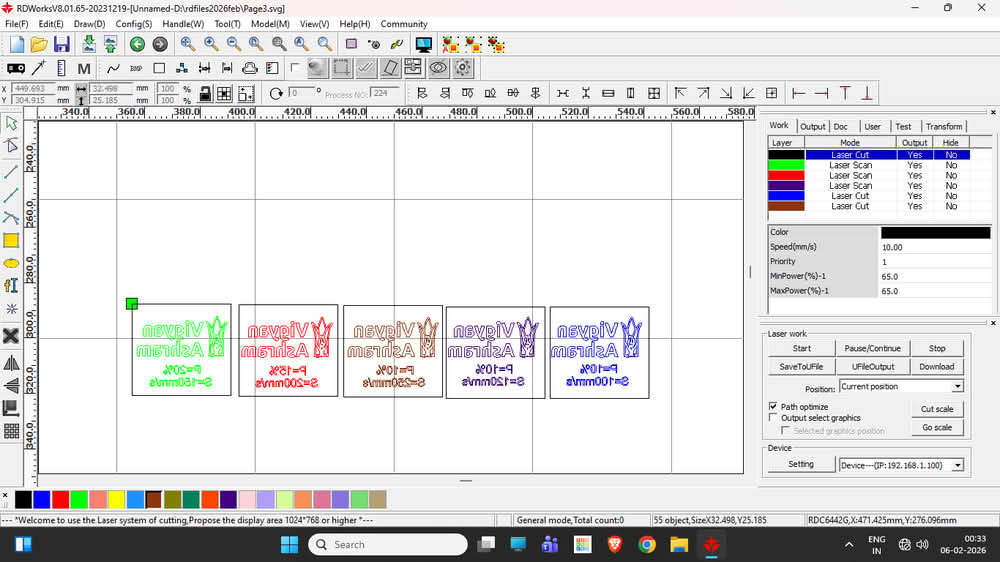
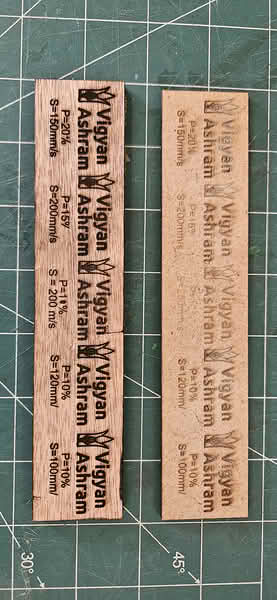
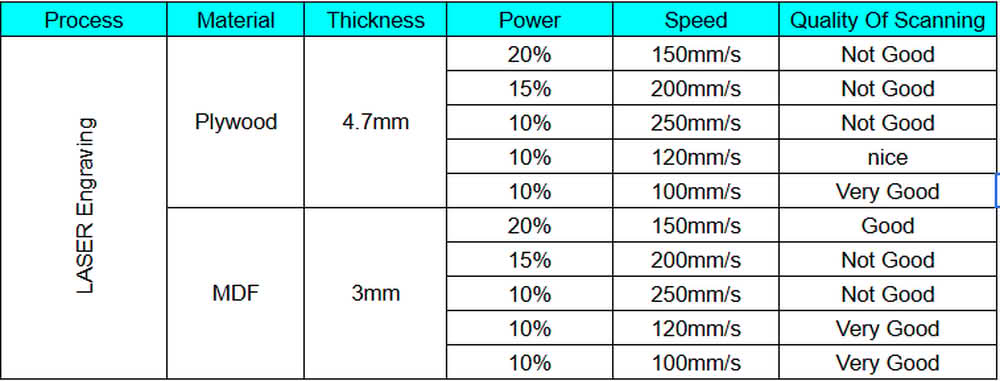
We used 3 mm thick plywood and MDF sheets for the scanning and engraving process. To understand how the laser machine works with different speed and power settings, I created one SVG file in Inkscape for both plywood and MDF. This file was then imported into RDWorks, where different speed and power values were applied. The snapshots show the SVG file, the layout in RDWorks, and the engraved results on plywood and MDF sheets. By observing the engraving quality, we concluded that for 4 mm plywood and MDF sheets, the machine gives very good engraving results at a speed of 100–120 mm/s with 10% power.
 |
 |
 |
 |
Plywood and MDF Cutting
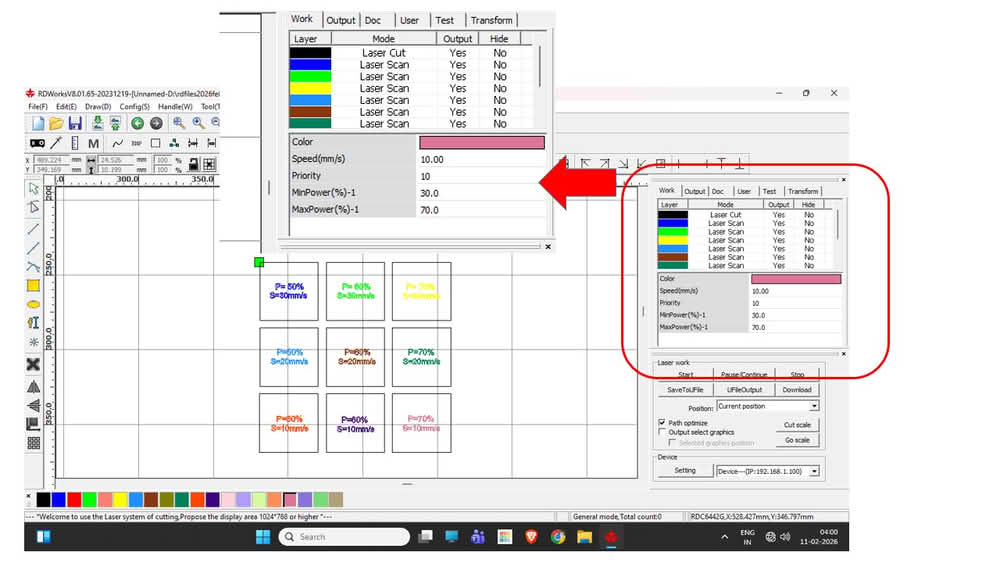
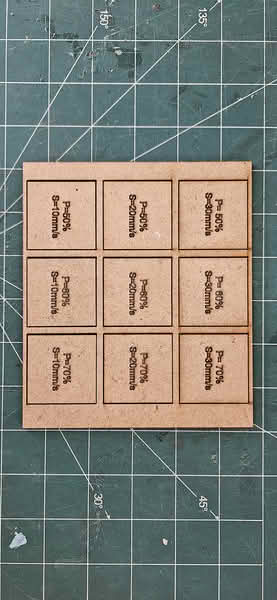
For cutting MDF and plywood, we used 3 mm thick MDF and plywood sheets. I created the cutting design in Inkscape and then imported it into RDWorks software. After importing the file, we assigned different colors to the cutting paths in RDWorks, where each color represented a different speed and power setting for the laser cutting process.
 |
 |
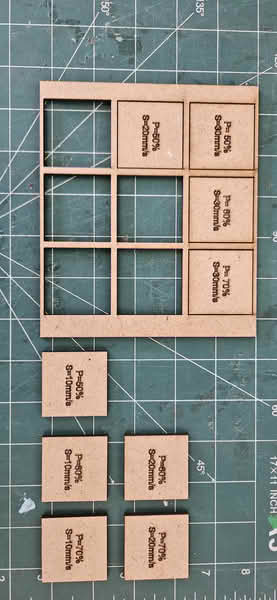
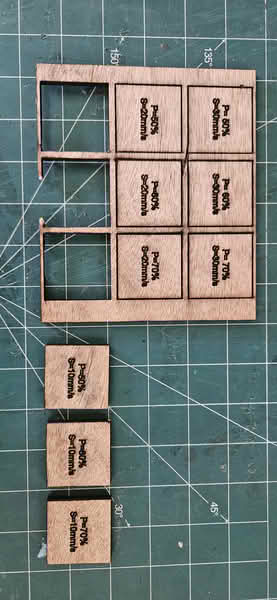
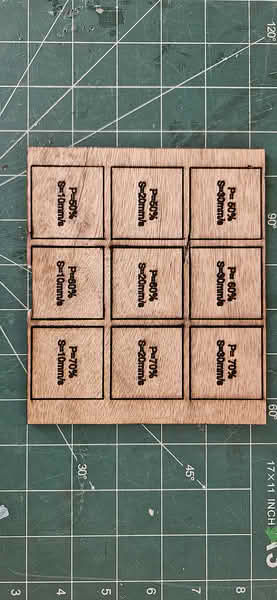
Below are the pictures of the plywood and MDF sheets that we used for cutting operation.
 |
 |
 |
 |
Conclusion
For MDF(3mm) cutting, we observed that with power settings of 50%, 60%, and 70% at a speed of 10 mm/s, the material was cut properly. At a speed of 20 mm/s, the MDF was cut at higher power levels, but at 20 mm/s with only 50% power, it did not cut. Similarly, at a speed of 30 mm/s with power settings of 50%, 60%, and 70%, the material was not cut properly.
For plywood(4.7mm) cutting, we observed that when the speed was set to 10 mm/s and the power was 50%, 60%, or 70%, the plywood was cut successfully. However, for other trials with a higher speed of 20 mm/s and power levels of 50%, 60%, and 70%, the plywood did not get cut properly.
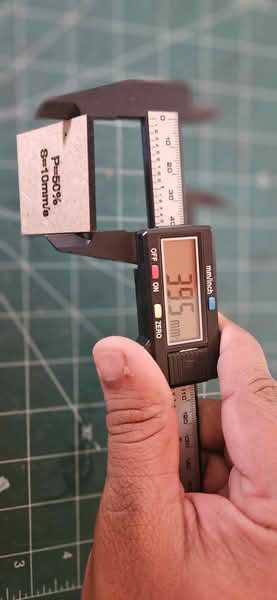
Kerf calculation for MDF and Plywood
 |
 |
| MDF Material | Plywood Material |

Acrylic scanning and cutting
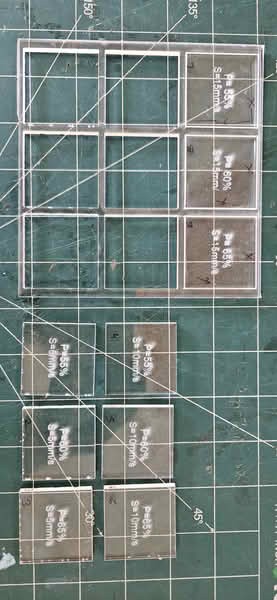
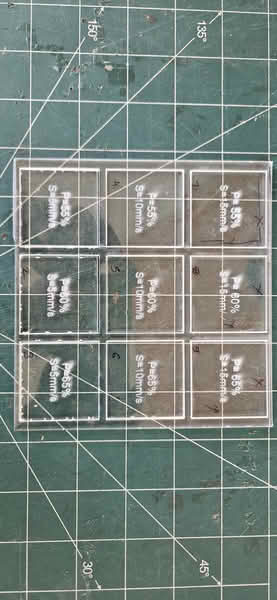
We chose an acrylic sheet that was 4.4 mm thick for our testing. To understand how the laser machine performs with different speed and power settings on acrylic, our team first created a simple design in Inkscape. After completing the design, we saved it as a SVG file so it could be used in the laser software. We then imported this SVG file into RDWorks. Inside RDWorks, we changed the colors of the cutting lines. Each color was set with different speed and power values. This helped us test multiple settings in one single design and compare the cutting results easily.
 |
 |
 |
 |
Conclusion:
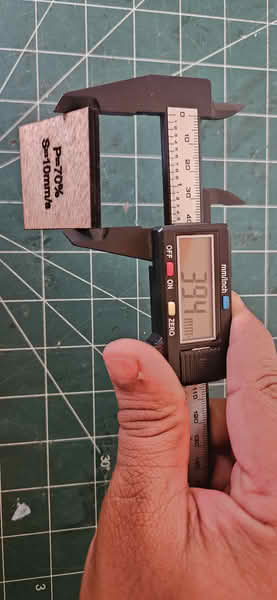
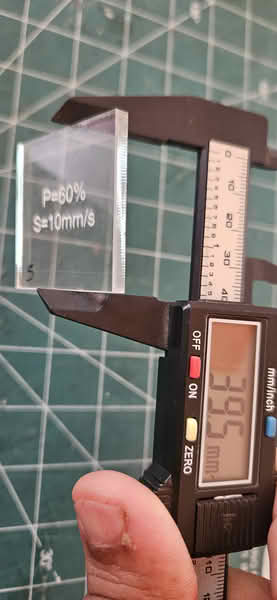
During testing, we observed that the acrylic blocks were successfully cut when the speed was set to 5 mm/s or 10 mm/s with power levels of 55%, 60%, and 65%. The cuts were clean and went through the full thickness of the material. However, when we increased the speed to 15 mm/s, even after using the same power settings, the acrylic did not cut completely. This shows that higher speed reduced the cutting effectiveness because the laser did not get enough time to fully penetrate the 4.4 mm thick acrylic sheet.
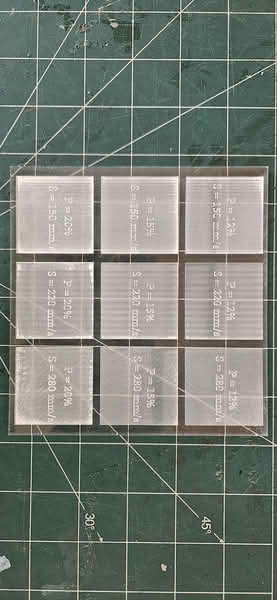 |
| During the engraving (scanning) test, two acrylic blocks were engraved properly. The best results were achieved when the speed was set to 280 mm/s with power levels of 12% and 15%. The engraving was clear and visible on the surface without cutting through the material. These settings worked well for surface marking on the 4.4 mm acrylic sheet. |
Group Assignment link
Laser Cutter
What is laser cutter
A laser cutter is a machine that uses a strong and focused beam of light to cut different materials. The laser beam is very thin and powerful, and it produces heat when it touches the material. Because of this heat, the material melts or burns and gets cut into the required shape. The machine is connected to a computer, and we first create a design using software like Inkscape, CorelDRAW, or AutoCAD. After completing the design, we send it to the laser cutter, and the machine follows the drawing lines exactly. Laser cutters can cut materials such as plywood, MDF, acrylic, cardboard, leather, and fabric. They can also engrave designs, which means making marks or text on the surface without cutting fully. The cutting is very clean and accurate, so it is widely used in schools, Fab Labs, industries, and workshops. People use laser cutters to make models, keychains, trophies, boxes, nameplates, and many other items. It saves time, reduces manual work, and gives precise results.
Safety measures for laser cutter
- Always wear safety glasses if required.
- Never open the machine lid while it is cutting
- Make sure the material is safe for laser cutting
- Never leave the laser cutter unattended while it is running.
- Check that the ventilation or exhaust system is working properly.
- Do not put your hands inside while the machine is operating.
- Use correct speed and power settings to avoid fire.
- If you see flames, pause the machine immediately.
- Do regular maintenance and clean the lens and mirrors carefully.
- Only trained persons should operate the laser cutter.
- Turn off the machine properly after use.
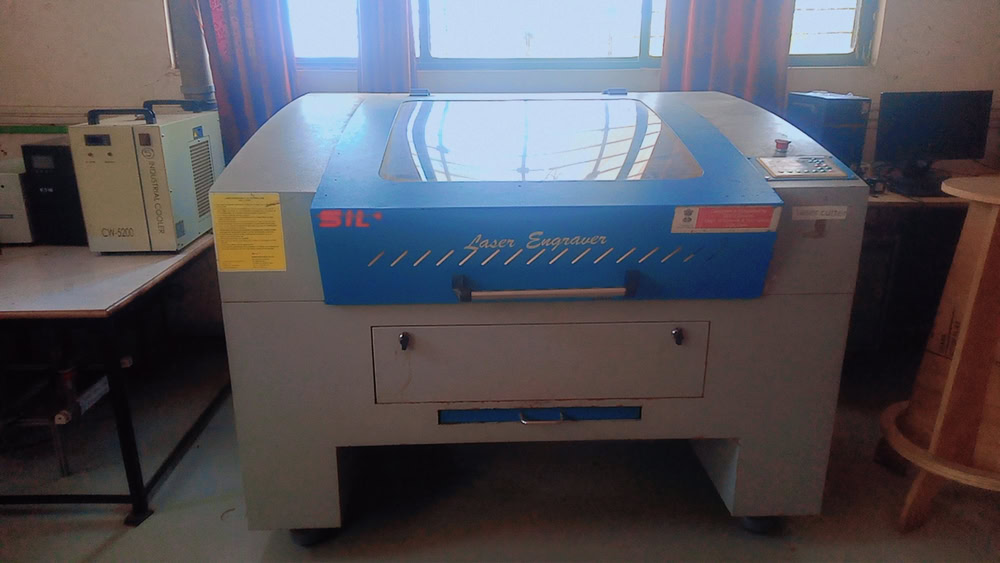
We have CO2 laser cutter.A CO2 laser cutter is a machine used to cut and engrave different materials using a laser beam. It uses CO2 gas to produce the laser. The laser beam is very strong and hot, so it can cut materials easily.
The design is first made on a computer using CAD software. This design is sent to the CO2 laser cutter. The machine follows the design and moves the laser accordingly. The laser burns or melts the material to make the required shape.
A CO2 laser cutter is commonly used to cut materials like wood, acrylic, cardboard, paper, fabric, and leather. It is very accurate and gives clean edges.
Specifications
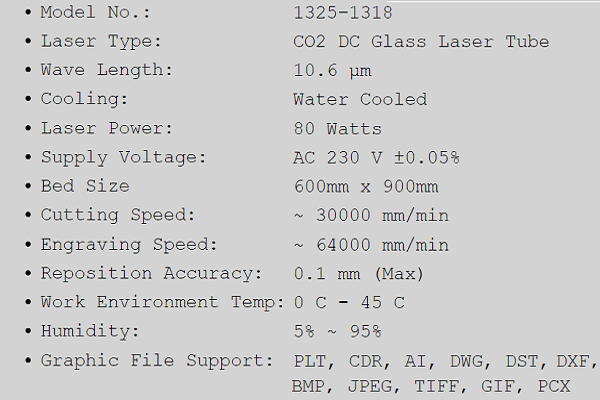 |
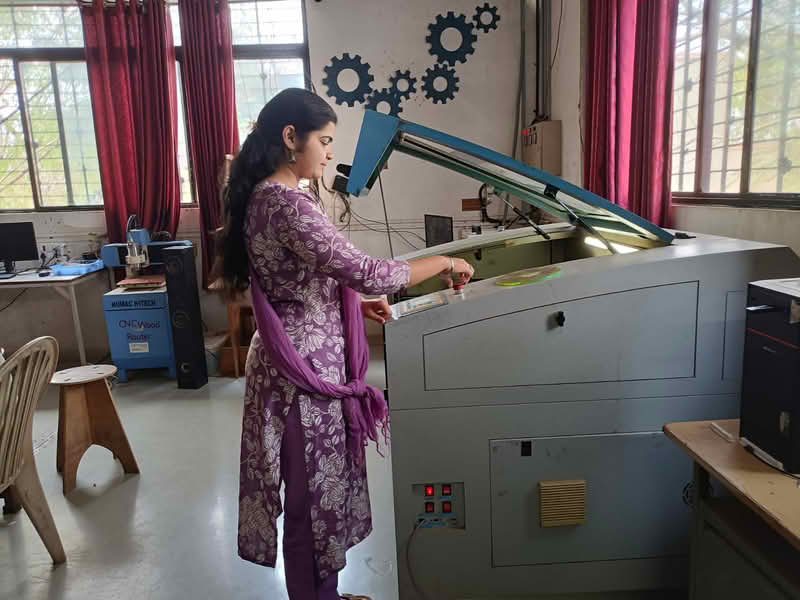
Operating Laser cutter machine
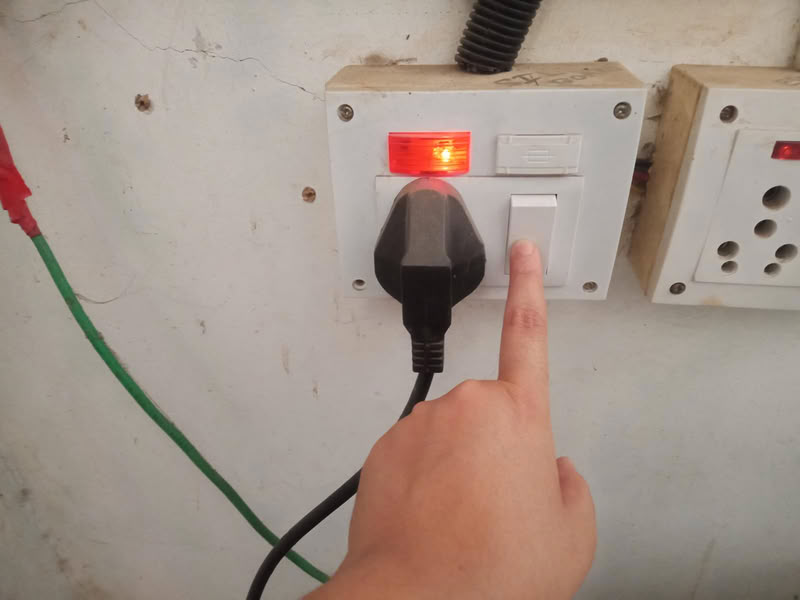
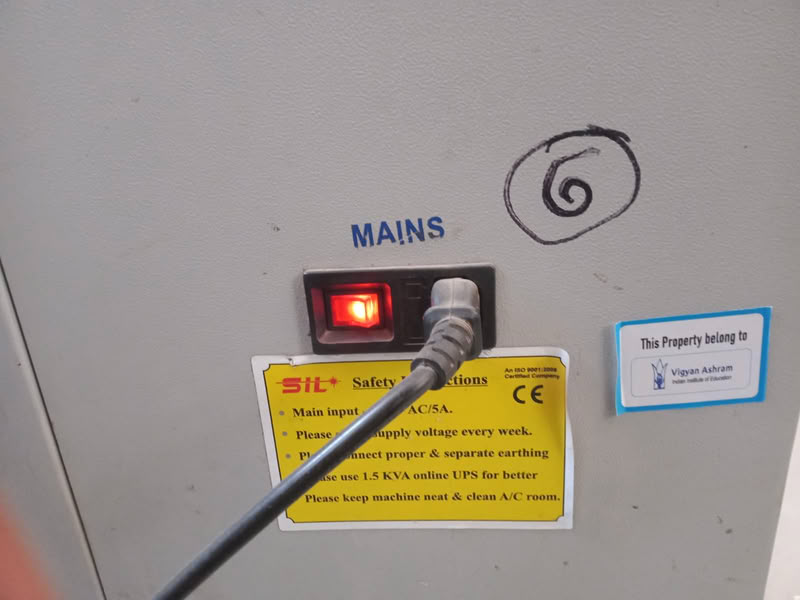
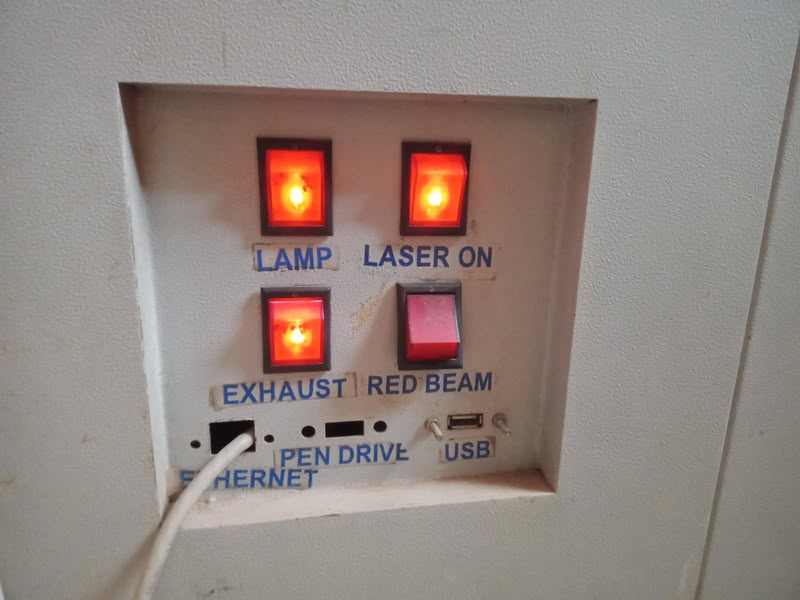
To start the laser machine, first switch on the servo voltage stabilizer. After that, turn on the isolation transformer and then switch on the inverter. Next, start the chiller or cooler to maintain the proper temperature of the machine. After the cooling system is running, switch on the main laser machine. Then turn on the air compressor, emergency switch, and control panel. The compressor supplies air at the nozzle tip, which helps in better focusing of the laser beam and improves cutting quality. Finally, switch on the laser beam, lamp, and exhaust system. The laser beam should be turned on only after making sure that the material is properly placed, the nozzle origin is set correctly, the reference frame is checked according to the drawing, and the machine door is completely closed for safety.
 |
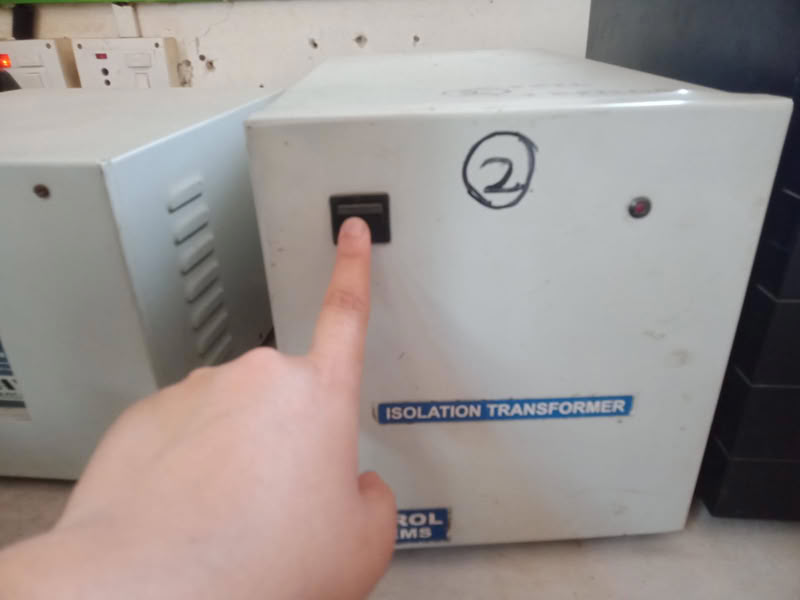 |
| First I turned on main power switch and stabilizer get started. | Then I turn on the transformer. |
 |
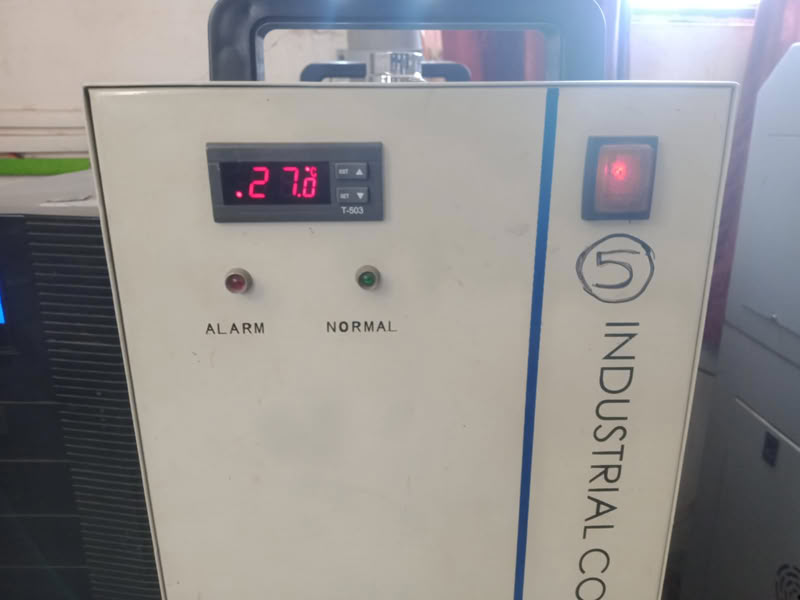 |
| Then I turn on inverter. | After this I turn on chiller which is helpful to cool down the temperature of the laser tube. |
 |
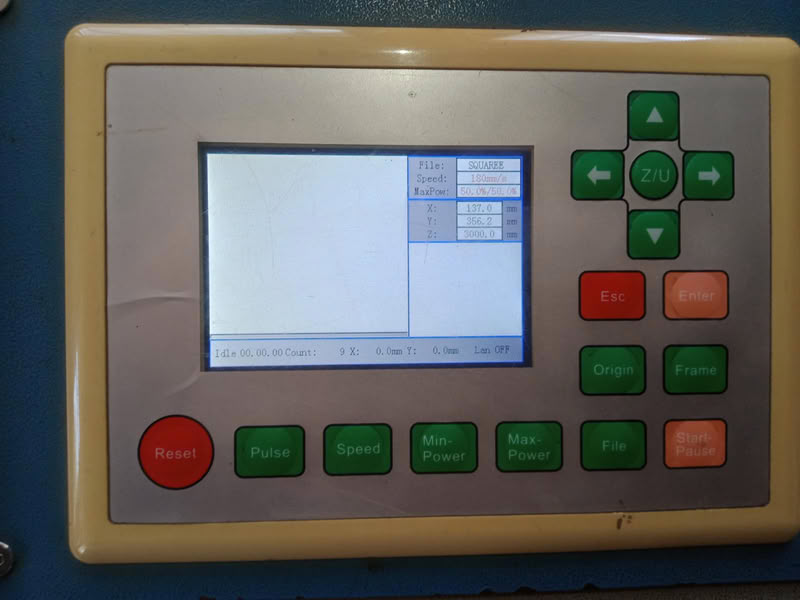 |
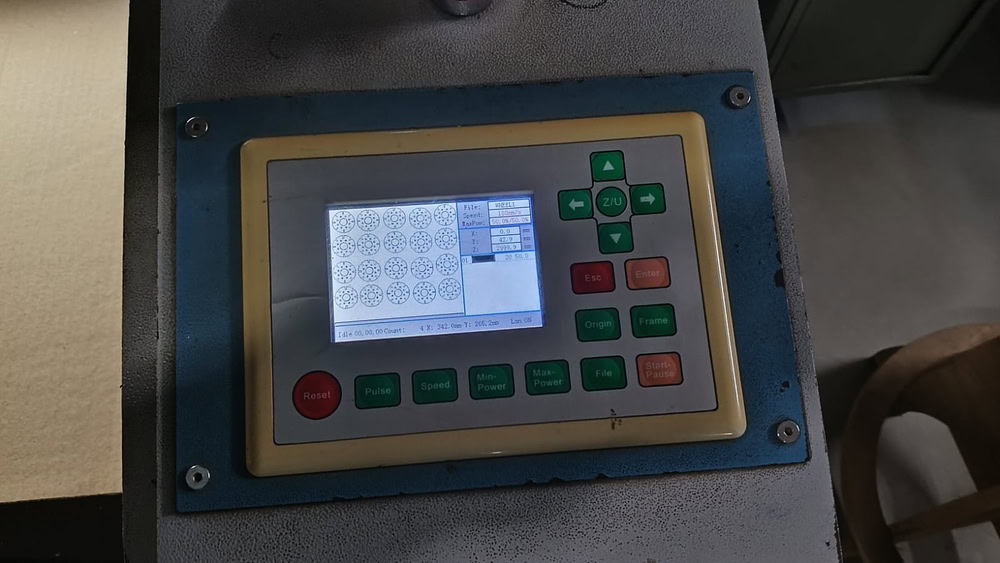
| I turned on the main switch of the laser which supplies power to the laser. | Then I saw the controller of the laser machine. using that we can adjust the nozzle position, we can also adjust the x,y,x axes, also we select files for cutting purpose and adjust their speed,power. |
 |
 |
| The laser cutting machine is equipped with a lamp button, a laser ON button, an exhaust button, and a red beam button, each serving an important function. The lamp button is used to turn on the internal light of the machine so that the working area is clearly visible while setting the material. The laser ON button activates the main laser beam, which is responsible for cutting or engraving the material. The exhaust button controls the ventilation system, which removes smoke, fumes, and burnt particles generated during the cutting process, ensuring safety and maintaining air quality. The red beam button turns on a low-power red alignment laser that helps in positioning the material accurately before starting the actual cutting operation. |
Parametric design and laser cutting
Parametric design means making a drawing where you can change the size easily by changing numbers. If you change one number, the whole drawing changes by itself. This helps us make the same design big or small without drawing again. It saves time and makes work simple. People use parametric design in computer drawing software to make smart designs.
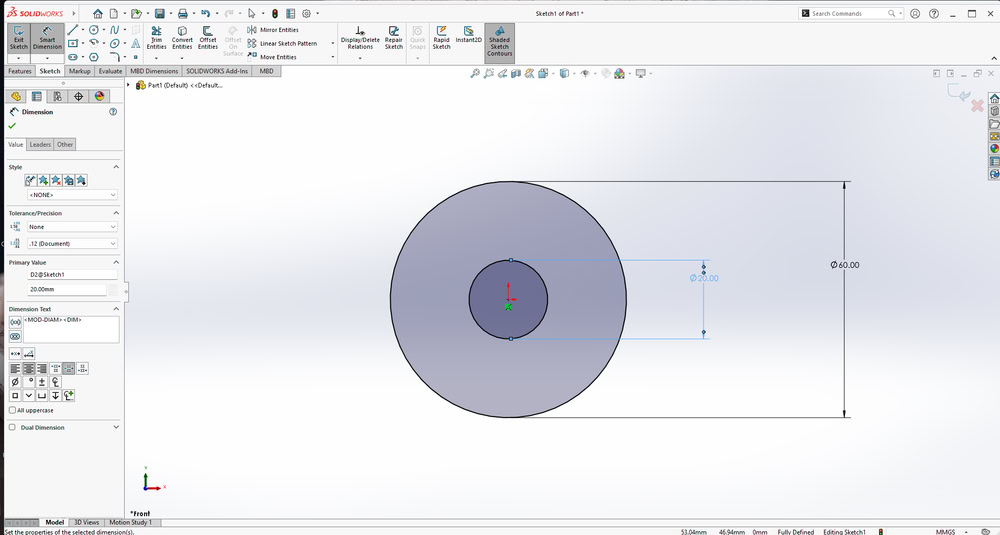
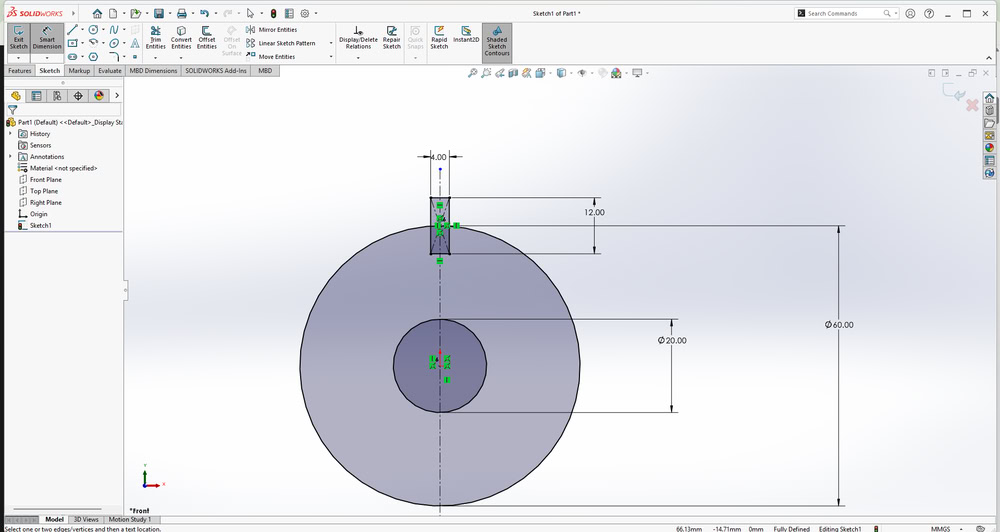
Step1:
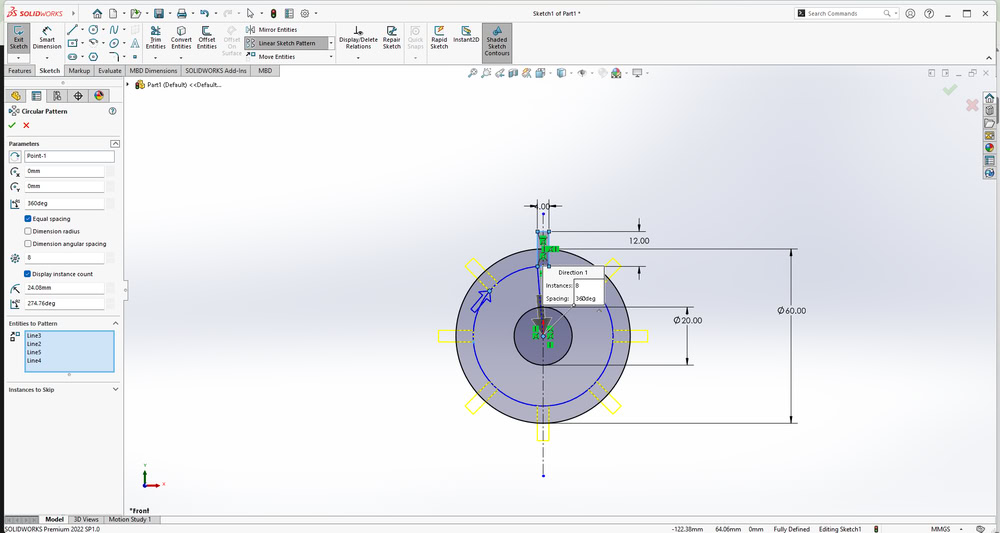
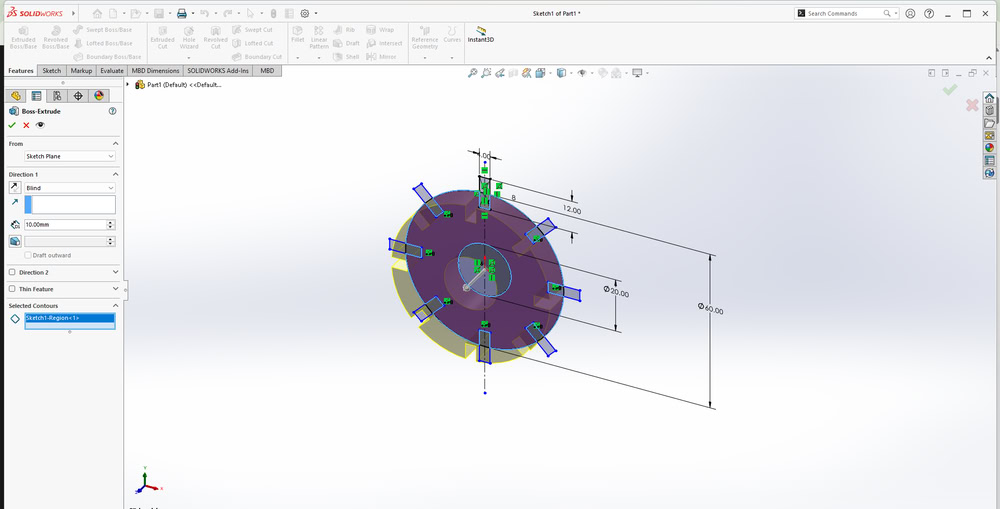
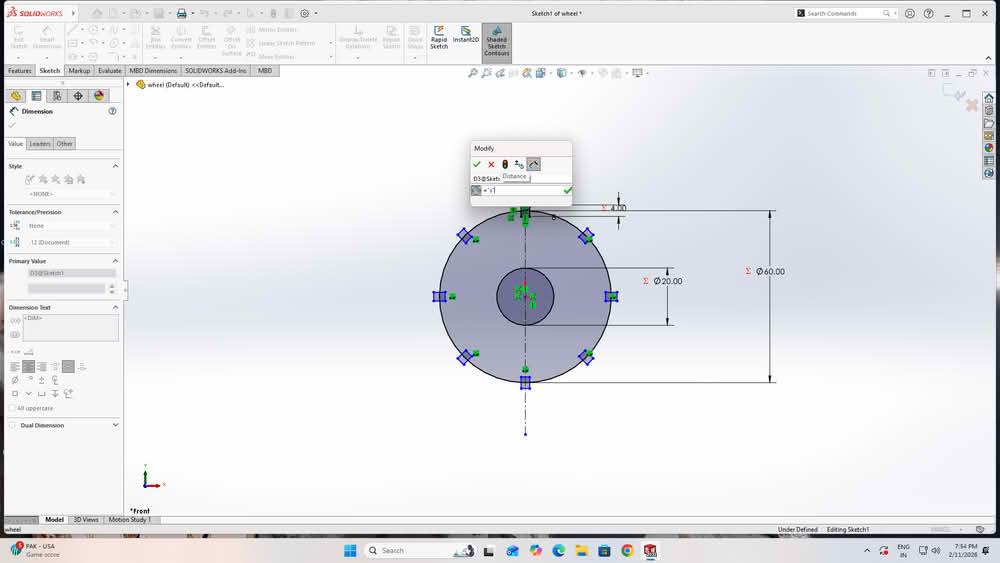
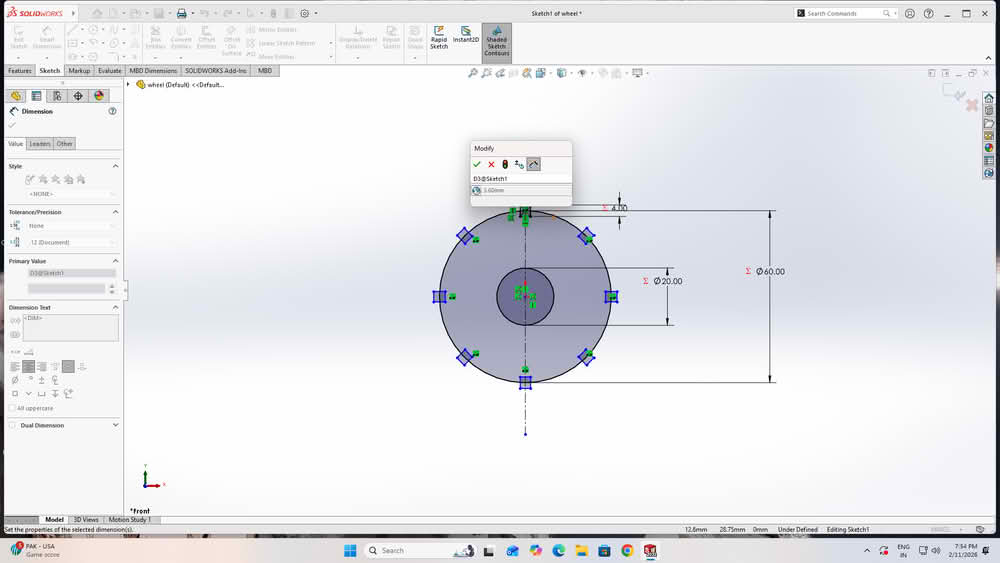
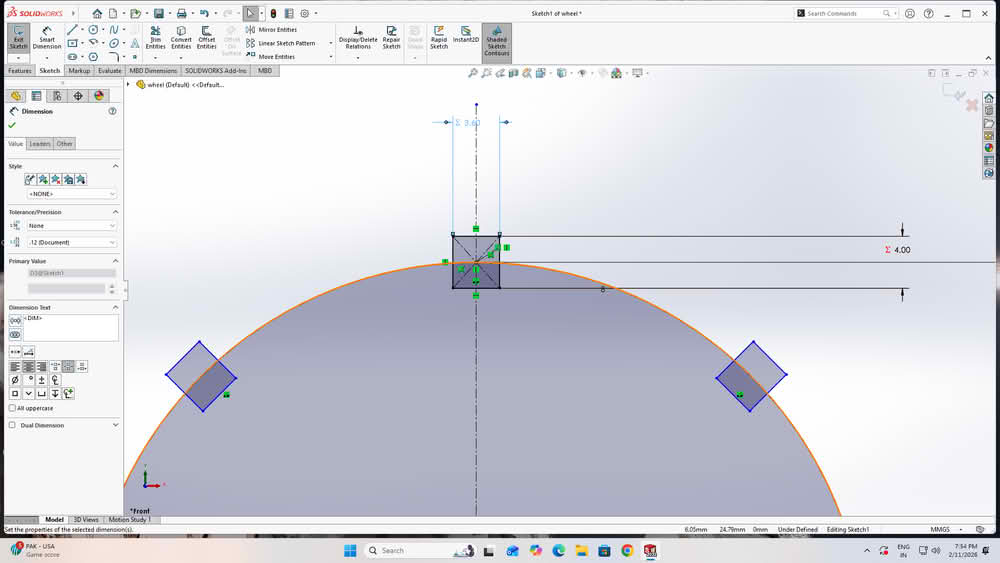
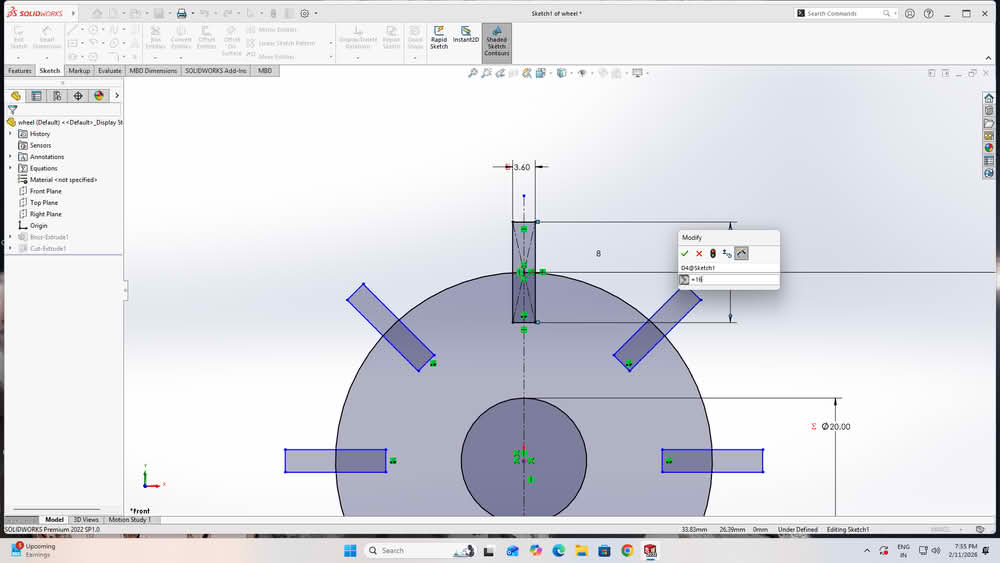
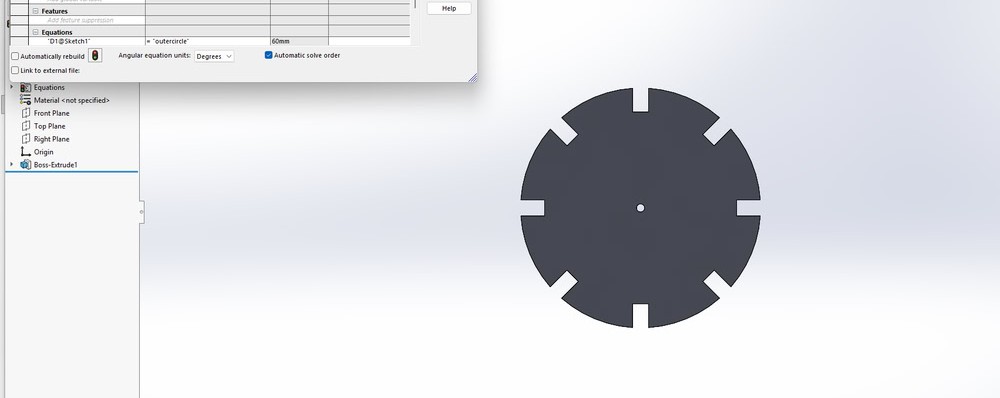
First, I started designing my parametric model in SolidWorks. I began by sketching circles and defining their sizes using Smart Dimensions. After fixing the circle dimensions, I created a center rectangle and then designed a slot on the outer circle. All the required dimensions were applied so that the design could be easily modified by changing the parameters. Also I used circular pattern to make slots on all the sides and extrude it.
 |
 |
 |
 |
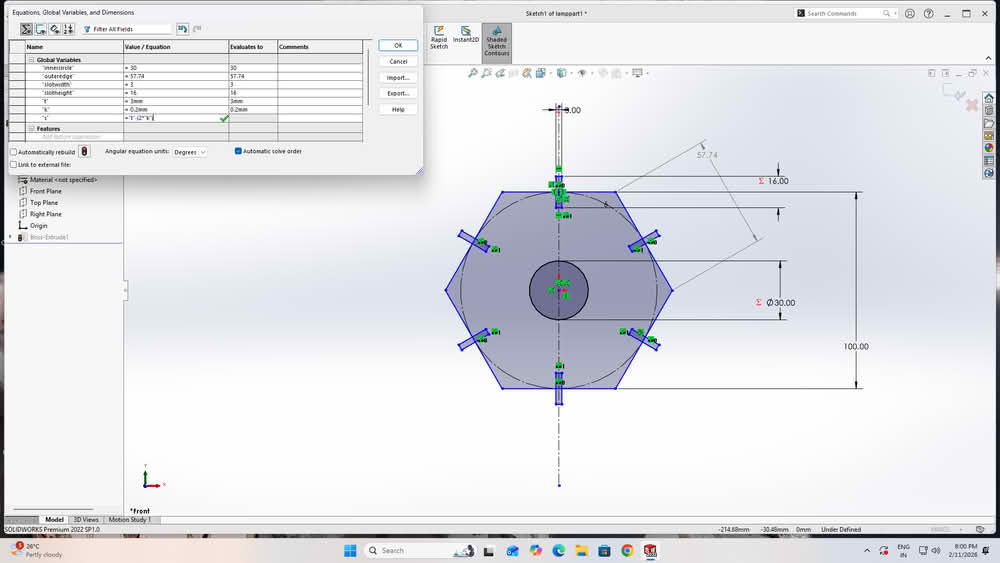
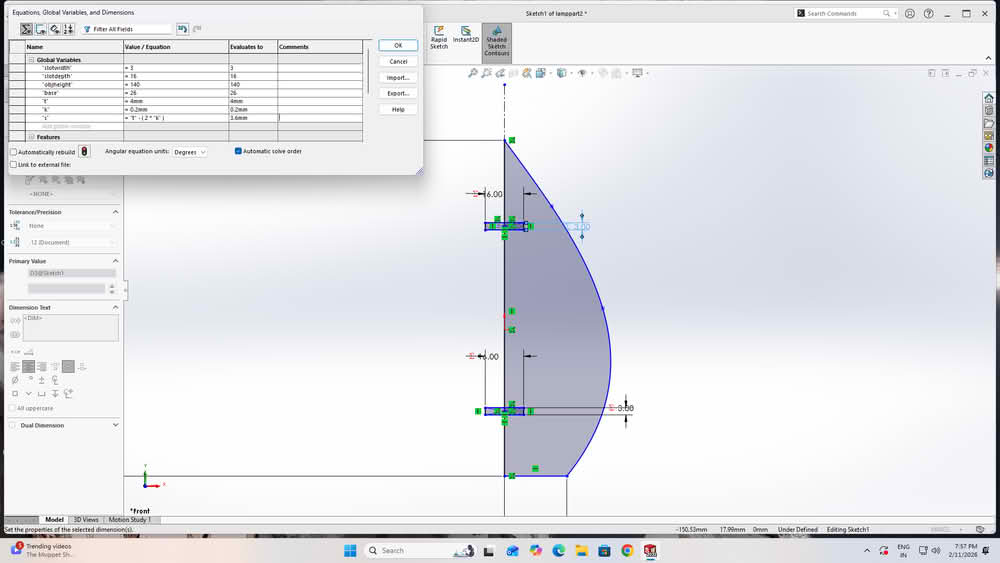
Step2:
I then created global variables using equations and assigned values to them. Finally, I linked each dimension to these global variables. I used equation (s=t-2k), where t=thickness of the material, k=0.2, s for slotwidth.
 |
 |
 |
 |
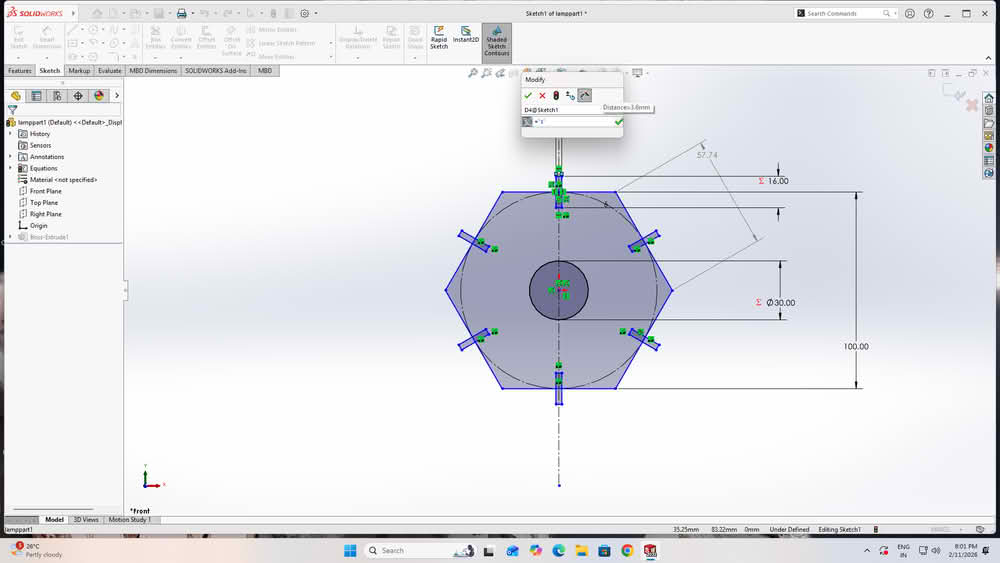
Step3:
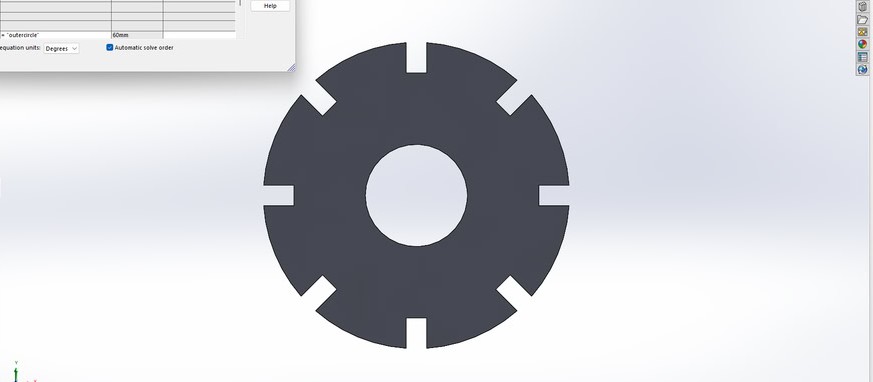
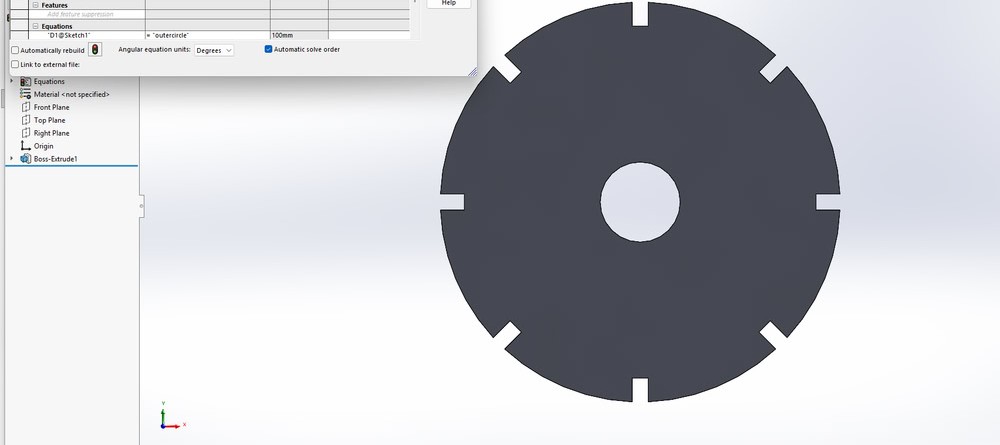
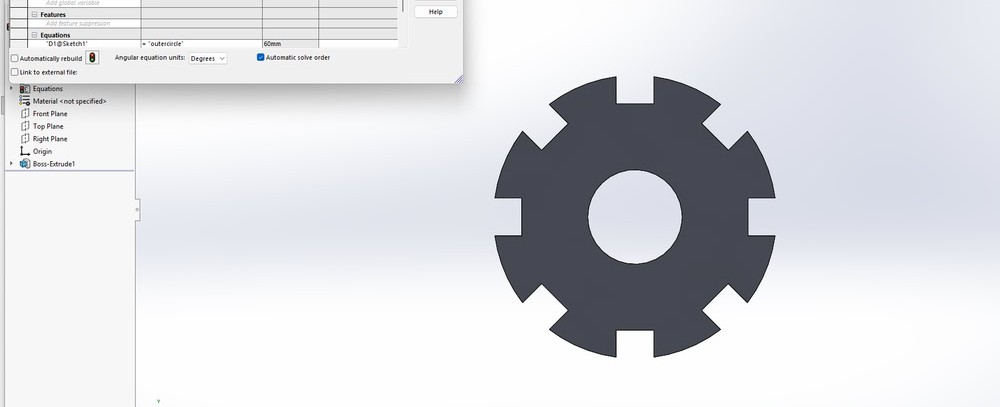
Each dimension was linked to these global variables so that the design could update automatically. After this, I changed the values of the global variables to check whether the dimensions updated correctly, and the changes were reflected successfully in the model.
 |
 |
 |
 |
Step4:
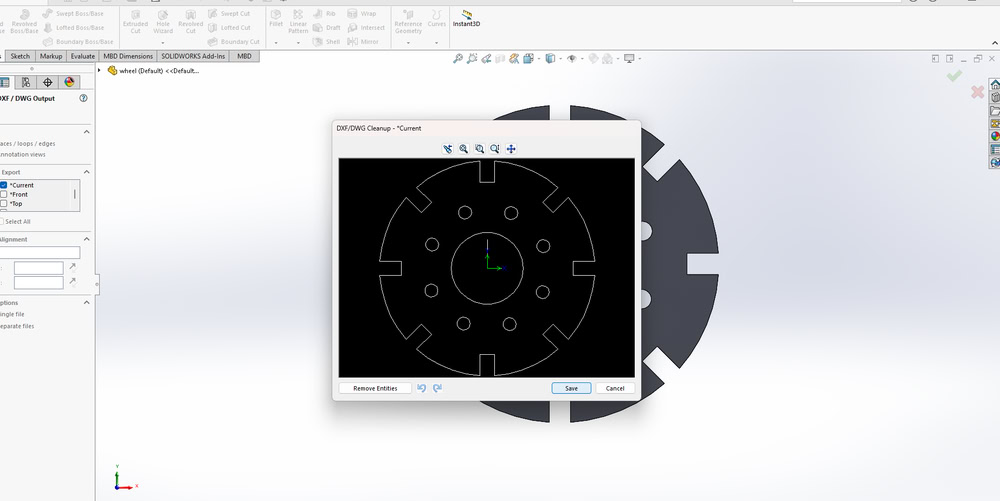
After this I export the file in DXF format and import file in RdWorks to set cutting power and speed.
 |
 |
Cutting file
kerf
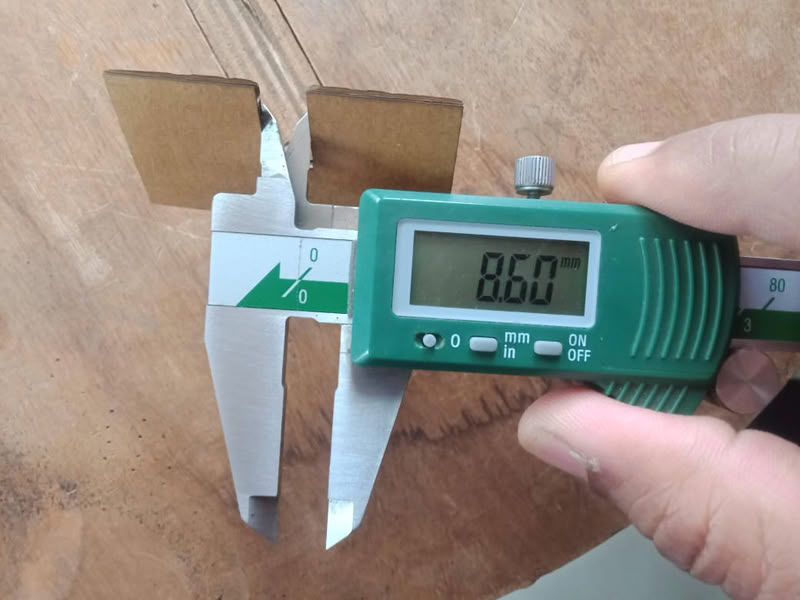
For my individual assignment I use cardboard. I put size of the slot 9mm while designing but after cutting I measured it and it shows 8.60mm. So I calculate the kerf as follows: 9-8.60 = 0.4. I divide this value by 2 to get kerf value which is 0.2mm.
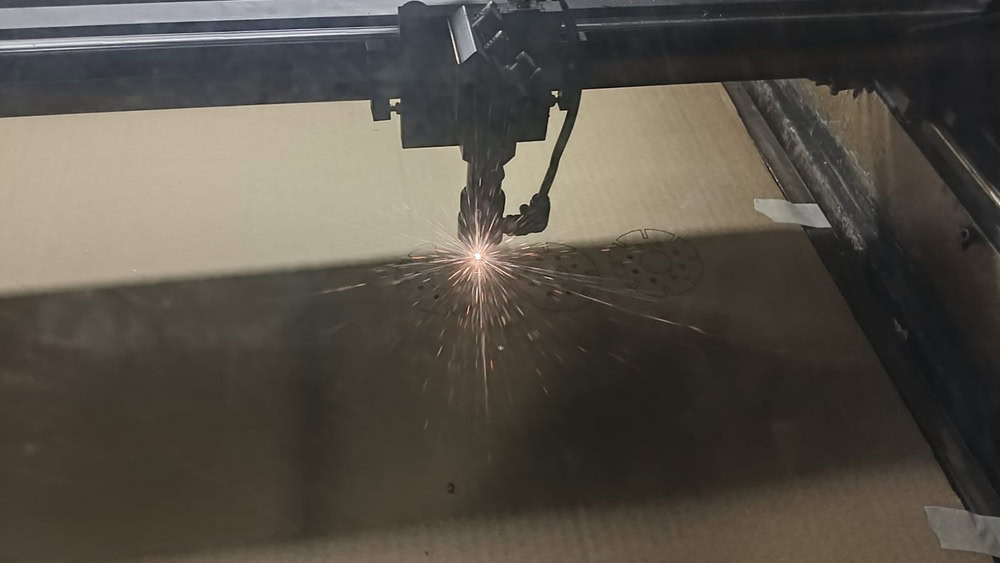
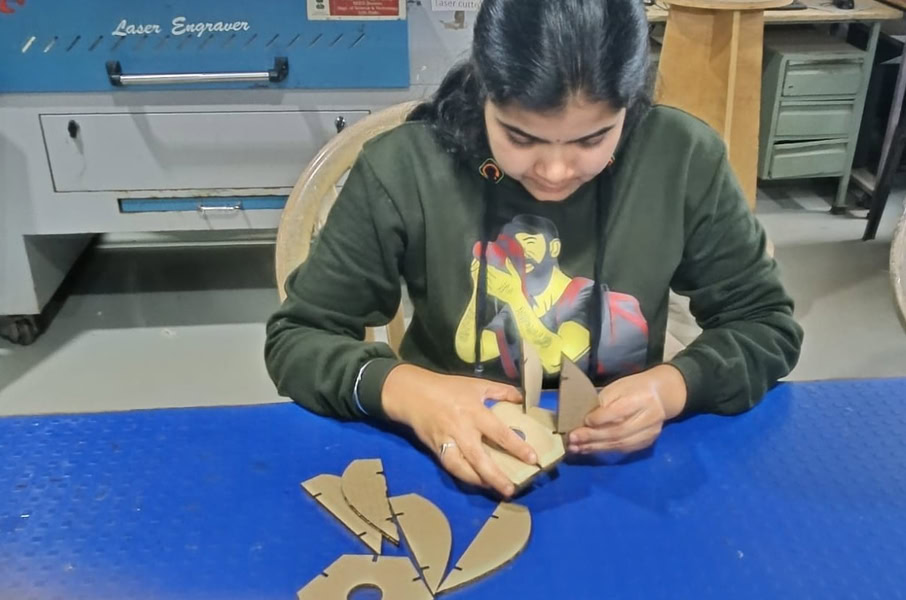
I placed the cardboard sheet properly on the laser cutter bed and ensured it was aligned correctly. Then I selected the required design file in the laser cutting software and checked the material and cutting settings. After focusing the laser beam, I started the cutting process. The laser beam began cutting the design accurately on the cardboard sheet, and the parts were cut one by one as per the design file. I continuously monitored the process for safety and proper cutting. Once the cutting was completed, all the parts were separated cleanly. Finally, I removed the cardboard sheet from the machine and collected the finished design parts.
 |
 |
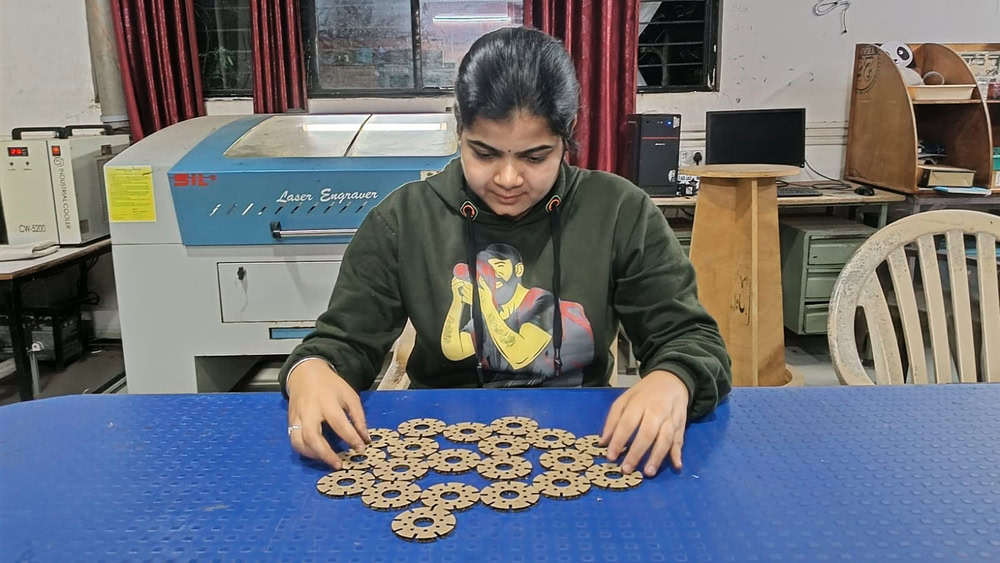 |
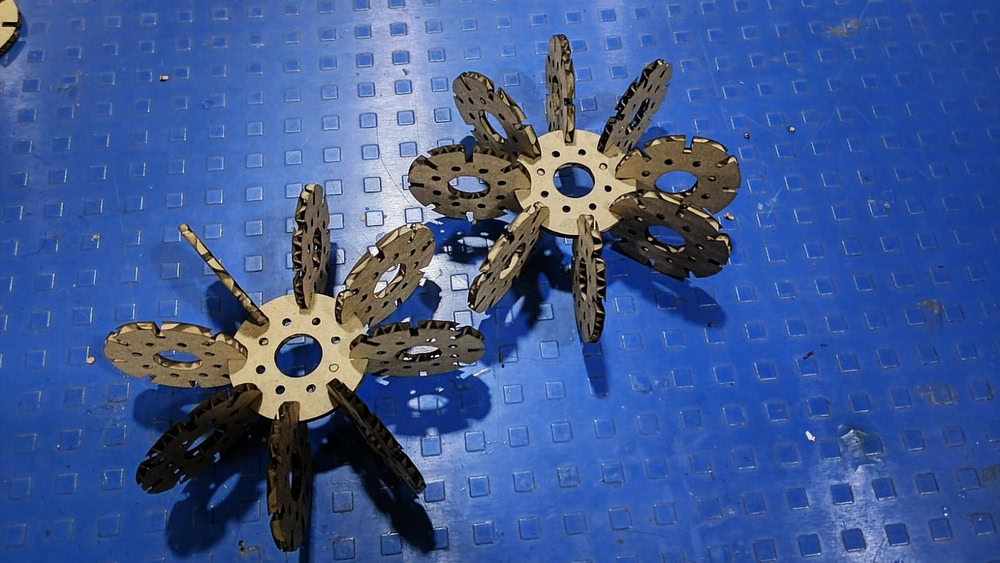
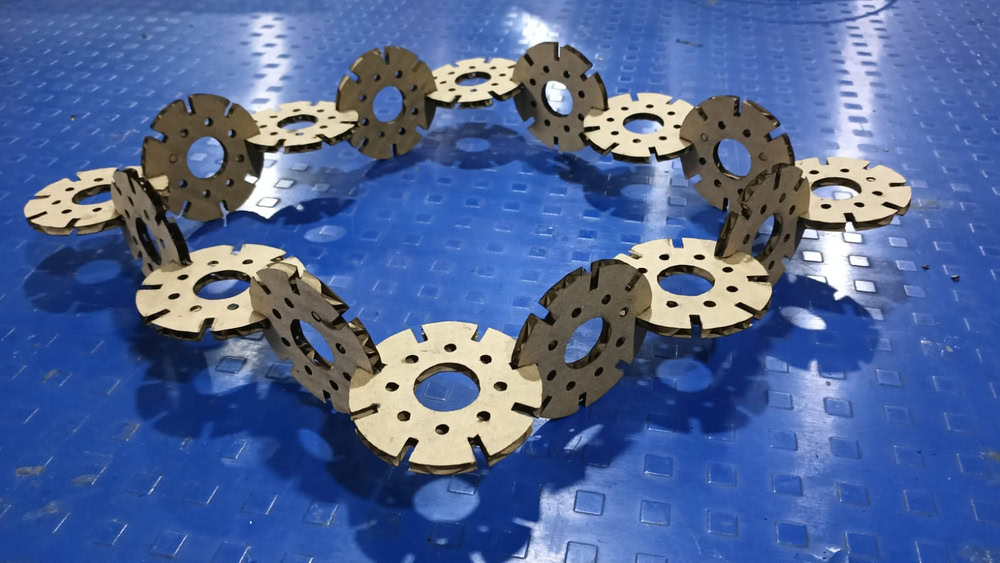
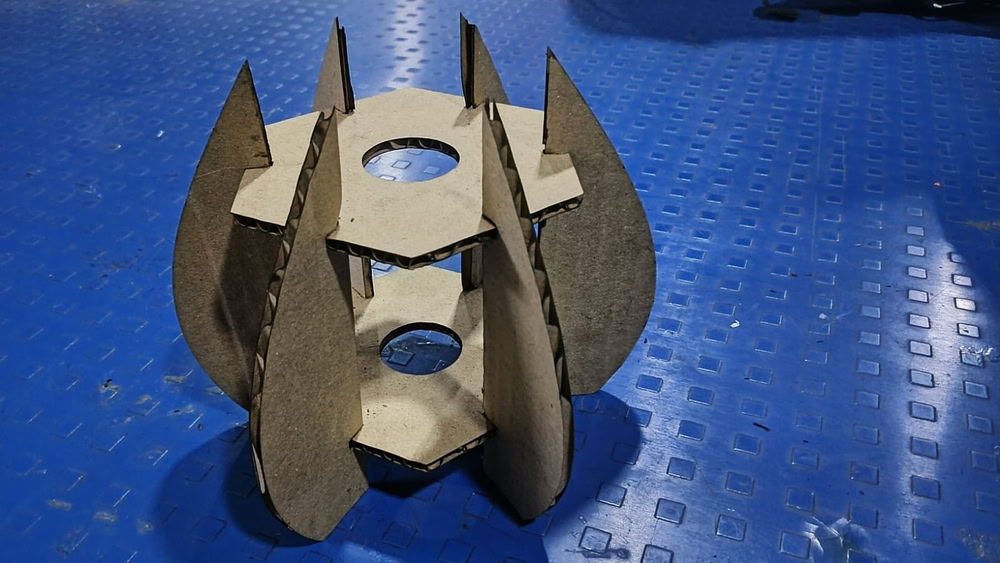
After this, I assembled the cut parts and joined them together to form an object. I carefully fitted each piece according to the design and ensured proper alignment. By assembling the parts, I was able to understand how the individual components come together to create a complete structure.
 |
 |
 |
Contruction kit using parametric design
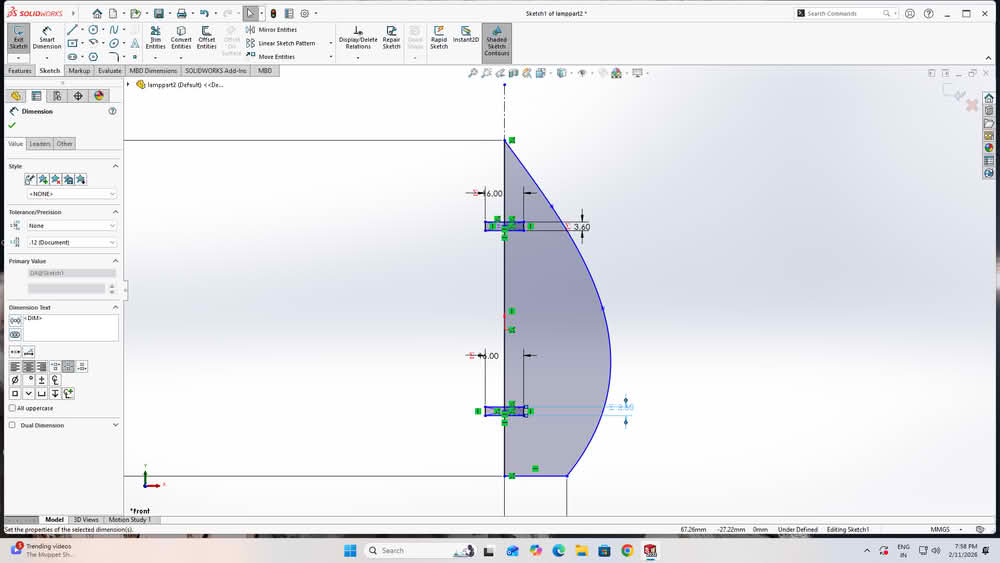
Designing
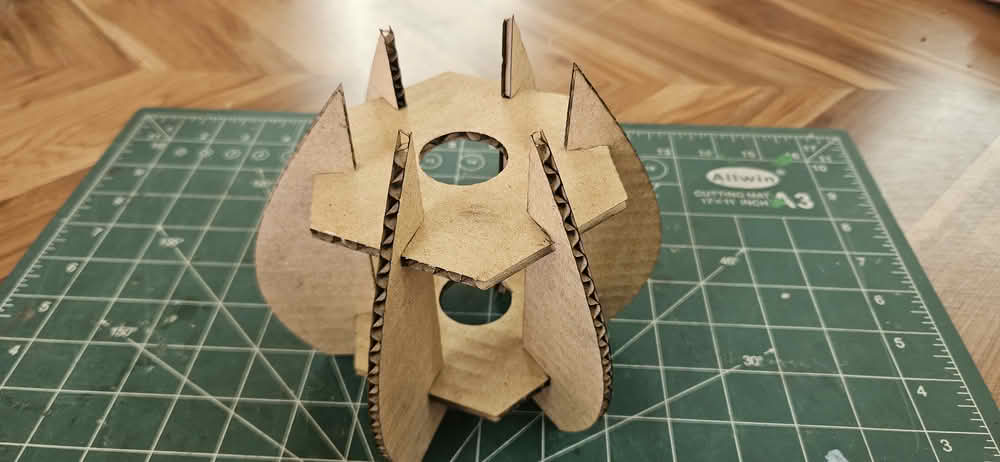
For the construction kit based on parametric design, I developed a lamp model. I created two separate parts for the lamp structure. All the sketches were properly dimensioned using Smart Dimensions. I then defined global variables to control the main dimensions. These variables were linked to the dimensions of both parts. By changing the values of the global variables, the design updated automatically. This made the lamp design flexible and easy to modify.
 |
 |
 |
 |
 |
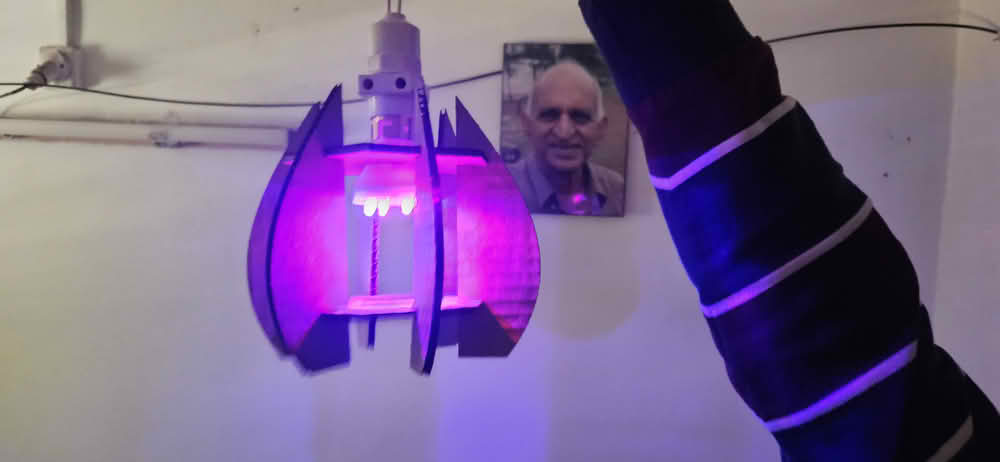
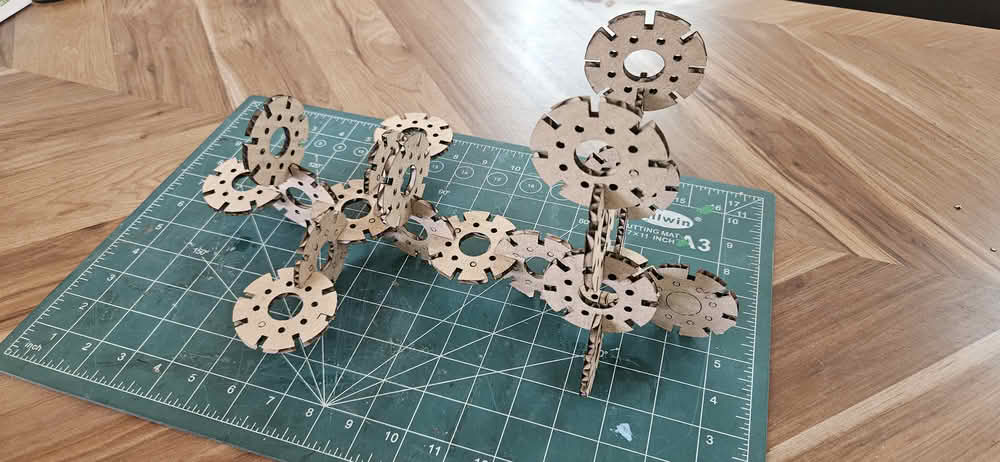
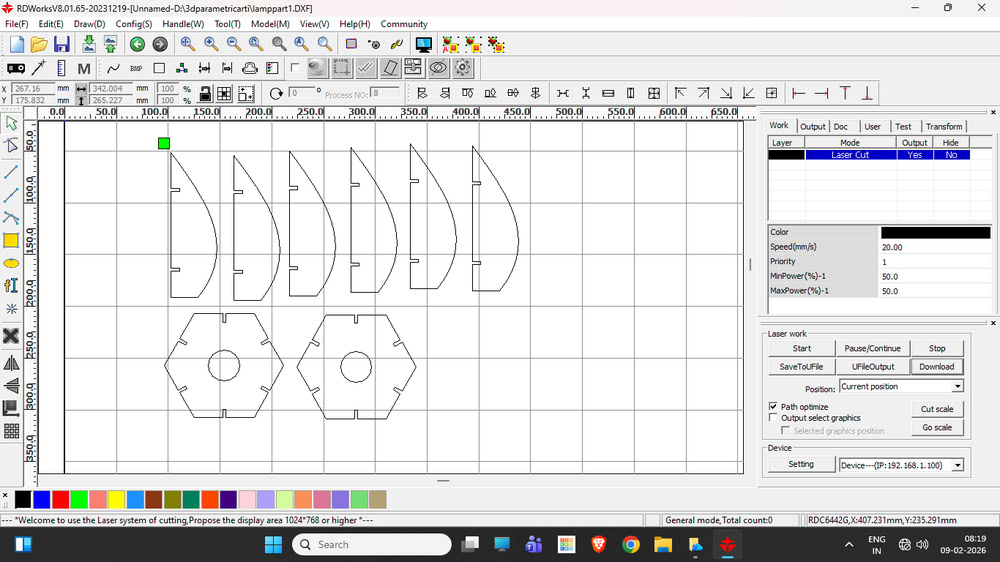
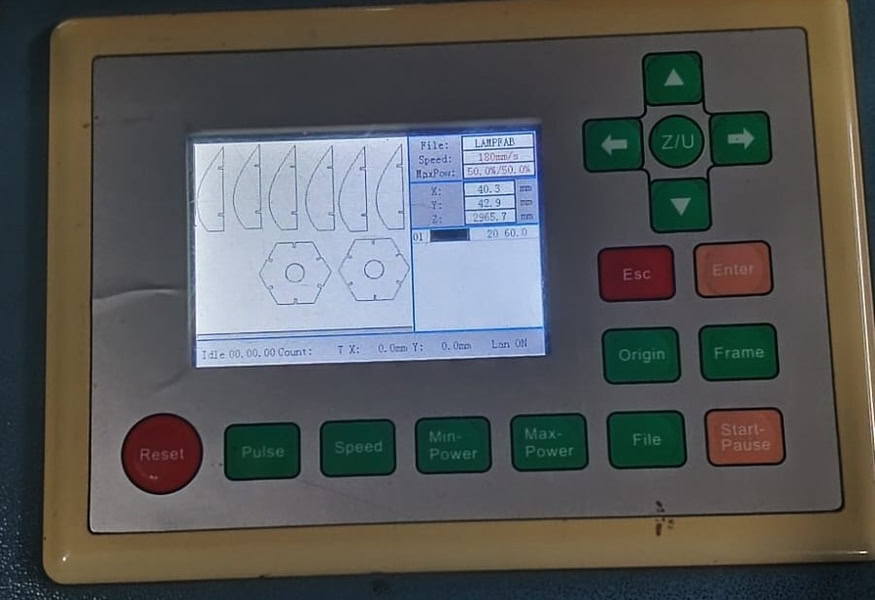
cutting and assembling
I set the cutting power and speed in RDWorks according to the material requirements and started the cutting process. The laser cutter accurately cut all the parts based on the design. After the cutting was completed, I carefully removed the parts from the machine. Then, I assembled all the cut parts properly by joining them together. Finally, the lamp was successfully assembled and ready.
 |
 |
 |
 |
 |
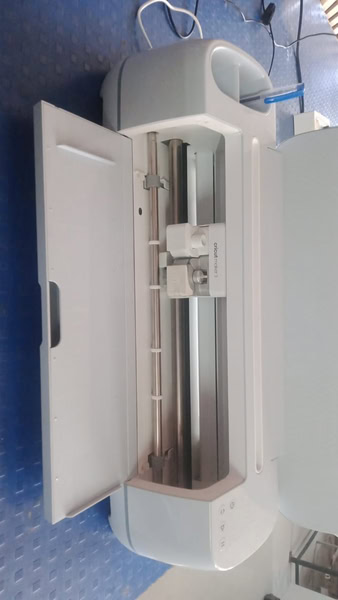
Cricut maker3
The Cricut Maker 3 is a small cutting machine that works with a computer or mobile phone. First, I choose or make a design on the computer. Then the machine cuts the material exactly like the design. It can cut paper, vinyl, cloth, leather, and thin wood. The machine uses sharp blades to cut neatly and safely. It is easy to use and works fast. The Cricut Maker 3 helps us make cards, stickers, labels, and craft items.It is very useful for simple craft work and digital fabrication.
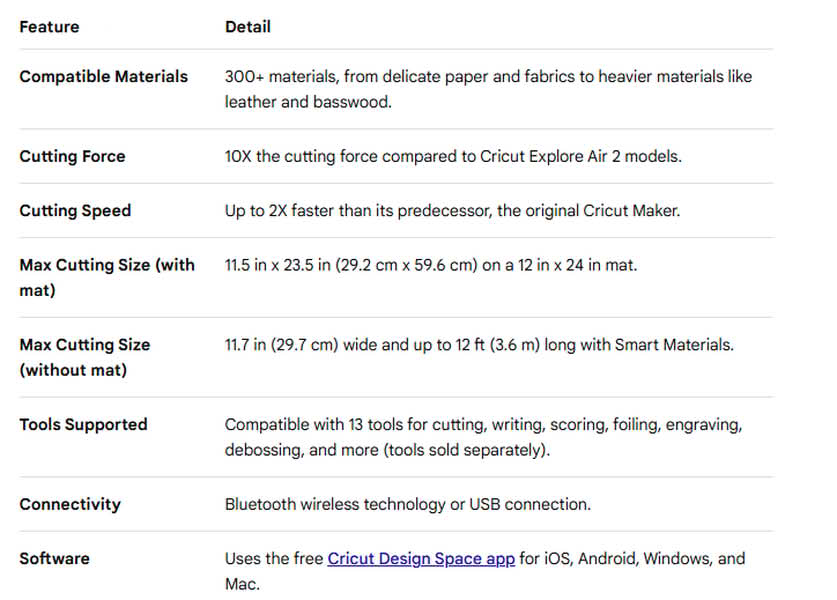
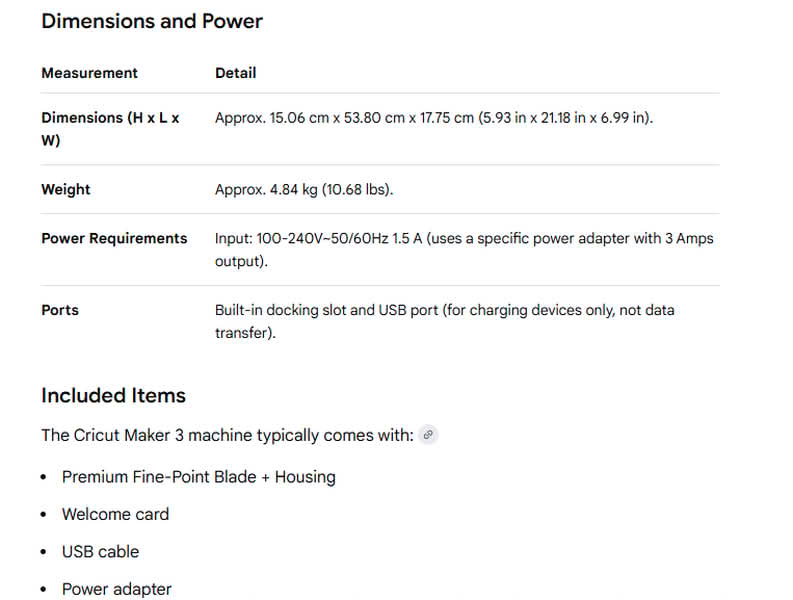
Specifications
 |
 |

- Reverse Tweezers (Top Left): Unlike standard tweezers, these stay closed naturally. You squeeze to open them and release to grip. They are perfect for holding tiny pieces of vinyl or gems without hand fatigue.
- Precision Scissors (Far Left): Small, sharp scissors designed for detail work and cutting through vinyl, paper, or cardstock.
- Weeding Hook (Second from Left): This is the "hook" tool. It is used to snag and lift the small "negative" pieces of vinyl (like the inside of the letter 'o') away from the backing.
- Precision Craft Knife (Third from Left): A standard X-Acto style knife for manual trimming or cutting intricate details that the machine might have missed.
- Spatula (Fourth from Left): This flat tool is designed to slide under cut shapes on your mat to lift them off without curling or tearing them.
- Large Scissors (Center): General-purpose shears for cutting larger pieces of material or clearing away scraps.
- Red Scraper (Top Center): Used to "burnish" (rub) transfer tape onto vinyl to ensure it sticks, or to scrape leftover debris and scraps off the green cutting mat.
- Blade Housings (Top Right): These are the metal components that go inside your Cricut machineThe two with gold/brass tops are likely Fine-Point Blades or Deep-Point Blades used for standard vinyl and cardstock.The silver one below them is likely a QuickSwap Housing or a Fine-Point Housing, which holds the actual cutting blade.
Step 1:-
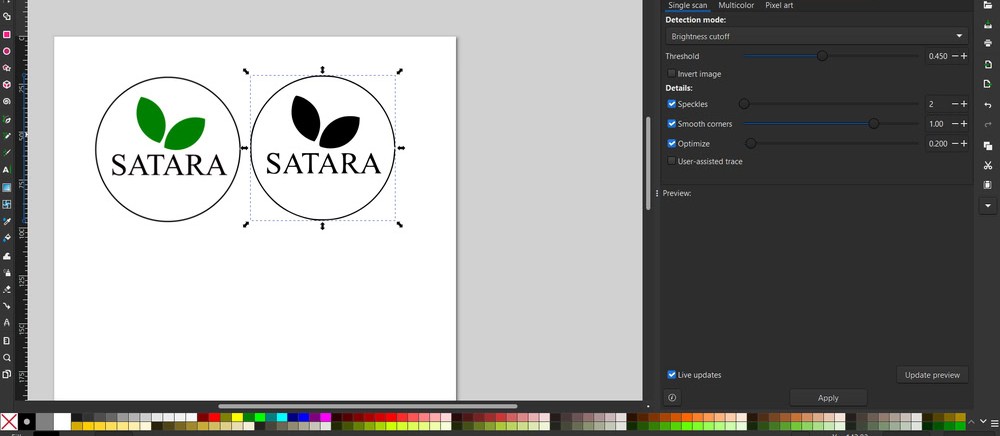
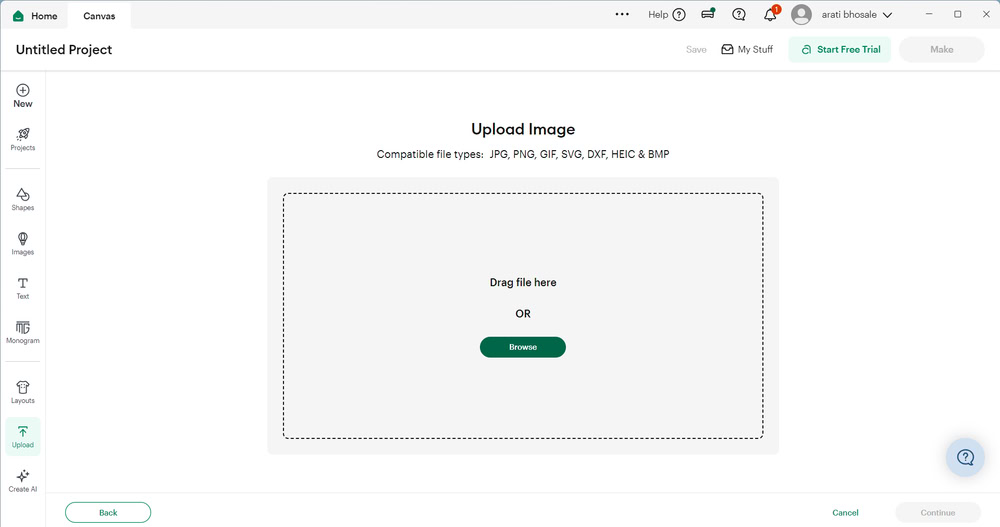
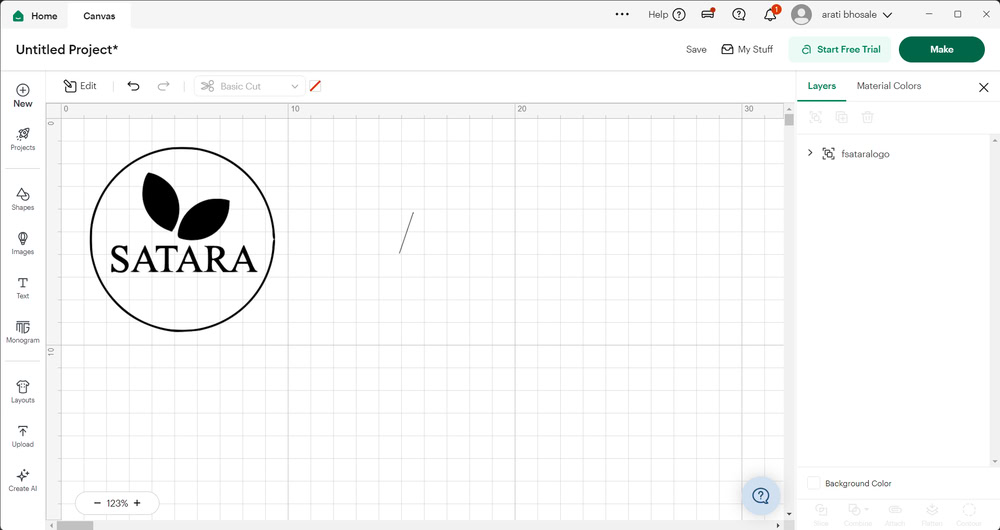
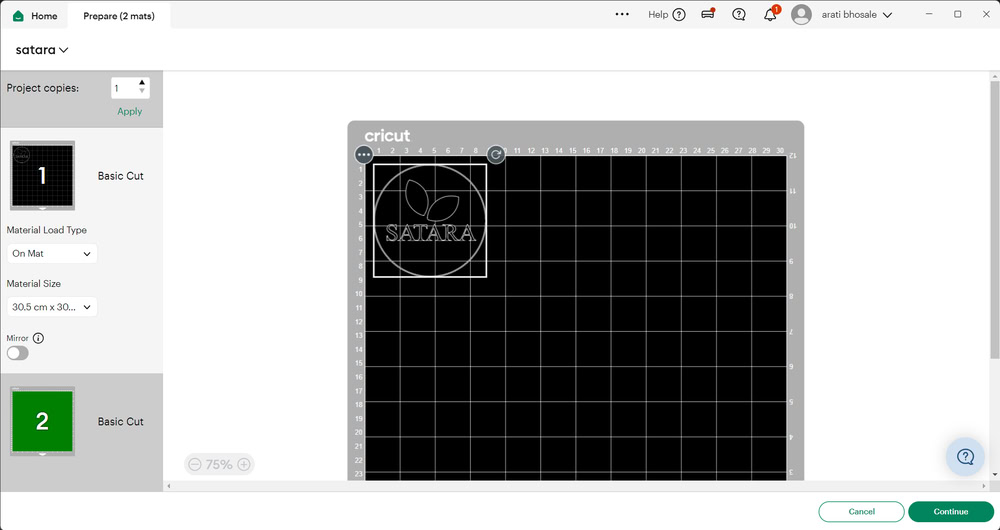
First, I created the logo design in Inkscape and saved it in SVG format. Then, I opened Cricut Design Space software and uploaded the logo file. After uploading, the logo appeared on the mat. Finally, I clicked on the Make option to start the cutting process.
 |
 |
 |
 |
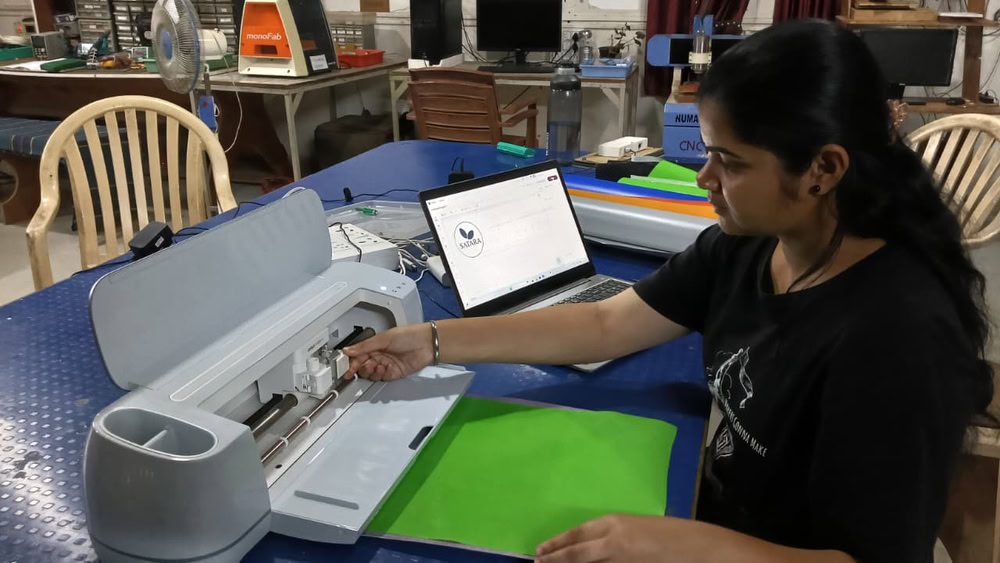
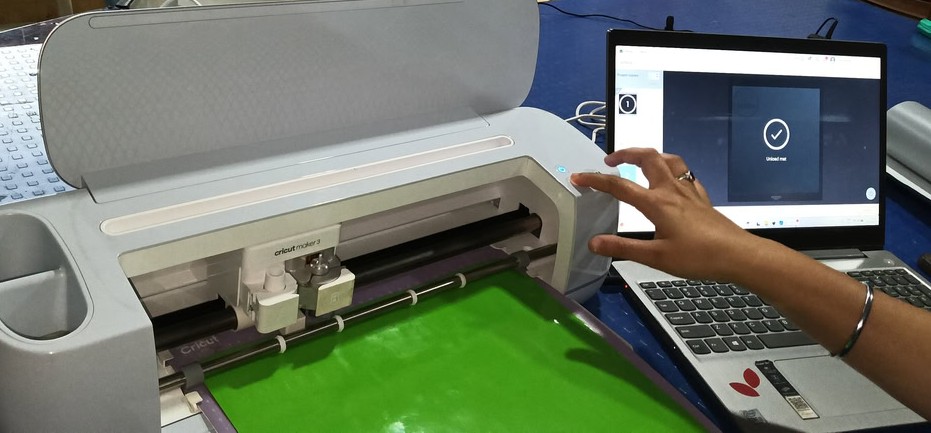
Step 2:-
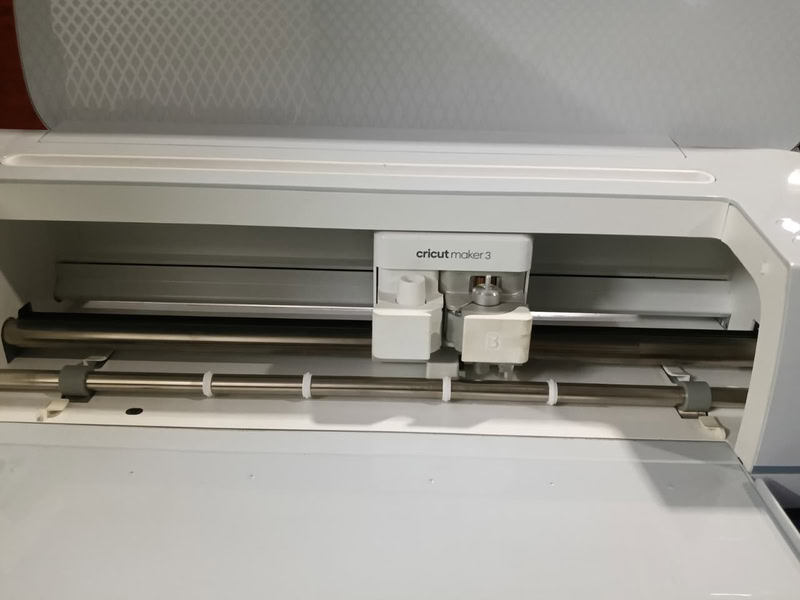
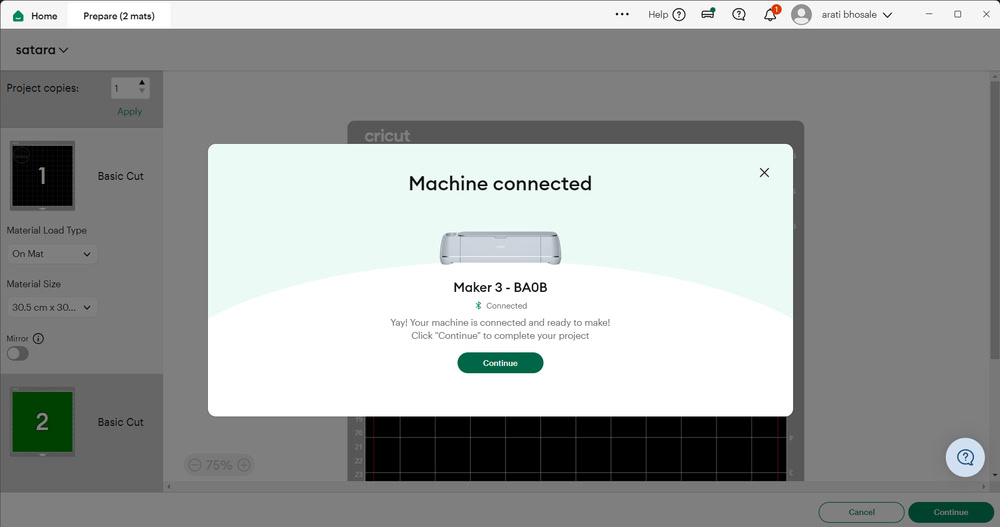
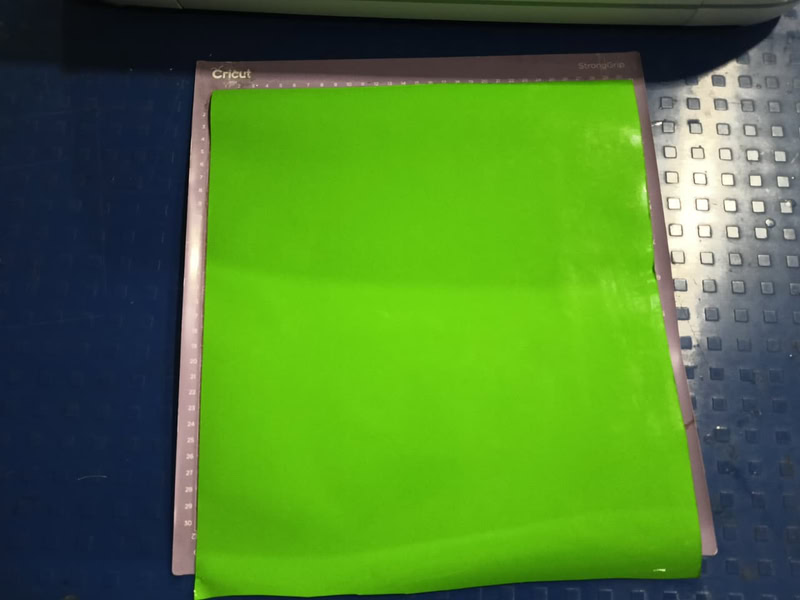
I powered on the Cricut machine and connected my laptop to it through Bluetooth. Then, I placed the vinyl paper on the mat and checked whether the blade was positioned correctly. After that, I clicked on the Continue option to start the cutting process. First, the machine checked the size of the vinyl paper that was inserted, and then it proceeded with the cutting.
 |
 |
 |
 |
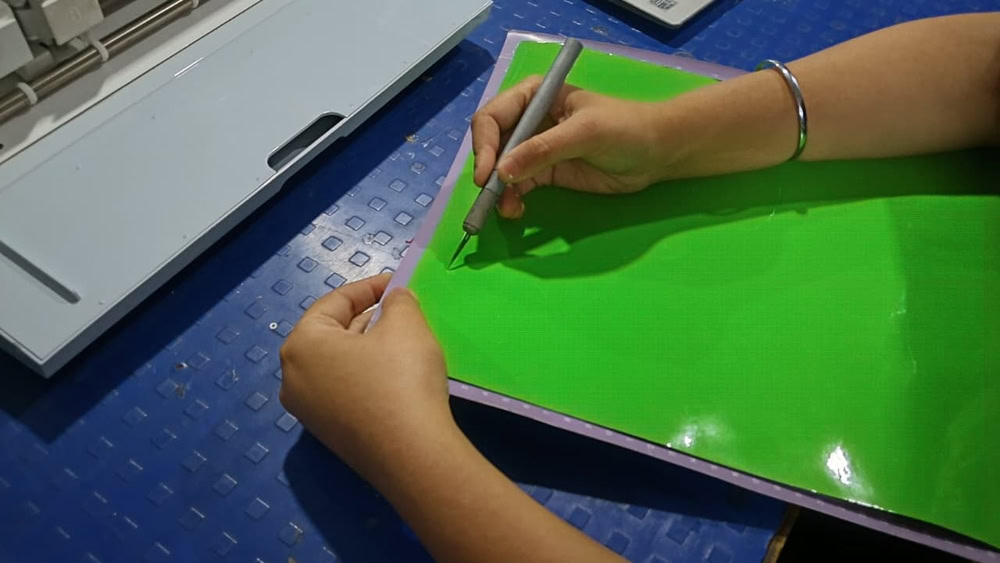
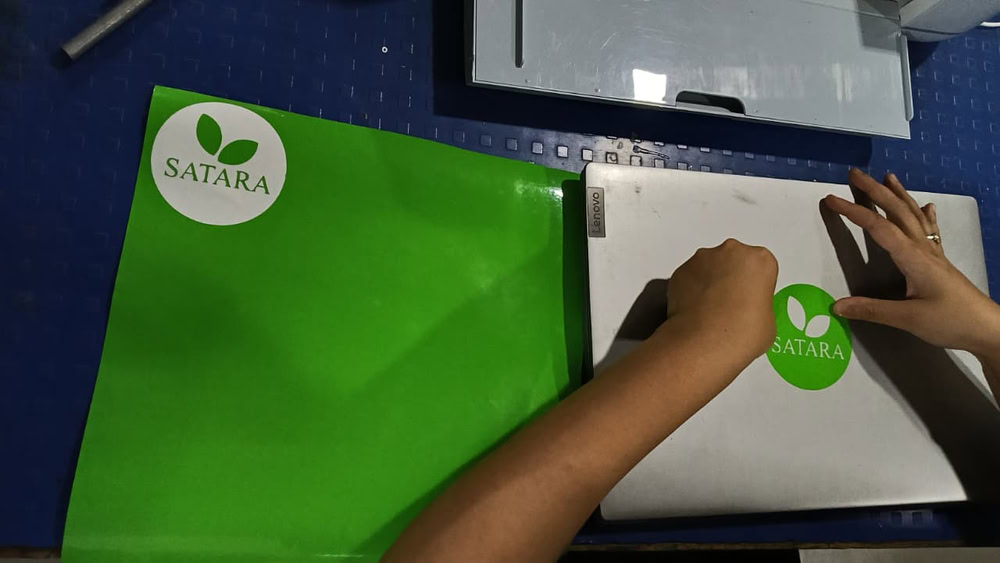
Step 3:-
Then the cutting process started after pressing the button on the machine. Once the cutting was completed, I carefully removed the logo from the vinyl sheet using a blade. Finally, I successfully placed the logo on my laptop.
 |
 |
 |