Week 19 Invention, Intellectual Property, and Income
For our last official week of class, we were charged with the following assignment
Develop a plan for dissemination of your final project
Complete your final project, tracking your progress:
- what tasks have been completed, and what tasks remain?
- what's working? what's not?
- what questions need to be resolved?
- what will happen when?
- what have you learned?
Develop a plan for dissemination of your final project
My plan for dissemination is display the physical piece in a space dedicated to works completed in my department- tentatively titled the Mezzanine Exhibition space. The audiences I have in mind are Neil Gershenfeld and the Fab Academy instructors, first, future Fab Academy students, second, and my students, third. In particular, I want my students to understand the process that I went through and be able to understand how physical, electronic and embedded programming intersect. The digital footprint of my project- the documentation pages- are for fab academy instructors, current and future fabacademy students, in order to demonstrate my process and the skills I've learned during this class. As this will also be used in my classes as an example of interaction design, I have relied on the department for some resources that can be repurposed- such as the neopixel strips, 4040 t-slot, and acrylic. There is no business plan nor need to scale up.
I chose a CC BY Creative Commons license for my project. The project by itself is not really patentable, and the name, PXL, is not something that I can trademark. I referred to the six different types of creative commons license listed on this page, “Sharing Openly, Sharing Globally.” Creative Commons, n.d. Accessed June 2, 2026. https://creativecommons.org/cc-licenses/ and determined that the CC BY made the most sense.
The text I will include on my project will be:
You are free to:
Share — copy and redistribute the material in any medium or format for any purpose, even commercially.
Adapt — remix, transform, and build upon the material for any purpose, even commercially.
The licensor cannot revoke these freedoms as long as you follow the license terms.
Under the following terms:
Attribution — You must give appropriate credit, provide a link to the license, and indicate if changes were made. You may do so in any reasonable manner, but not in any way that suggests the licensor endorses you or your use.
No additional restrictions — You may not apply legal terms or technological measures that legally restrict others from doing anything the license permits.
Notices:
You do not have to comply with the license for elements of the material in the public domain or where your use is permitted by an applicable exception or limitation.

No warranties are given. The license may not give you all of the permissions necessary for your intended use. For example, other rights such as publicity, privacy, or moral rights may limit how you use the material.
Before it could be readily used, most importantly I would need to make the power safer as the total possible current that the Neopixels can pull is 57 amps. In addition, I have to make the project more modular to make it easier to assemble/disassemble and more user-friendly, where users could go easily turn it on or off or change the volume.
I have built the design to accommodate some of these revisions, such as power on off and the inclusion of sound, but only in future spirals.
Tasks completed
This week I put in a lot of time in the lab working on the project (Wednesday through Monday). My first child is graduating from high school this week, so I am trying to complete everything before the ceremony, party, and family come in.
The tasks I have completed include:
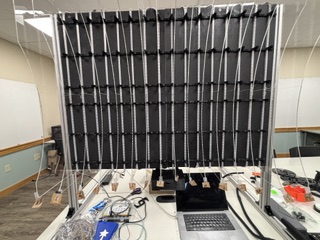
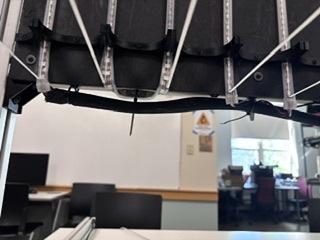
- attached/mounted all 32 of the slats, (which took approximately 17 minutes per pair of slats)
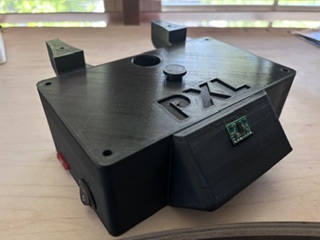
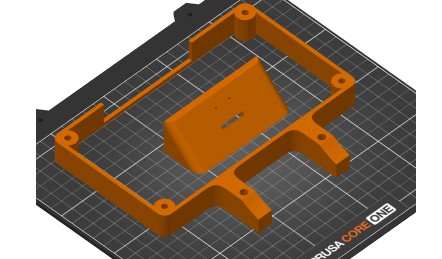
- finalized the enclosure design, which involved prototyping and testing:
- wire mgmt integration (I incorporated the 4040-tslot wire mgmt doodads into my enclosure file).
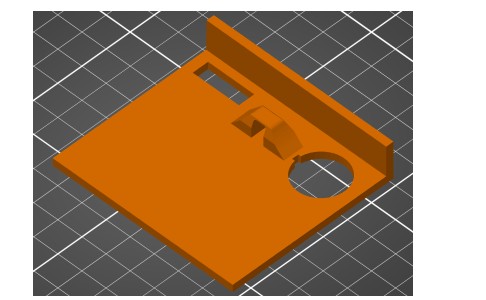
- the spacing and dimensions of pins for mounting boards to enclosure
- on off power button integration into enclosure wall (for future spiral)

- mounting TOF sensor to front of enclosure (pins and double sided tape)
- mounting a mini-mp3 player to the enclosure (for future spiral)
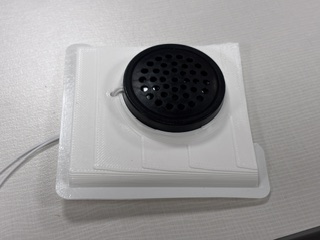
- mounting a speaker to the enclosure (for future spiral)
- Testing enclosore mounts to ensure that they fit the project/attach to the 4040 t-slot
- I calibrated the sensor and worked on refining the LED animations using Codex (45 versions of the program at last count). This was made easier by numbering each slat (0-15) so that I could identify addresses and slats by number.
- Excel spreadsheet of slats/columns and neopixel addresses (originally created by me, then modified with Codex)
- Deadpixel address map

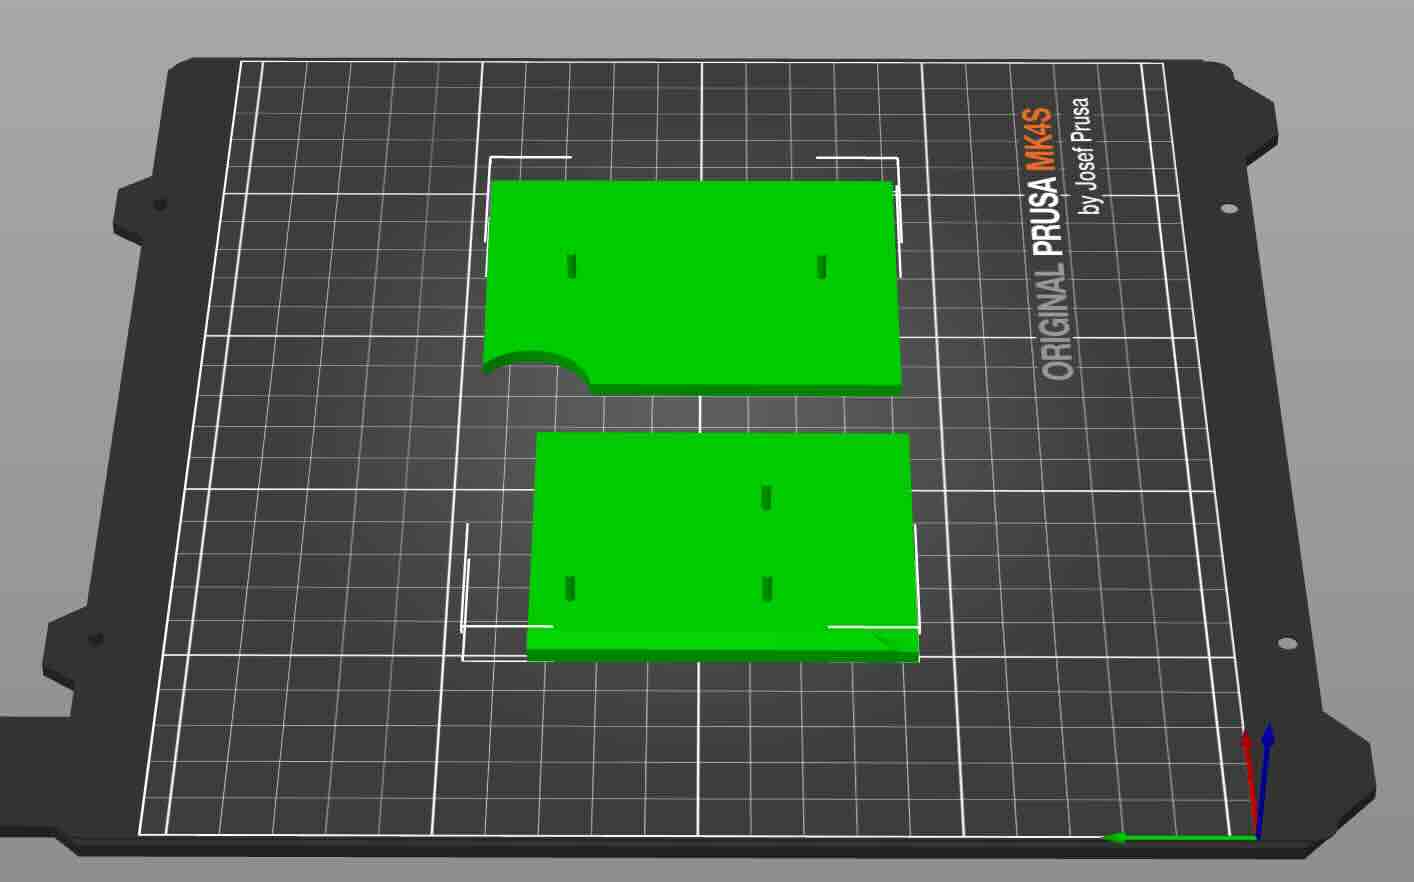
To do this, I would use the split tool in the prusa slicer to
save time printing. Doing this allowed me to quickly see if the part worked as expected and allow me to quickly iterate. For instance, I tested the attachment of the enclosure to the 4040 tslot extrusion and found that my dimensions were off (I had neglectged to account for the thickness of the neopixel strip and the acrylic slats descenging down lower than the base).
That being said, the downside to this prototyping strategy is that the parts as a whole might not reveal problems.
I first created a spreadsheet of the slats/columns and 60 neopixel addresses, to get a sense of how to program the neopixels.
I then placed the neopixels on the back, determined that in order to reuse the neopixel strips I would wrap them rather than cut them, and determined that as a result of this design choice there would be neopixels at the top and bottom that would not be usable in the animations.
Rather than count each neopixel to determine where each slat would work, I used the following program to map and calibrate the neopixel addresses. I used the following prompt on Codex to create it.
I would like to have you create a program that tests the addresses of the neopixels. I will video the animation and you/we can fine tune the addresses. The pixel addresses are listed in this program. Don't change any existing programs. Instead, create a new program using version number- as in this program is version 21.
In this program, the first LED in the slat is red, and the last LED in the slat is green.
Neopixel address mapping/testing program
I then worked through each slat, ensuring that the program would map the correct physical start and end of each pixel column/slat.
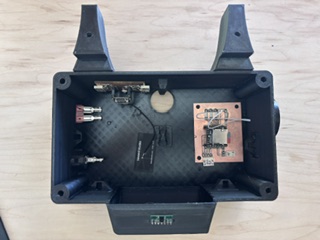
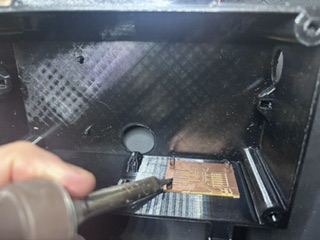
For the enclosure, I used a combination of hot glue for wires, double-sided tape, and tabs that aligned with the boards so that I could permanetly attach them to the enclosure drill holes using a soldering iron.
I am experimenting with this process here on an earlier prototype.
The wire mgmt for the project on the macro level worked really well. The wire management in the enclosure was not as effective as needed. Don't use permanent means of fixing anything in projects- even when you think that they are finished. It is just a really bad idea- it makes repairing or replacing components inordinately difficult and does't really allow for iterative improvement.
Tasks undone
The tasks I have left to complete include:
- finish slide
- finish video
- finish documentation
Spiral tasks
- add sound to animation states
- add volume button to outside of enclosure
- add easy way to open/close enclosure
- Add wifi communications to the board to enable remote functions and data collection
- add button to outside of enclosure that would reset XIAO
- incorporate a 10 amp Fuse
- power/integration- determine how to safely and effectively integrate power into my project (using a 5v 10 amp power supply).
- Wire/connect the power on off switch
- split power/route to sensor, board, and mini-mp3 player
what's working? what's not?
I have six sets of animation for six movement states that the TOF sensor is to detect.
- No One there- works well
- Standing still- works well
- approaching- works okay
- withdrawing- works okay
- Left to right - works okay
- Right to left - works okay
Overall, I am happy with the animation sequences, which respond fairly well to the TOF sensor, however there is still some issues discerning between approaching/withdrawing (y axis movement) and walking past (x axis movement) and movement that tracks on both x and y axes.
Wire management and the enclosure- functions for the sake of the final project, but the design is unwieldy to use and means once it is on, it is on. That was not a great idea (see my comments earlier).
what questions need to be resolved?
- Can I run 5v 10 amp power supply to my board. I brought this to my local instructor, my global instructor, and the GOT instructors. Almost all either didn't/couldn't answer the question or said that it was dangerous and that I should use two different power supplies. One instructor did say that it was fine and not worry about it, but he also suggested that I use a thermal camera (if available) to see if the amperage was overheating the components of my project.
- Will the diode schottky 100v 150MA SOD123 be appropriate for my board?
What will happen when?
- finalize movie- wednesday through sunday of this week
- finalize documentation (assignments-Tuesday through Monday of thjis week- final project wednesday through monday of next week)
- finalize slide -thursday of this week
Week 19 Files
- VL53L5CX Sensor / Neopixel animation program for Final Project
- Neopixel test program for Final Project
- Excel spreadsheet of slats/columns and neopixel addresses (originally created by me, then modified with Codex)
- Deadpixel address map
- Enclosure (branded) with lid
- Enclosure (branded) with lid
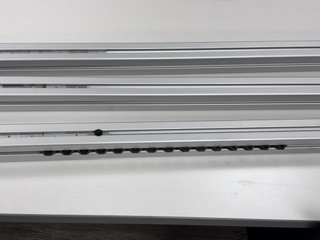
- 4040 T-slot Wire Mgmt
- Holder- single 12 printed total
- Holder- dual 90 printed total
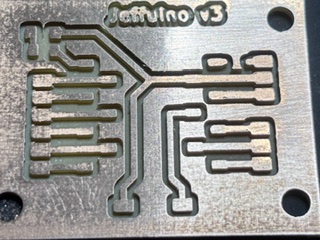
- Jeffuino board (Designed so that the XIAO ESP32C3 board can be reused)