# 0. Instructors, Bootcamp and What to expect !
The first week emphasized on how much FabAcademy can take of your mental,physical and social health. However it really surfaced important overlooked factors in our daily life
and surely along the program. We certainly got to know a lot more about the instructors, the efforts put and the experiences **open source** way of thinking in between of lines
and how literally you can build anything, given the right mentality,resillience and...budget, and...equipment...and skills and memes. But I for one believe understanding your mental
health is step 0, and this presentation has some keywords which are nice to have along the way.
| | |
| ----------- | ----------- |
|
||
|
# 1.Project Management
Project Management has been one of most controversial practices in my experience, every institute has its own way (**as it should**).
However the first eye opener in FabAcademy was literally **Time Management**, although heavely emphasized and *MEME-fied* that the documentation journey is gonna be
a roller coaster, I realized the **hack** lies in the subcontext of
##### (**Available Time...determines Tasks ~ Rico Kanthatham**), in other words
##### **Supply Side Time Management**.
Listening to Neil sharing his own insight and other student projects, it was obvious that if one is to succeed in this journey,
the following practices are **best**, when it comes to **rapid prototyping**:
1) [Parallel Development](https://www.youtube.com/watch?v=hWEhdTwbIJk), to put into simple words rather than all the formal defintions out there
- This practice is purely poetic without actual **Planning** , once you got stuff planned, you can align tasks, time slots and see how you can work simulatenously.
2) [Spiral Development](https://en.wikipedia.org/wiki/Spiral_model#/media/File:Spiral_model_(Boehm,_1988).svg)
- As Neil simply described, each extra task or progress in the projects adds to a spiral, think of it as a method that will hone your iteration capabilities, while keeping a systematic process set
the whole concept was to migitate risk.
3) Supply Side Time Management
⬇️ Tip: Google Calendar is step one
Organising my schedule on my google calendar was the first step to allocate time for the tasks and do a practical implementation of the supply side time management approach.
💡 Useful Links and Videos
- [https://en.wikipedia.org/wiki/The_Toyota_Way] (The Toyota Way)
- [https://vimeo.com/1156143813](https://vimeo.com/1156143813) (@51 minutes marker)
- [https://vimeo.com/1156954051?share=copy&fl=sv&fe=ci] (https://vimeo.com/1156954051?share=copy&fl=sv&fe=ci)(@39 min marker)
- [https://www.youtube.com/watch?v=LIFu5l38bq8&list=LL&index=21](https://www.youtube.com/watch?v=LIFu5l38bq8&list=LL&index=21]) (A good summary of essential PM terminology and concepts)
So in summary, Project Management is mostly overlooked in almost everything but from my experience I believe a strong understanding and familiarization with the concepts of it
can pave a way to more succesfful journey , I also strongly recommend anyone to read [https://en.wikipedia.org/wiki/The_Toyota_Way] (The Toyota Way), it really gives a good grasp of
agile Project Management concepts and inspires a different way of thinking, which branches out to a lot of practices and methodologies, but the mind must be set first !, hence: mindset.
> [BUTTON BOX FOR DRIVING SIMULATOR by ANDREW PUKEY](https://fabacademy.org/2025/labs/charlotte/students/andrew-puky/presentation.png)
> is a good example of System Integration.
# 2. Building this website!
## Inspo , Background and Workflow
### My Inspiration
Although I come from a Mechanical Engineering background, I have been playing around with HTML and CSS since my early school days, so it was
very interesting to see if I can merge HTML and Markdown into a single website, which so far seems not such a bad idea (24th of Jan. 2026- M.Azizi)
Browsing through the [The Fab Academy 2025 page](https://fabacademy.org/2025/people.html) I was inspired by [Eveylyn Cuadrado](https://fabacademy.org/2025/labs/lima/students/evelyn-cuadrado/) website.
I wanted to keep my website, aesthetic (to a point) yet very practical in my documentation journey, so I emptied my cup and decided to implement my inspo with some tweaks which I will cover thoroughly here.
🤖(1)
Note:
I shall be adding a robot emoji on all the sections I have used AI to refine my code, in additon to the full GPT chat as a reference, just click the robot (example 🤖(2))
🤖(1) is me working out a syntax to build a TIP box like this and the drop down boxes
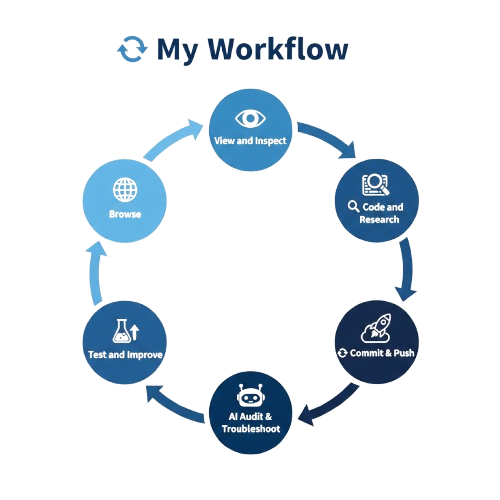
🤖(2) is me refining my "dull" markdown table (My Workflow Table)
# 3. Tools and Websites
- [x] [Markgdown Guide](https://www.markdownguide.org/) : **This is where you can use,learn and explore all markdown syntax**
- [x] [md-block](https://md-block.verou.me/) : **Essential to render Markdown on this website**
- [x] [W3Schools](https://W3Schools.com) : **This is useful to explore so html/css combos, after googling what do you want**
**Example: Sidenav bar using html/css > Familiarize yourself with W3Schools , and then follow the workflow above**
- [x] [Stackoverflow](https://stackoverflow.com)
**Great for troublshooting**
- [x] [FabAcademy - People](https://fabacademy.org/2025/people.html) <--- 2025 list here,feel free to navigate around
**A starting point to get inspired to something very relative, instead of random templates and themes of informative websites**
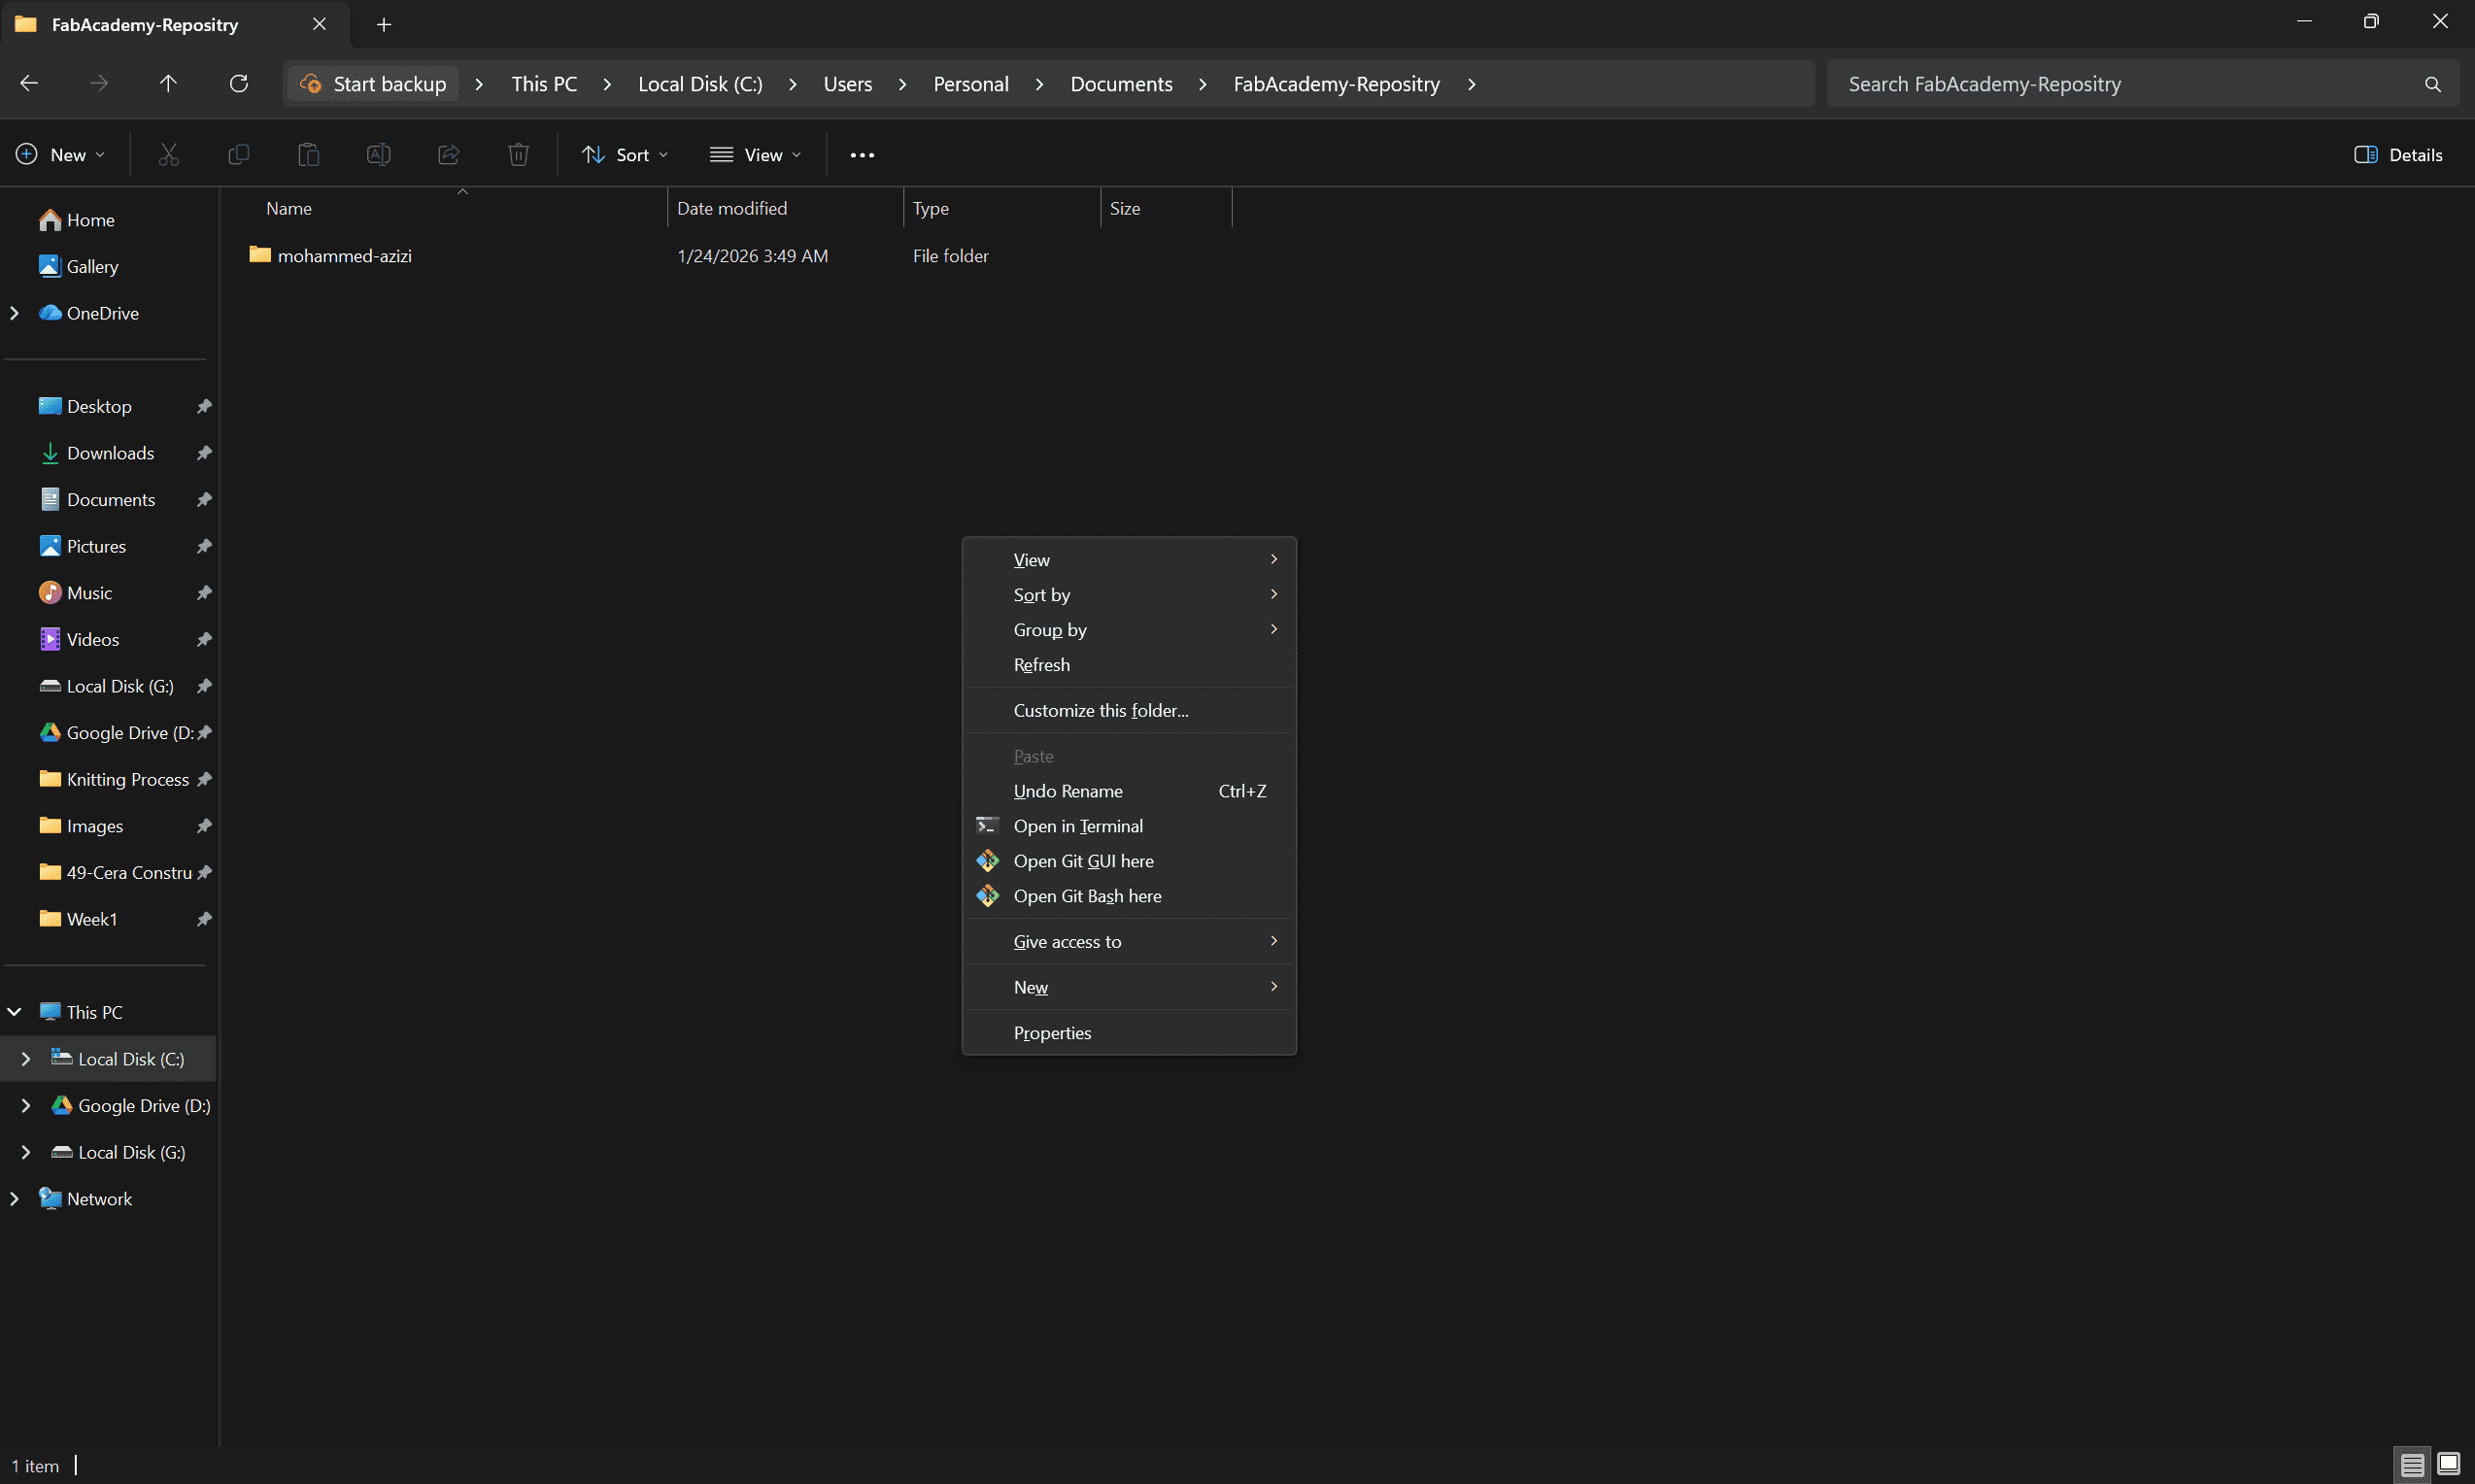
- [x] [Gitlab](https://gitlab.com)
**Setting up your repositry,offline branch, and extract some code bits you might need**
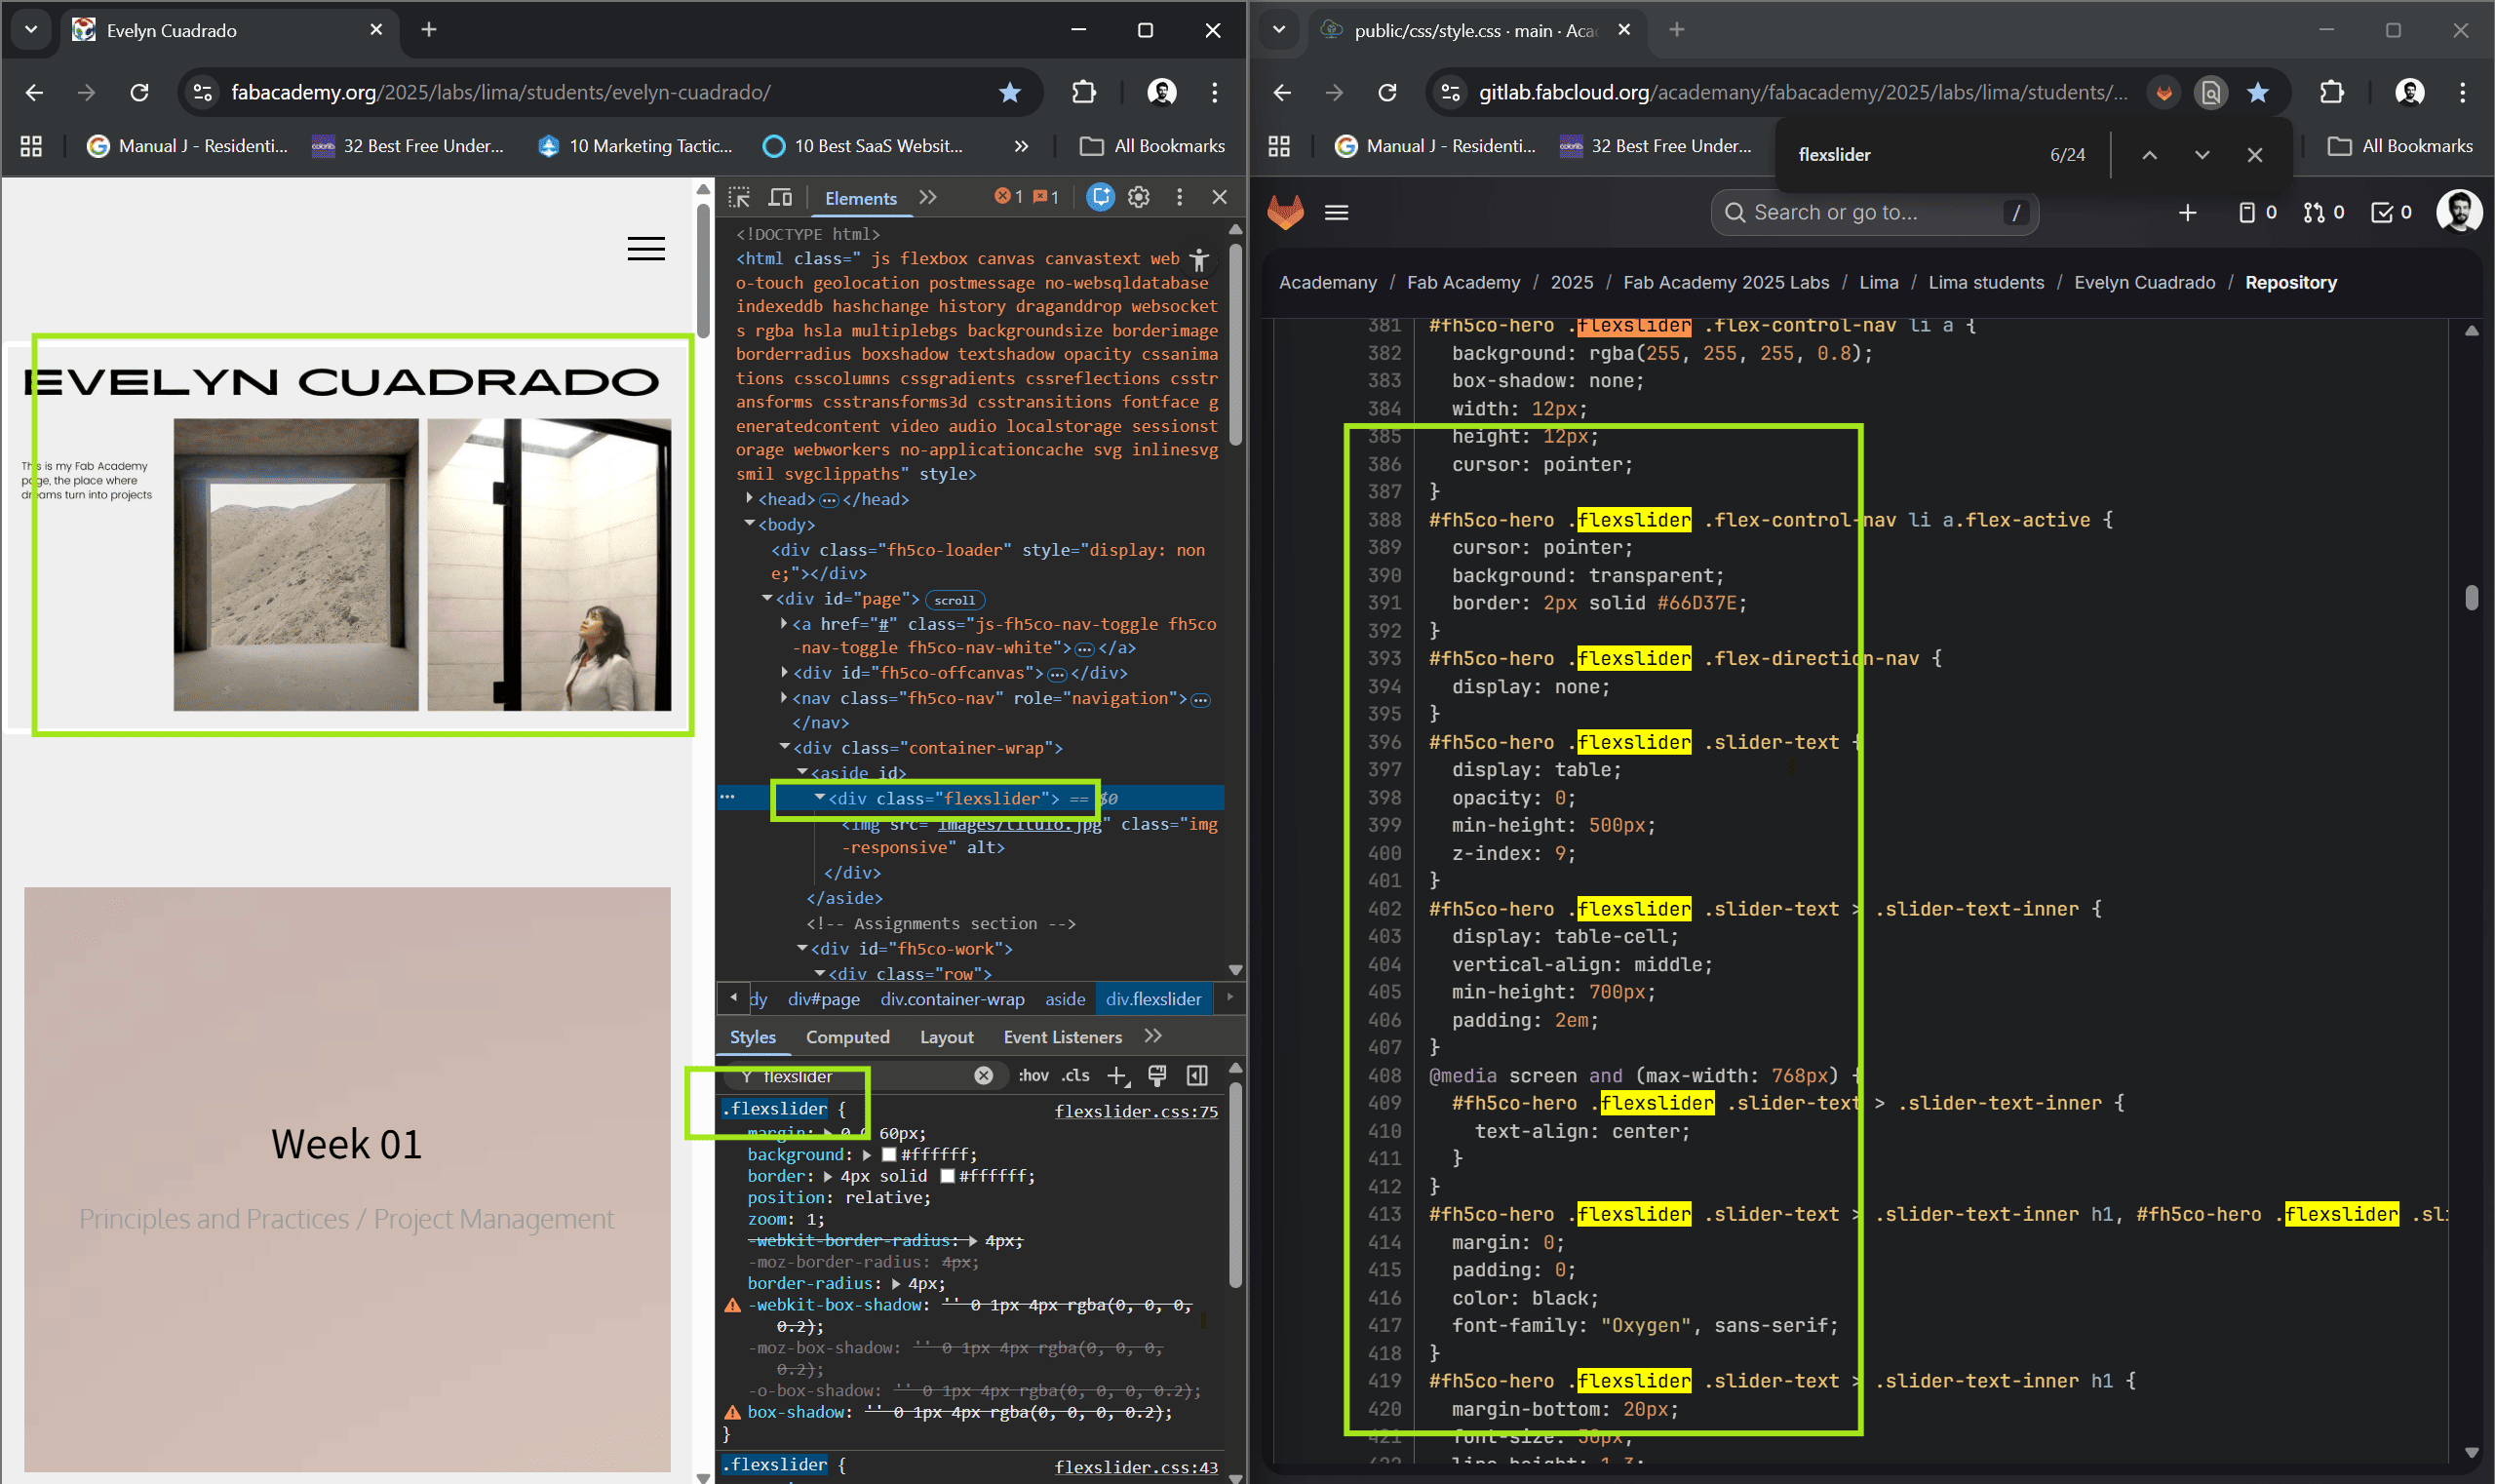
- [x] [Google Chrome Inspect Tool](https://www.youtube.com/watch?v=i_qYXUbhtIY) <--- Must Watch
**To understand HTML/CSS, one must read HTML/CSS**
- [x] [Visual Studio Code](https://code.visualstudio.com/docs/setup/windows)
**My personal favorite text editor for web development,apparently the whole world too**
- [x] [GitBash](https://git-scm.com/install/windows)
**This download link is for the gitbash/gitlab terminal, you'll be running some important setup functions here**
- [x] [Fun Emoji Ref](https://gist.github.com/rxaviers/7360908)
- [x] [Our CSS Inspo Reference Sheet](https://gitlab.fabcloud.org/academany/fabacademy/2025/labs/lima/students/evelyn-cuadrado/-/blob/main/public/css/style.css?ref_type=heads)
- [x] [iloveimg](https://www.iloveimg.com/)
# 4. Setting up the Repositry and Gitlab
Steps:
1. Check your email for **Fab Academy 20[XX] platform details, and navigate to your project repositry [url](https://gitlab.fabcloud.org/academany/fabacademy/2026/labs/techworks/students/mohammed-azizi/)**
*optional: [Install the WEB-APP to your ](https://gizmodo.com/app/uploads/2023/06/a8d952b59d7aab1a6f1abf39c6f83bb4.jpg)*
2. Setup your local directory folder on your PC, I created a folder **FabAcademy-Repositry** in my Documents Folder for example
3. Make sure you got the [gitbash cmd](../images/snips/gitbash.png), if not refer to Tools and Websites for the download link and follow the installation.
4. Navigate to your local directory folder "FabAcademy-Repositry" in my case, right click > **open git bash here** > run:
1. `Personal@DESKTOP-SRJDO3S MINGW64 ~/Documents/FabAcademy-Repositry` <--- repositry path
2. `$ ssh-keygen -t rsa -C "youremail" -b 4096` <-------Run This
3. `Generating public/private rsa key pair.`
4. `Enter file in which to save the key (/c/Users/Personal/.ssh/id_rsa):` <--------you can change this easier to keep it
5. `Created directory '/c/Users/Personal/.ssh'. <--------- this where the ssh is stored`
6. `Enter passphrase for "/c/Users/Personal/.ssh/id_rsa" (empty for no passphrase): <----- optional`
7. `Enter same passphrase again: <---------- optional`
8. `Your identification has been saved in /c/Users/Personal/.ssh/id_rsa <----- not this`
9. `Your public key has been saved in /c/Users/Personal/.ssh/id_rsa.pub <---------- this`
10.`The key fingerprint is:`
11. `SHA256:ishallnotsharethisonlinebecauseitsjustsafernotto`
12. `The key's randomart image is:
RSA 4096]----+
|somecoolstuffhere|
+----[SHA256]-----+`
🤖(1)
NOTE: CHECKOUT THE ROBOT TO SEE HOW I BUILT THIS QUICK IMAGE SLIDER, INSPIRED BY < iframe >
#### Continue...
5. Navigate to `C:\Users\Personal\.ssh` (Personal is my account name, yours could be different) [open the public SSH key file and copy it](../images/week01/4.png)
6. Navigate back to your gitlab repo, > Account Icon > Preferences > Add SSH Key
7. Paste the public SSH we copied in step 5 and paste it, follow the rest of the instructions
8. Congrats you got your SSH key
9. In the same terminal in step 4, run ` git config --global user.name "user-name"` and ` git config --global user.email "youremail"`
10. Run `git clone` followed by your SSH clone URL
11. Open VS code, and open your cloned repo directory and enjoy coding !
IMP: Make sure you to follow step 9 before cloning your repo [error screenshot](../images/snips/error1.png),[stackoverflow solution](../images/snips/stack1.png)
# 5. Markdown with HTML using [md-blocks](https://md-block.verou.me/md-block)
**Usage Via HTML:**
Insert this
``
at the end of your page before the `
` tag.
Open `` and `` where you want to use markdown.
Refer to the [Github repo to learn more and adjust it to your needs](https://github.com/leaverou/md-block).
**Update #1 (1/28/2026): I realized I can simply referene a full native markdown file using this script
` `,
[final project template for example](../final-project.html).**
# 6. Using Google Chrome Inspect Tool to understand CSS and more.
For the purpose of this website, I used google chrome inspect tool can be accessed by clicking
**Right Click → Inspect** on any webpage and then you can hover with your mouse over the elements,
as soon as you do that you will notice something like below
The idea here was to figure which style sets I needed and through copy, paste and offline testing on VS Code,
I managed to combine the style sets.
Following my workflow process, I finalized the code using
[🤖AI audit and review](https://chatgpt.com/share/697534e1-3884-8008-9973-0e9e42dee3cb),
to make sure my CSS is less redundant and optimised for future use and cloning.
You can also check the final `style.css` file in my repo for further reference.
TIP:
For VS live preview you can always download extension within VS Code, I used
[HTML PREVIEW](../images/snips/htmlpreview.png)
# 7. Commit and Push (The Two Methods)
It is more common in my experience to commit and push to a repositry such as Github or Gitlab
through the setup we just did in [section 4](#section3).
However CMDs/Terminals (Command Terminals) such as **Gitbash** and the built in windows **cmd** tool
can communicate your local pc to the repositry via dedicated functions
some of which we already used in setting up the repostiry in the first place.
Here are the steps commands you need to use to commit and push:
- open the folder, right click and select open git bash here
- type: `git add .`
- type: `git commit -m "message goes here"`
- type: `git push`
*NOTE*
It is also important to add a commit message if you are using VS Code to commit your code.
# 8. Used HTML and MK syntax
[🤖AI Summary](https://chatgpt.com/c/6975f40e-4474-8326-98aa-a2df2d35862c)
HTML Syntaxes Used in This Page + (AI Prompts in across the entire website.)
“Help me structure and write a clear Fab Academy Final Project page in HTML and Markdown.
Organize the content into sections such as concept, design process, electronics,
fabrication, programming, challenges, and final outcome.
Keep the tone technical, concise, and documentation-oriented.”
“Generate a clean, professional Student Agreement page for Fab Academy documentation.
Format it in HTML, ensure clarity and formality, and preserve the original meaning
while improving readability and structure.”
“Create a clear process flow diagram representing my project workflow from concept
to final output. Use a clean engineering style suitable for a Fab Academy homepage,
with logical steps, icons, and visual hierarchy.”
4
AI Reference Table
ChatGPT
—
“Create an AI reference sheet in HTML as a table.
List all AI tools used during the project, include links to shared conversations,
and clearly document the prompts used for transparency and evaluation purposes.”