Summary
This week focused on introducing the structure of the course and preparing the foundation for future assignments. I defined a potential final project idea and learned how to properly document my work. I explored GitLab and version control concepts, created and configured my personal GitLab repository, and practiced basic Git commands. I also customized the default GitLab webpage by adding personal information and an initial description of my final project, ensuring that my documentation is clear and well organized.
Principles and Practices
Planned and Sketched My Final Project
This week, I planned and sketched a potential final project. I defined the project idea, its purpose, and the main components involved. A simple sketch was created to visually explain how the system will work and how the different parts will be connected.
My final project is TrailNAV, a solar powered offline navigation device. It tracks your location, stores and guides waypoints, and gives directional feedback in remote off grid areas with no internet or mobile network. It is made for hikers and outdoor users who need a rugged guide when there is no phone signal. You can read the full plan on my final project page.
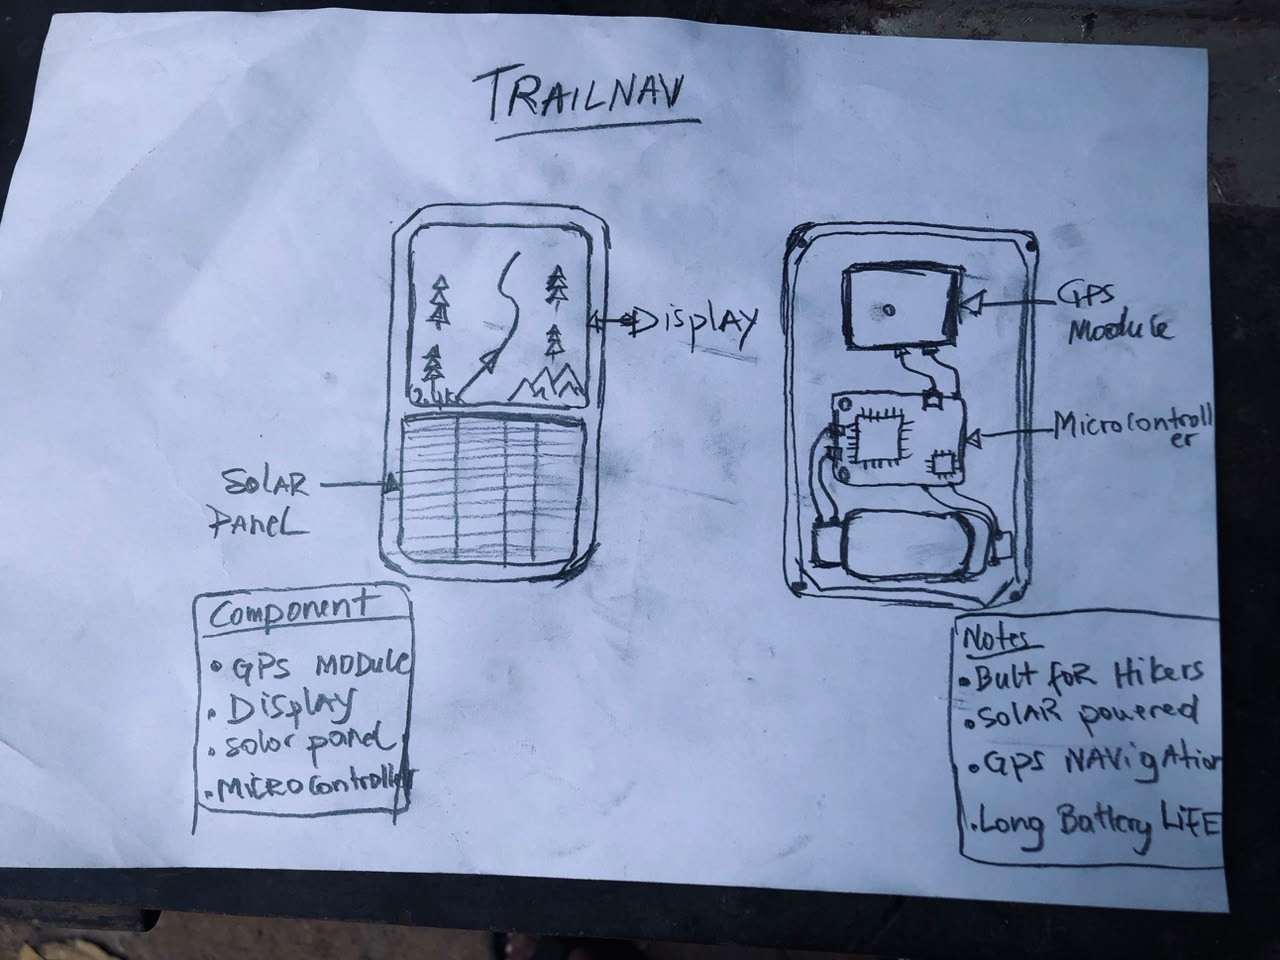
My hand sketch of TrailNAV showing the GPS module, the display, the solar panel and the microcontroller
Learning About GitLab
I started by exploring helpful learning resources from the GitLab YouTube channel. The playlist covered the basics of GitLab, including how it works and its key features. By following the tutorials, I gained a foundational understanding of version control and GitLab’s role in collaborative projects.
GitLab is a web-based platform built on Git that allows version control and collaboration. It helps users store projects online, track changes, and manage documentation. its use the official GitLab server to publish weekly assignments, document their learning process, and develop their final projects using version control.
you can get git program through Git official website gitlab Download. Before downloading, you should choose the correct (desired) operating system if it isn't selected automatically
Signing In & Setting Up GitLab
I signed in to GitLab using my FabLab account https://www.fablabs.io/signin and then started editing my profile by adding details
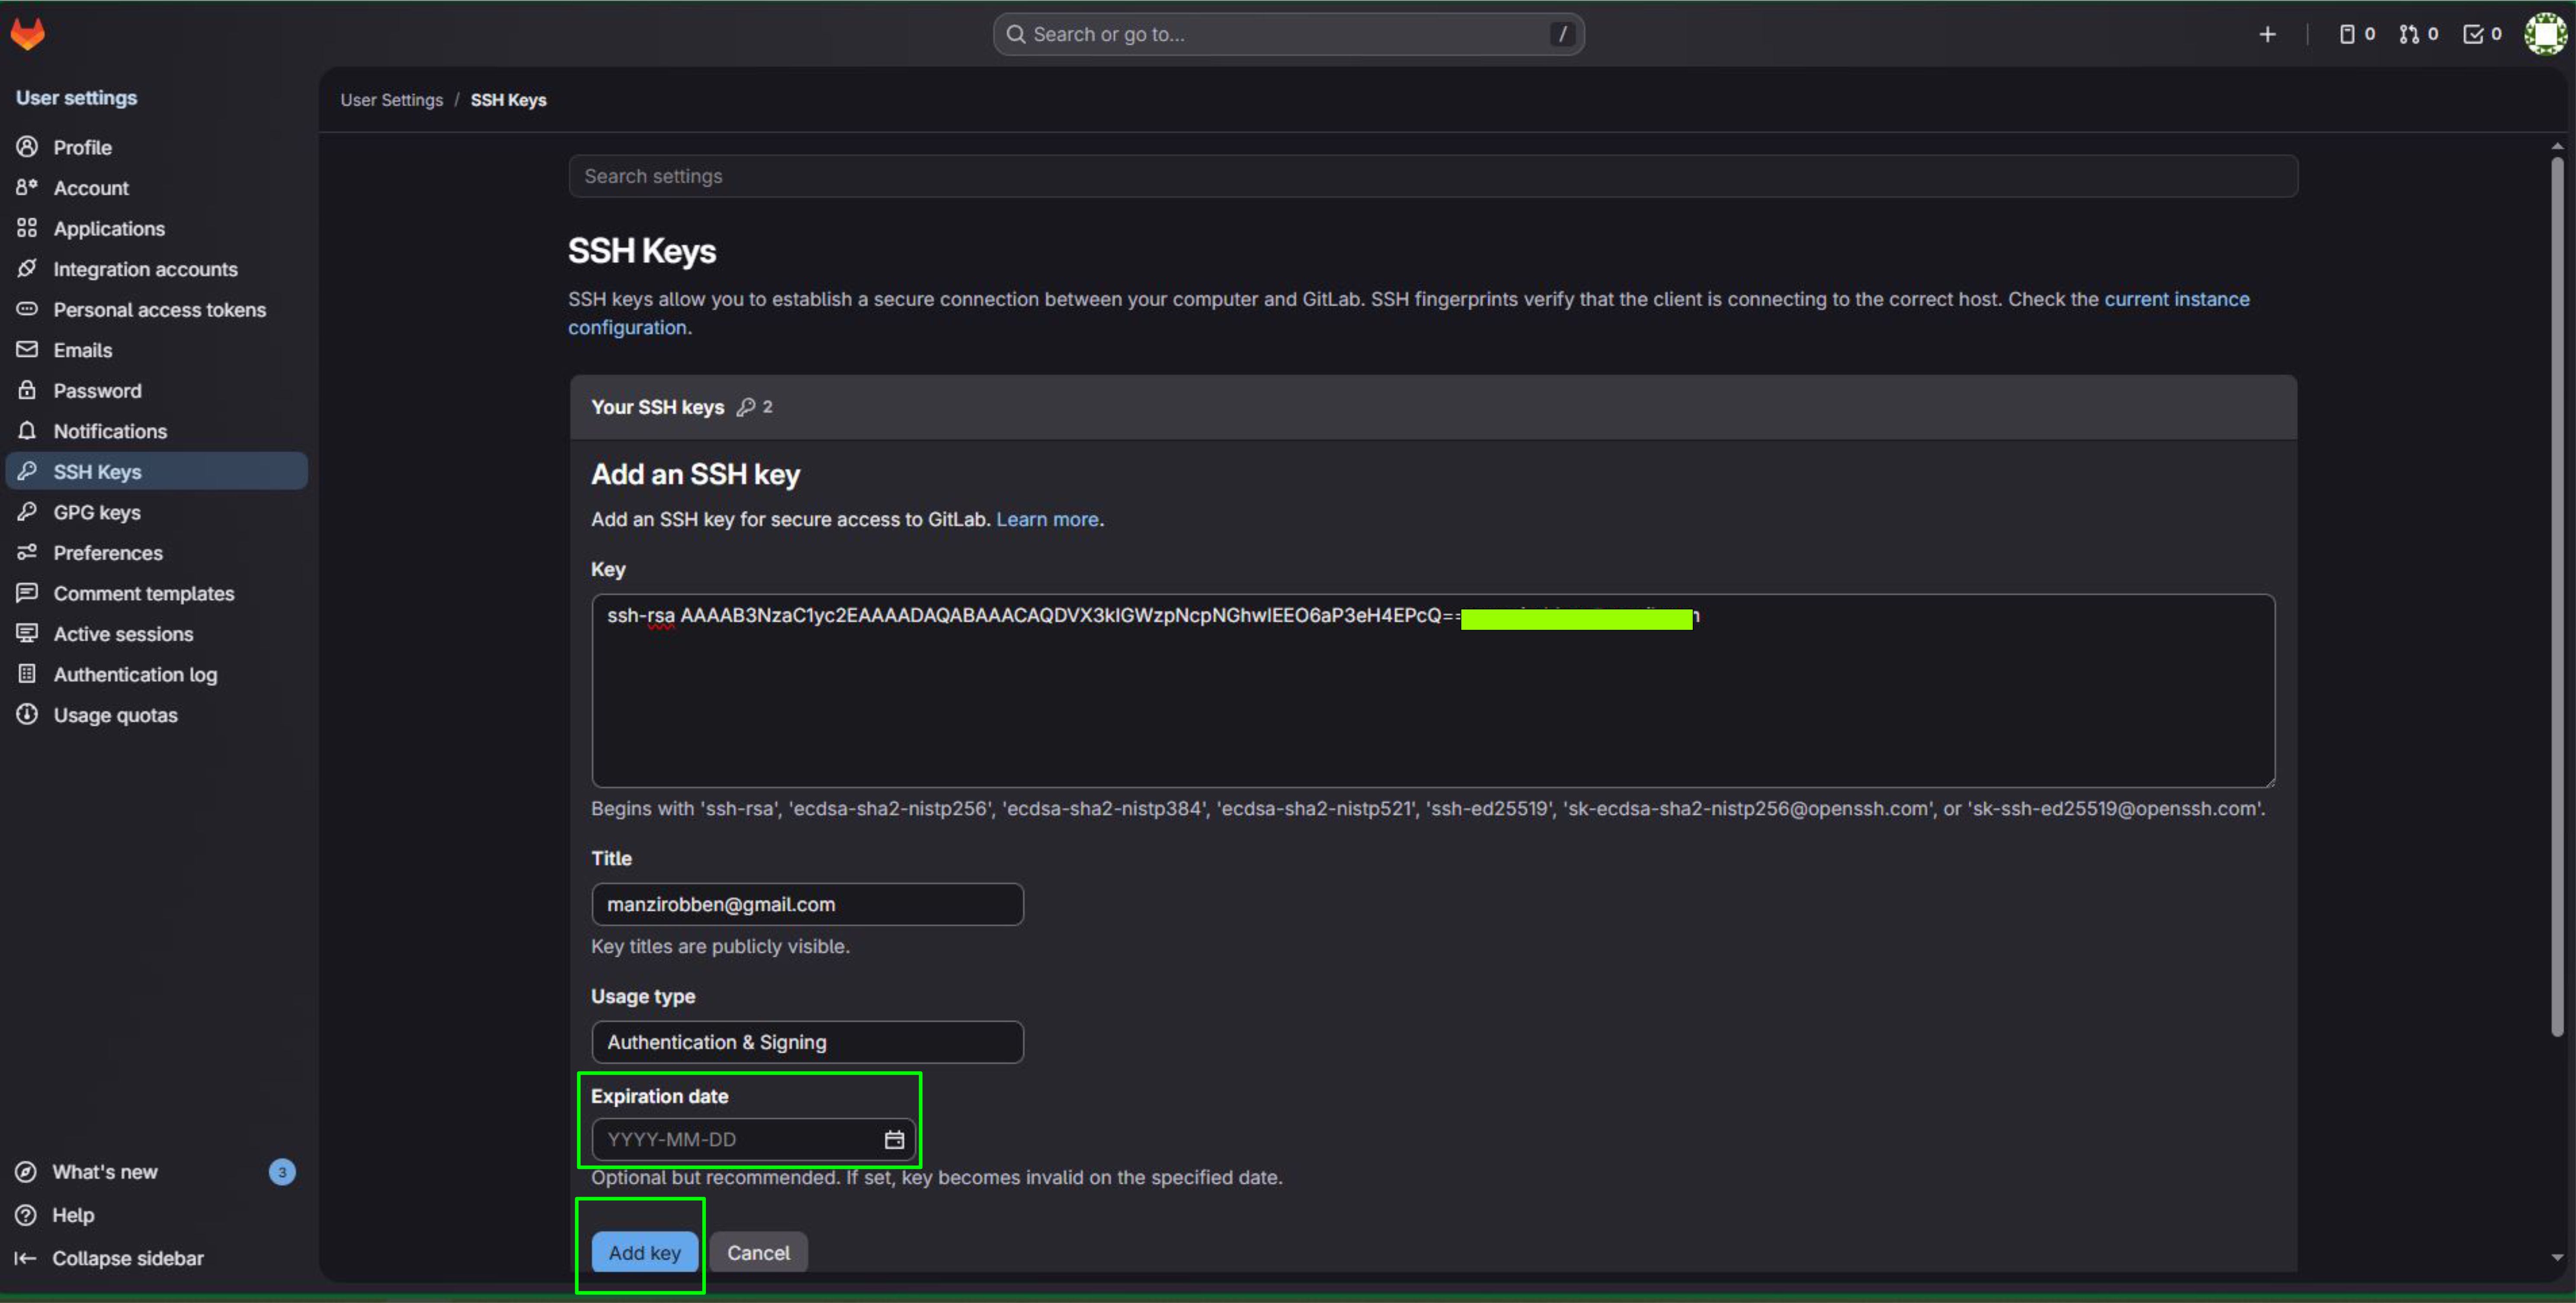
Next, I created an SSH key.
An SSH key (Secure Shell key) is a secure digital key used to connect your computer to a remote server and GitLab without needing to enter a password every time.
To create the SSH key, I used the Git Bash terminal. You can also use other terminals such as Windows Command Prompt, PowerShell
I opened the Command Prompt (cmd) on my Windows computer and typed this to generate a key:
ssh-keygen
The key is stored in the .ssh folder inside my user folder. On Windows I printed the public key like this, then opened it in my code editor:
type %USERPROFILE%\.ssh\id_rsa.pub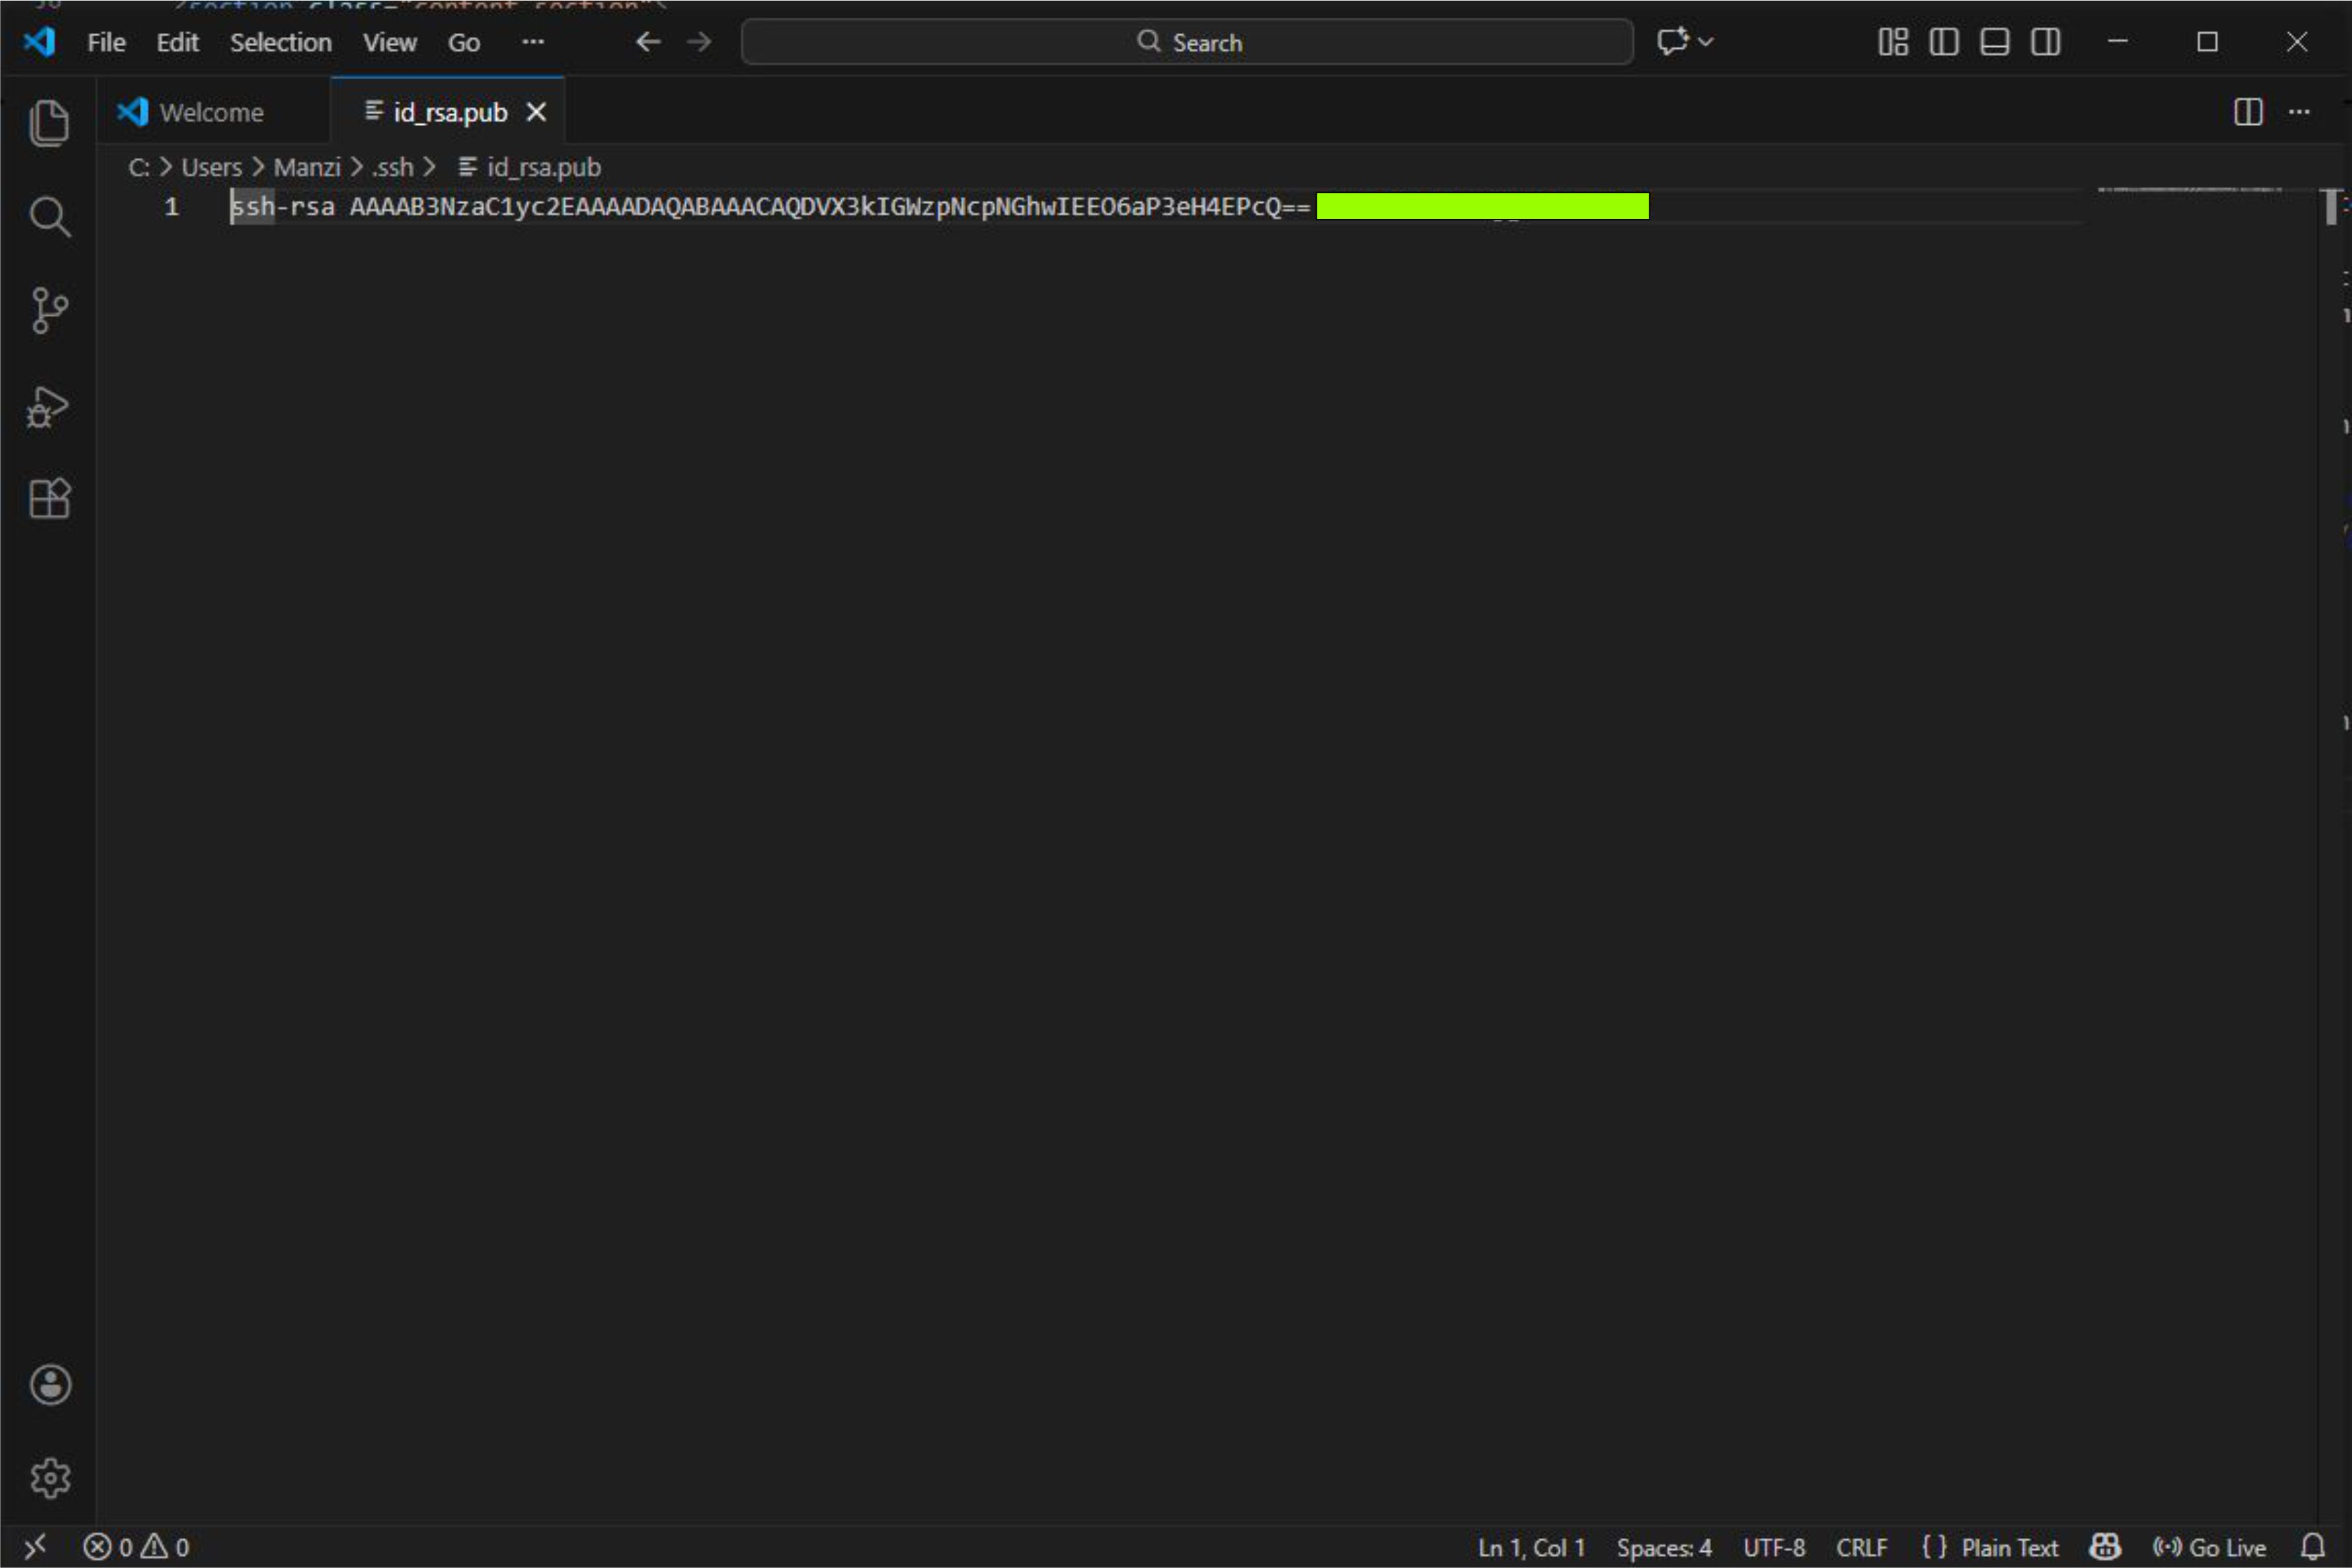
copy and paste the public key
Cloning Repository
Cloning is the process of copying a remote repository to your local computer.
Key Terms
- Repository is a structured storage location where files, folders, and all related project data are kept together along with their complete history of changes
- directory is a container used to organize files and other directories within a file
Steps to Clone
- Opened my gitlab repository
- Go to the Code tab
- Copied link under Clone with SSH
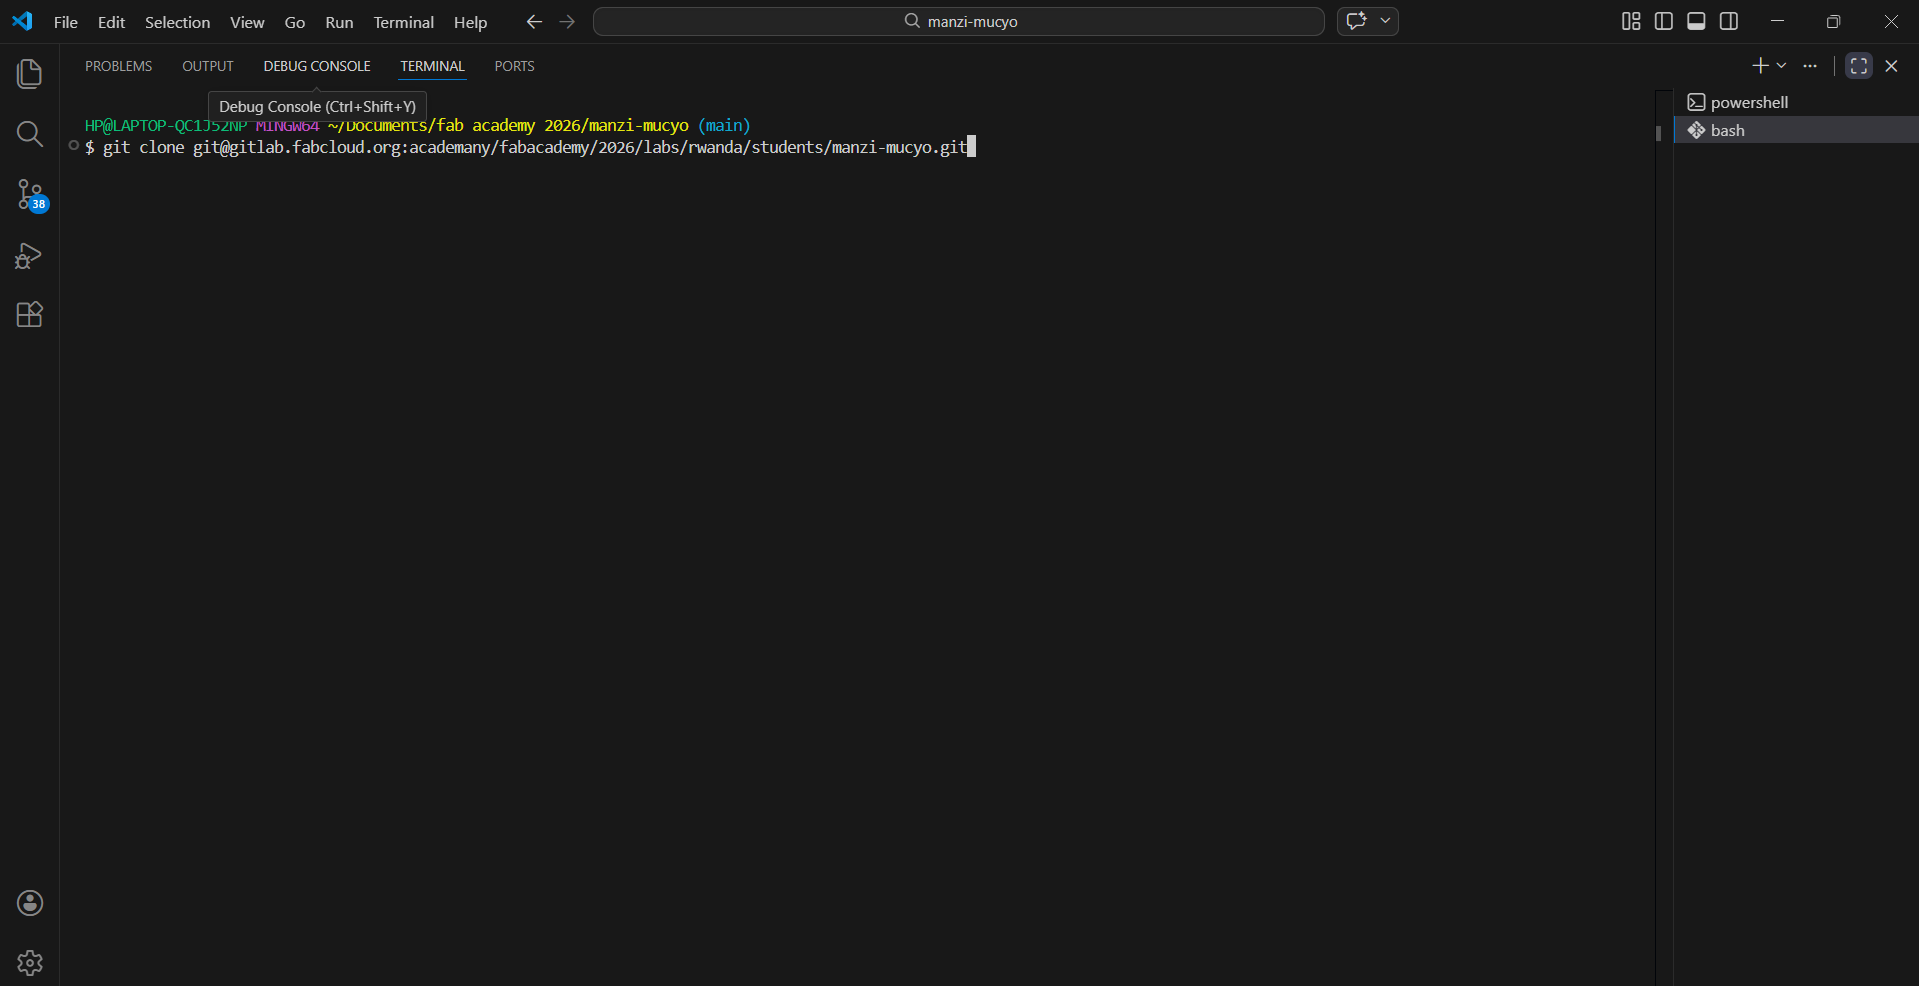
- Pasted the link
git clone <paste your SSH clone link from GitLab>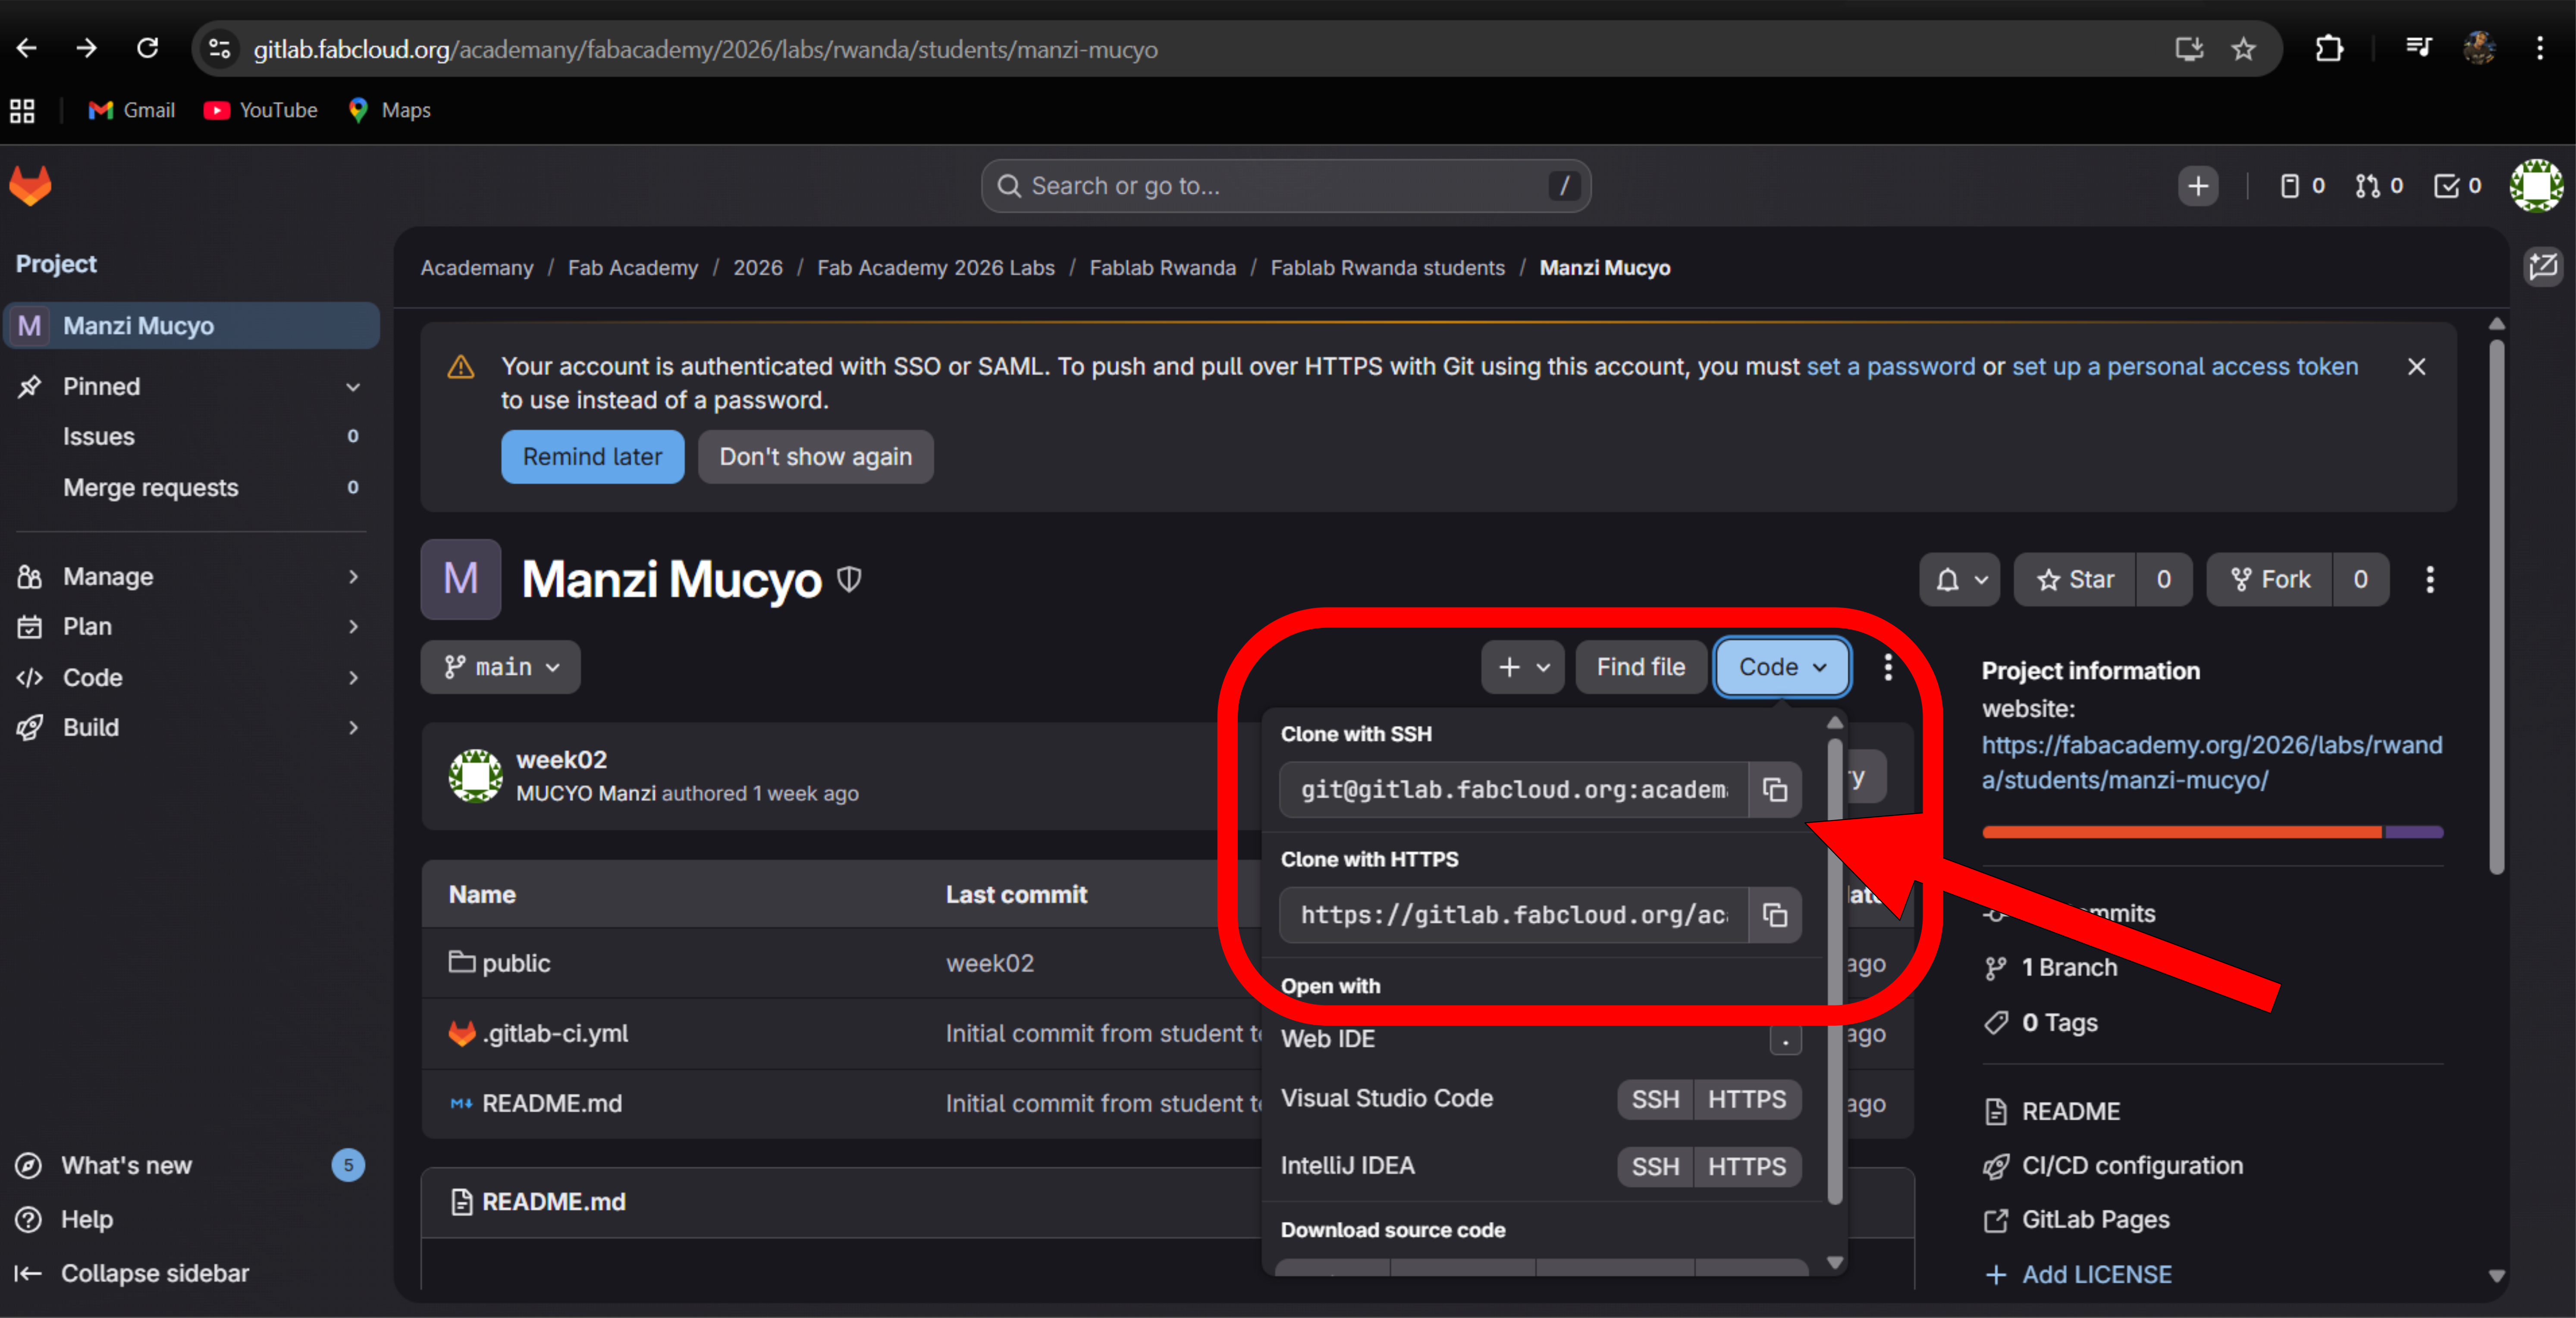
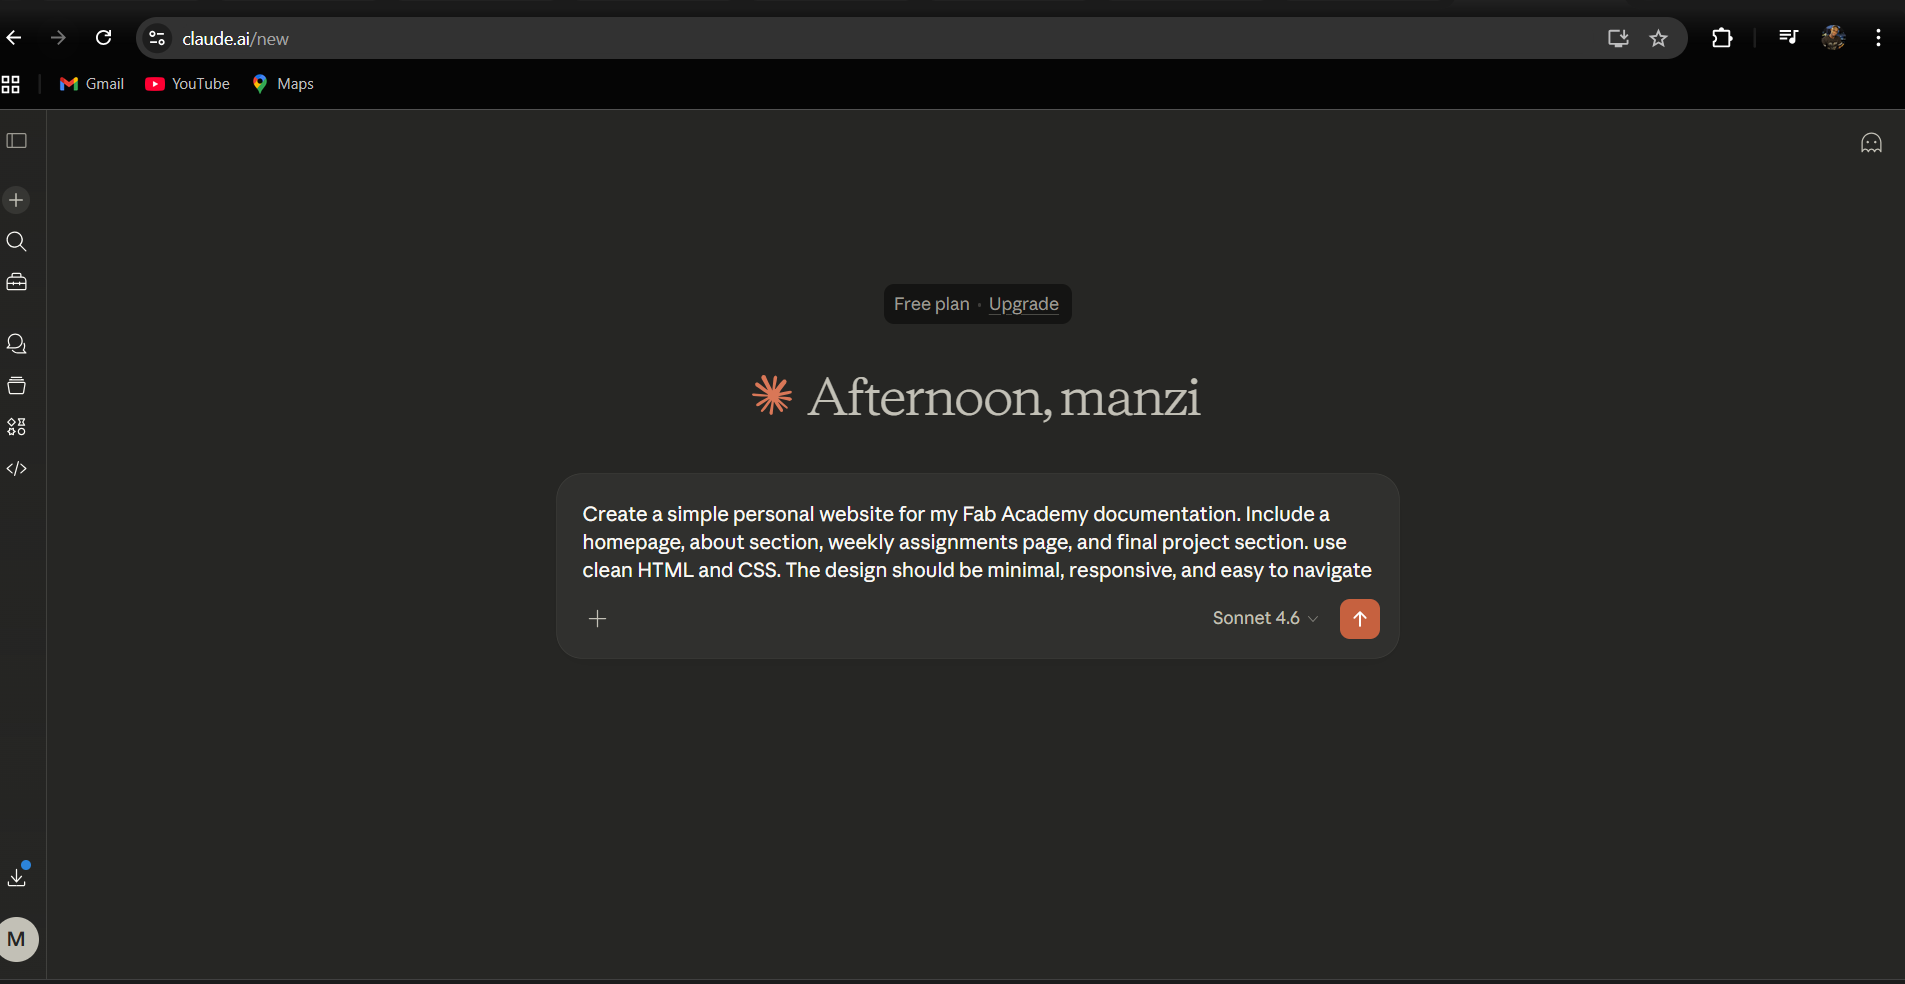
creat website
After that, I built my website with Cloud AI using this prompt and downloaded it
Since VS Code is already installed
Next, open your code editor and open the folder. Some example code files are already included in this folder, which you can use as a starting
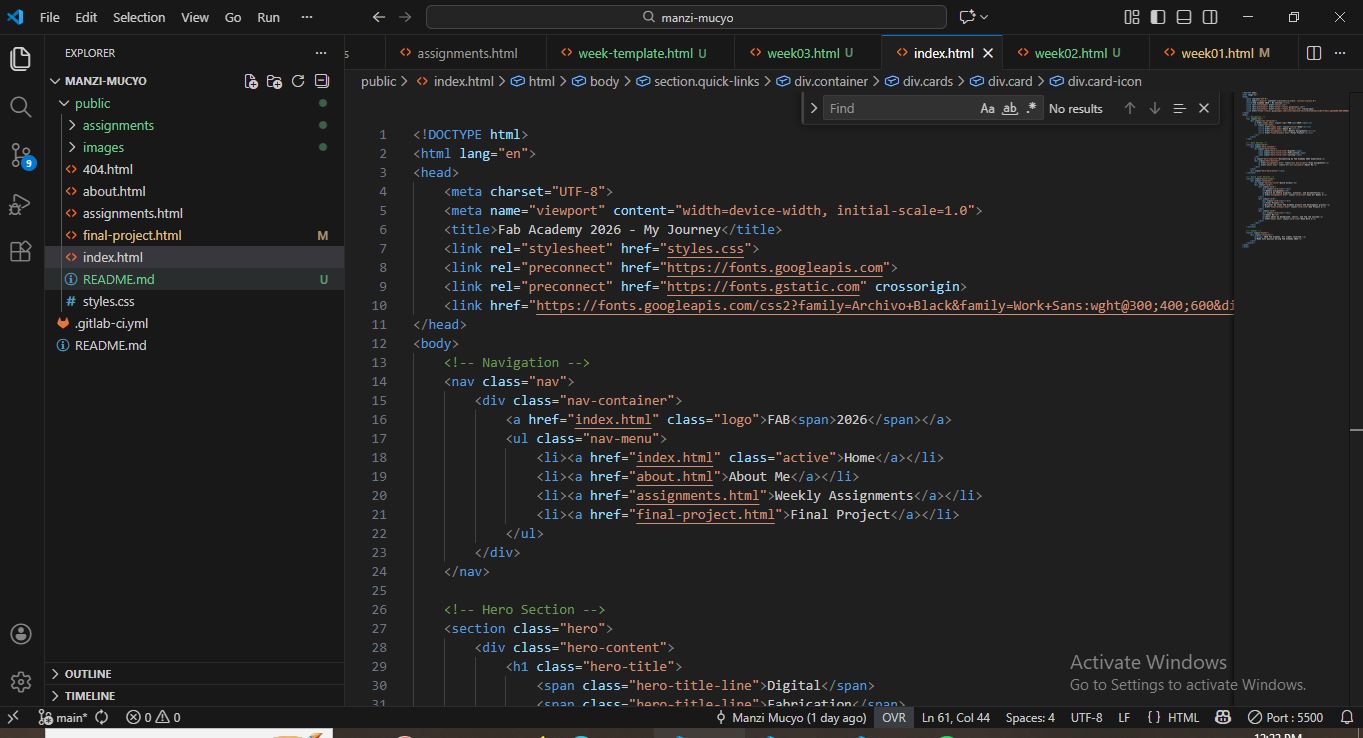
After this, Open new terminal in vs code
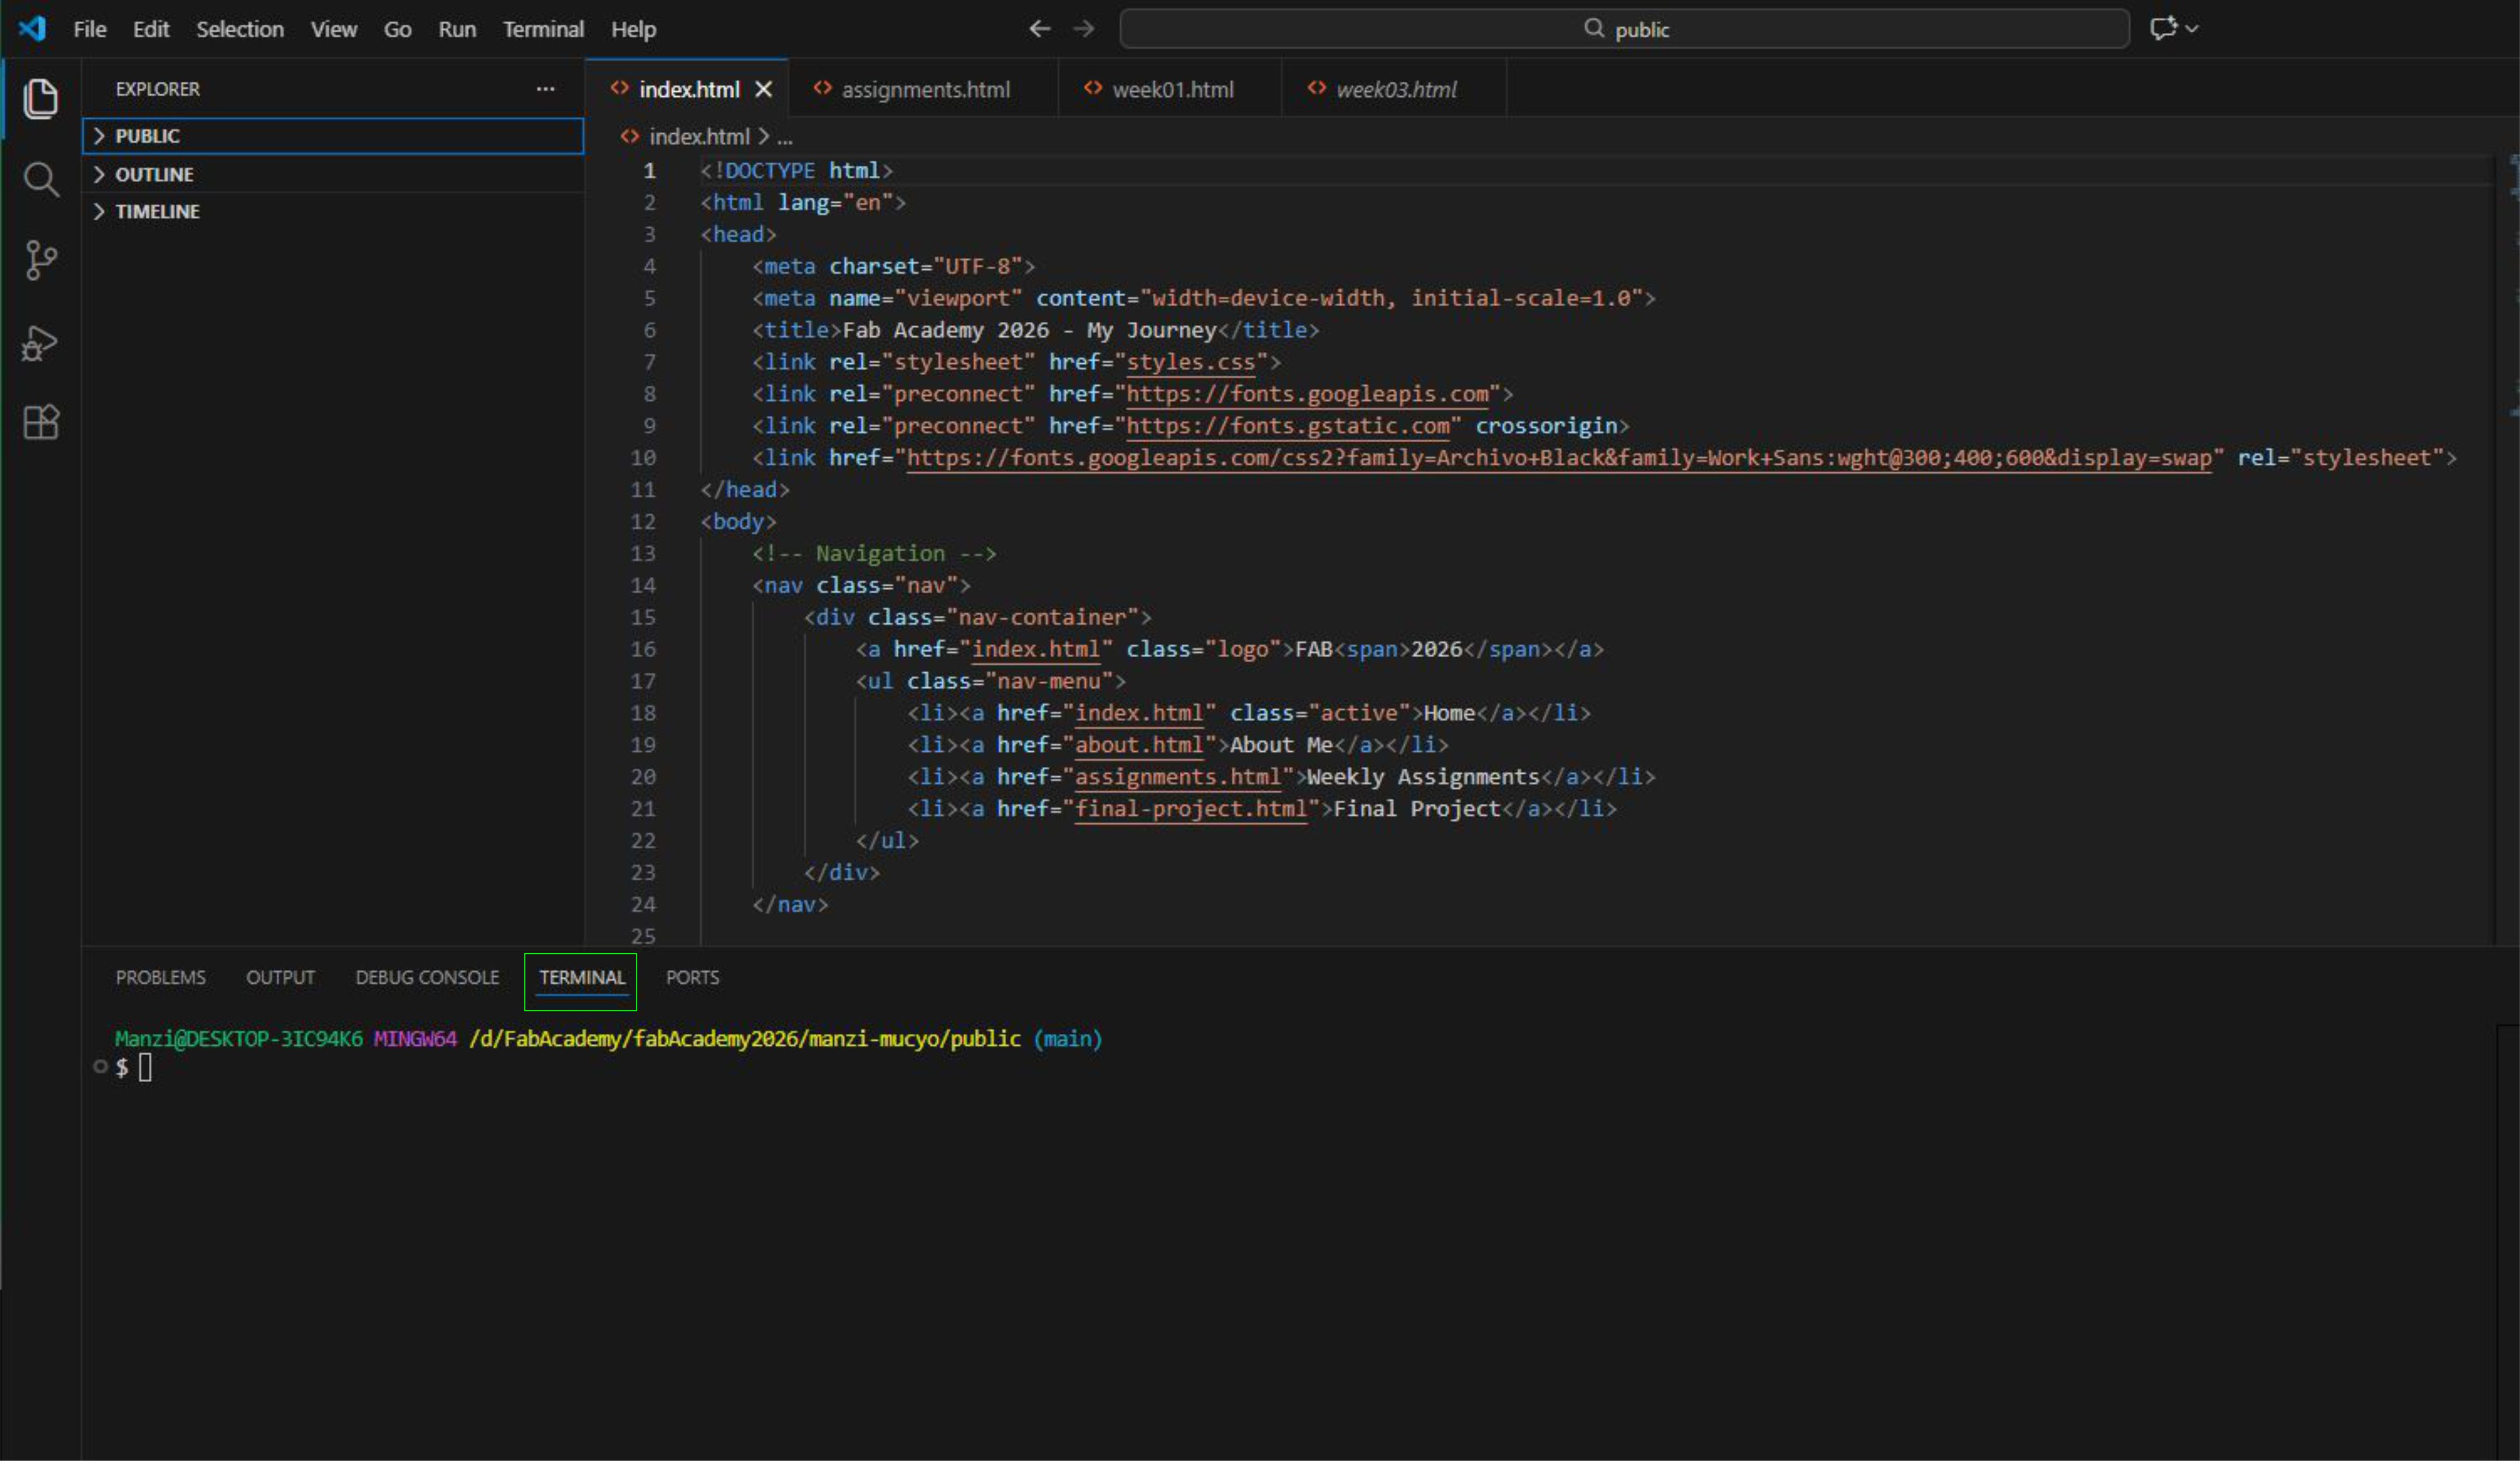
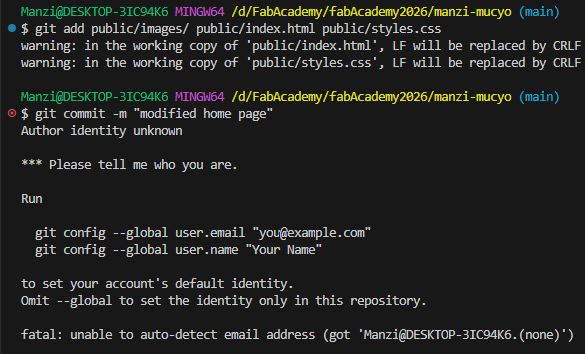
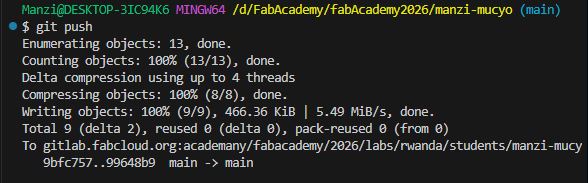
This is the loop I repeat every time I change my files. I check what changed, stage it, save it with a short message, and upload it:
git status
git add .
git commit -m "update week documentation"
git push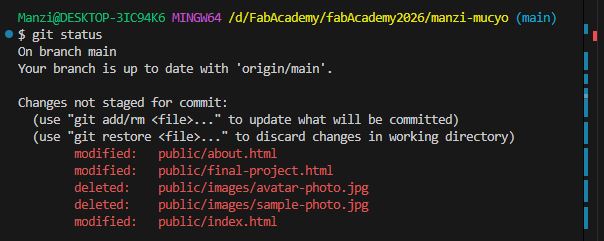
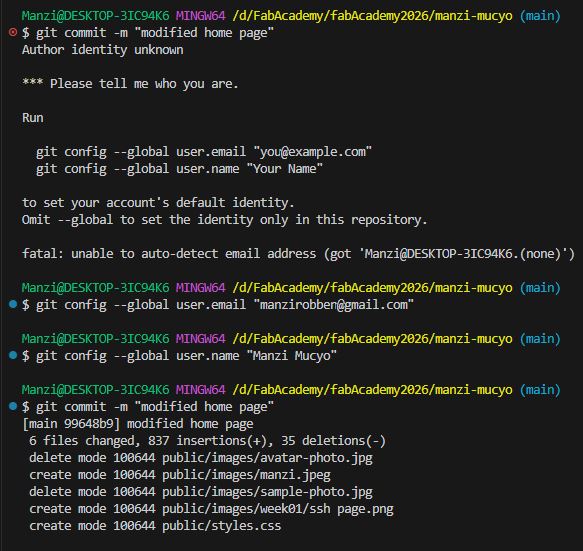
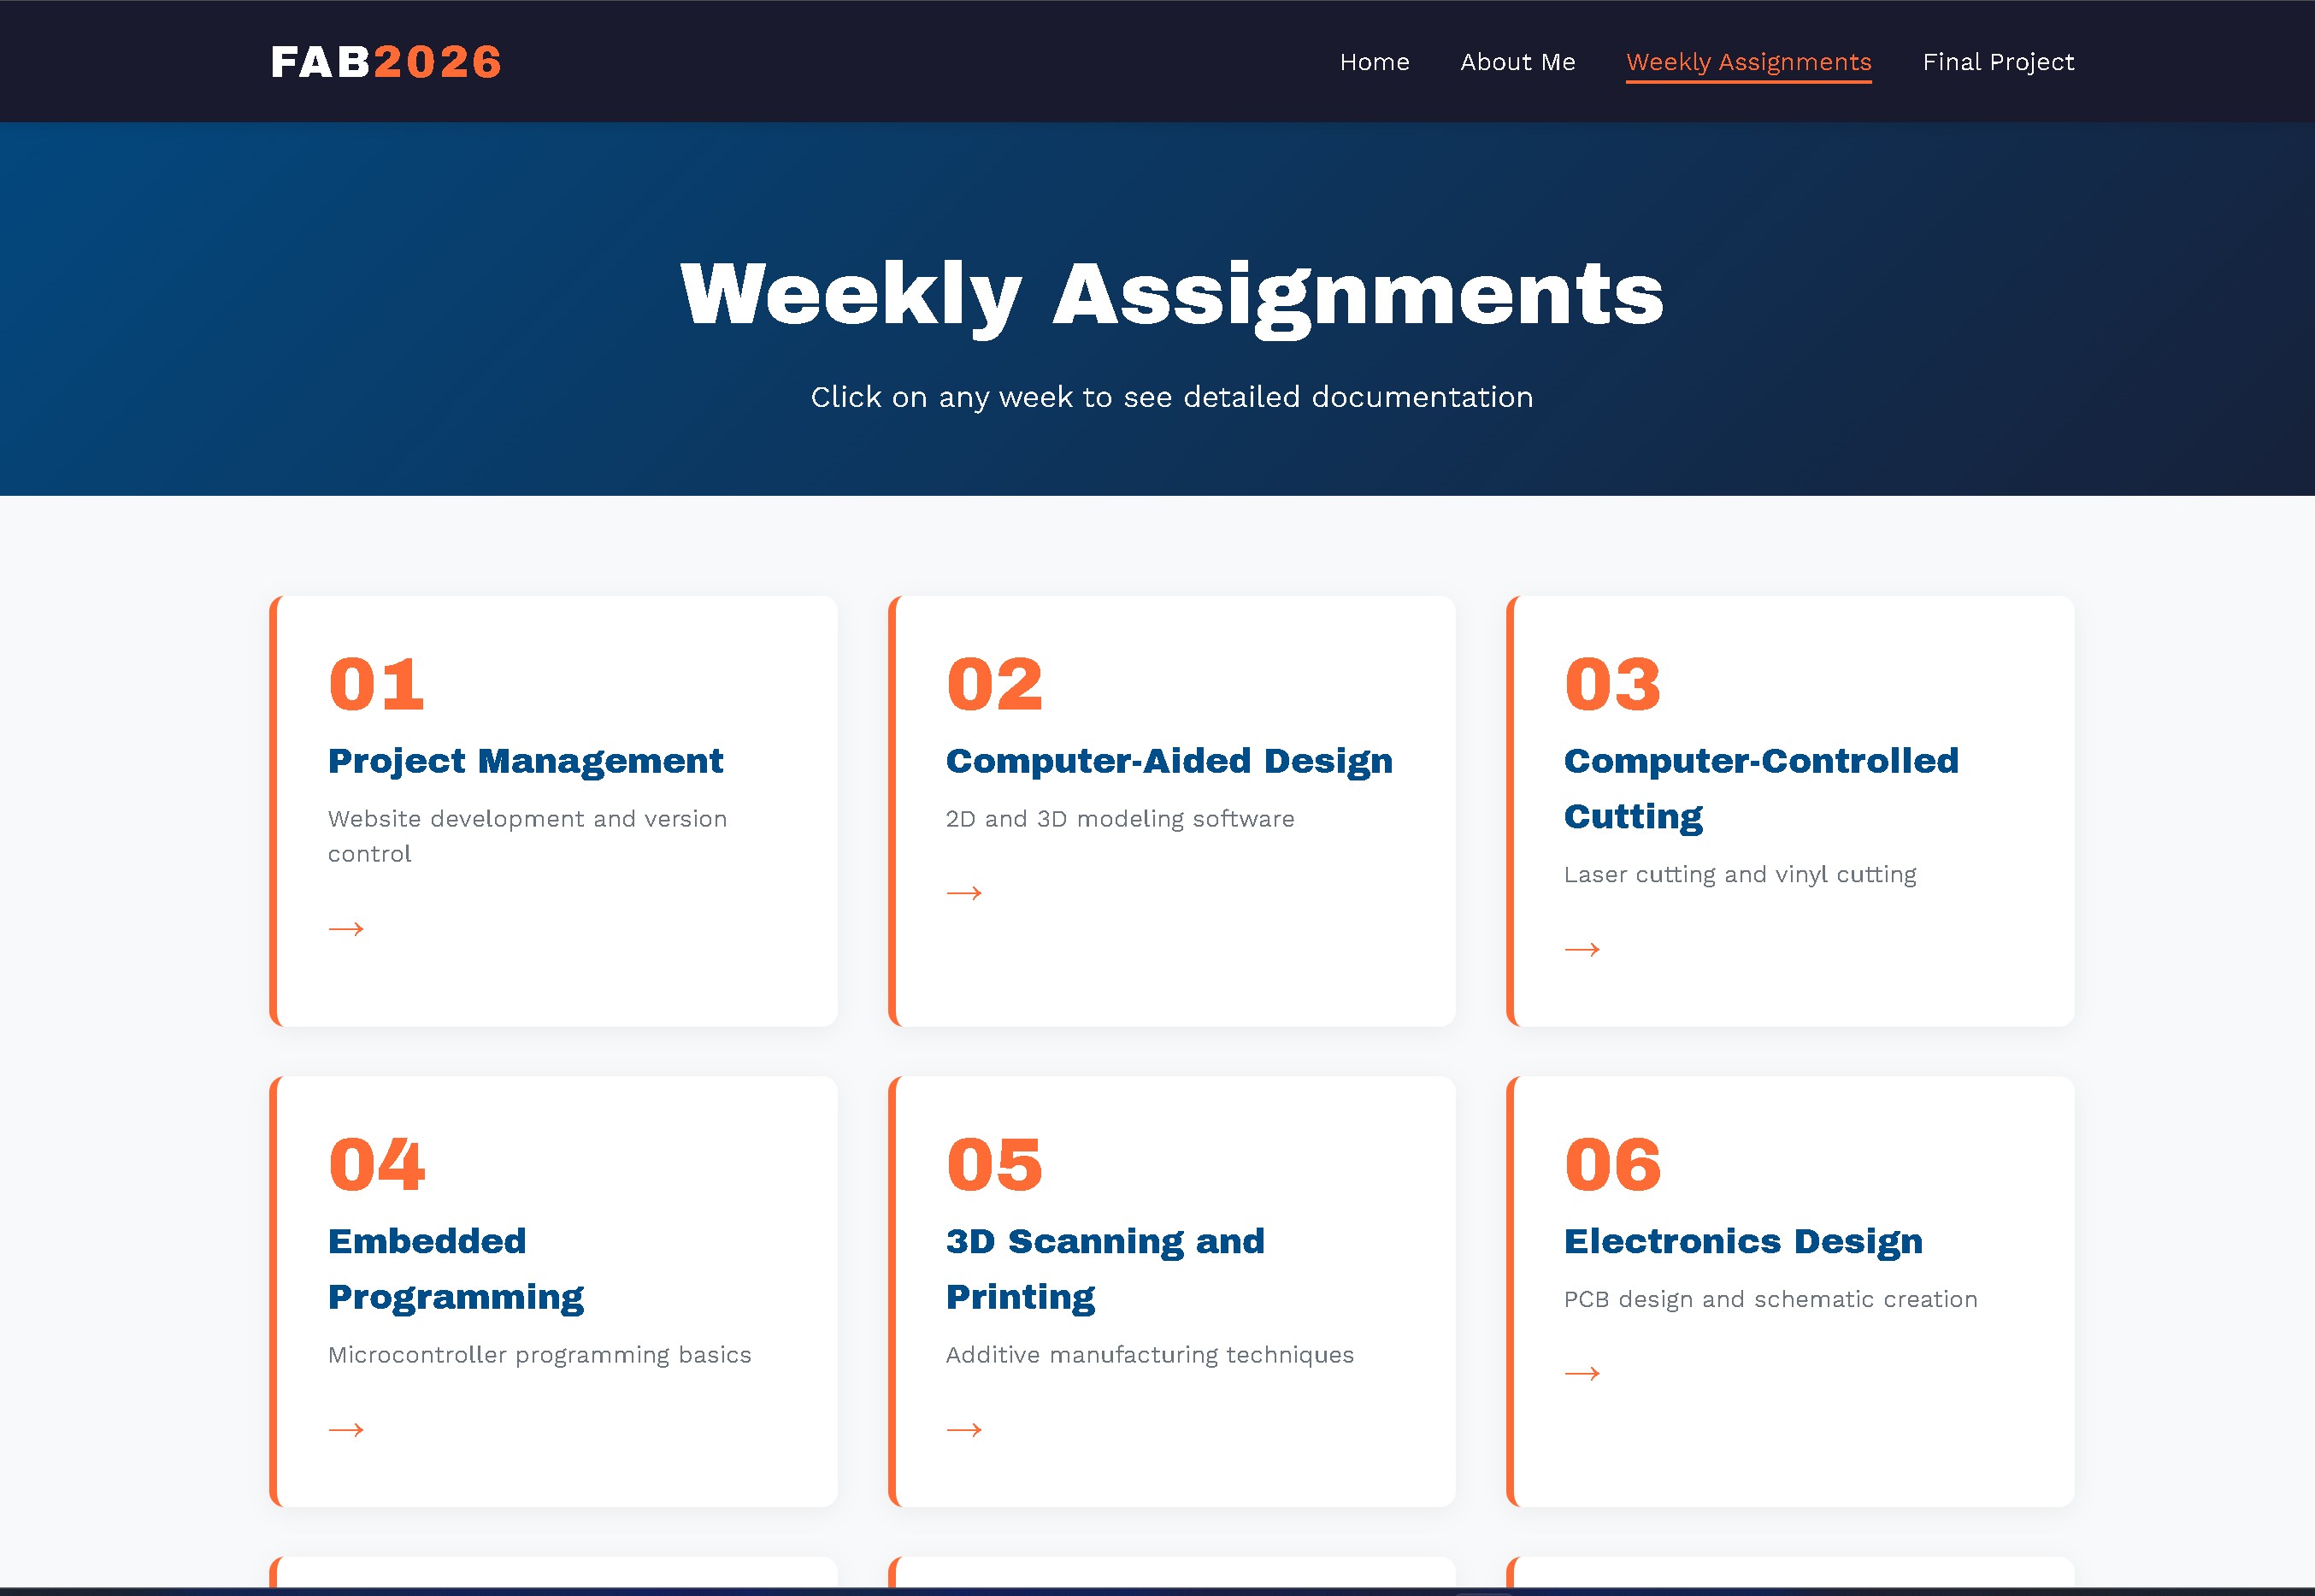
website has been built successfully
Student Agreement
I read the Fab Academy student agreement, signed it by adding my name, and committed it to my repository. It sets out what the program expects from me and what I can expect from the program.
A scan of my signed Fab Academy student agreement