The assignment for this week was to design and produce something using a digital fabrication process that had not been covered in another assignment.
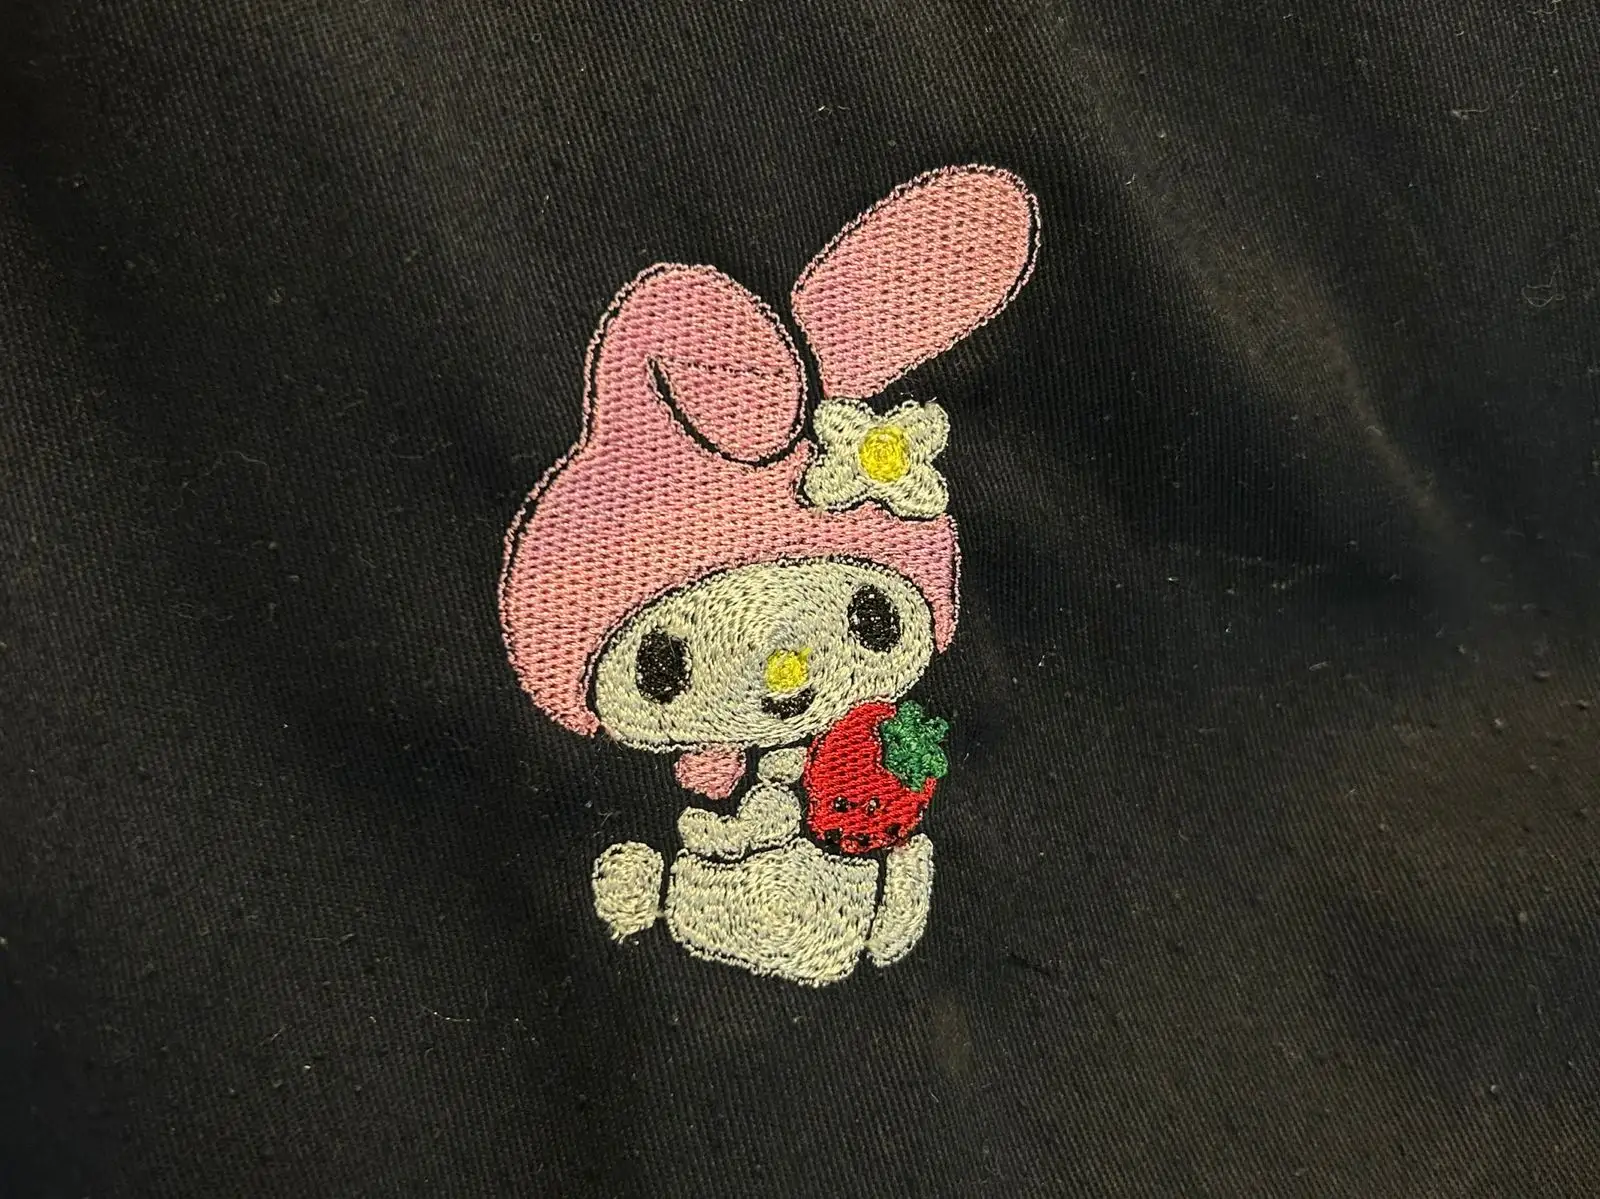
For this week, I decided to create an embroidery design on my lab coat. I used an image of My Melody obtained from the internet as the reference design for the embroidery.
Inkscape
New document
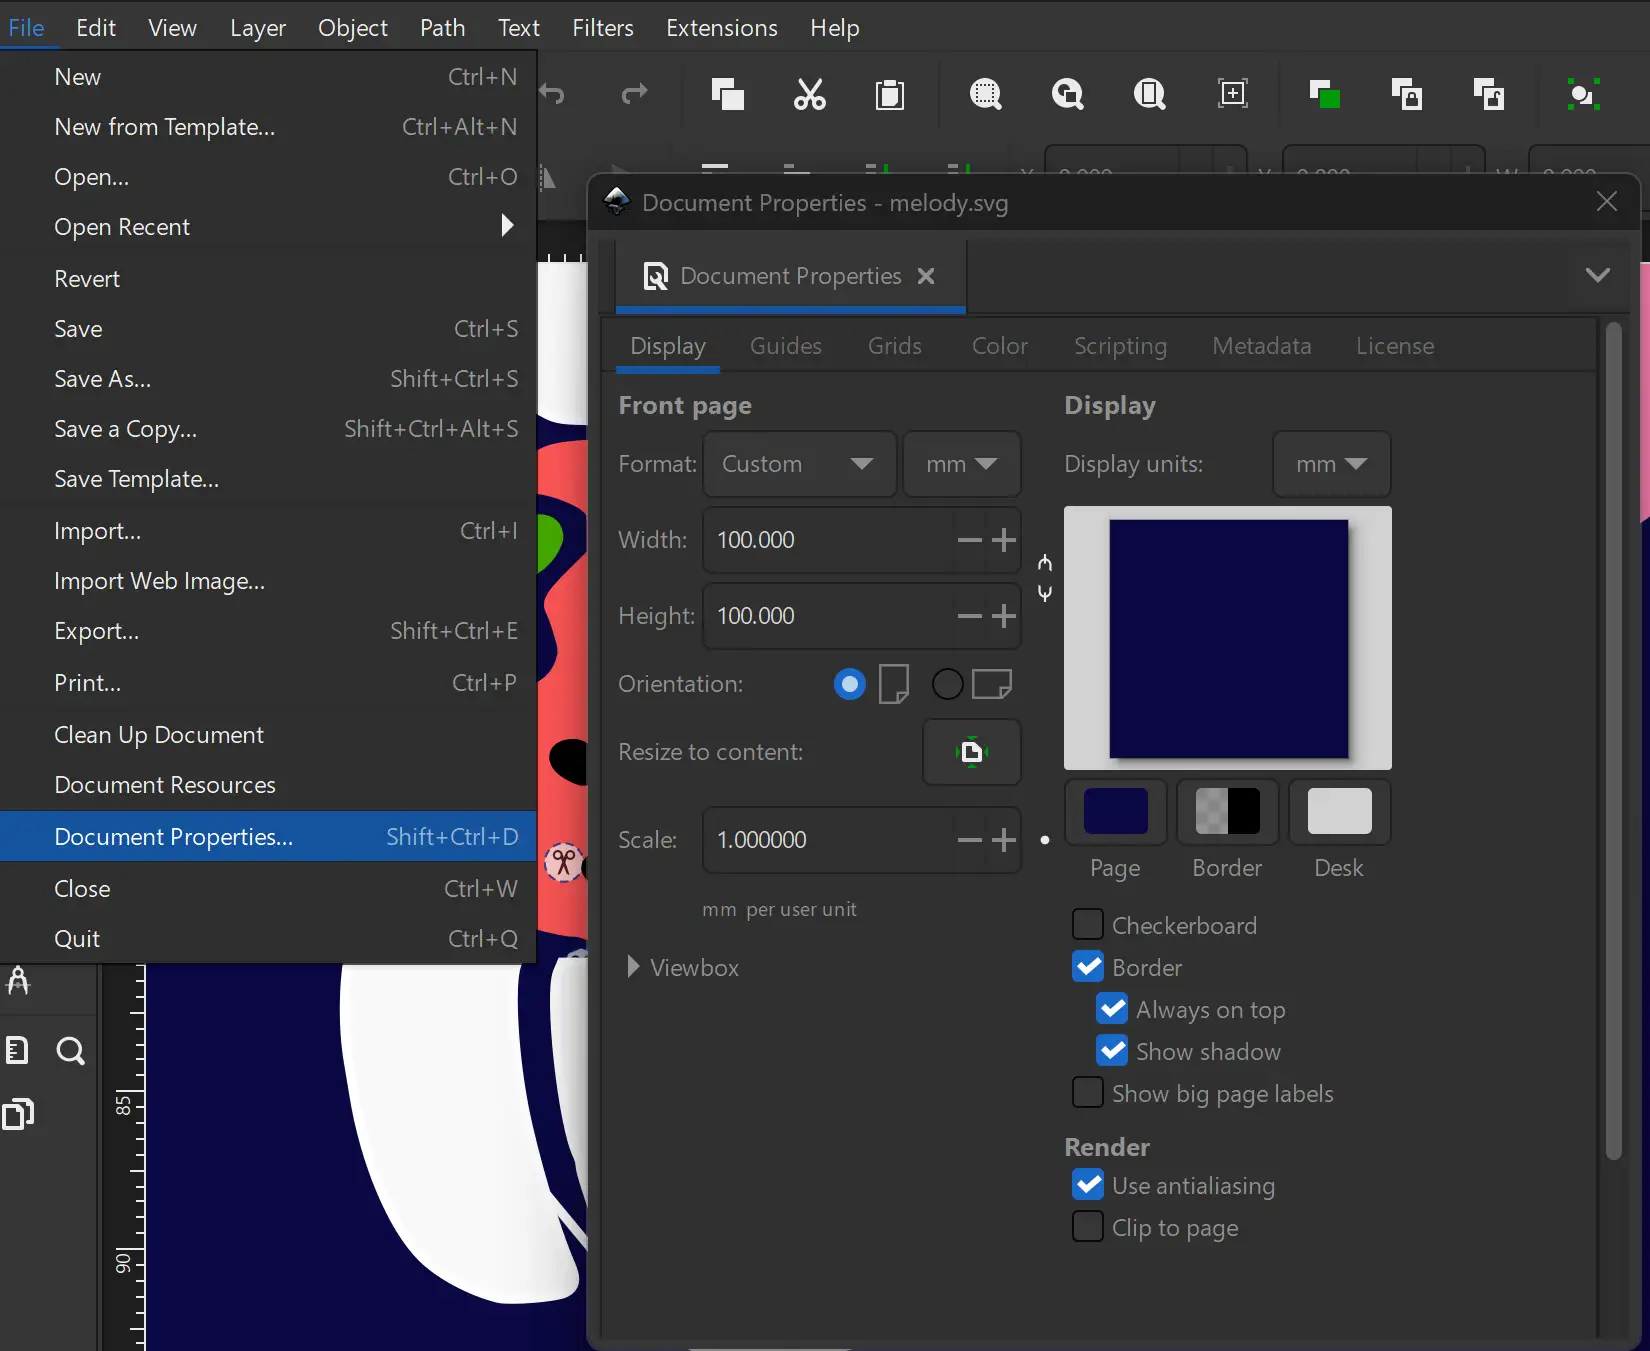
Open a new document in Inkscape and adjust the document size by going to File > Document Properties. The dimensions should match the embroidery machine workspace. In my case, the document size was set to 100 × 100 mm.
In this section you can also change the document color to help visualize how the design will look on the fabric color you will use. In my case, I changed it to navy blue since my lab coat is that color.
Trace Bitmap
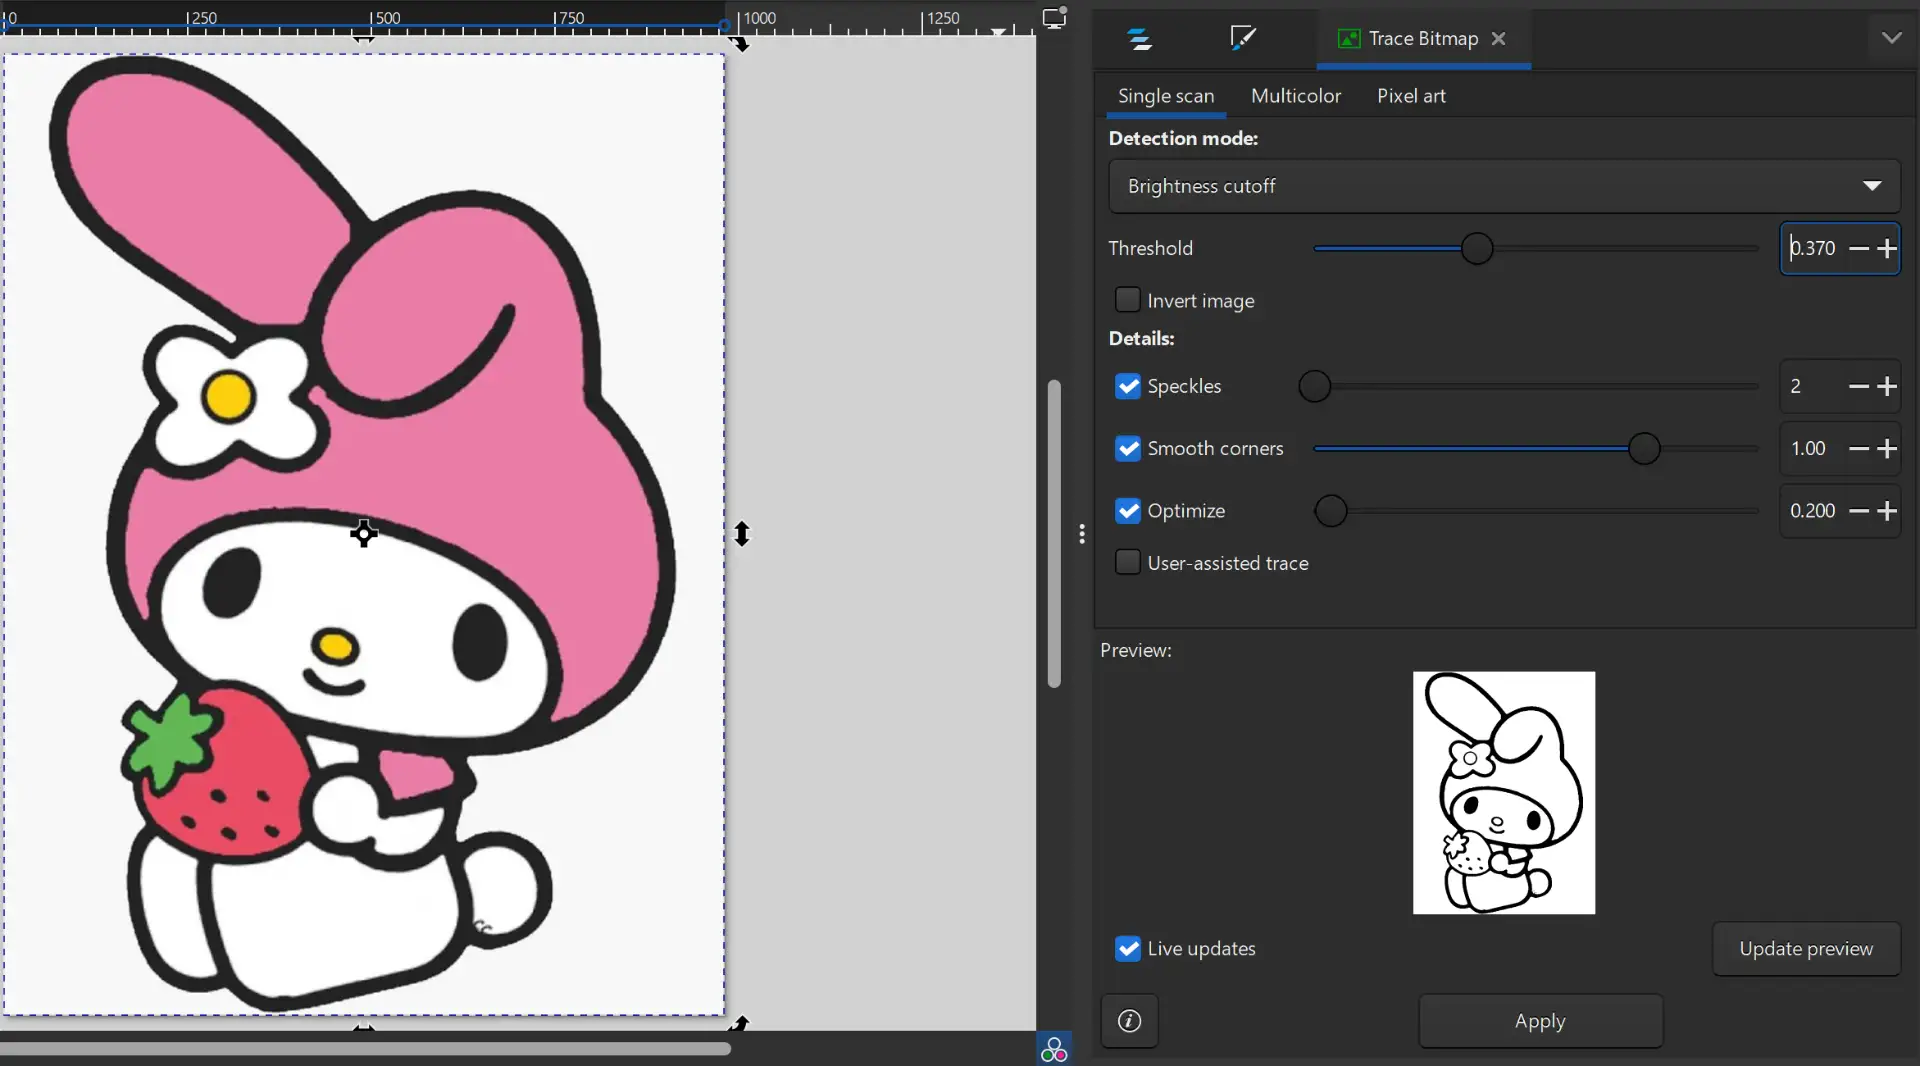
Open the image you are going to use and resize it so it fits properly inside the work area. Vectorize the image using the Trace Bitmap tool. With the threshold slider, you can adjust the thickness of the lines. Once you are satisfied with the result, click Apply to generate the vector, and then delete the original image.
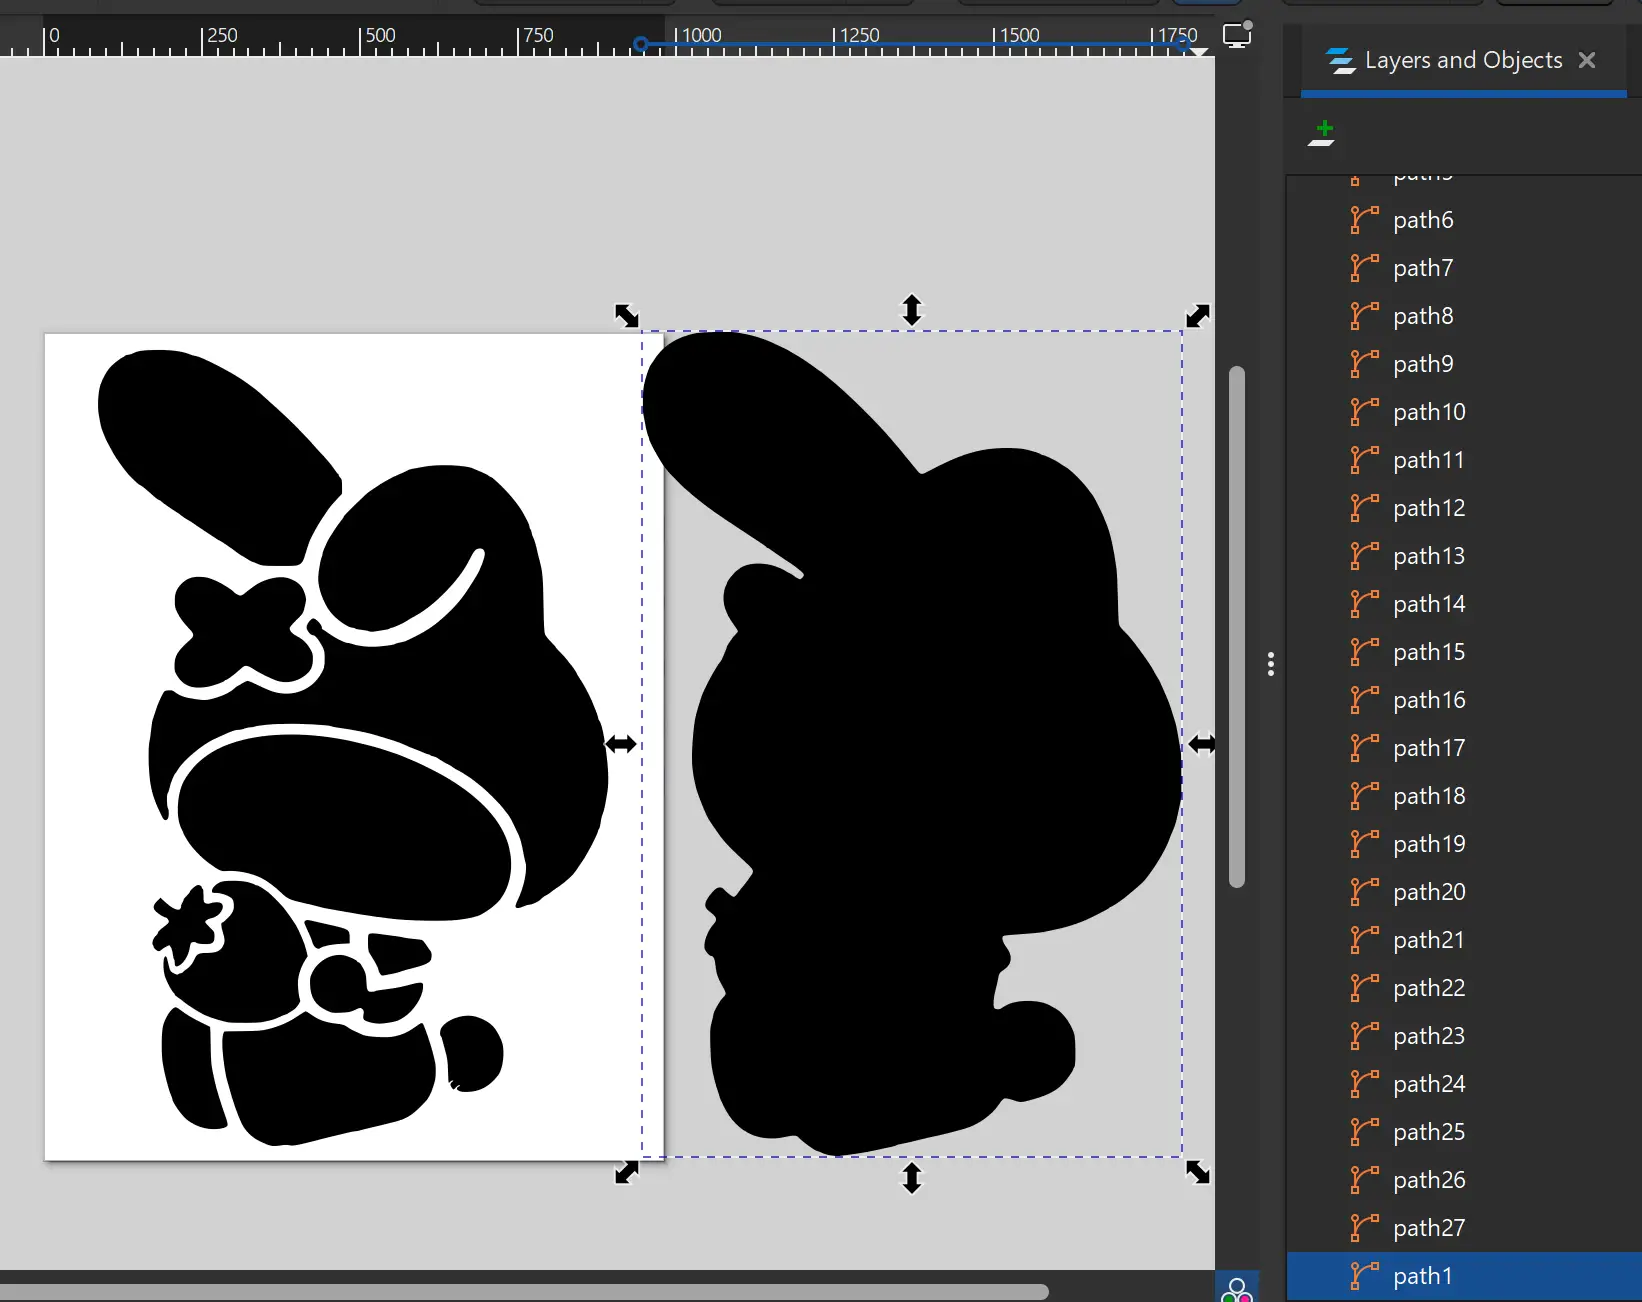
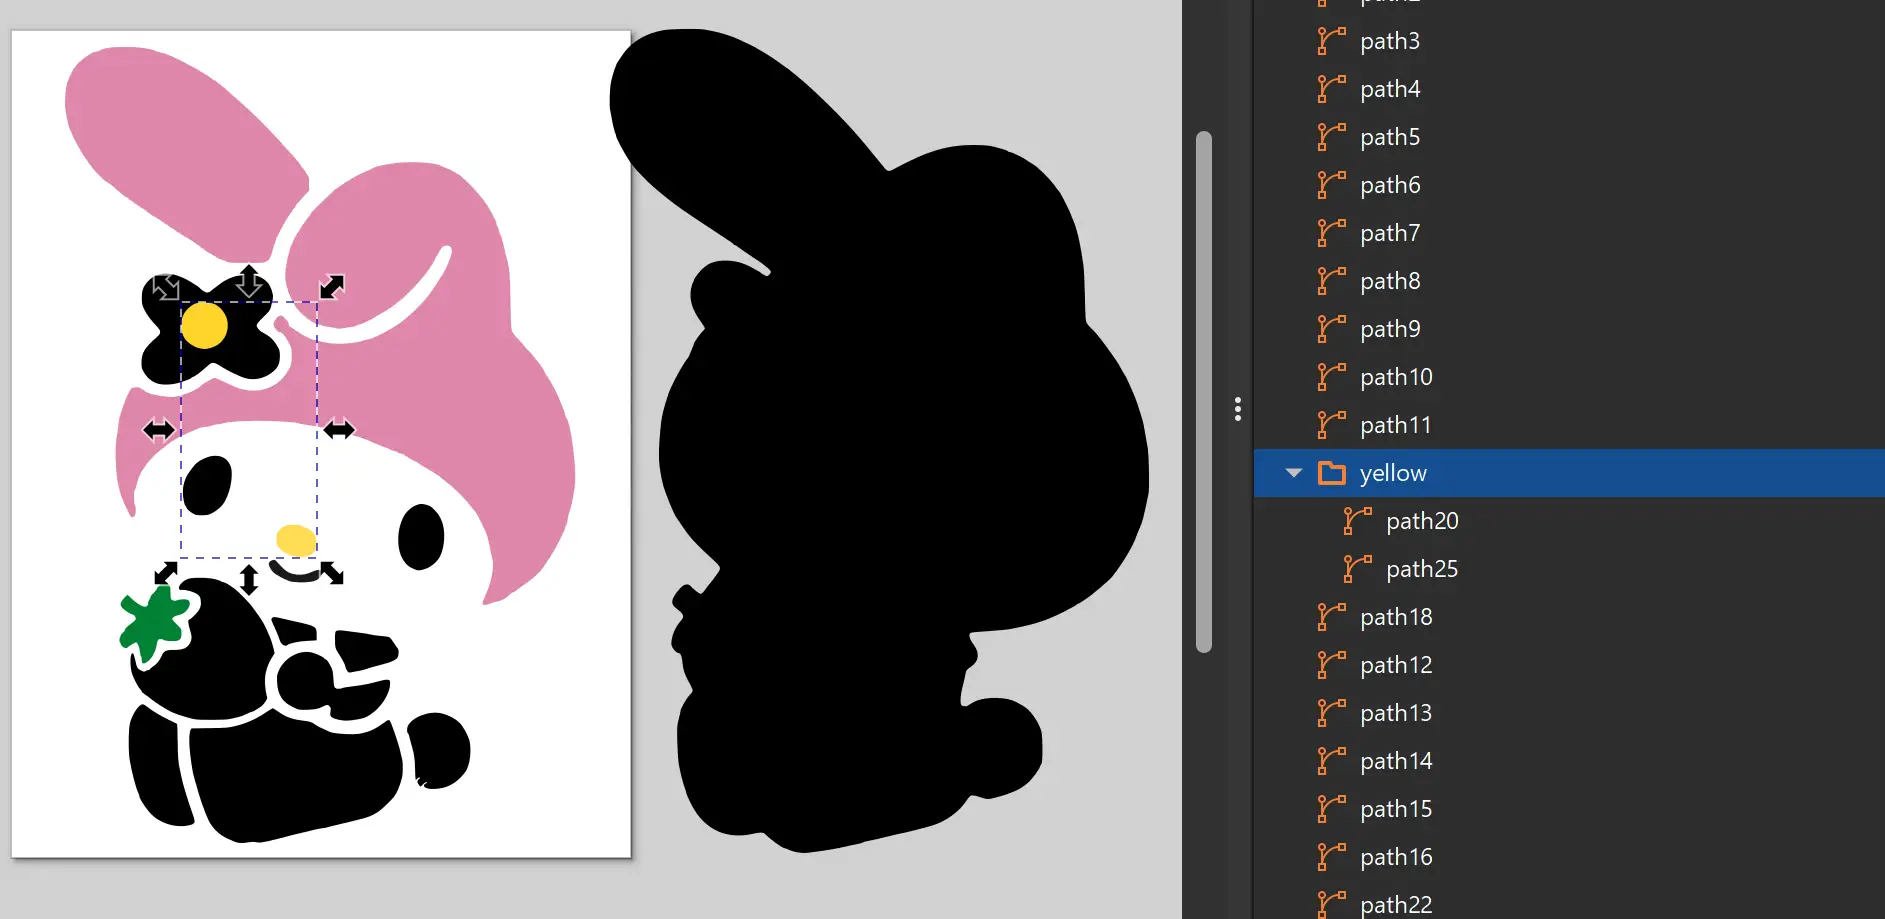
Break apart
Go to Path > Break Apart. This helps separate the polygons and different parts of the image into multiple layers. From there, you can delete or resize each part depending on how you want your design to look.
Fill and Stroke
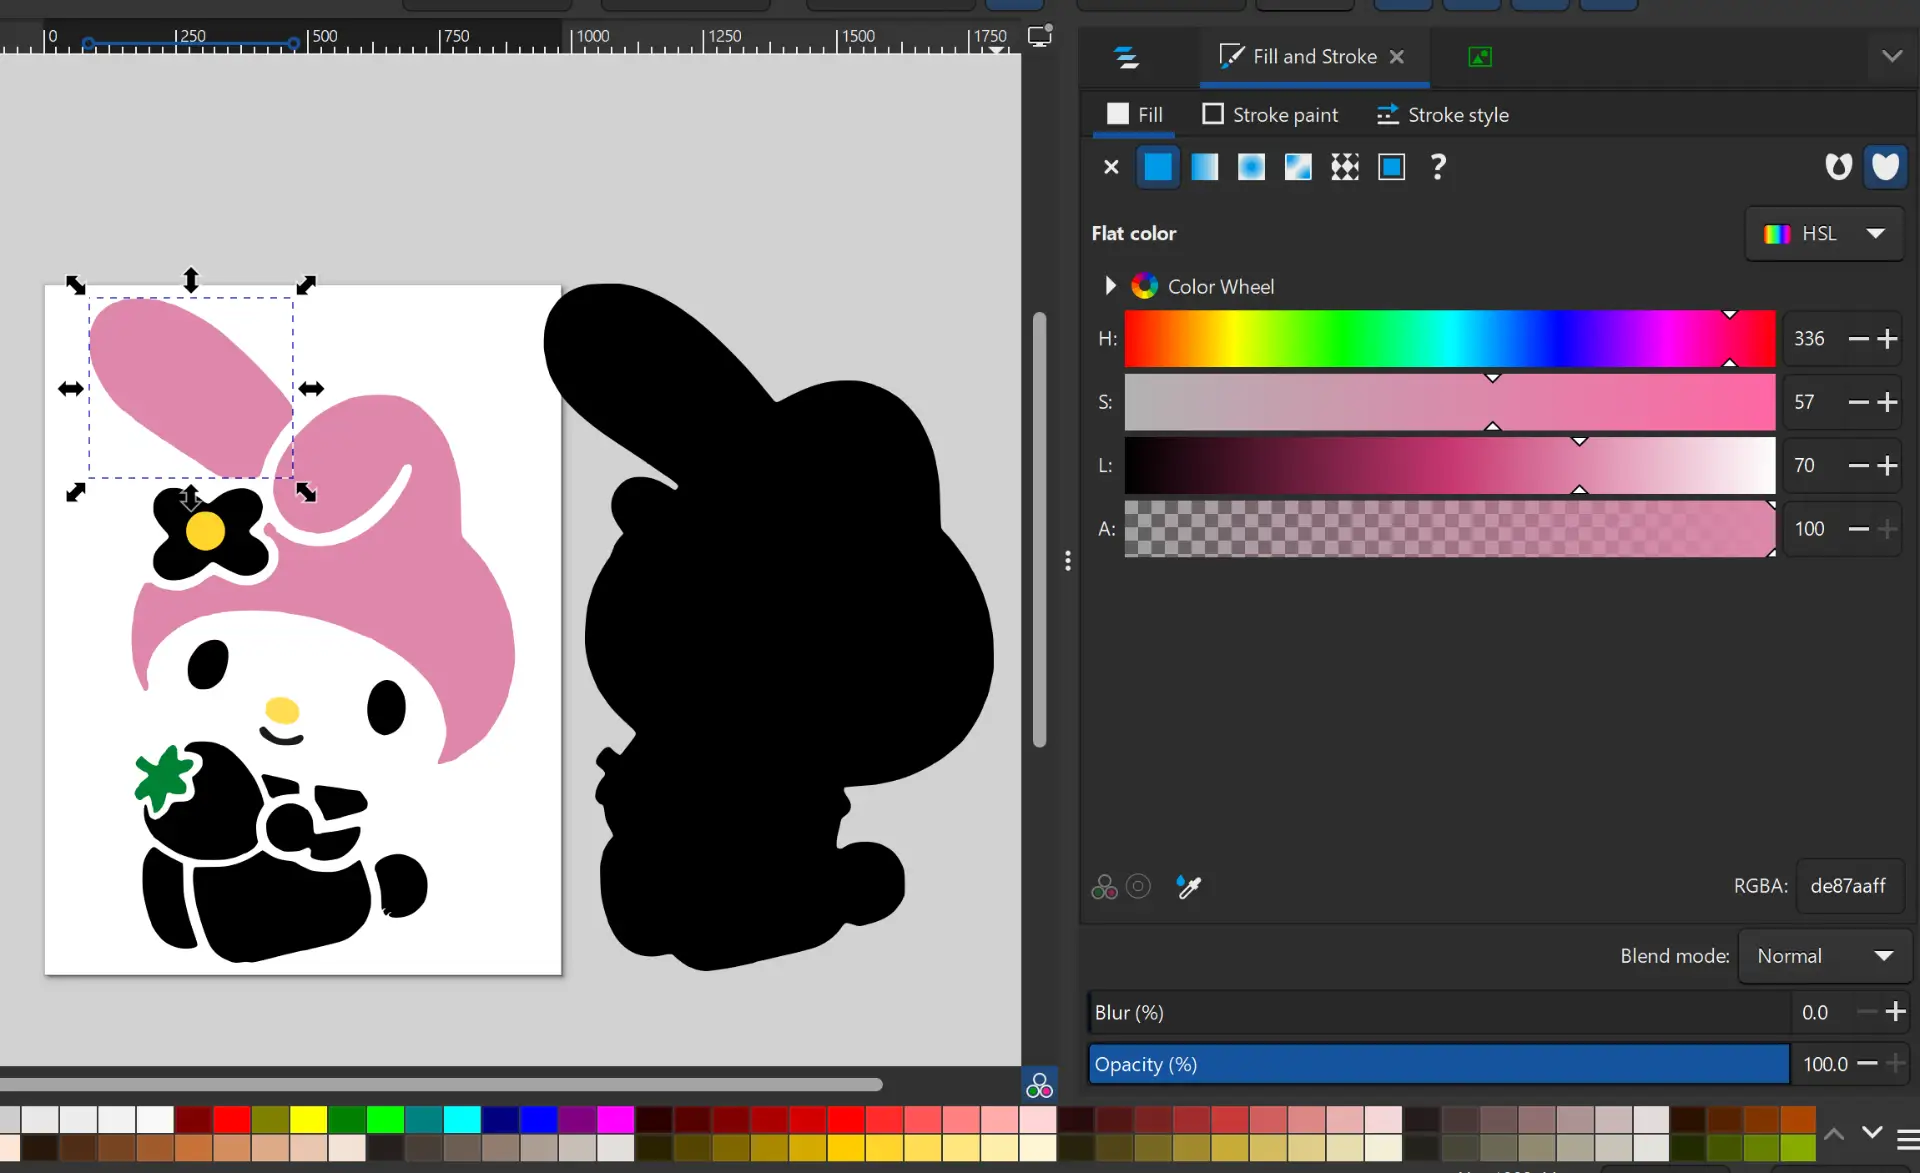
To change the colors, select the different parts using the Layers and Objects panel. Then, with the Fill and Stroke option or the color bar at the bottom, you can modify the fill colors. Remember to also add an stroke to each section to give the design a better finish.
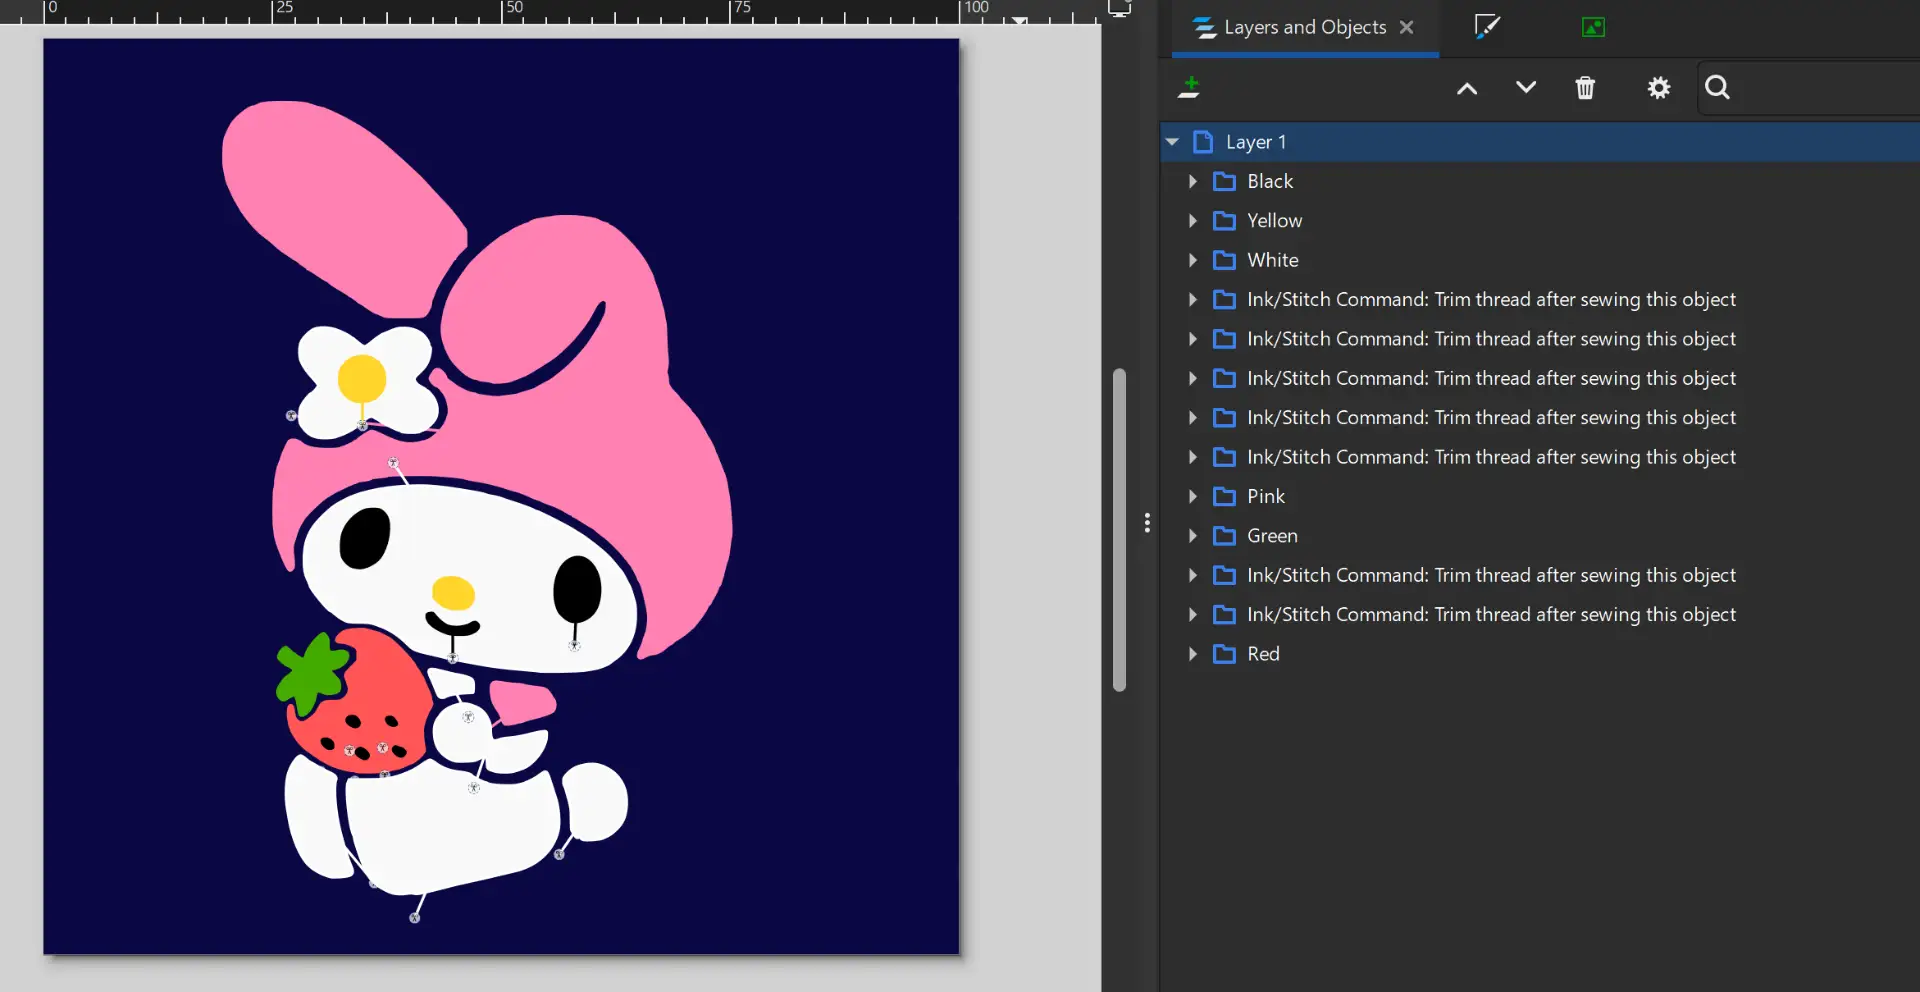
Group folder
In the Layers and Objects panel, you can group different layers by right-clicking and selecting the Group option. You can also drag multiple layers into the same group folder. Grouping layers with the same color helps make the embroidery process easier and more organized.
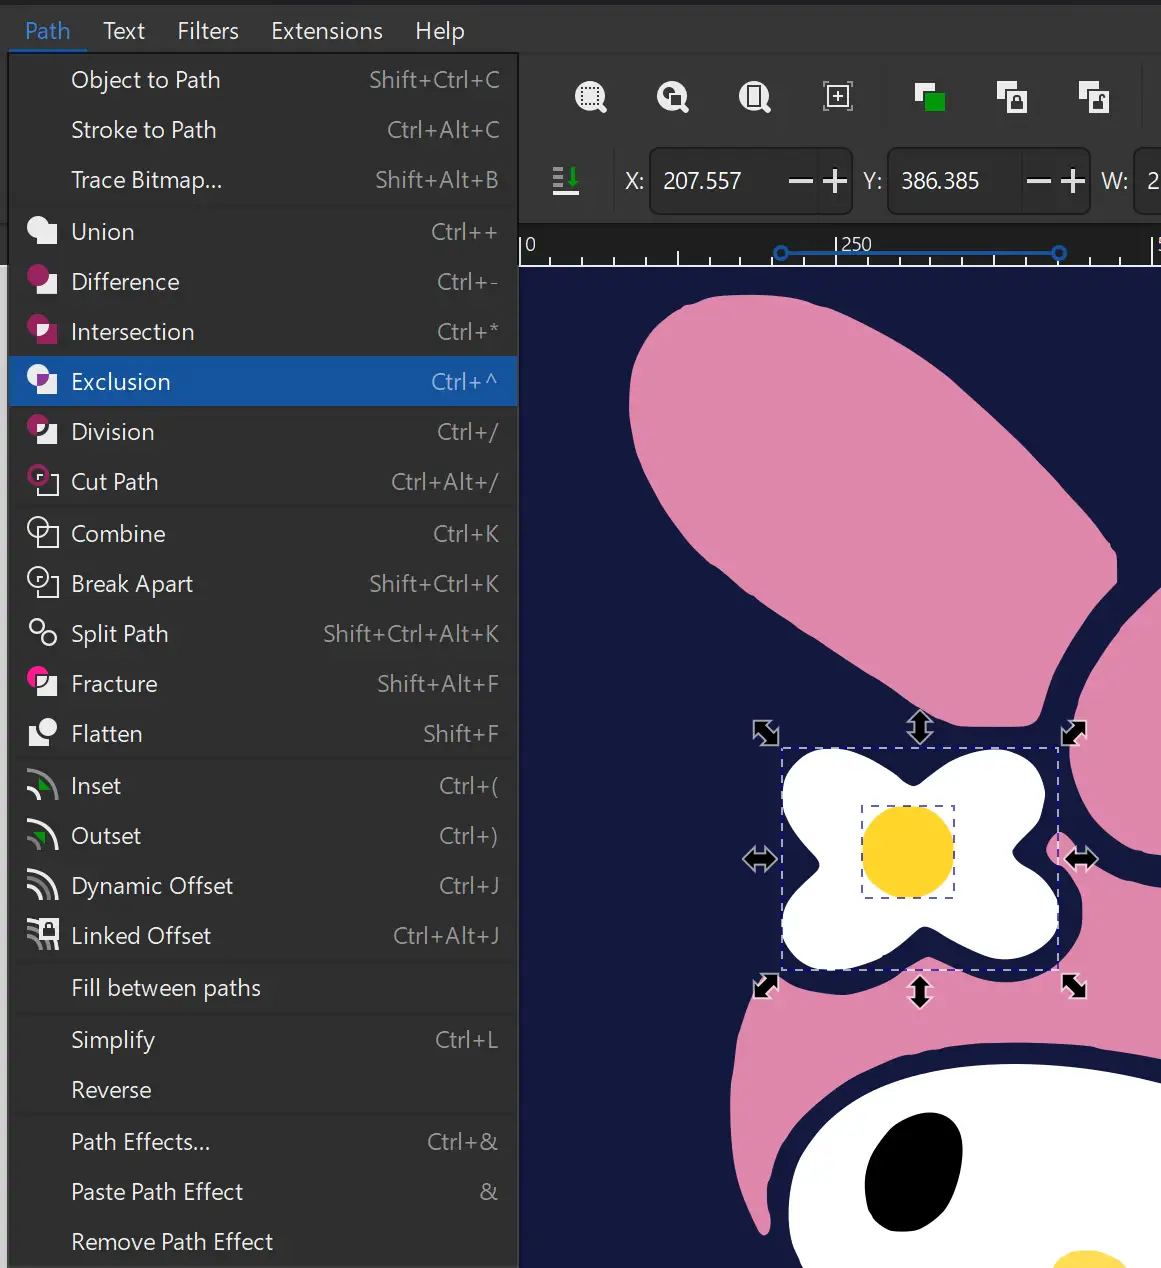
Exclusion
An important note is to make sure there are no polygons overlapping each other, since this can cause problems during the embroidery process. The easiest way to fix this is to first copy the polygon that is overlapping. Then select both polygons and go to Path > Exclusion. After that, you can paste the copied polygon back and reposition it correctly.
Final arrangement
Here is the final arrangement of all the colors I will use. You can organize the layers in the order you want the embroidery machine to follow, leaving the final details and outlines for the end.
To continue with the embroidery process, you need to have the Ink/Stitch extension installed for Inkscape. Ink/Stitch is an extension for Inkscape that allows you to create embroidery designs. It provides various stitch types and options to customize the embroidery pattern.
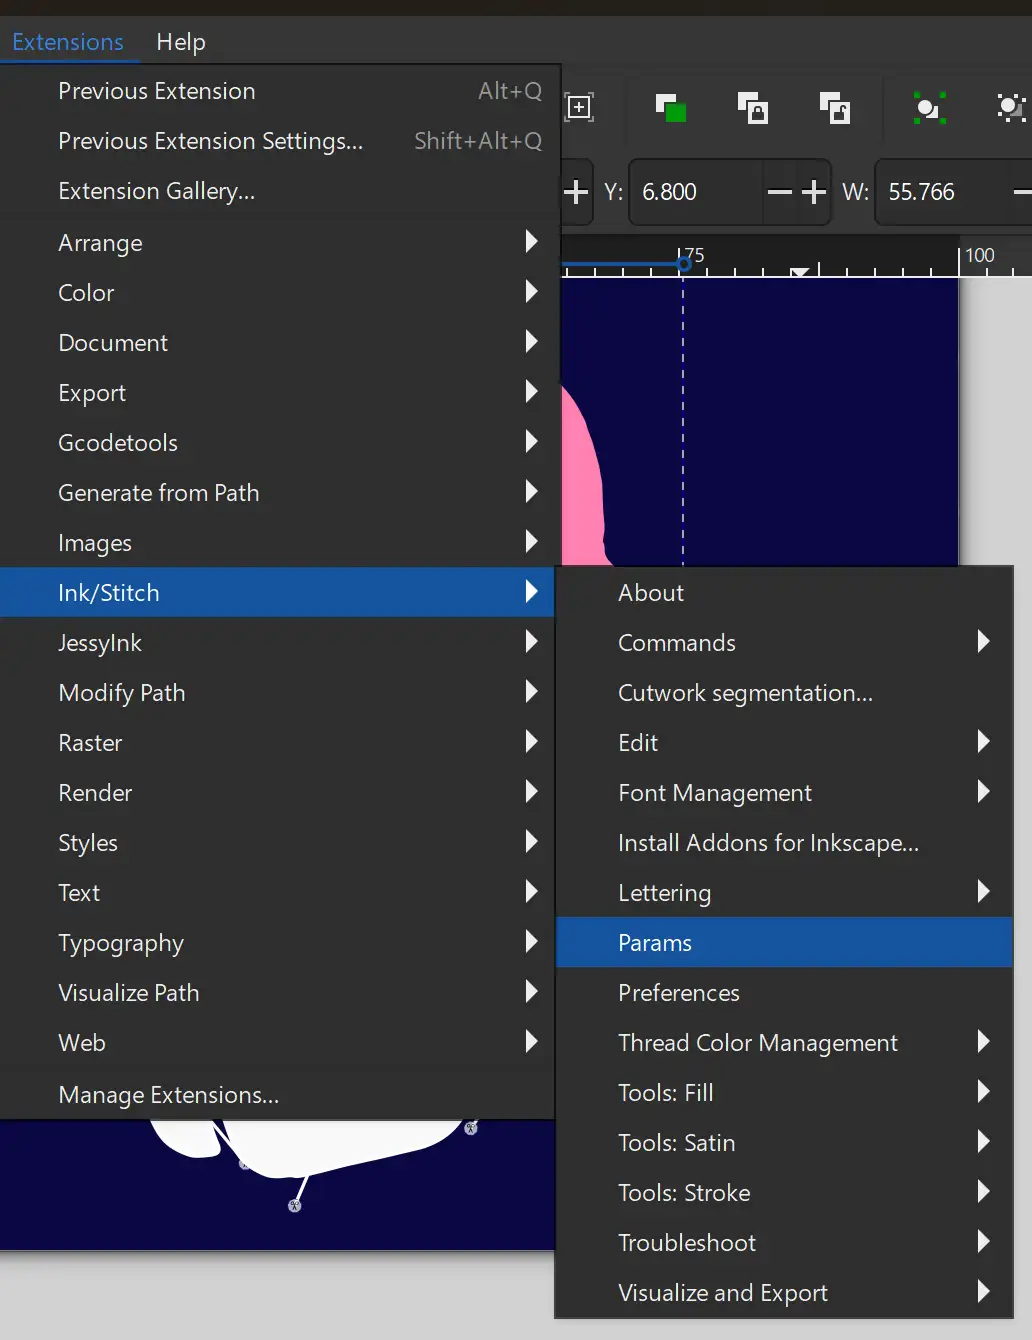
Params
To change the fill and stroke style, select the layer or group of layers you want to edit. Then go to Extensions > Ink/Stitch > Params. Remember to do this for all the layers.
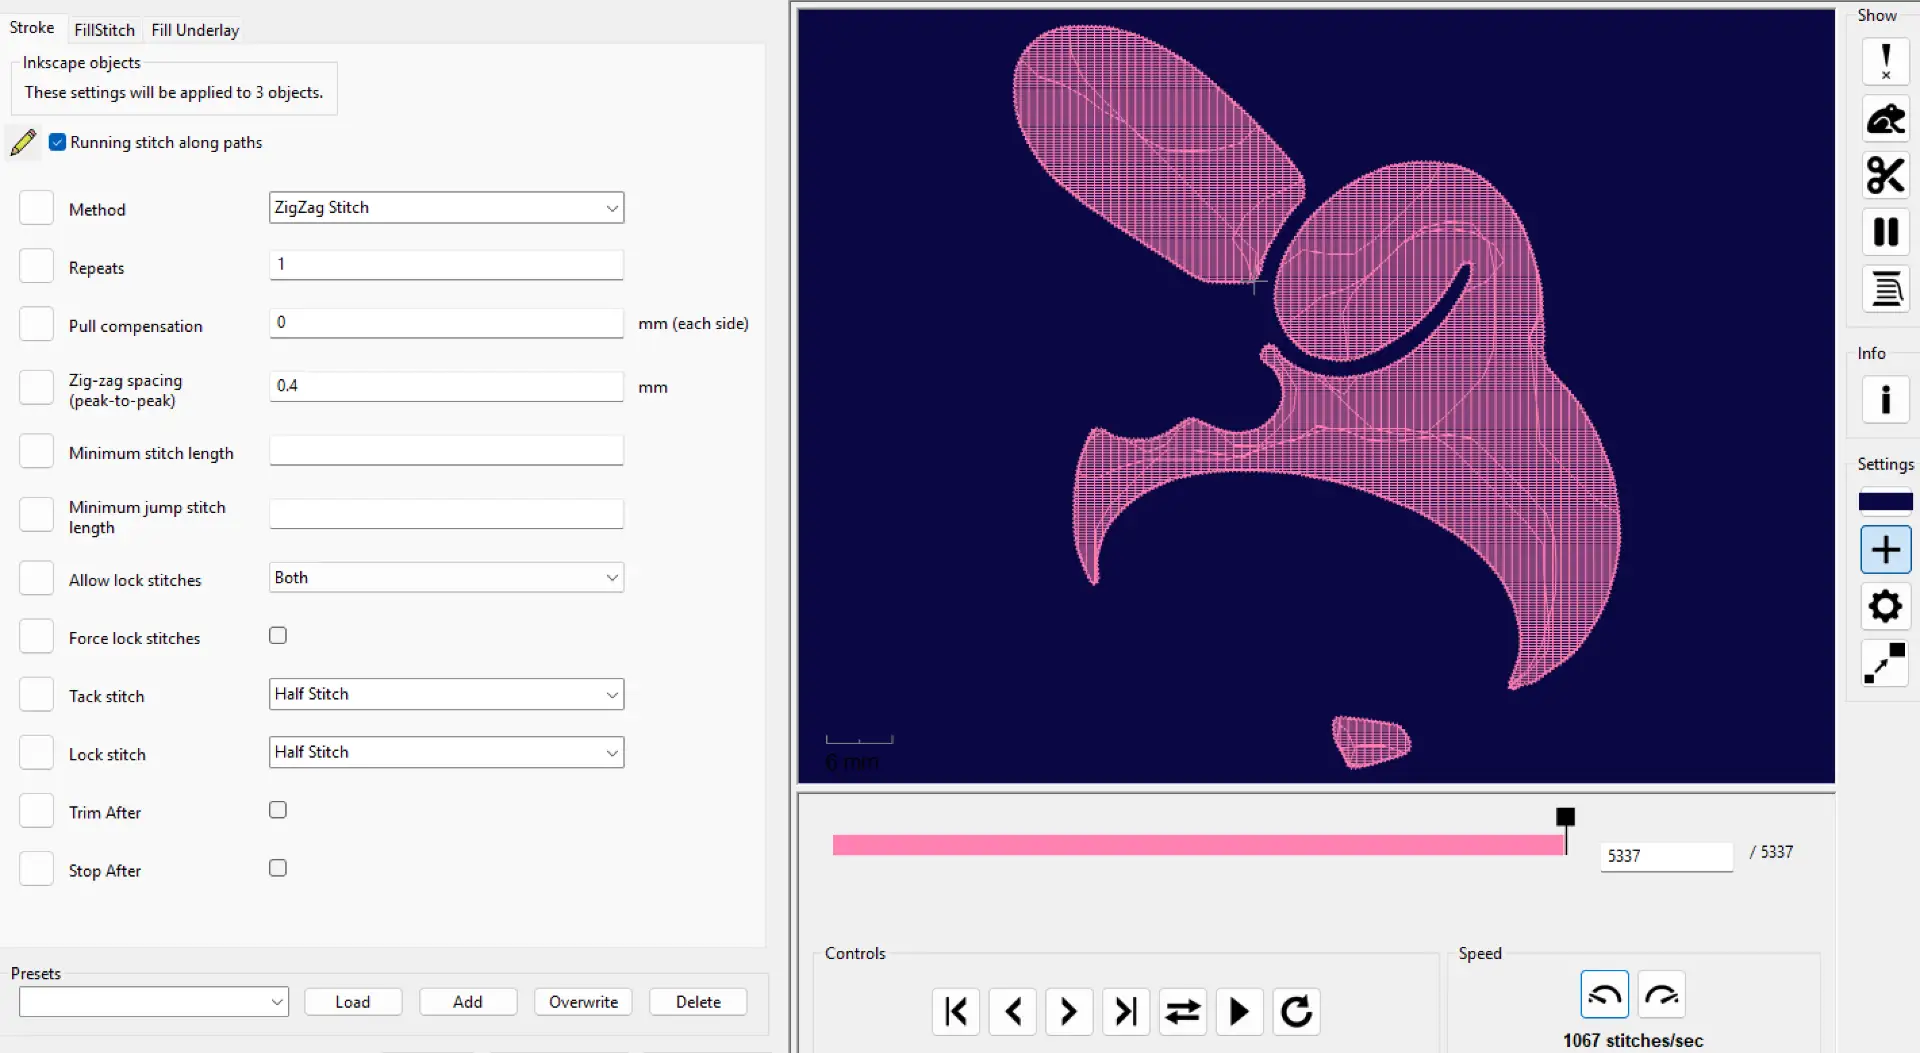
Stroke
The settings panel will open. In the Stroke tab, change the stroke type to Zigzag Stitch. You can also adjust how many times you want the stitch to repeat; in this case, I left it at 1.
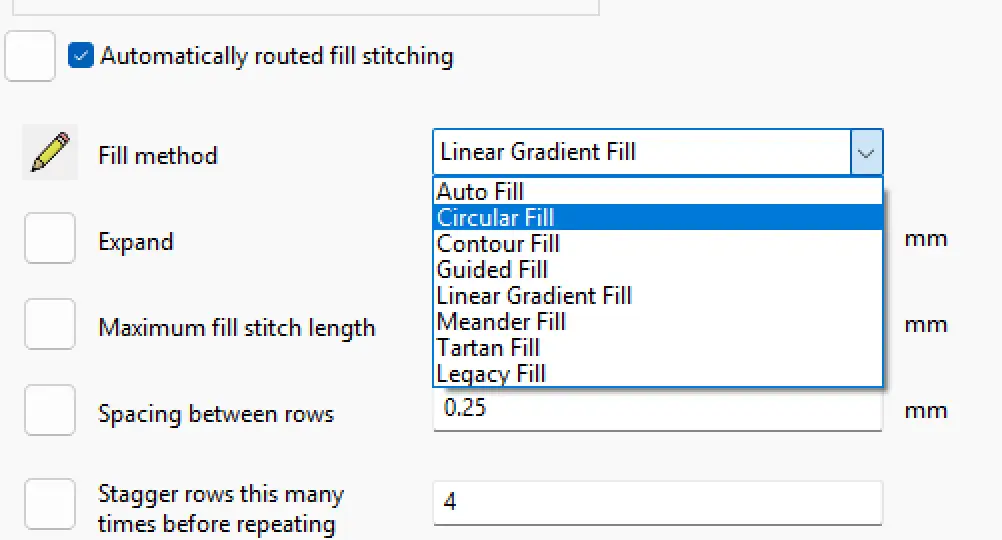
FillStitch
In the FillStitch tab, you can change the type of fill. There are several options depending on the finish you want to achieve. You can also adjust the spacing between each fill line. In my case, I used the Auto Fill option and a Circular Fill pattern in some areas, such as the eyes and face, to give those details a nicer finish.
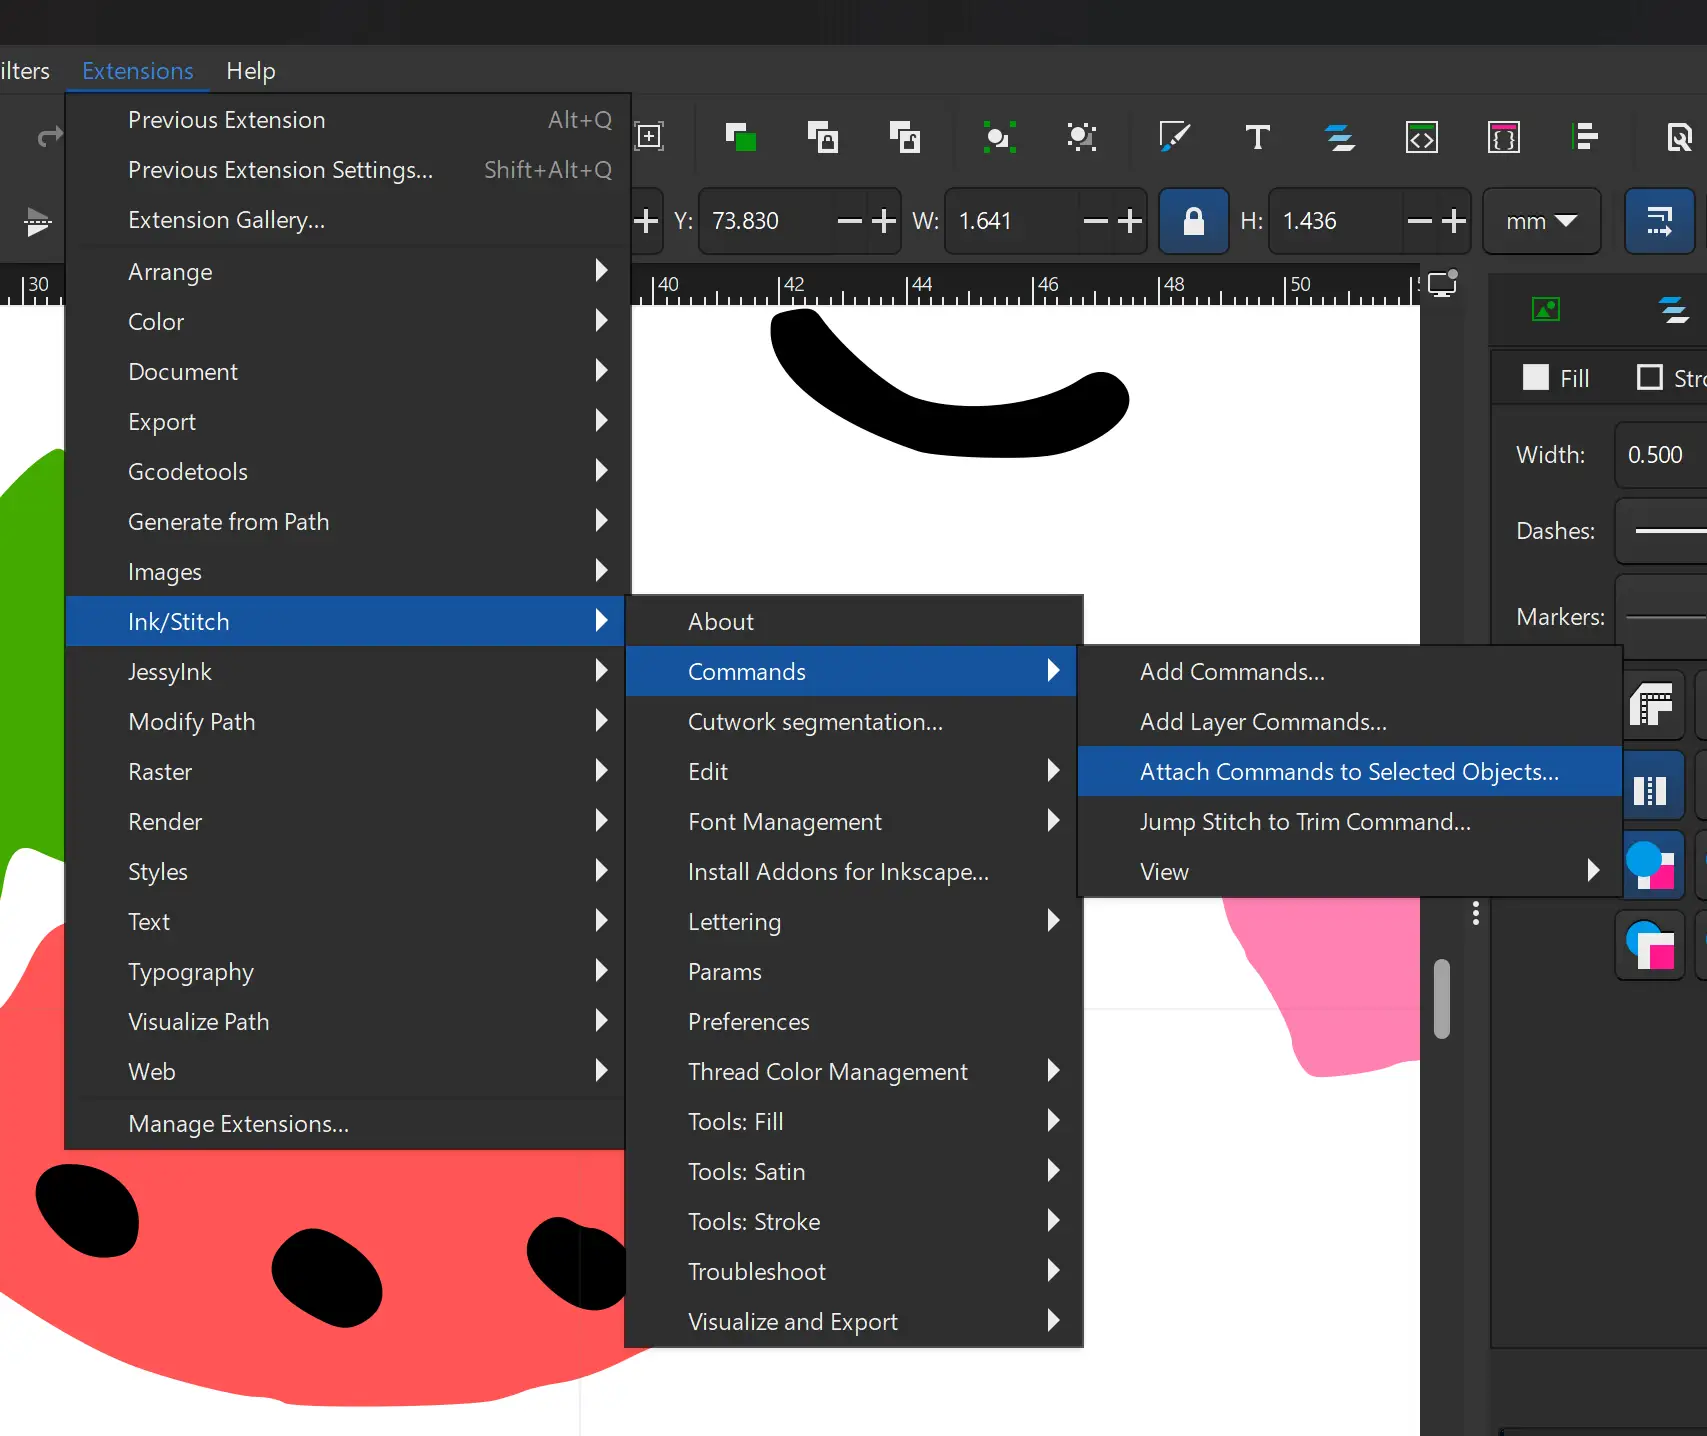
Attach Commands
In the parameter preview, you may notice some lines connecting different sections. These lines represent the path the machine follows when jumping from one layer to another. To avoid visible thread lines in the embroidery, we need to add trim commands. To do this, select the layer where the jump to the next layer begins, then go to Extensions > Ink/Stitch > Commands > Attach Commands to Selected Objects.
Trim thread
Here, select the option Trim thread after sewing this object and click Apply. Repeat this process for every layer where these jump lines appear.
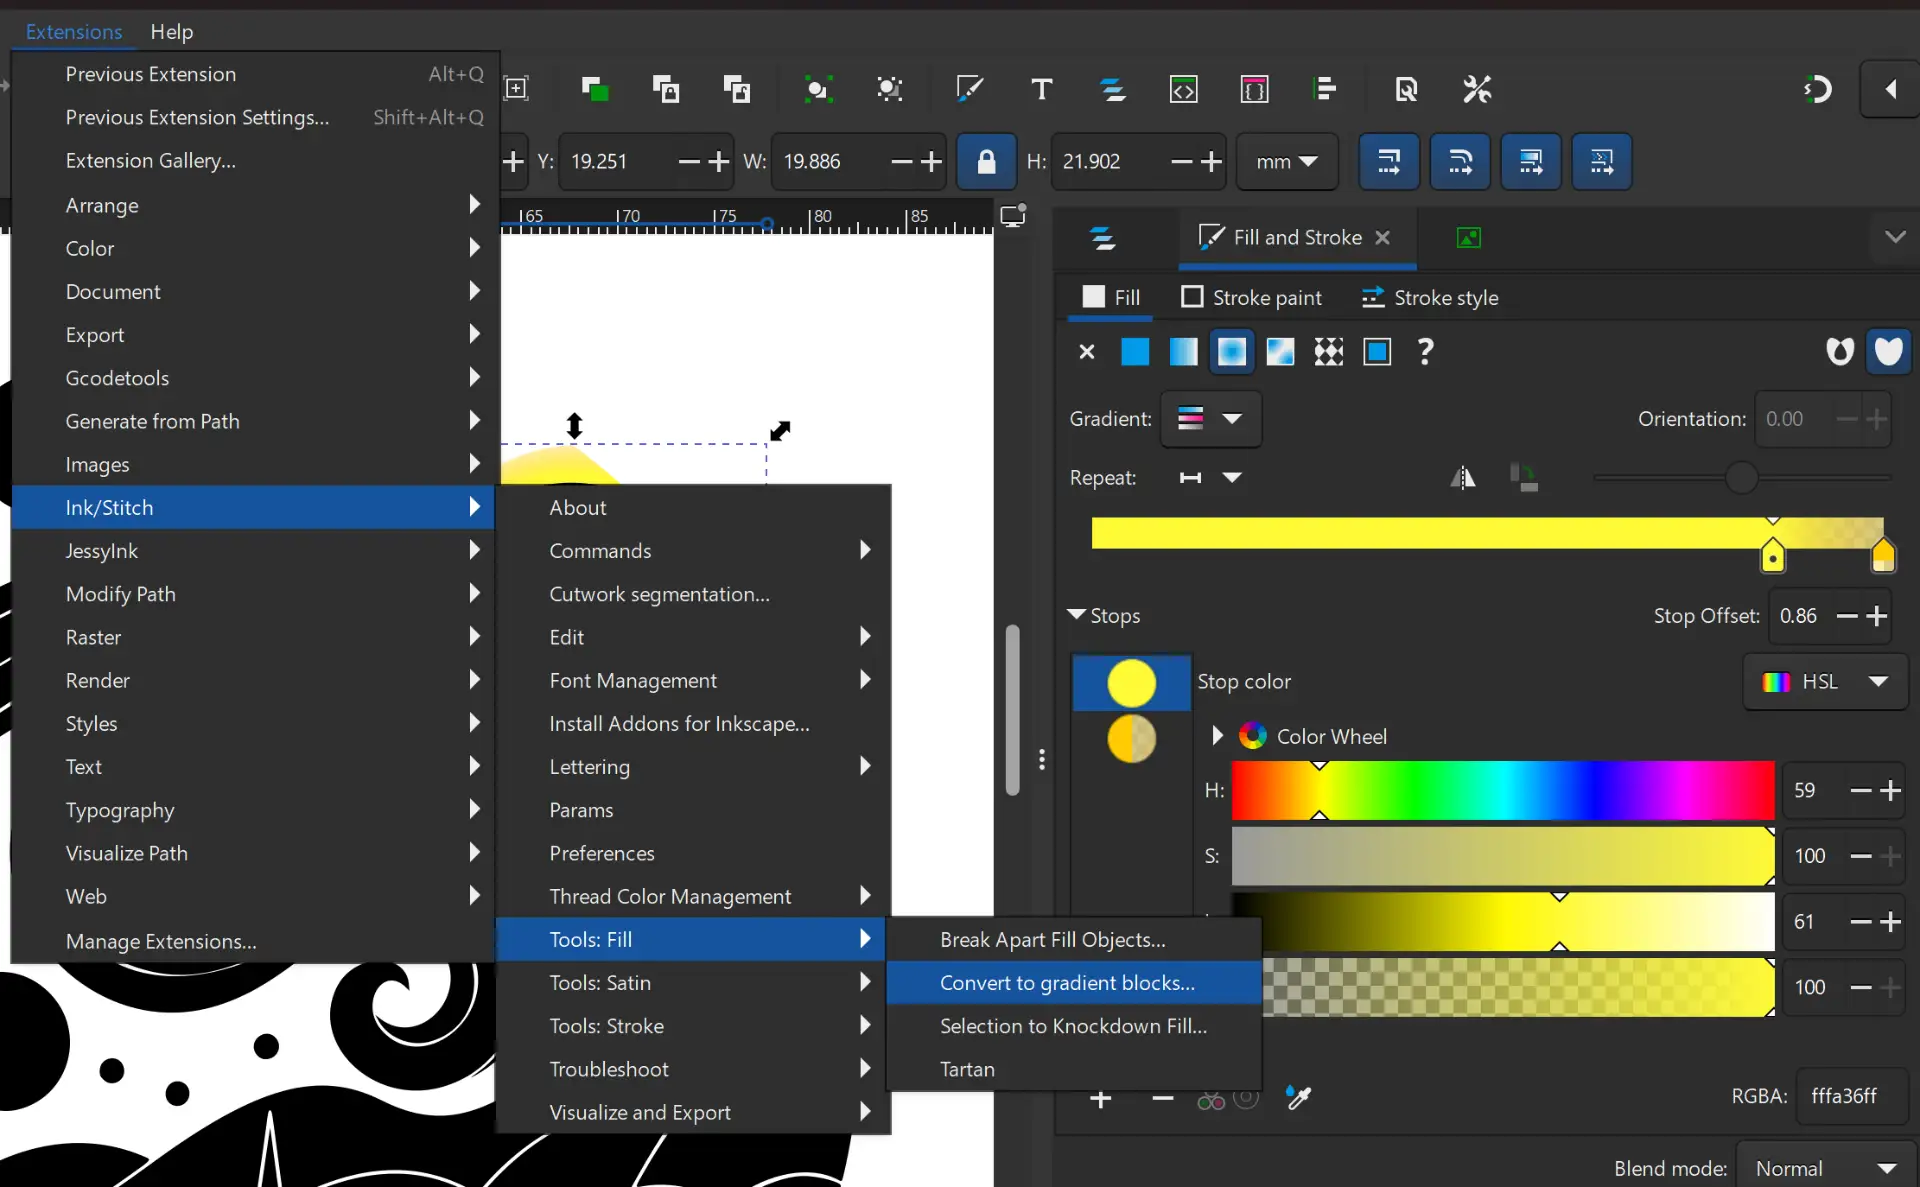
Gradient
If you want to use objects with gradient colors, once you have created the color combination you want, go to Extensions > Ink/Stitch > Tools: Fill > Convert to Gradient Blocks. This option helps the simulator correctly interpret the gradient during the embroidery process.
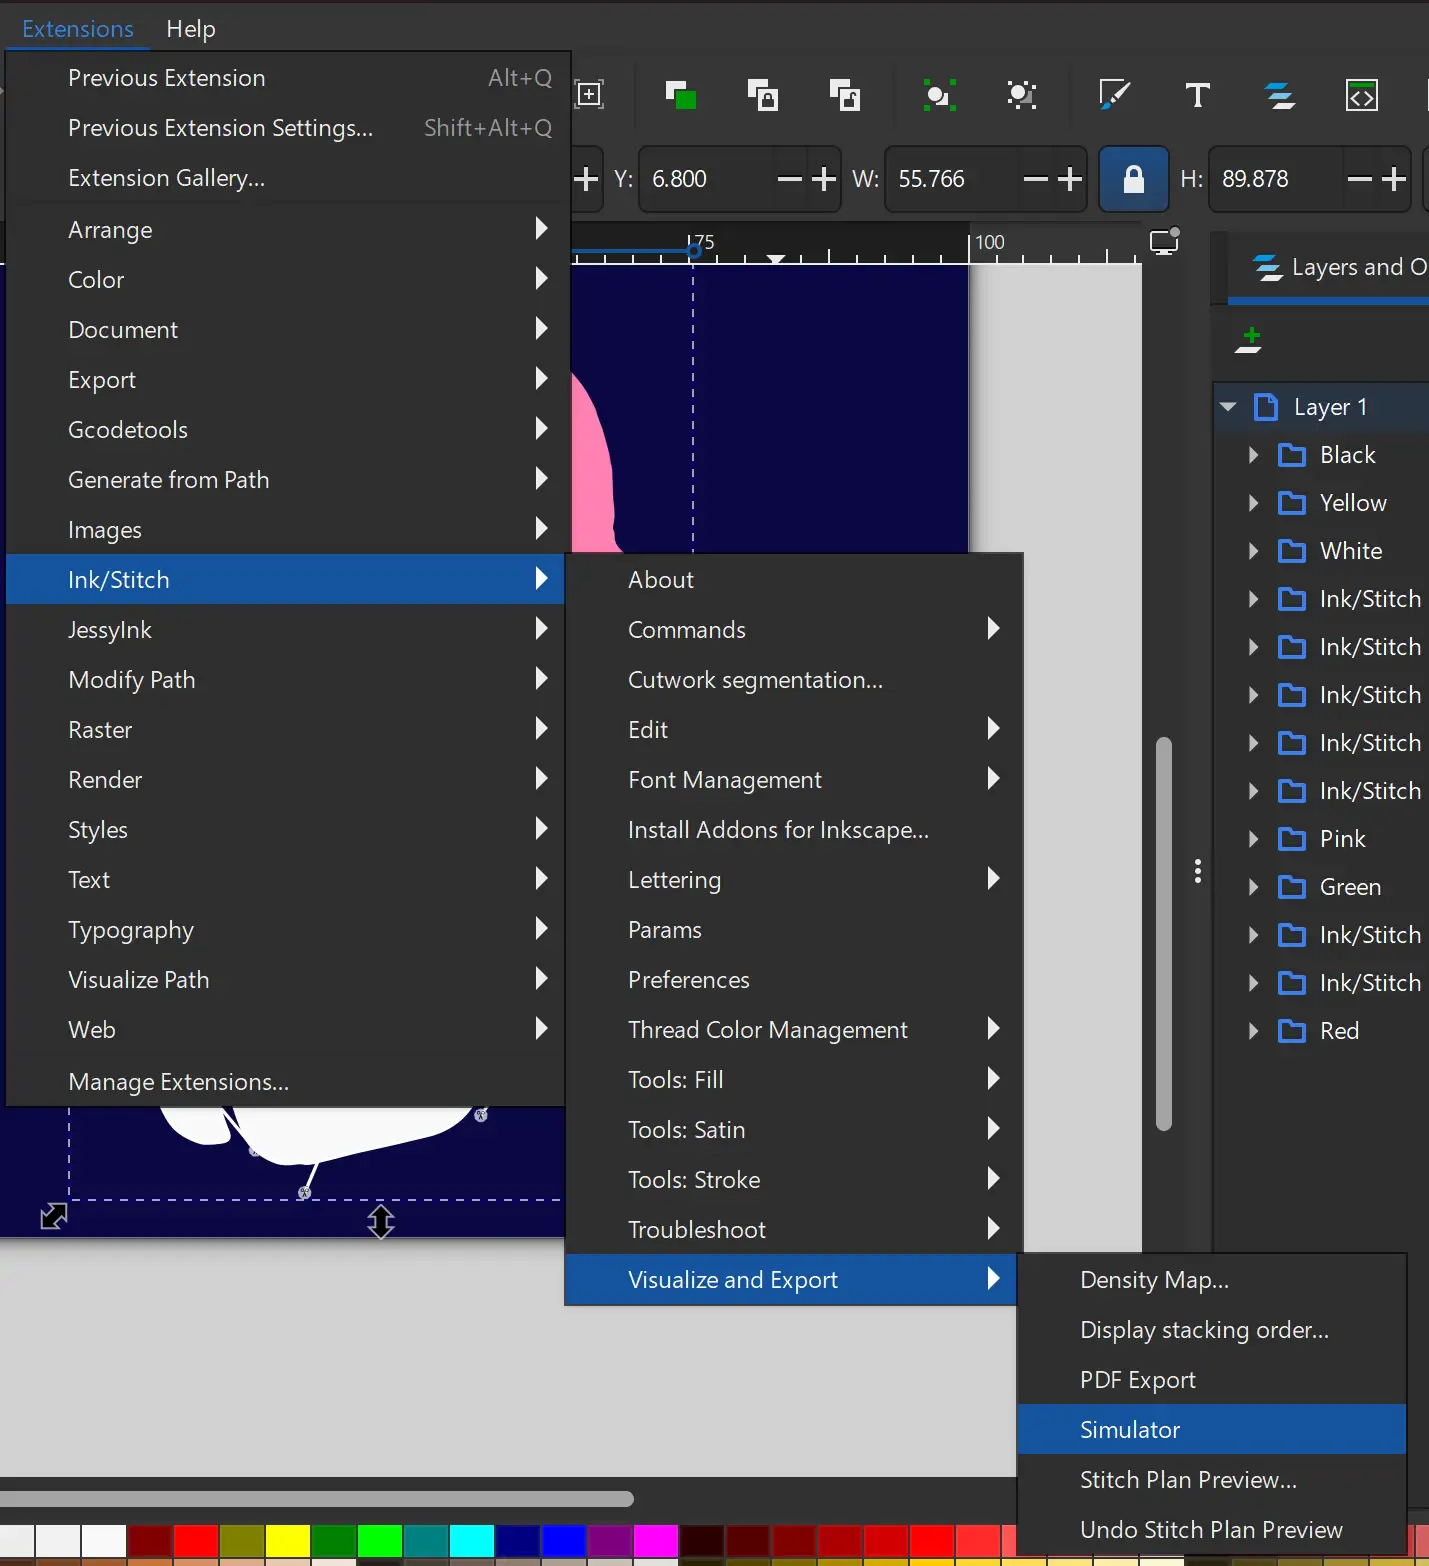
Simulator
To preview the embroidery simulation, go to Extensions > Ink/Stitch > Visualize and Export > Simulator. You can select a specific folder to simulate only that part, or leave everything unselected to simulate the complete design.
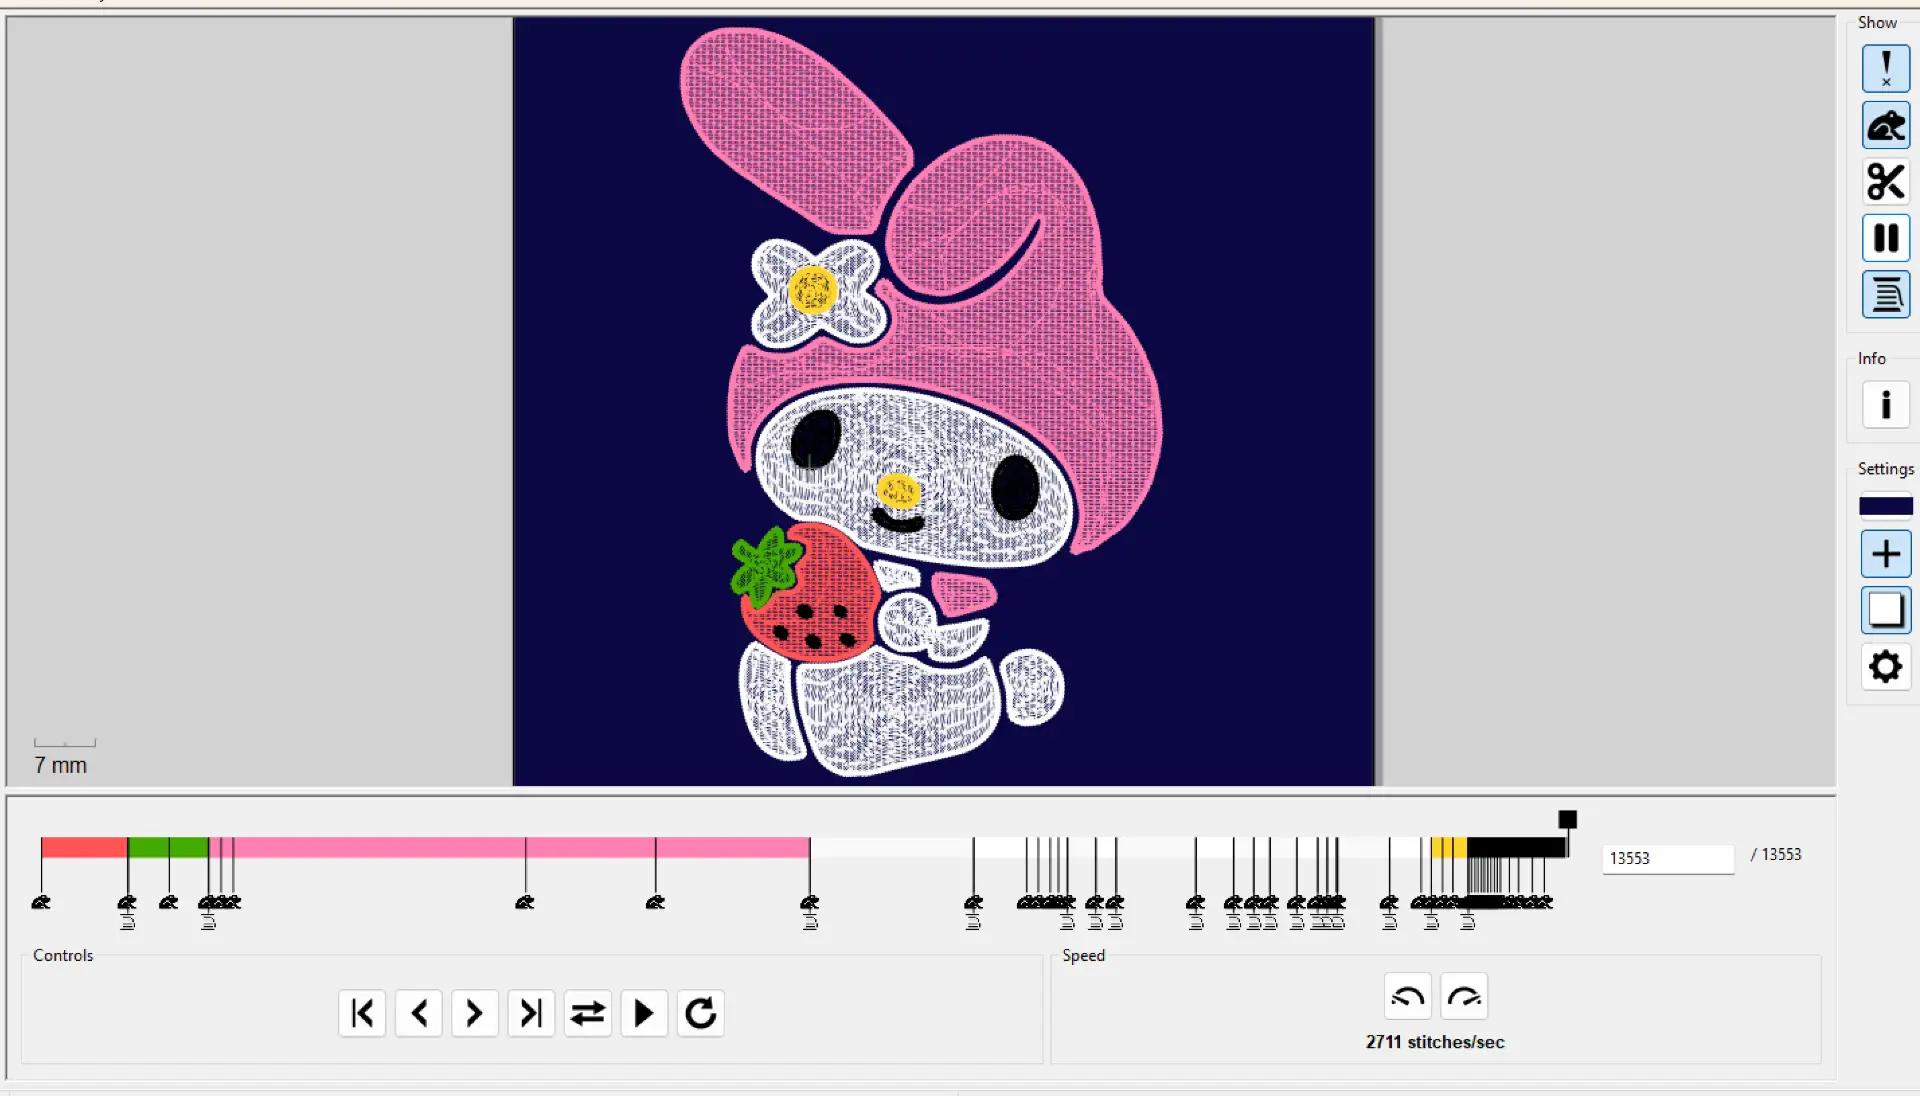
Simulator panel
In this simulator, you can also use the options on the right-side panel to view trims, color changes, stitch paths, and other details. Once everything is finished, save the document in .PES format to a USB drive.
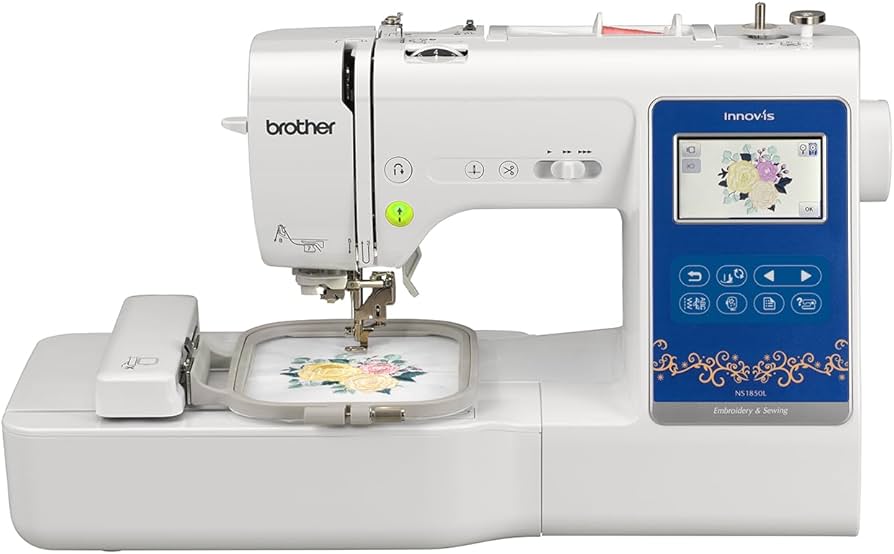
The machine I used for this project was the Brother NS1850L that is the one available at the Fab Lab Puebla.
Brother NS1850L
Type: Computerized Embroidery and Sewing Machine
Embroidery Area: 100 x 100 mm
Connectivity: USB Port for Design Import
Special Feature: Automatic Needle Threader
Tools: Embroidery hoop, embroidery foot, and sewing accessories
Max Embroidery Speed: Up to 650 stitches per minute
Embroidery Process
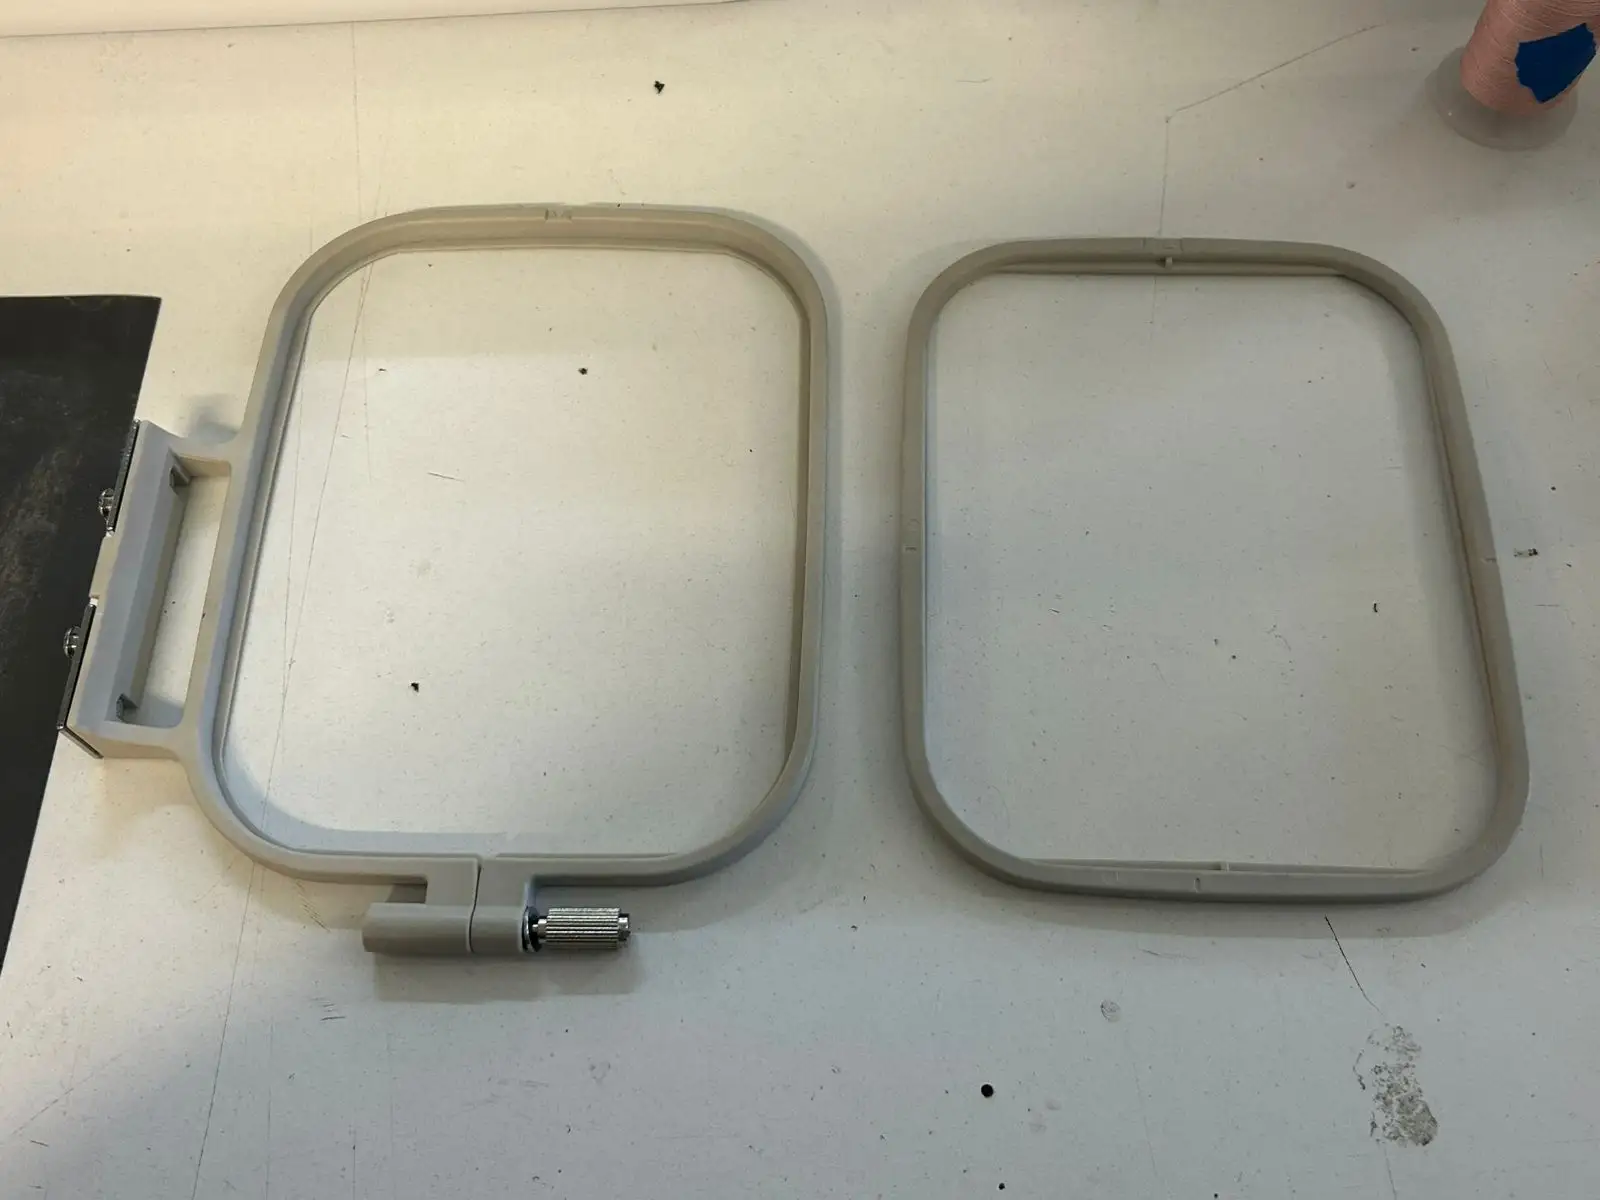
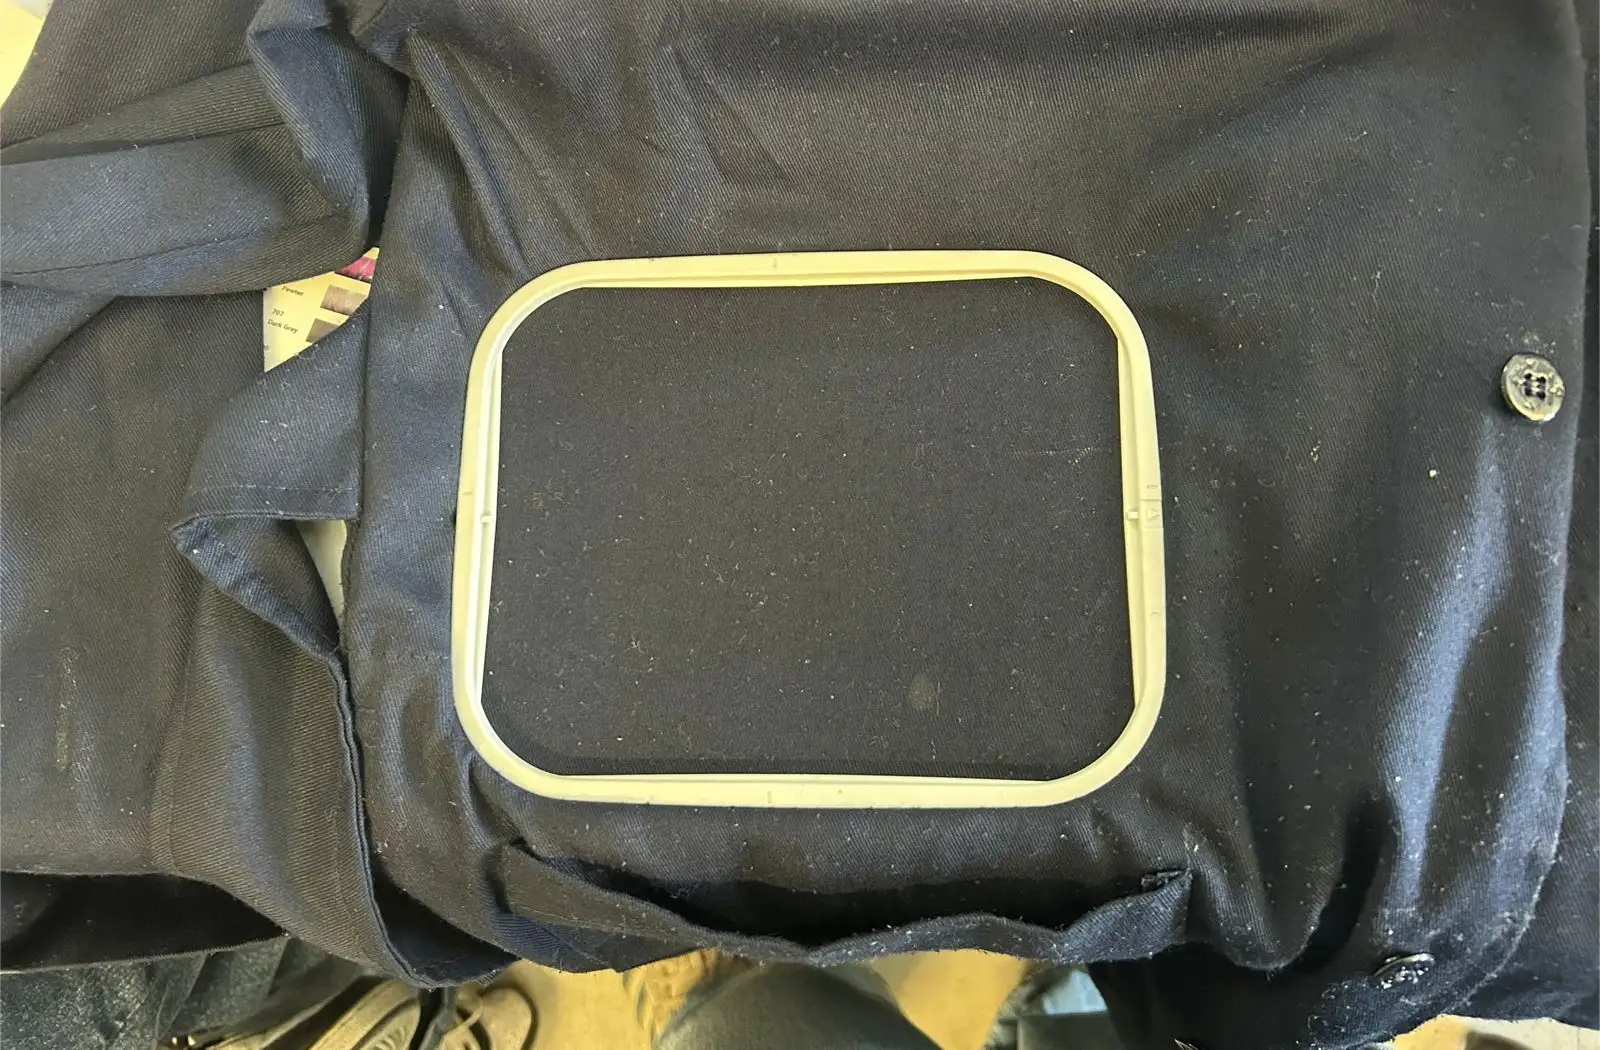
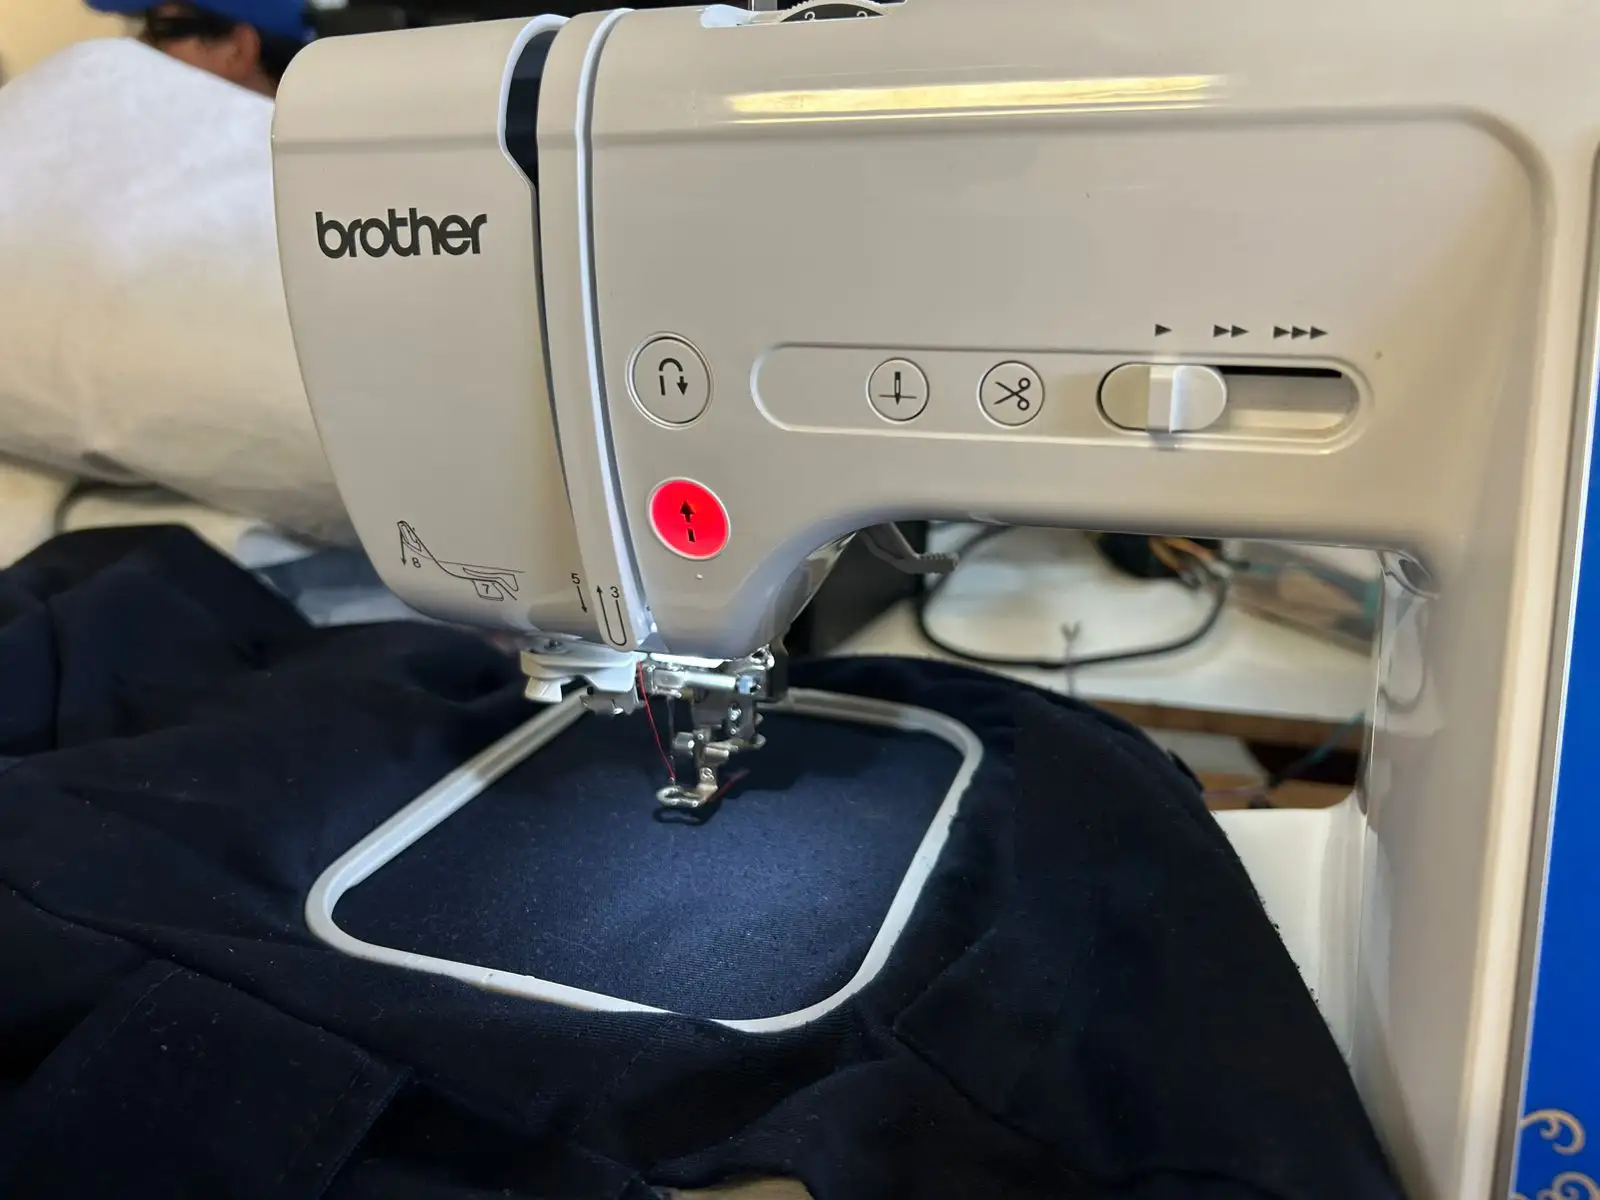
The first thing we need to do is place the fabric onto the embroidery frame. It is important to make sure the fabric is stretched tightly.
⚠️
Note: It is important to avoid using very soft fabrics. If the fabric is slightly rigid, the embroidery will usually turn out better. You can add pellon underneath the fabric to reinforce it.
Then, place the frame onto the machine bed and carefully attach the embroidery tool to the sewing machine, making sure it does not hit the needle.
Embroidery File
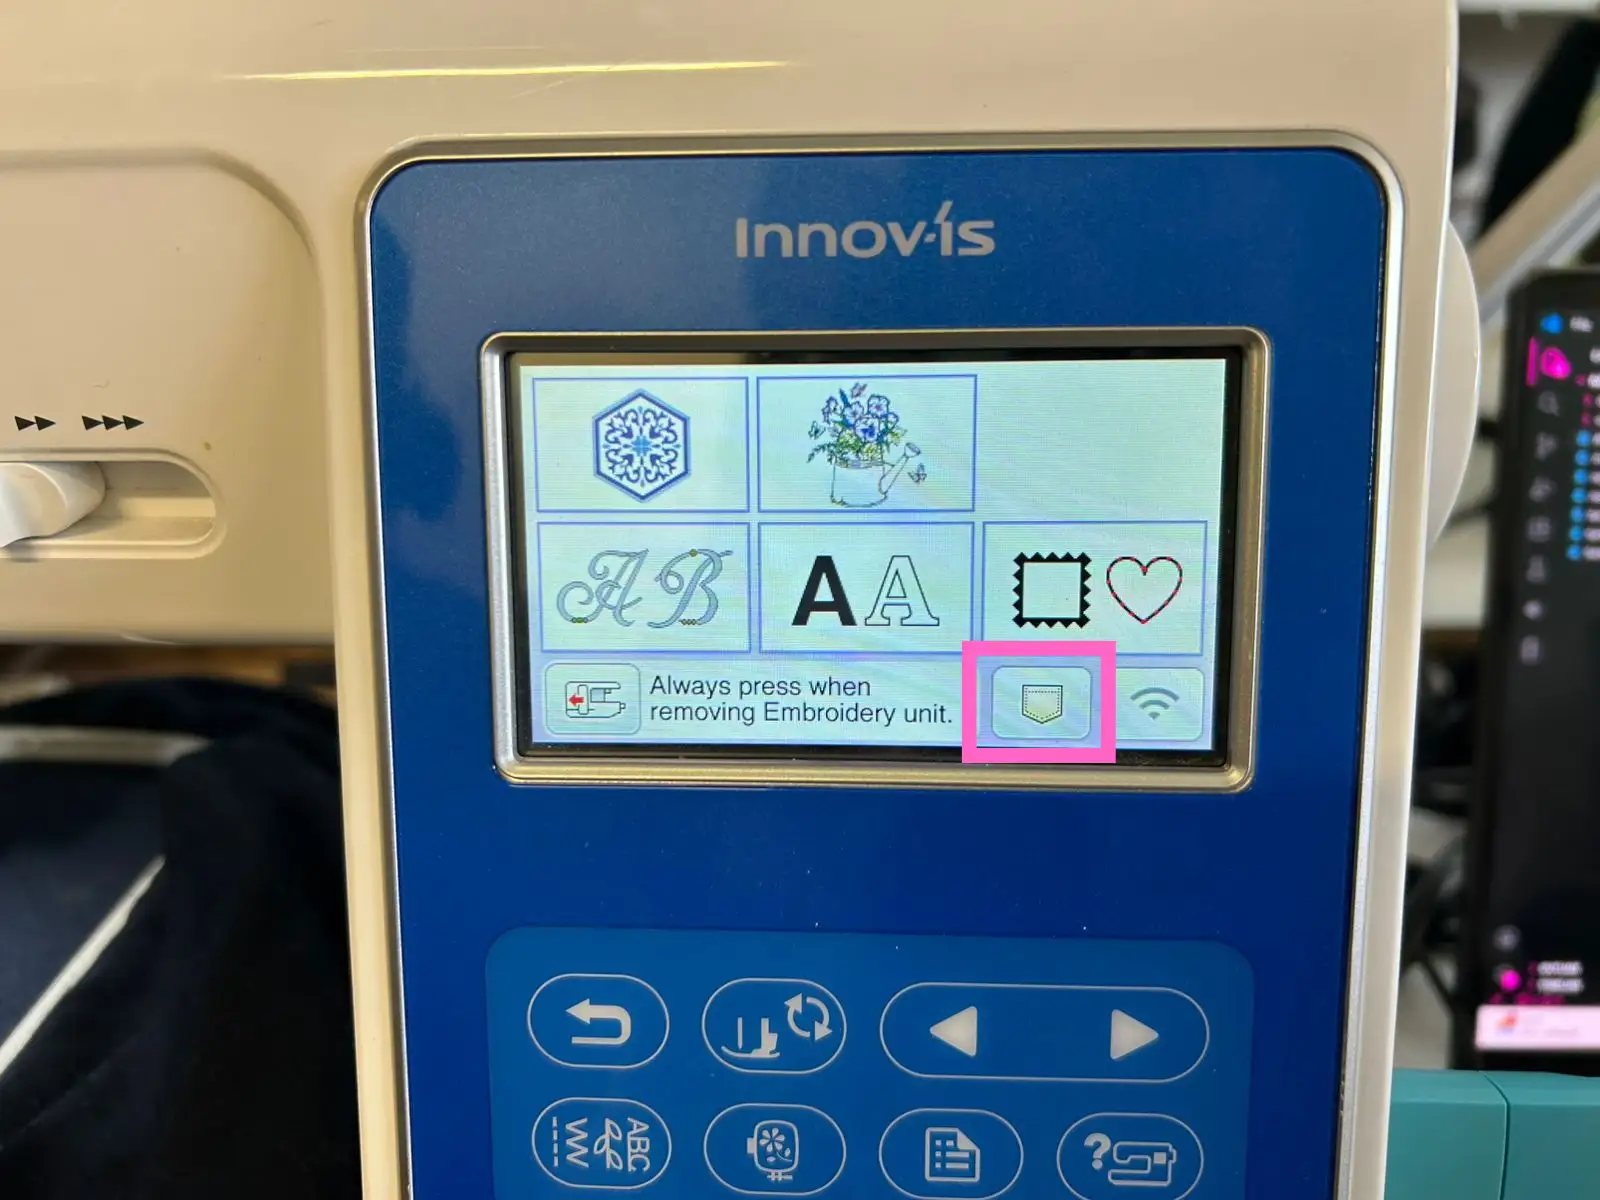
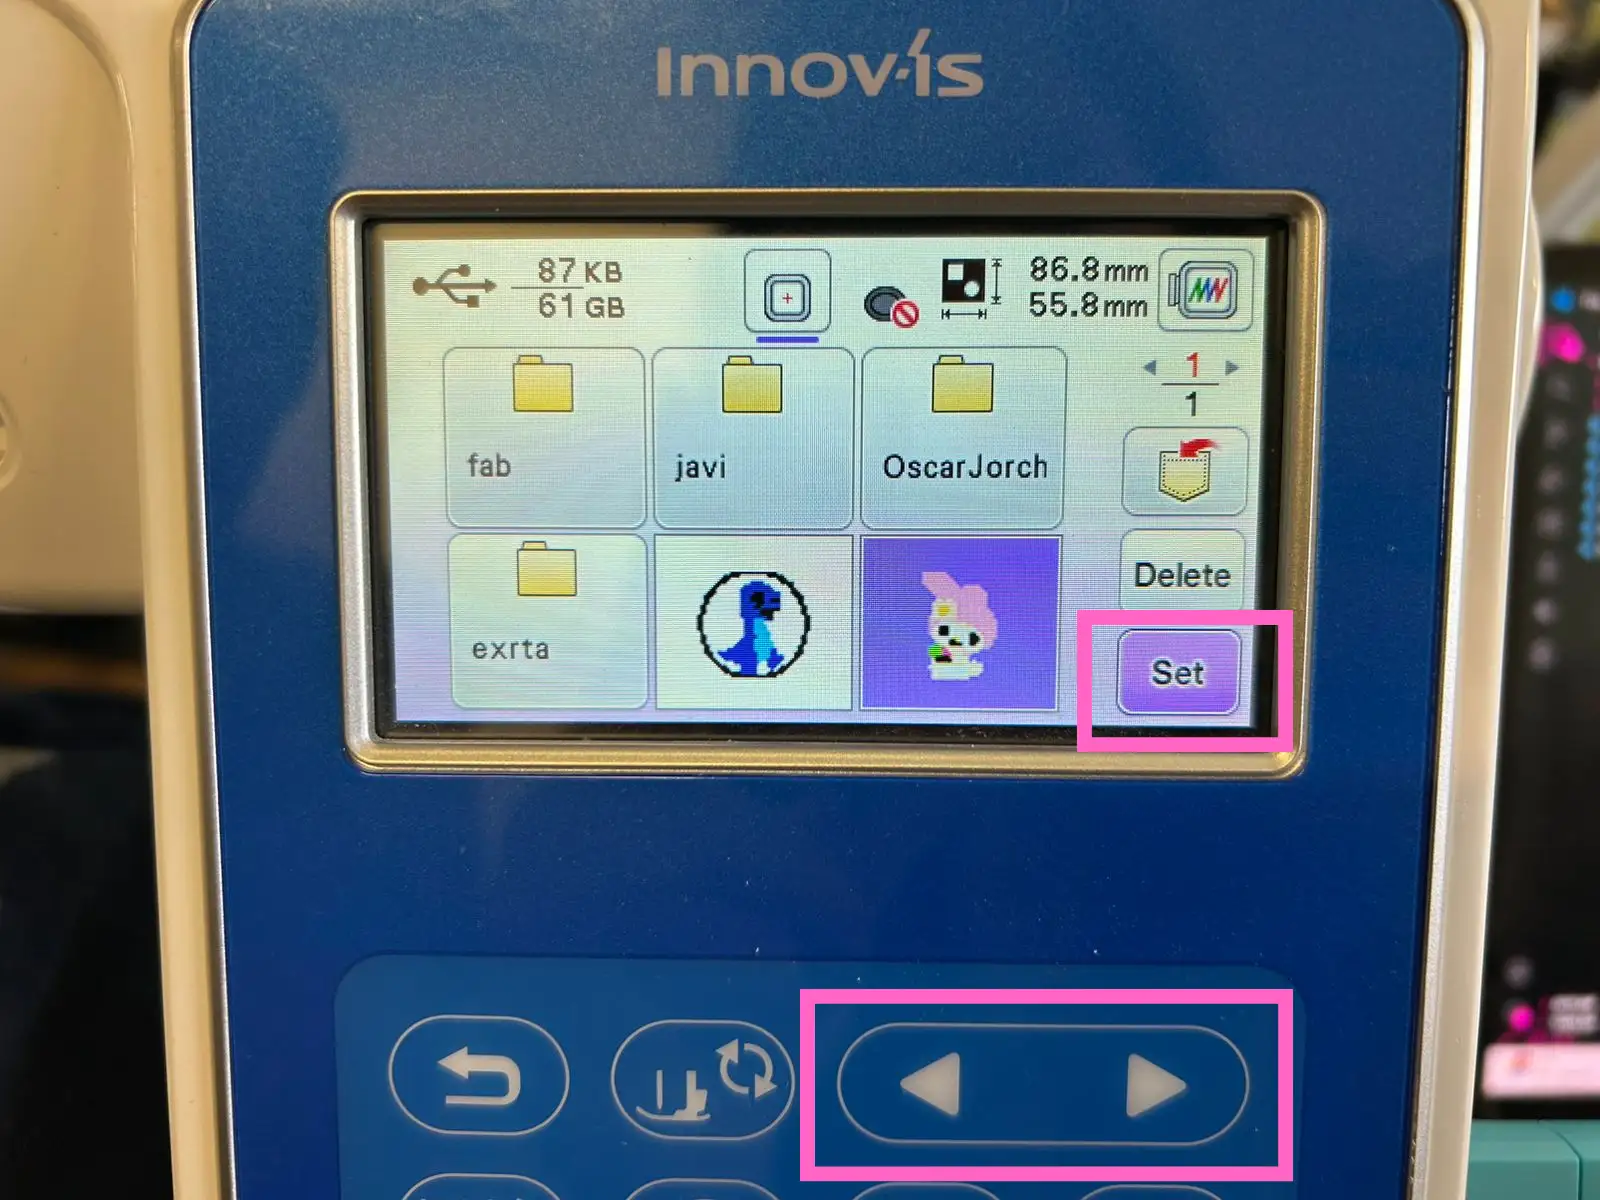
To prepare your file on the embroidery machine, follow these steps:
Turn on the machine and insert the USB drive. Then, select this option.
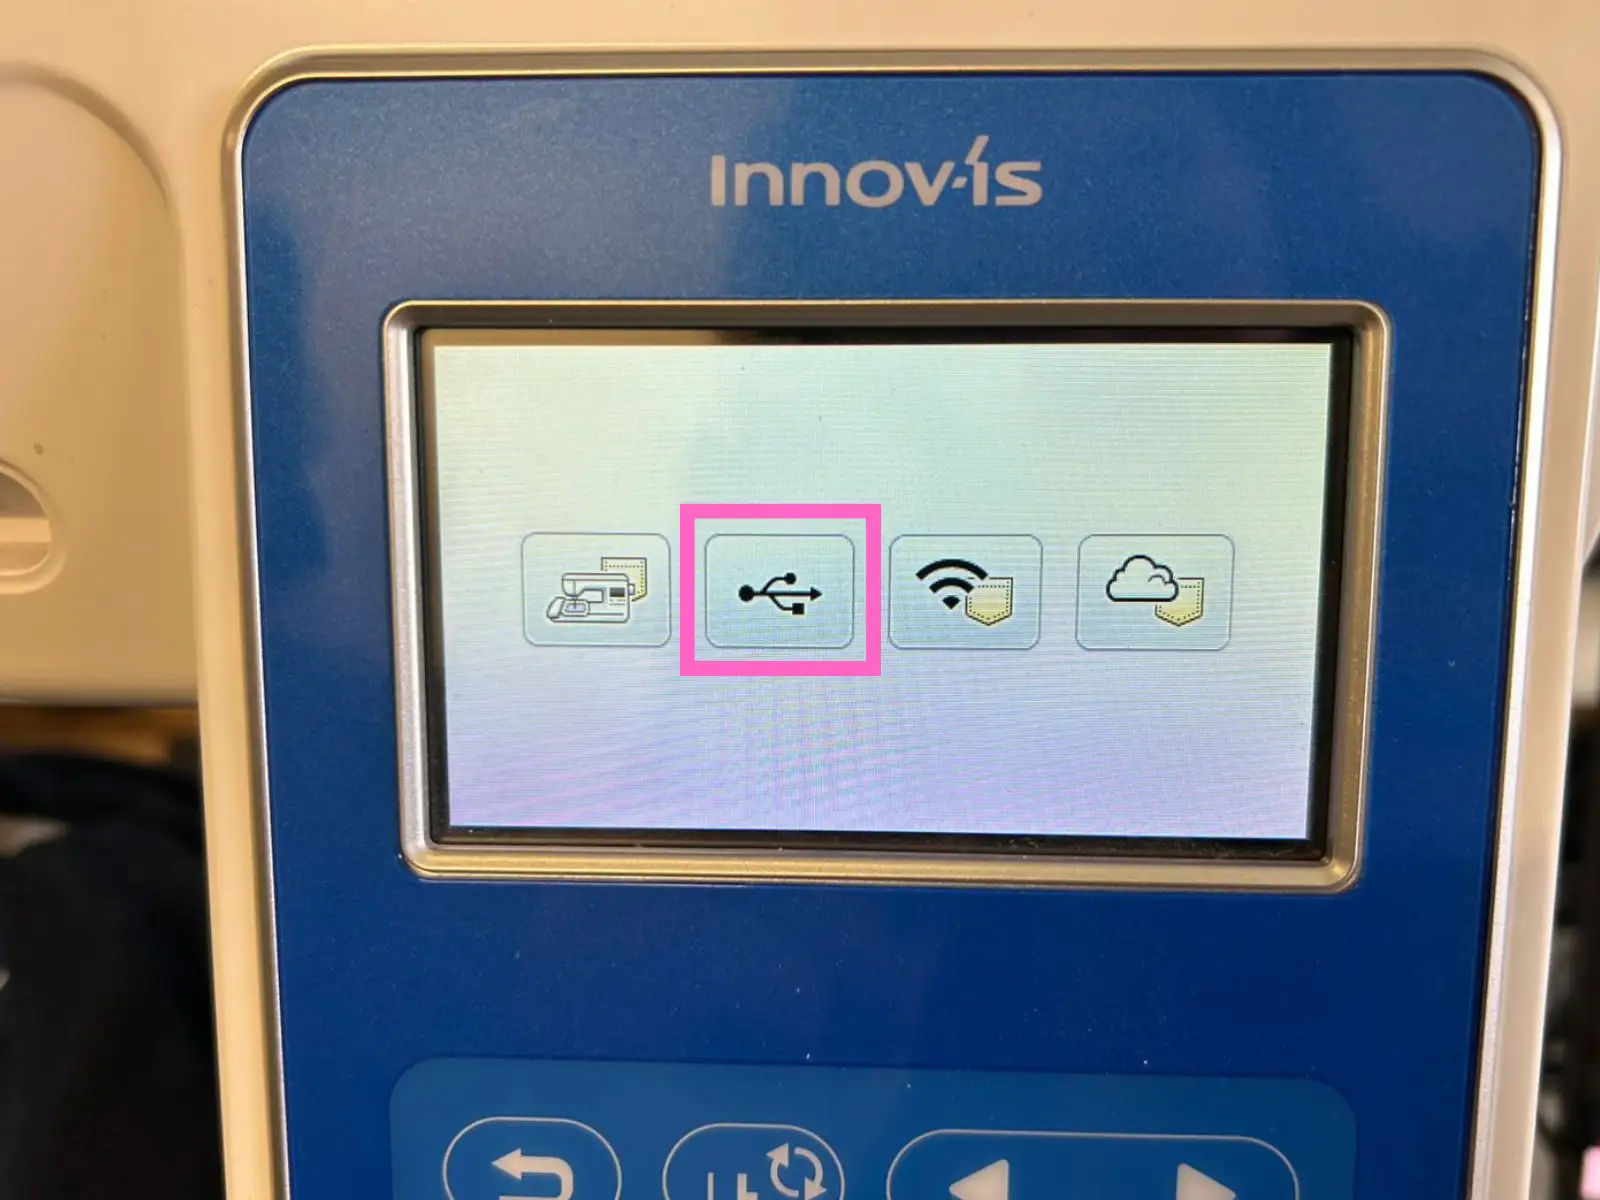
Select the second button.
Select your file. You can use the machine’s arrow buttons to move around and view all the files in the USB drive. Press the Set button.
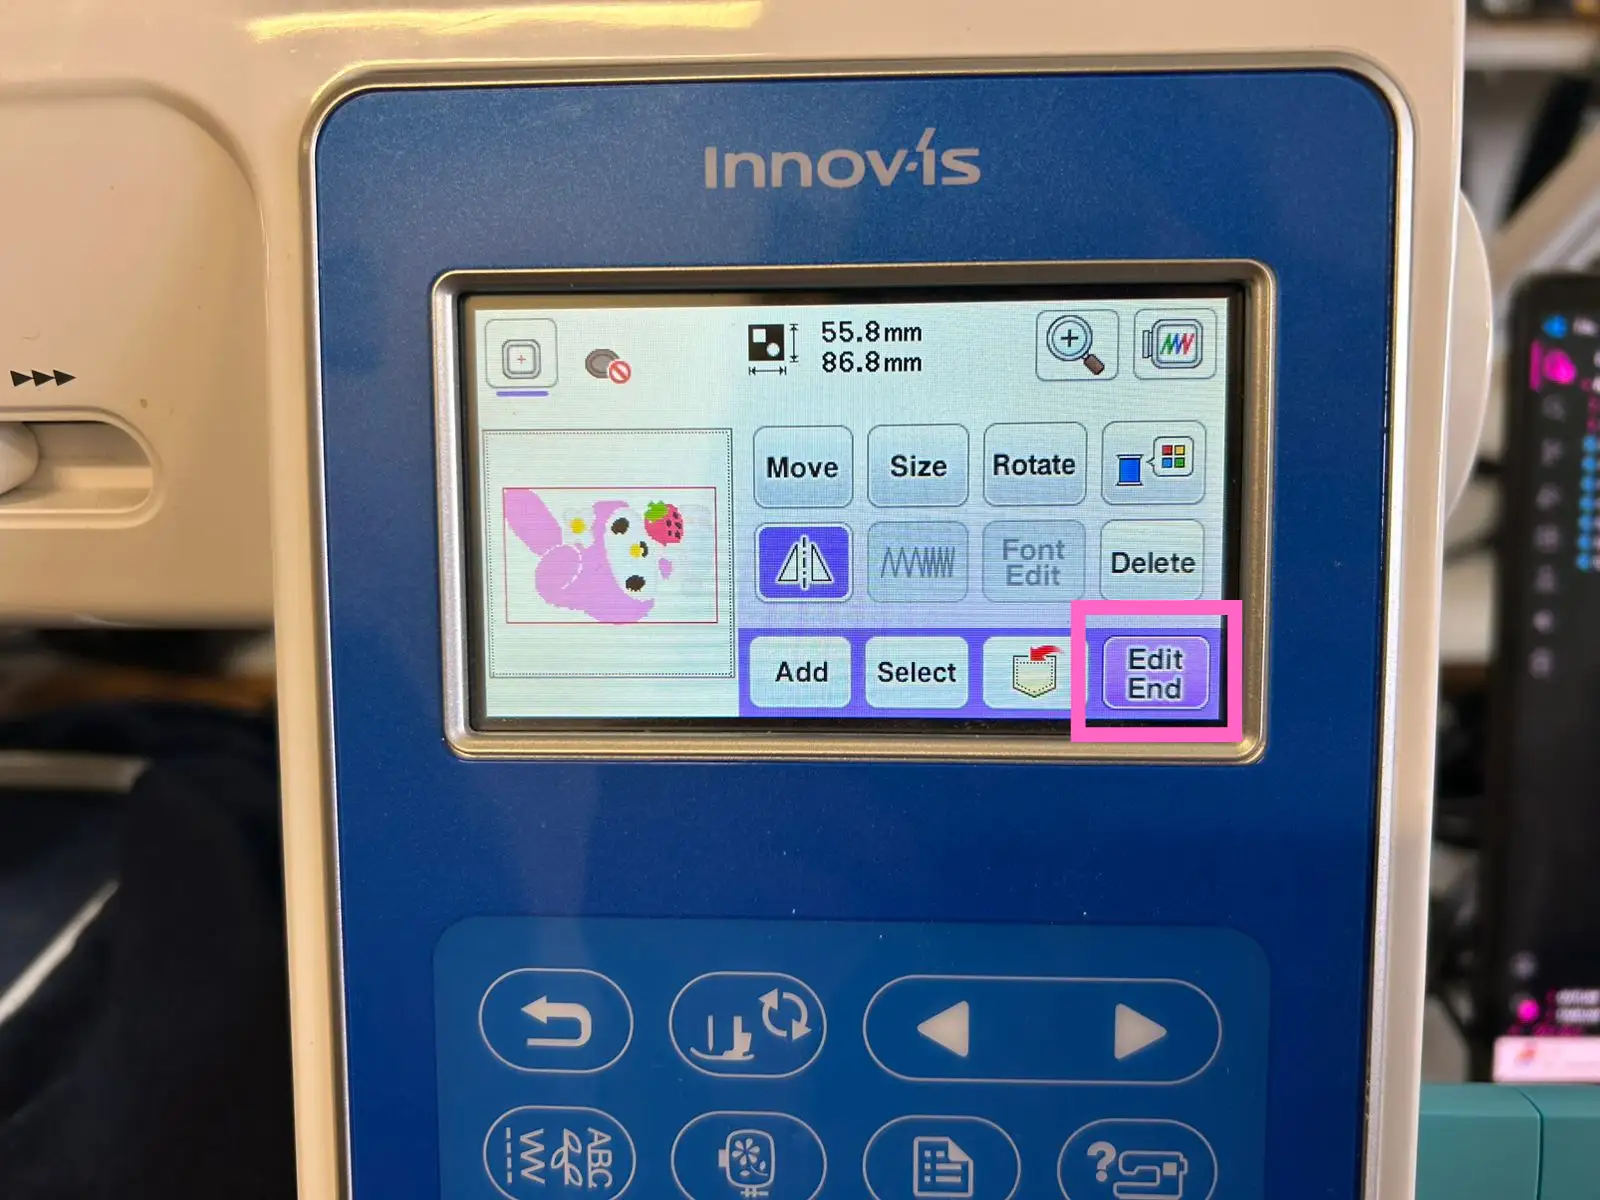
In this section, you can rotate the image, mirror it, resize it, etc. In my case, I had to rotate it and apply the mirror option so it would be correctly oriented on my lab coat. Once you finish editing the design, press the Edit End button.
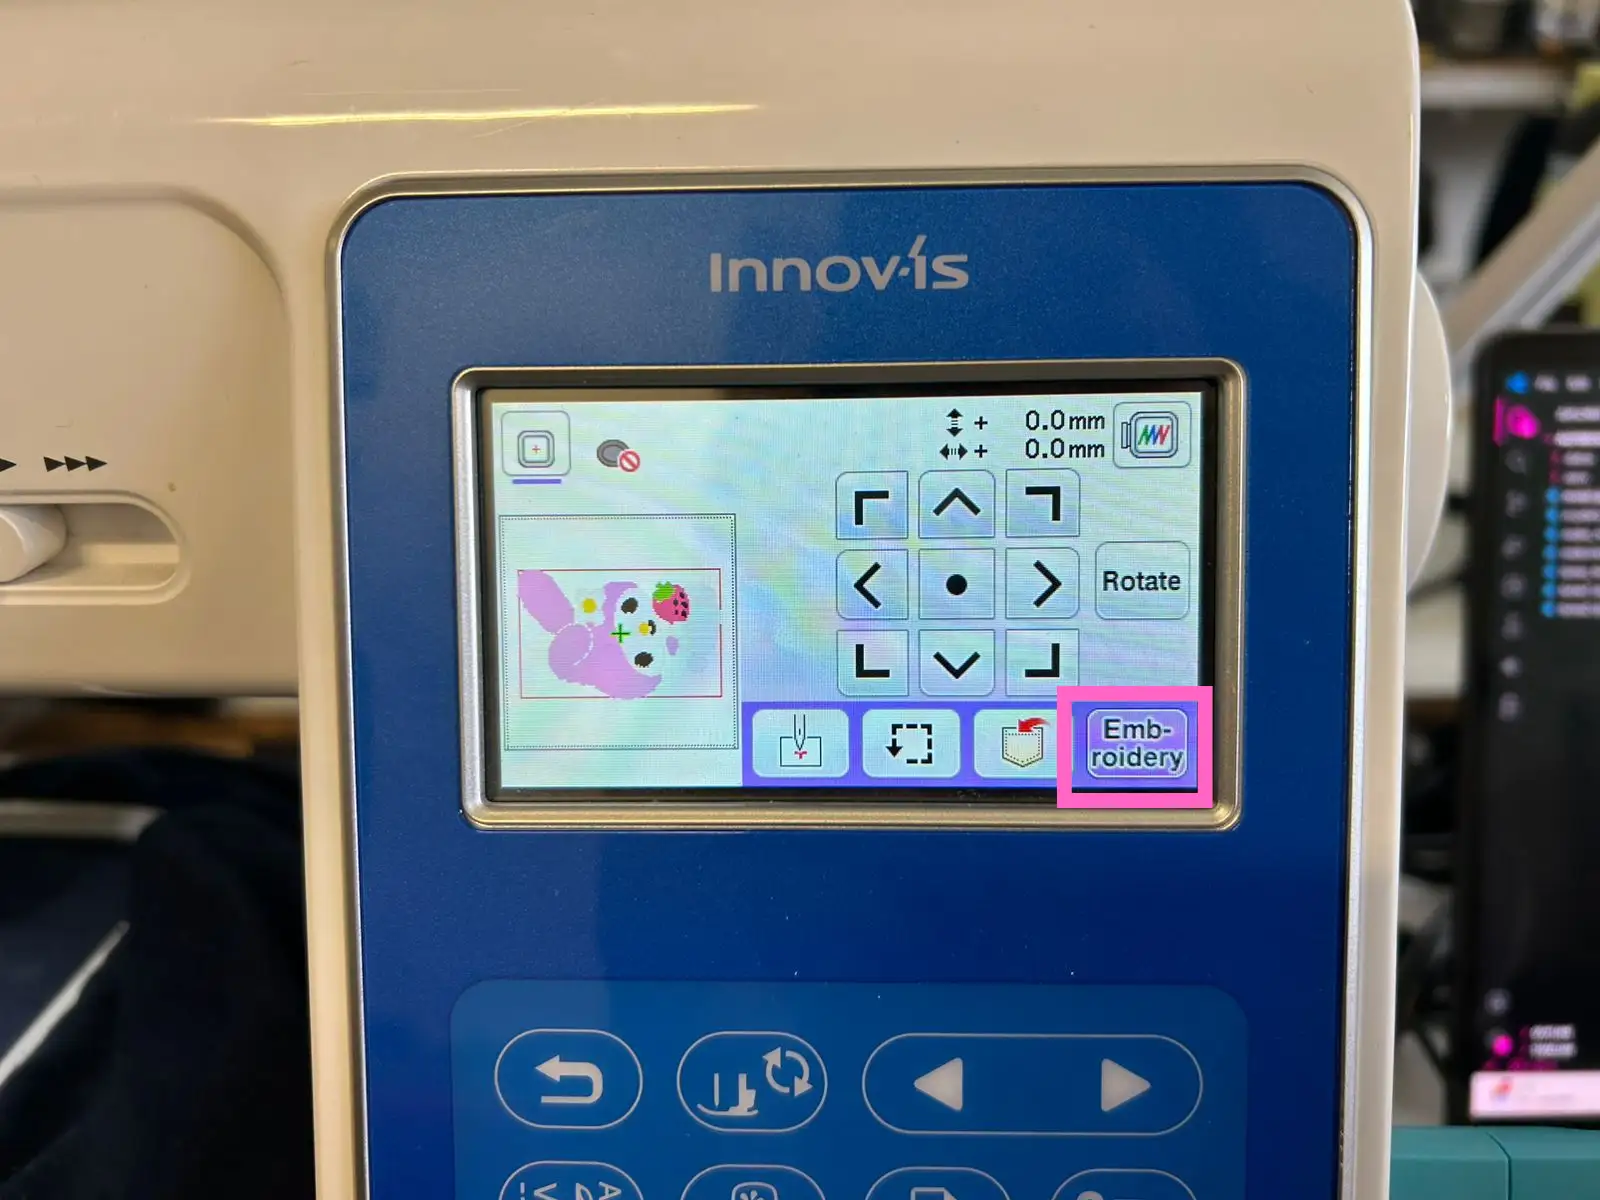
Push the Embroidery button.
Now, here you can see all the color changes the design will have. You can also check how long each section will take and the number of stitches used. With the button in the corner, you can move backward or forward through the stitches in case something goes wrong with the thread, allowing you to repeat that specific part of the design.
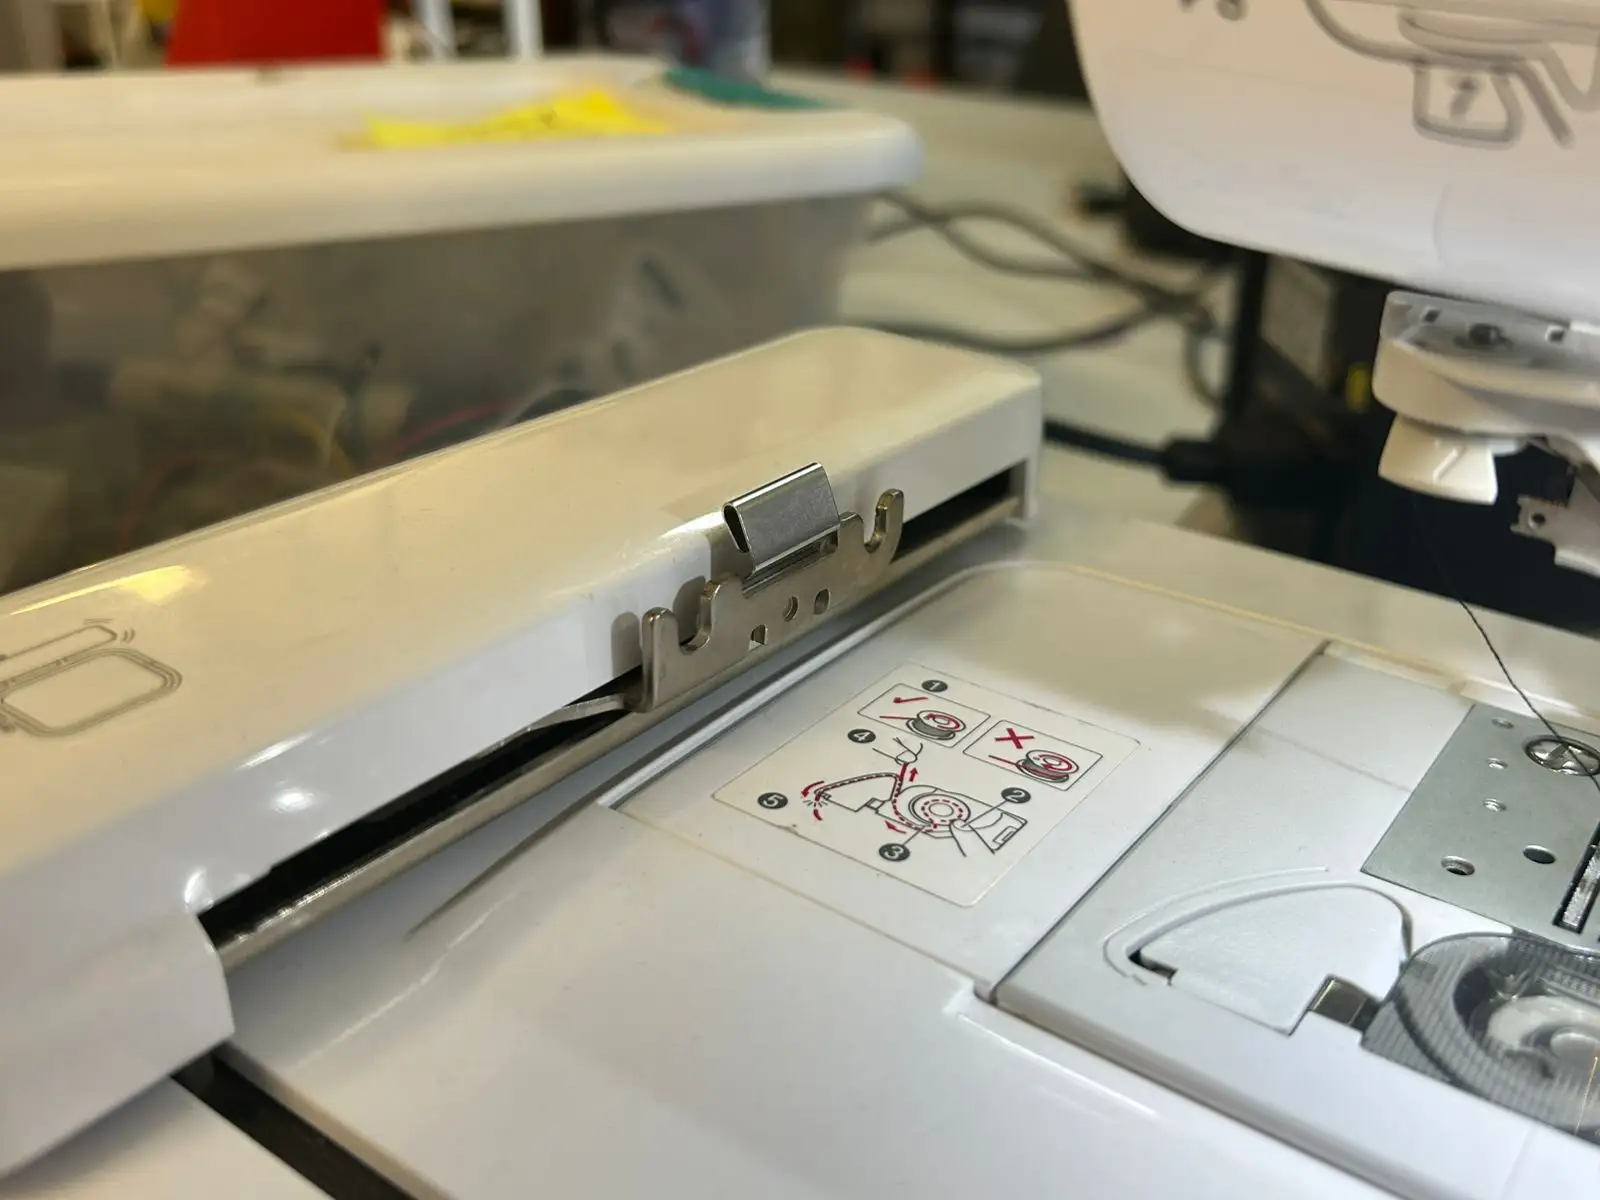
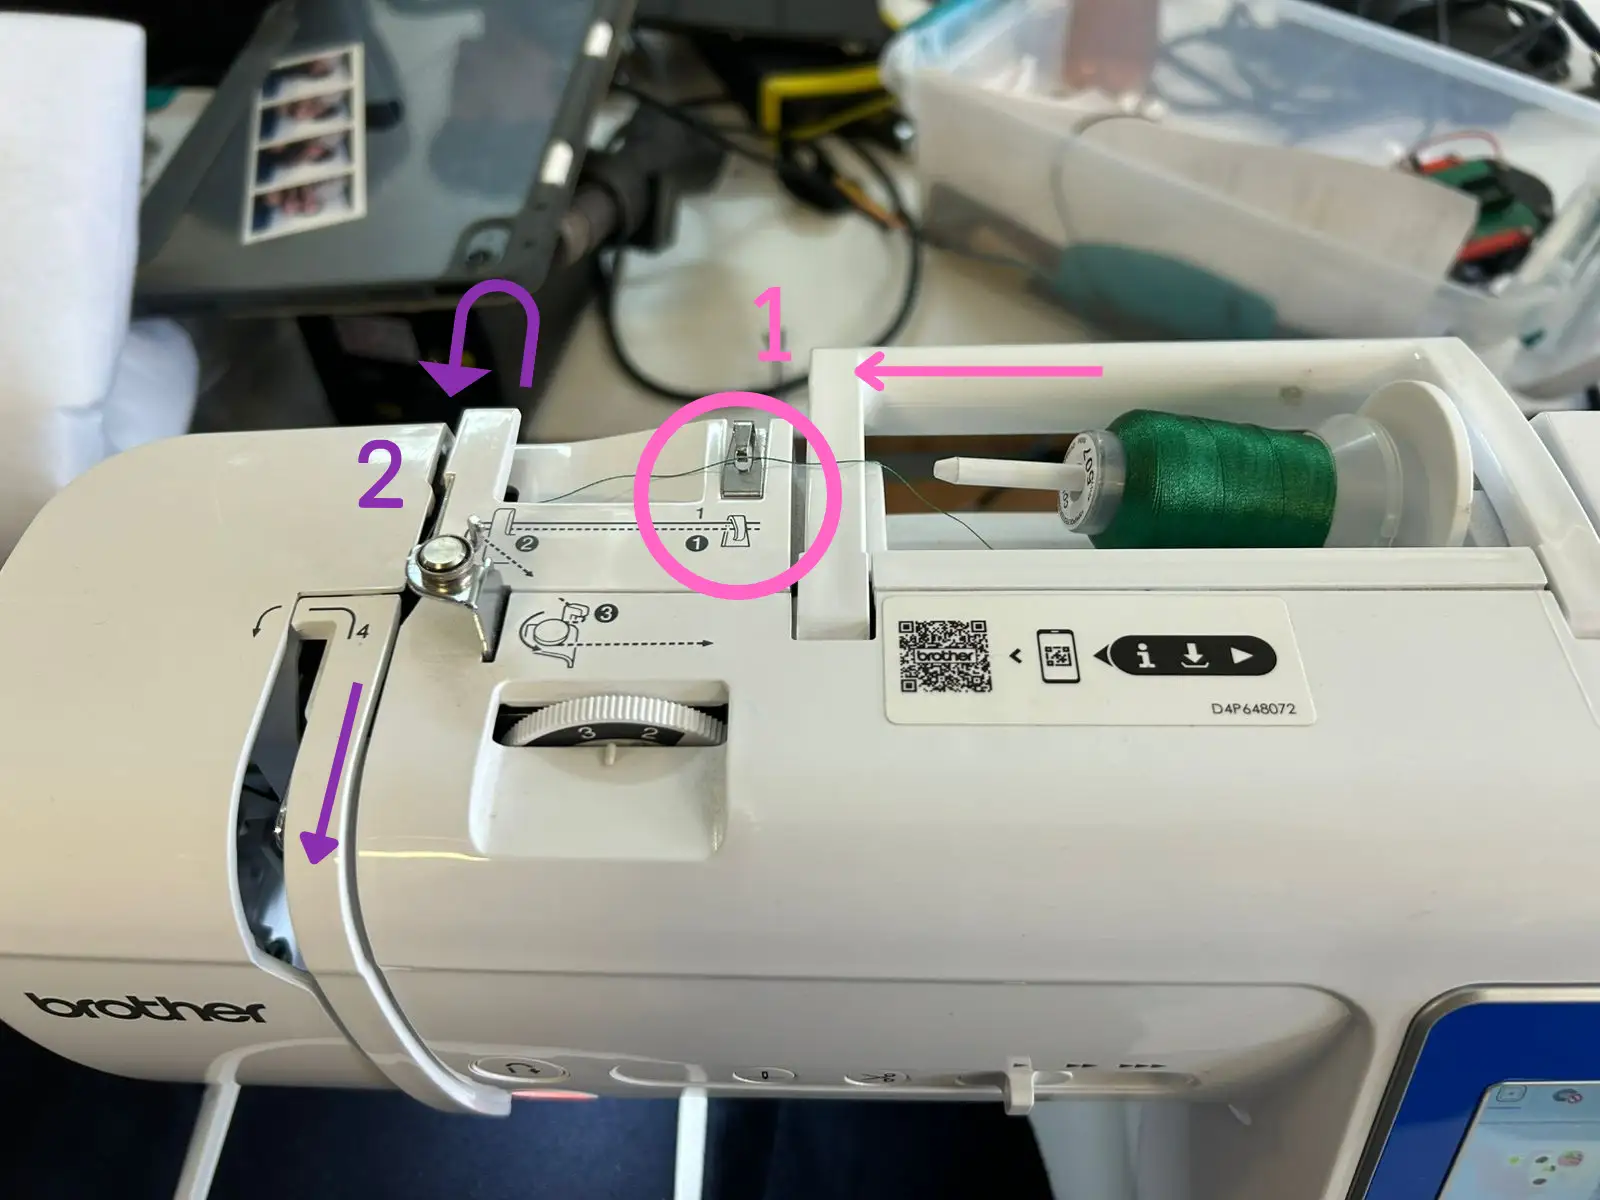
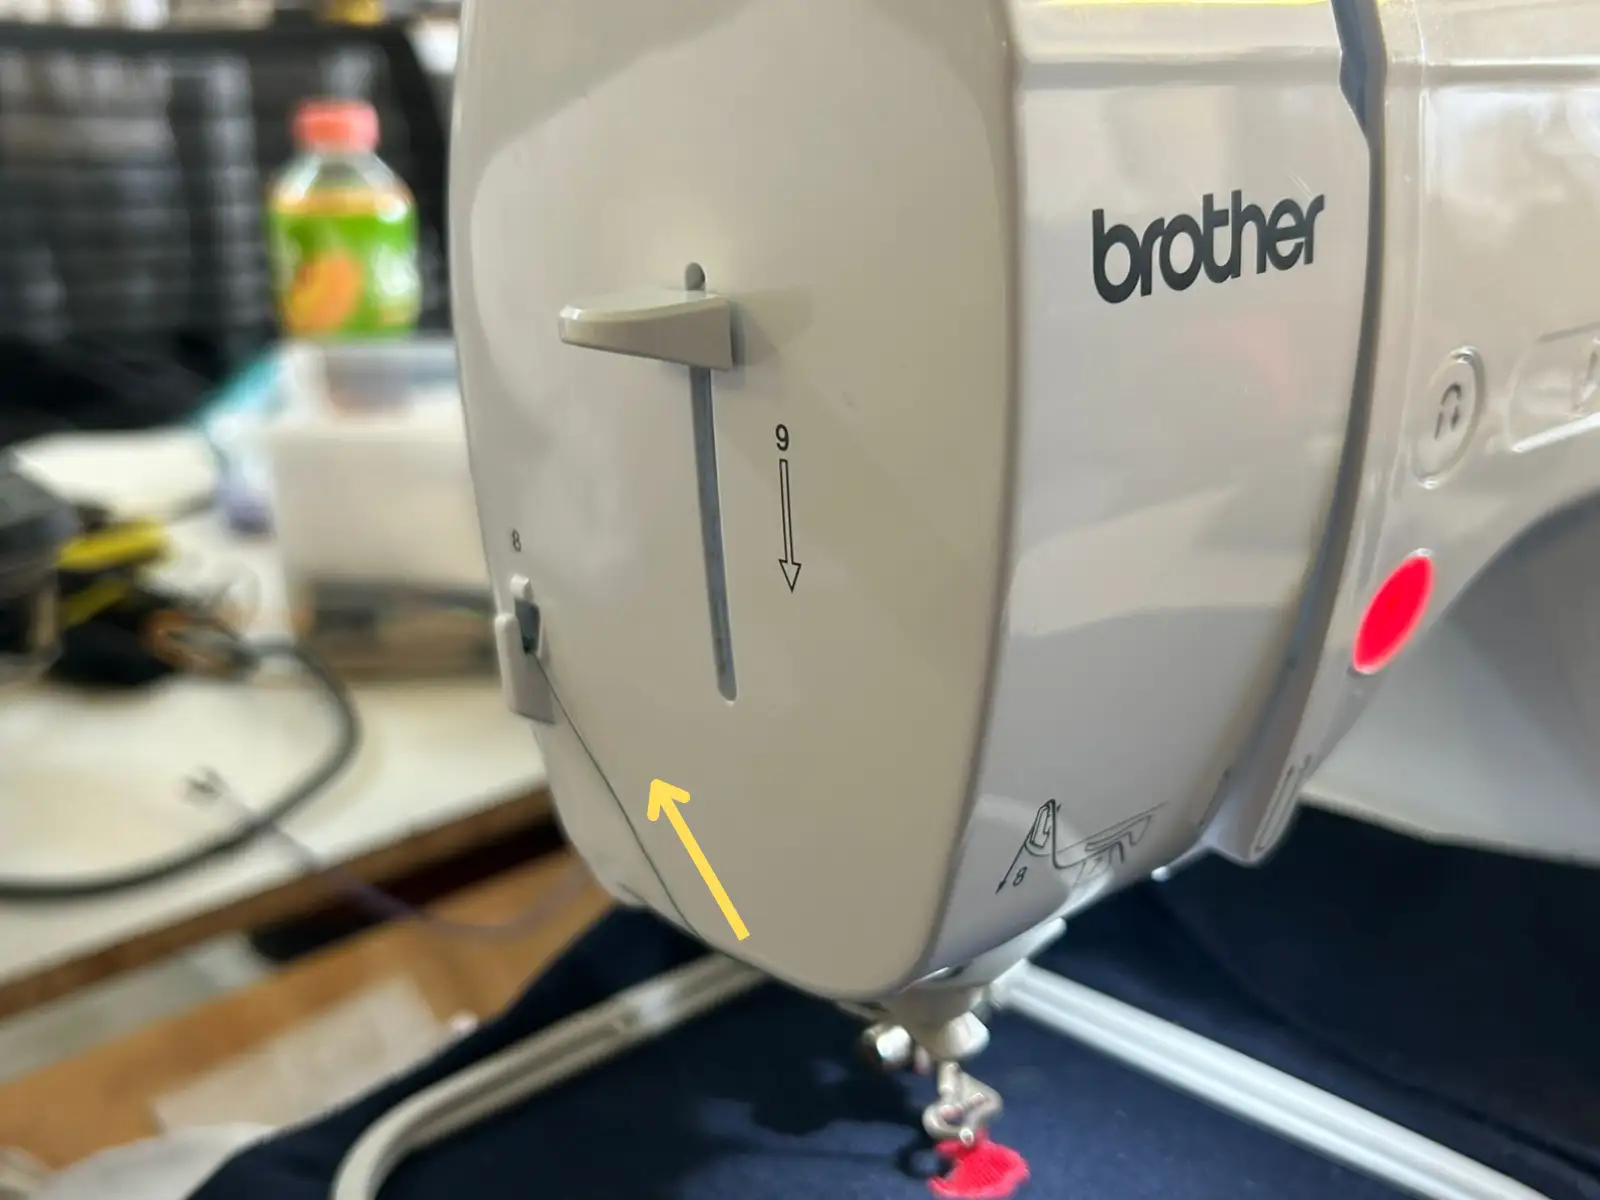
Once you know which color the machine will start with, place the thread spool on the top holder and follow these steps to correctly thread the needle.
First, pass the thread through the small hook from step 1 and then pull it behind the tab shown in step 2.
Pull the thread downward, wrap it around the tab shown in step 3, and then bring it back up.
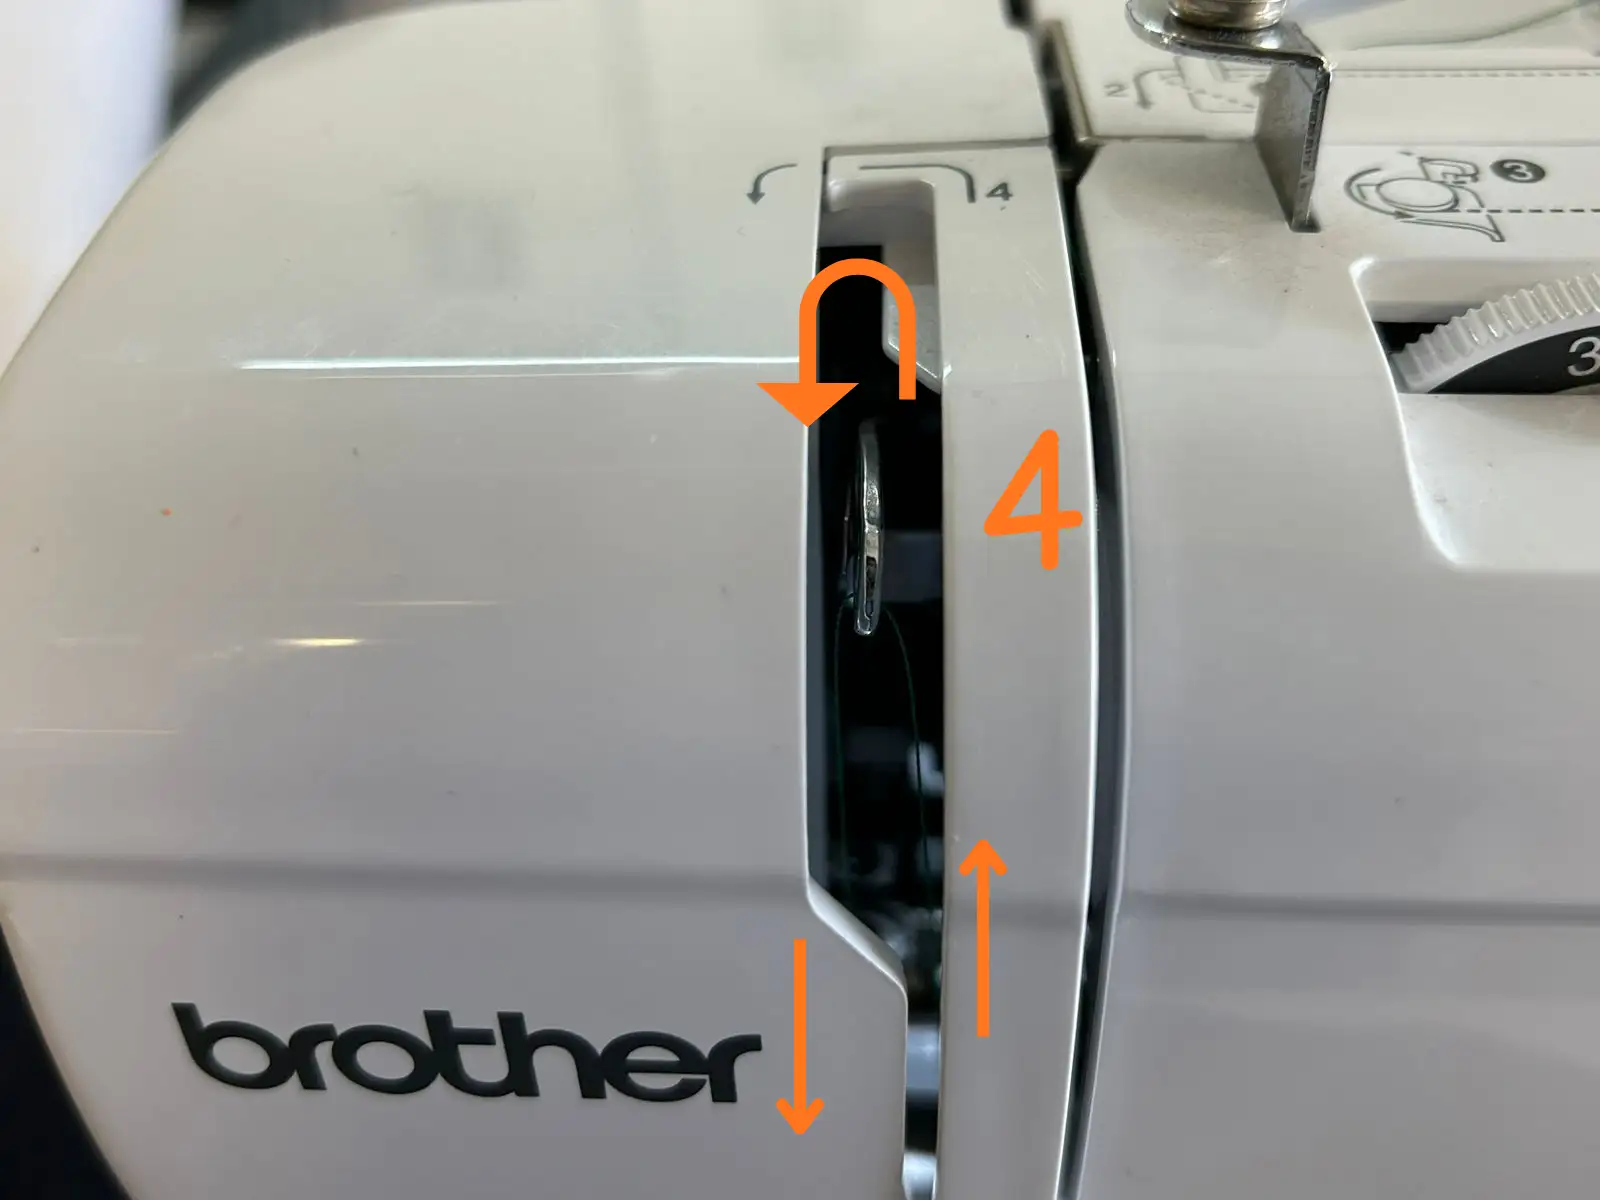
In step 4, make sure the thread is properly inserted into the hook.
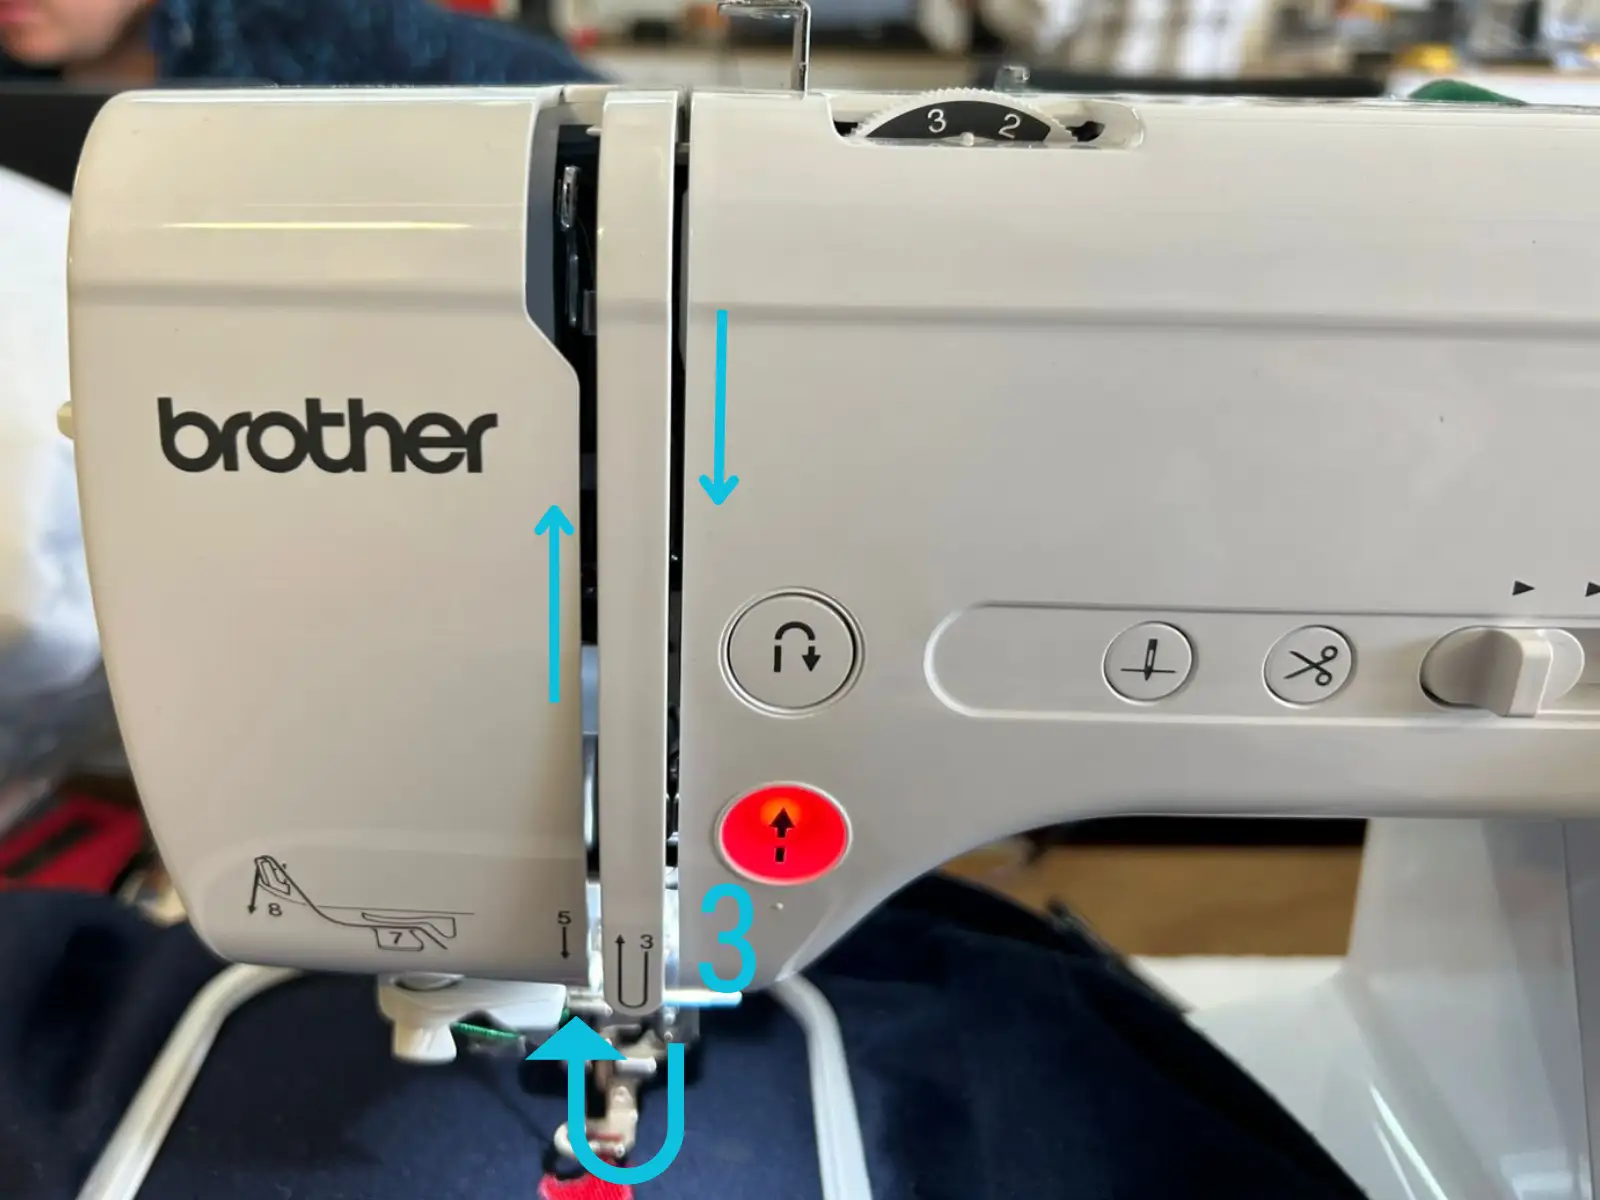
Bring the thread down again and insert it into the small hook above the needle. It is easier to use both hands for this step, since it requires a little pressure for the thread to hook properly. Then, pass it through the opening and make sure it goes into the guide shown in step 7.
Then, pull the thread upward and pass it through the cutter blade shown in step 8 to trim the excess thread. Lower the lever shown in step 9, and the machine will automatically insert the thread into the needle. Finally, pass the remaining thread underneath the presser foot.
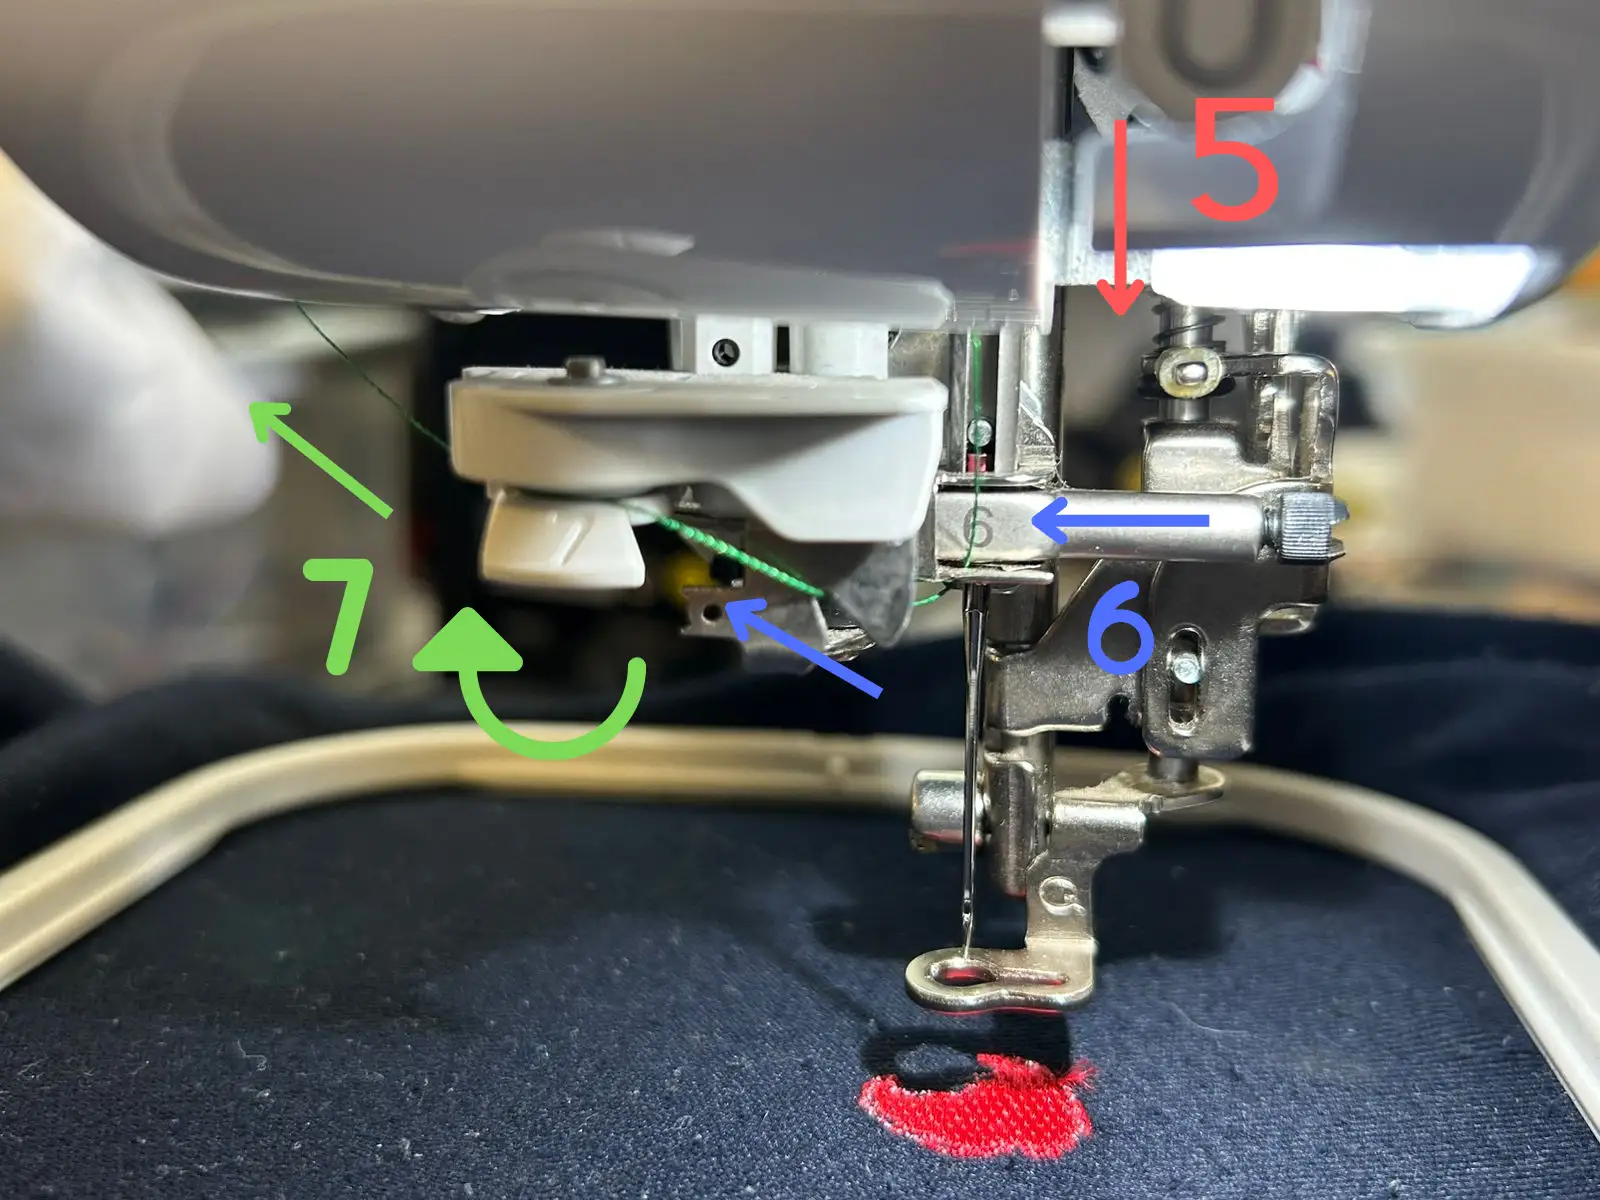
Also, make sure the bobbin thread spool at the bottom is properly filled before starting the embroidery process.
The machine will automatically stop and cut the thread at each color change so you can remove the current thread and place the new one.
Tip 1: If the bobbin thread from the bottom starts becoming visible on the top side of the fabric, it means the tension is incorrect and the machine is pulling the thread too tightly. To fix this, you can reduce the embroidery speed using the slider next to the control panel. It is recommended to keep the machine at the slowest speed. You can also adjust the thread tension using the knob located on the top part of the machine.
Tip 2: Make sure the presser foot is tightly secured to prevent it from moving too much during the embroidery process, since this could ruin the design.
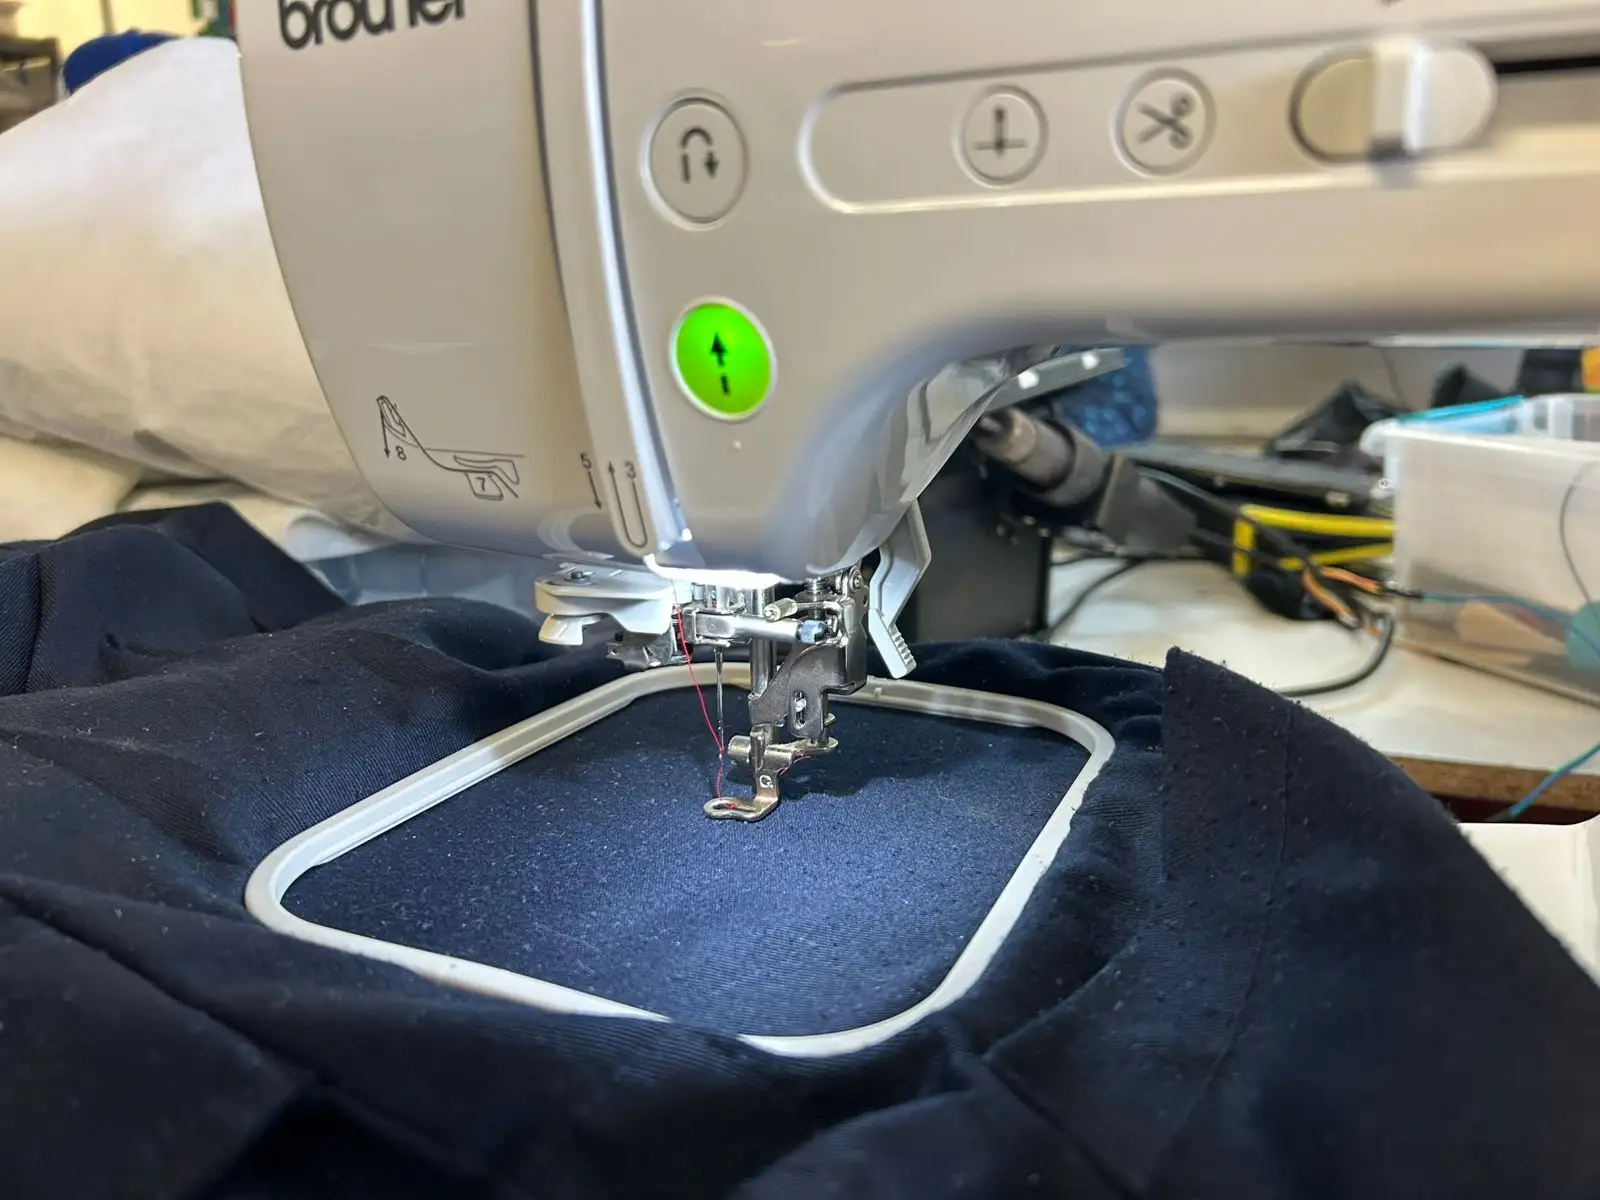
Once everything is ready, lower the gray lever above the needle to bring the presser foot down.
Once the button changes from red to green, press it to start the embroidery process.
Final Result
Files
You can download the files created and used during this week here: