Week 13: Moulding and Casting
Group assignment
Week 13Introduction
This week I’m going to design an MF DOOM mask, just like I did in my second week, since I’m a huge fan of his. I’m going to create a positive mold and then print it using a resin 3D printer. Next, I’ll use 3030 silicone to make the mold, and finally, I’ll use wax for my pieces.
Molding and casting
Is a two-part, formative manufacturing processes used to create exact replicas of an object. Molding creates a negative, hollow cavity (the mold) from a master object, while casting involves filling that cavity with liquid material, that solidifies into the final positive part.
Positive Mold: Is a convex tool that represents an exact, raised replica of the desired final product's internal shape.
Negative Mold: Is a concave tool that holds the inverse, or reverse, image of a final product
Design & Printing
MF DOOM MASK
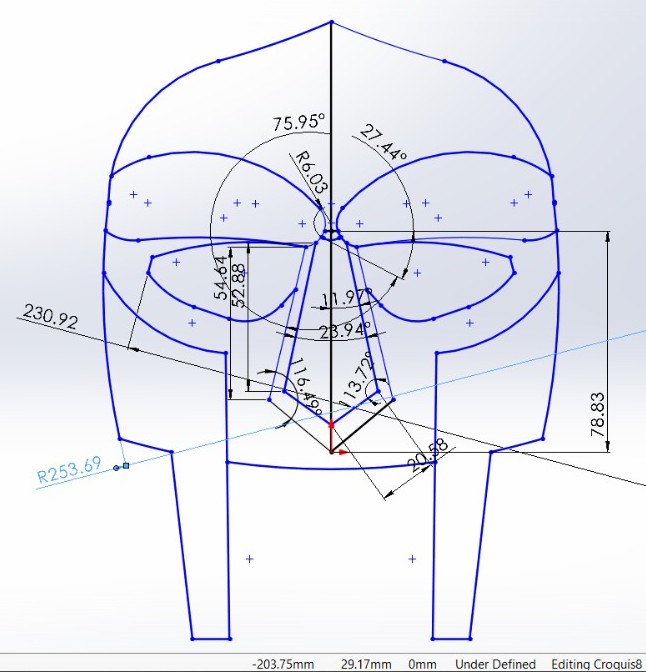
1. In solidworks, on the front plane, I sketched the MF DOOM's mask. I didn't follow any specific steps; I just tried to make it resemble his mask but with a simpler design. The measurements were only guidelines, so they aren't very precise.
After finishing the design I noticed that I was doing it in CSG unit system, so I resigned to change the dimentions in the Resin 3D printer slicer.
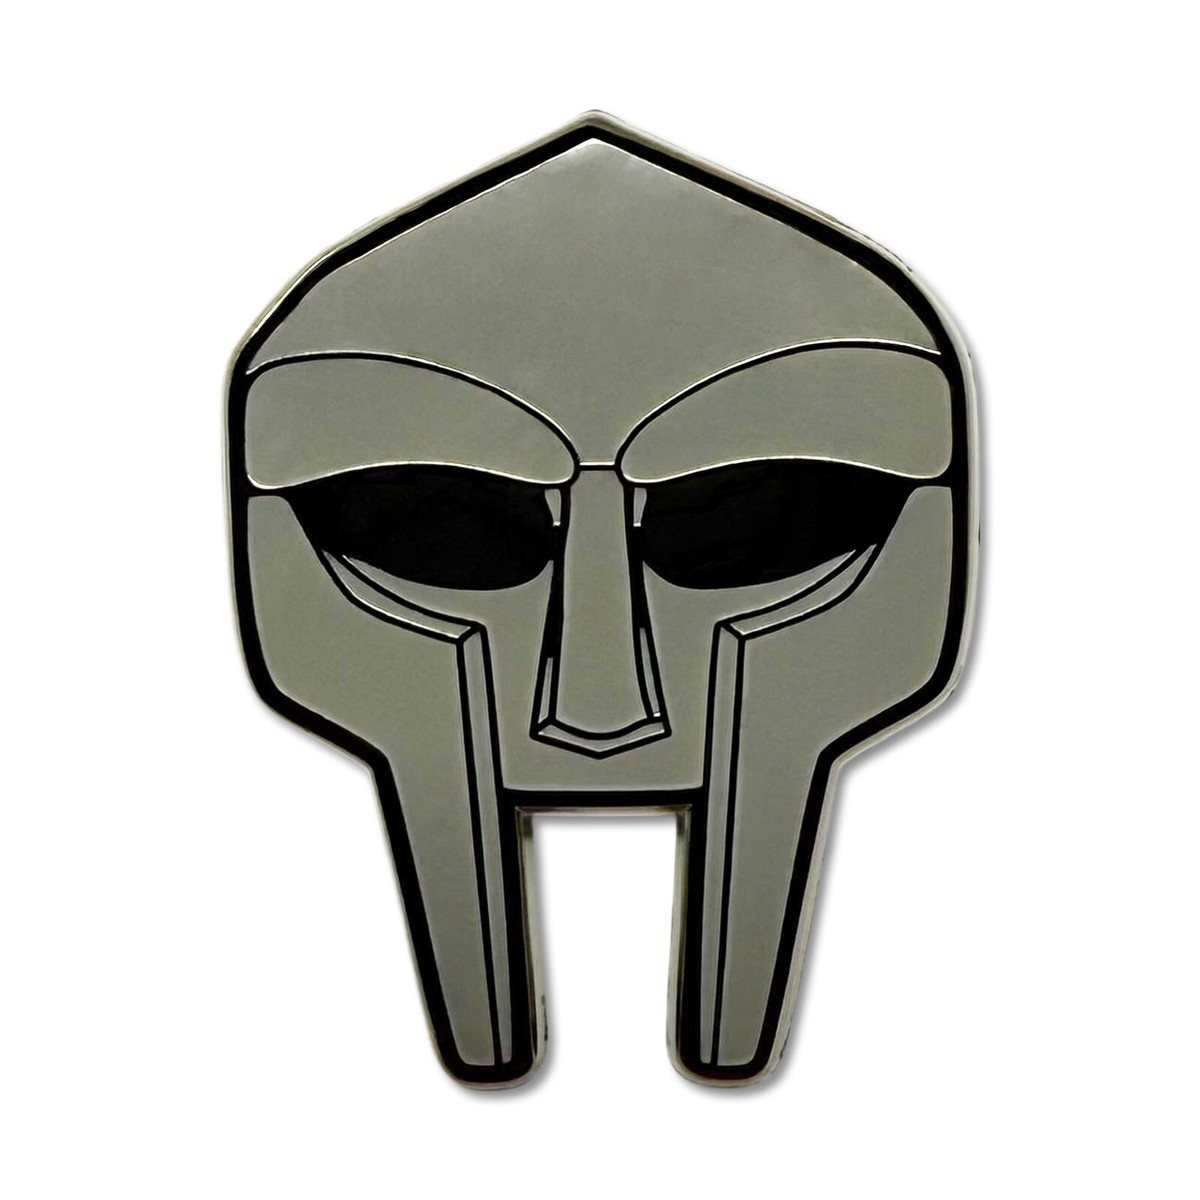
I used the second image as a reference, but I added my own touch.
MF DOOM MASK
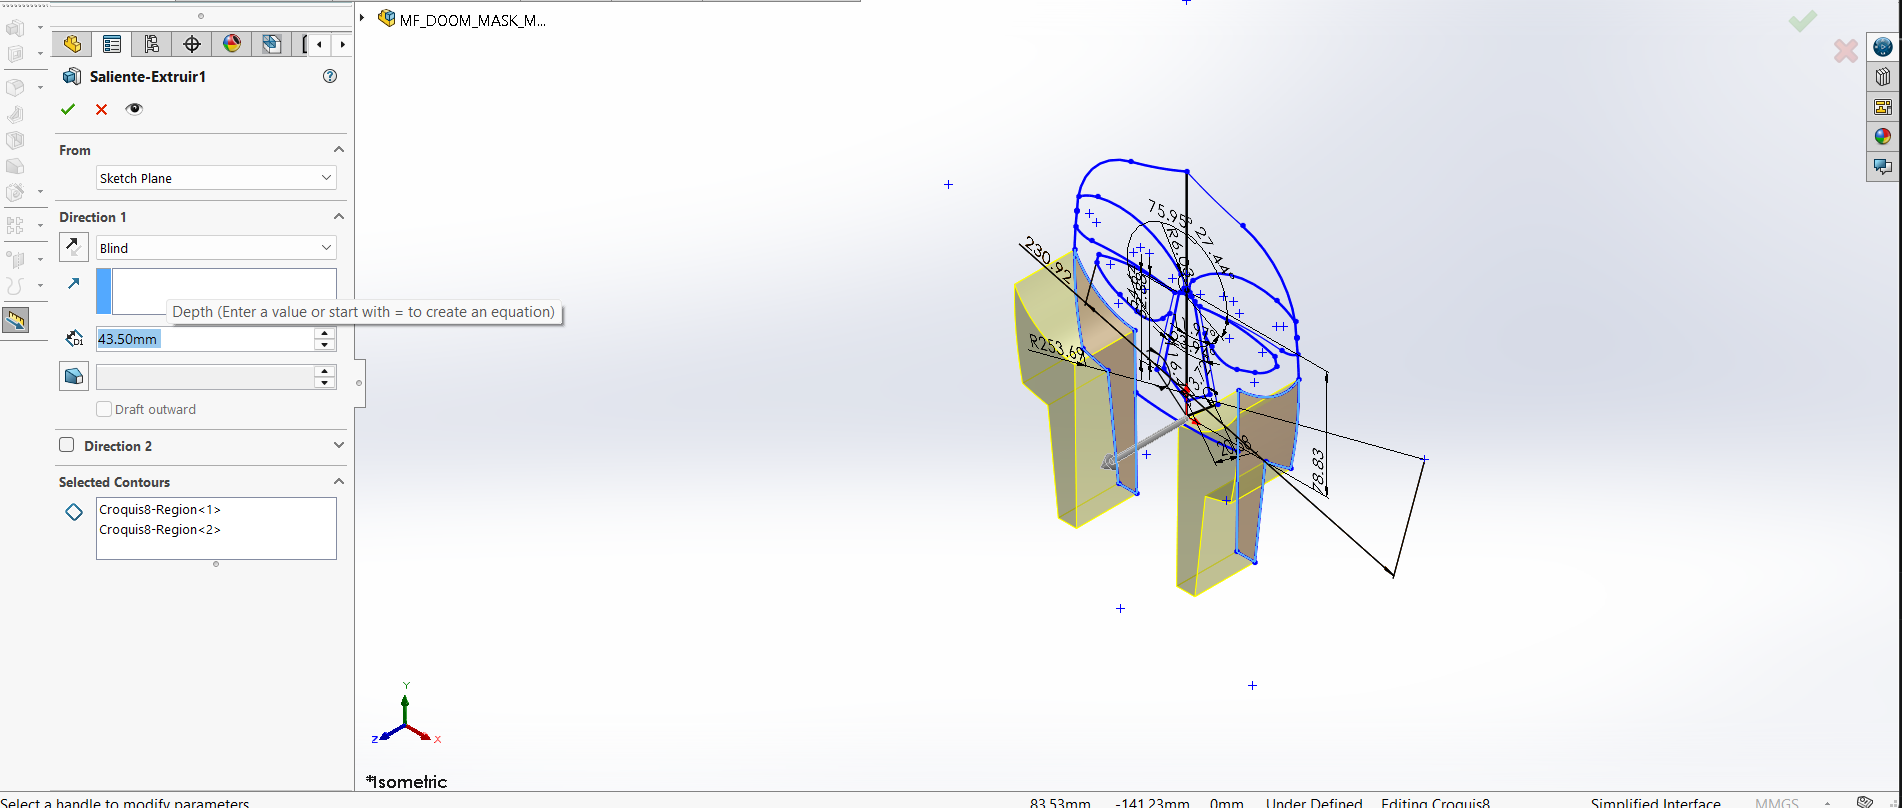
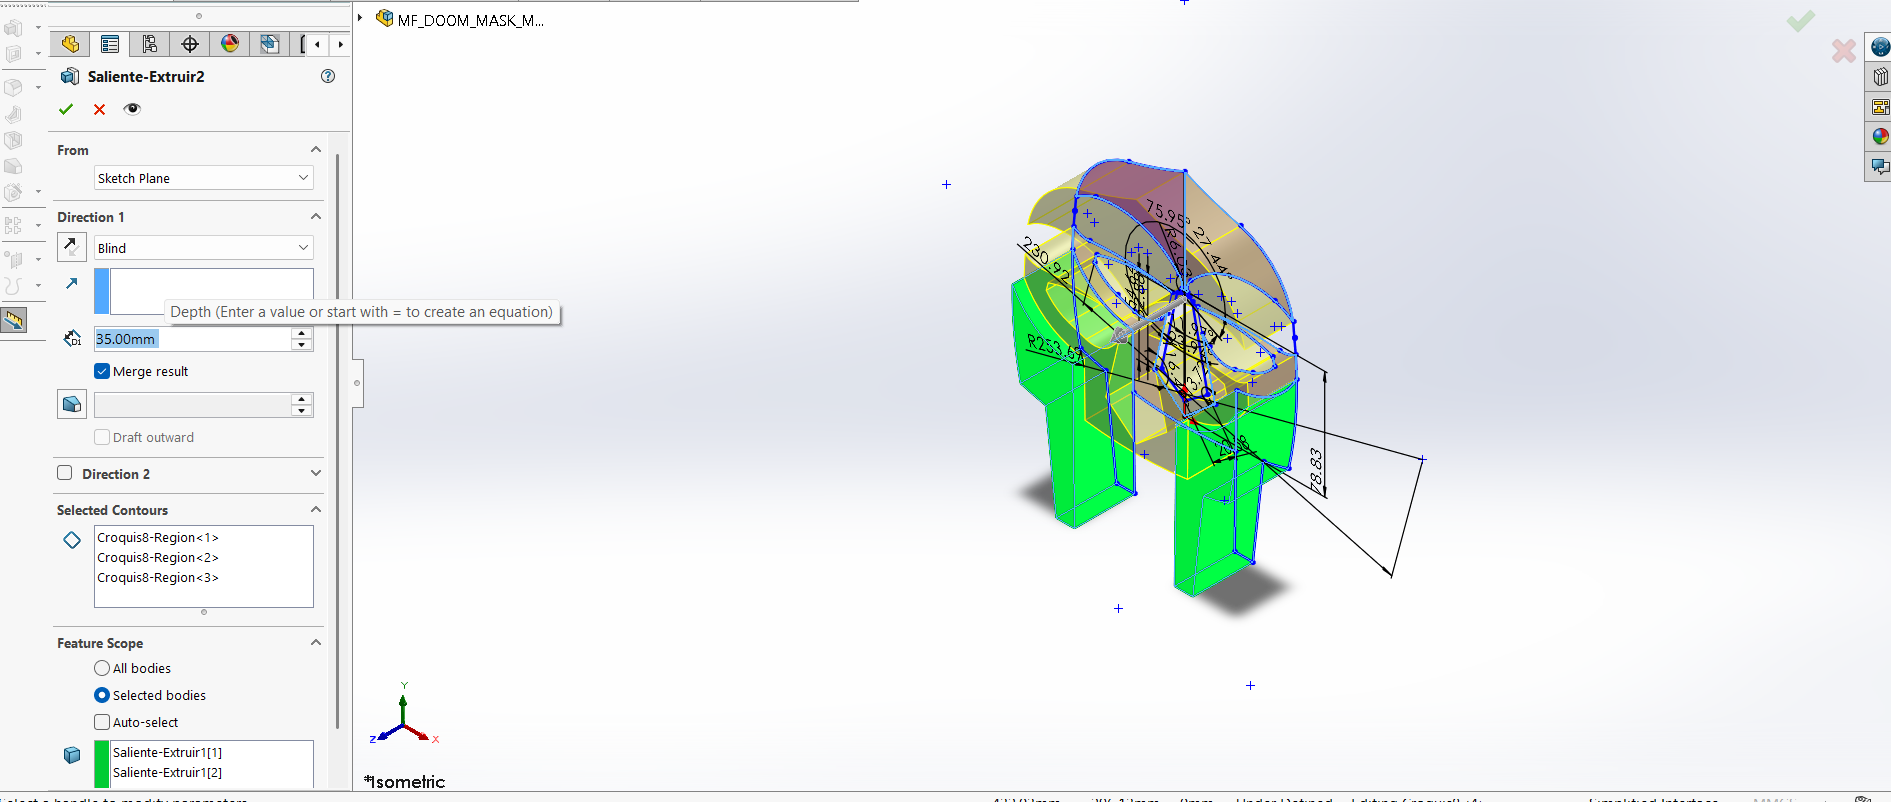
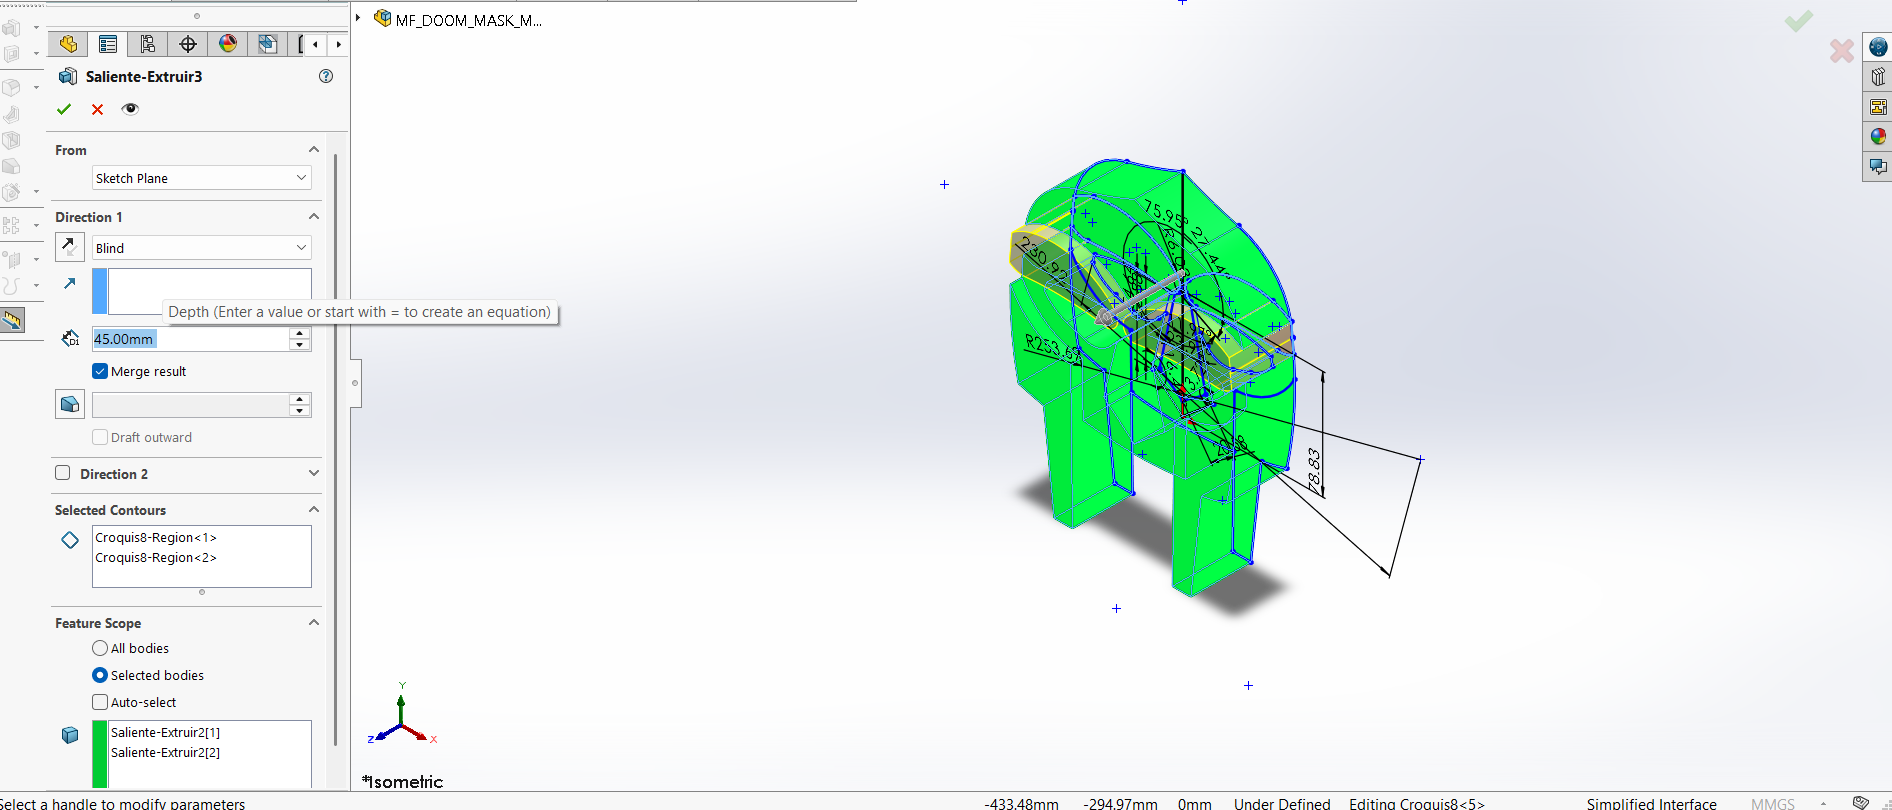

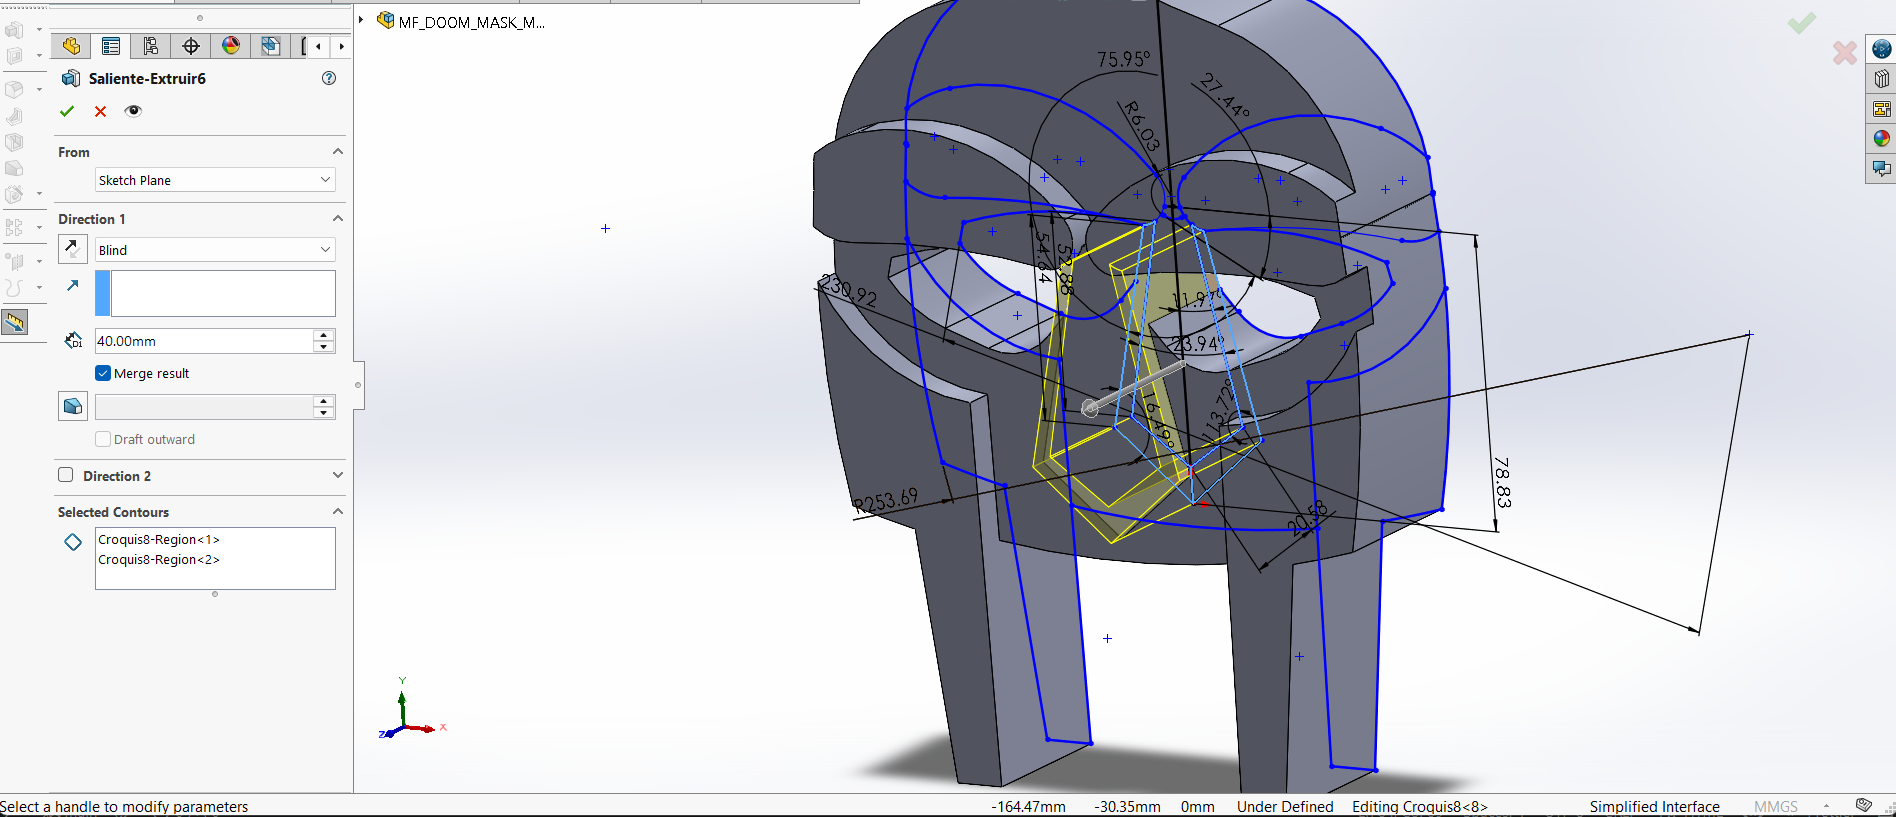
2. Next, I created extrusions for each part I wanted to highlight, with a range of 35 to 45 mm, keeping in mind that I would scale them in the slicer. While doing this, I realized how important it is to create designs with clearly defined dimensions and to keep extrusion in mind, since I had to make multiple copies because I hadn't thought about it beforehand.
Extrusions.
First image.43.50 mm
Second image.35 mm
Third image.45 mm
Fourth image.40 mm
Fifth image.43.50 mm
MF DOOM MASK
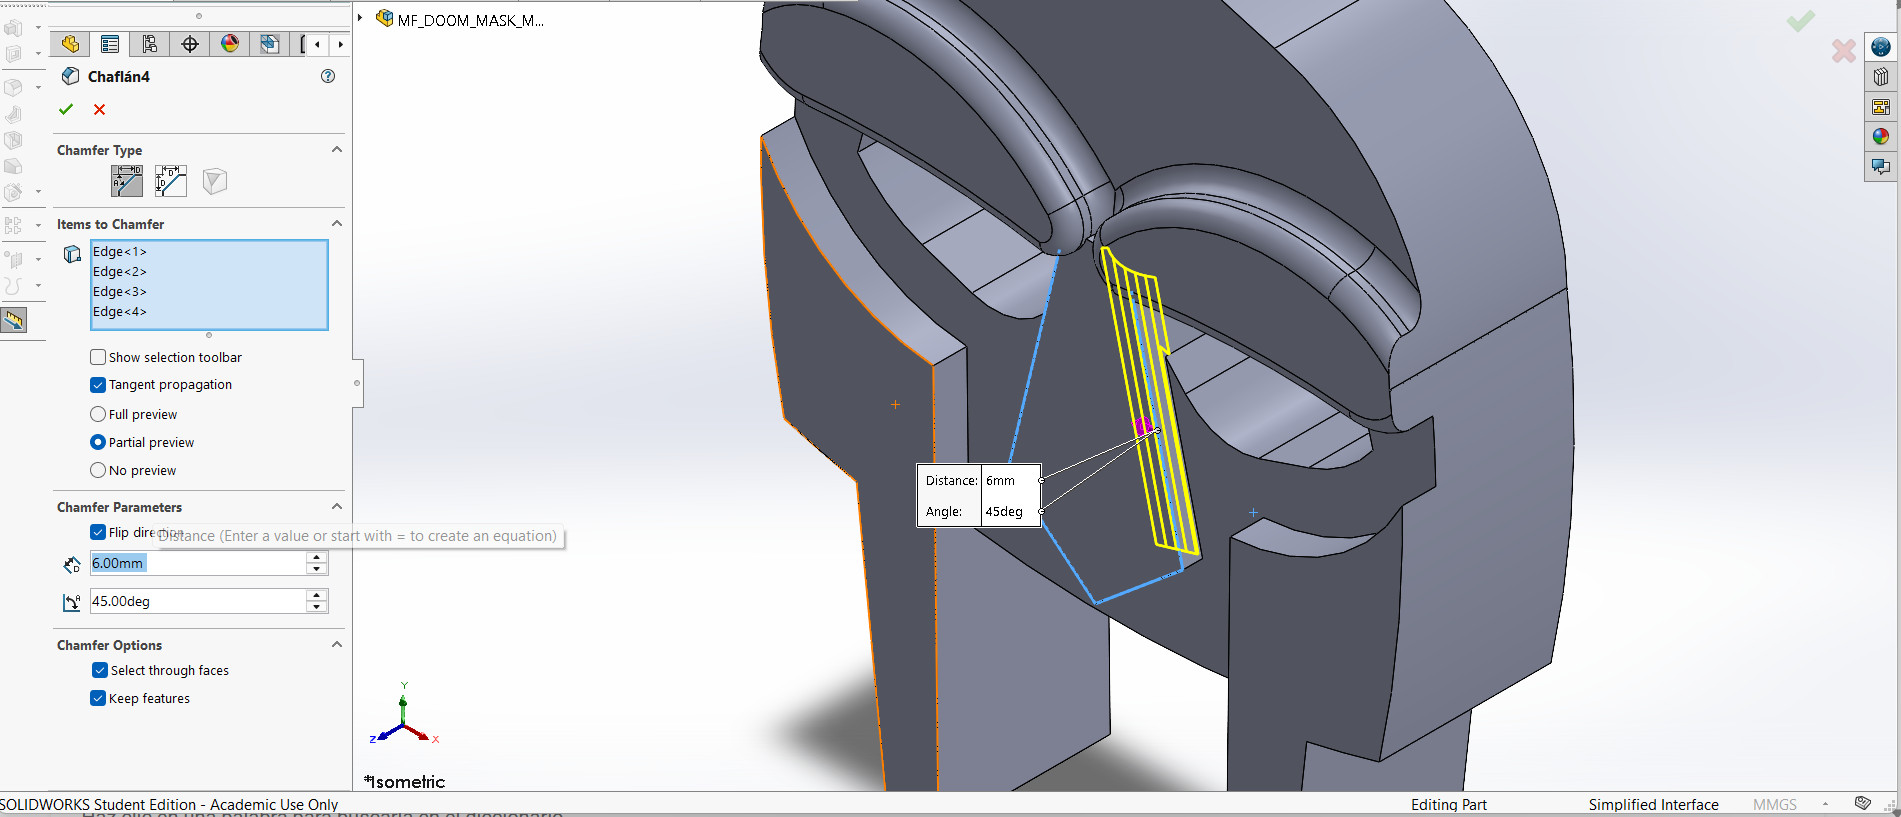
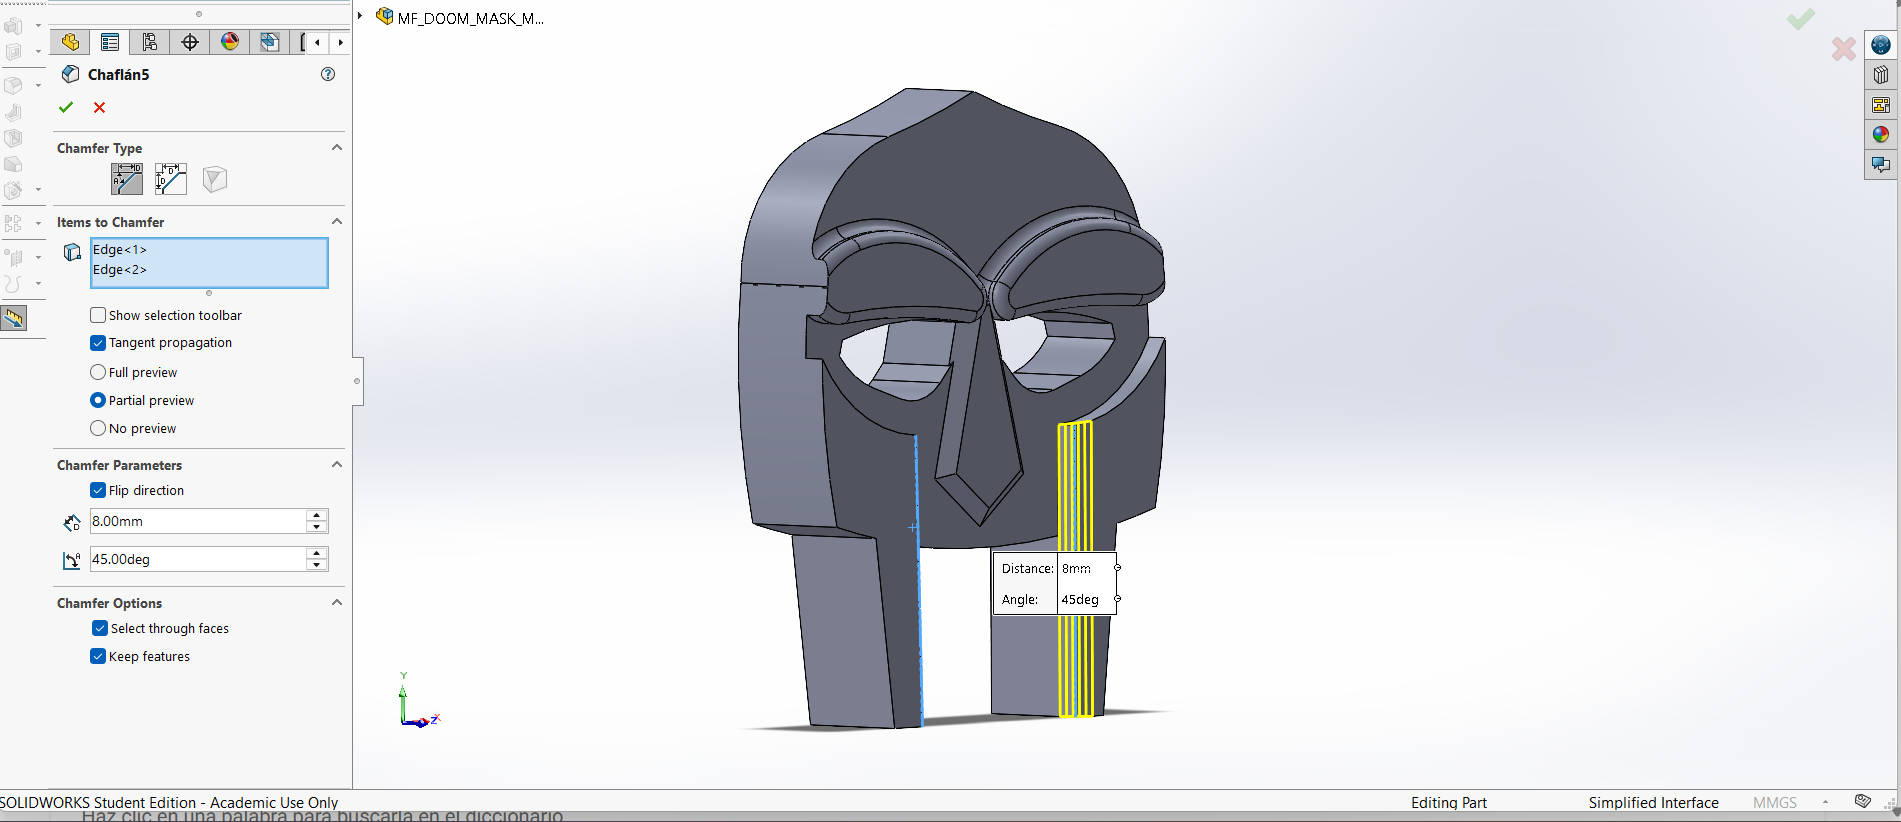
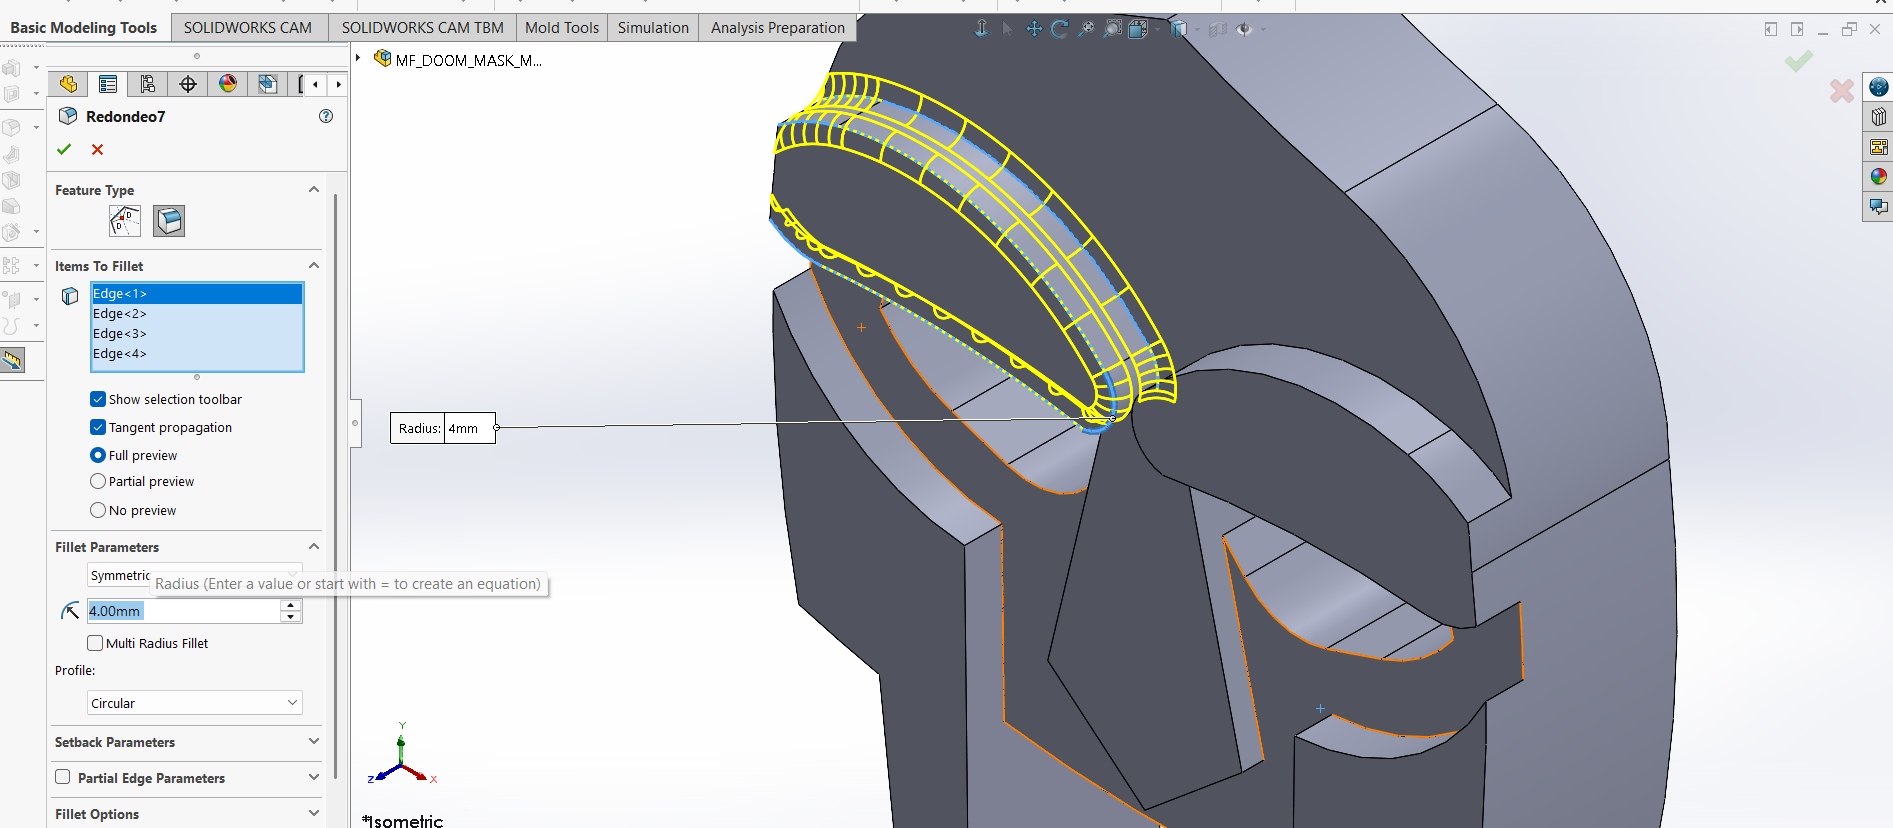
3. Then I made some fillets and chamfers to have a more natural surface.
Meassures.
First Chamfer. 6 mm.
Second Chamfer.8 mm.
Fillet. 8 mm of radius.
MF DOOM MASK
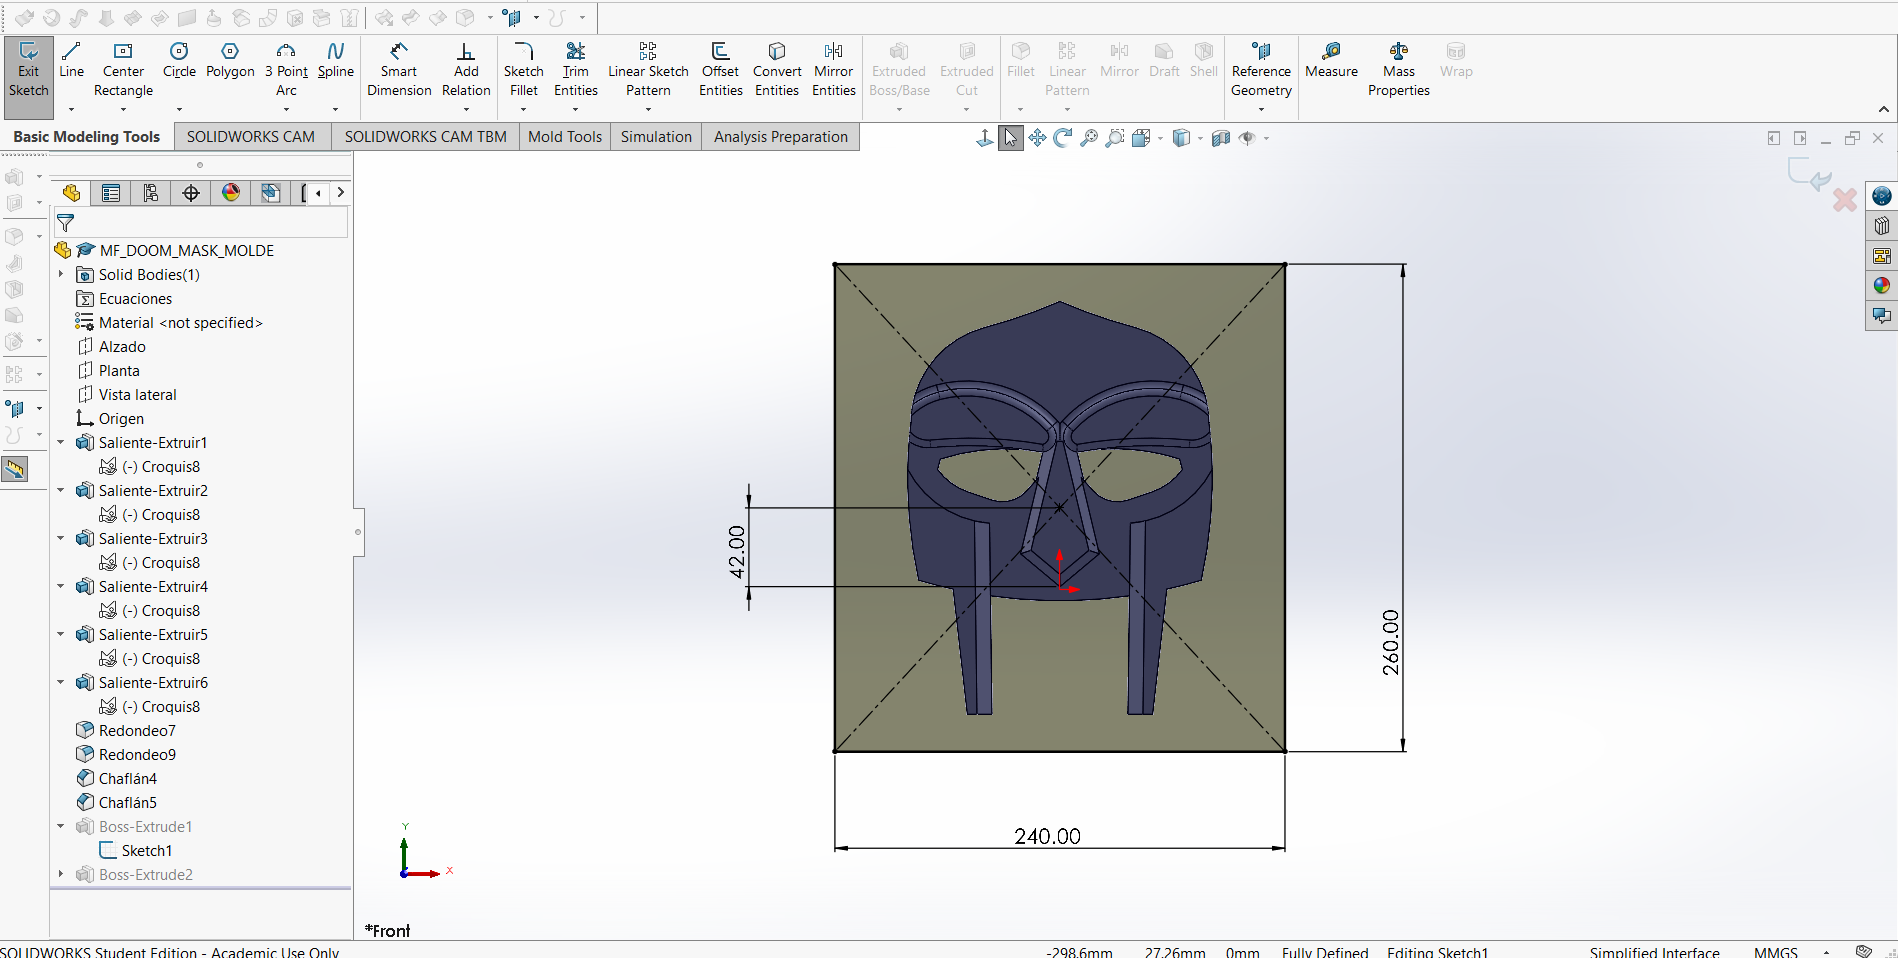
4.Then, also in the front plane, I made a rectangle of 240 X 260 mm and I extruded it 10 mm.
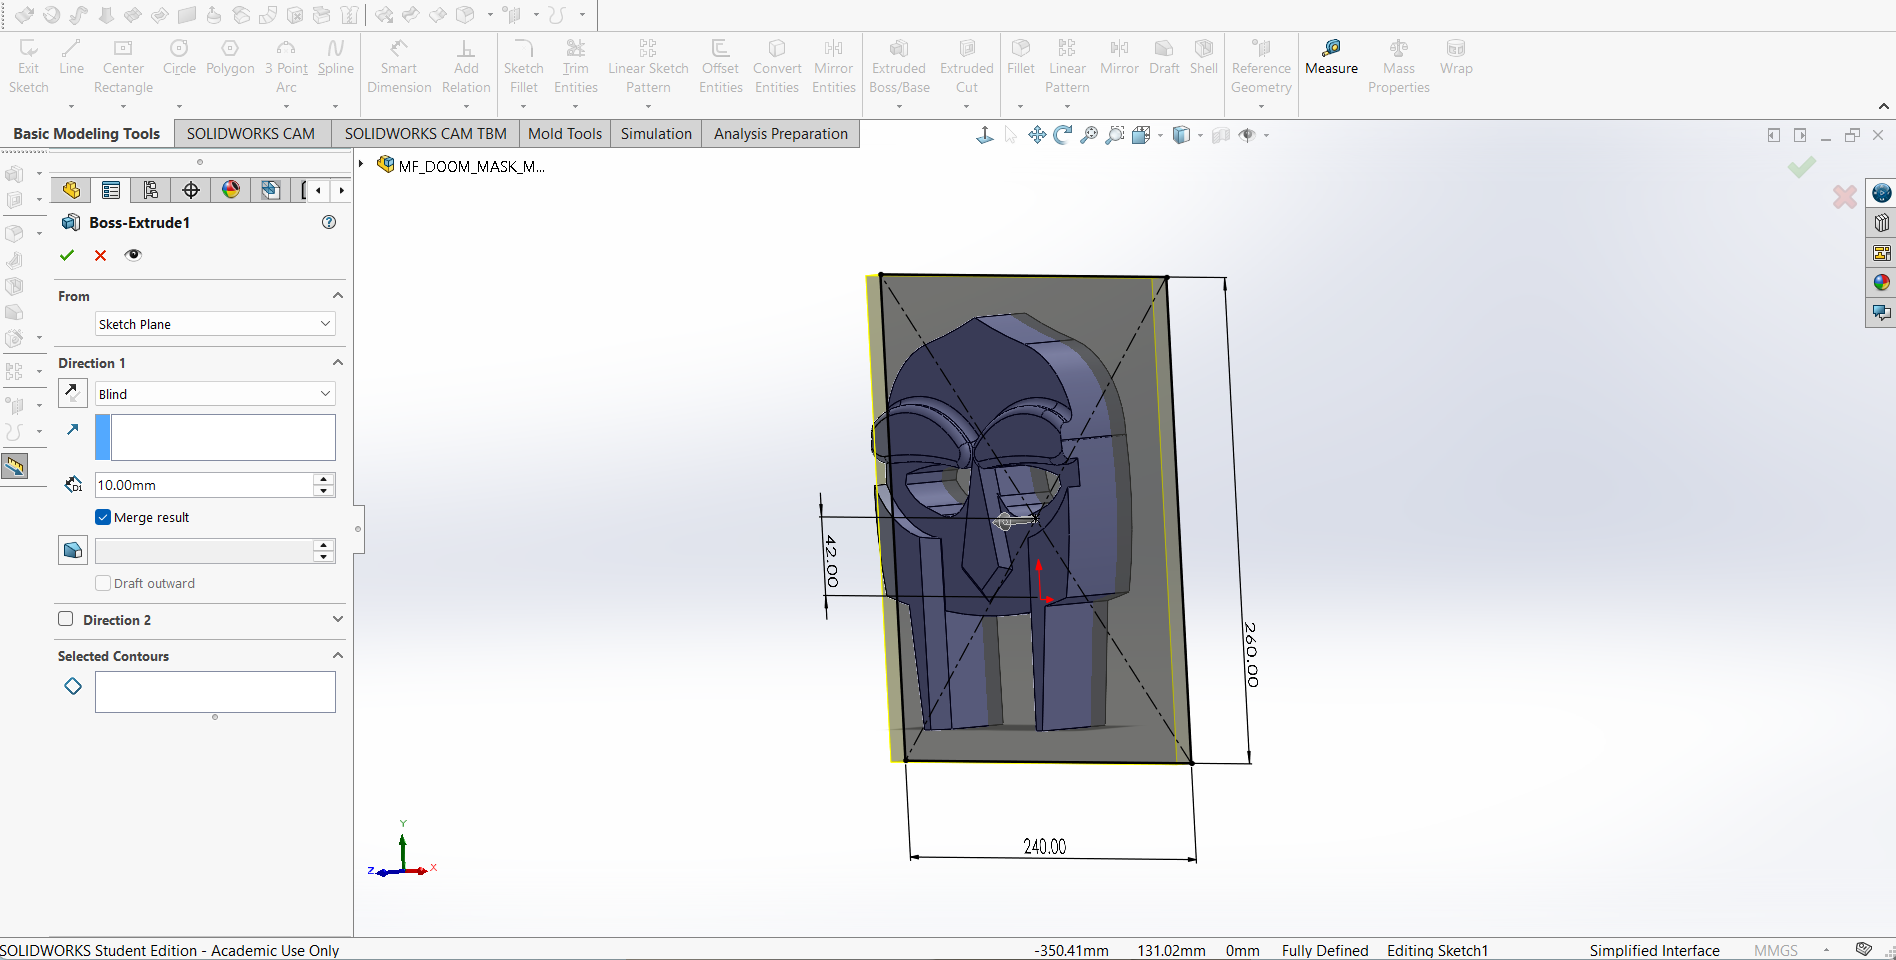
MF DOOM MASK
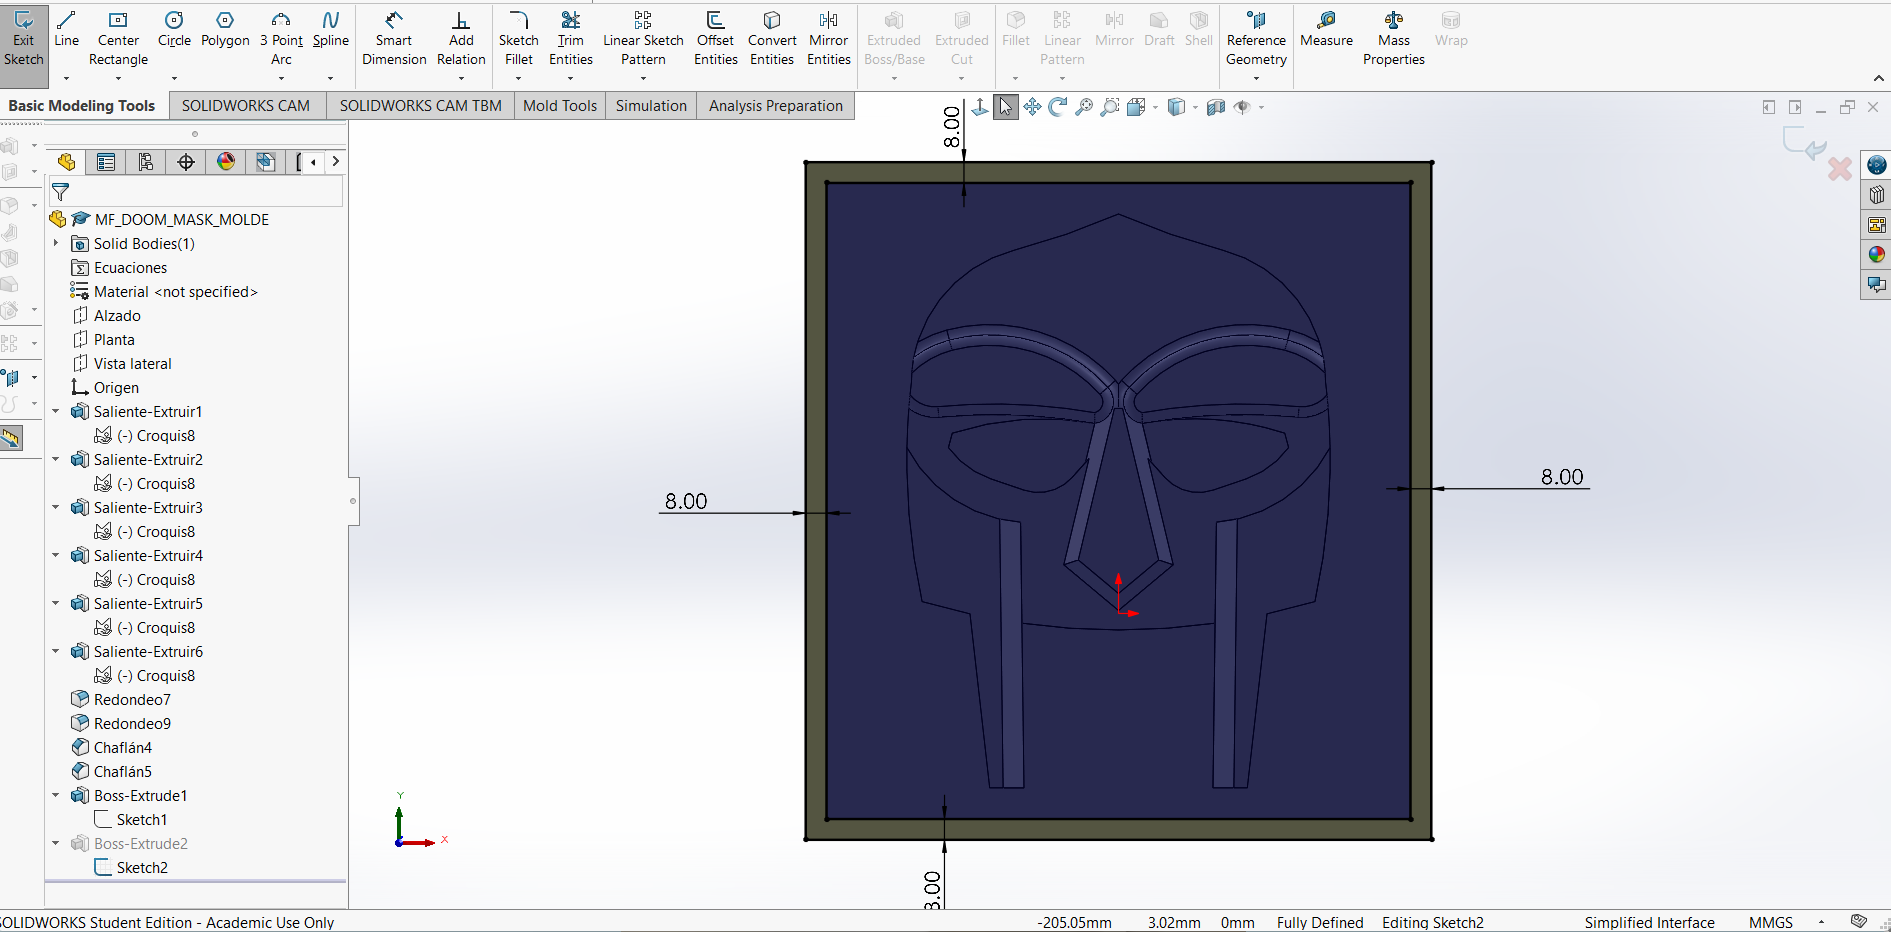
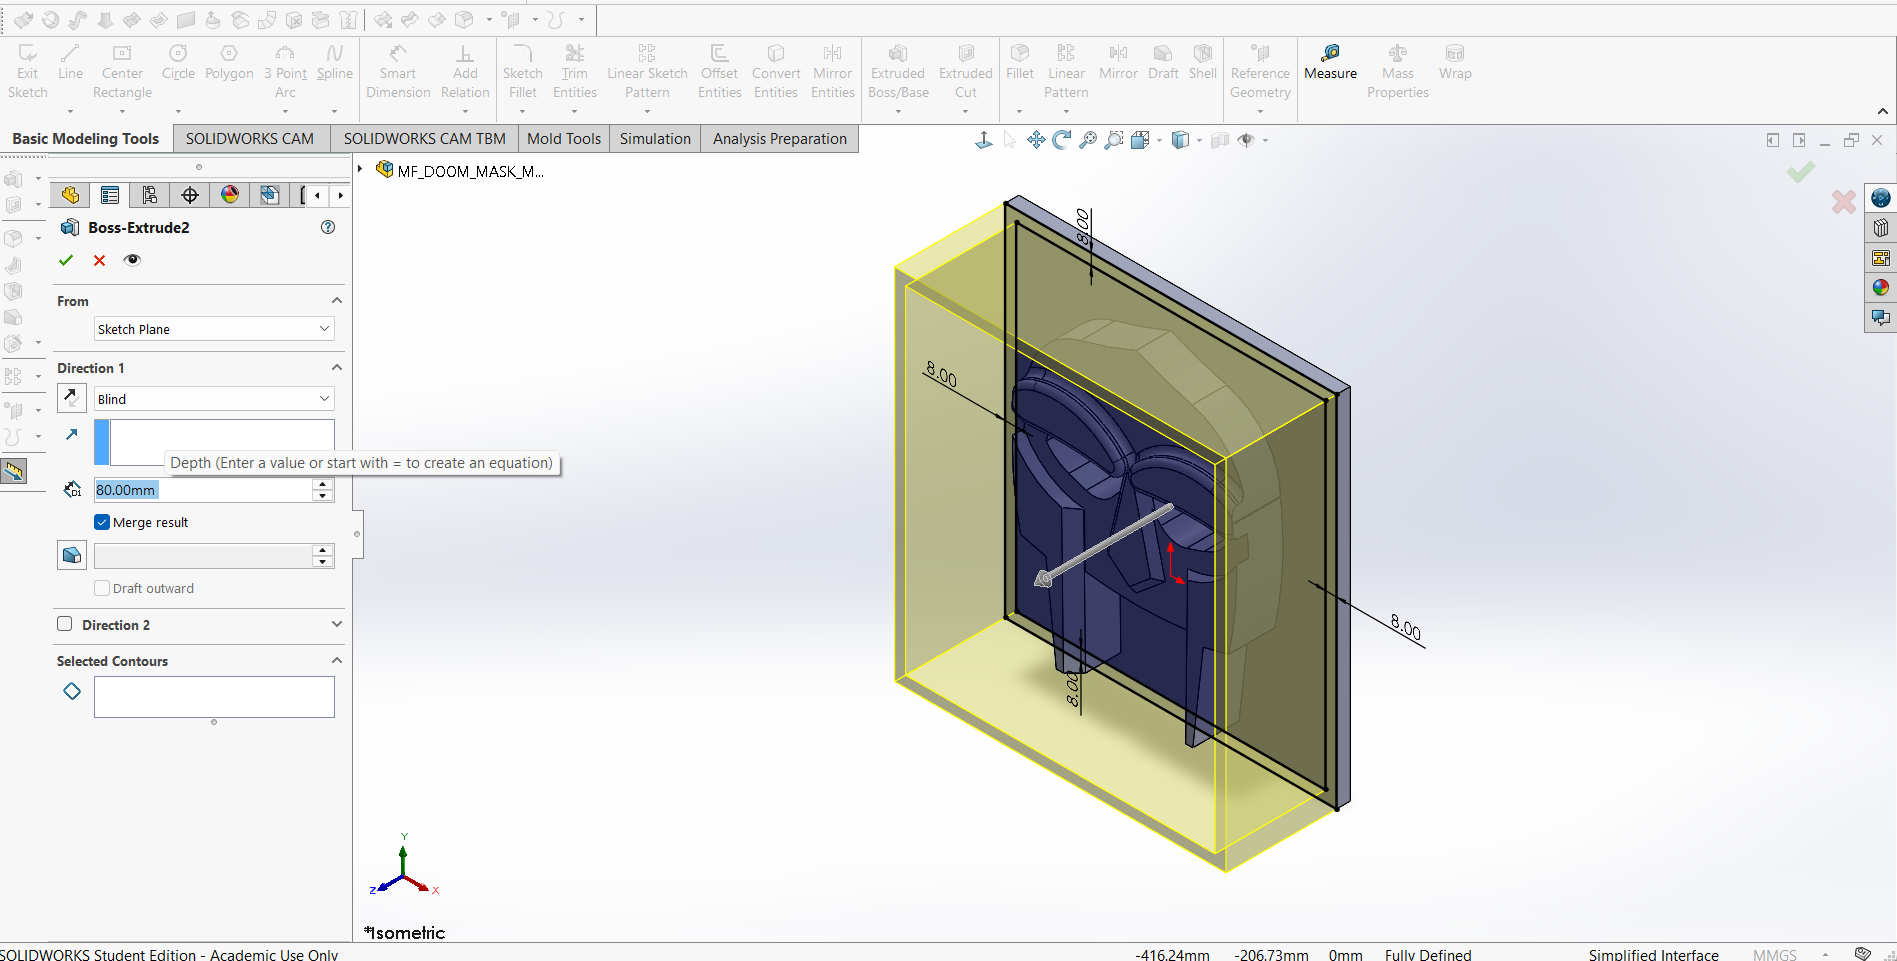
5.Finally, I made the walls of the positive mold and extruded them 80 mm.
AnyCubic Photon Workshop
Anycubic Photon Workshop is a free, proprietary 3D slicing software developed by Anycubic specifically for their resin printers. It converts 3D models (STL/OBJ files) into sliced files (.pws, .photon) with custom support generation, model hollowing, and exposure settings. Here you can download AnyCubic Photon Workshop.

Steps
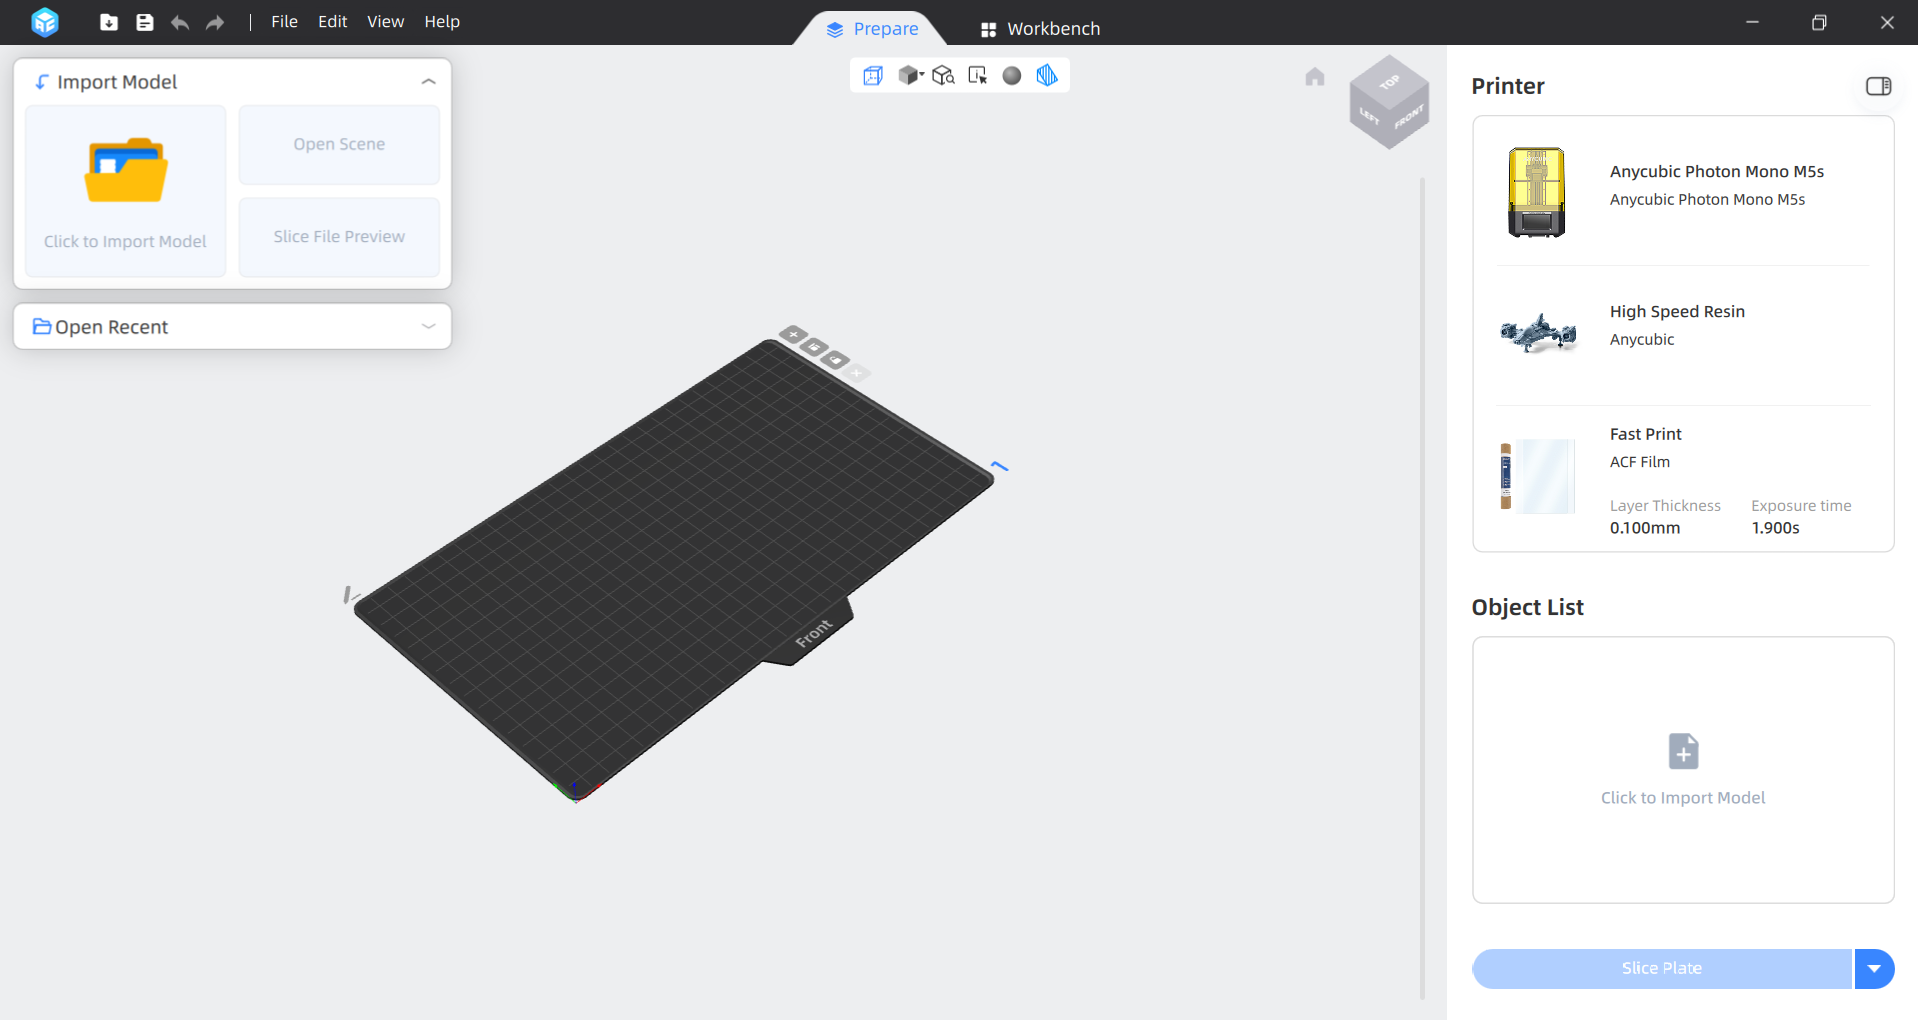
1. We have to open Anycubic Photon Workshop and import our STL.
Steps
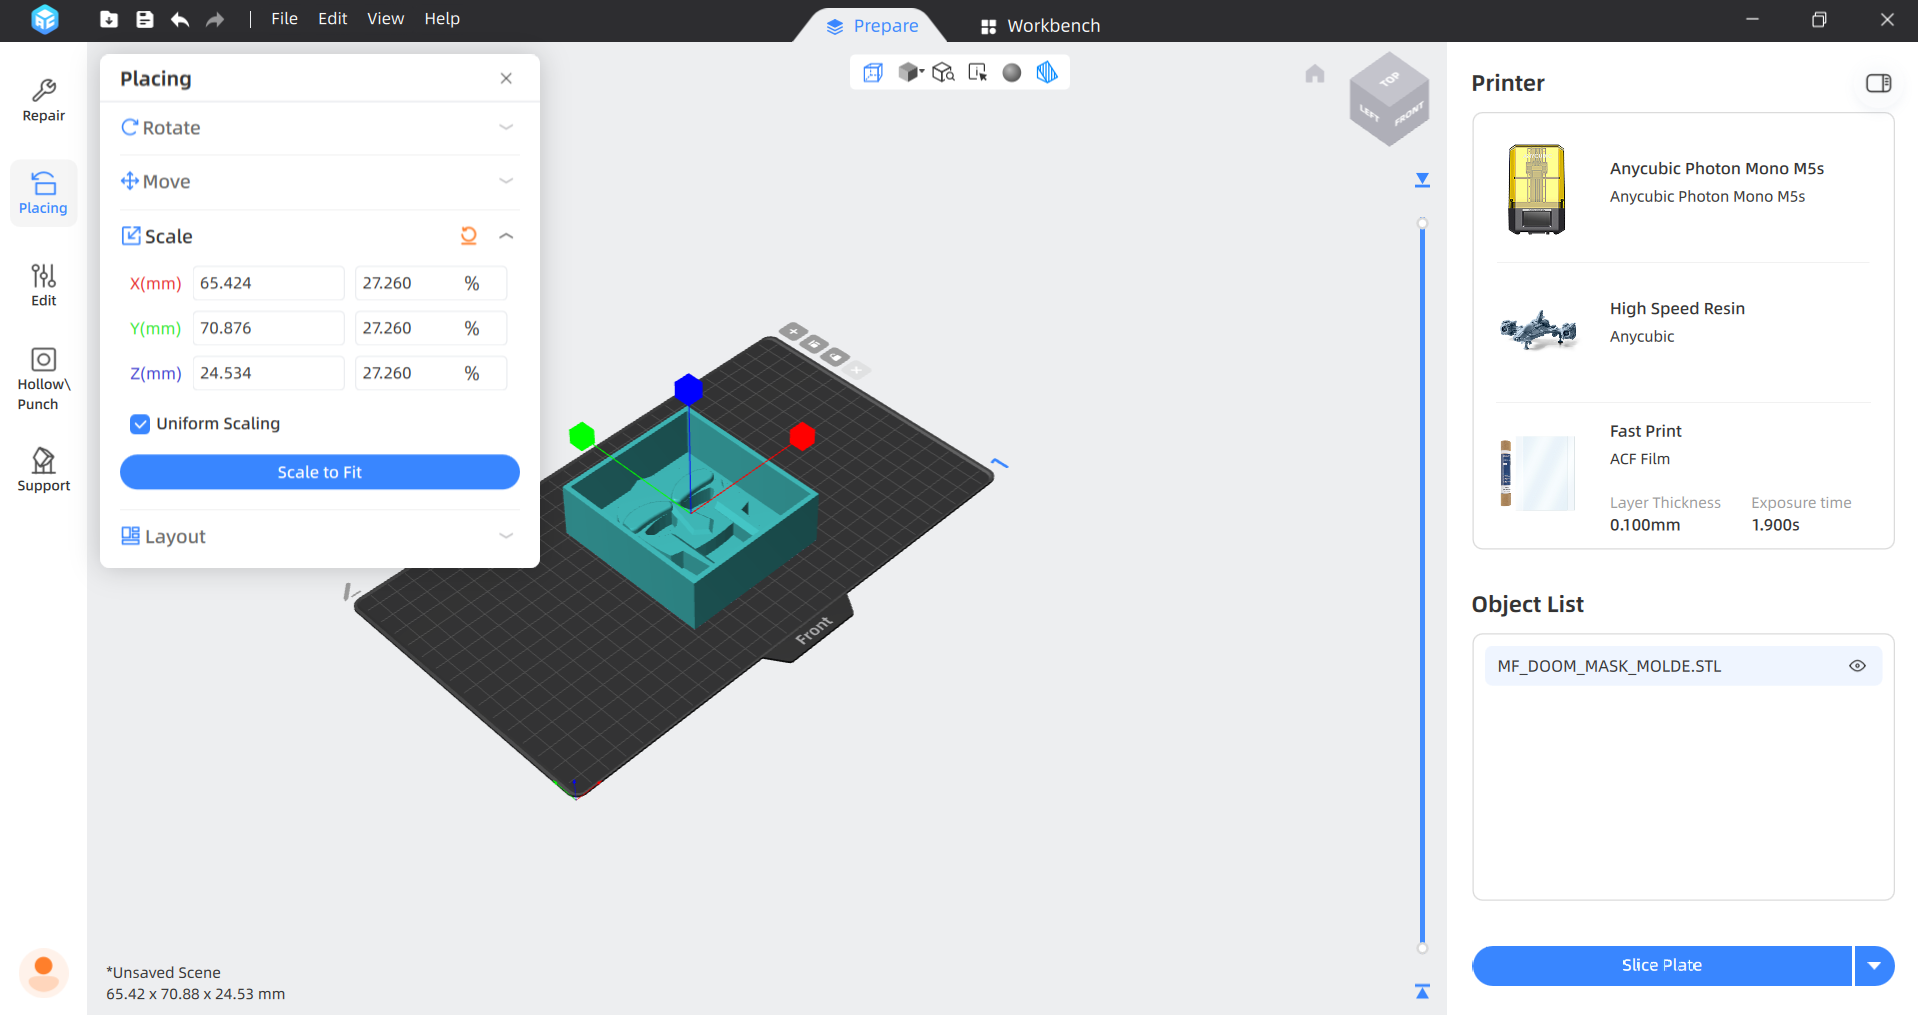

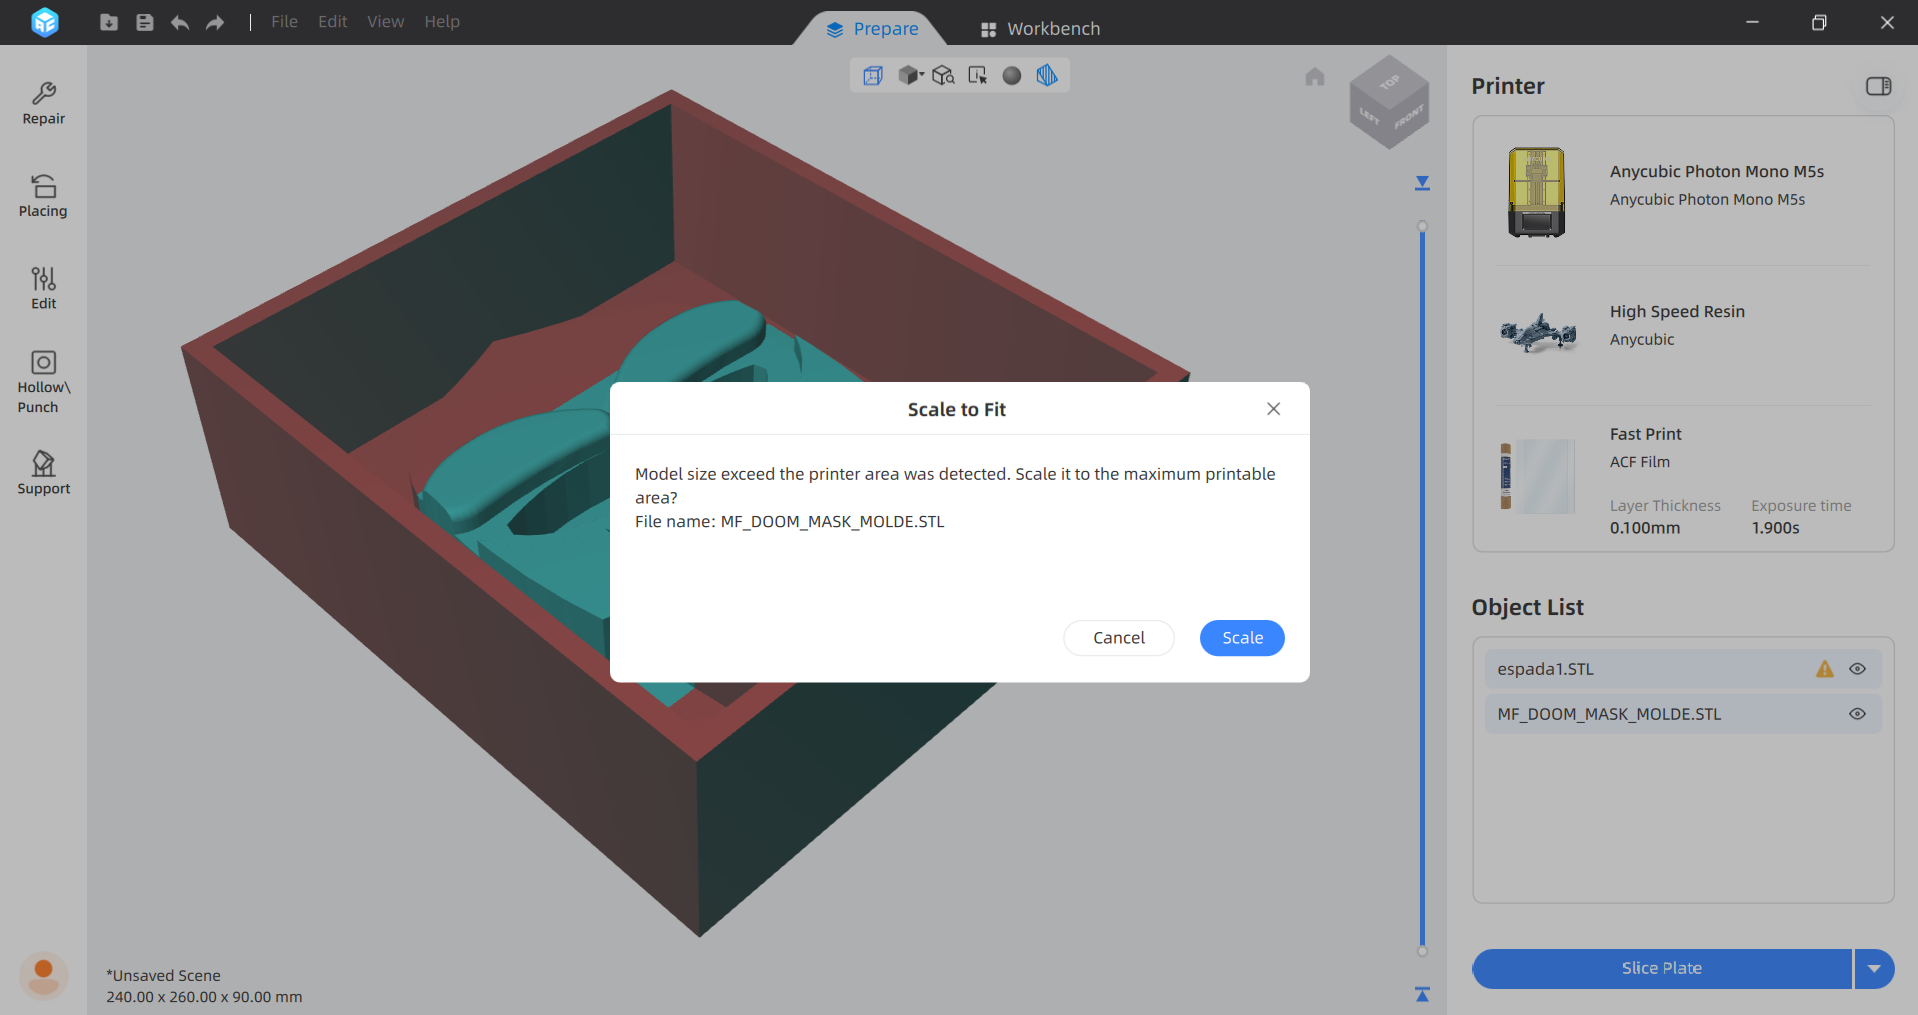
2.Then we have to scale the piece and tilt it 45°. To scale the piece we have to select Placing in the left menu and choose scale, since minimizing the surface area of each layer drastically reduces the suction force that separates the piece from the tank, improving print quality, releasing residual resin, and making it difficult for it to detach from the plate.
Steps
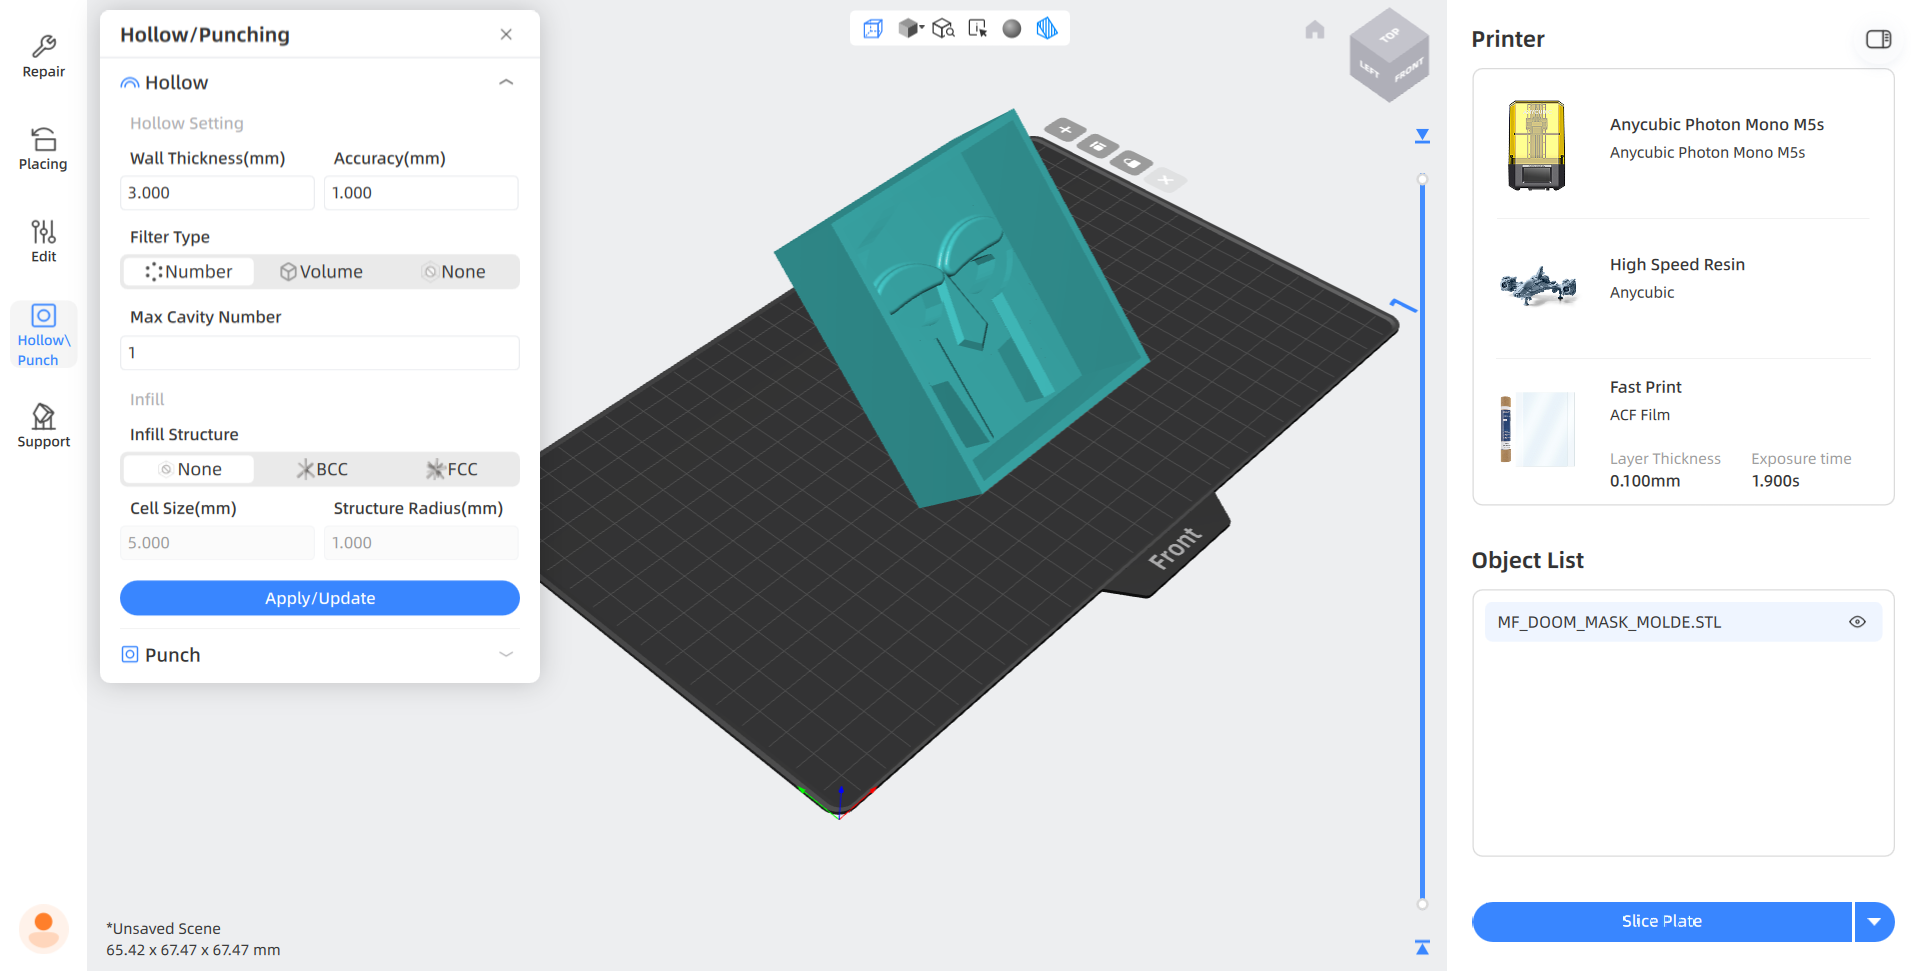
3.Next, we will hollow out the figure and assign an appropriate thickness to its walls. In my case, I selected a thickness of 3 mm. The Hollos function is useful for saving resin and preventing it from detaching from the bed, which in this case is upside down.
Steps
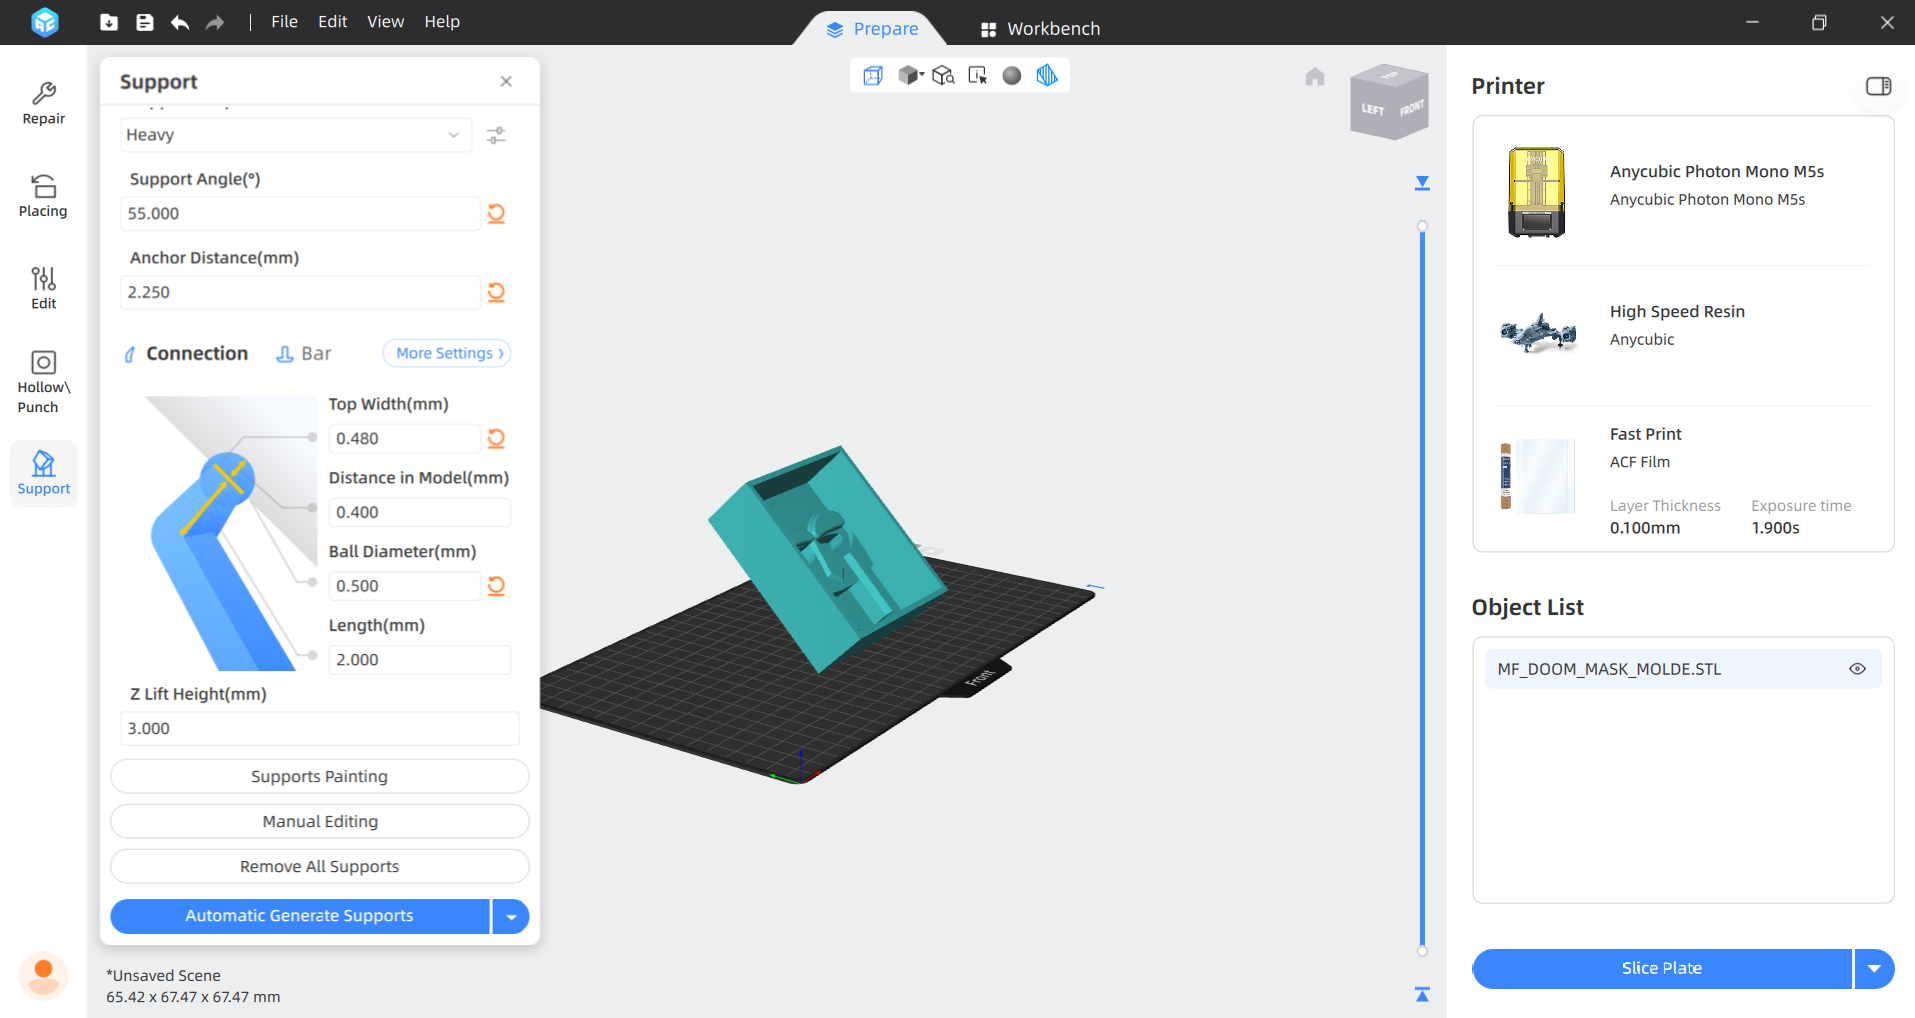
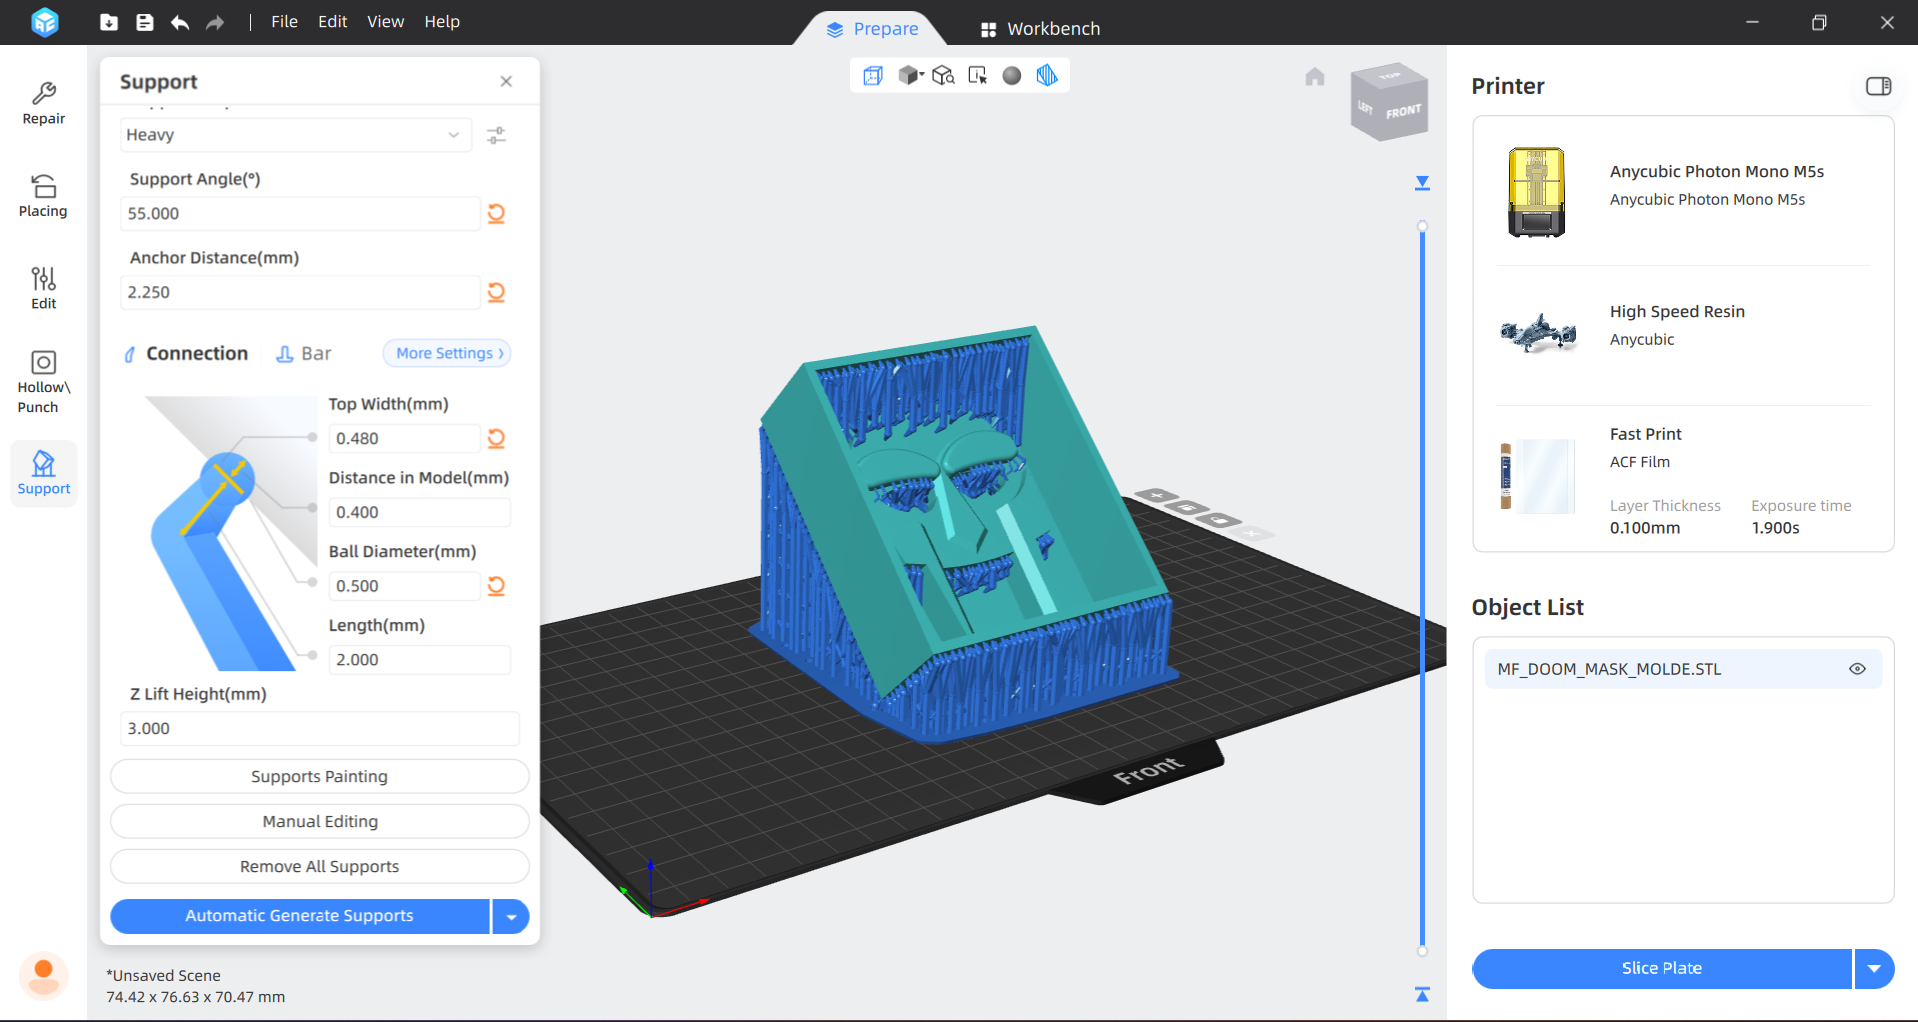
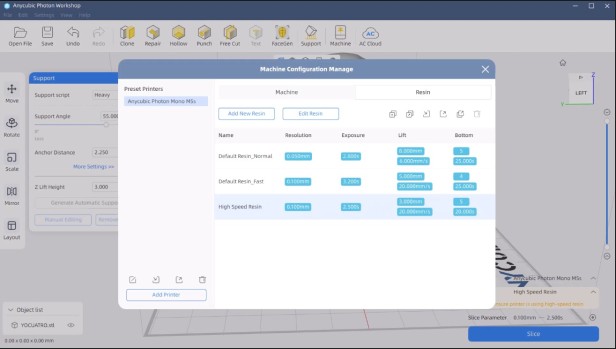
4. Then, we have to add supports in order to facilitate the printing process. The software offers three types of supports: Light, Medium and Heavy. I choose heavy because it brings more grip.
Support parameters
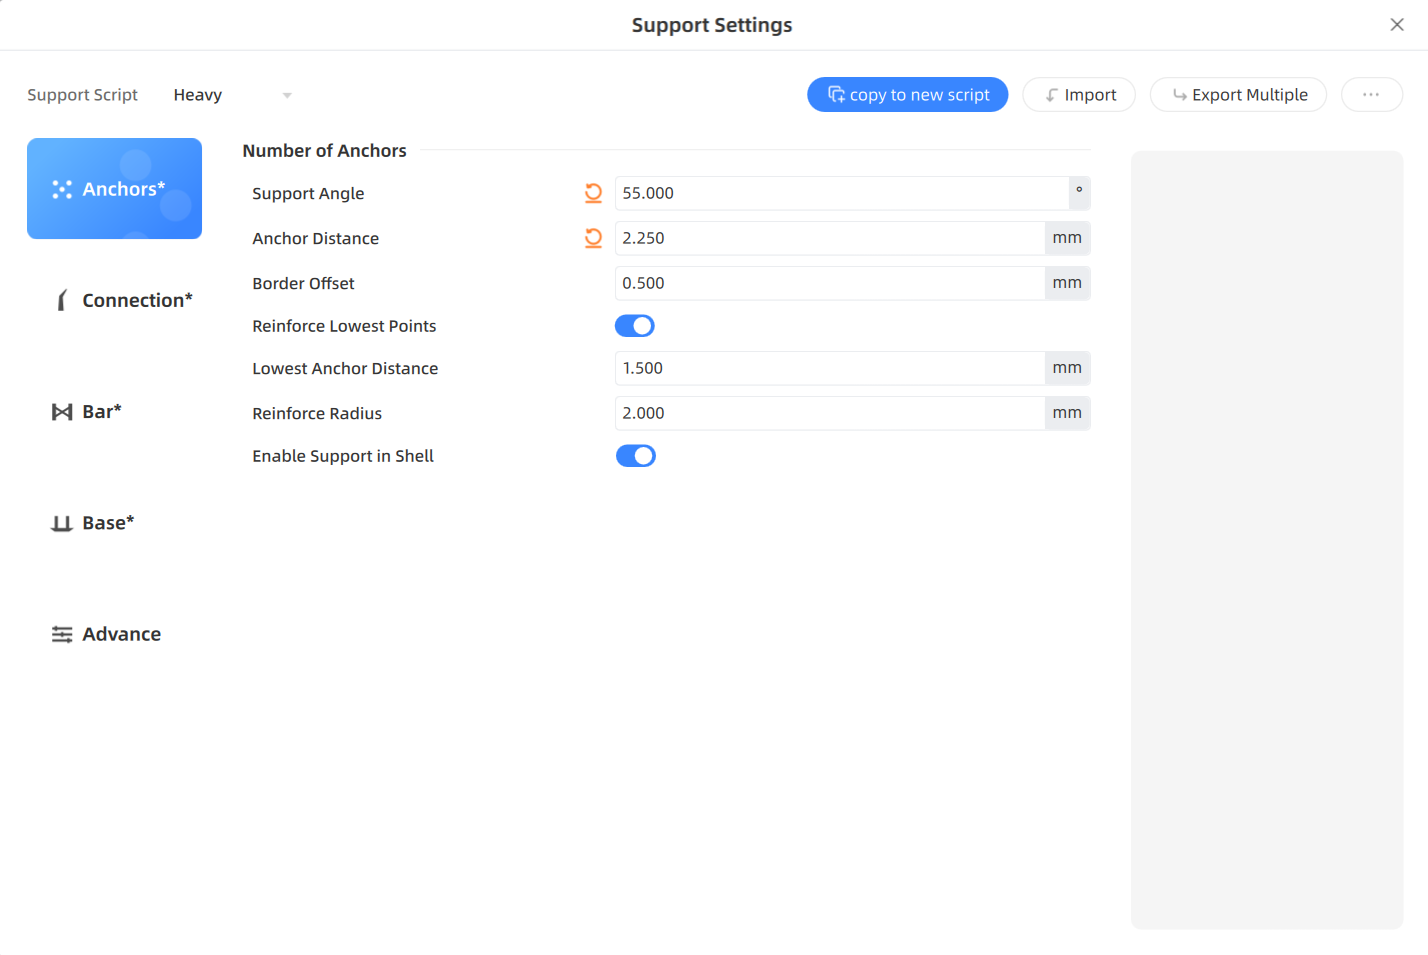
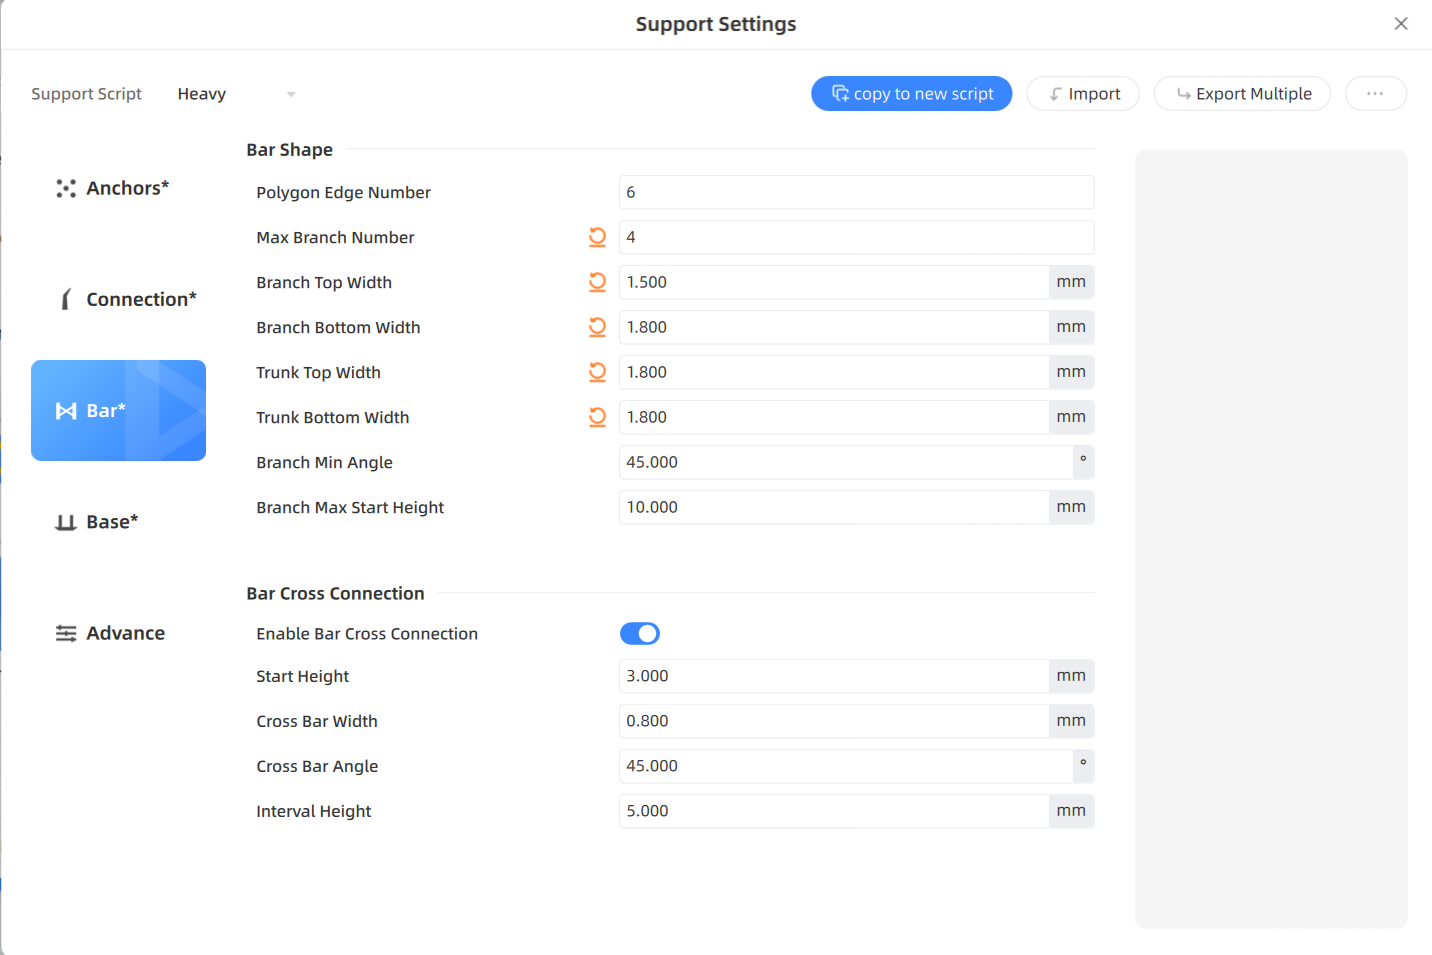
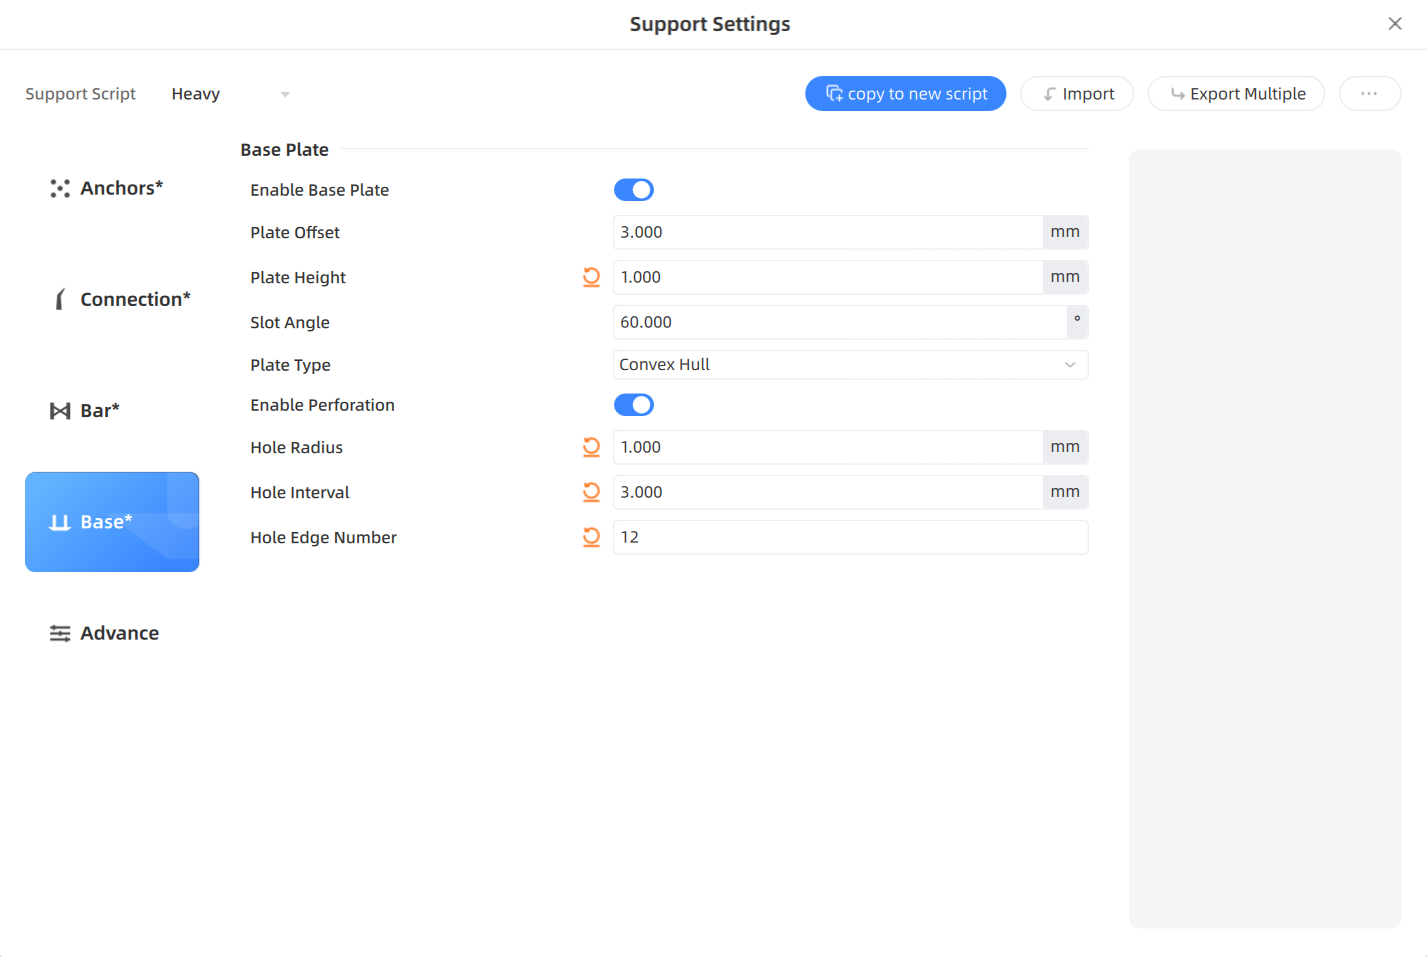
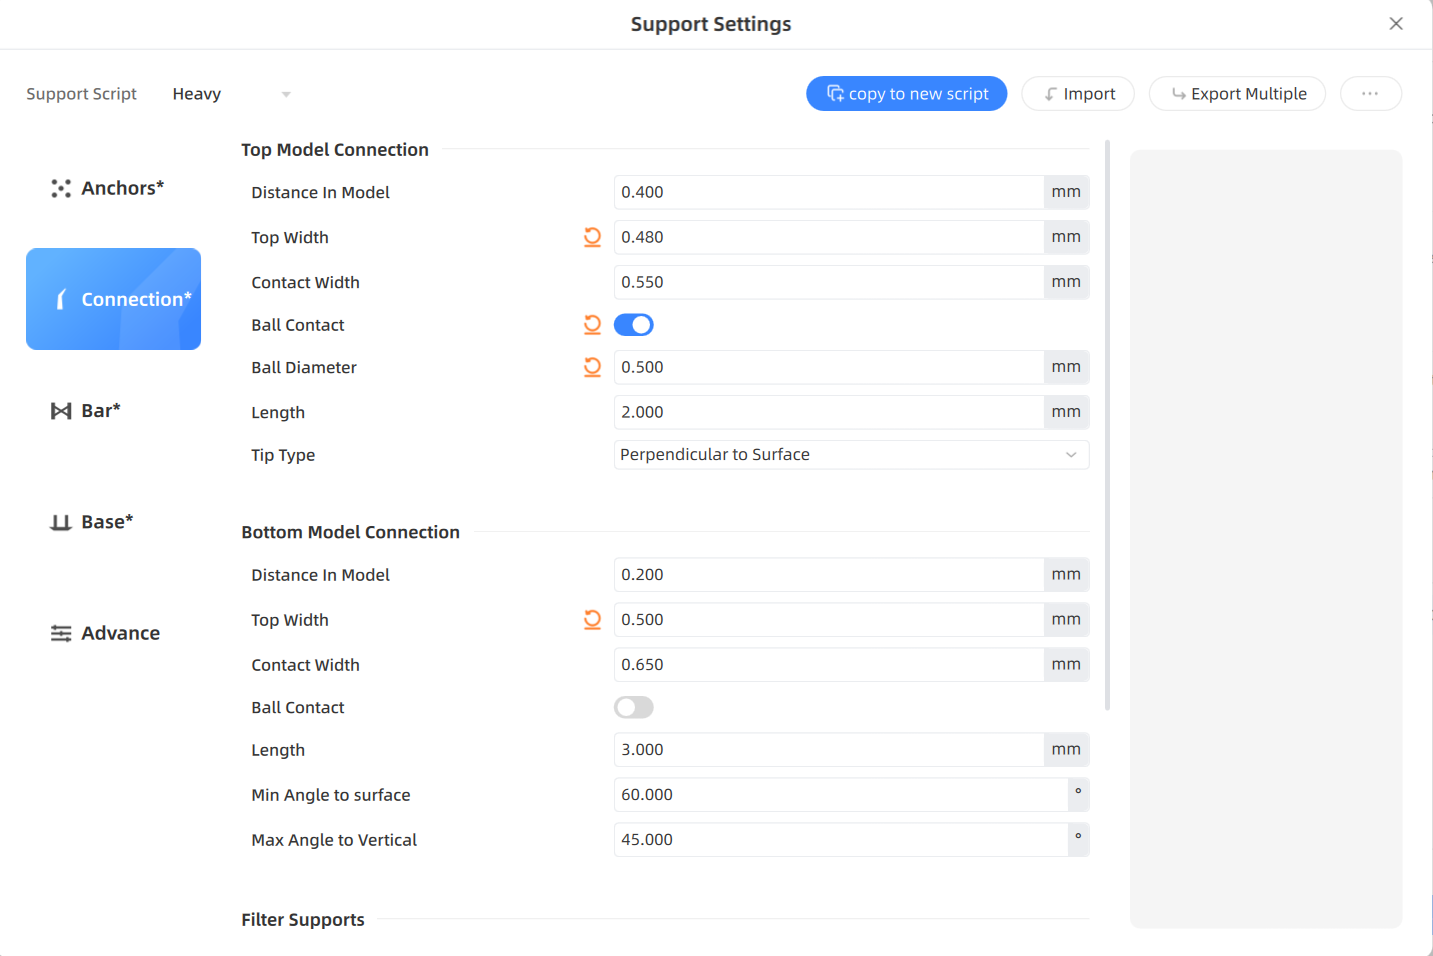
Parameters.Shortly, this parameters allows us to set the anchors characteristics, in my opinion the most relevant one is the support angle. We can also set Model connection, Bar shape, Base Plate. The ones that we must pay more attention in order to obtain a better printing are the plate type, plate offset, Trunk Height and Branch Max angle.
Steps
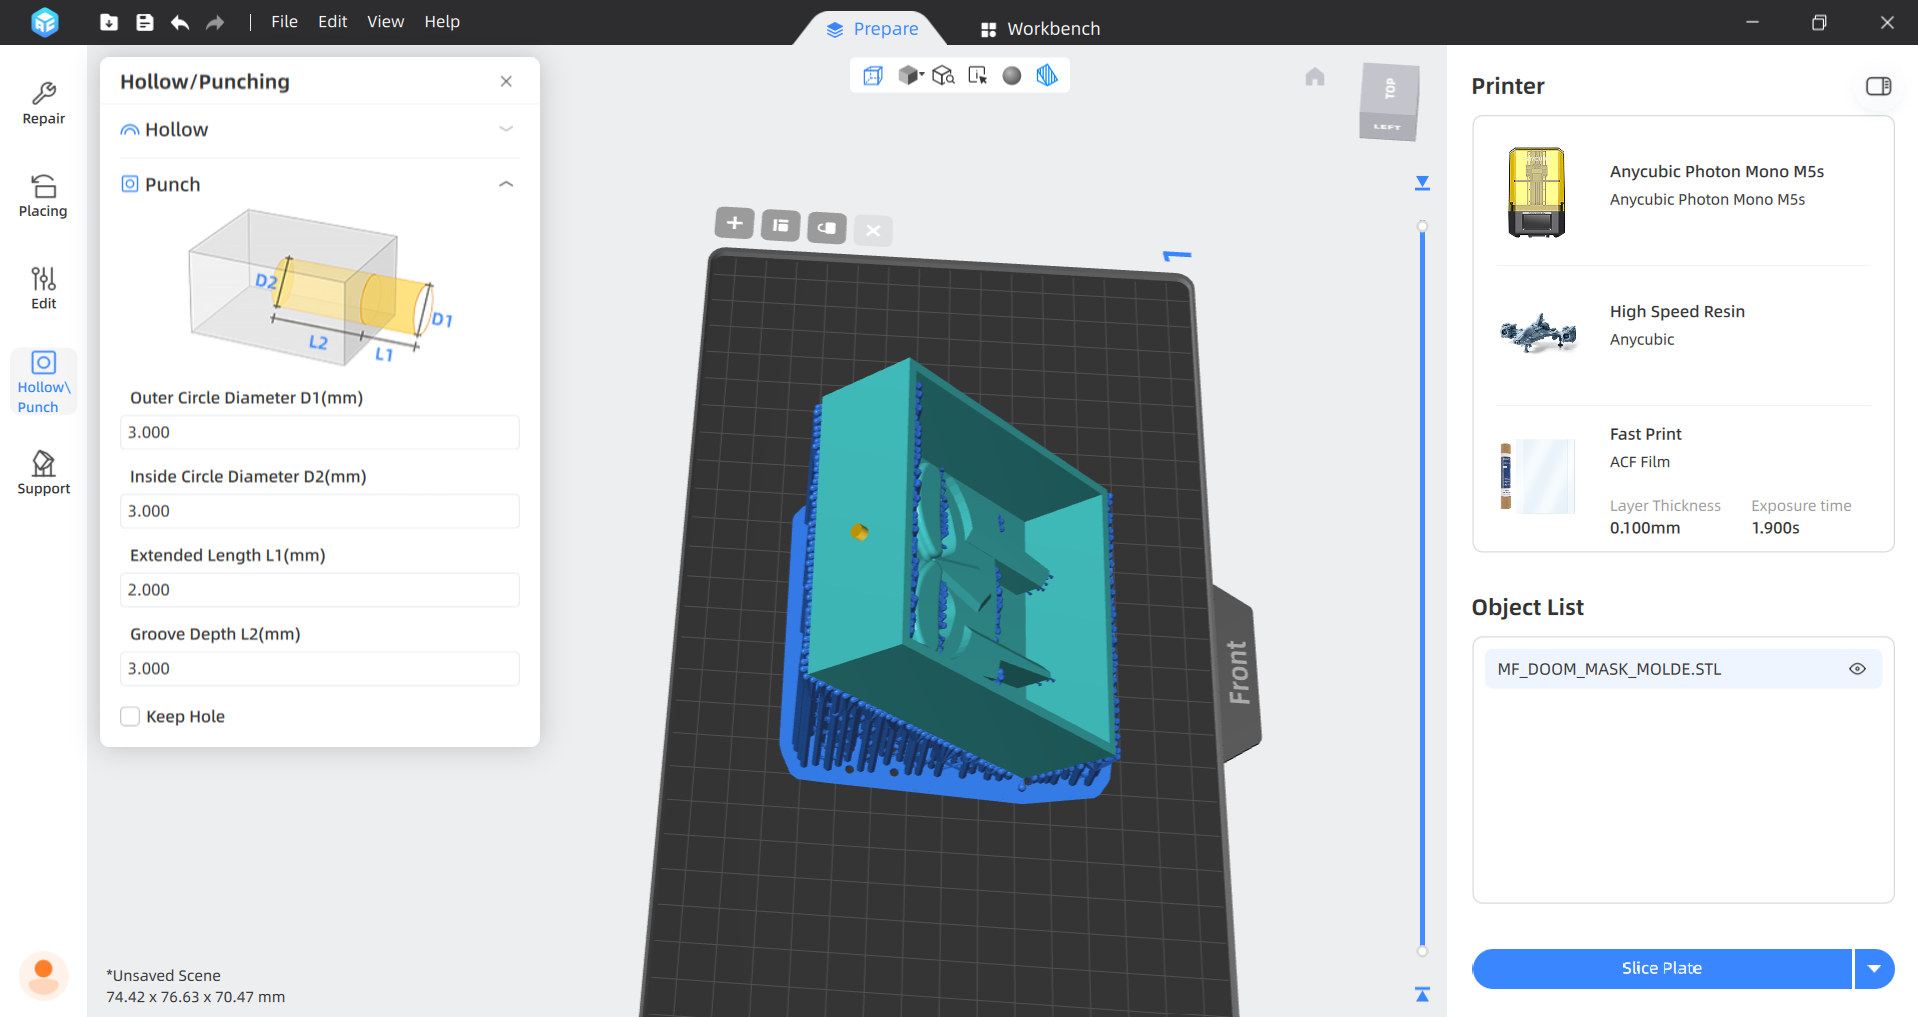
5.We will then add two holes in order to release the air inside the figure and the residual resin.
Steps
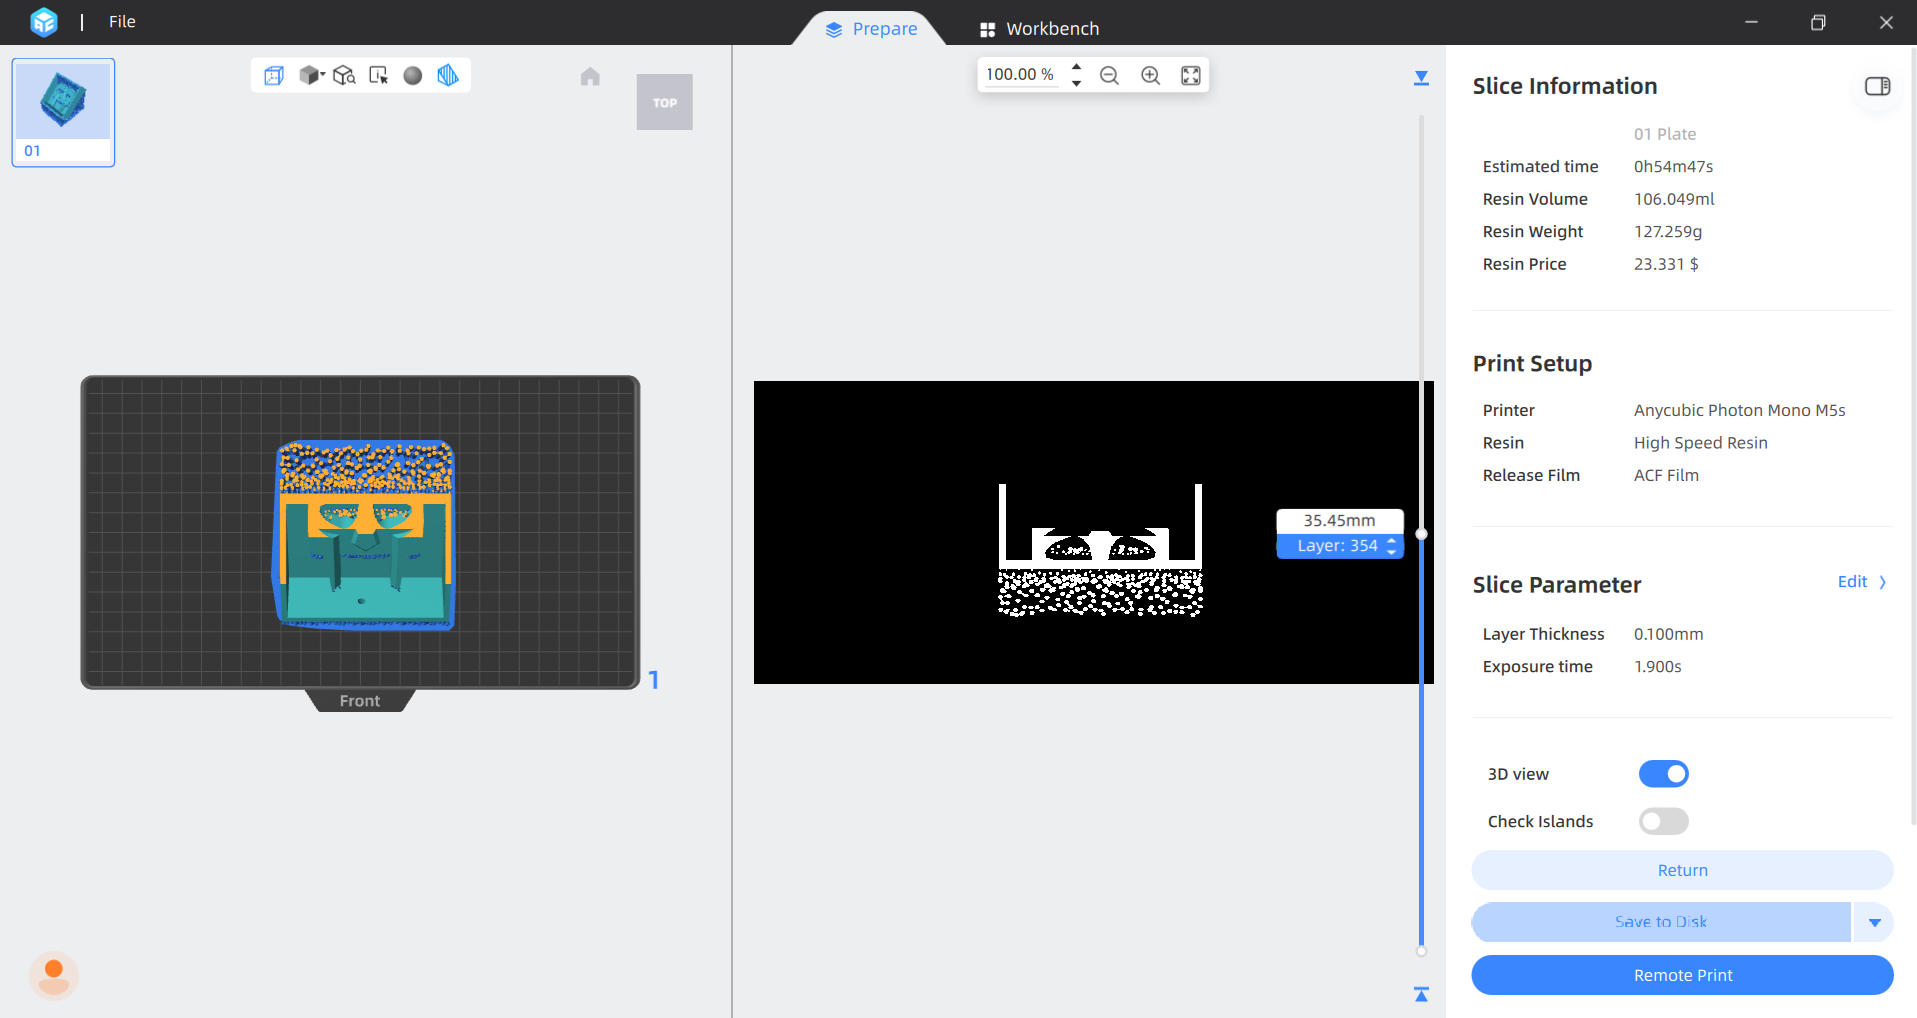
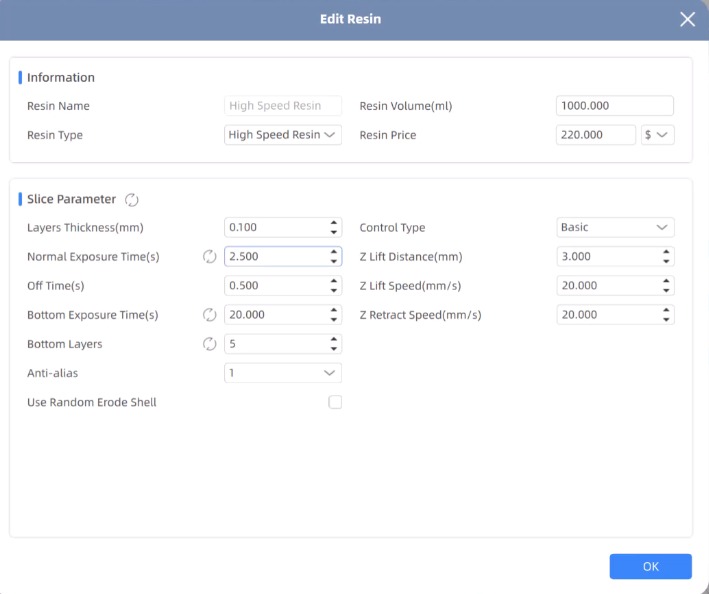
6. To slice we have to click the button in the bottom right. But before slicing we have to make sure of having the correct resin. In my lab we have High Speed Resin, so that is the one I used.
Resins. There are 3 types of resin:
High Speed Resin
Standard Normal
Standard Fast
7. Finally, we have to save it in a USB disk.
3D Printer
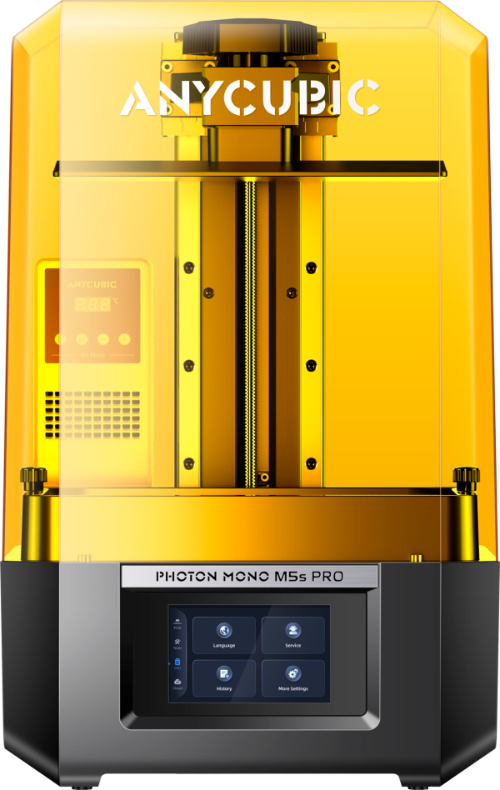
For printing my piece I used an ANYCUBIC PHOTON M5s.
Steps
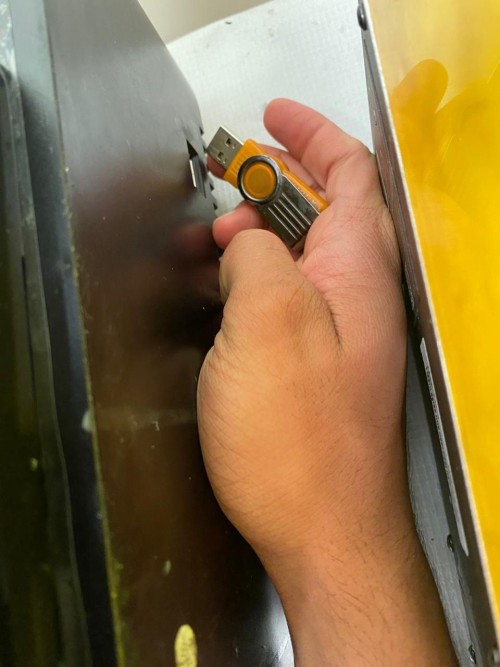
1. First, I connected my USB adapter so I could load my document and removed the cover.
Steps
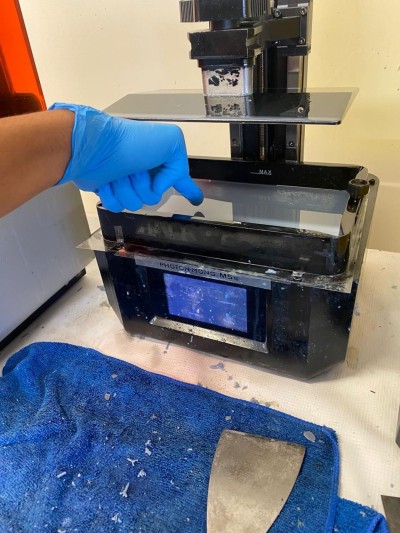
2. After that, I made sure that there was nothing that may obstruct the printing process.
3. Then I logged into the USB and uploaded my document.
Steps
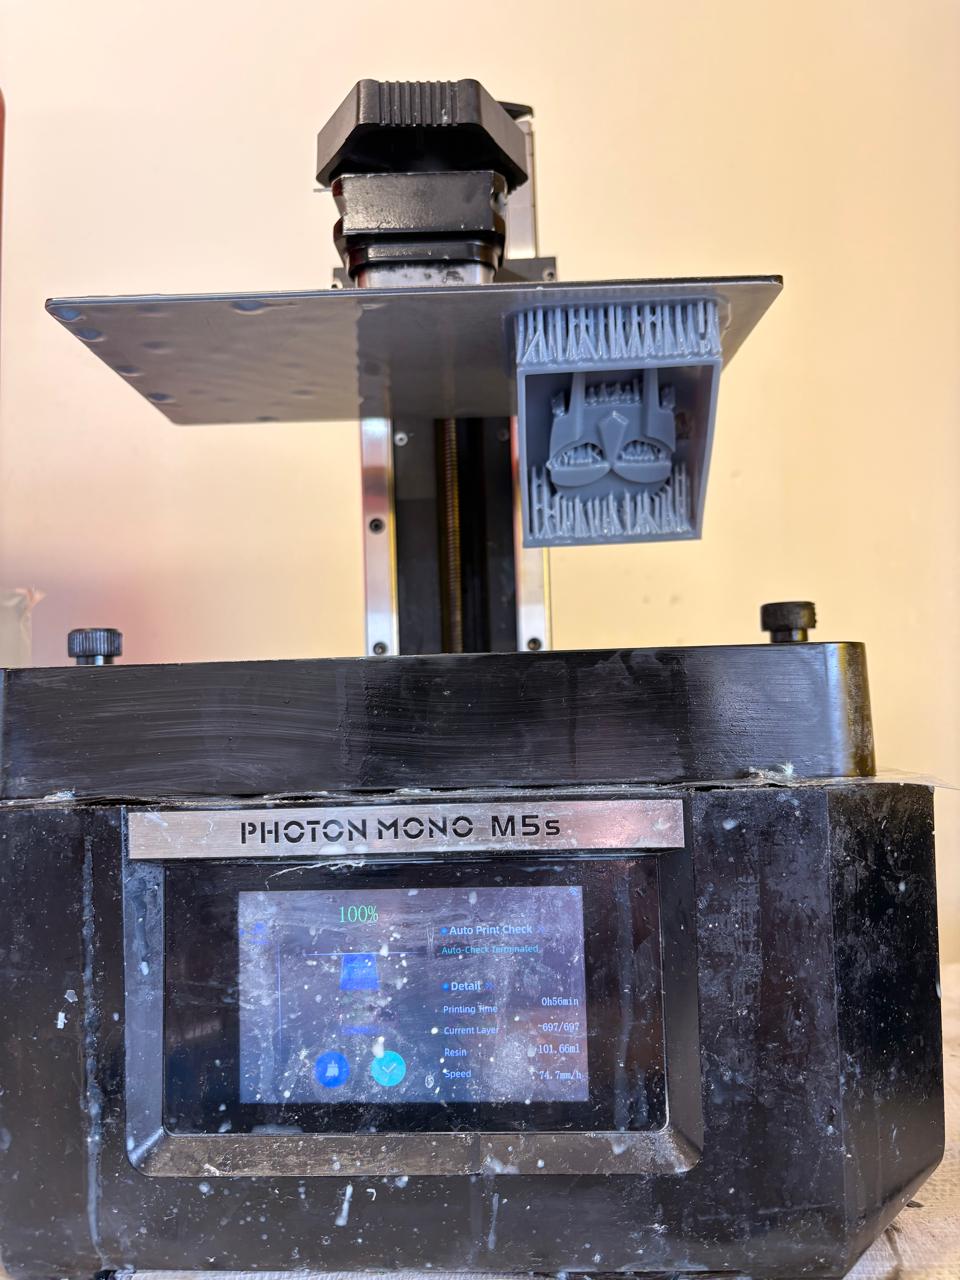
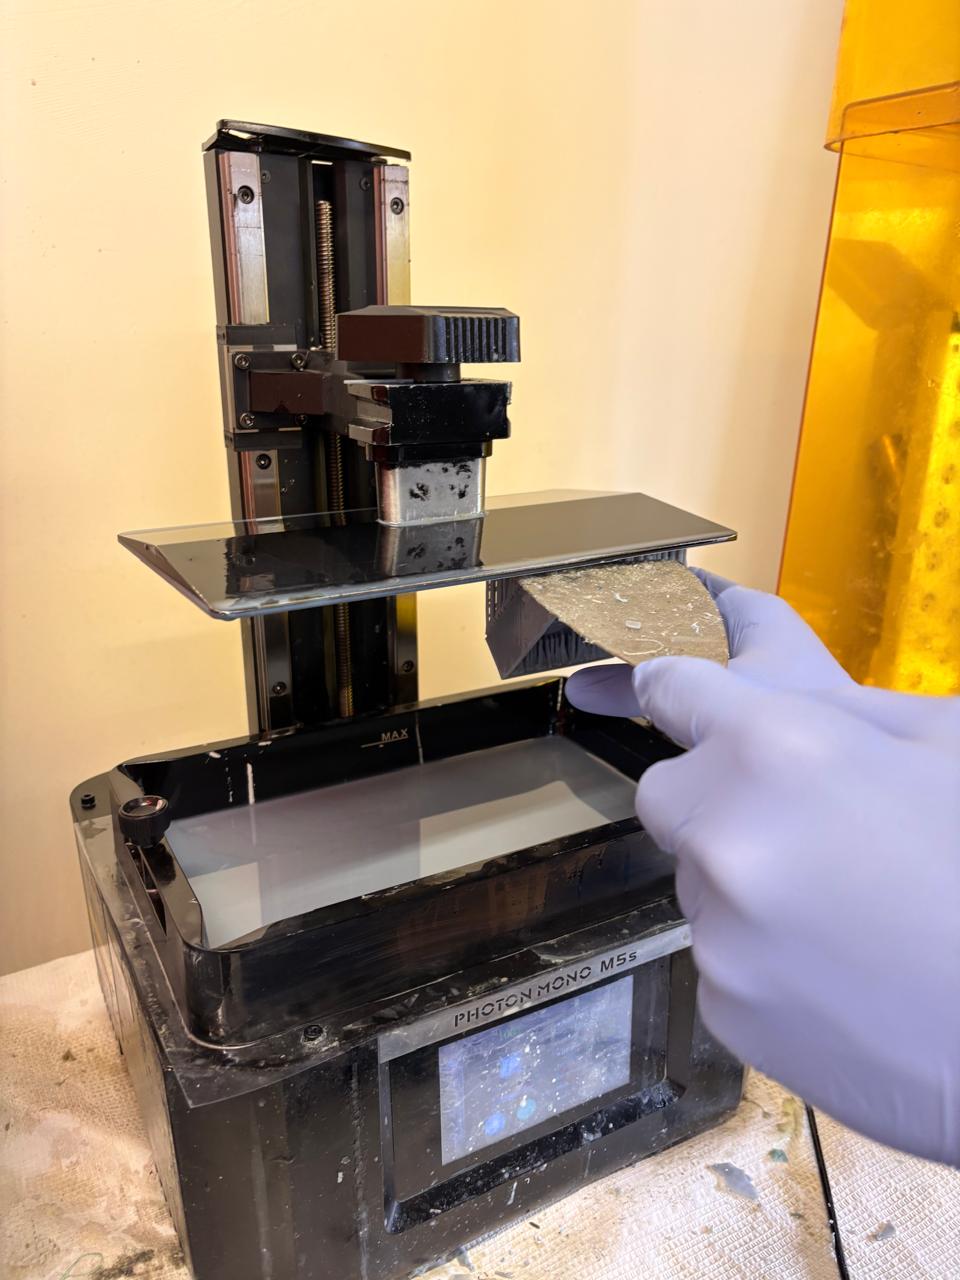
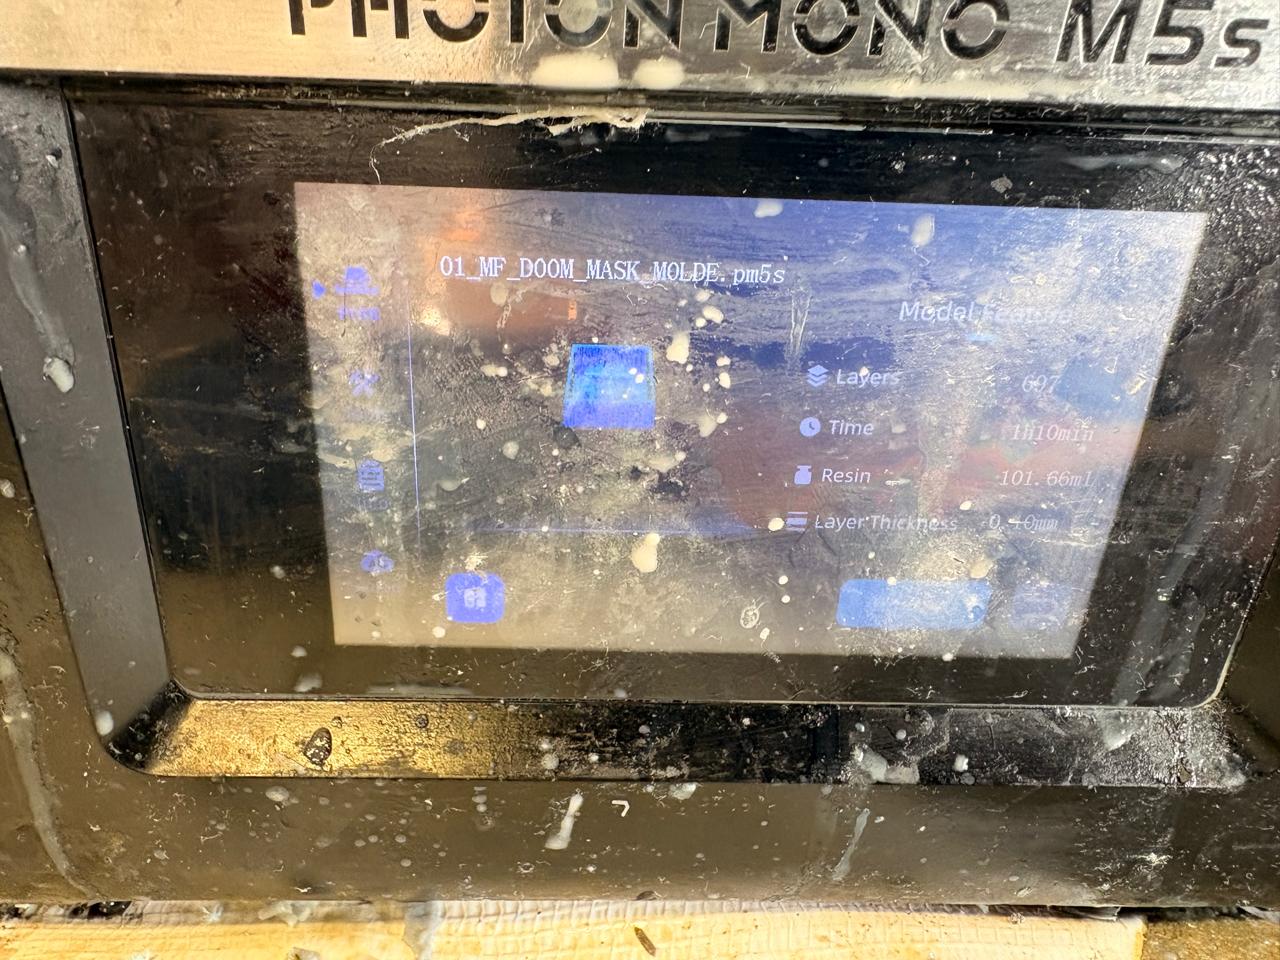
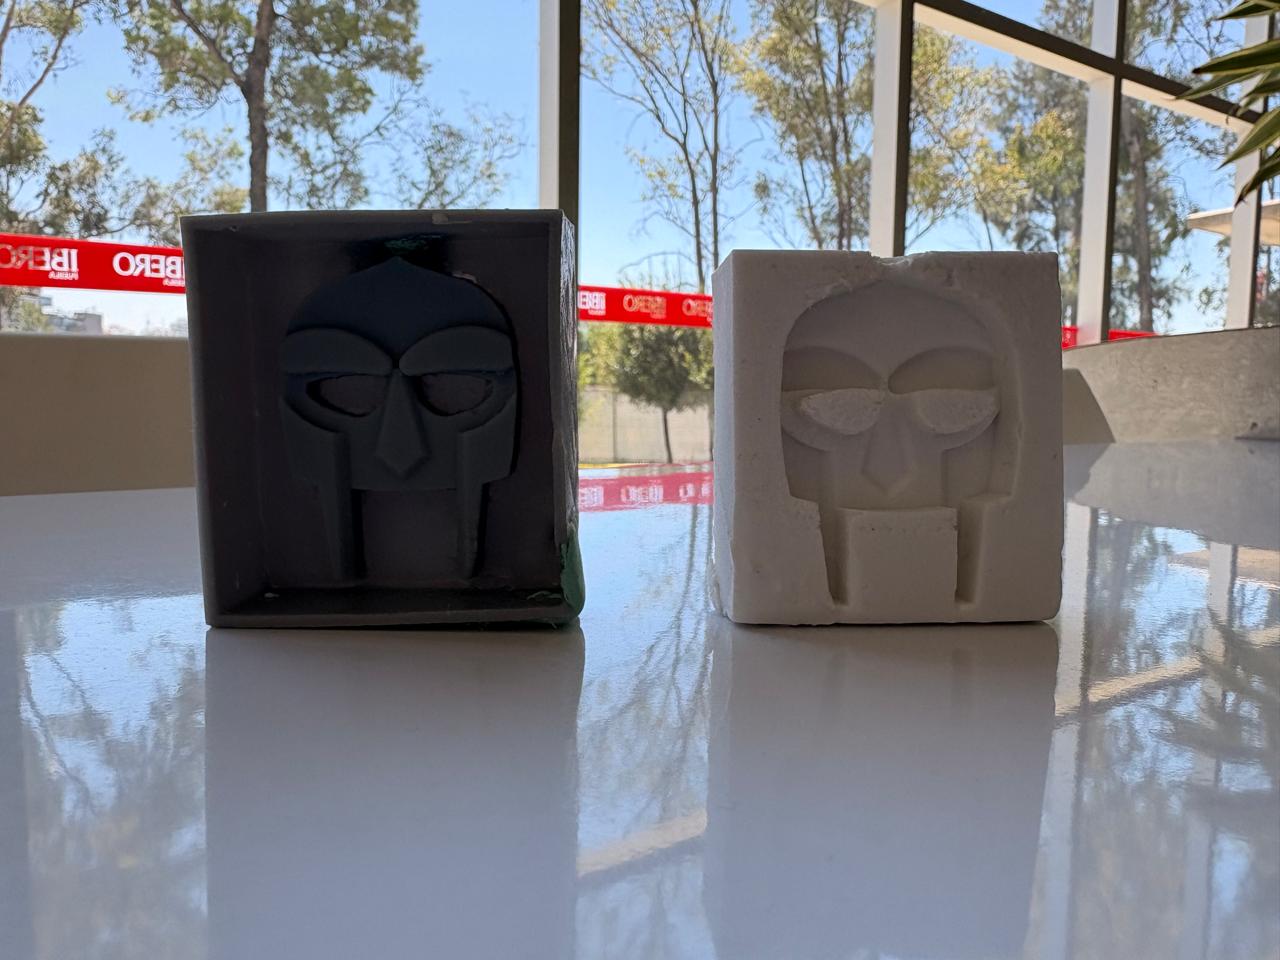
5. When the printing was finished, I gently removed my mold with a spatula. My print consisted of 697 layers.
Steps
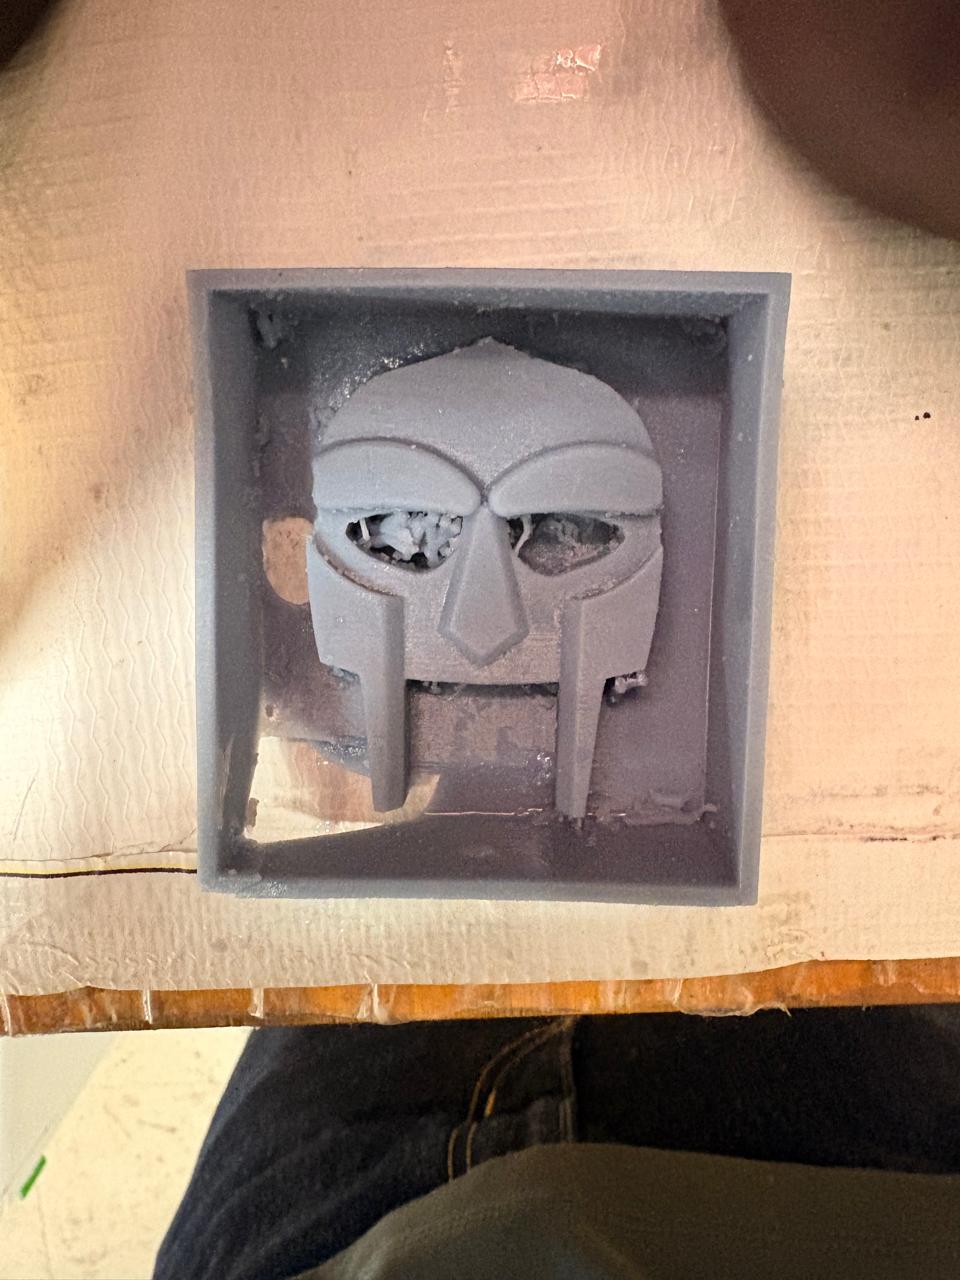
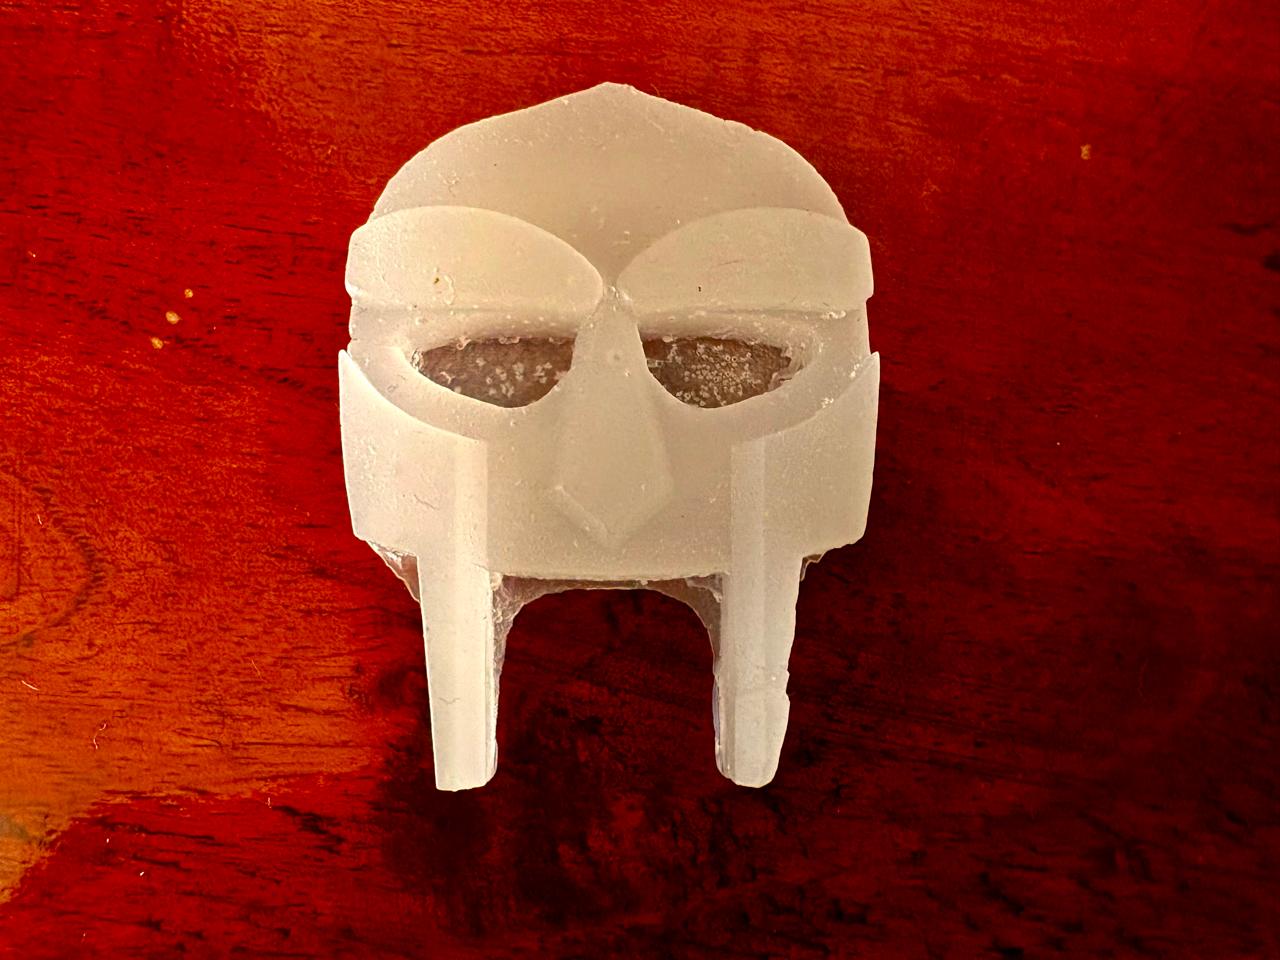
Fail. My first result had holes, so it wouldn't work correctly as a mold. This happened because the machine has dead pixels. Dead pixels mean that the screen used to cure the resin has some pixels that don't light up.
7. Finally I used an Anycubic Wash & Cure 3 to cure my piece and cleaned it using a paper towel and Isopropyl alcohol.
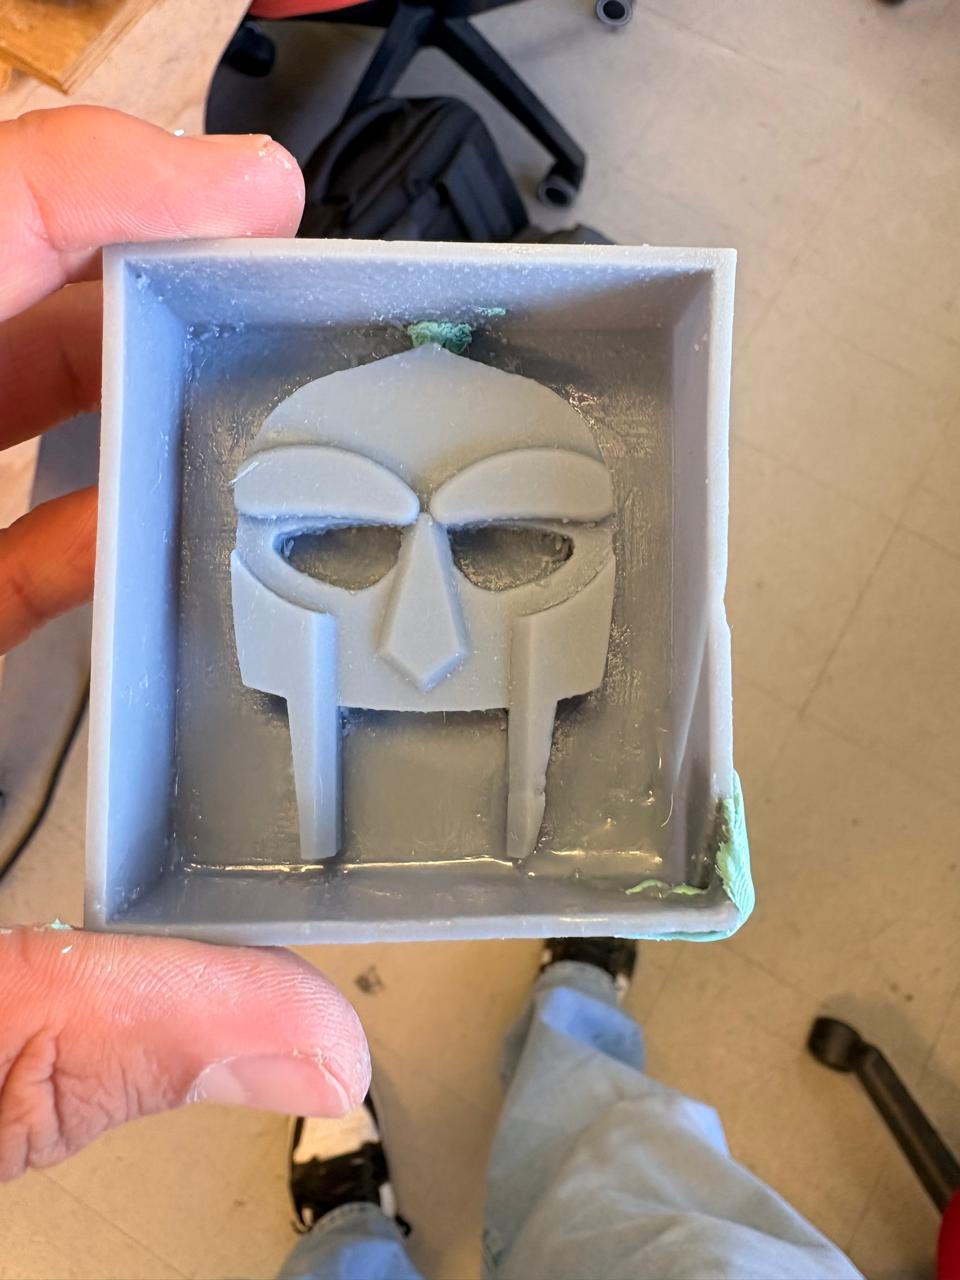
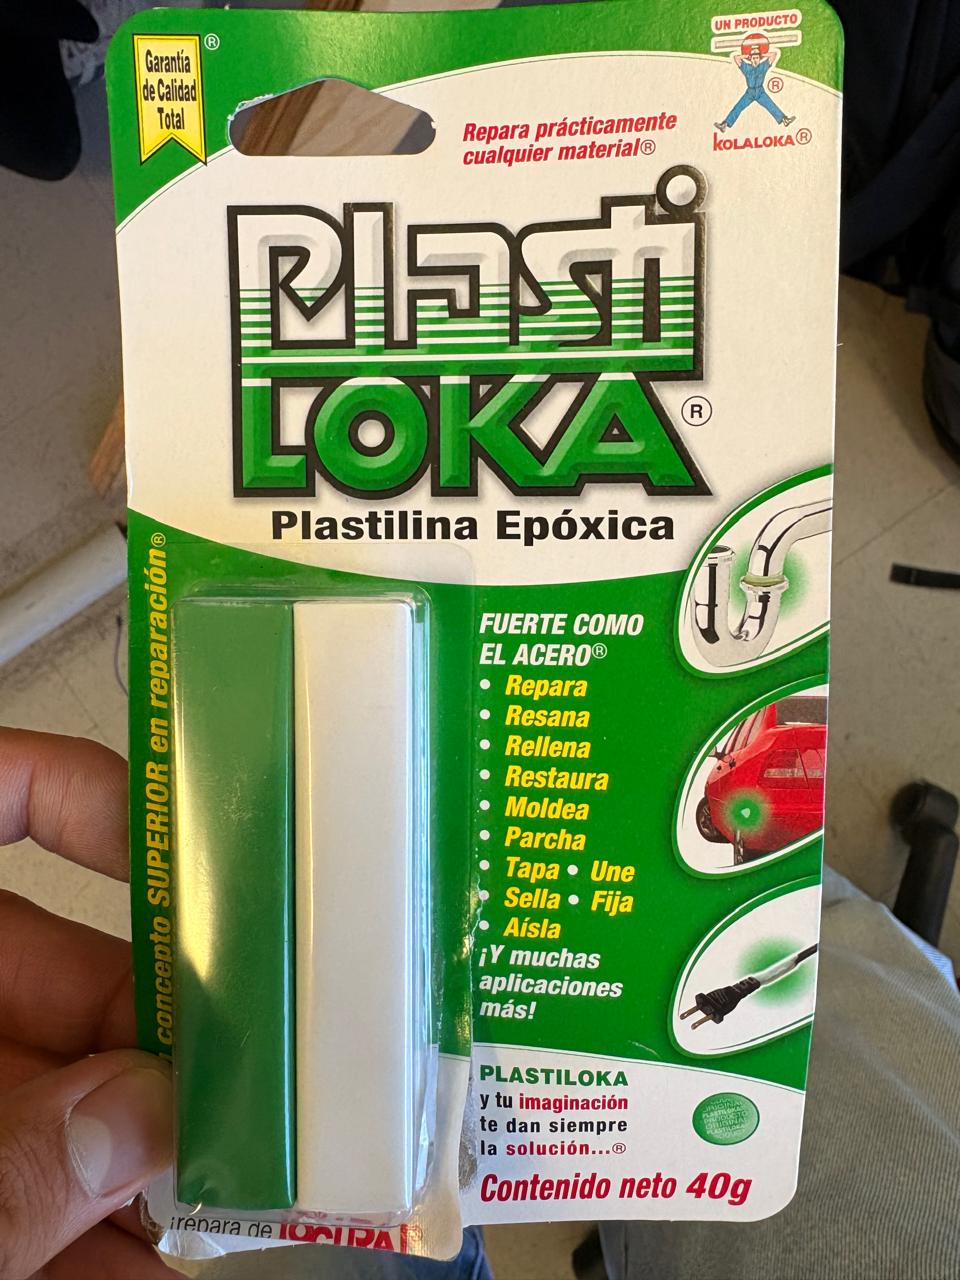
8. Because my final mold still had some holes I decided to repair ir using two-component epoxy putty.
Fabrication
Moulding
Materials
Materials.
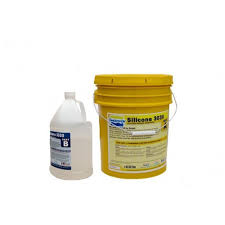
~ Silicone 3030/3
~ Catalyst 3030/3
~ 2 cups
~ Water
~ 1 Scale
Moulding
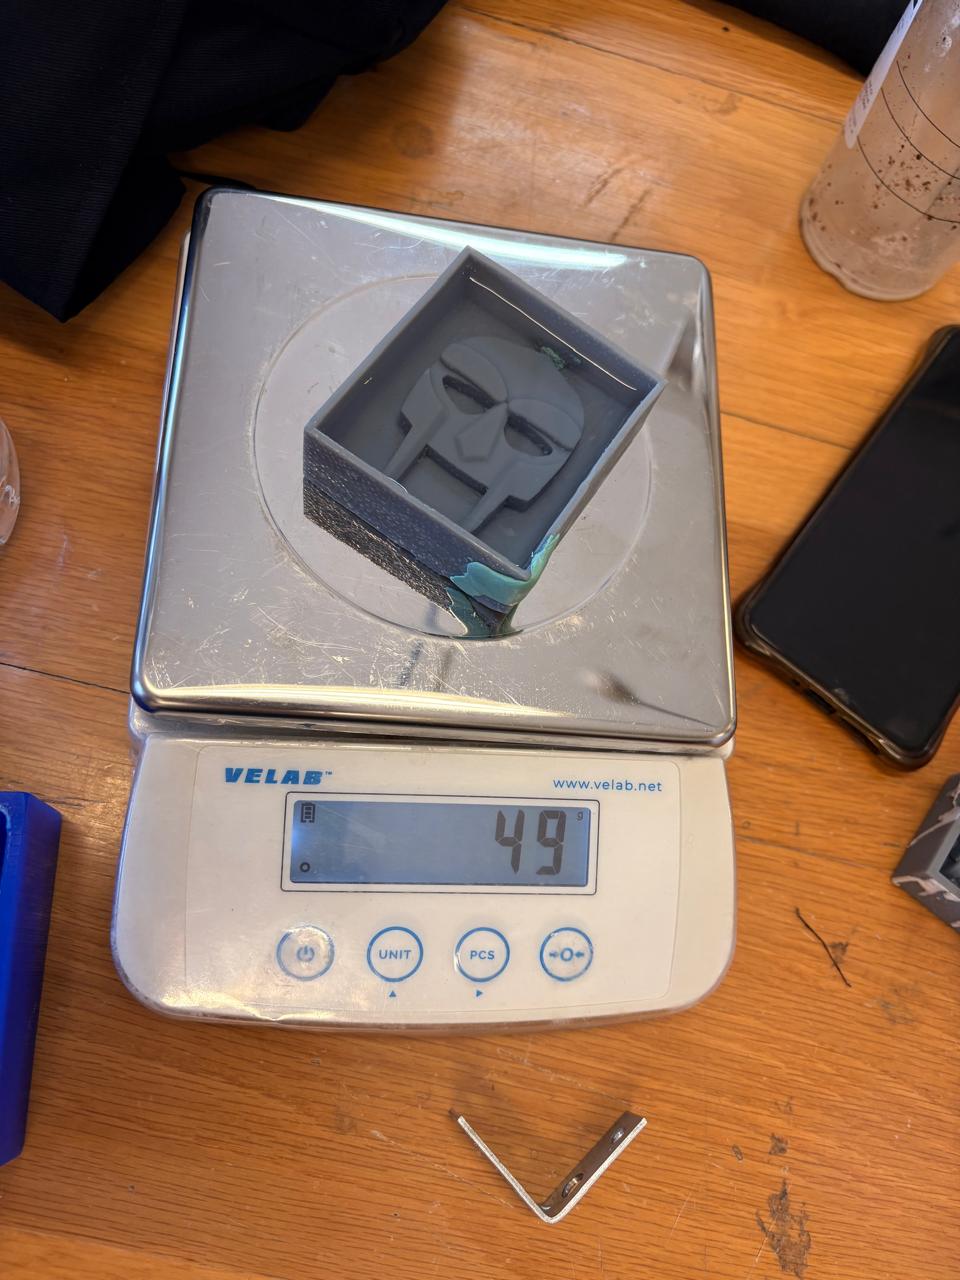
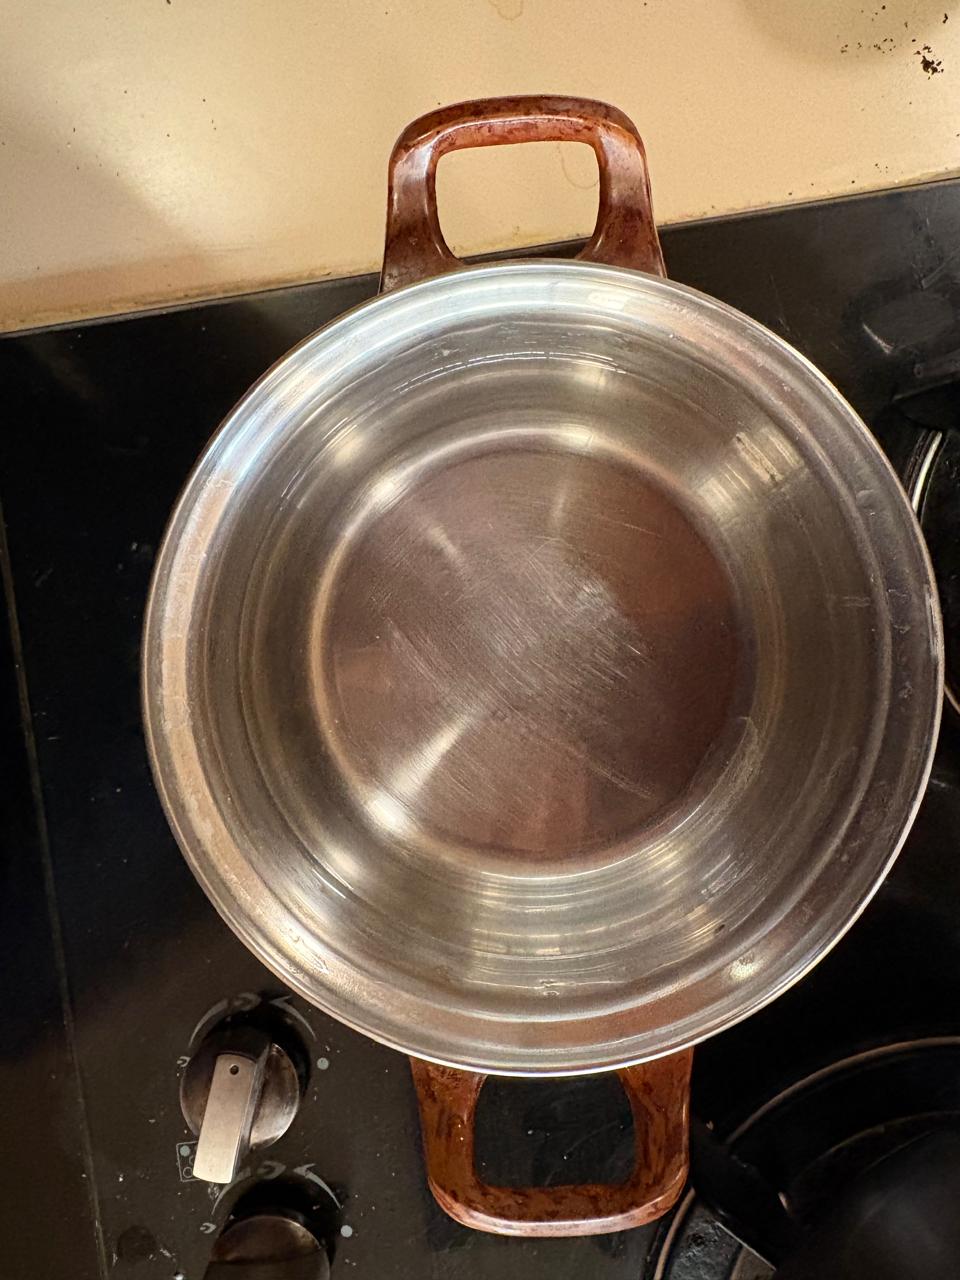
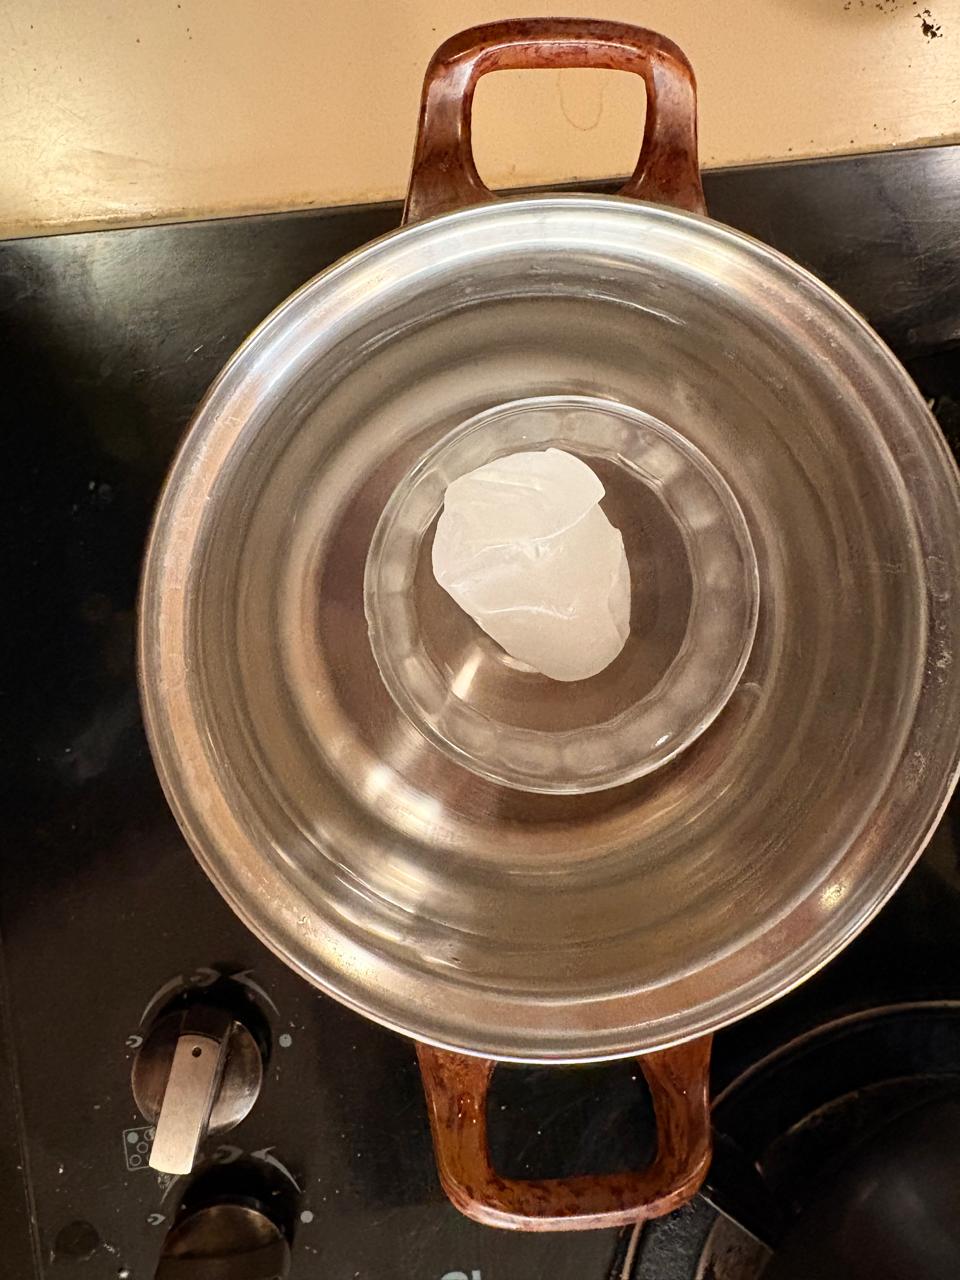
1.First, we need to get a scale, place our mold on it, and set the weight to zero.
2.Then we have to fill our mold with water, this is because we will meassure it by volume. In my case, the water volume of my mold is of 49 ml.
Moulding
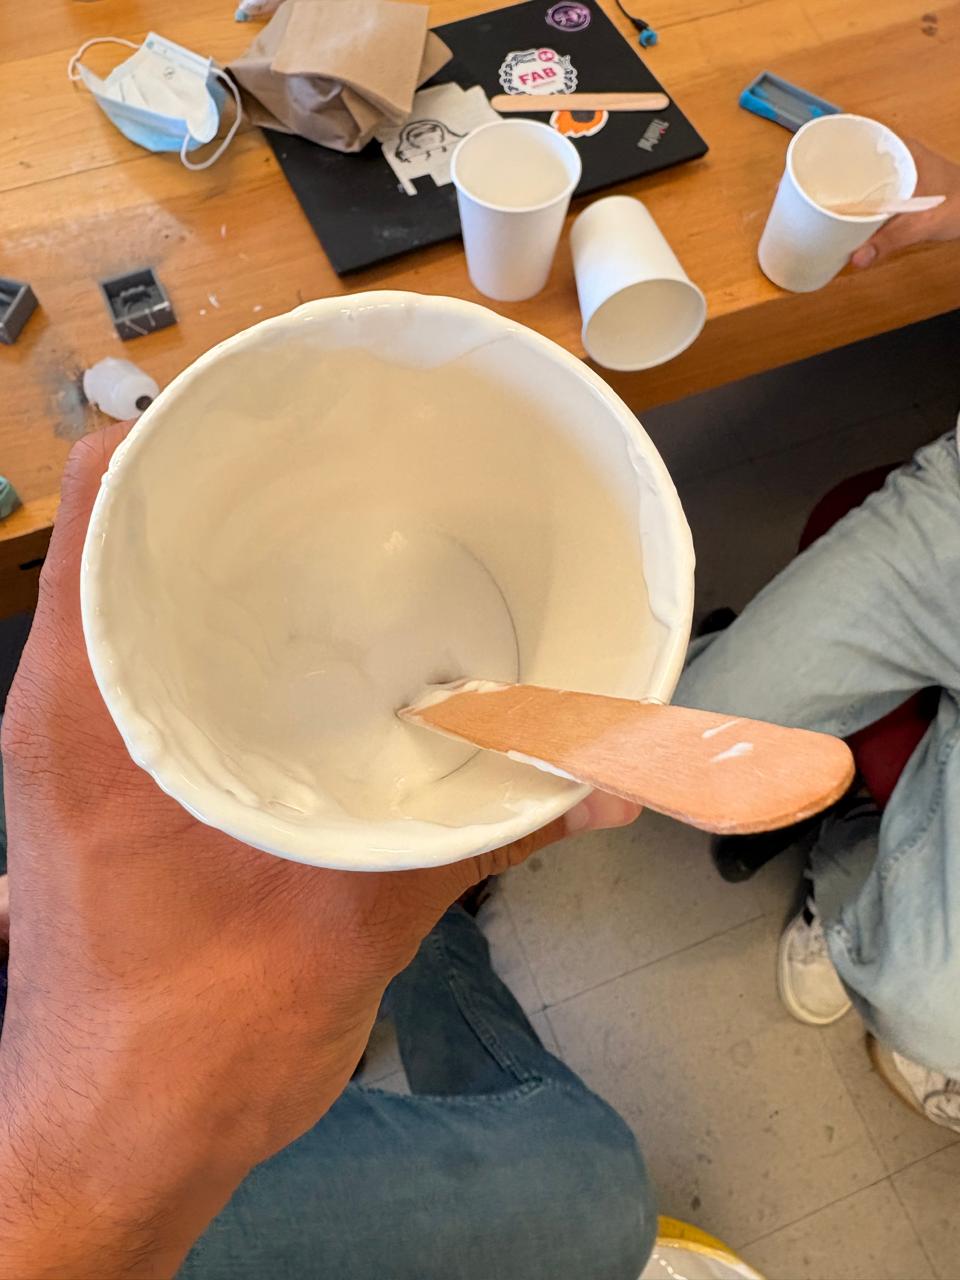
3. Then, we have to fill a cup with the volume we have got with silicone 3030/3, with a 10:1 mixing ratio. The silicone 3030 is a low-viscosity and easy-to-use condensation silicone for mold construction. This material requires a catalyst to transform the liquid into a durable, rubbery solid.
Moulding
Vacuum machine
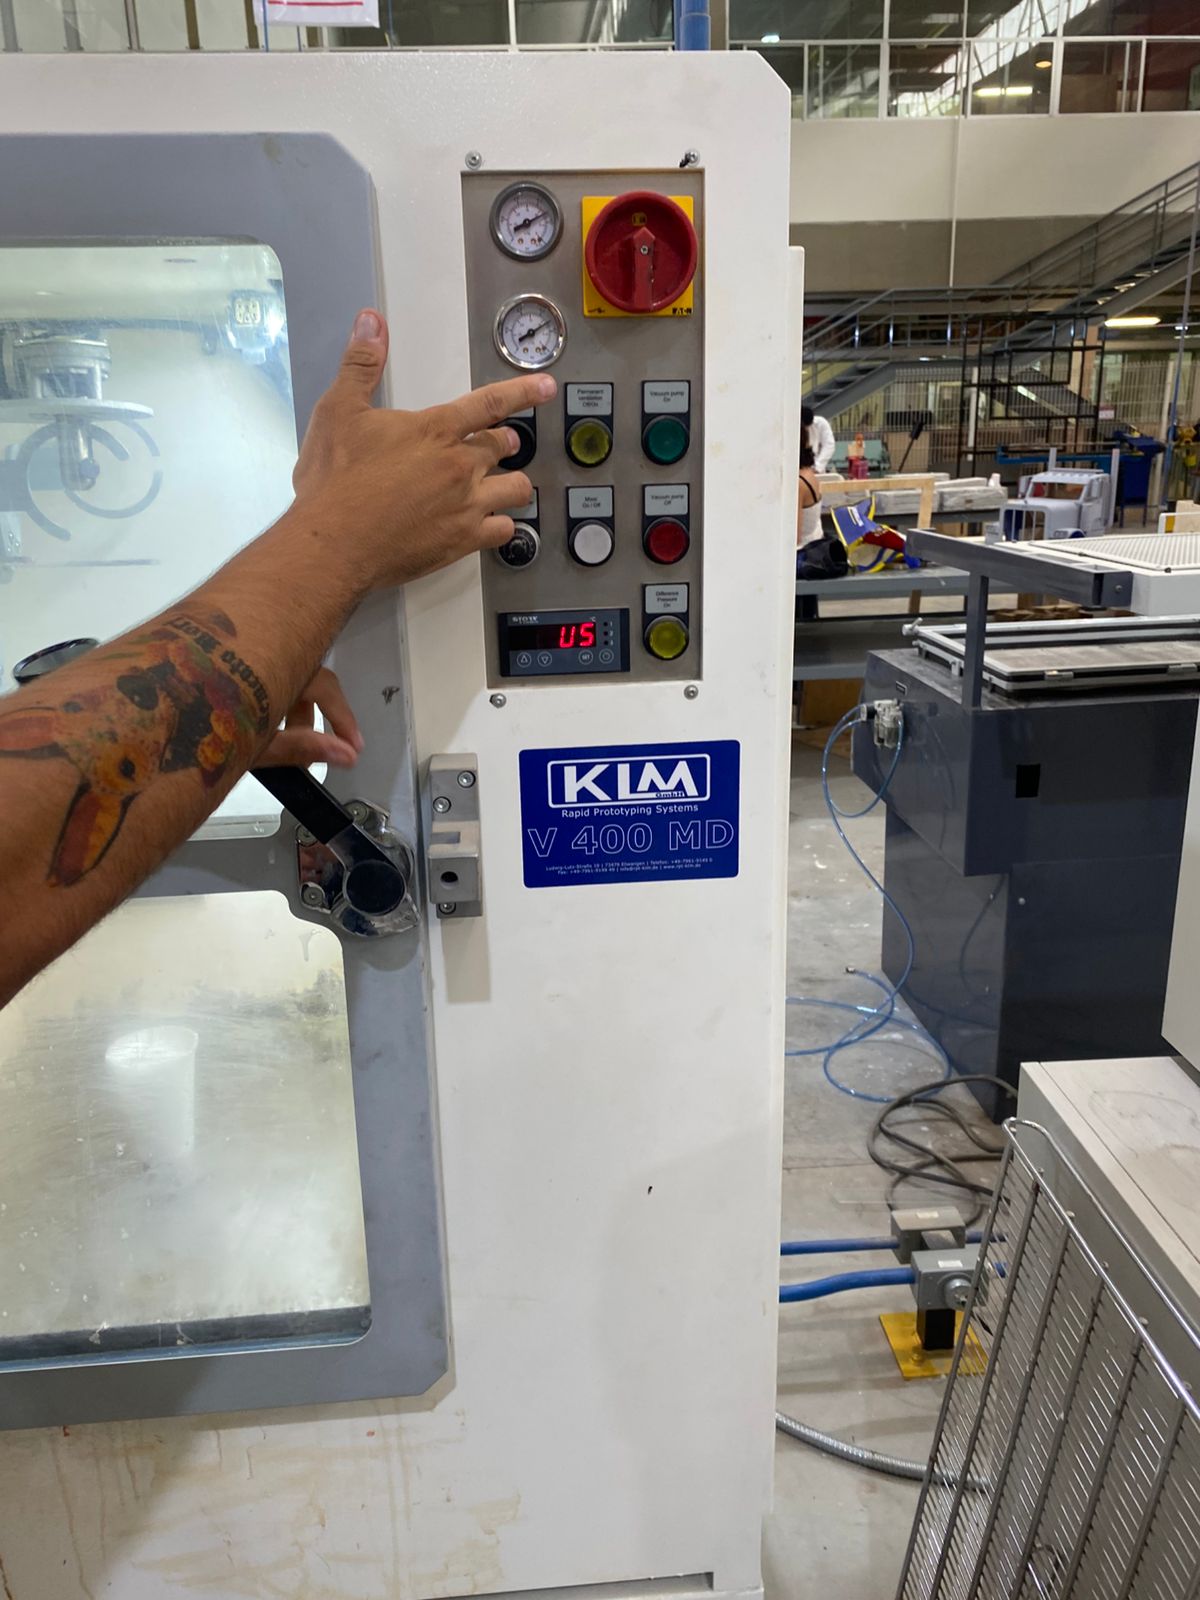
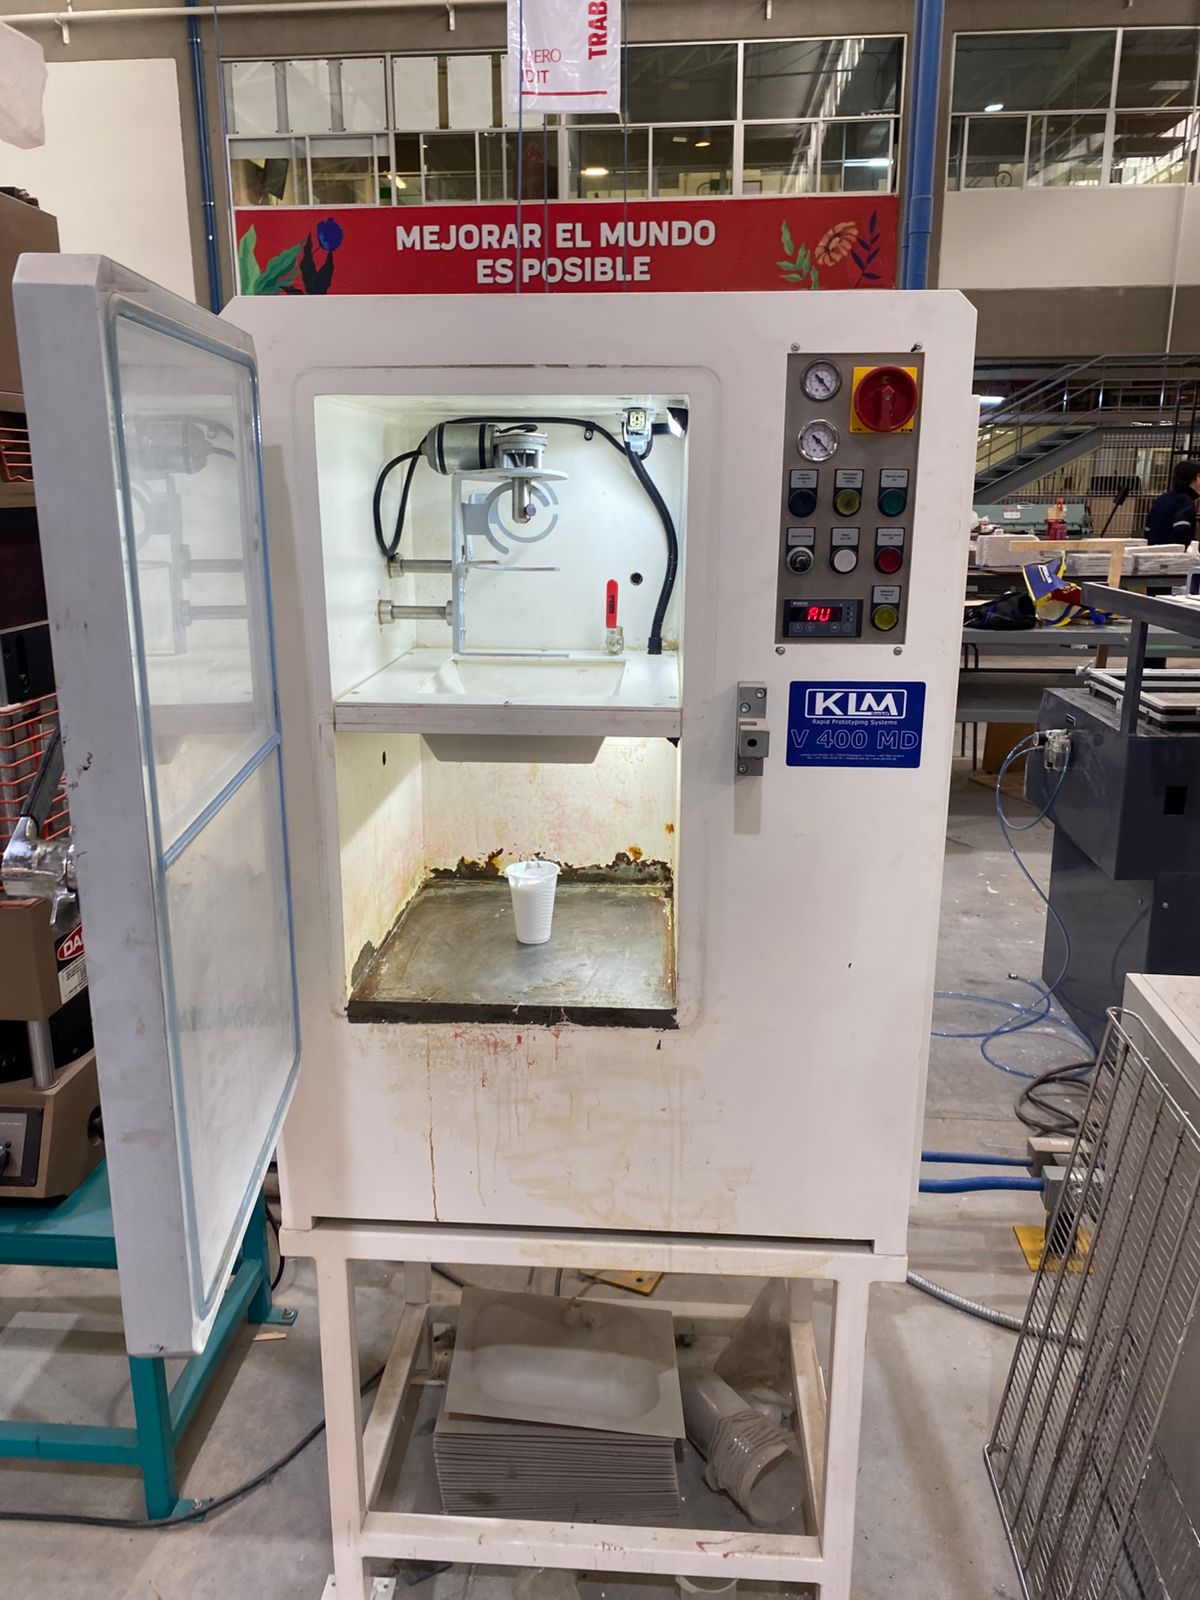
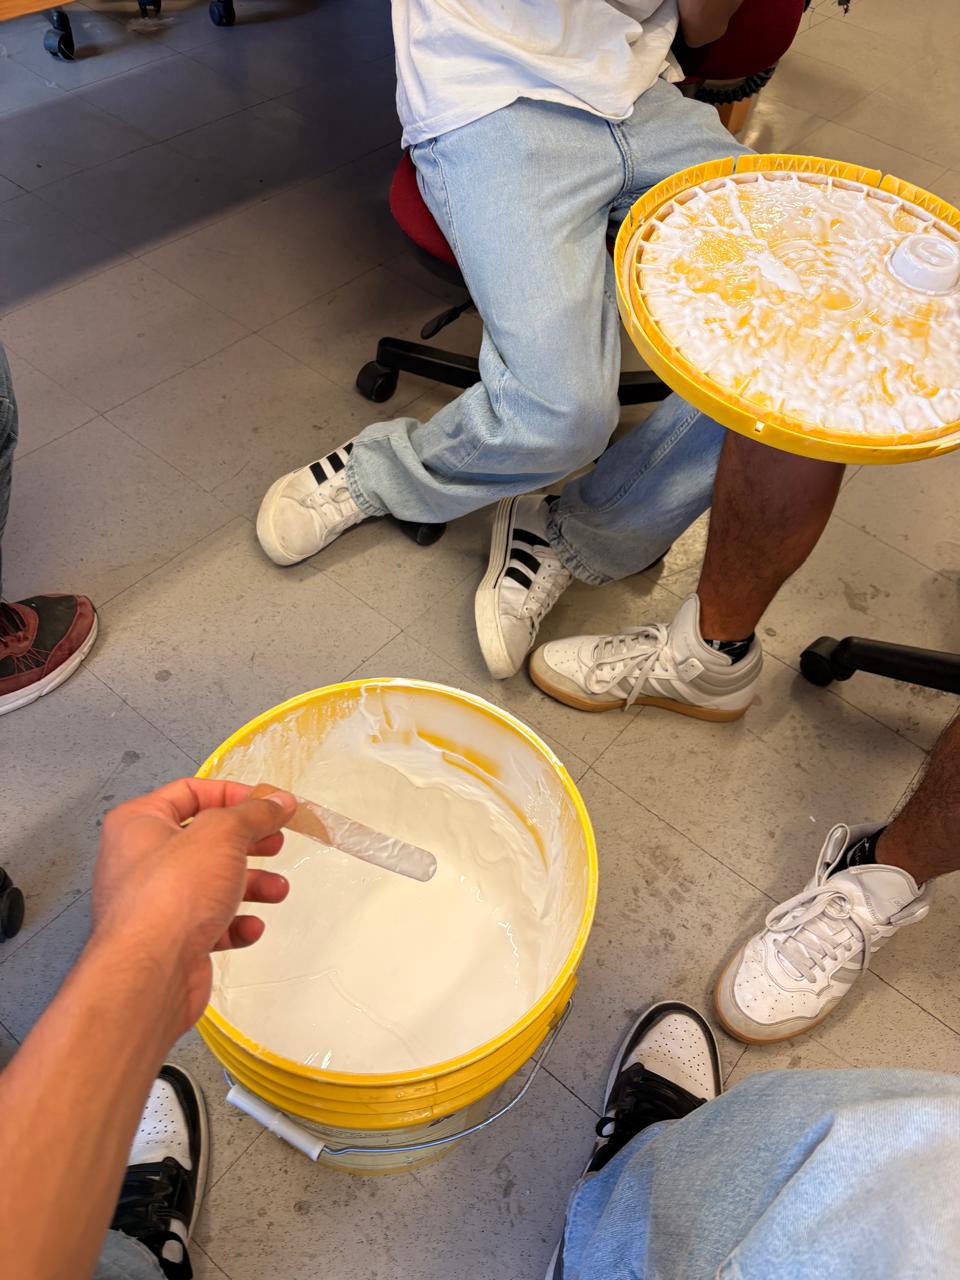
5.Next, we need to combine both compounds and mix rapidly for 1 minute. Then we have to place the silicone inside the vacuum chamber for 1:30 minutes to eliminate air bubbles. To use it, we have to turn on the machine by moving the safety, then place the silicone inside, close the door, and press the green button. To turn it off, we simply press the red button and the black button to release the vacuum, and then open the door.
Moulding
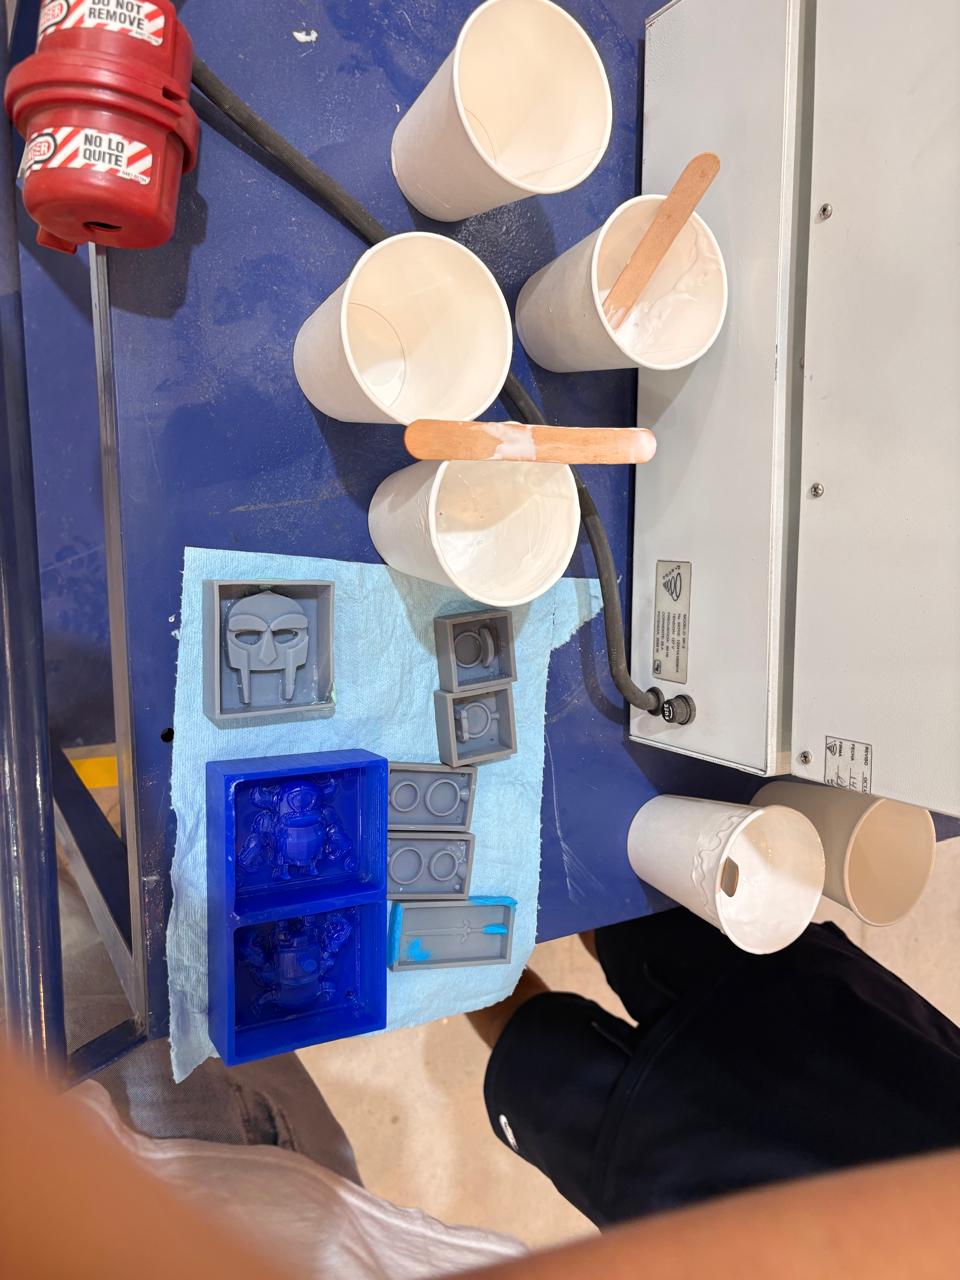
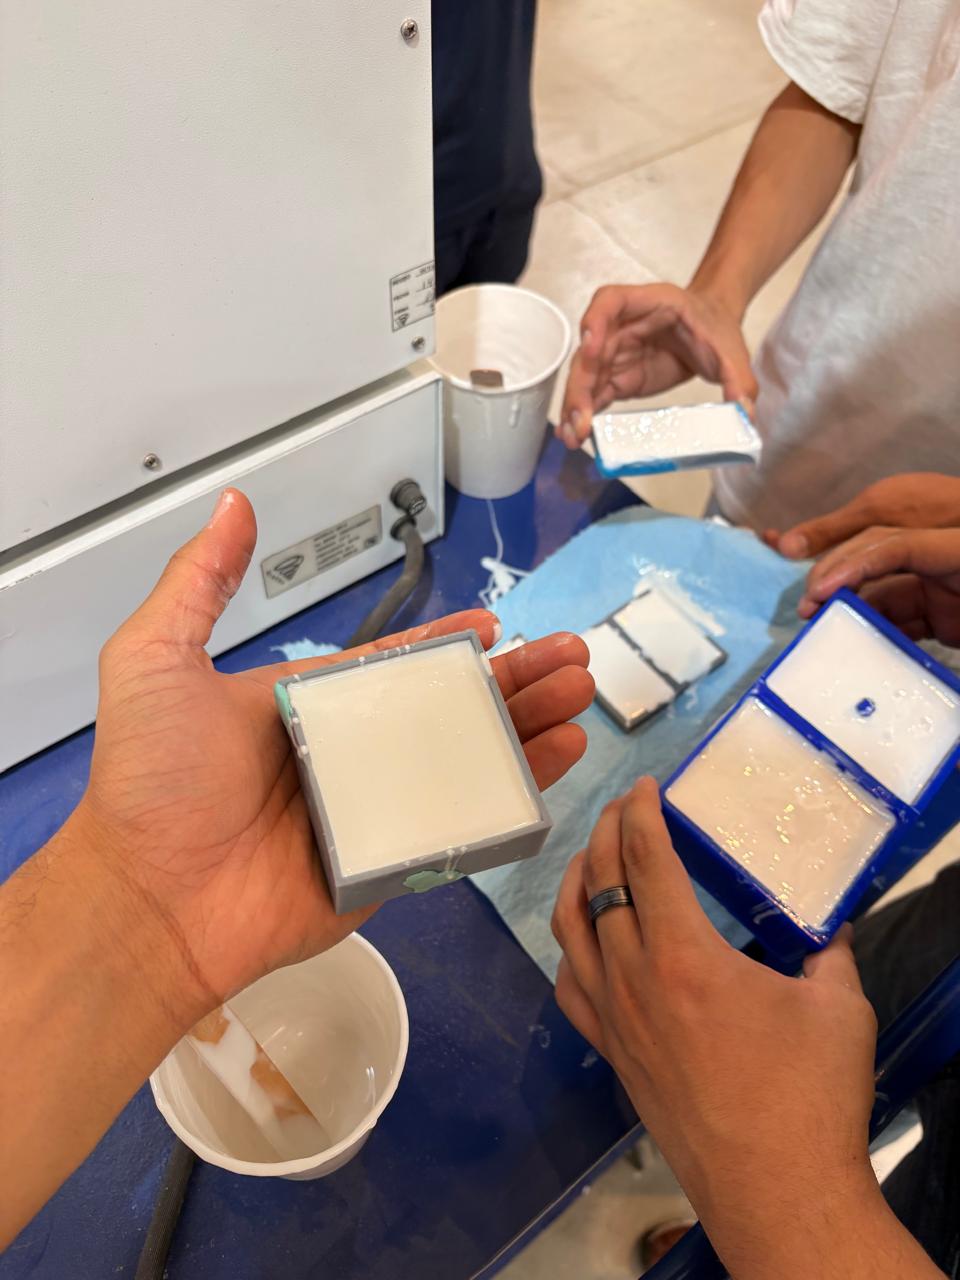
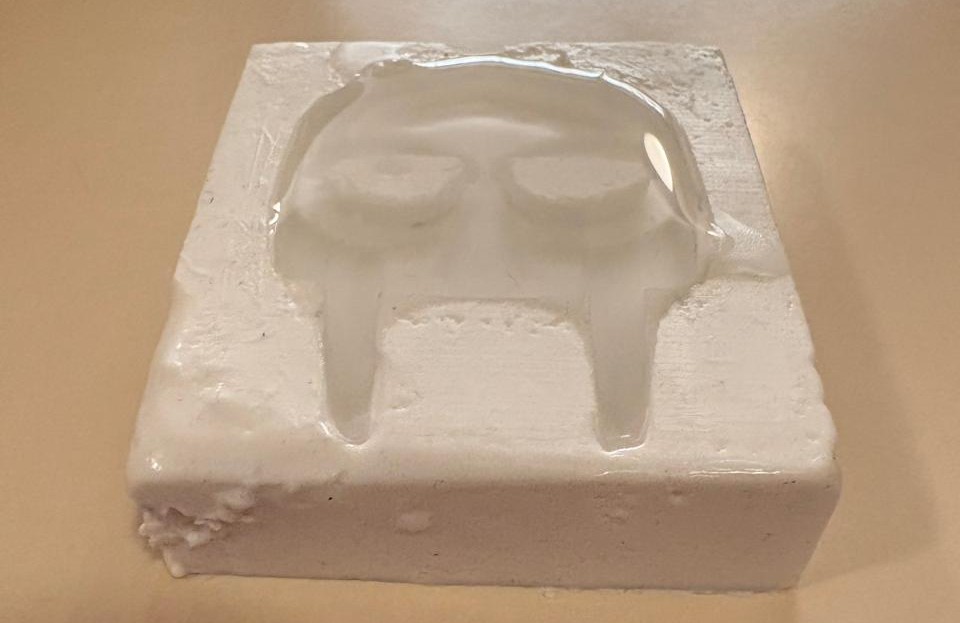
6.Then, pour the silicone into the mold quickly and from above to prevent bubbles from forming.
RESULT
Moulding
1.First, place the casserole on the stove and fill it with water. Then place the glass container with the wax inside and start heating it.
Materials.
1. Glass container
2. Wax
3. Casserole
Moulding
2. Having melted the wax we have to pour inside the mold and wait until it solidifies.
RESULT
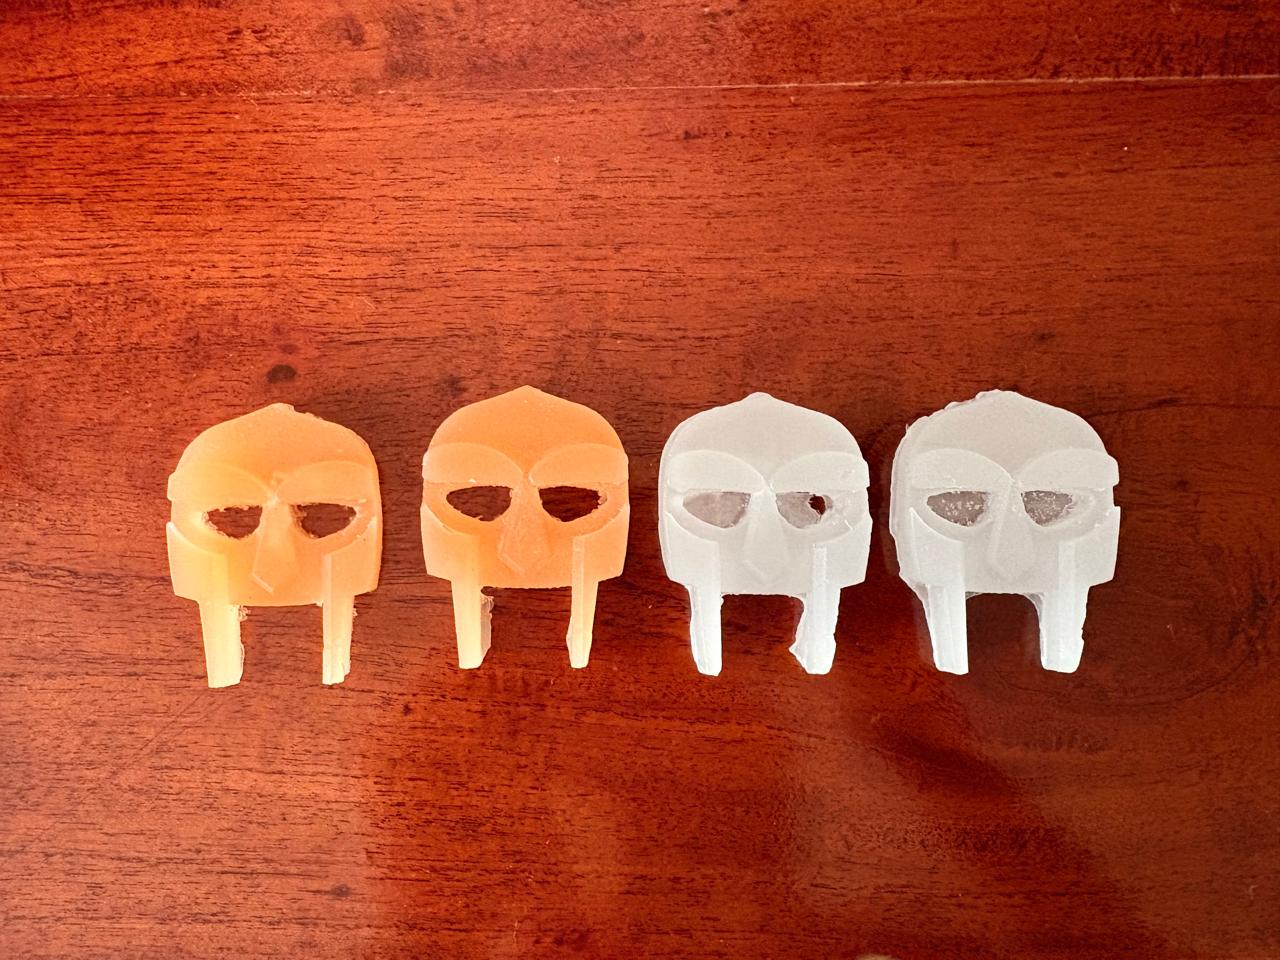
3. Finally we can change the wax color and get different results.
Learning outcomes
This week I learned a great deal about molding and casting, especially the different methods used to create a positive mold. Previously, I had made a positive mold using wax and a CNC machine, but through this experience I found that resin printing provides much cleaner and more detailed results while also reducing the amount of manual work required during the fabrication process. The main difficulty I encountered was related to the printer’s pixels, since some imperfections affected the surface quality of the final piece and required additional attention during post-processing. Even with this challenge, the resin printing workflow felt more efficient and practical compared to traditional wax machining.
The candle wax produce very attractive and smooth finishes, it is an interesting material to work with for prototyping and casting tests. This helped me better understand how different materials behave during the molding process and how material choice can influence the final appearance of a piece.
Regarding the design aspect, I realized that padlocks can involve very complex geometries, especially when considering moving parts and internal spaces. Because of this, it is essential to design while keeping the molding and demolding process in mind. I learned that avoiding undercuts and enclosed spaces is very important, since these features can trap the silicone from the negative mold and make it difficult to remove the final cast without damaging either the mold or the piece itself. Overall, this week gave me a much better understanding of the relationship between design decisions, material selection, and manufacturing constraints in molding and casting workflows.