Week 1. Project Management
Summary
This week focused on setting up my personal site using Git, exploring documentation strategies, and planning my final project. I learned how to manage repositories and established the visual identity of my site.
1. Setting up our accounts
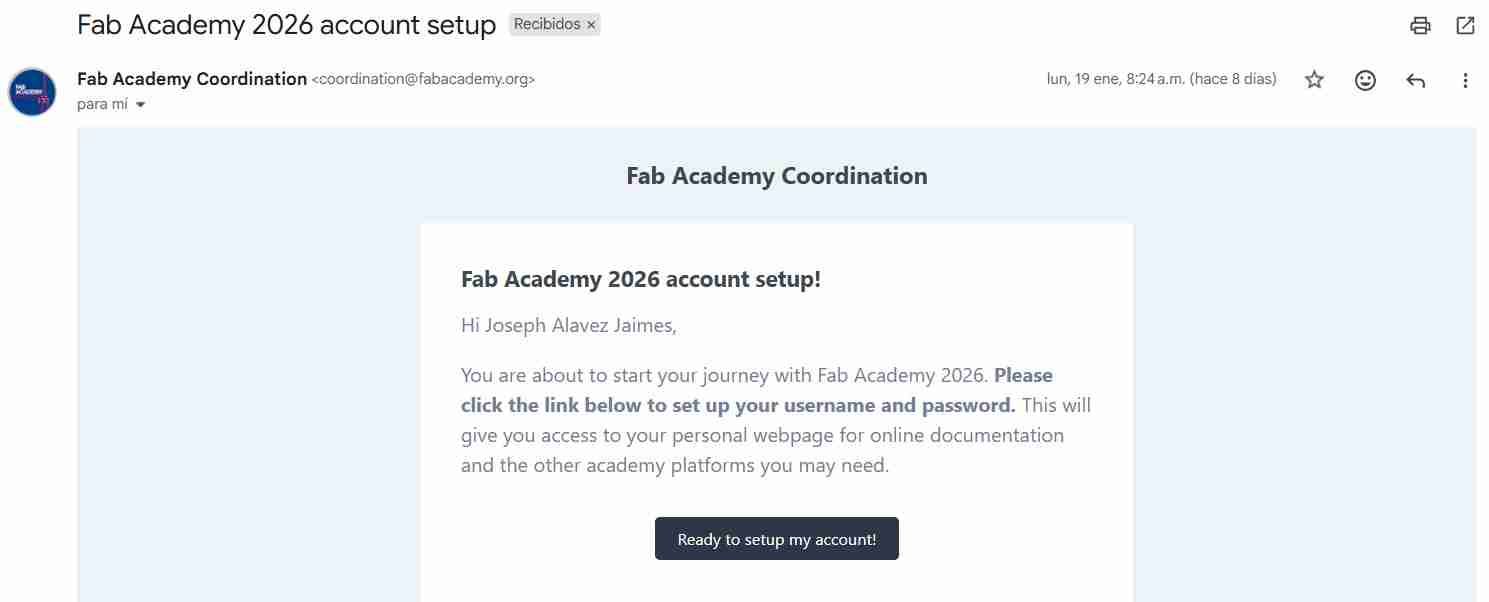
1.1 Mail from Fab Academy coordination
The very first step is to set up your Fab Academy account, for that you will receive a mail from the fab academy coordination to start the configurations of your account like your name, password, etc.
1.2 Your account linked to the different platforms
Once you have setted up your account you will receive 3 mails, 2 of them will give you direct access to the Gitlab and Mattermost platform linked to Fab Academy (you will just have to log in with your data) and the last mail is a confirmation from Fab coordination that your account have been successfully created.

1.3 Logging in to Gitlab
To log in to your account you will have to click on the button Contiue with fablabs if not you will not be able to log in. After that you will see GitLab web interface, where the repository files, commits, and project settings are managed.
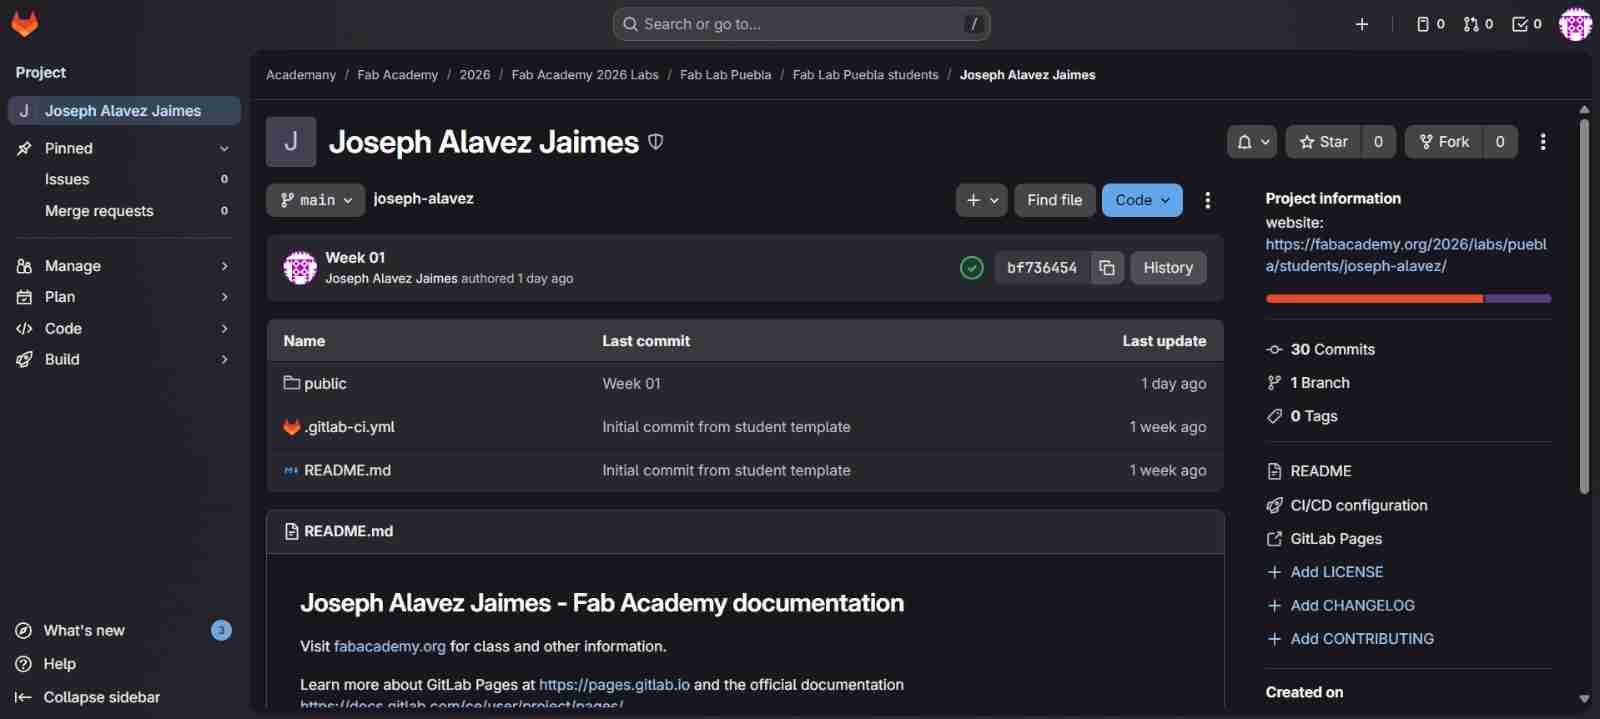
In this interface the main tabs are Code and Build.
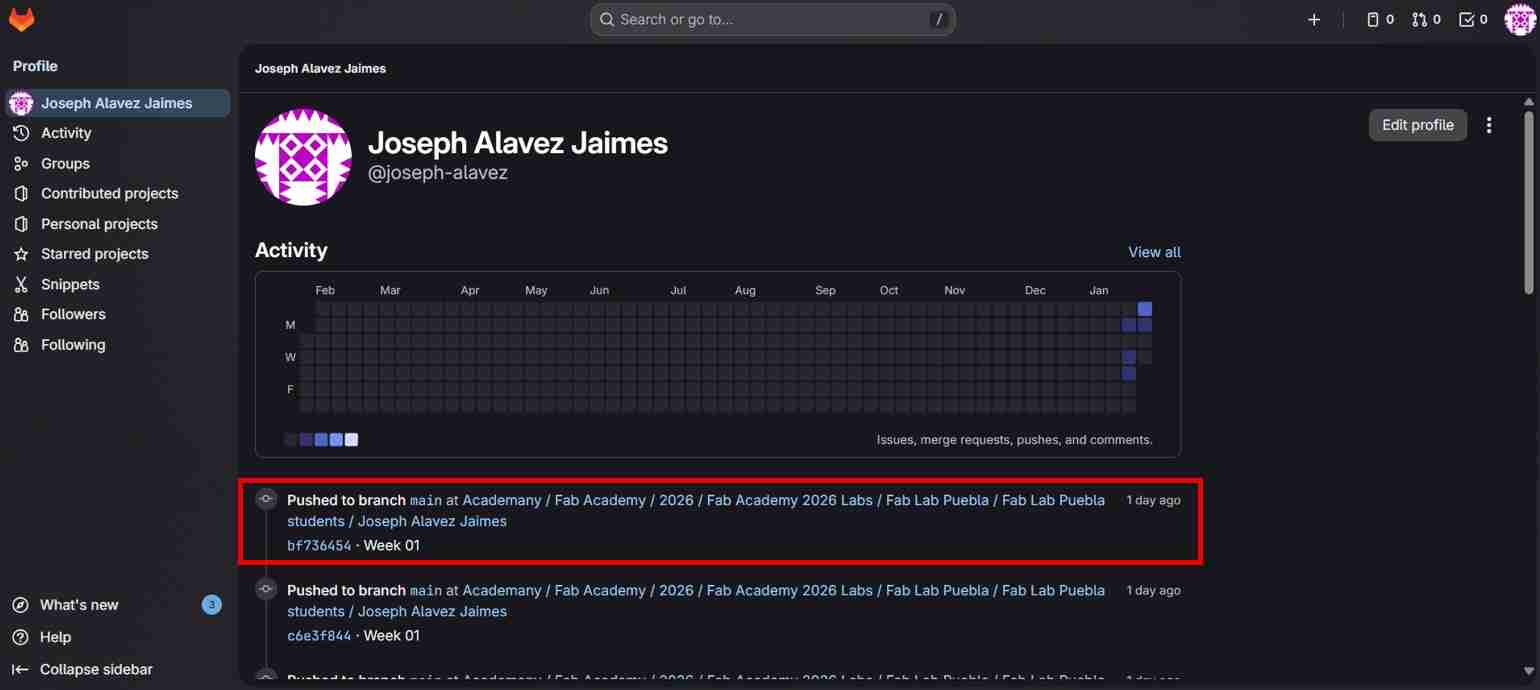
In Code tab you will commonly use Repository to see your files and Commits for the modifications on your files (we will see that later).
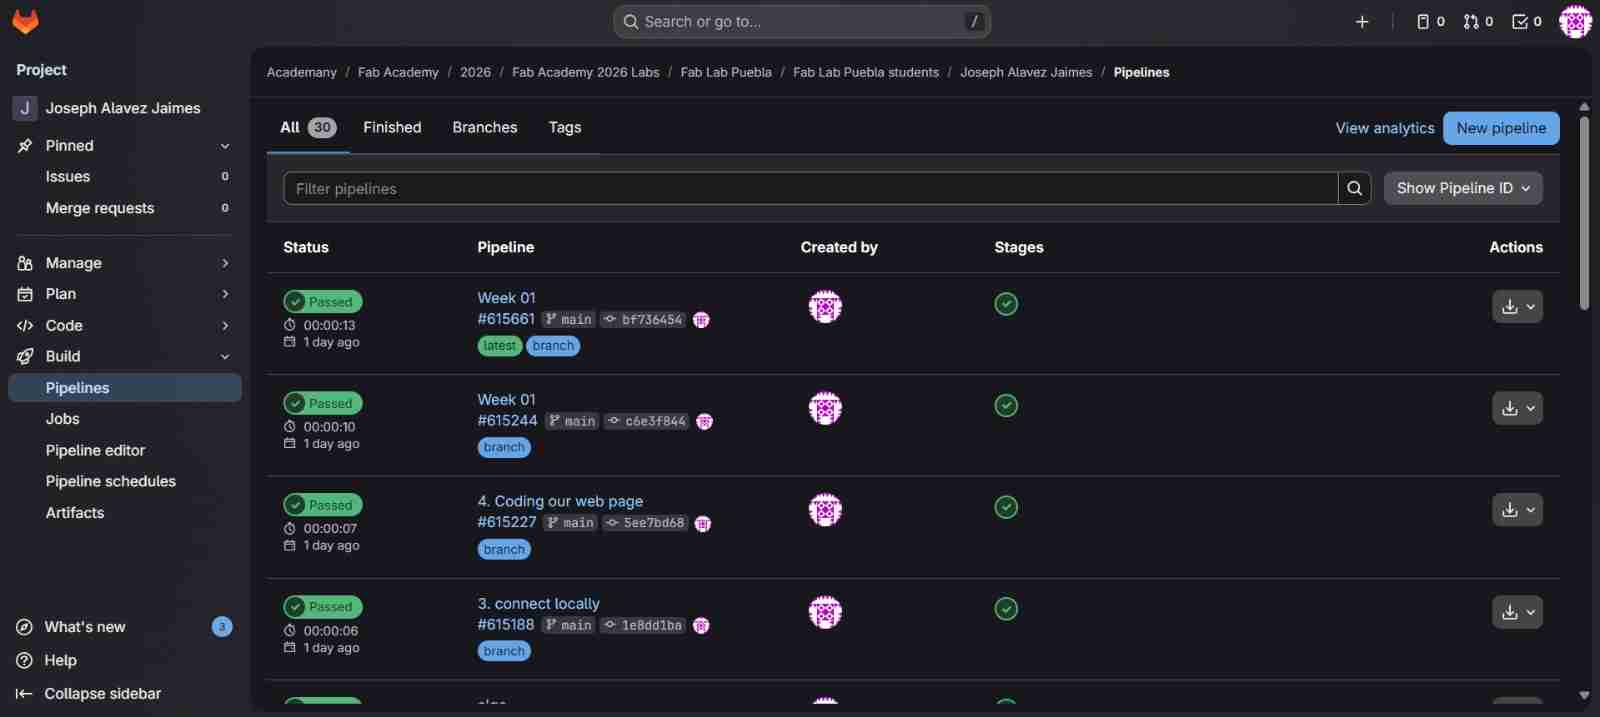
In Build tab you will commonly use only Pipeline which shows you if a change has occurred (green), has had an error (yellow) or if it hasn't been uploaded yet (red); and also the name of the commit that you have use so you know which modification has been done or not done. All of this in your files.
Hint: If you close the window and open GitLab you will see your profile interface, to access again to the main GitLab interface you only have to click on the URL that mentions Fab Academy.
2. Use of Git Bash and connecting locally to the GitLab cloud
2.1 Download GitBash
Git Bash allows you to have a Linux-like (Bash) terminal within Windows and is especially useful for working with Git.
2.2 Setting up Git Bash
We will open it and configure it, selecting the use default configurations almost in everything except in the one that ask which software we will be using to edit HTML code; in that option we will select Visual Studio Code.
We will select Visual Studio Code because It's the program I normally use for programming.
Here are some command and their function:
Navigation
| Command | Function |
|---|---|
| cd Folder_name | Moves into a folder |
| cd.. | Goes back one level |
| mkdir/Folder_name | Creates a new folder |
| rm/Folder_name | Deletes a file |
| pwd | Shows the current directory path |
| touch/Folder_name | Creates a new file |
Git basic
| Command | Function |
|---|---|
| git status | shows current changes and staged files |
| git add/file_name | Stages a file for commit |
| git add . | Stages all changes |
| git commit -m "message" | Saves changes with a message |
| git push | uploads commits to the remote repository |
| git cloneURL | Downloads a repository to your PC |
| git pull | Downloads and merges remote changes |
| du -h | Shows the repository's size in a readable format, FabAcademy asksnot to have more than 10MB per week. |
We will use these commands to navigate through the folders and upload the locally made changes that appear in the GitLab cloud.
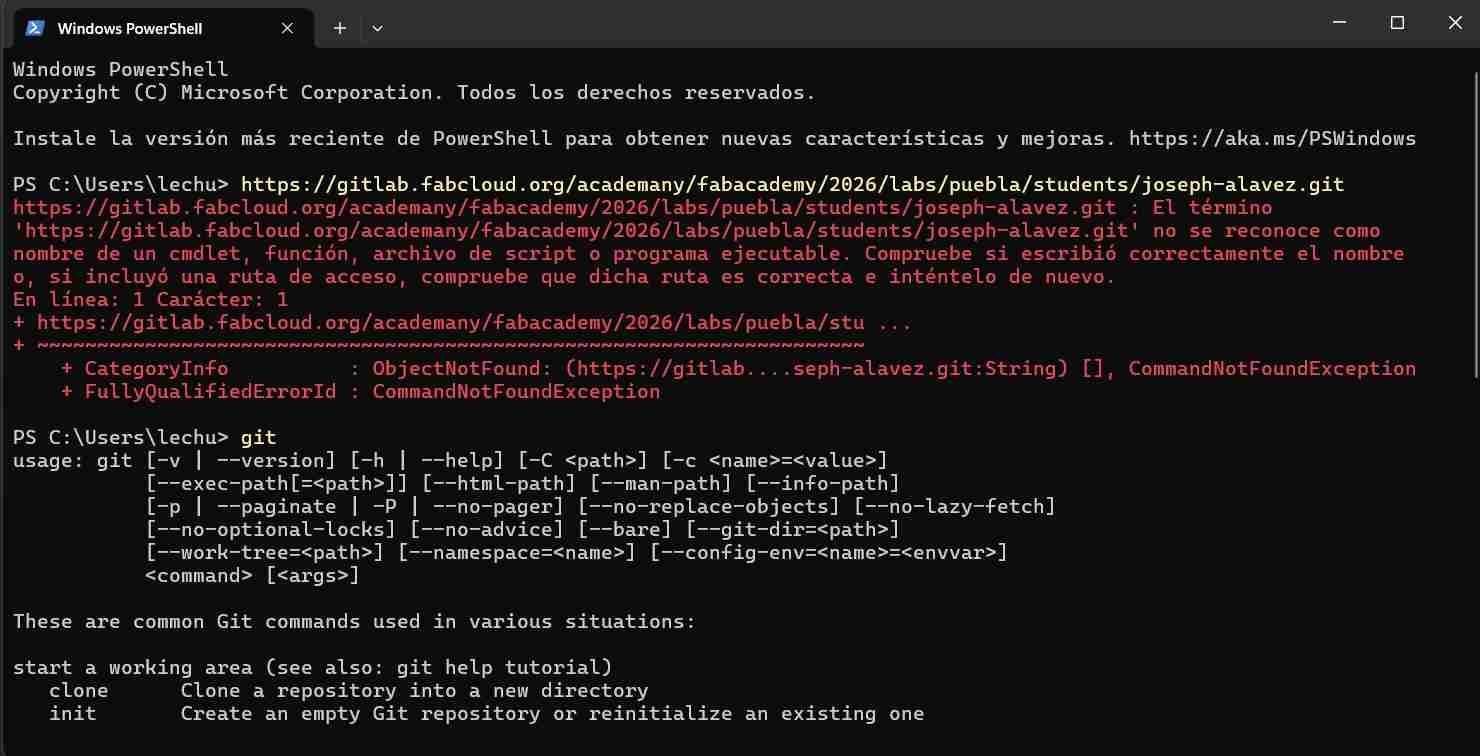
Hint: You can verify that Git Bash is installed by opening the “Terminal” of your PC and writing git.
2.3 Connecting to the GitLab cloud
Once is setted up we will connect to the GitLab cloud so we can work locally and not in the web.
2.3.1 Create a new folder to work on it
this folder has to be new and alone because we don’t want to have mixed files or documents/images that adds weight to our page, since we only have 100MB in total for what our page can weigh.
2.3.2 Use a navitagion command to move through the folders
The command is cd "Folder_name" and it has to be the new folder that we just created.
2.3.3 Clone our repository
Once we are in the folder, we will clone our repository from GitLab.
We must be in the GitLab web interface, then click on Code button after that we will copy the link Clone with HTTPS and paste it. This will automatically connect us to the cloud.
Hint: If it asks you to log in but after you it tells you it's wrong, don't worry, just change your GitLab account password (it can be the same one), close the terminal and repeat everything again; this time it should let you continue.
3. Connect locally with Visual Studio Code
3.1 Open Visual Studio Code
Once we open VSC we open a new terminal to access to our repository.
3.2 Open a new terminal
We need to open a new terminal to access to the new created folder (my case FabAcademy_2026/).
3.3 Move our repository
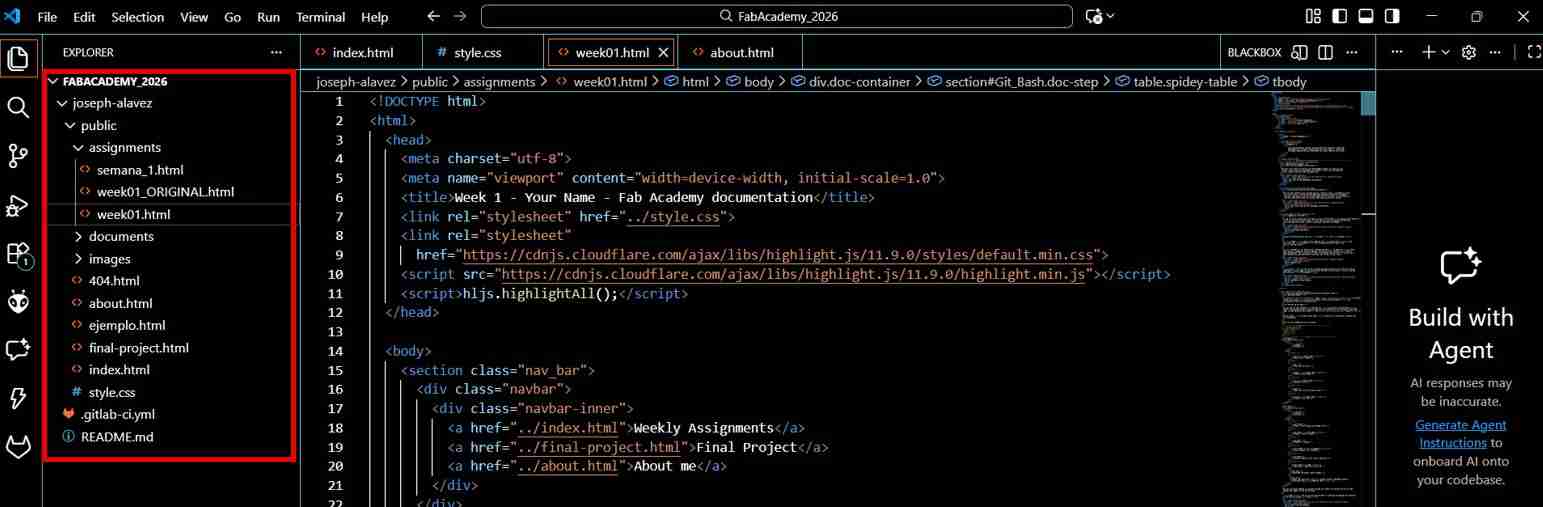
We will move to our repository with command cd "Folder_name"(my case cd/FabAcademy_2026). Press enter and repeat de command but now with your repository name (my case "cd joseph-alavez"). This is the safest way to open any folder.
When we are in the folder with your name (commonly) it will appear all the files and folders that were online but now in your PC.
3.4 Starting to upload changes to your files
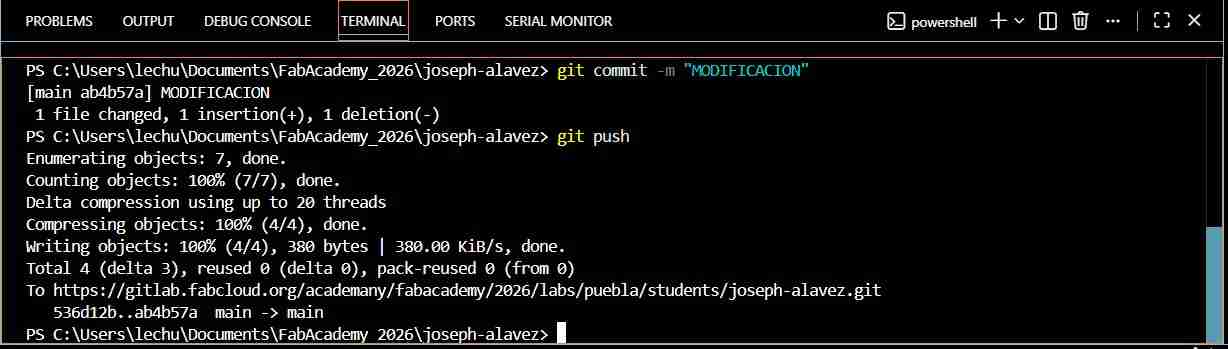
To start uploading changes to your files you need to use the commands git add ., git commit -m “Label” and git push. It must be in that order if not it won’t work.
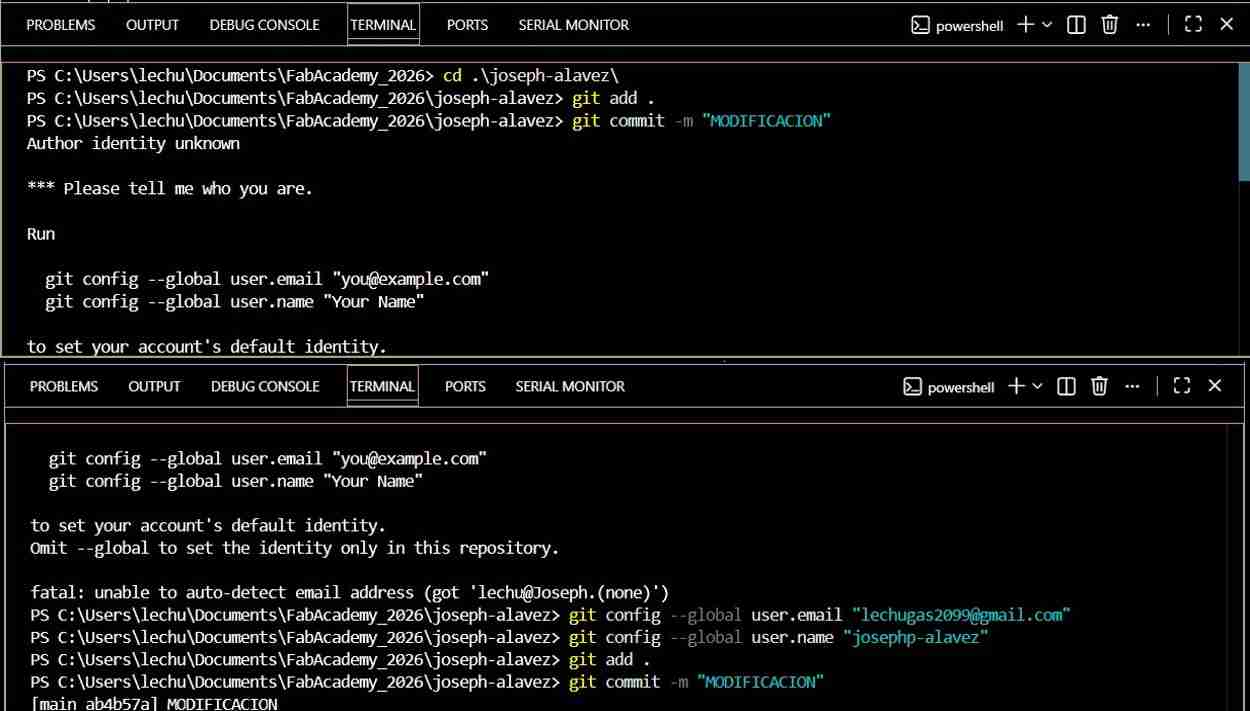
Hint: If it appears this message “Author identity unknown” don’t panic some computers don't trust making these changes, but you just need to enter the email address your GitLab account is registered with and your username, after that you'll be able to use the commands normally.
3.5 Repeat the process
For the next changes you only have to repeat the sequence of commands to upload it to the cloud.
While making changes colors appear in the files: green with a U to the right for indefinite (a new file), orange for an unuploaded file with an M, and white } if both local and online files are the same.
4. Coding our web page
4.1 What is HTML?
HyperText Markup Language or HTML is the standard markup language used to create the structure of a web page. It defines the content and layout using elements like headings, paragraphs, images, links, and lists. It is like the bones of our body, the main structure.
Basic lines
| Code | Function |
|---|---|
<!DOCTYPE html> |
Defines the document as HTML5. |
<html lang="en"> |
Starts the HTML document and sets the language (en = English). |
<head> |
The section for “invisible” information (page settings). |
<meta charset="UTF-8"> |
Allows special characters to display correctly. |
<meta name="viewport" content="..."> |
Makes the website mobile-friendly (responsive). |
<title>My Website</title> |
Text shown in the browser tab. |
<link rel="stylesheet" ...> |
Links an external CSS file. |
</head> |
Closes the page settings section. |
<body> |
Everything visible on the page goes here. |
<h1>Hello World</h1> |
A main heading. |
<p>This is a paragraph.</p> |
A text paragraph. |
<img src="..." alt="..."> |
Adds an image. |
<a href="...">Link</a> |
Creates a link. |
</body> |
Closes the visible content section. |
</html> |
Closes the entire HTML document. |
Text Formatting
| Code | Function |
|---|---|
<strong>text</strong> |
Makes text bold (important meaning). |
<b>text</b> |
Makes text bold (visual only). |
<em>text</em> |
Makes text italic (emphasis). |
Sections & Layout
| Code | Function |
|---|---|
<section> |
Defines a section of the page (grouped content). |
<div> |
A generic container used for layout. |
<header> |
Top part of a page or section (title, nav, etc.). |
<footer> |
Bottom part of a page (credits, copyright, links). |
<main> |
Main content area of the page. |
<nav> |
Defines a navigation menu section. |
Classes & IDs
| Code | Function |
|---|---|
class="box" |
Adds a class (used to style multiple elements with CSS). |
id="main-box" |
Adds a unique ID (used for one specific element). |
Lists & Separators
| Code | Function |
|---|---|
<ul> <li> |
Creates an unordered list (bullet points). |
<ol> <li> |
Creates an ordered list (numbered steps). |
<hr> |
Adds a horizontal line separator. |
Buttons & Inputs
| Code | Function |
|---|---|
<button>Click me</button> |
Creates a clickable button for user interaction. |
<input type="text" placeholder="..."> |
Creates a text box where users can type information. |
Navigation
| Code | Function |
|---|---|
<nav> ... </nav> |
Defines a dedicated section for navigation links (menus). |
4.2 What is CSS?
Cascading Style Sheets is a style language used to design and format a web page. It controls how HTML looks: colors, fonts, spacing, alignment, sizes, and responsive design. Is like our clothes.
Example uses: making a website look modern, adding layouts (flexbox), animations, and mobile-friendly styles.
CSS can be written in small or large blocks depending on what you want to customize. Sometimes you only need one or two lines (like changing a color), and other times you may use longer rules to control layout, spacing, and responsiveness.
              /*Changes color of all h1 tittles*/
              h1{
                color: black;
              }

              /*Sets the page background*/
              body{
                background-color: white;
              }

              /*Change font and size*/
              p{
                font-size: 16px;
                font-family: Arial, sans-serif;
              }

              /*Adds spacing*/
              section{
                margin: 20px;
                padding: 15px;
              }

              /*Center text*/
              h2{
                text-align: center;
              }

              /*Make a button look better*/
              button{
                background-color: #001D3D;
                color: white;
                padding: 10px 16px;
                border: none;
                border-radius: 10px;
                cursor: pointer;
              }

              /*Place elements side by side*/
              .project-row{
                display: flex;
                gap: 20px;
                align-items: flex-start;
              }

              /*Prevent image from overflowing and keeps proportions*/
              img{
                max-width: 100%;
                height: auto;
              }

              /*Hover effect*/
              a:hover{
                color: red;
              }
This lines are the very basic stuff but between searching and using AI (always understanding the why of the text changed or added so you can modify or create new styles that you want) you can create the design you want based on a character, band, style, movie, etc.
4.3 What is JavaScript?
A programming language used to add logic and interactivity to web pages. Allows dynamic behavior like button actions, forms validation, animations, interactive menus, and updating content without reloading.
Example uses: opening menus, switching tabs, loading data, interactive maps.
4.4 Code mixing HTML and CSS
When coding CSS is like making styles and saving it to later use them. So, in every HTML that you have and want to use a CSS style you just must refer it by writing the name of the style to apply it to the code below.
<!DOCTYPE html>
<html lang="en">
<head>
<meta charset="UTF-8" />
<title>Small Example</title>
<style>
body {
font-family: Arial, sans-serif;
margin: 30px;
}
.project-row {
display: flex;
gap: 20px;
align-items: flex-start;
}
.project-img {
width: 160px;
height: 160px;
object-fit: cover;
border-radius: 12px;
}
</style>
</head>
<body>
<div class="project-row">
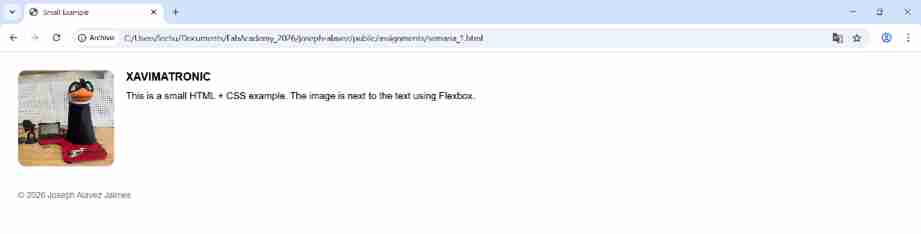
<img src="../images/About_me/XAVIMATRONIC.jpeg" alt="XAVIMATRONIC" class="project-img" />
<div class="project-text">
<h3>XAVIMATRONIC</h3>
<p>This is a small HTML + CSS example.</p>
</div>
</div>
<footer>© 2026 Joseph Alavez Jaimes</footer>
</body>
</html>
Hint: You can have these CSS styles in other files to have a file of styles in order to not make the code of your web page larger.
5. Design
My favorite superhero is Spider-man and my final project will be a Spiderbot due to that I wanted thet my page use the color palette of Spidey's suit and a yellow that is a subtle reference to Twenty One Pilots, my favorite band, these ideas were mixed together resulting in the page you are seeing now.
For the design and aesthetic of my page I used AI more specifically Gemini as a creative collaborator significantly enhancing my workflow. It acted as a bridge between my conceptual ideas like the Spidey aesthetic and the technical CSS implementation. AI assisted in optimizing layout structures, solving responsive challenges, and ensuring that the visual identity remained consistent across all sections. This synergy allowed me to focus on high-level design decisions while maintaining clean, professional-grade code.
I used AI to translate my visual ideas into code. By providing specific prompts about layout (Flexbox), color palettes (Spidey Red #C5001A), and transparency levels, I was able to maintain a consistent 'Hero' aesthetic throughout the site.
I first created sections and a section separator, to end every section, for three reasons. First, to maintain order and avoid confusing myself or the AI; second, to create short and precise prompts; and third, to understand what's being done, research it, and manually correct anything I don't like. This way, I maintain a fast workflow, quickly conceptualize my ideas, and learn so I can later create my own styles without AI or modify them to my liking.
Example of the prompt used: "Dame la paleta de spider-man pero como color de fondo quiero que uses rojo y azul como colores dominantes en el fondo pues siento que el color blanco se ve muy simple, tal vez que el blanco sea el color de las letras, dame el css con estas modificaciones y añade la interacción para que al pasar el mouse sobre cambie a un color blanco claro”
Here is the translation of the prompt: "Give me the Spider-Man color palette, but for the background color, I want you to use red and blue as the dominant colors. I feel like white looks too plain. Maybe white could be the color of the text. Give me the CSS with these modifications and add the interaction so that when you hover over it, it changes to a light white color.
With this prompt I got the main aesthetic of my web page which is the blue to red gradient, with white letters and that when you hover through the navigation bar menu it reacts with a bright white.

Another prompt example for the creation of the About me section:
"Act as an expert UI/UX Front-End Developer. I am building a personal portfolio with a "Spider-Man" (Spidey) visual identity."
Task: "Generate the HTML5 and CSS3 for a profile section titled 'About me'."
HTML Structure Requirements:
- Create a main container that holds a profile card.
- Left Column: A container for a profile image with a stylized caption below it reading "Subject #021".
- Right Column: Organize the information into two blocks:
- Stats Block: Should include "Identity: Joseph Alavez Jaimes", current studies, and a "Power Levels" subsection with three progress bars (3D Modeling, Electronics, and Programming).
- Bio Block: A description area for personal text and a prominent link for a "Student Agreement" PDF.
CSS Styling Requirements:
- Background: Use a transparent white background rgba(255, 255, 255, 0.1) with 15px border-radius and a subtle white border.
- Colors: All text must be white. Progress bars should be a vibrant Spidey Red (#C5001A).
- Typography: Titles ("Abilities" and "Description") must share the same style: underlined in white with a 5px offset.
- Layout: Use Flexbox to ensure the photo and the info columns are side-by-side and responsive.

6. Useful sites
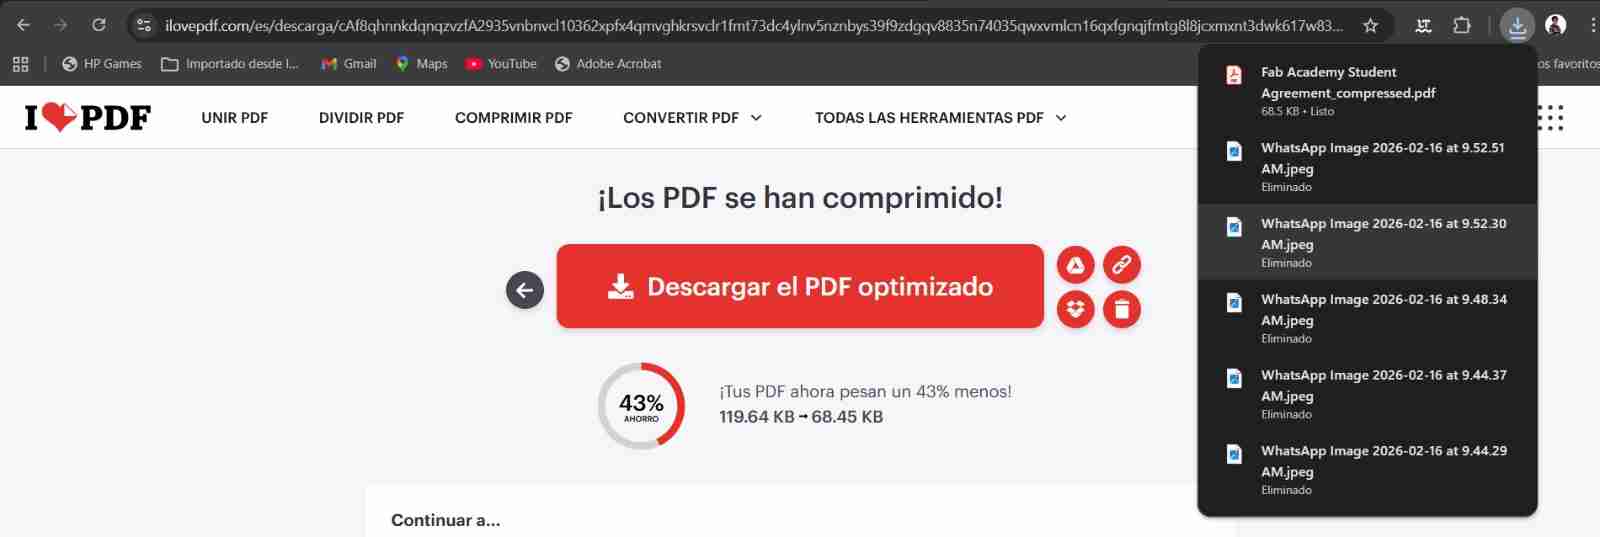
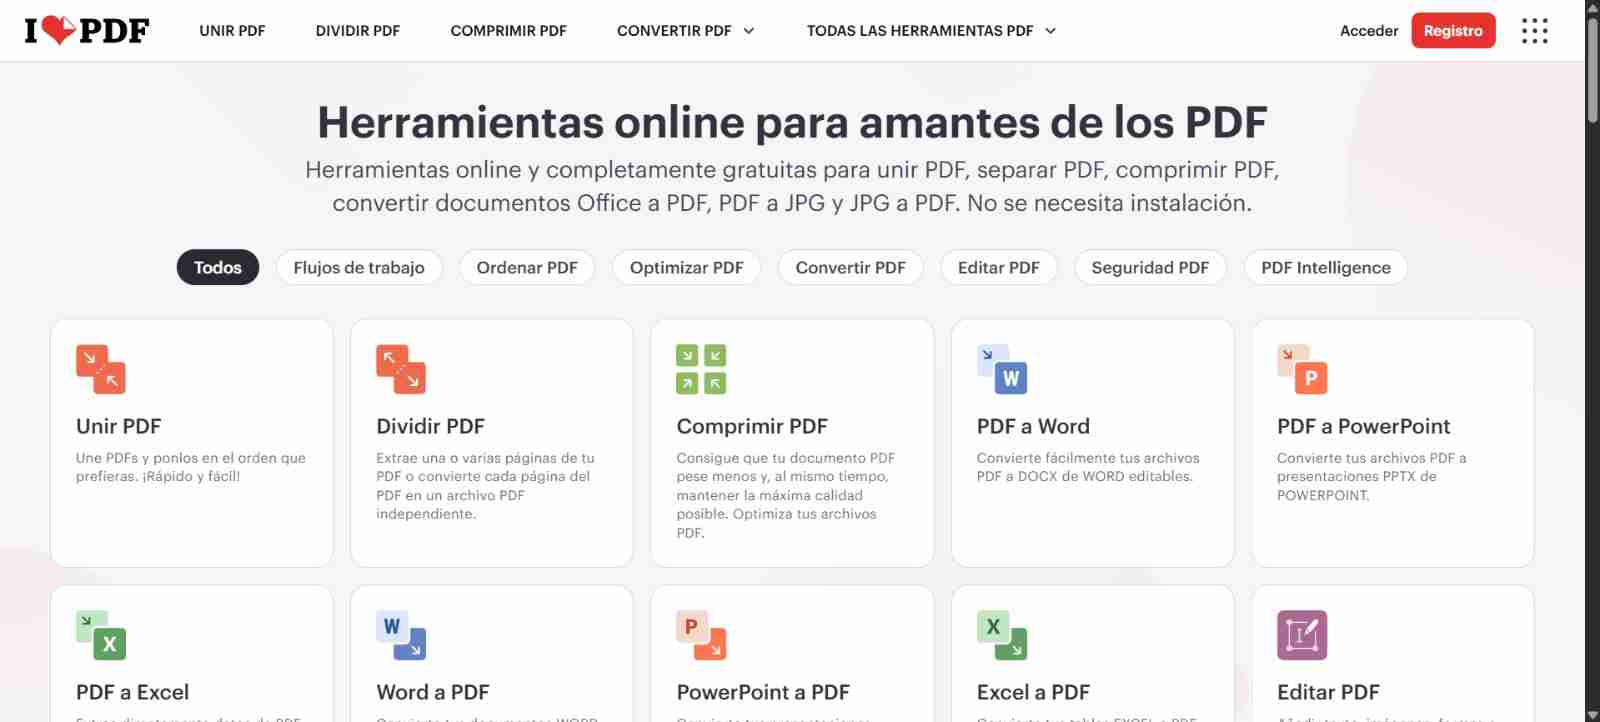
For compressing images, I used I love IMG and for compressing pdf´s I used I love PDF both are free-to-use websites. Also is important to mention that sending your photos through whatsapp compress your images.
6.1 How to use them?
Both sites works the same way, they will give you different options but this time I clicked on comprimr PDF/IMG "compress PDF/IMG" since I want to compress the PDF and images.
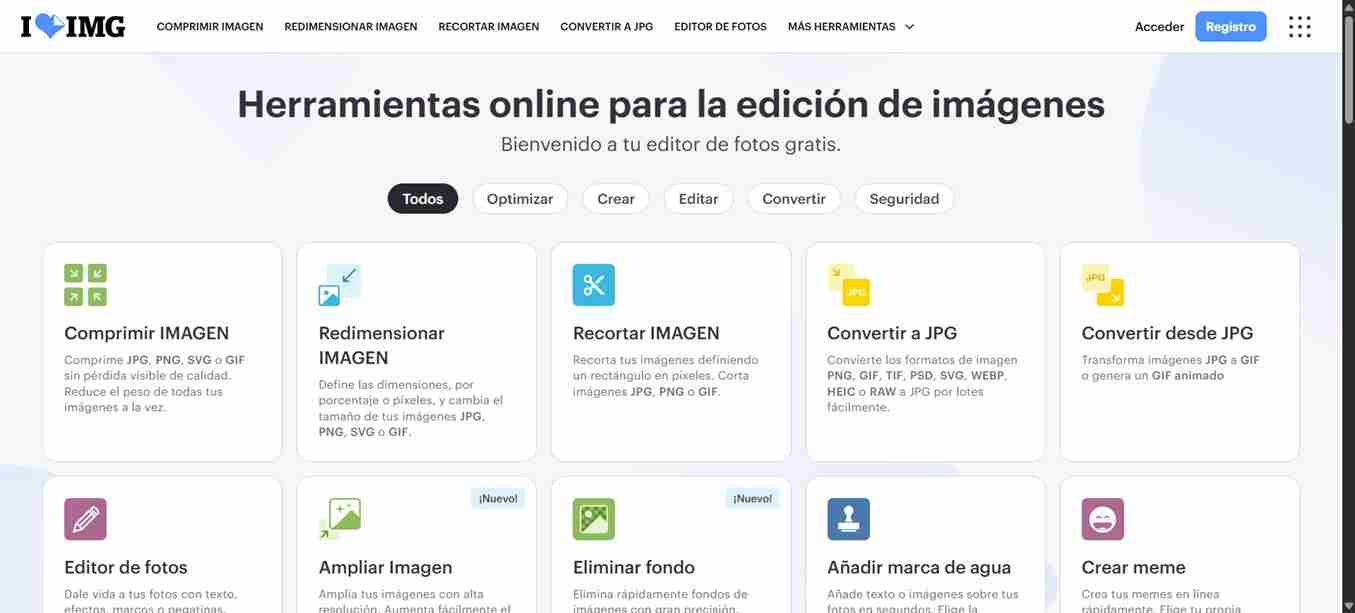
Since both work the same I will continue in I love PDF, if you want to use I love PDF you can repeat the same process.
Once we have selected the compress option we will just have to drag or selct our file to the page.
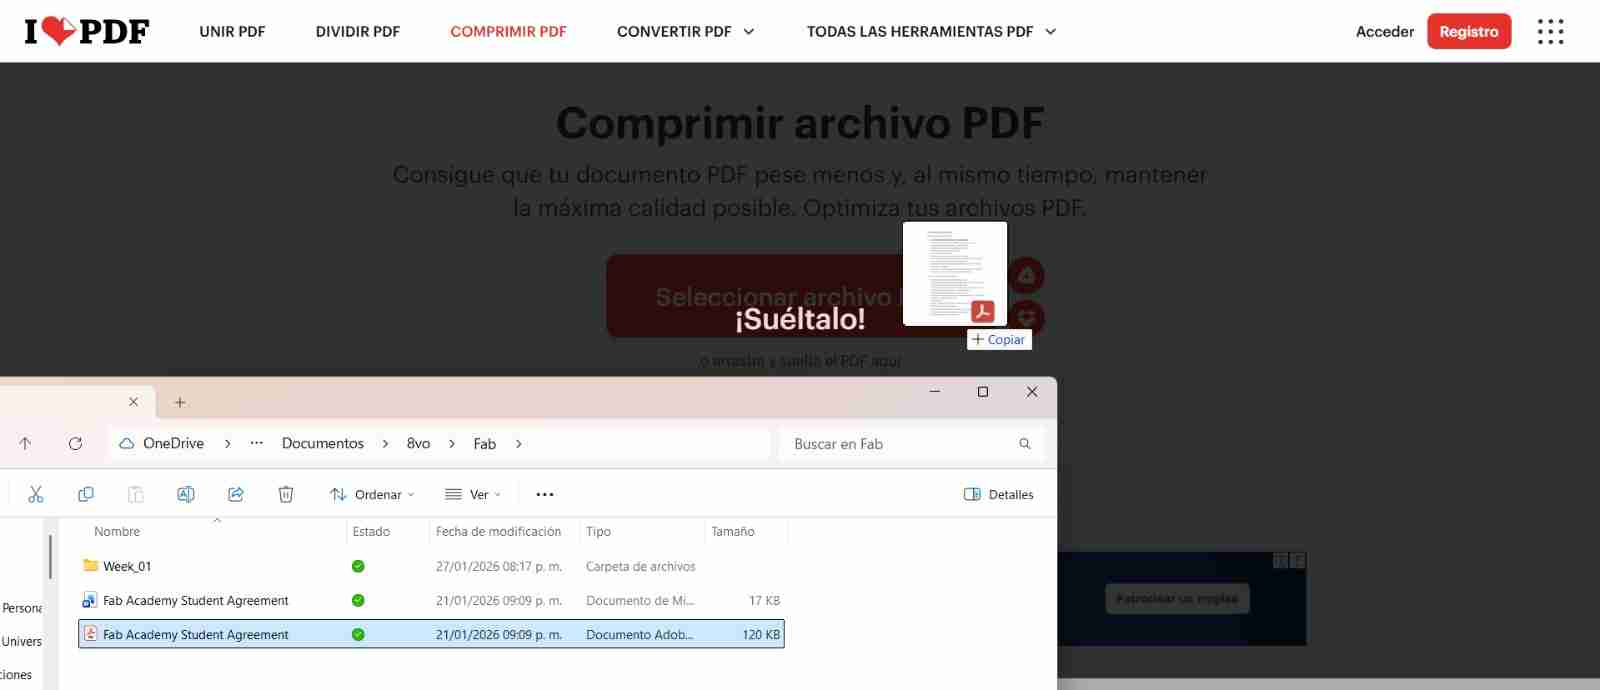
After a tab of compressing options will appear, we can select the option we want I personally recommed the intermediate option to sill have good quality but less weight of the file. After we select the option we will click on Comprimir PDF "Compress PDF".
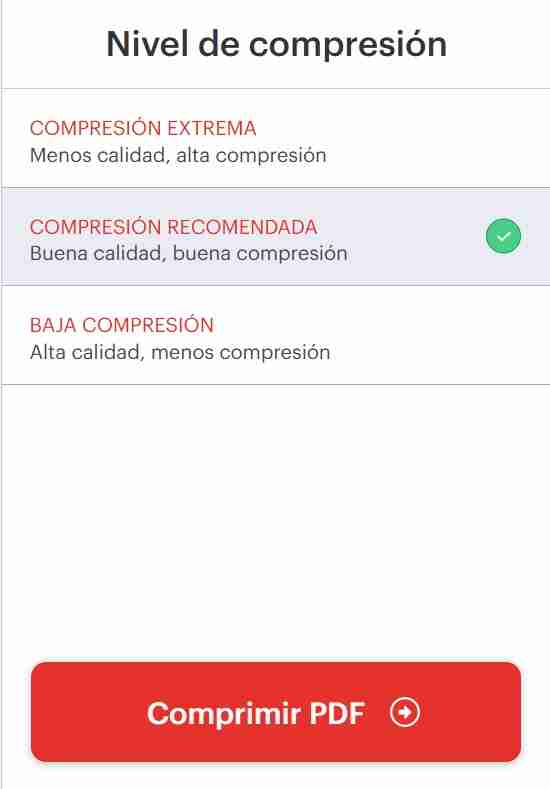
After we clicked on compress PDF the pdf will automatically download to our devices. If you put more than one PDF a ZIP folder will be downloaded with the compressed files.