Week 14 - Interface and Application Programming
This week we learned about User Interfaces and designed one for controlling an input and an output related to our final project. For this week's group assignment, we compared different tools for designing User Interfaces for controlling microcontrollers.
Work log
Completed tasks
- Wrote an application for an embedded board I made.
- Used the application for controlling an output and reading an input related to my final project.
1. What is a GUI?
A Graphical User Interface (GUI) is a visual way for users to interact with software or hardware using graphical elements instead of typing text commands. Graphics help represent actions and data in an intuitive, visual way. Common GUI elements include:
- Windows: Containers that hold information or applications.
- Buttons: Clickable elements that trigger actions.
- Sliders/ knobs: Instruments for visually adjusting numerical data.
- Text fields: Input areas for typing.
- Menus/dropdowns: Lists of options.
- Icons:Small images that represent files, apps, or actions.
- Checkboxes/toggles: Offer binary controls for on/off selections.
Types of GUIs include
- Desktop GUIs: These are desktop environments, including Windows, macOS, and Linux.
- Web GUIs: These refer to browser-based interfaces that utilize HTML, CSS, and JavaScript.
- Mobile GUIs: These are touchscreen interfaces found on phones and tablets.
- Embedded GUIs: These are small screens present on devices such as printers, ovens, and industrial equipment.
- Web-based control panels: These are primarily found in IoT projects that include components like ESP32 web servers.
An application is a program designed for a specific purpose. In the context of hardware control, applications typically perform the following tasks:
- Send or receive data via serial, USB, Bluetooth, WiFi, or sockets.
- Display real-time sensor data or camera feeds.
- Allow users to send commands for managing outputs, such as motor speed, LED settings, color, and more.
Applications can operate in three primary environments: desktop (on a PC), web (in a browser), or mobile (on a phone or tablet).
There are several tools available for developing GUIs, including Tkinter, LabVIEW, and Processing. I must admit that at first, I wanted to write my application using LabVIEW. However, our local instructor arranged a Qt Designer session for us to complete the assignment. Therefore I decided to follow the arrangement and learn something new along the way.
Qt is a cross-platform framework based on C++ that includes Python bindings through PyQt5 or PySide6, allowing you to build desktop applications with professional-looking graphical user interfaces (GUIs). Qt Designer is a drag-and-drop visual editor that enables the design of interfaces without the need to write layout code. Users can place elements such as buttons, sliders, and labels on a canvas, which are then saved as a .ui file to be loaded into either Python or C++ code.
The following sections will explain how did I use Qt Designer to create the graphical user interface for my application.
2.First steps
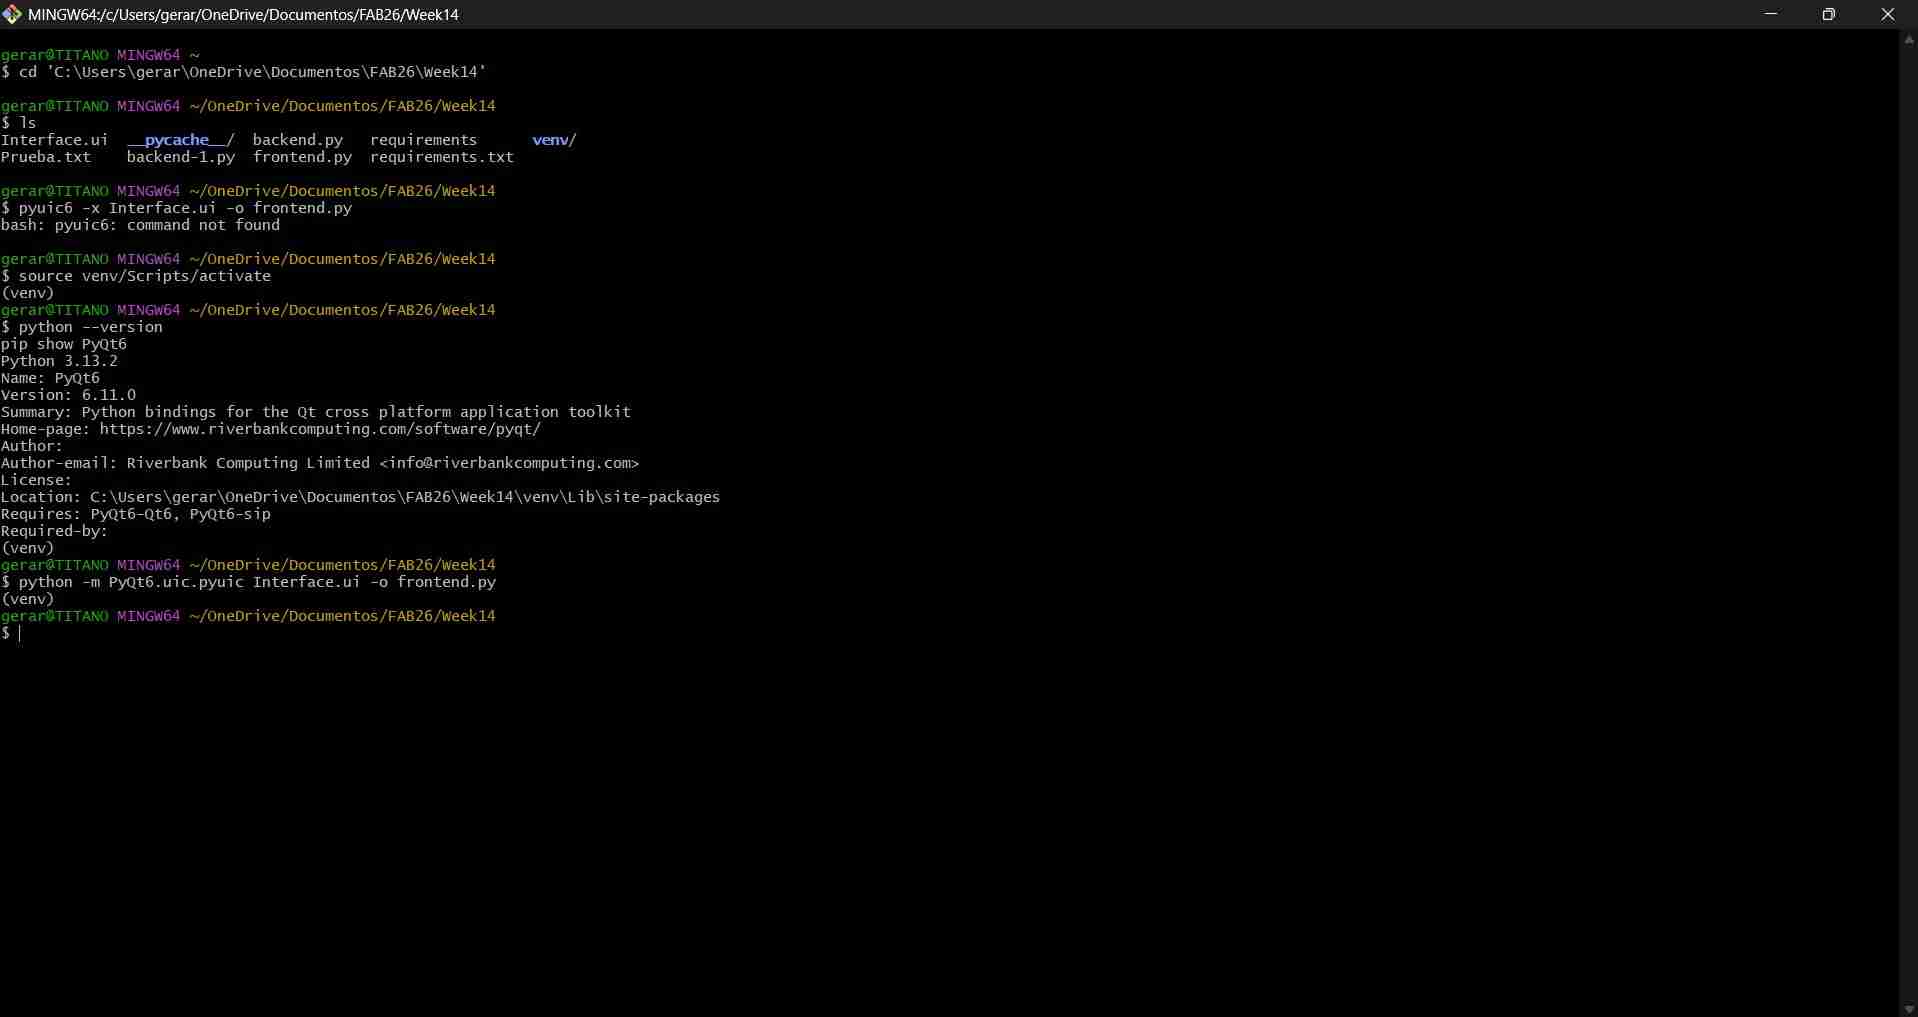
As our instructor mentioned, the first step was to ensure that Python was installed on our personal computers. I chose to follow the workflow using the Git Bash terminal, so the commands and instructions provided on this website will likely be compatible only with this environment.
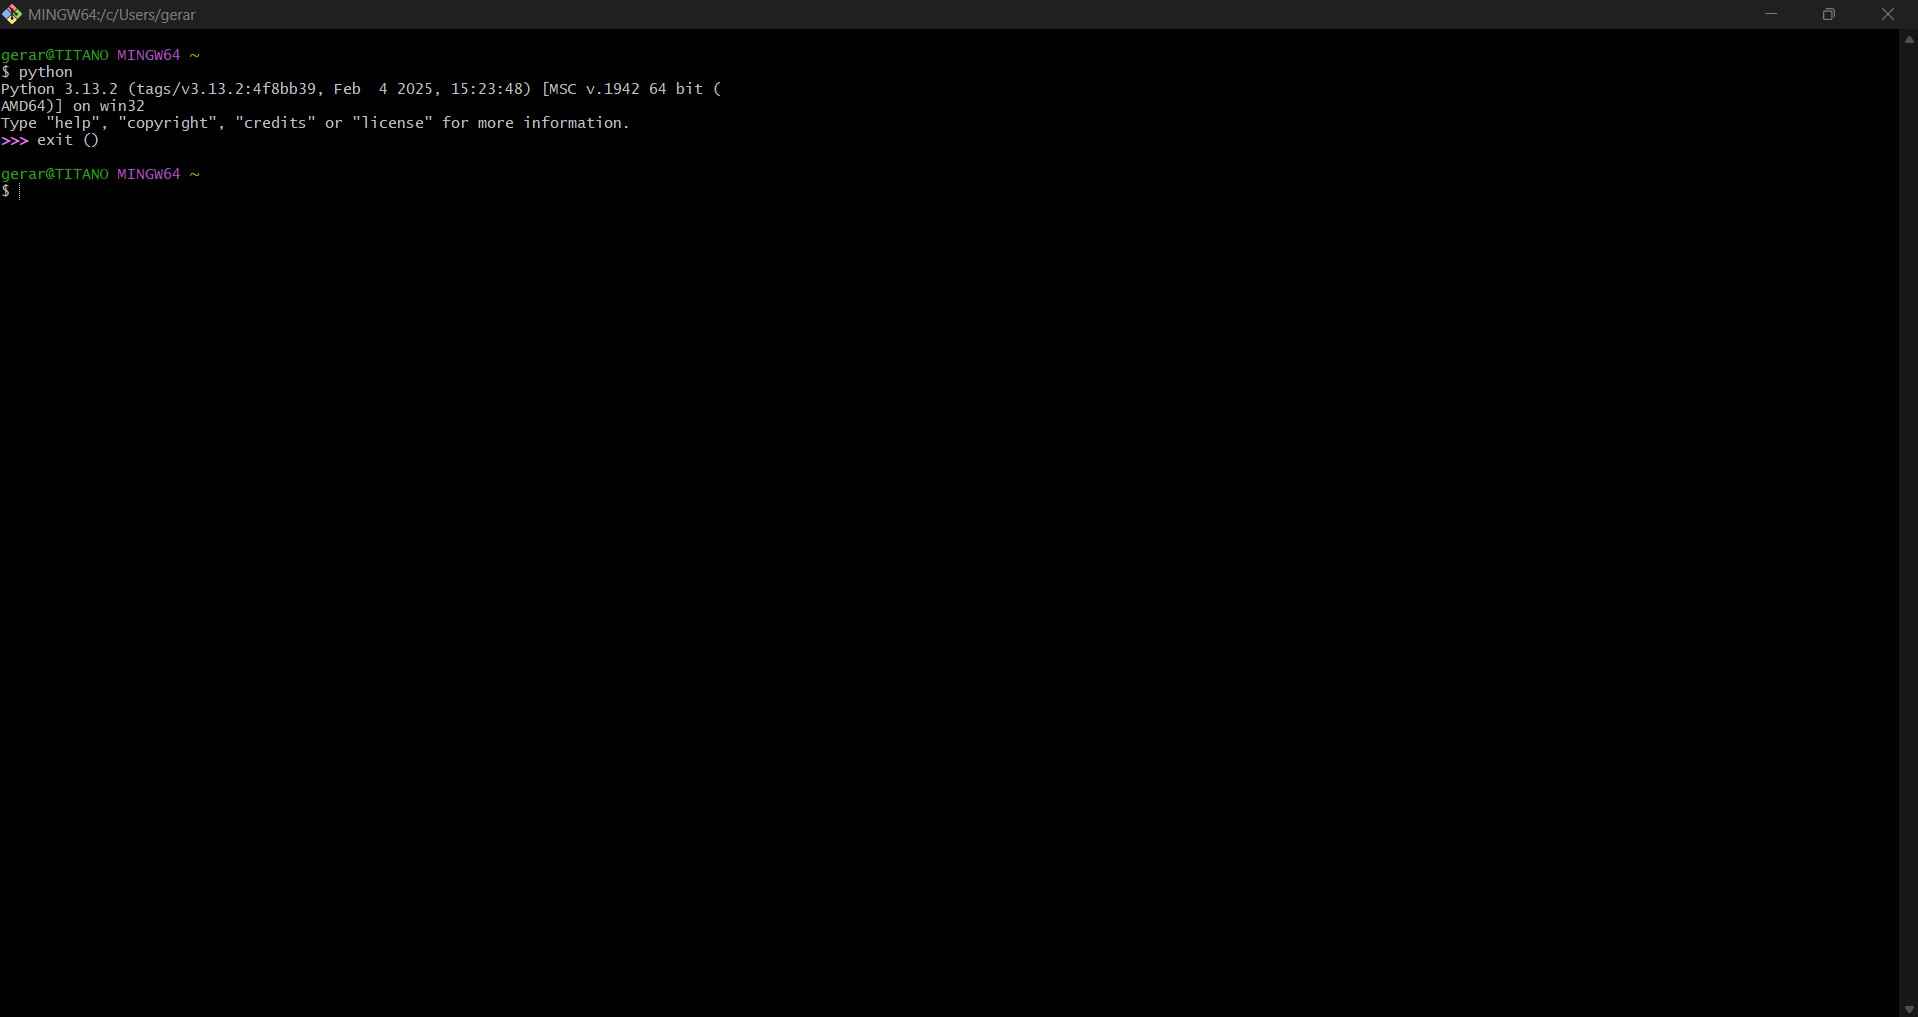
To make this confirmation, we only need to write "python" in the command line, and the terminal will prompt the Python version present in the operating system.
The next step is to create the folder where our project will be hosted. I usually create a simple .txt file as a flag to verify that I have accessed the correct directory from the terminal. In this case, my file is named Prueba.txt.

We can directly access our created folder by using the cd 'Your folder location' command in the Git Bash terminal. Once you have gained access to the directory, you can use the ls command to show the list of the files already present.
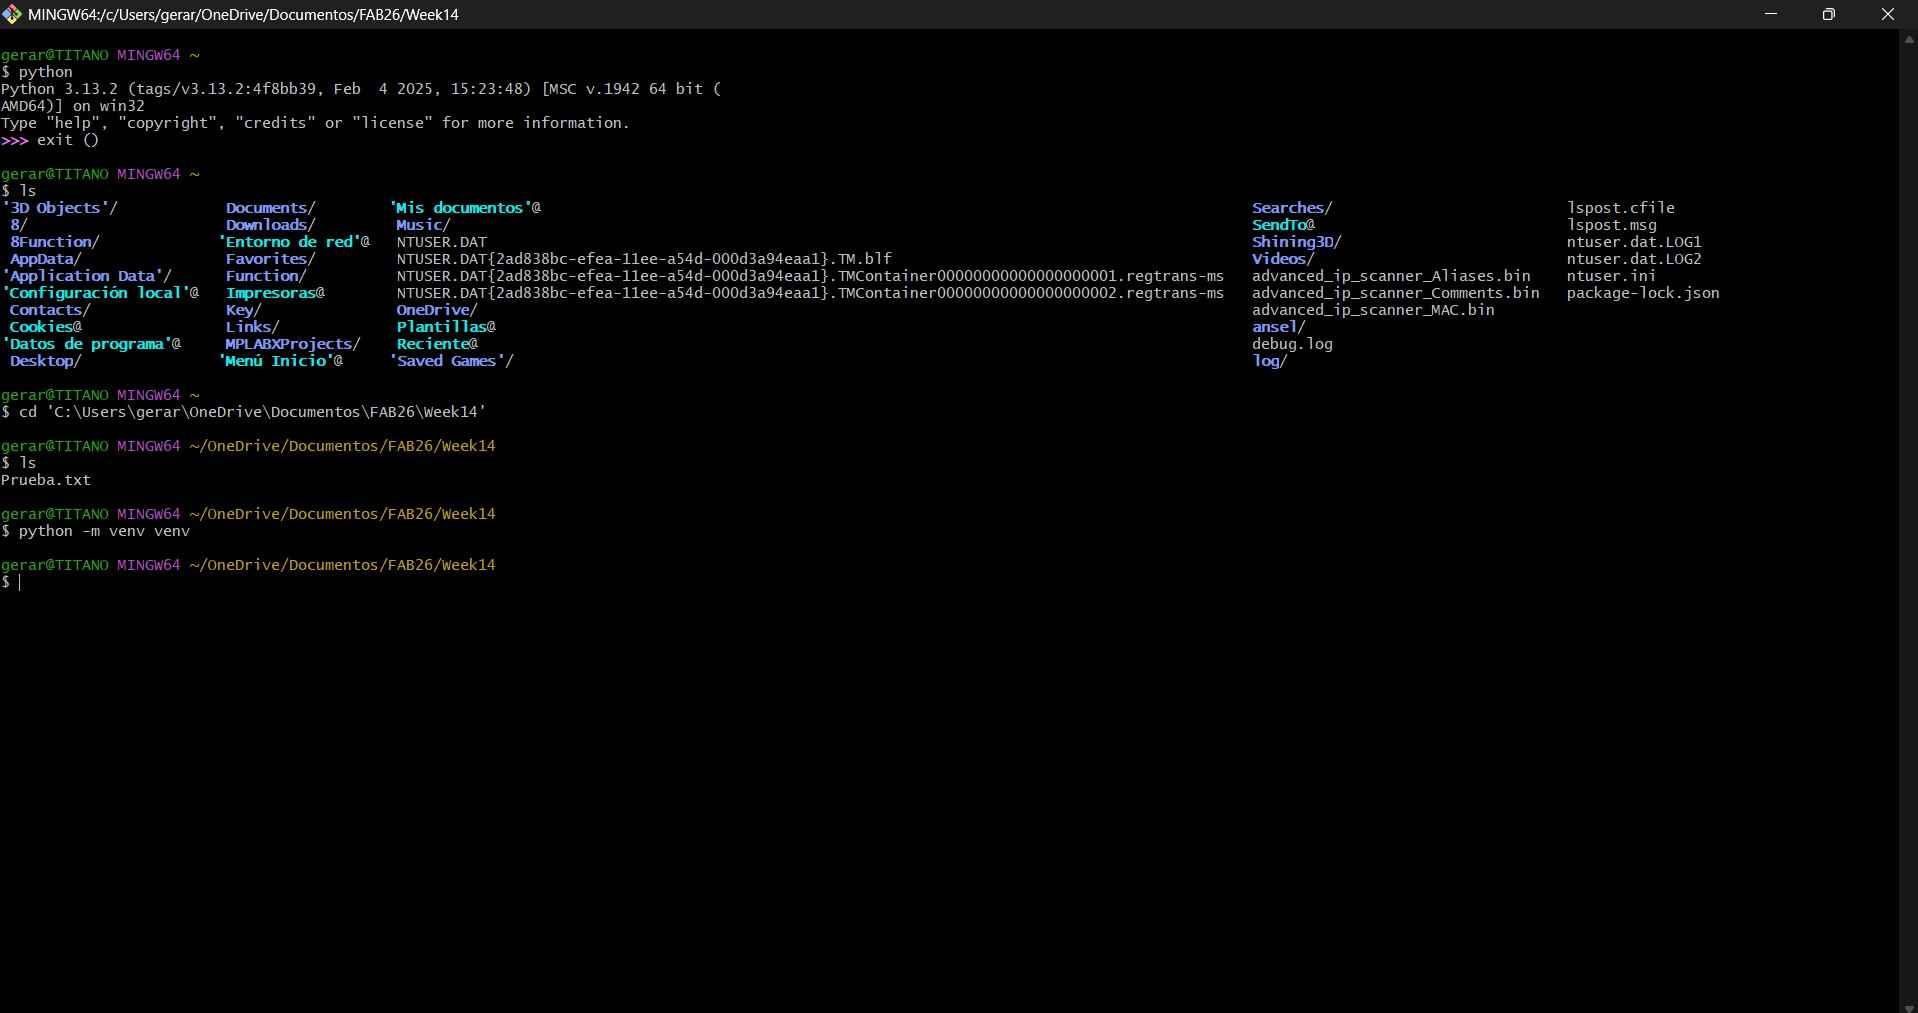
Once we have accessed our project directory, we will need to create a virtual environment. A PC typically has a global Python installation with its own set of packages. When pip install is executed, packages are installed there. This can lead to several problems, such as project A needing NumPy 1.21 while project B requires NumPy 2.0. These versions cannot coexist globally; one will override the other. Additionally, if everything is installed globally, over time, the Python environment will become cluttered with packages from old projects, which may conflict with each other.
Creating a virtual environment establishes an isolated, self-contained Python environment for each project. This environment includes its own Python interpreter, pip, and packages, keeping it completely separate from the global installation and from other projects. A virtual environment is created by executing the following command inside the desired directory: python -m venv venv.

After creating and activating the virtual environment, we need to run the command "pip install PyQt6." Following that, we will execute "pip freeze." This will install PyQt6 and display the packages that are already installed in our virtual environment.
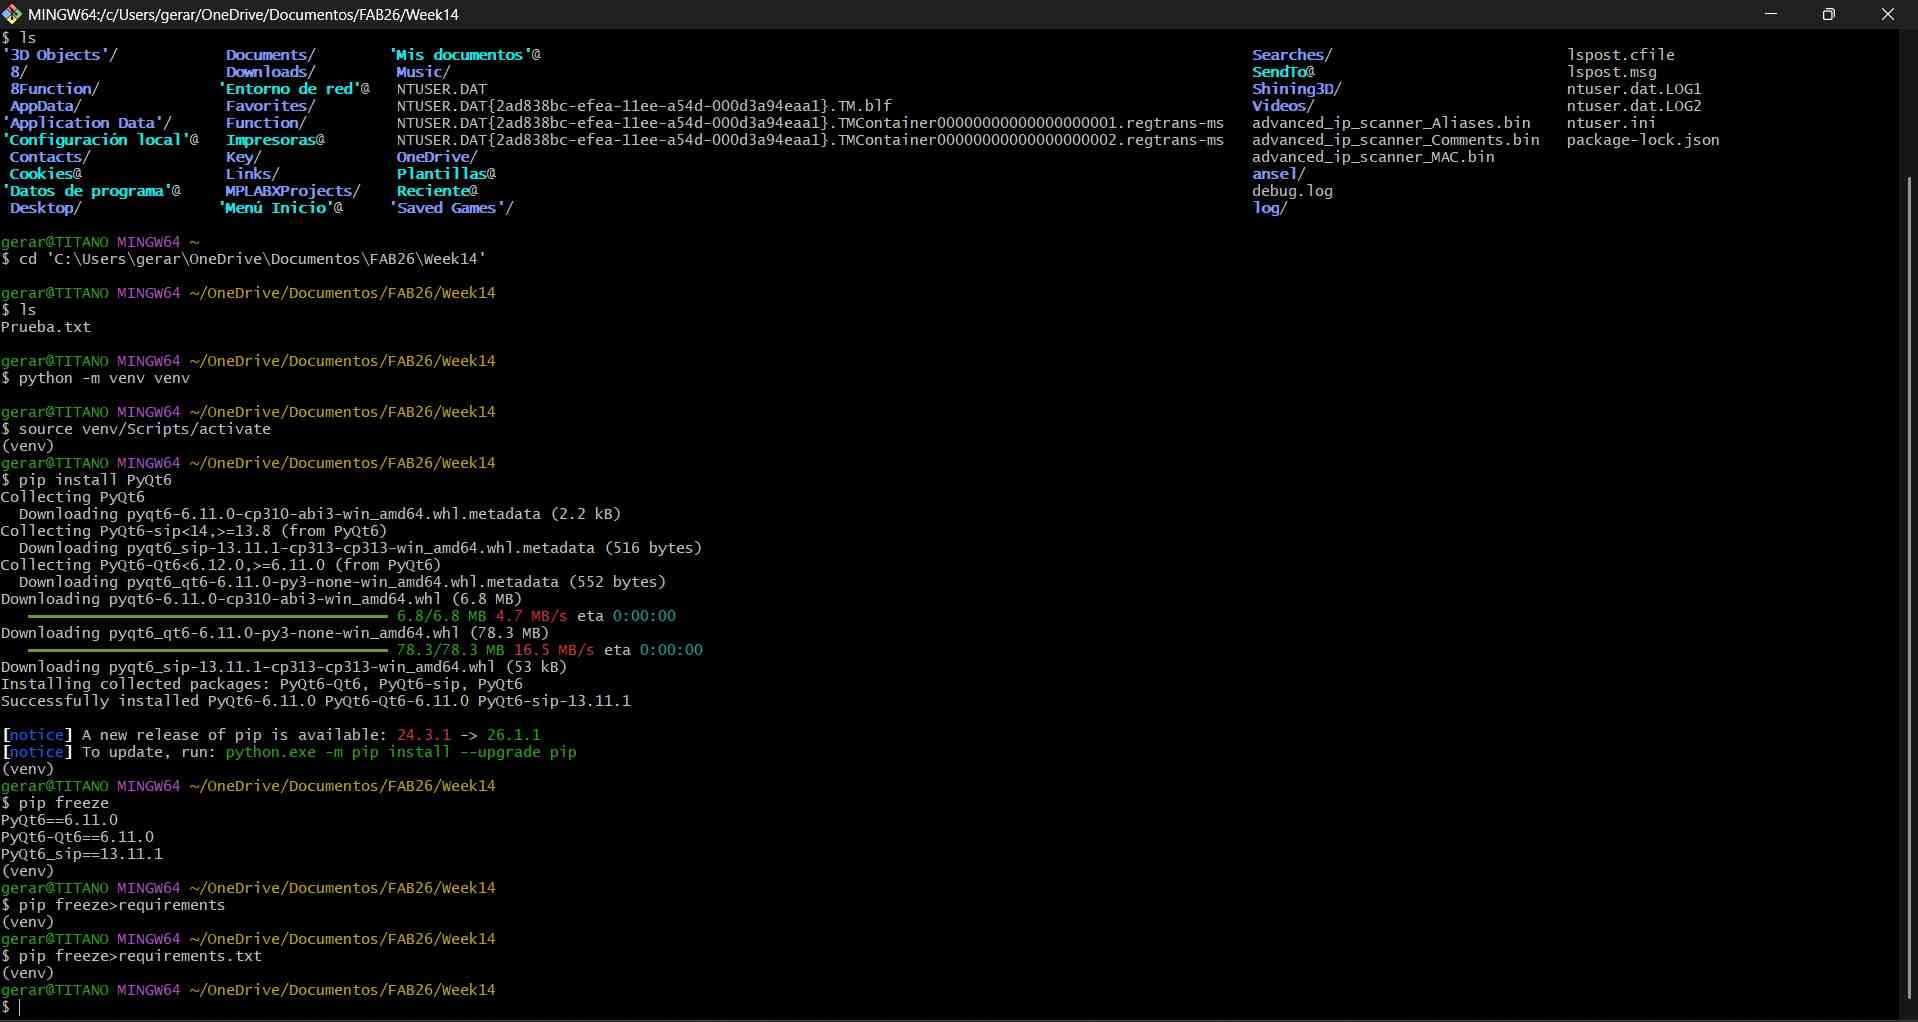
We need to execute the following command lines: "pip install pyserial" and "pip freeze > requirements.txt." The first command will download and install the PySerial library, which allows Python code to communicate over serial ports. This capability is essential for interfacing with microcontrollers such as Arduino or STM32 boards.
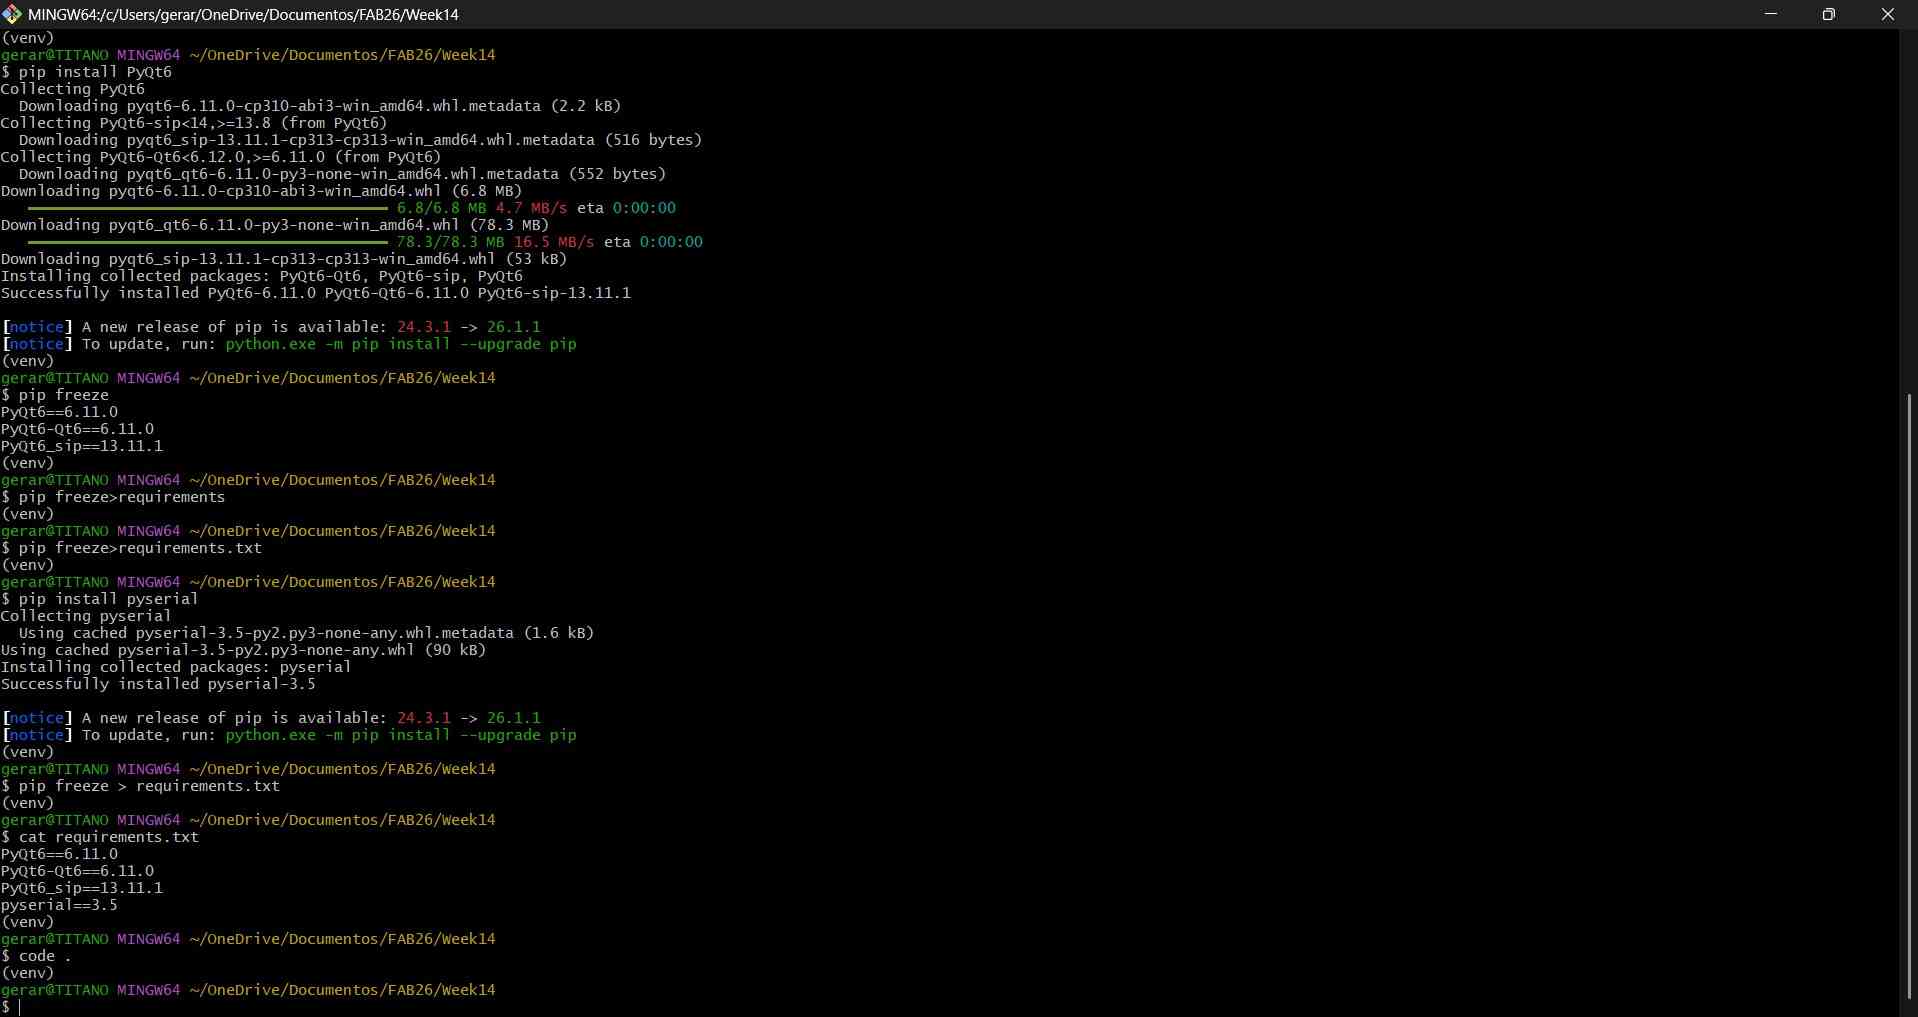
After everything is set up, we can now execute the command "code ." to launch Visual Studio Code from the virtual environment. This action will prompt a window similar to the one we encountered during our Week 1 assignment.
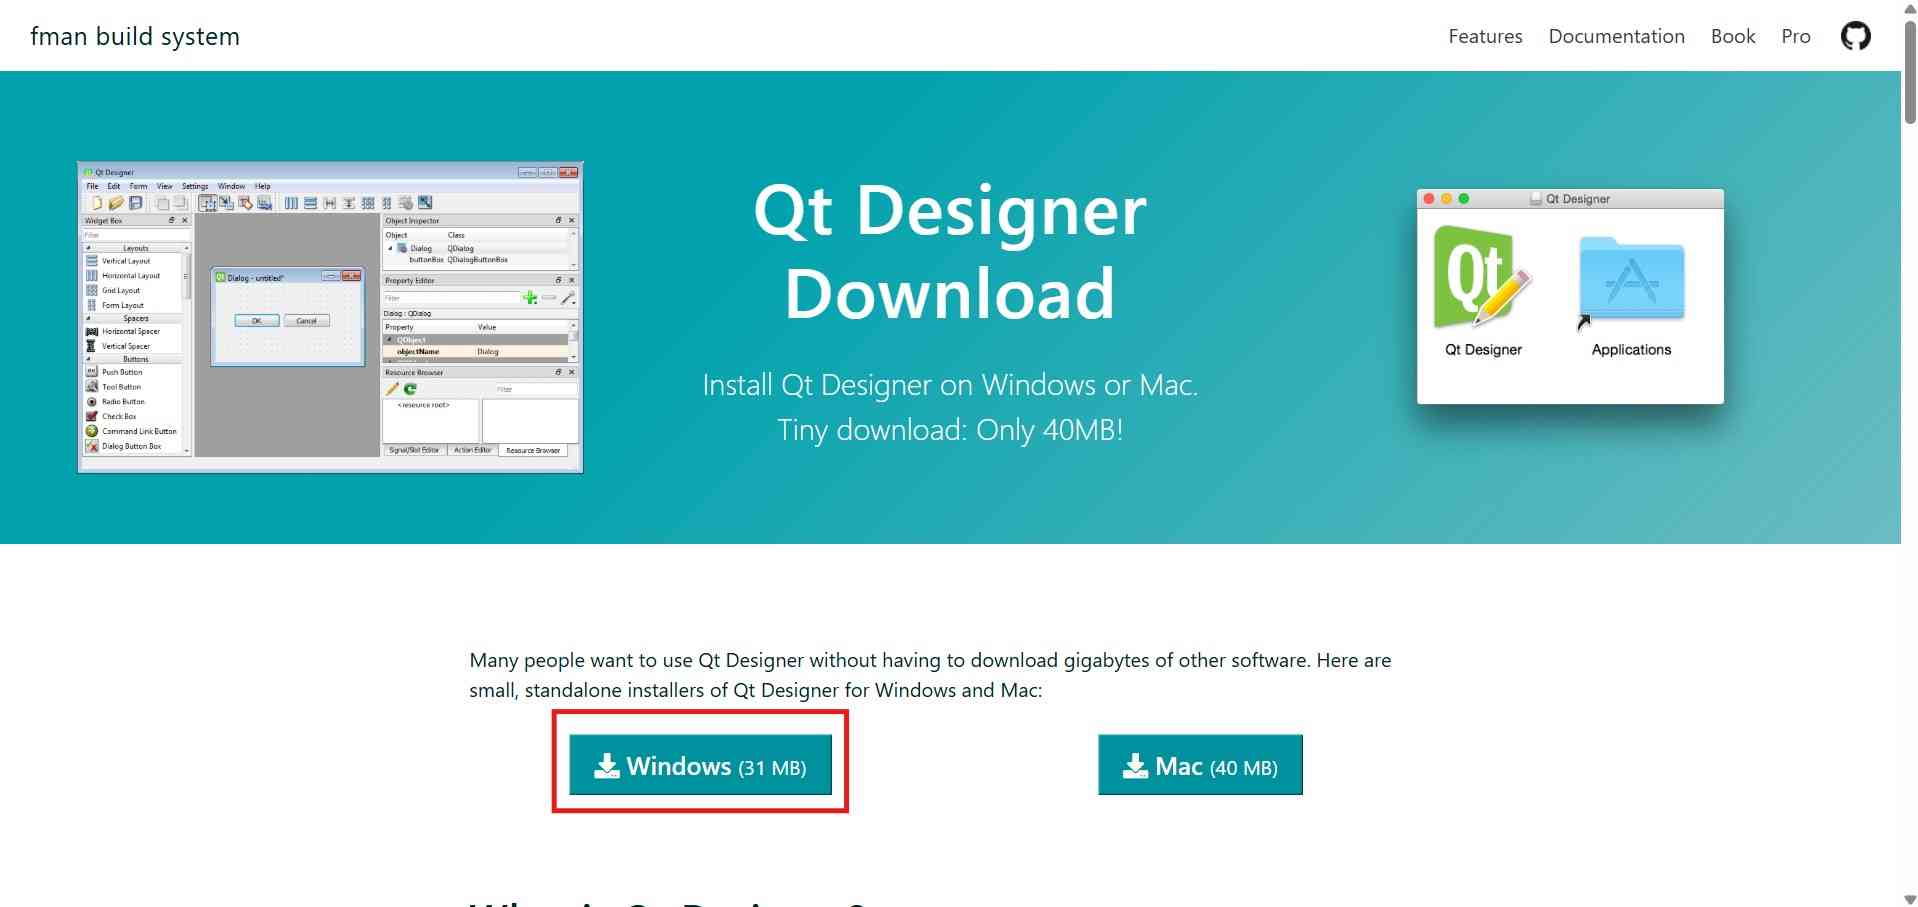
Qt Designer can be downloaded by clicking here.
After downloading and installing Qt Designer, you can open the application to start exploring its user interface. The interface includes a top bar with menu tabs, a central workspace where you arrange and design your elements, a left panel listing the available widgets and interface elements you can add, and a right sidebar displaying the properties and settings for the selected elements.
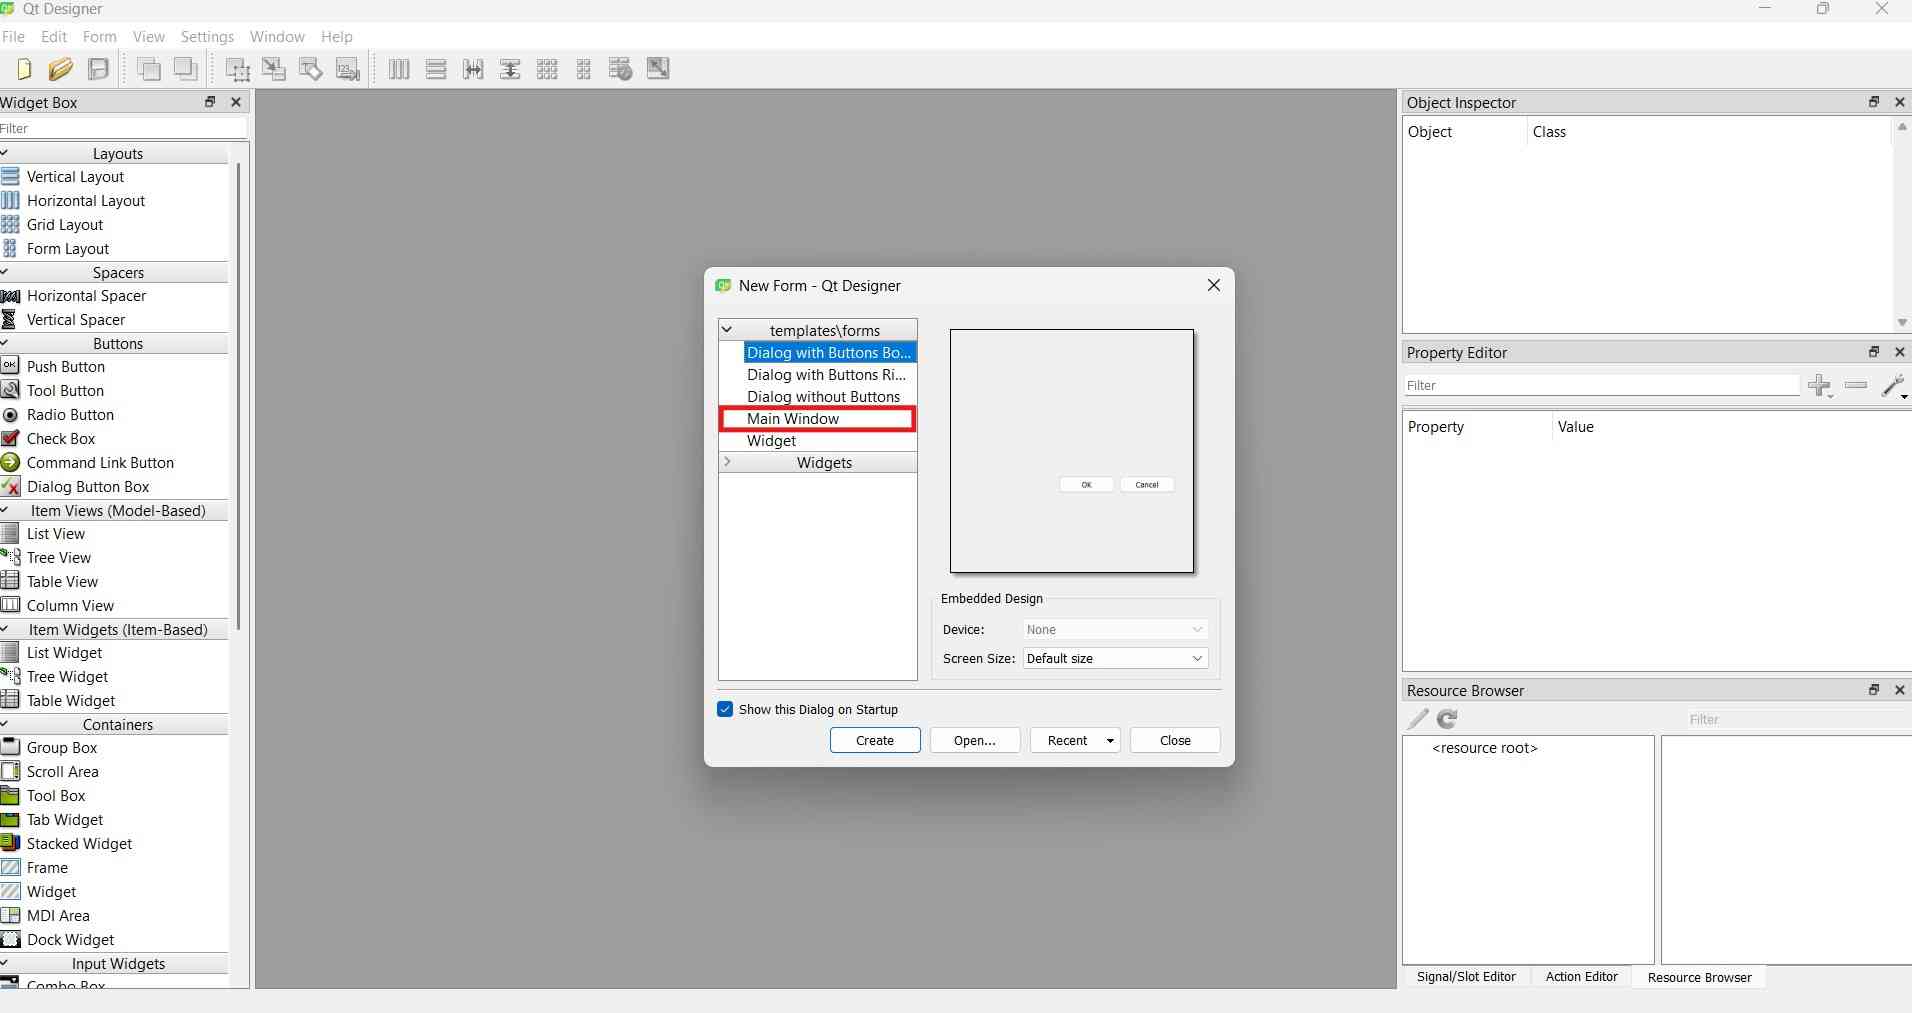
To begin creating a user interface, start by selecting the Main Window option from the New Form menu in Qt Designer. This selection will display a blank white canvas where you can place and arrange elements to design your interface.
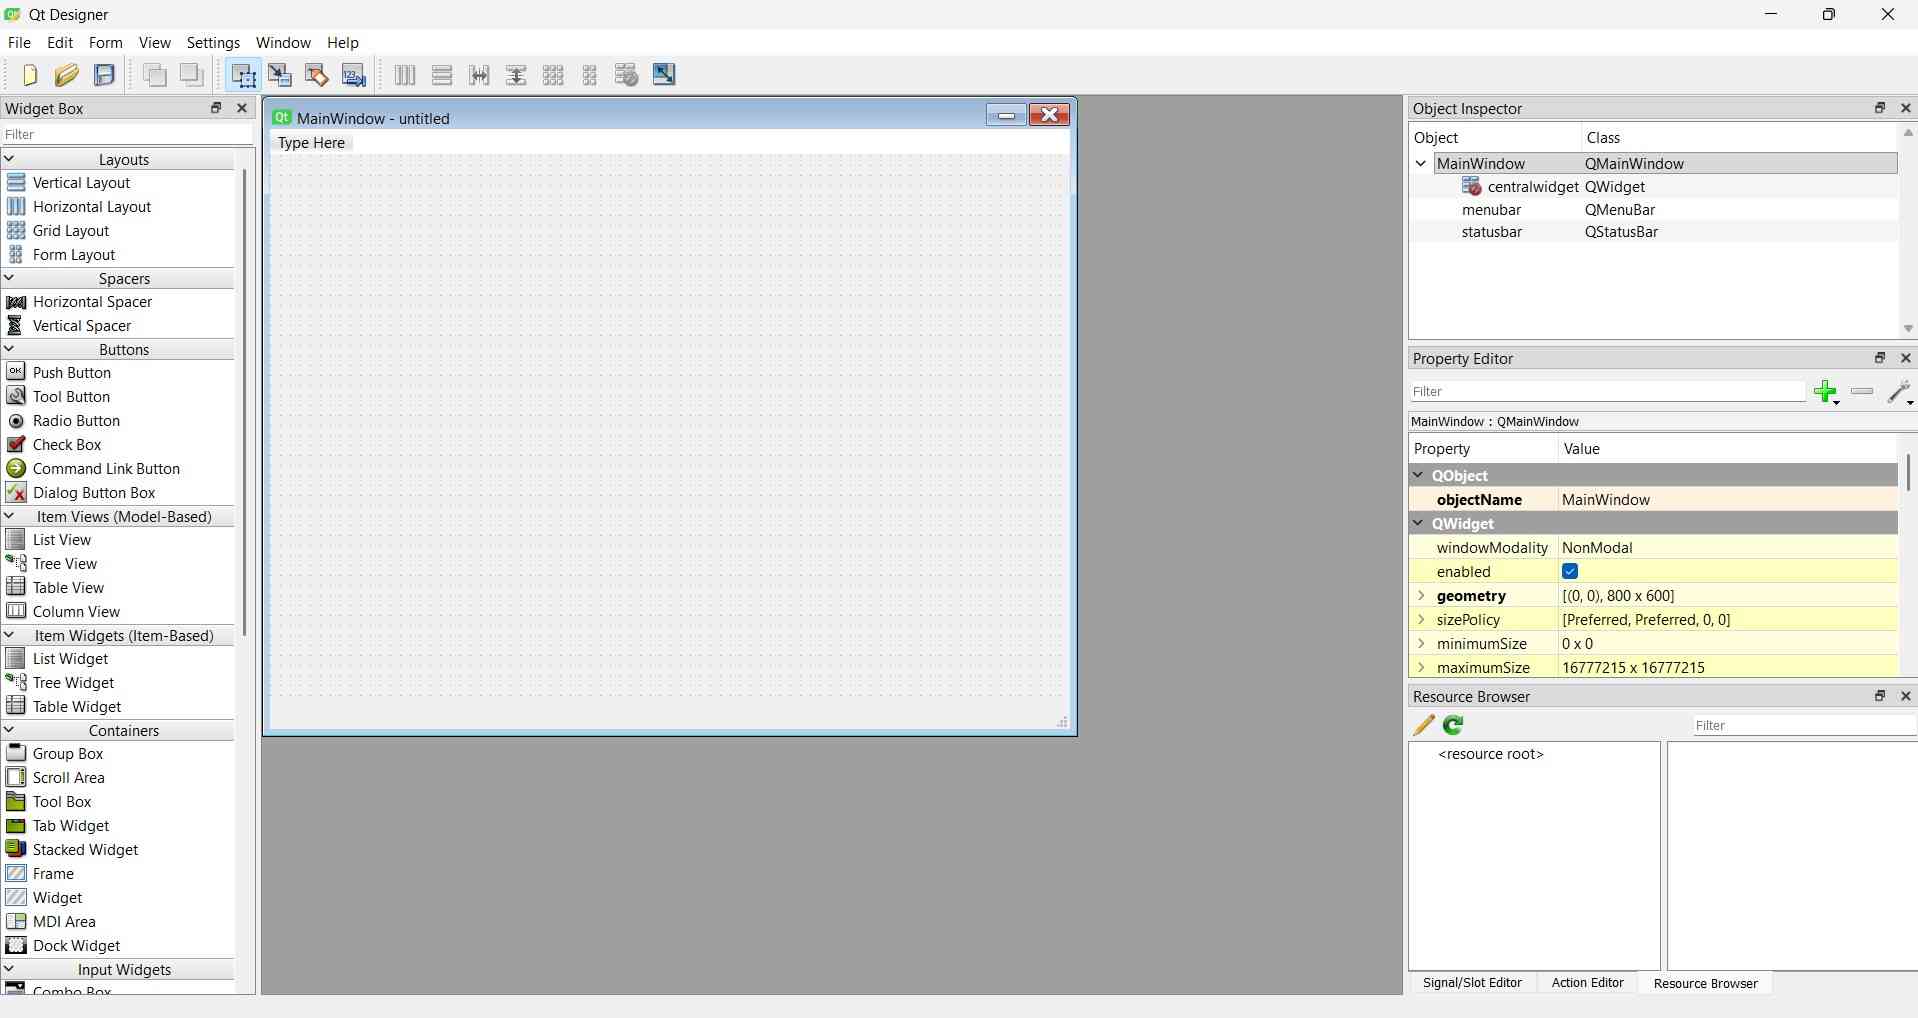
As a first step, I placed a label and two buttons onto the canvas. The type and number of elements currently on the canvas can be viewed in the Object Inspector located in the left panel.
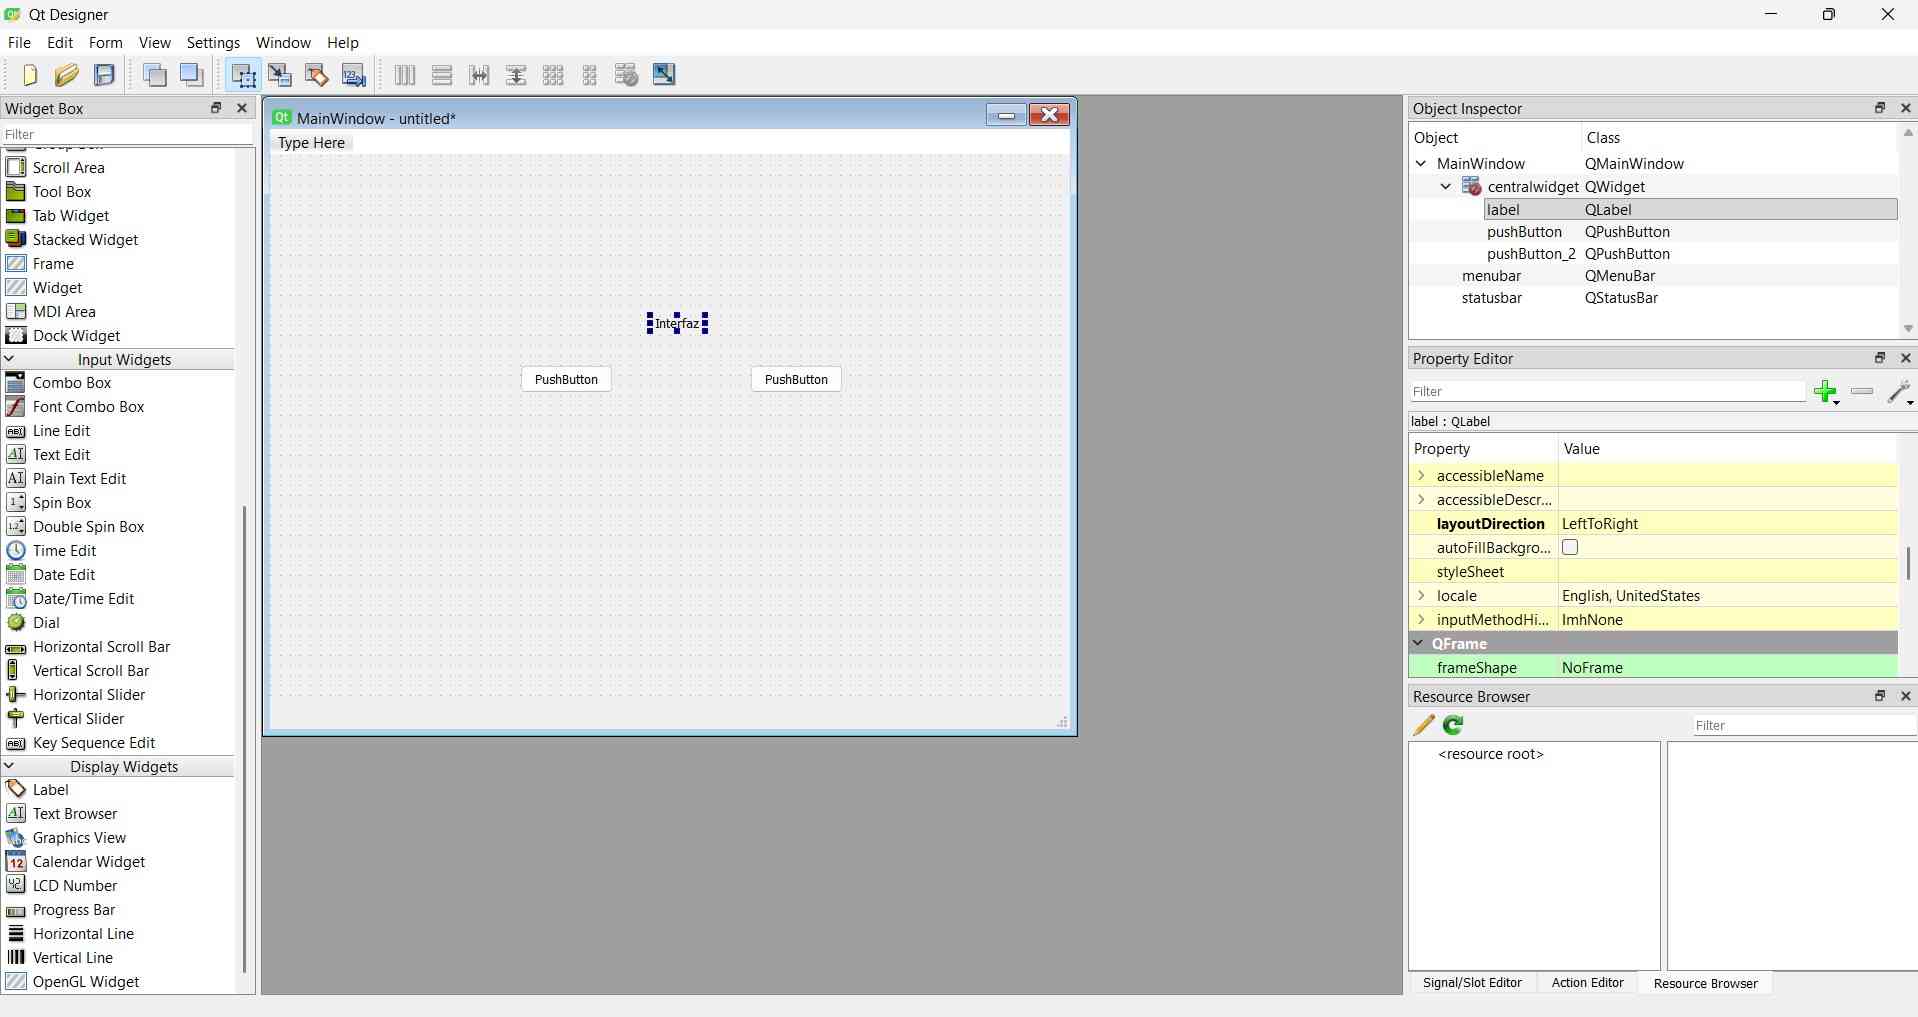
Current interface designs can be visualized by pressing Ctrl+R for a preview.
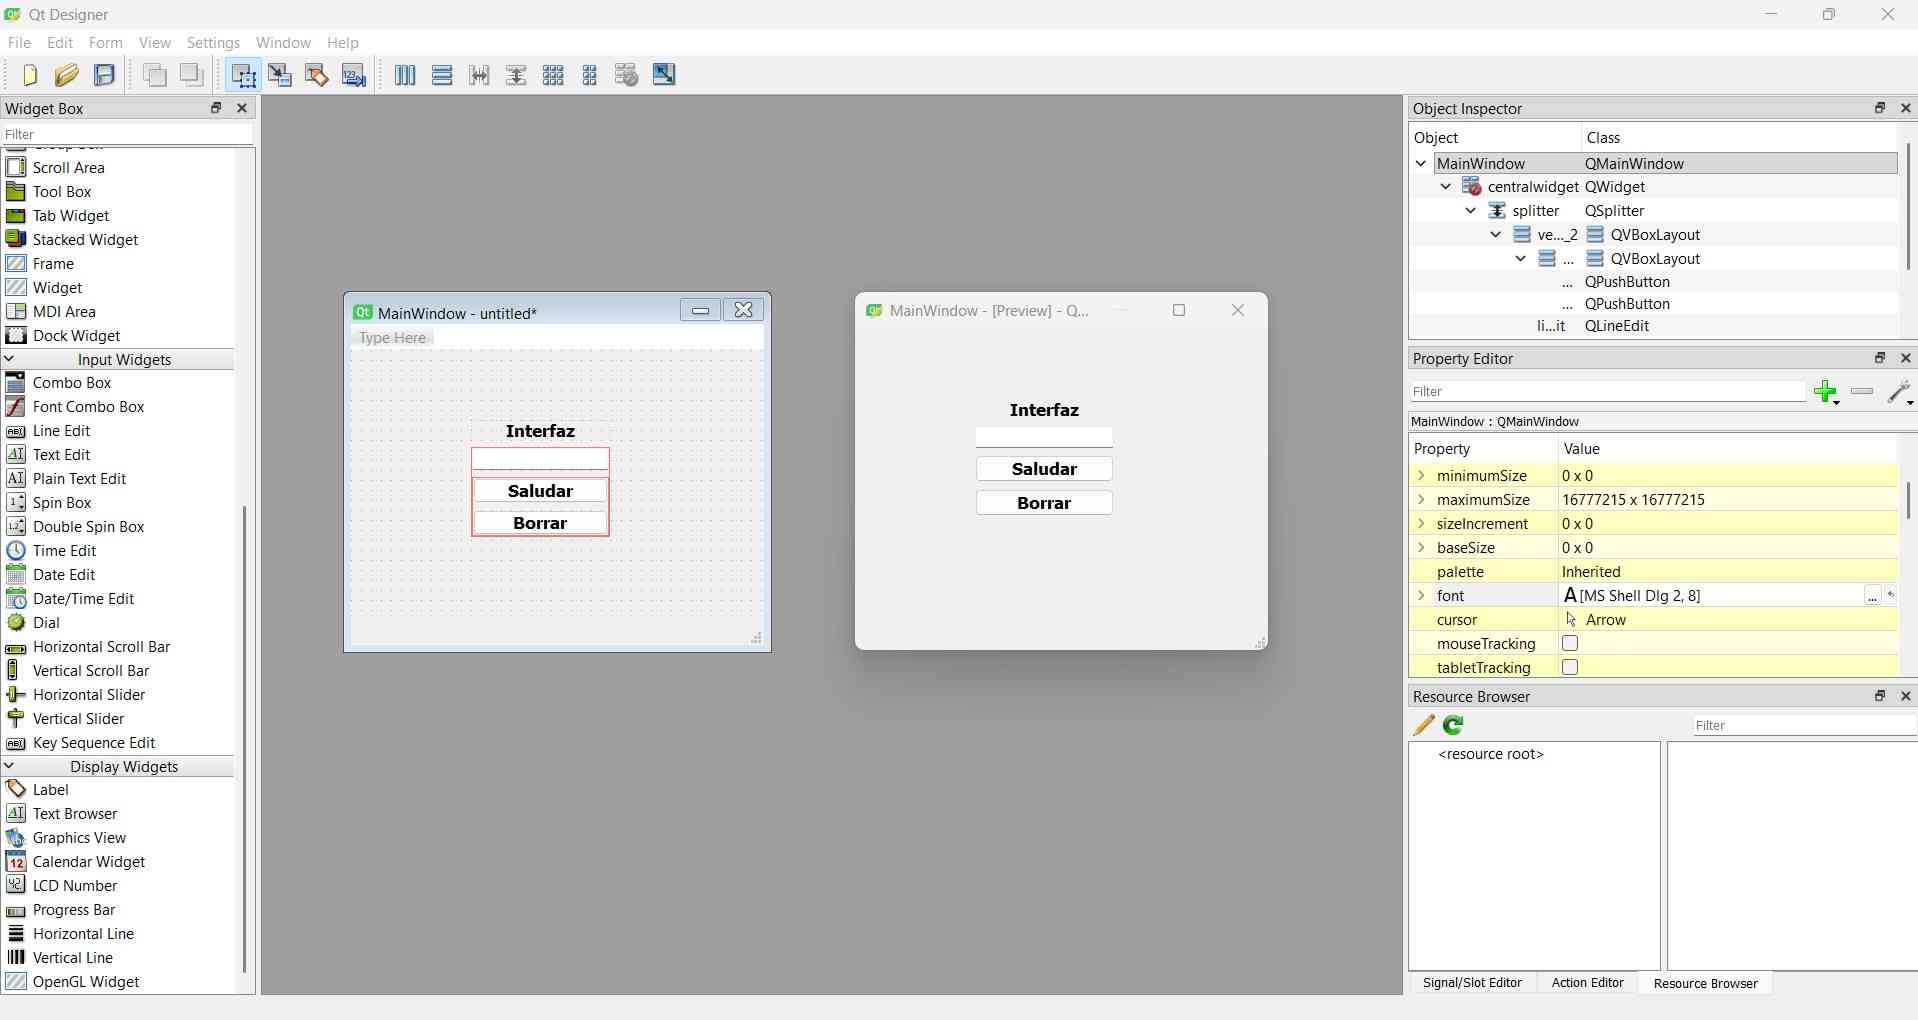
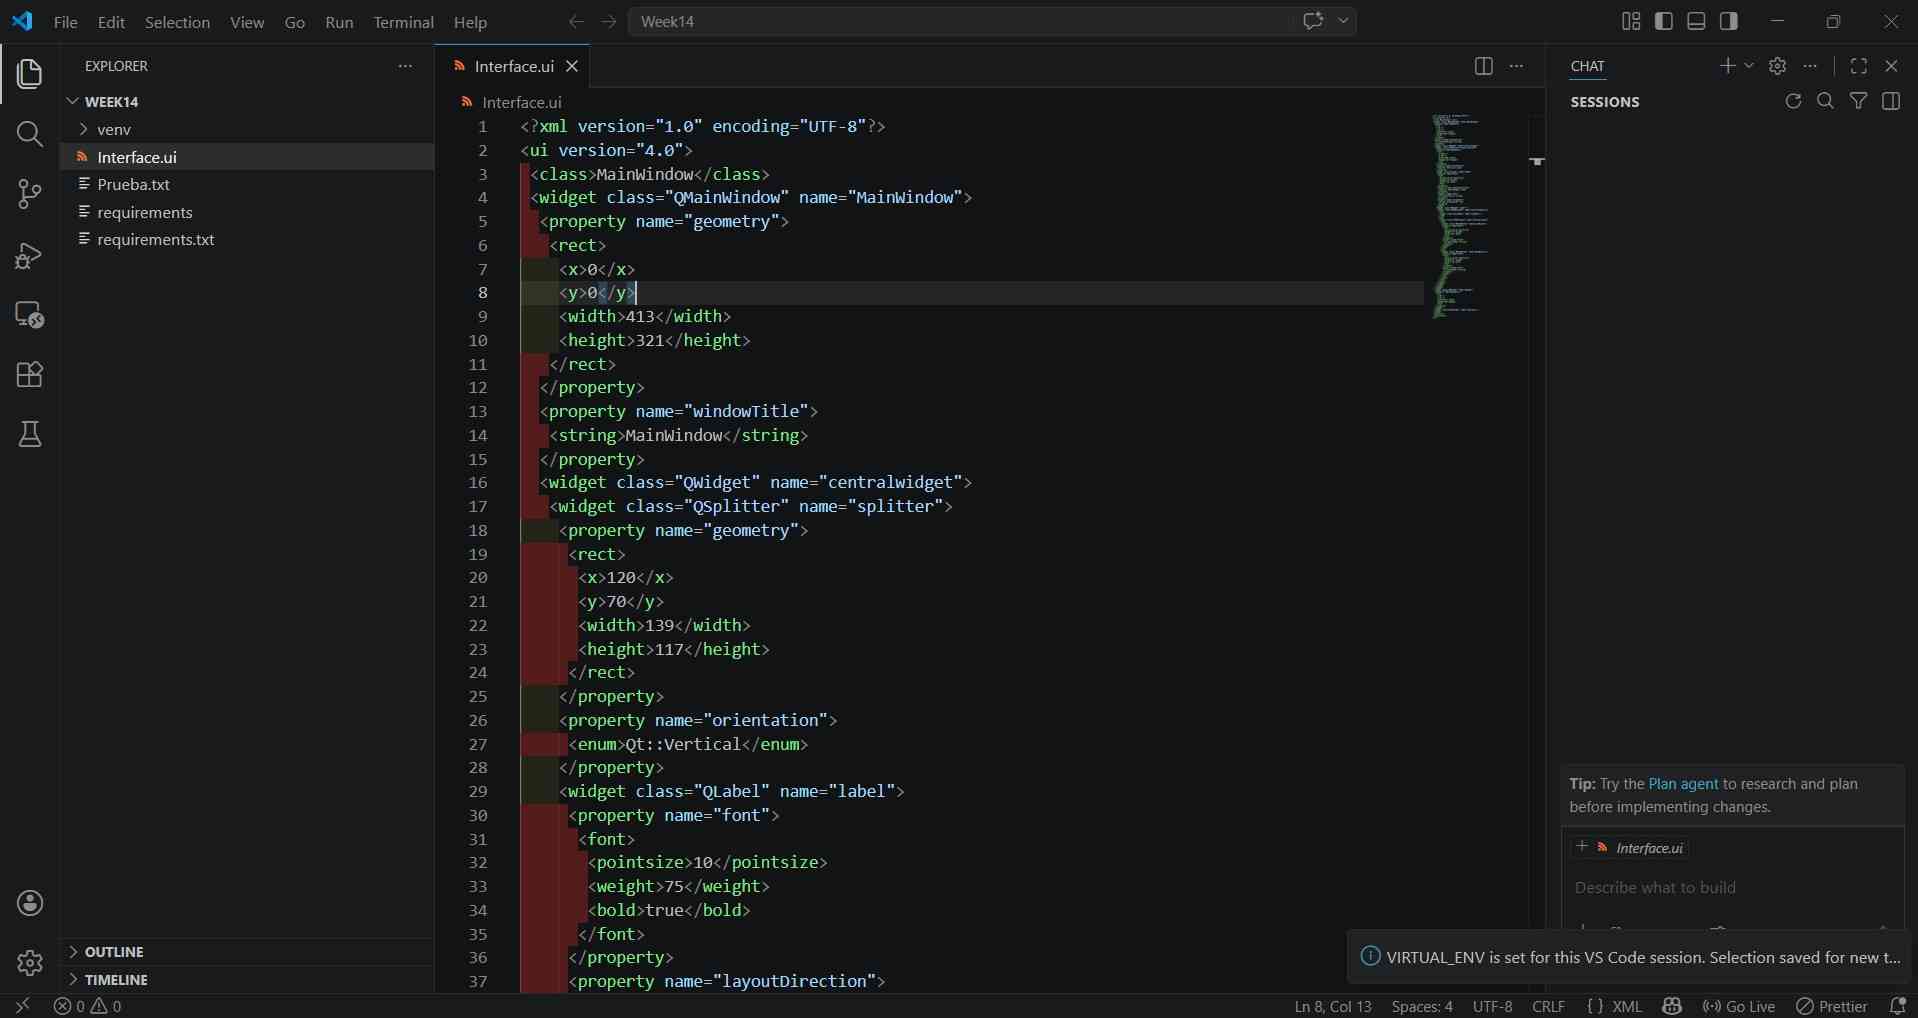
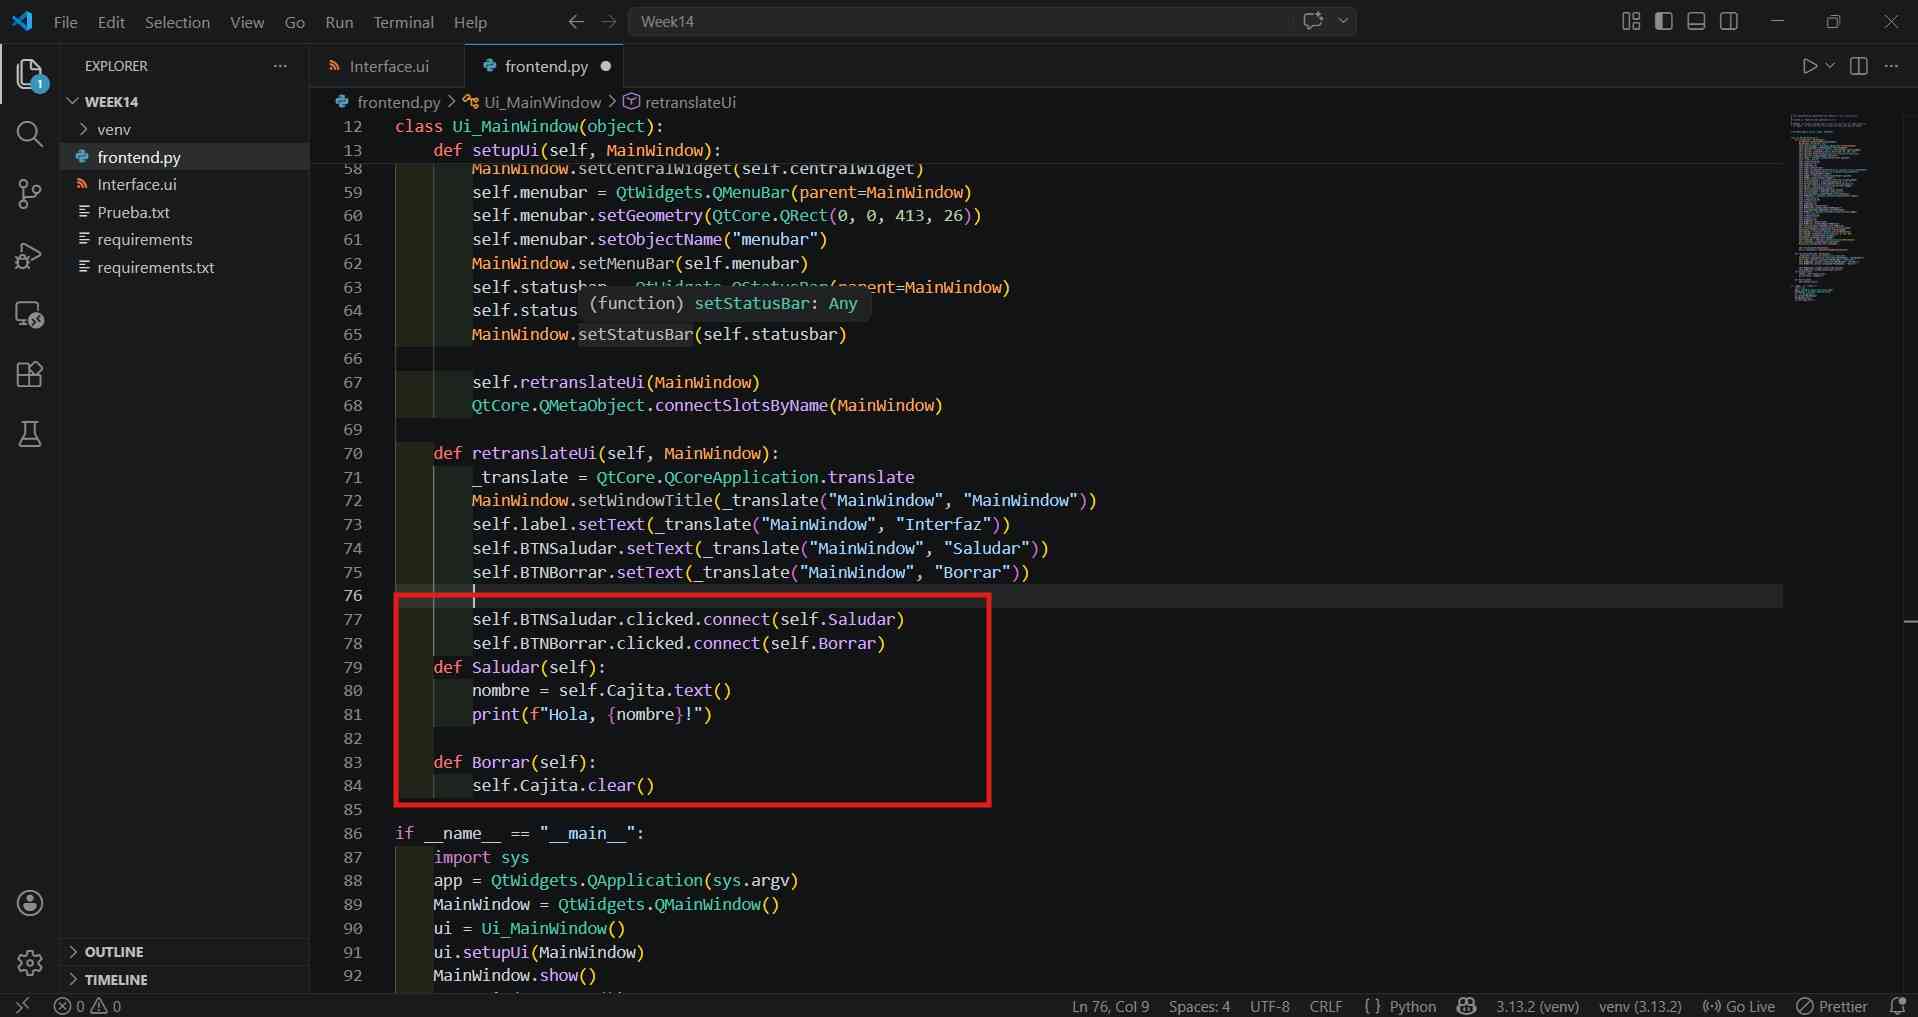
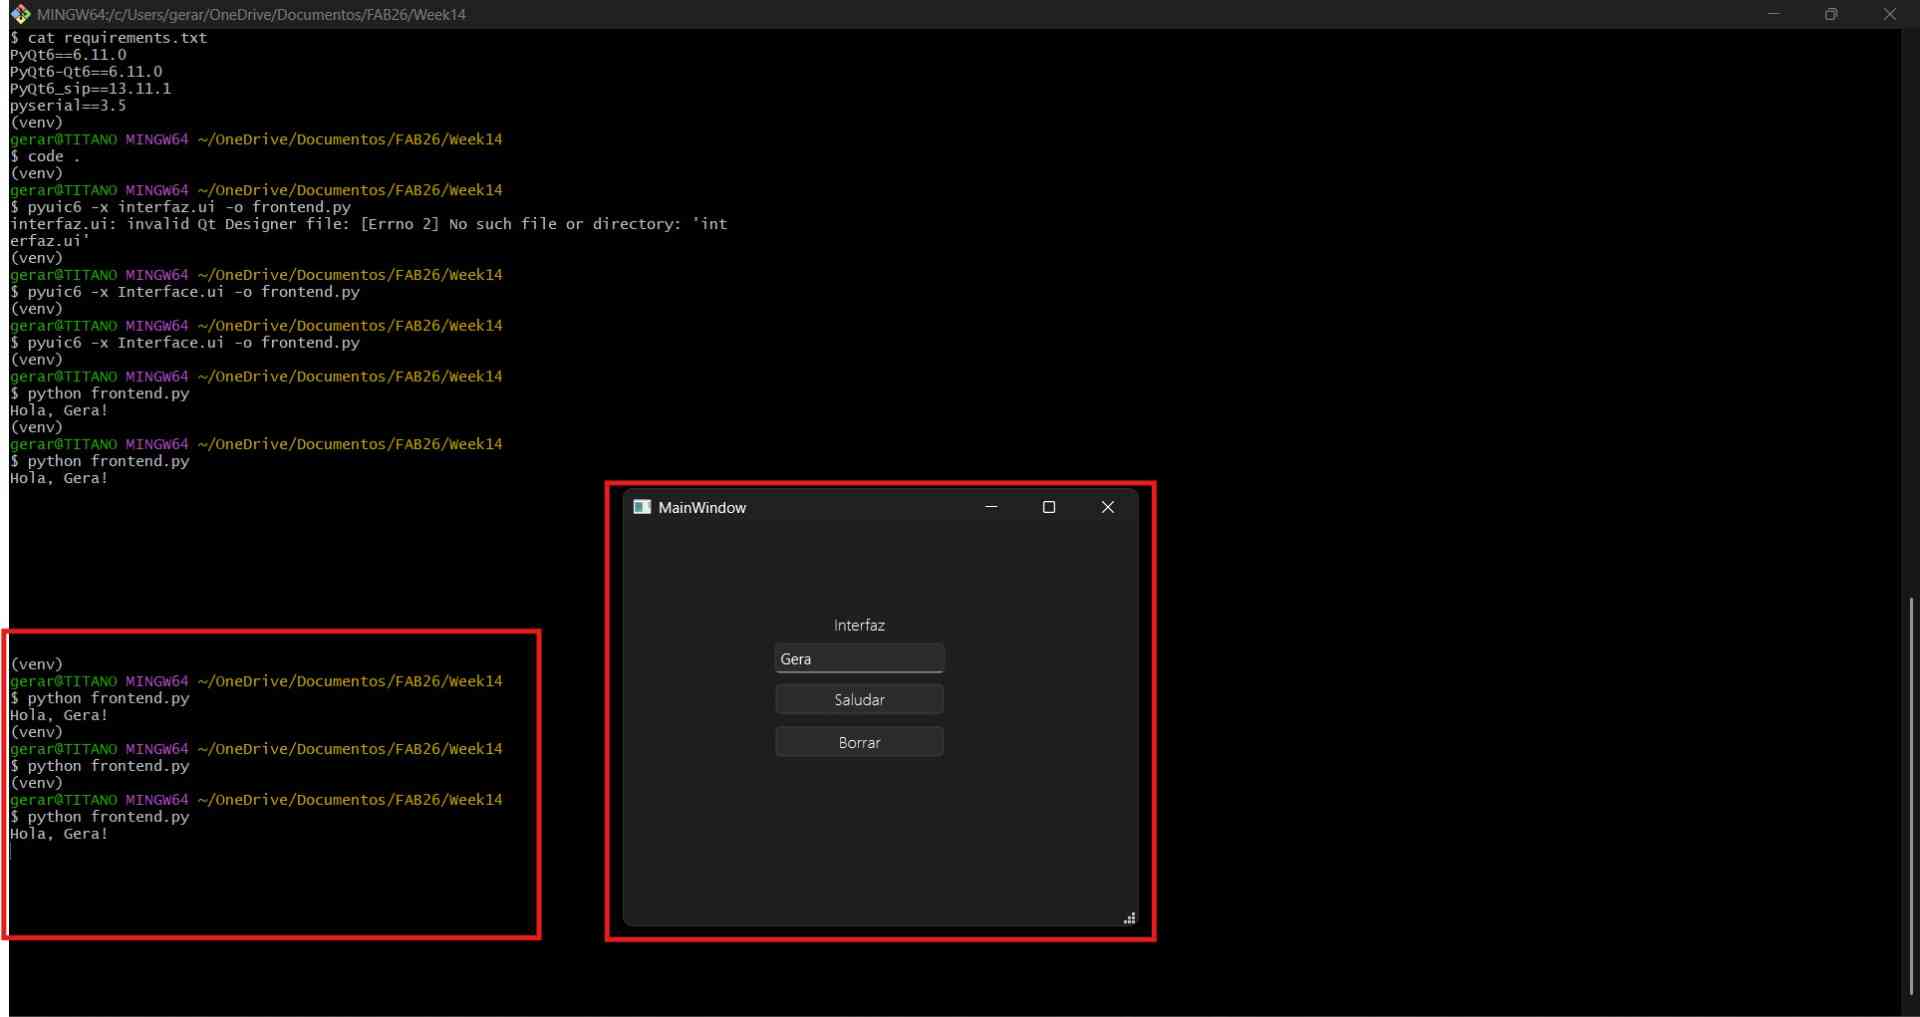
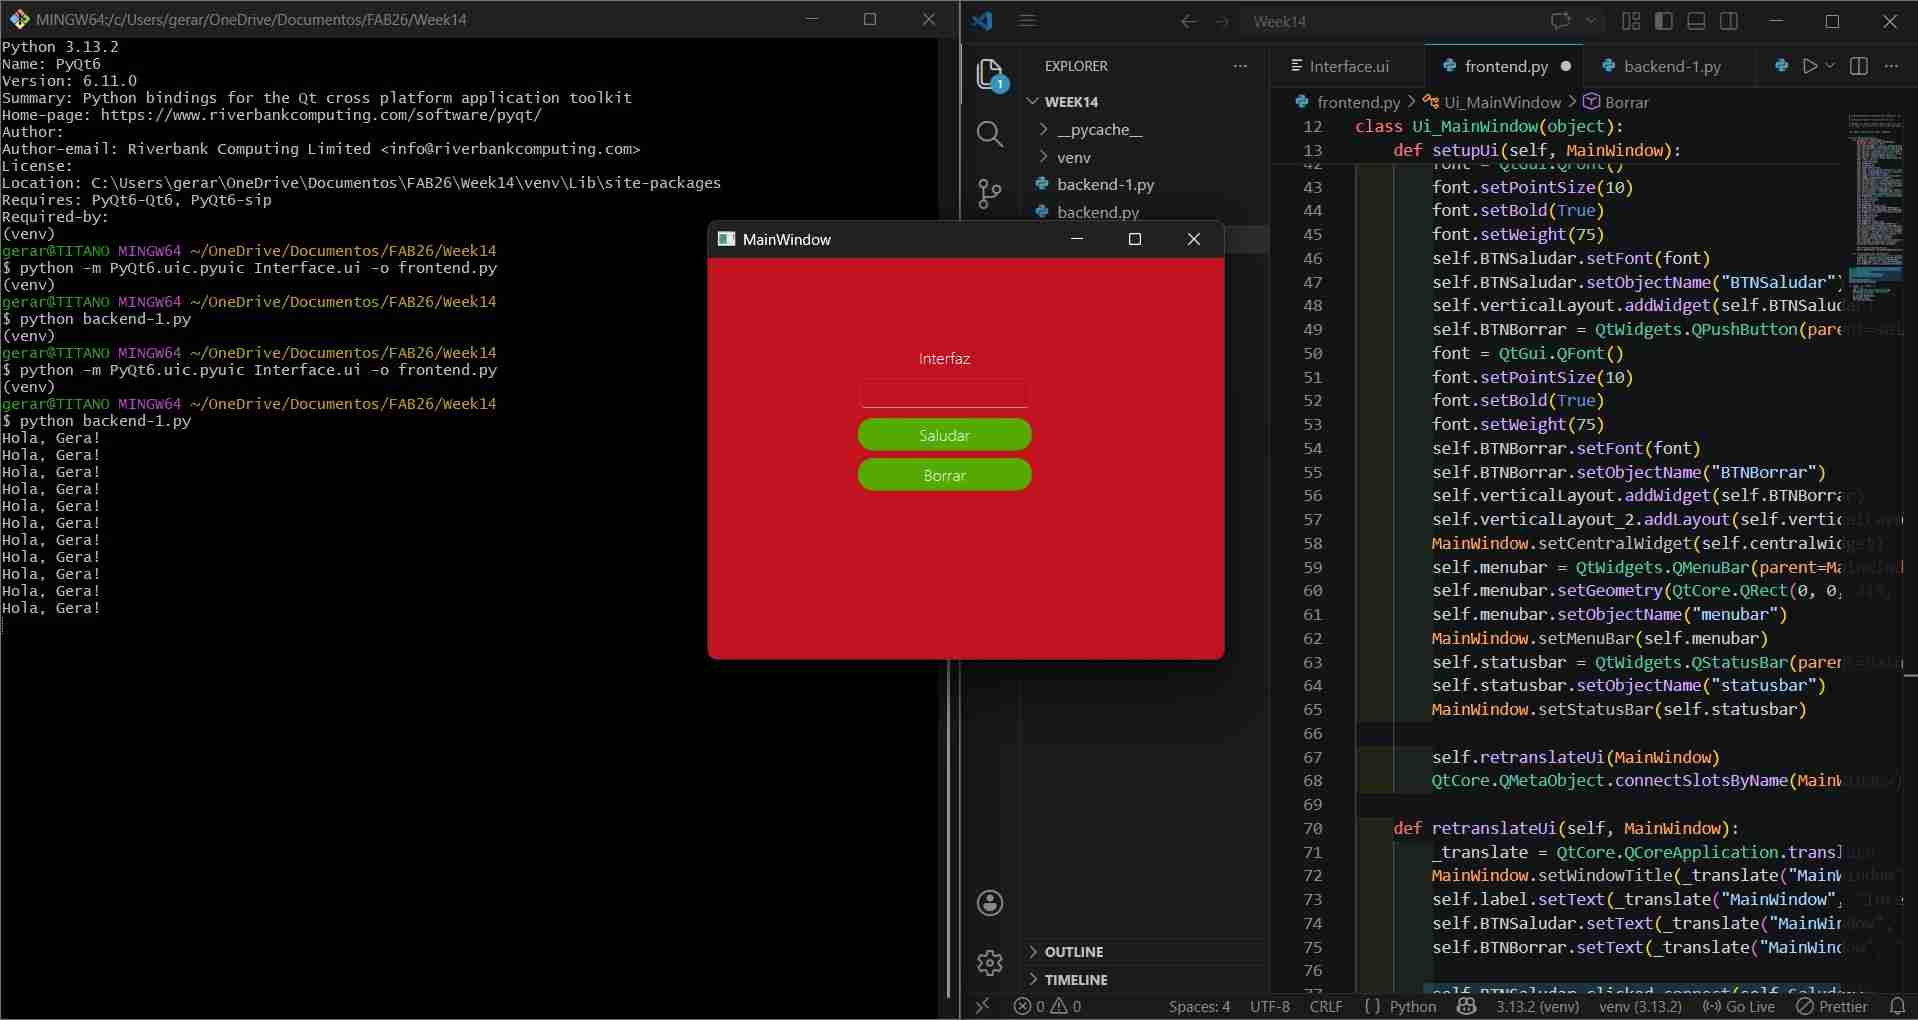
To connect the user interface to Python code, begin by saving the file; for example, I saved mine as Interface.ui. Then, use the command line with the following command: pyuic6 -x Interface.ui -o frontend.py. This command converts the .ui file into a Python script called frontend.py. This script acts as the frontend of your application, enabling users to interact with your system through the graphical interface.

After executing the previously mentioned command line, we can now visualize our user interface as lines of Python code. Whenever we make a change to our interface in Qt Designer, we must run the same command again to update the Python code.
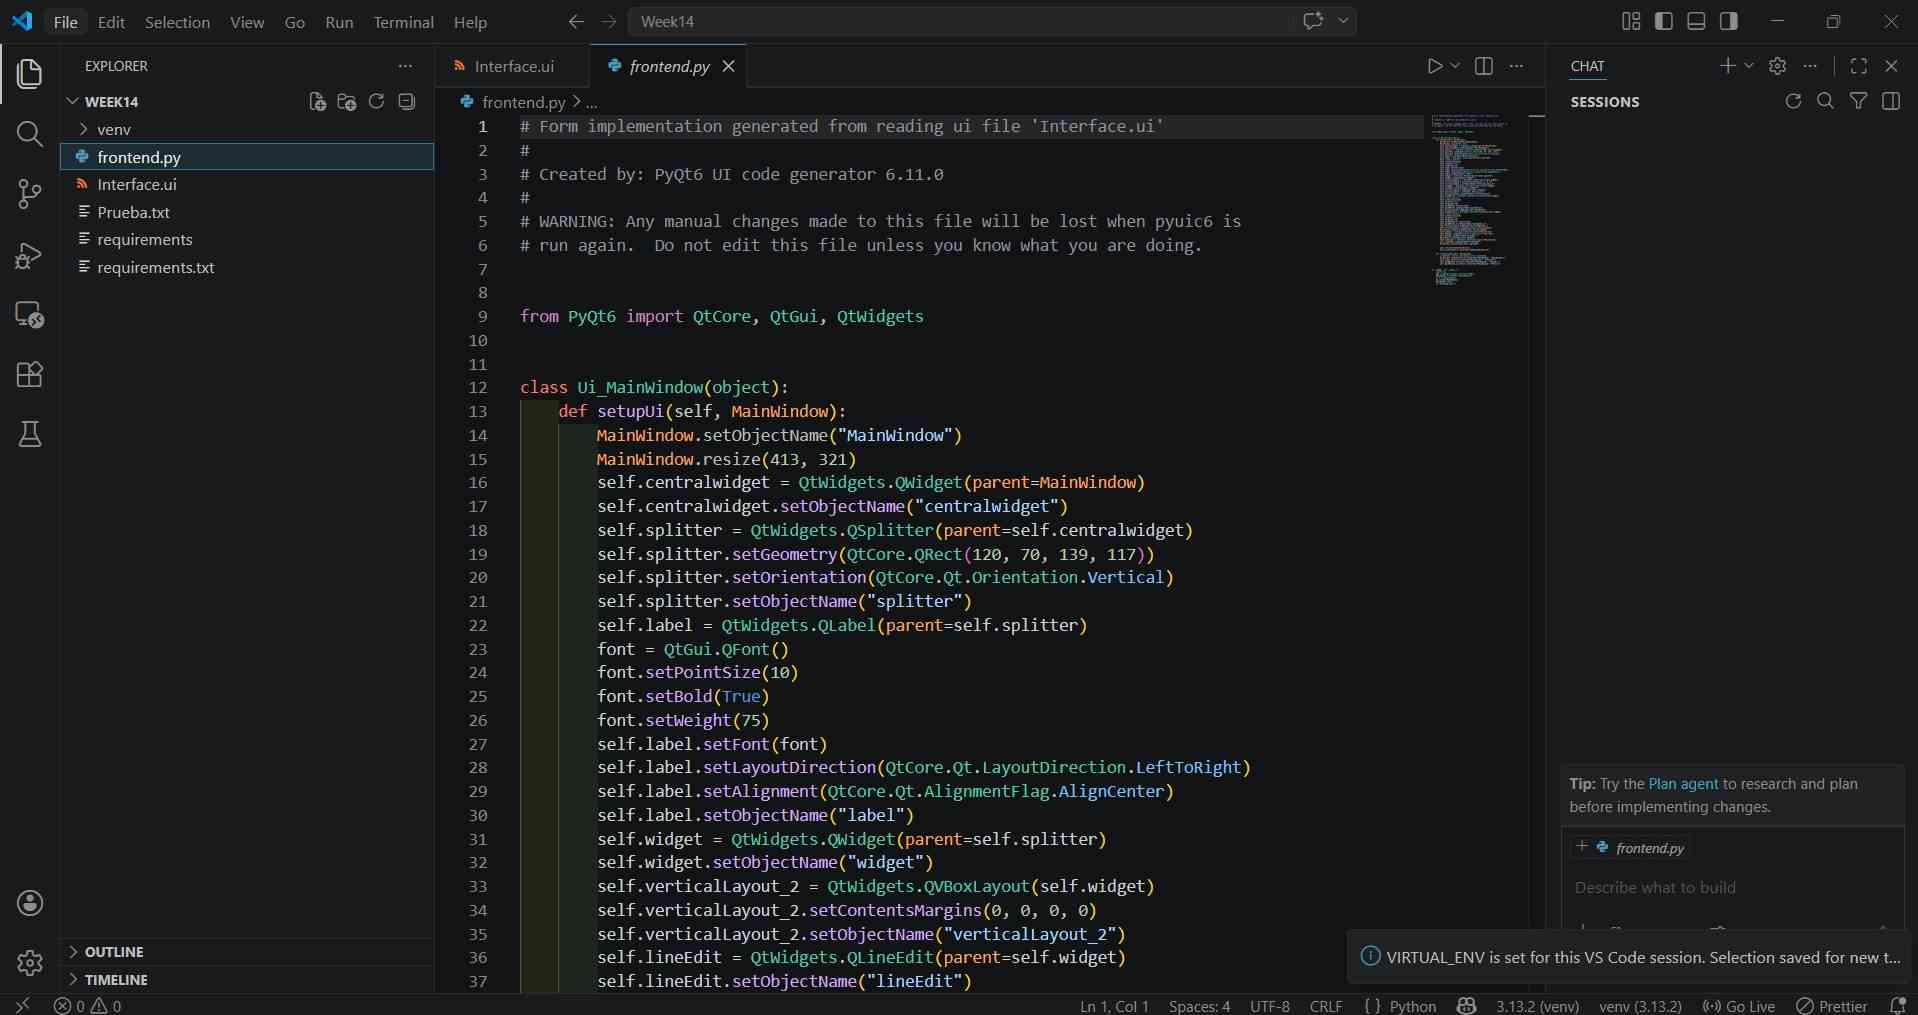
Lines of code can be added to this Python script to define the behavior of the user interface elements.
To launch the live user interface, execute the command 'python frontend.py' in Git Bash, or use the appropriate name of the user interface. I used frontend.py, as that's how I named my code file.
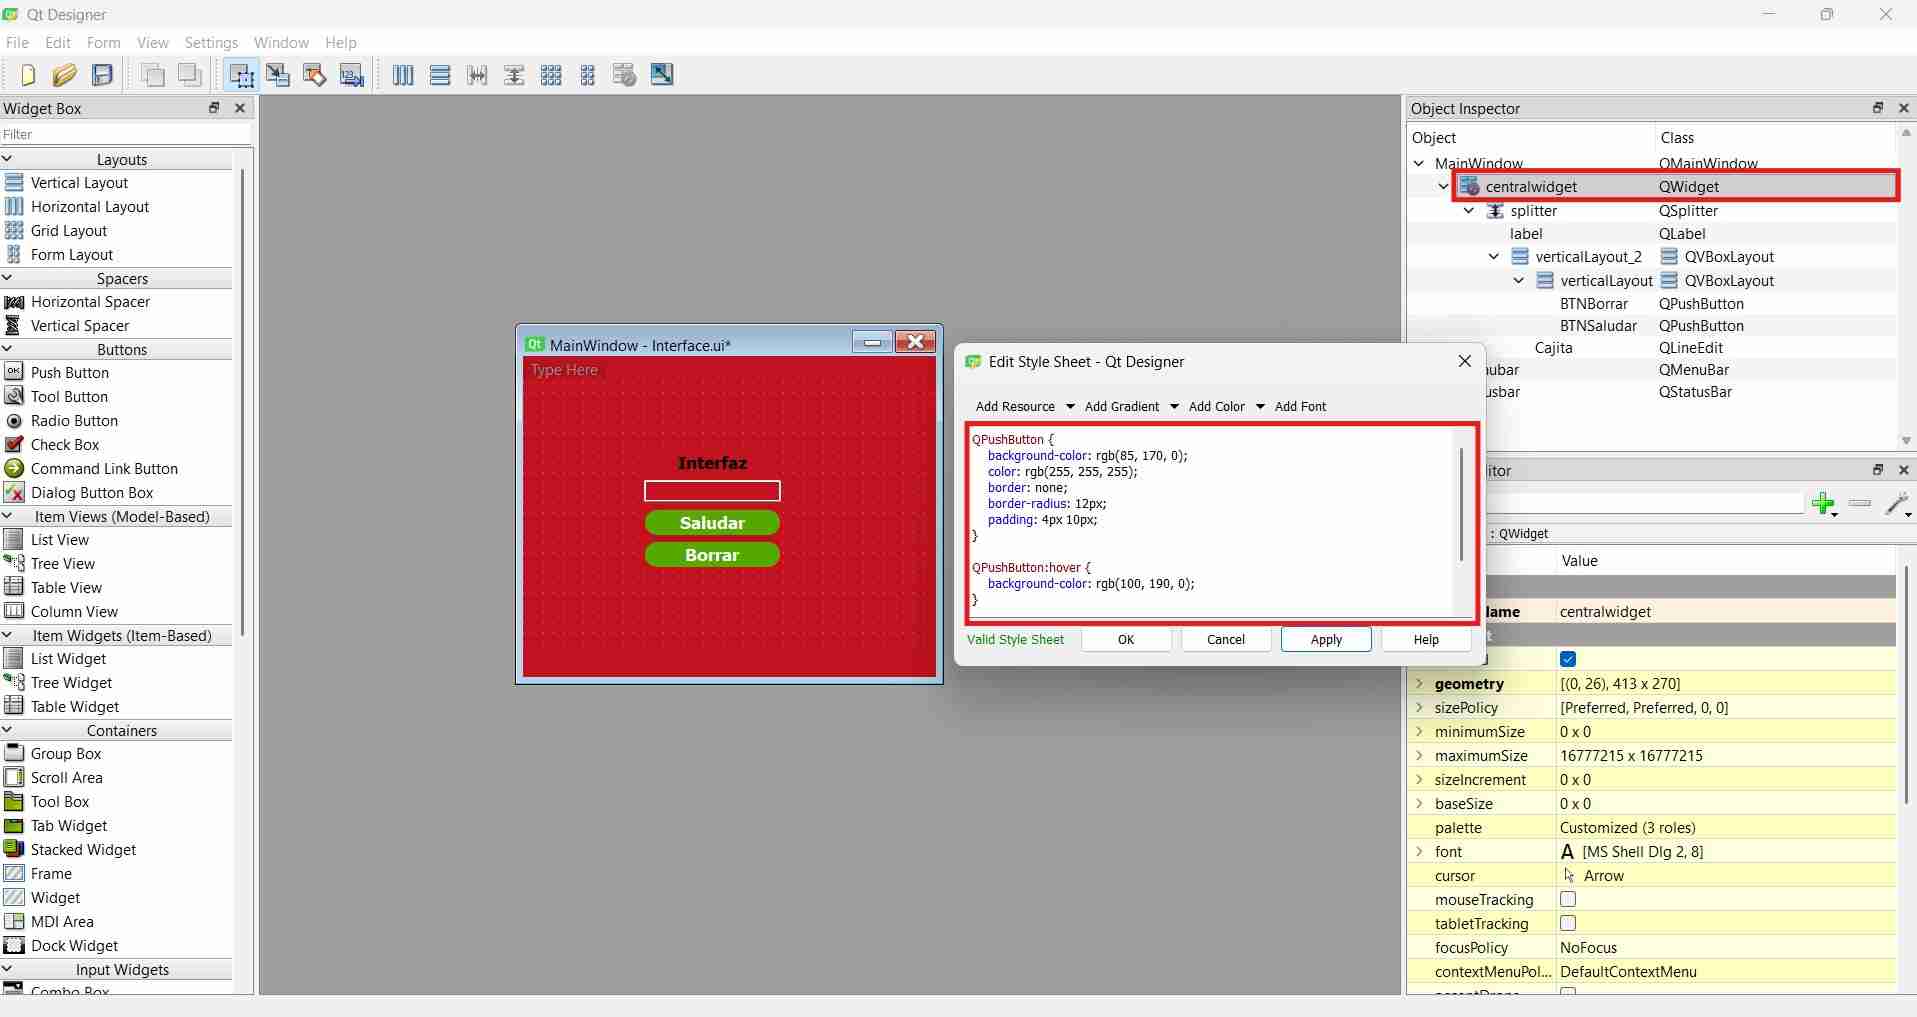
It is important to note that the attributes for each element can be tweaked via attributes like the following:
- Background-color: Sets the background color of a widget. Accepts RGB or hex.
- Color: Changes the text/font color.
- Border-radius: Expressed in px.
- QPushButton:hover: A pseudo-state that changes the button's appearance when the mouse cursor is over it. Great for visual feedback.
- QPushButton:pressed: Another pseudo-state that changes appearance at the moment the button is clicked/pressed.
- border:Adds a border around the widget.
- font-size: Sets text size.
- font-weight: Makes text bold.
- padding: Inner spacing between text and edge.
- min-width: Minimum button width.
Parameters for each element can be adjusted by accessing

Attributes for each element can be modified by right-clicking on the desired element and selecting the appropriate menu option for the attribute you wish to change. For example, I wanted to set the window background to red.
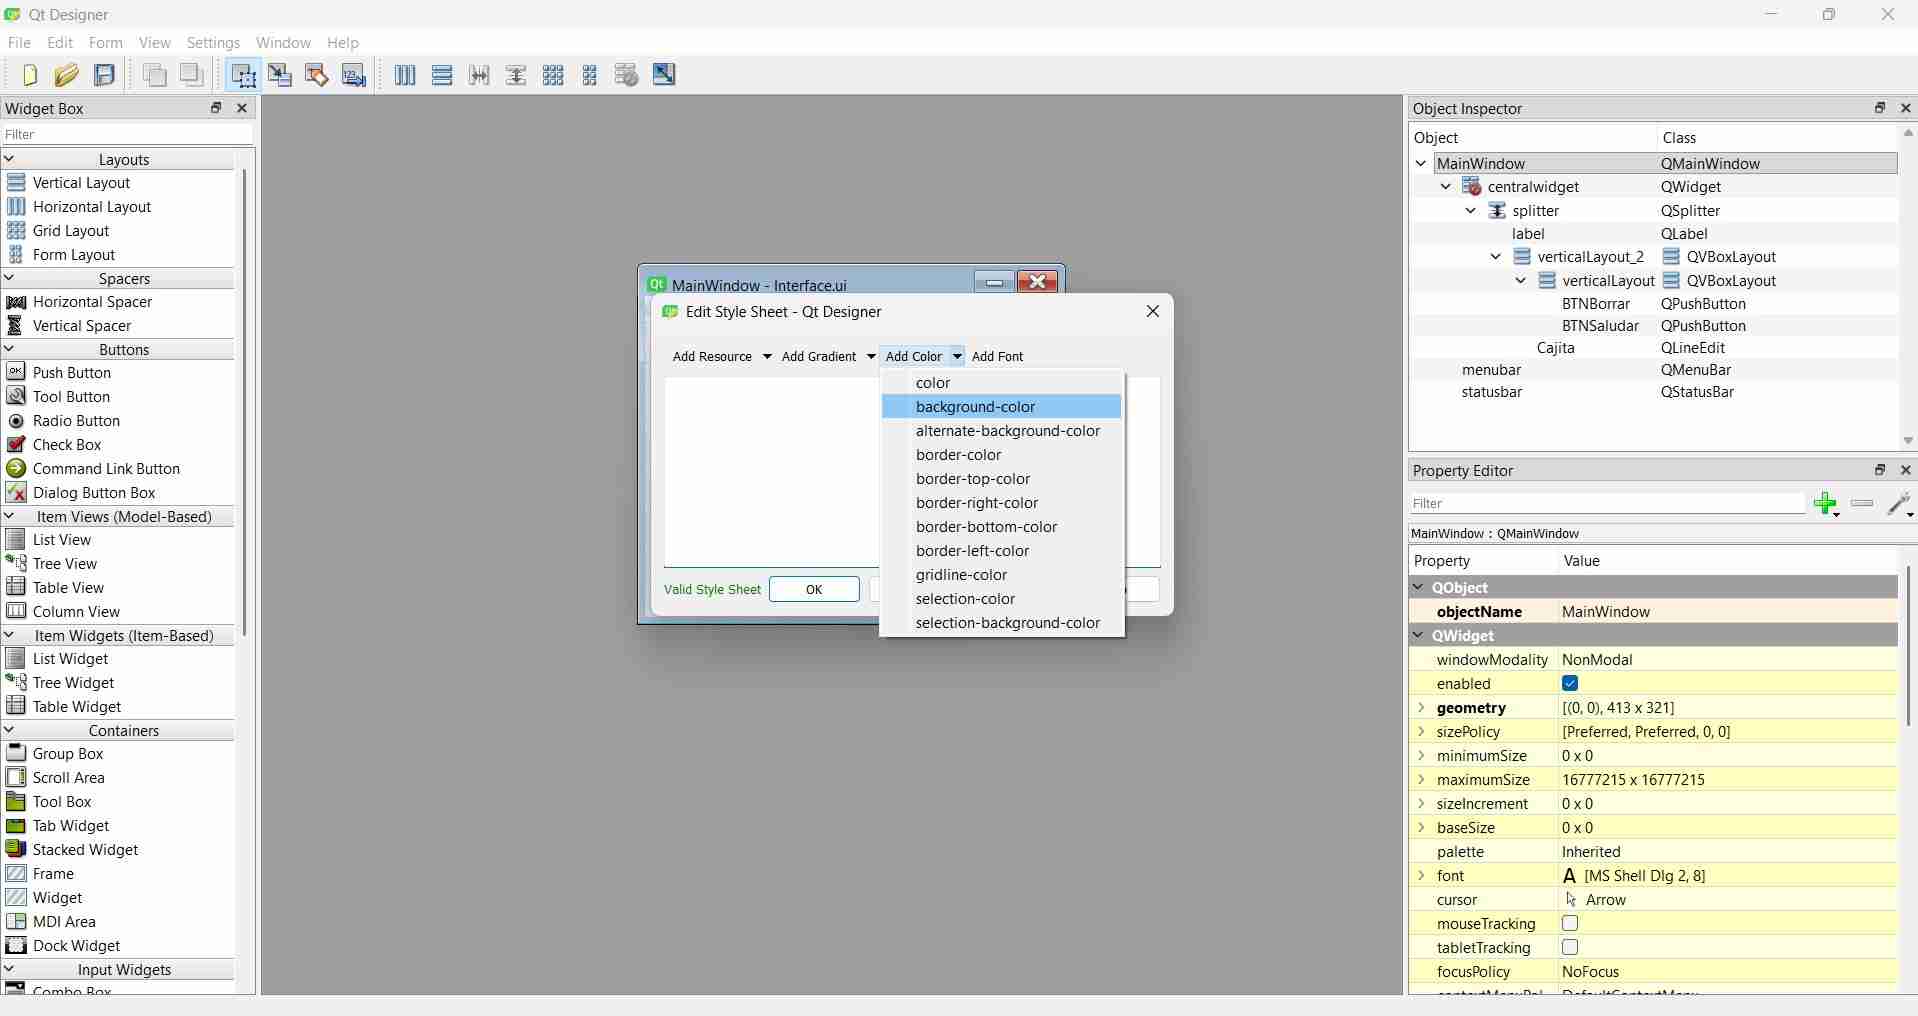
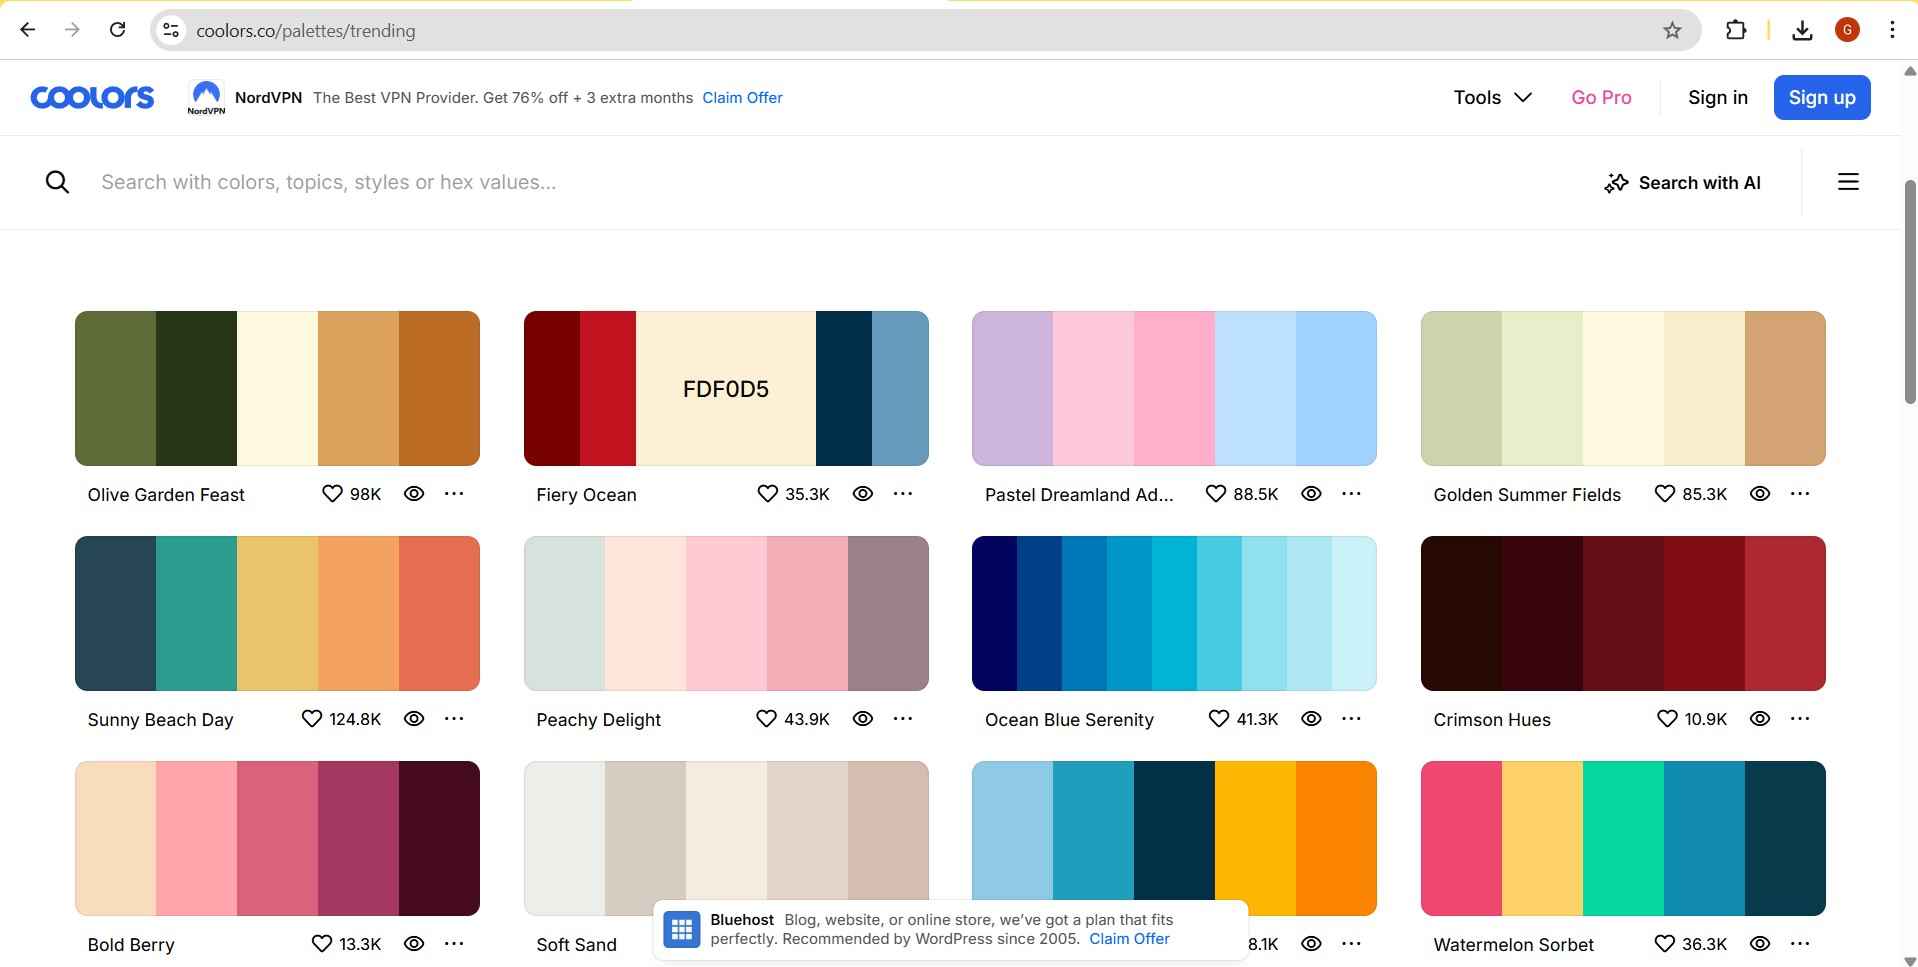
For specific color shades, websites like colors.co can be used to find and obtain the hex codes for a virtually unlimited range of colors. Coolors.co website .
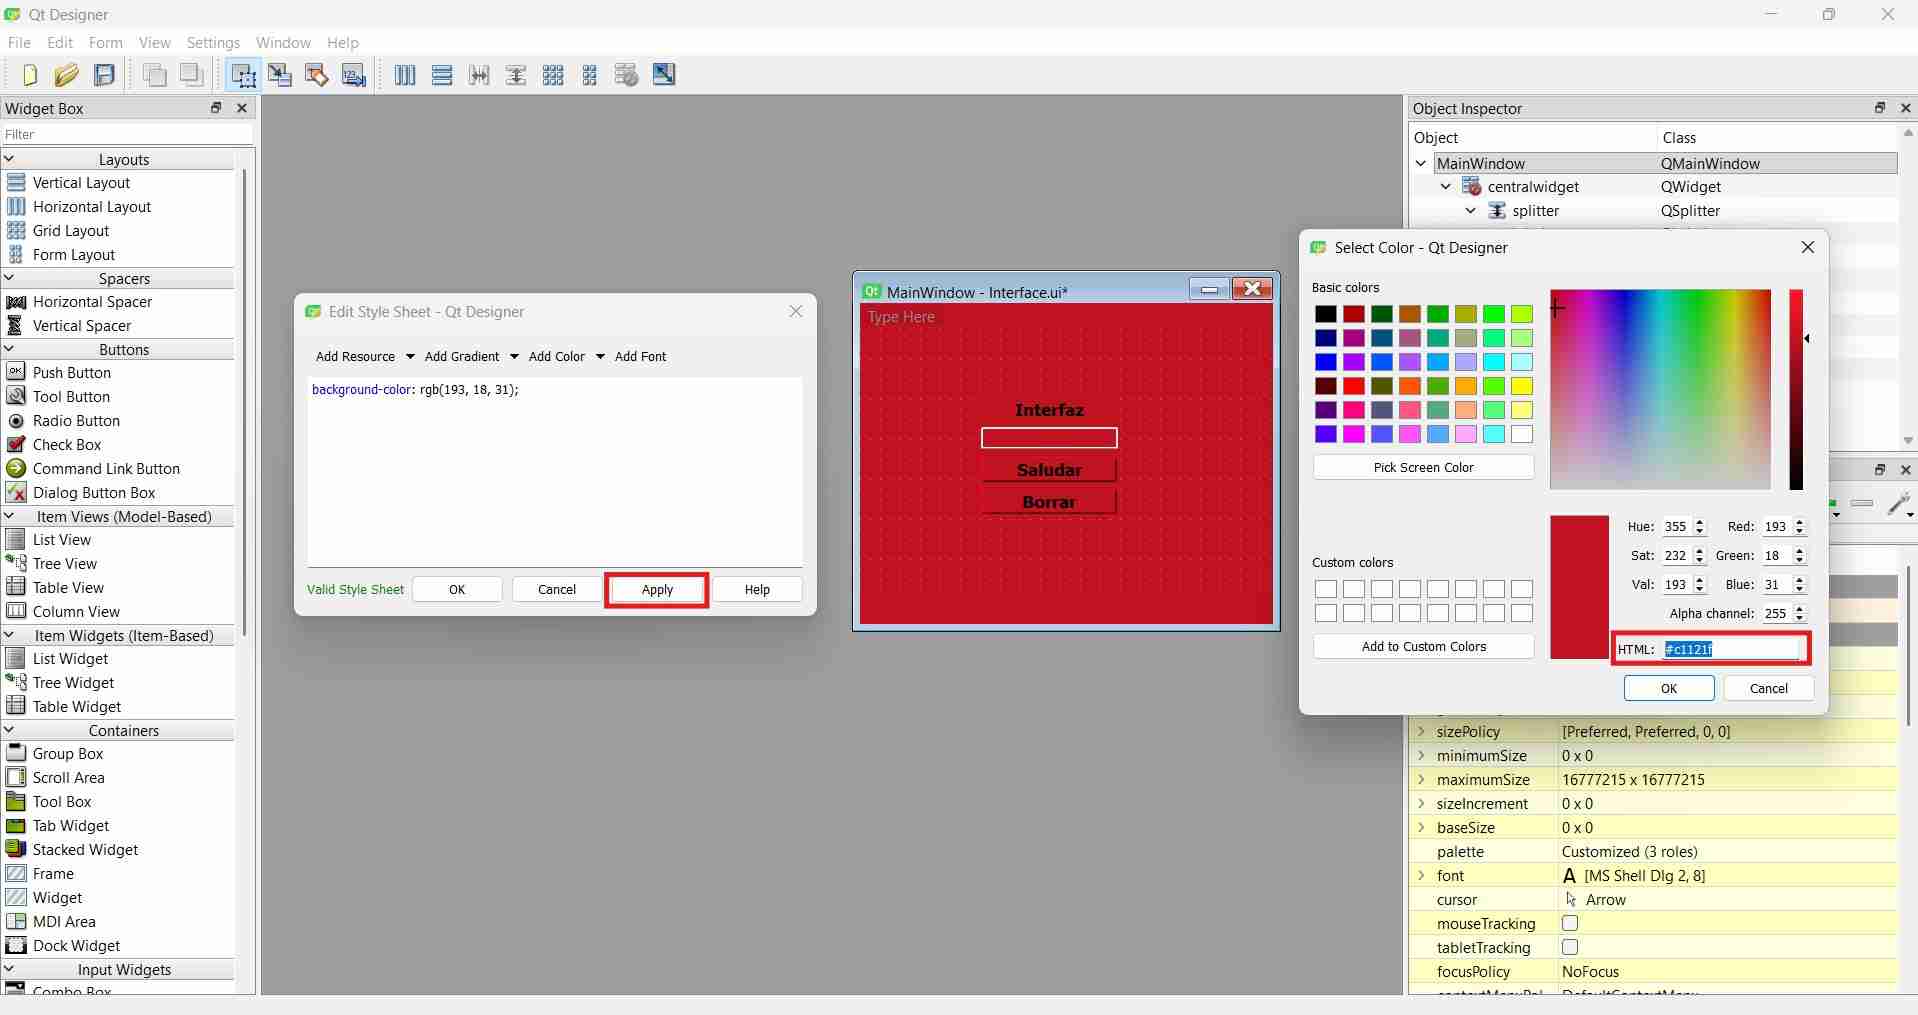
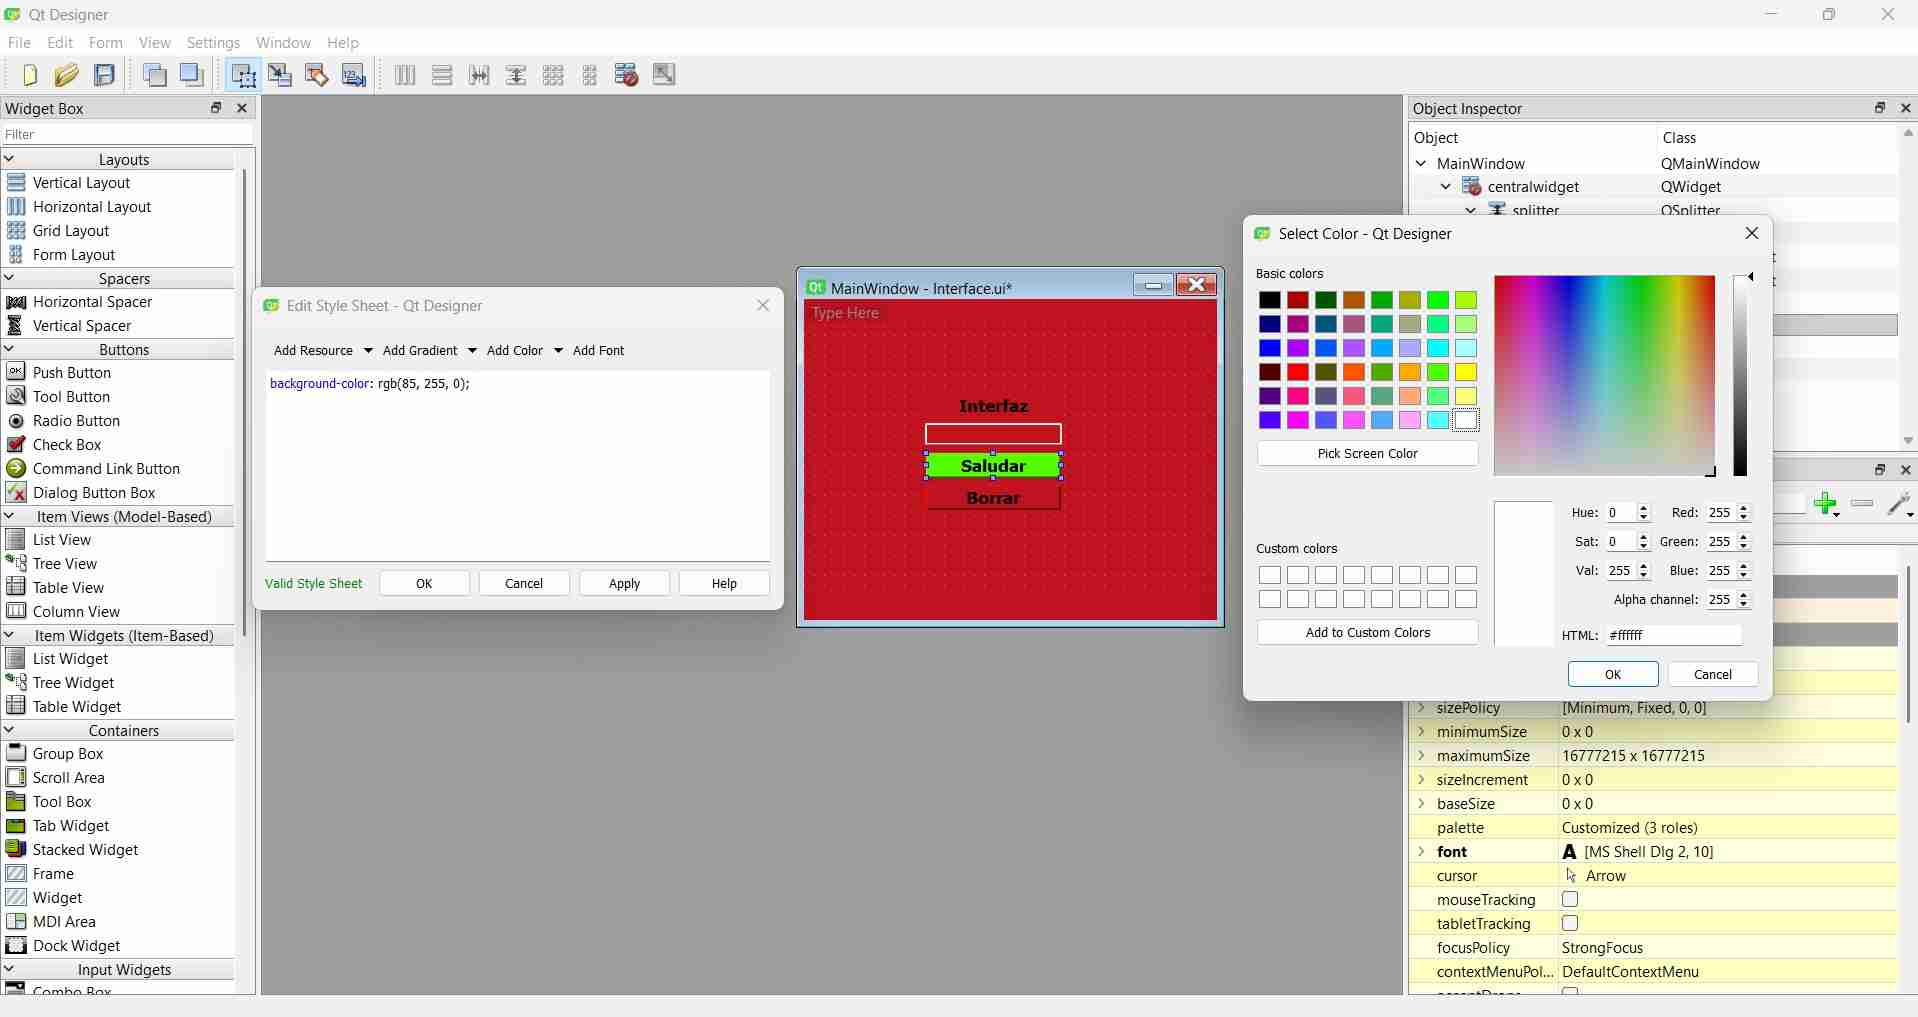
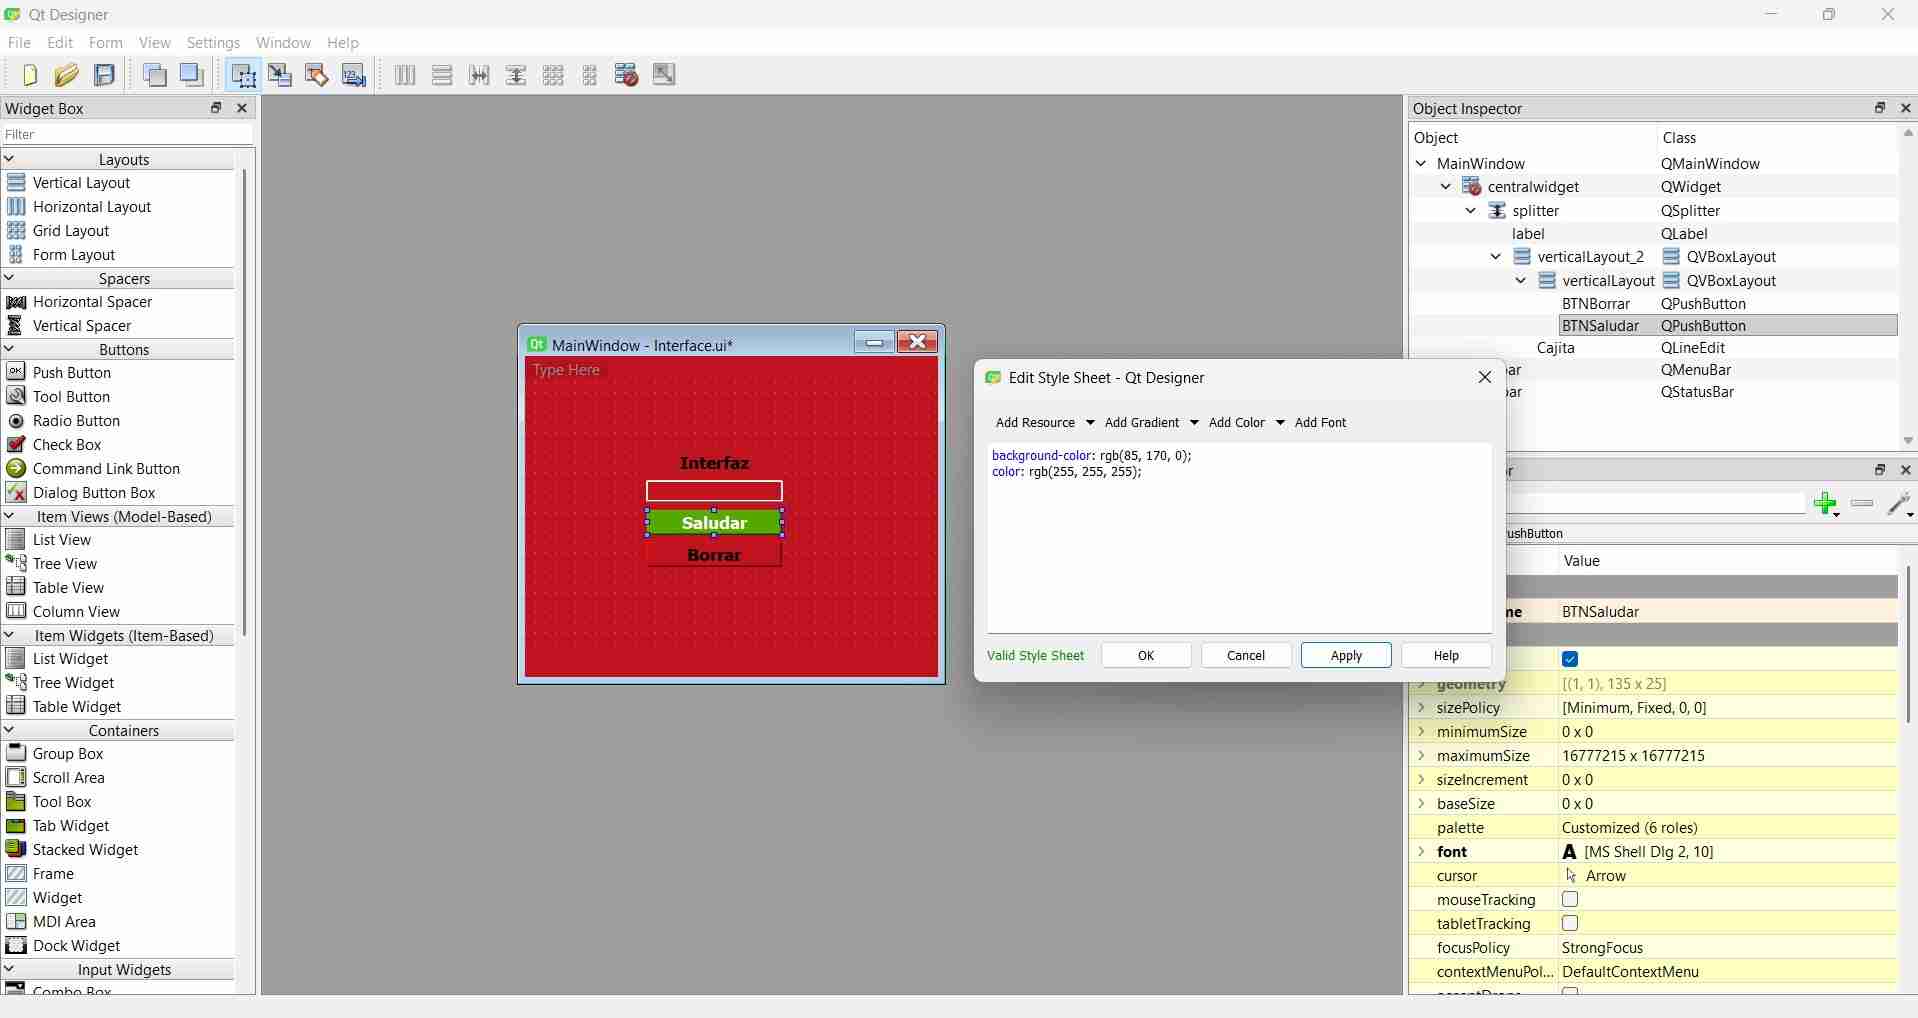
As the central widgeth is the parent component, changes in the properties of one type of object will affect every similar object in the interface. Properties of specific objects can still take effect if added to a specific object.
Every time the session is closed, it is imperative to reactive the virtual environment to successfully execute commands each time.
3. Custom Interface Design
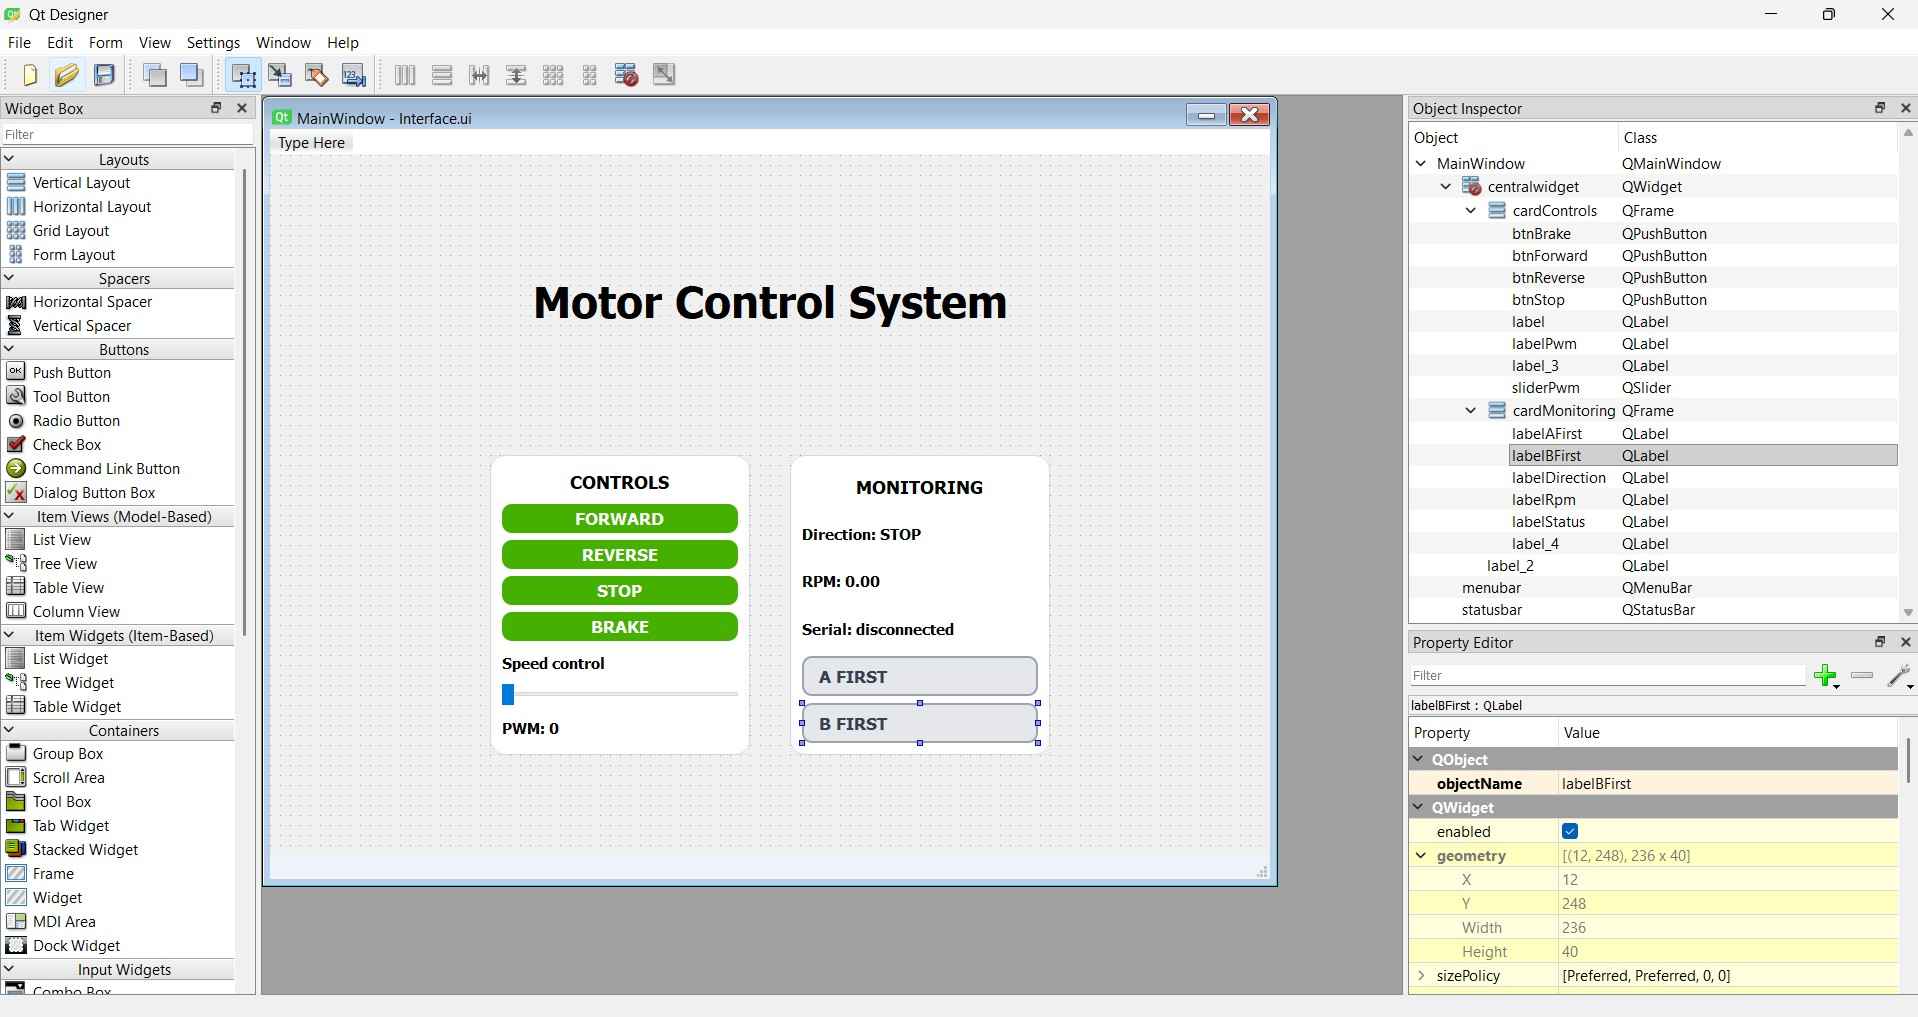
As I've mentioned in previous assignments, my goal is to build a mobile robot, which requires using multiple micrometal DC motors—some equipped with encoders. To test the connections of each motor driver individually, I have decided to develop a user interface that allows me to turn each motor on, control its forward and backward movement, and adjust its speed. Since I will be using encoders on some motors, the interface will also display the pulse count from each encoder. I have written the interface and Arduino code for a Xiao RP2040 controlling a DRV8871 motor driver. Motor direction is controlled by two buttons, while speed is managed using a slider element. Additionally, the code can detect which encoder signal is detected first. This is important because quadrature encoders typically send two signals to a microcontroller. Identifying which signal arrives at its input pin first helps determine the true direction in which the motor is moving.
4. Codes
The following codes were developed with assistance from ChatGPT.
4.1. Arduino code
This is the Arduino code used to control the motor and detect pulse counts. After the code, tables with relevant information are presented.
            const int motorPwmPin = D0;
            const int motorIn2Pin = D1;
            const int motorIn1Pin = D2;
            const int motorStandbyPin = D3;


            // ==========================
            // Encoder pins
            // ==========================

            const int encoderAPin = D4;
            const int encoderBPin = D5;


            // ==========================
            // Encoder calibration
            // ==========================

            // Calibrated value:
            // 970 pulses/s * 60 / 70 rpm = 831.43
            //
            // Since this version counts rising edges from both channel A and B,
            // the previous value is doubled.
            const float pulsesPerOutputRevolution = 1662.86;


            // ==========================
            // Motor state variables
            // ==========================

            int currentPwm = 0;
            char motorState = 'S';
            // F = forward
            // R = reverse
            // S = stopped
            // B = braking


            // ==========================
            // Encoder variables
            // ==========================

            volatile long encoderPulses = 0;

            volatile long forwardVotes = 0;
            volatile long reverseVotes = 0;

            int encoderDirection = 0;
            //  1 = forward
            // -1 = reverse
            //  0 = stopped

            char phaseLead = 'N';
            // A = phase pattern associated with forward
            // B = phase pattern associated with reverse
            // N = unknown / stopped
            // RPM calculation variables

            long previousEncoderPulses = 0;
            float currentRpm = 0.0;

            unsigned long previousRpmTime = 0;
            const unsigned long rpmInterval = 500;

            // Setup and main loop

            void setup() {
              Serial.begin(115200);

              configureMotorPins();
              configureEncoderPins();

              enableMotorDriver();
              stopMotor();

              Serial.println("INFO,System ready");
              Serial.println("INFO,Available commands: F,pwm | R,pwm | S,0 | B,0");
            }

            void loop() {
              readSerialCommand();
              calculateRpmAndDirection();
              sendSystemStatus();
            }

            // Serial communication

            void readSerialCommand() {
              if (Serial.available() > 0) {
                String command = Serial.readStringUntil('\n');
                command.trim();

                parseCommand(command);
              }
            }

            void parseCommand(String command) {
              int commaPosition = command.indexOf(',');

              if (commaPosition == -1) {
                Serial.print("ERR,Invalid command,");
                Serial.println(command);
                return;
              }

              char action = command.charAt(0);
              int pwmValue = command.substring(commaPosition + 1).toInt();

              pwmValue = limitPwm(pwmValue);

              if (action == 'F') {
                moveMotorForward(pwmValue);
              }
              else if (action == 'R') {
                moveMotorReverse(pwmValue);
              }
              else if (action == 'S') {
                stopMotor();
              }
              else if (action == 'B') {
                brakeMotor();
              }
              else {
                Serial.print("ERR,Unknown command,");
                Serial.println(command);
              }
            }

            // Motor setup

            void configureMotorPins() {
              pinMode(motorPwmPin, OUTPUT);
              pinMode(motorIn1Pin, OUTPUT);
              pinMode(motorIn2Pin, OUTPUT);
              pinMode(motorStandbyPin, OUTPUT);
            }

            void enableMotorDriver() {
              digitalWrite(motorStandbyPin, HIGH);
            }

            void disableMotorDriver() {
              digitalWrite(motorStandbyPin, LOW);
            }

            // Motor control

            void moveMotorForward(int pwmValue) {
              pwmValue = limitPwm(pwmValue);

              currentPwm = pwmValue;
              motorState = 'F';

              digitalWrite(motorIn1Pin, HIGH);
              digitalWrite(motorIn2Pin, LOW);
              analogWrite(motorPwmPin, pwmValue);

              Serial.print("ACK,F,");
              Serial.println(pwmValue);
            }

            void moveMotorReverse(int pwmValue) {
              pwmValue = limitPwm(pwmValue);

              currentPwm = pwmValue;
              motorState = 'R';

              digitalWrite(motorIn1Pin, LOW);
              digitalWrite(motorIn2Pin, HIGH);
              analogWrite(motorPwmPin, pwmValue);

              Serial.print("ACK,R,");
              Serial.println(pwmValue);
            }

            void stopMotor() {
              currentPwm = 0;
              motorState = 'S';

              digitalWrite(motorIn1Pin, LOW);
              digitalWrite(motorIn2Pin, LOW);
              analogWrite(motorPwmPin, 0);

              Serial.println("ACK,S,0");
            }

            void brakeMotor() {
              currentPwm = 0;
              motorState = 'B';

              digitalWrite(motorIn1Pin, HIGH);
              digitalWrite(motorIn2Pin, HIGH);
              analogWrite(motorPwmPin, 255);

              Serial.println("ACK,B,0");
            }

            // Encoder setup and voting
            void configureEncoderPins() {
              pinMode(encoderAPin, INPUT_PULLUP);
              pinMode(encoderBPin, INPUT_PULLUP);

              attachInterrupt(digitalPinToInterrupt(encoderAPin), onEncoderARisingEdge, RISING);
              attachInterrupt(digitalPinToInterrupt(encoderBPin), onEncoderBRisingEdge, RISING);
            }

            // On channel A rising edge, read channel B.
            // Depending on the wiring, this vote can be forward or reverse.
            void onEncoderARisingEdge() {
              int channelBState = digitalRead(encoderBPin);

              if (channelBState == HIGH) {
                reverseVotes++;
              } else {
                forwardVotes++;
              }

              encoderPulses++;
            }

            // On channel B rising edge, read channel A.
            // This gives a complementary direction check.
            void onEncoderBRisingEdge() {
              int channelAState = digitalRead(encoderAPin);

              if (channelAState == HIGH) {
                forwardVotes++;
              } else {
                reverseVotes++;
              }

              encoderPulses++;
            }

            // RPM and direction calculation

            void calculateRpmAndDirection() {
              unsigned long currentTime = millis();

              if (currentTime - previousRpmTime >= rpmInterval) {
                noInterrupts();
                long pulseSnapshot = encoderPulses;
                long forwardSnapshot = forwardVotes;
                long reverseSnapshot = reverseVotes;

                forwardVotes = 0;
                reverseVotes = 0;
                interrupts();

                long pulseDifference = pulseSnapshot - previousEncoderPulses;
                previousEncoderPulses = pulseSnapshot;

                float elapsedSeconds = (currentTime - previousRpmTime) / 1000.0;

                currentRpm = (pulseDifference * 60.0) / (pulsesPerOutputRevolution * elapsedSeconds);

                if (pulseDifference == 0) {
                  currentRpm = 0.0;
                  encoderDirection = 0;
                  phaseLead = 'N';
                }
                else if (forwardSnapshot > reverseSnapshot) {
                  encoderDirection = 1;
                  phaseLead = 'A';
                }
                else if (reverseSnapshot > forwardSnapshot) {
                  encoderDirection = -1;
                  phaseLead = 'B';
                }
                else {
                  // Pulses were detected, but the vote count was inconclusive.
                  encoderDirection = 0;
                  phaseLead = 'N';
                }

                previousRpmTime = currentTime;
              }
            }

            // Serial status output

            void sendSystemStatus() {
              static unsigned long previousStatusTime = 0;
              const unsigned long statusInterval = 500;

              unsigned long currentTime = millis();

              if (currentTime - previousStatusTime >= statusInterval) {
                previousStatusTime = currentTime;

                Serial.print("RPM,");
                Serial.print(currentRpm, 2);
                Serial.print(",");

                if (encoderDirection == 1) {
                  Serial.print("FORWARD");
                }
                else if (encoderDirection == -1) {
                  Serial.print("REVERSE");
                }
                else {
                  Serial.print("STOP");
                }

                Serial.print(",");

                if (phaseLead == 'A') {
                  Serial.println("A_FIRST");
                }
                else if (phaseLead == 'B') {
                  Serial.println("B_FIRST");
                }
                else {
                  Serial.println("UNKNOWN");
                }
              }
            }

            // Utility functions

            int limitPwm(int value) {
              if (value < 0) {
                value = 0;
              }

              if (value > 255) {
                value = 255;
              }

              return value;
            }
Table 1. Pin definitions
| Pin | Assigned to | Role |
|---|---|---|
D0 |
motorPwmPin | PWM signal that controls motor speed |
D1 |
motorIn2Pin | Direction control input 2 of the motor driver |
D2 |
motorIn1Pin | Direction control input 1 of the motor driver |
D3 |
motorStandbyPin | Enables or disables the motor driver (HIGH = active) |
D4 |
encoderAPin | Encoder channel A input with interrupt on rising edge |
D5 |
encoderBPin | Encoder channel B input with interrupt on rising edge |
Table 2. Function overview
| Function | What it does |
|---|---|
setup() |
Initializes serial communication, configures motor and encoder pins, enables the driver, and sends a ready message |
loop() |
Continuously checks for incoming serial commands, calculates RPM and direction, and sends a status report |
readSerialCommand() |
Checks if a new command has arrived over serial and passes it to parseCommand() |
parseCommand(command) |
Splits the incoming string by comma, reads the first character as the action, and routes it to the correct motor function |
configureMotorPins() |
Sets the motor driver pins as outputs |
enableMotorDriver() |
Pulls the standby pin HIGH to activate the motor driver |
disableMotorDriver() |
Pulls the standby pin LOW to deactivate the motor driver |
moveMotorForward(pwmValue) |
Sets IN1 HIGH and IN2 LOW, applies PWM, and sends an ACK confirmation over serial |
moveMotorReverse(pwmValue) |
Sets IN1 LOW and IN2 HIGH, applies PWM, and sends an ACK confirmation over serial |
stopMotor() |
Sets both IN pins LOW and PWM to 0, motor coasts to a halt |
brakeMotor() |
Sets both IN pins HIGH and PWM to 255, motor stops abruptly |
configureEncoderPins() |
Sets encoder pins as inputs with pull-up resistors and attaches rising edge interrupts to both channels |
onEncoderARisingEdge() |
ISR triggered when channel A rises; reads channel B to cast a forward or reverse vote and increments the pulse counter |
onEncoderBRisingEdge() |
ISR triggered when channel B rises; reads channel A to cast a complementary forward or reverse vote and increments the pulse counter |
calculateRpmAndDirection() |
Every 500ms takes a snapshot of pulse and vote counts, calculates RPM, and determines direction based on which vote count is higher |
sendSystemStatus() |
Every 500ms sends a formatted RPM line over serial with speed, direction, and phase lead information |
limitPwm(value) |
Clamps a PWM value to the valid range of 0 to 255 |
Table 3. Motor commands
| Command | Example | What it does |
|---|---|---|
F,pwm |
F,200 |
Runs the motor forward at the specified PWM speed |
R,pwm |
R,150 |
Runs the motor in reverse at the specified PWM speed |
S,0 |
S,0 |
Stops the motor, letting it coast to a halt |
B,0 |
B,0 |
Brakes the motor, stopping it abruptly |
Table 4. Key variables
| Variable | What it stores |
|---|---|
pulsesPerOutputRevolution |
Calibrated constant of 1662.86 pulses per output shaft revolution, accounting for encoder resolution and 298:1 gearbox ratio |
encoderPulses |
Running total of all encoder pulses counted by both ISRs, declared volatile for safe interrupt access |
forwardVotes / reverseVotes |
Counters incremented by the ISRs to determine rotation direction; reset every 500ms after being read |
encoderDirection |
Result of the vote count: 1 for forward, -1 for reverse, 0 for stopped or inconclusive |
phaseLead |
Which encoder channel leads: A for forward, B for reverse, N for unknown |
currentRpm |
Calculated RPM value updated every 500ms and sent over serial |
4.2. Python frontend code
            # Form implementation generated from reading ui file 'Interface.ui'
#
# Created by: PyQt6 UI code generator 6.11.0
#
# WARNING: Any manual changes made to this file will be lost when pyuic6 is
# run again.  Do not edit this file unless you know what you are doing.


from PyQt6 import QtCore, QtGui, QtWidgets


class Ui_MainWindow(object):
    def setupUi(self, MainWindow):
        MainWindow.setObjectName("MainWindow")
        MainWindow.resize(1000, 750)
        MainWindow.setStyleSheet("QMainWindow {\n"
"    background-color: #eef3f7;\n"
"}")
        self.centralwidget = QtWidgets.QWidget(parent=MainWindow)
        self.centralwidget.setStyleSheet("QPushButton {\n"
"    background-color: rgb(85, 170, 0);\n"
"    color: rgb(255, 255, 255);\n"
"    border: none;\n"
"    border-radius: 12px;\n"
"    padding: 4px 10px;\n"
"}\n"
"\n"
"QPushButton:hover {\n"
"    background-color: rgb(100, 190, 0);\n"
"}\n"
"\n"
"QPushButton:pressed {\n"
"    background-color: rgb(60, 130, 0);\n"
"}")
        self.centralwidget.setObjectName("centralwidget")
        self.label_2 = QtWidgets.QLabel(parent=self.centralwidget)
        self.label_2.setGeometry(QtCore.QRect(260, 100, 481, 91))
        font = QtGui.QFont()
        font.setPointSize(26)
        font.setBold(True)
        font.setWeight(75)
        self.label_2.setFont(font)
        self.label_2.setAlignment(QtCore.Qt.AlignmentFlag.AlignCenter)
        self.label_2.setObjectName("label_2")
        self.cardControls = QtWidgets.QFrame(parent=self.centralwidget)
        self.cardControls.setGeometry(QtCore.QRect(220, 300, 260, 300))
        self.cardControls.setStyleSheet("QFrame#cardControls {\n"
"    background-color: #ffffff;\n"
"    border: 1px solid #d9e2ec;\n"
"    border-radius: 16px;\n"
"}")
        self.cardControls.setFrameShape(QtWidgets.QFrame.Shape.StyledPanel)
        self.cardControls.setFrameShadow(QtWidgets.QFrame.Shadow.Raised)
        self.cardControls.setObjectName("cardControls")
        self.verticalLayout = QtWidgets.QVBoxLayout(self.cardControls)
        self.verticalLayout.setObjectName("verticalLayout")
        self.label_3 = QtWidgets.QLabel(parent=self.cardControls)
        font = QtGui.QFont()
        font.setPointSize(11)
        font.setBold(True)
        font.setWeight(75)
        self.label_3.setFont(font)
        self.label_3.setAlignment(QtCore.Qt.AlignmentFlag.AlignCenter)
        self.label_3.setObjectName("label_3")
        self.verticalLayout.addWidget(self.label_3)
        self.btnForward = QtWidgets.QPushButton(parent=self.cardControls)
        font = QtGui.QFont()
        font.setPointSize(10)
        font.setBold(True)
        font.setWeight(75)
        self.btnForward.setFont(font)
        self.btnForward.setStyleSheet("QPushButton {\n"
"    background-color: #45b000;\n"
"    color: white;\n"
"    border: none;\n"
"    border-radius: 10px;\n"
"    font-weight: bold;\n"
"    font-size: 10pt;\n"
"}\n"
"\n"
"QPushButton:hover {\n"
"    background-color: #3d9900;\n"
"}\n"
"\n"
"QPushButton:pressed {\n"
"    background-color: #2f7500;\n"
"}")
        self.btnForward.setObjectName("btnForward")
        self.verticalLayout.addWidget(self.btnForward)
        self.btnReverse = QtWidgets.QPushButton(parent=self.cardControls)
        font = QtGui.QFont()
        font.setPointSize(10)
        font.setBold(True)
        font.setWeight(75)
        self.btnReverse.setFont(font)
        self.btnReverse.setStyleSheet("QPushButton {\n"
"    background-color: #45b000;\n"
"    color: white;\n"
"    border: none;\n"
"    border-radius: 10px;\n"
"    font-weight: bold;\n"
"    font-size: 10pt;\n"
"}\n"
"\n"
"QPushButton:hover {\n"
"    background-color: #3d9900;\n"
"}\n"
"\n"
"QPushButton:pressed {\n"
"    background-color: #2f7500;\n"
"}")
        self.btnReverse.setObjectName("btnReverse")
        self.verticalLayout.addWidget(self.btnReverse)
        self.btnStop = QtWidgets.QPushButton(parent=self.cardControls)
        font = QtGui.QFont()
        font.setPointSize(10)
        font.setBold(True)
        font.setWeight(75)
        self.btnStop.setFont(font)
        self.btnStop.setStyleSheet("QPushButton {\n"
"    background-color: #45b000;\n"
"    color: white;\n"
"    border: none;\n"
"    border-radius: 10px;\n"
"    font-weight: bold;\n"
"    font-size: 10pt;\n"
"}\n"
"\n"
"QPushButton:hover {\n"
"    background-color: #3d9900;\n"
"}\n"
"\n"
"QPushButton:pressed {\n"
"    background-color: #2f7500;\n"
"}")
        self.btnStop.setObjectName("btnStop")
        self.verticalLayout.addWidget(self.btnStop)
        self.btnBrake = QtWidgets.QPushButton(parent=self.cardControls)
        font = QtGui.QFont()
        font.setPointSize(10)
        font.setBold(True)
        font.setWeight(75)
        self.btnBrake.setFont(font)
        self.btnBrake.setStyleSheet("QPushButton {\n"
"    background-color: #45b000;\n"
"    color: white;\n"
"    border: none;\n"
"    border-radius: 10px;\n"
"    font-weight: bold;\n"
"    font-size: 10pt;\n"
"}\n"
"\n"
"QPushButton:hover {\n"
"    background-color: #3d9900;\n"
"}\n"
"\n"
"QPushButton:pressed {\n"
"    background-color: #2f7500;\n"
"}")
        self.btnBrake.setObjectName("btnBrake")
        self.verticalLayout.addWidget(self.btnBrake)
        self.label = QtWidgets.QLabel(parent=self.cardControls)
        font = QtGui.QFont()
        font.setPointSize(9)
        font.setBold(True)
        font.setWeight(75)
        self.label.setFont(font)
        self.label.setObjectName("label")
        self.verticalLayout.addWidget(self.label)
        self.sliderPwm = QtWidgets.QSlider(parent=self.cardControls)
        self.sliderPwm.setMaximum(255)
        self.sliderPwm.setOrientation(QtCore.Qt.Orientation.Horizontal)
        self.sliderPwm.setObjectName("sliderPwm")
        self.verticalLayout.addWidget(self.sliderPwm)
        self.labelPwm = QtWidgets.QLabel(parent=self.cardControls)
        font = QtGui.QFont()
        font.setPointSize(9)
        font.setBold(True)
        font.setWeight(75)
        self.labelPwm.setFont(font)
        self.labelPwm.setObjectName("labelPwm")
        self.verticalLayout.addWidget(self.labelPwm)
        self.cardMonitoring = QtWidgets.QFrame(parent=self.centralwidget)
        self.cardMonitoring.setGeometry(QtCore.QRect(520, 300, 260, 300))
        self.cardMonitoring.setStyleSheet("QFrame#cardMonitoring {\n"
"    background-color: #ffffff;\n"
"    border: 1px solid #d9e2ec;\n"
"    border-radius: 16px;\n"
"}")
        self.cardMonitoring.setFrameShape(QtWidgets.QFrame.Shape.StyledPanel)
        self.cardMonitoring.setFrameShadow(QtWidgets.QFrame.Shadow.Raised)
        self.cardMonitoring.setObjectName("cardMonitoring")
        self.verticalLayout_3 = QtWidgets.QVBoxLayout(self.cardMonitoring)
        self.verticalLayout_3.setObjectName("verticalLayout_3")
        self.label_4 = QtWidgets.QLabel(parent=self.cardMonitoring)
        font = QtGui.QFont()
        font.setPointSize(11)
        font.setBold(True)
        font.setWeight(75)
        self.label_4.setFont(font)
        self.label_4.setAlignment(QtCore.Qt.AlignmentFlag.AlignCenter)
        self.label_4.setObjectName("label_4")
        self.verticalLayout_3.addWidget(self.label_4)
        self.labelDirection = QtWidgets.QLabel(parent=self.cardMonitoring)
        font = QtGui.QFont()
        font.setPointSize(9)
        font.setBold(True)
        font.setWeight(75)
        self.labelDirection.setFont(font)
        self.labelDirection.setObjectName("labelDirection")
        self.verticalLayout_3.addWidget(self.labelDirection)
        self.labelRpm = QtWidgets.QLabel(parent=self.cardMonitoring)
        font = QtGui.QFont()
        font.setPointSize(9)
        font.setBold(True)
        font.setWeight(75)
        self.labelRpm.setFont(font)
        self.labelRpm.setObjectName("labelRpm")
        self.verticalLayout_3.addWidget(self.labelRpm)
        self.labelStatus = QtWidgets.QLabel(parent=self.cardMonitoring)
        font = QtGui.QFont()
        font.setPointSize(9)
        font.setBold(True)
        font.setWeight(75)
        self.labelStatus.setFont(font)
        self.labelStatus.setObjectName("labelStatus")
        self.verticalLayout_3.addWidget(self.labelStatus)
        self.labelAFirst = QtWidgets.QLabel(parent=self.cardMonitoring)
        font = QtGui.QFont()
        font.setPointSize(10)
        font.setBold(True)
        font.setWeight(75)
        self.labelAFirst.setFont(font)
        self.labelAFirst.setStyleSheet("QLabel {\n"
"    background-color: #e5e7eb;\n"
"    color: #374151;\n"
"    border: 2px solid #9ca3af;\n"
"    border-radius: 10px;\n"
"    font-weight: bold;\n"
"    font-size: 10pt;\n"
"    padding-left: 10px;\n"
"}")
        self.labelAFirst.setObjectName("labelAFirst")
        self.verticalLayout_3.addWidget(self.labelAFirst)
        self.labelBFirst = QtWidgets.QLabel(parent=self.cardMonitoring)
        font = QtGui.QFont()
        font.setPointSize(10)
        font.setBold(True)
        font.setWeight(75)
        self.labelBFirst.setFont(font)
        self.labelBFirst.setStyleSheet("QLabel {\n"
"    background-color: #e5e7eb;\n"
"    color: #374151;\n"
"    border: 2px solid #9ca3af;\n"
"    border-radius: 10px;\n"
"    font-weight: bold;\n"
"    font-size: 10pt;\n"
"    padding-left: 10px;\n"
"}")
        self.labelBFirst.setObjectName("labelBFirst")
        self.verticalLayout_3.addWidget(self.labelBFirst)
        MainWindow.setCentralWidget(self.centralwidget)
        self.menubar = QtWidgets.QMenuBar(parent=MainWindow)
        self.menubar.setGeometry(QtCore.QRect(0, 0, 1000, 26))
        self.menubar.setObjectName("menubar")
        MainWindow.setMenuBar(self.menubar)
        self.statusbar = QtWidgets.QStatusBar(parent=MainWindow)
        self.statusbar.setObjectName("statusbar")
        MainWindow.setStatusBar(self.statusbar)

        self.retranslateUi(MainWindow)
        QtCore.QMetaObject.connectSlotsByName(MainWindow)

    def retranslateUi(self, MainWindow):
        _translate = QtCore.QCoreApplication.translate
        MainWindow.setWindowTitle(_translate("MainWindow", "MainWindow"))
        self.label_2.setText(_translate("MainWindow", "Motor Control System"))
        self.label_3.setText(_translate("MainWindow", "CONTROLS"))
        self.btnForward.setText(_translate("MainWindow", "FORWARD"))
        self.btnReverse.setText(_translate("MainWindow", "REVERSE"))
        self.btnStop.setText(_translate("MainWindow", "STOP"))
        self.btnBrake.setText(_translate("MainWindow", "BRAKE"))
        self.label.setText(_translate("MainWindow", "Speed control"))
        self.labelPwm.setText(_translate("MainWindow", "PWM: 0"))
        self.label_4.setText(_translate("MainWindow", "MONITORING"))
        self.labelDirection.setText(_translate("MainWindow", "Direction: STOP"))
        self.labelRpm.setText(_translate("MainWindow", "RPM: 0.00"))
        self.labelStatus.setText(_translate("MainWindow", "Serial: disconnected"))
        self.labelAFirst.setText(_translate("MainWindow", "A FIRST"))
        self.labelBFirst.setText(_translate("MainWindow", "B FIRST"))
Table 5. UI Elements
| Element | Type | What it does |
|---|---|---|
label_2 |
QLabel | Main title of the window, displays "Motor Control System" |
cardControls |
QFrame | White rounded card that groups all motor control elements |
btnForward |
QPushButton | Sends the forward command to the microcontroller when clicked |
btnReverse |
QPushButton | Sends the reverse command to the microcontroller when clicked |
btnStop |
QPushButton | Sends the stop command, motor coasts to a halt |
btnBrake |
QPushButton | Sends the brake command, motor stops abruptly |
sliderPwm |
QSlider | Horizontal slider ranging from 0 to 255 for controlling motor speed |
labelPwm |
QLabel | Displays the current PWM value selected by the slider |
cardMonitoring |
QFrame | White rounded card that groups all real-time monitoring elements |
labelDirection |
QLabel | Displays the current motor direction reported by the microcontroller |
labelRpm |
QLabel | Displays the current RPM value calculated by the microcontroller |
labelStatus |
QLabel | Displays the serial connection status and last acknowledged command |
labelAFirst |
QLabel | Indicator that highlights when encoder channel A is detected first |
labelBFirst |
QLabel | Indicator that highlights when encoder channel B is detected first |
Table 6. Methods
| Note | Explanation |
|---|---|
| Autogenerated file | This file is produced by running pyuic6 -x Interface.ui -o frontend.py and should not be edited manually, as changes are lost every time it is regenerated |
| QSS applied at two levels | Global button styles are set on centralwidget and affect all buttons; individual buttons can override these with their own stylesheet |
| Layout system | Both cards use QVBoxLayout to stack their elements vertically, making them adapt automatically if the window is resized |
4.3.Backend code
from PyQt6 import QtWidgets
from frontend import Ui_MainWindow
from base_serial import SerialWorker, listar_puertos


class MainWindow(QtWidgets.QMainWindow, Ui_MainWindow):
    def __init__(self, *args, **kwargs):
        super().__init__(*args, **kwargs)
        self.setupUi(self)

        # Runtime styles are applied here because frontend.py is autogenerated.
        self.apply_runtime_styles()

        # Motor state
        self.current_pwm = 0
        self.current_direction_command = "S"

        # Serial worker receives data and calls self.process_serial_line()
        self.serial = SerialWorker(callback=self.process_serial_line, baudrate=115200)

        # Styles for phase indicators
        self.phase_inactive_style = """
            QLabel {
                background-color: #e5e7eb;
                color: #374151;
                border: 2px solid #9ca3af;
                border-radius: 10px;
                font-weight: bold;
                font-size: 10pt;
                padding-left: 10px;
            }
        """

        self.phase_active_style = """
            QLabel {
                background-color: #22c55e;
                color: white;
                border: 2px solid #16a34a;
                border-radius: 10px;
                font-weight: bold;
                font-size: 10pt;
                padding-left: 10px;
            }
        """

        self.configure_interface()
        self.connect_buttons()
        self.connect_to_board()

    # --------------------------
    # Runtime styles
    # --------------------------

    def apply_runtime_styles(self):
        # Main title
        self.label_2.setStyleSheet("""
            QLabel {
                color: #111827;
                font-size: 26pt;
                font-weight: bold;
            }
        """)

        # Section titles
        self.label_3.setStyleSheet("""
            QLabel {
                color: #111827;
                font-size: 12pt;
                font-weight: bold;
            }
        """)

        self.label_4.setStyleSheet("""
            QLabel {
                color: #111827;
                font-size: 12pt;
                font-weight: bold;
            }
        """)

        # Normal text inside cards
        normal_label_style = """
            QLabel {
                color: #1f2933;
                font-size: 10pt;
                font-weight: bold;
            }
        """

        self.label.setStyleSheet(normal_label_style)
        self.labelPwm.setStyleSheet(normal_label_style)
        self.labelRpm.setStyleSheet(normal_label_style)
        self.labelDirection.setStyleSheet(normal_label_style)
        self.labelStatus.setStyleSheet(normal_label_style)

    # --------------------------
    # Interface setup
    # --------------------------

    def configure_interface(self):
        self.setWindowTitle("Motor Control System")

        self.sliderPwm.setMinimum(0)
        self.sliderPwm.setMaximum(255)
        self.sliderPwm.setValue(0)

        self.labelPwm.setText("PWM: 0")
        self.labelRpm.setText("RPM: 0.00")
        self.labelDirection.setText("Direction: STOP")
        self.labelStatus.setText("Serial: disconnected")

        self.labelAFirst.setStyleSheet(self.phase_inactive_style)
        self.labelBFirst.setStyleSheet(self.phase_inactive_style)

    def connect_buttons(self):
        self.btnForward.clicked.connect(self.move_forward)
        self.btnReverse.clicked.connect(self.move_reverse)
        self.btnStop.clicked.connect(self.stop_motor)
        self.btnBrake.clicked.connect(self.brake_motor)

        self.sliderPwm.valueChanged.connect(self.update_pwm_value)

    # --------------------------
    # Serial connection
    # --------------------------

    def connect_to_board(self):
        available_ports = listar_puertos()
        print("Available serial ports:", available_ports)

        # Change this if your XIAO appears on a different COM port.
        selected_port = "COM19"

        if self.serial.conectar(selected_port):
            self.labelStatus.setText(f"Serial: connected ({selected_port})")
            print(f"Connected to {selected_port}")
        else:
            self.labelStatus.setText("Serial: disconnected")
            print("Could not connect to the board.")

    def send_motor_command(self, command, pwm_value):
        message = f"{command},{pwm_value}"
        self.serial.send(message)
        print(f"Sent: {message}")

    # --------------------------
    # Button and slider actions
    # --------------------------

    def update_pwm_value(self):
        self.current_pwm = self.sliderPwm.value()
        self.labelPwm.setText(f"PWM: {self.current_pwm}")

        # If the motor is already running, update the PWM immediately.
        if self.current_direction_command == "F":
            self.send_motor_command("F", self.current_pwm)

        elif self.current_direction_command == "R":
            self.send_motor_command("R", self.current_pwm)

    def move_forward(self):
        self.current_direction_command = "F"
        self.send_motor_command("F", self.current_pwm)

    def move_reverse(self):
        self.current_direction_command = "R"
        self.send_motor_command("R", self.current_pwm)

    def stop_motor(self):
        self.current_direction_command = "S"
        self.send_motor_command("S", 0)

    def brake_motor(self):
        self.current_direction_command = "B"
        self.send_motor_command("B", 0)

    # --------------------------
    # Serial data processing
    # --------------------------

    def process_serial_line(self, line):
        print(f"Received: {line}")

        if line.startswith("RPM,"):
            self.process_rpm_line(line)

        elif line.startswith("ACK,"):
            self.process_ack_line(line)

        elif line.startswith("INFO,"):
            print(line)

        elif line.startswith("ERR,"):
            self.labelStatus.setText("Serial: error")
            print(line)

    def process_rpm_line(self, line):
        parts = line.split(",")

        if len(parts) != 4:
            return

        rpm_value = parts[1]
        direction = parts[2]
        phase = parts[3]

        self.labelRpm.setText(f"RPM: {rpm_value}")
        self.labelDirection.setText(f"Direction: {direction}")
        self.update_phase_indicators(phase)

    def process_ack_line(self, line):
        parts = line.split(",")

        if len(parts) >= 2:
            command = parts[1]
            self.labelStatus.setText(f"ACK: {command}")

    def update_phase_indicators(self, phase):
        if phase == "A_FIRST":
            self.labelAFirst.setStyleSheet(self.phase_active_style)
            self.labelBFirst.setStyleSheet(self.phase_inactive_style)

        elif phase == "B_FIRST":
            self.labelAFirst.setStyleSheet(self.phase_inactive_style)
            self.labelBFirst.setStyleSheet(self.phase_active_style)

        else:
            self.labelAFirst.setStyleSheet(self.phase_inactive_style)
            self.labelBFirst.setStyleSheet(self.phase_inactive_style)

    # --------------------------
    # Safe shutdown
    # --------------------------

    def closeEvent(self, event):
        # Stop the motor before closing the interface.
        self.send_motor_command("S", 0)
        self.serial.desconectar()
        event.accept()


if __name__ == "__main__":
    app = QtWidgets.QApplication([])
    window = MainWindow()
    window.show()
    app.exec()
Table 7. Methods
| Method | What it does |
|---|---|
__init__ |
Initializes the window, loads the frontend UI, sets up motor state variables, creates the SerialWorker, and calls the setup methods |
apply_runtime_styles() |
Applies QSS styles to labels at runtime, since frontend.py is autogenerated and styles added there would be overwritten |
configure_interface() |
Sets initial values for the slider, labels, and phase indicators when the application first opens |
connect_buttons() |
Links each button and the slider to their corresponding handler methods using Qt signals |
connect_to_board() |
Lists available serial ports and attempts to connect to COM19; updates the status label with the result |
send_motor_command(command, pwm_value) |
Formats a command string as COMMAND,value and sends it to the microcontroller via the SerialWorker |
update_pwm_value() |
Reads the slider value, updates the PWM label, and if the motor is already running sends the updated speed immediately |
move_forward() |
Sets direction to forward and sends the F command with the current PWM value |
move_reverse() |
Sets direction to reverse and sends the R command with the current PWM value |
stop_motor() |
Sends the S command with PWM 0, motor coasts to a halt |
brake_motor() |
Sends the B command with PWM 0, motor stops abruptly |
process_serial_line(line) |
Receives every line from the SerialWorker and routes it to the correct handler based on its prefix: RPM, ACK, INFO, or ERR |
process_rpm_line(line) |
Parses the RPM line from the microcontroller and updates the RPM, direction, and phase indicator labels |
process_ack_line(line) |
Parses the acknowledgement line and updates the status label to confirm the last command was received |
update_phase_indicators(phase) |
Highlights either labelAFirst or labelBFirst in green depending on which encoder channel was detected first; turns both grey if unknown |
closeEvent(event) |
Triggered when the user closes the window; sends a stop command to the motor and disconnects the serial port cleanly before exiting |
Table 8. State variables
| Variable | What it stores |
|---|---|
current_pwm |
The current PWM value selected by the slider, ranging from 0 to 255 |
current_direction_command |
The last direction command sent: F, R, S, or B; used to decide whether to update speed immediately when the slider moves |
serial |
The SerialWorker instance that handles all communication with the microcontroller |
phase_inactive_style |
QSS string applied to phase indicator labels when they are not active (grey background) |
phase_active_style |
QSS string applied to phase indicator labels when they are active (green background) |
Table 9. Serial message prefixes
| Prefix | Example | What it means |
|---|---|---|
RPM, |
RPM,45.30,FORWARD,A_FIRST |
Real-time status update with speed, direction, and encoder phase |
ACK, |
ACK,F,200 |
Confirmation that the microcontroller received and executed a command |
INFO, |
INFO,System ready |
Informational message printed to the console only |
ERR, |
ERR,Invalid command,X |
Error reported by the microcontroller; updates the status label to show an error state |
4.4. Serial communication layer
This is the serial communication layer of the application. Its sole responsibility is managing the connection between the Python app and the microcontroller over USB serial. Think of it as the "messenger" between the PC and the board.
              """
base_serial.py — Clase para comunicación serial con microcontroladores.

Uso básico en backend.py:
    from base_serial import SerialWorker, listar_puertos

    self.serial = SerialWorker()
    self.serial.conectar('/dev/ttyUSB0')   # Mac/Linux
    # self.serial.conectar('COM3')         # Windows
"""

import serial
import serial.tools.list_ports
from PyQt6.QtCore import QTimer


class SerialWorker:
    """
    Maneja la conexión con el microcontrolador.

    Usa un QTimer para revisar periódicamente si llegaron datos,
    sin bloquear la interfaz gráfica.
    """

    def __init__(self, callback, baudrate=115200):
        """
        Parámetros:
            callback  — función que se llamará cada vez que llegue una línea
                        (normalmente un método de MainWindow en backend.py)
            baudrate  — velocidad de comunicación, debe coincidir con el micro
        """
        self.ser = None             # aquí se guardará la conexión serial
        self.callback = callback    # función a llamar con cada dato recibido
        self.baudrate = baudrate

        # El timer llama a self._leer() cada 100ms
        self.timer = QTimer()
        self.timer.timeout.connect(self._leer)

    def conectar(self, puerto: str):
        """
        Abre el puerto serial e inicia la lectura periódica.

        Parámetros:
            puerto — nombre del puerto, ej. '/dev/ttyUSB0' o 'COM3'
        """
        try:
            self.ser = serial.Serial(puerto, self.baudrate, timeout=1)
            self.timer.start(100)   # revisa cada 100 milisegundos
            return True
        except serial.SerialException as e:
            print(f"Error al conectar {puerto}: {e}")
            return False

    def desconectar(self):
        """Detiene la lectura y cierra el puerto."""
        self.timer.stop()
        if self.ser and self.ser.is_open:
            self.ser.close()

    def send(self, mensaje: str):
        """
        Envía un comando al microcontrolador.

        En Arduino se recibe con: Serial.readStringUntil('\\n')
        """
        if self.ser and self.ser.is_open:
            self.ser.write((mensaje + '\n').encode('utf-8'))

    def _leer(self):
        """
        Se ejecuta cada 100ms gracias al QTimer.
        Si llegaron bytes, lee una línea y llama al callback.
        """
        try:
            if self.ser and self.ser.in_waiting:
                linea = self.ser.readline().decode('utf-8').rstrip()
                if linea:
                    self.callback(linea)
        except serial.SerialException as e:
            print(f"Error de lectura: {e}")
            self.desconectar()


def listar_puertos() -> list:
    """
    Retorna una lista con los puertos seriales disponibles en el sistema.

    Ejemplo de uso:
        for puerto in listar_puertos():
            print(puerto)   # '/dev/ttyUSB0', '/dev/ttyACM0', etc.
    """
    puertos = serial.tools.list_ports.comports()
    return [p.device for p in puertos]
Table 10. Components
| Component | Type | What it does |
|---|---|---|
SerialWorker |
Class | Main class that manages the serial connection with the microcontroller |
__init__ |
Method | Sets up the connection object, stores the callback function, and creates a QTimer that checks for incoming data every 100ms |
conectar(puerto) |
Method | Opens the serial port at the specified COM port and baud rate, then starts the timer |
desconectar() |
Method | Stops the timer and closes the serial port cleanly |
send(mensaje) |
Method | Sends a text command to the microcontroller, adding \n so Arduino can detect the end of the message with readStringUntil('\n') |
_leer() |
Method | Called every 100ms by the QTimer; reads incoming data and passes each line to the callback function |
listar_puertos() |
Function | Scans the system and returns a list of all available serial ports |
Table 11. Design considerations
| Design decision | Reason |
|---|---|
Uses QTimer instead of a thread |
Threads can crash if they touch the GUI; QTimer runs safely inside the same Qt thread as the interface |
Video demonstration
The following video demonstrates the functionality of the overall system:
Files
Here are the downloadable files for this week:
Sources codes for this weekReflection
Although I still prefer using LabVIEW over Qt Designer or other UI development platforms, I can appreciate the advantages this platform offers. Nevertheless, this assignment has enabled me to develop a tool that I will certainly use during the debugging phase of my final project.