Molding and Casting
Up to this point in our FAB Academy journey, we’ve already learned how to bring to life (almost) any shape we desire. With 3D printing we can print any piece we can think of (that we can design). The CNC router is great for bigger products, like furniture. But what if we needed to get multiple copies of the exact same thing? A 3D printer would struggle in that regard, specially with the amount of time that would be needed for single printer to produce multiple things.
Molding and Casting is the process of creating the “stencil”, from which a defined product can be easily replicated. Once a mold is properly constructed, it can be used to produce an infinite amount of copies that will always be exactly the same. For projects that require multiple identical pieces, taking the time to think and design a mold rather than using more “conventional” methods, like plain 3D printing, is a smart step to take.
Some Theory Before Starting
There are a few concepts we need to learn before starting to produce our own molds. The first concept being positive and negative molds. Essentially, a negative mold is the actual mold, and the positive mold is the object to replicate. A positive mold is used to create a negative mold, and a negative mold is used to create copies of the positive mold. Combining these kinds of molds will help us to create mold we desire. The other concept we need to keep in mind is soft and hard materials. Soft materials can be easily manipulated in its final form, whilst hard materials cannot be easily manipulated. An example of a soft material could be silicone, which can me torn and twisted (to a certain degree) after it has settle down without breaking. An example of a hard material could be concrete, which shape cannot be manipulated once it has settle down. If you want to create a soft object, you need to use a hard material for your mold. Likewise, if you want to create a hard object, you need to use a soft material.
This is just a fast explanation of the whole process. There are a lot of things to consider when creating a mold. For more information on how to fabricate molds and some materials you can use for your pieces, check out our Lab’s Group Assignment Page. From this page I learned important information on the main materials we can use to create our final pieces from, all of it coming directly from their data sheet. Plus, I learned about some other mold creation processes, like using a CNC router for wax carving.
The Plan
Now that we know a little bit of the theory behind mold making, here’s the plan: I will be designing and 3D printing a positive mold. From this mold I will be creating a second negative mold out of silicone. This second mold will be used to create the final object’s replicas out of wax. The piece I will be replicating will be a simple 2D shape. Even though my final products will be very simple, the purpose of this assignment is learning how to create any kind of mold, and using a simple shape for our first attempt will simplify our learning experience. In the future, with all the knowledge acquired from this experience, I will be able to create more complex molds for 3D printing.
Step 1: Designing The Mold
I will be using OpenSCAD for my 3D designing. I’m aware some software like Solidworks include functionality for easy mold creation. I appreciate this functions, but building our own from scratch will give us a better understanding of how molds should be created, hence why I chose OpenSCAD (plus, I don’t know how to use these Solidworks functions…).
I started by choosing my design. As I’m currently learning how to play chess, I choose this 2D knight as my piece:
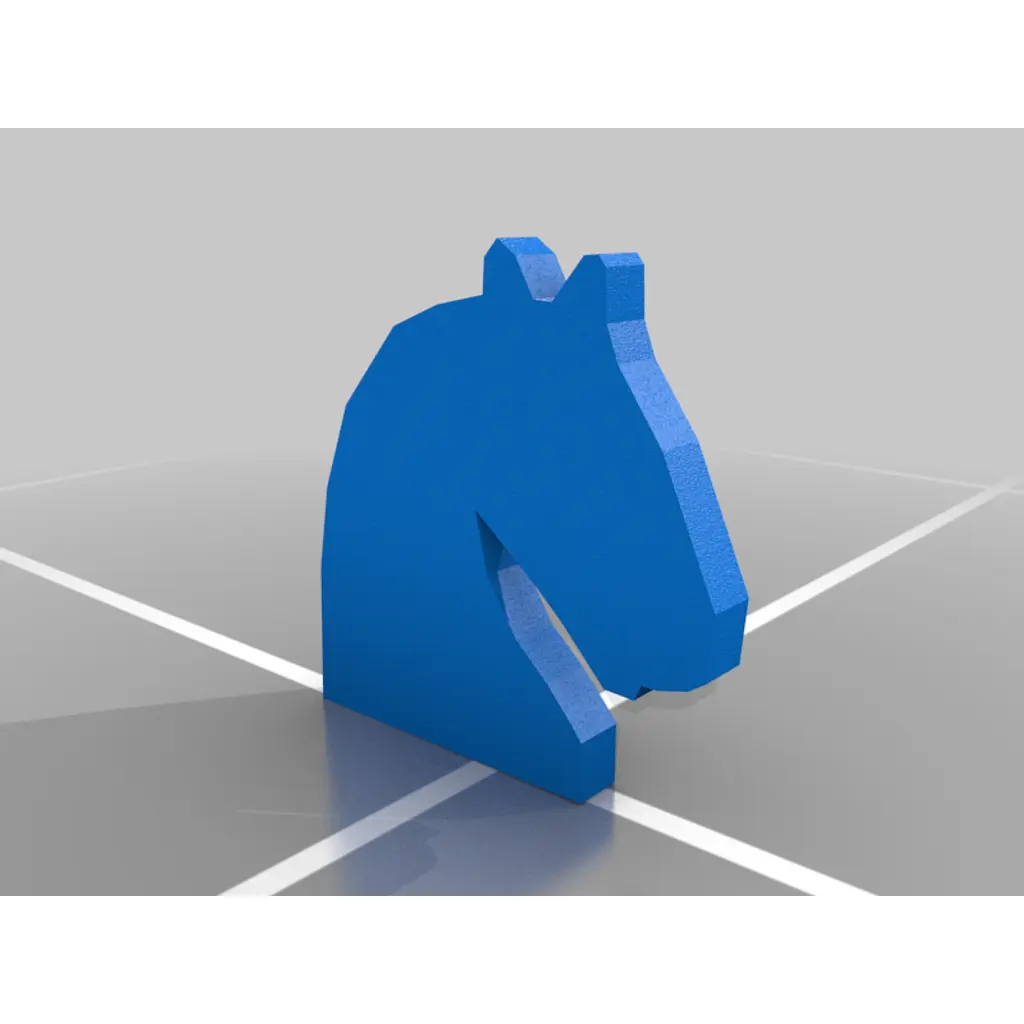
This pieces comes from a 2D Chess Set created by user HughPrints on Thingiverse. I have this thing for custom made chess sets and seeing the creative potential they have. In the future I would love to make my own real life 2D chess set, with mold produced pieces out of something “fancy” like porcelain. In the mean time, a single piece with a simple material will do.
I have my piece, but I’m still missing an enclosure for the it. In OpenSCAD I built a box surrounding my piece, with enough walls to have a solid bottom. I also added rounded corners for both visuals and (hopefully) ease of release for the final silicon mold.
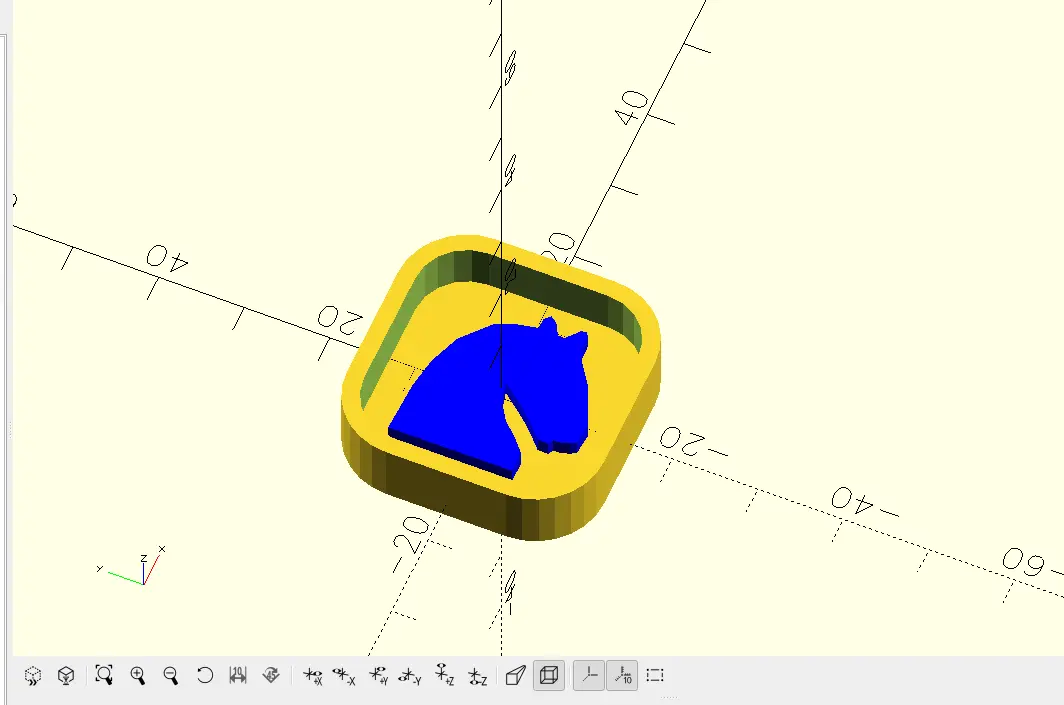
As you can see, the blue part is the actual model to be replicated, and the yellow part is the mold itself. Now, I just need to print this part and process it.
Step 2: Post-processing the Mold
Our 3D printed mold could be used to produce our silicon mold, but there are a few issues with it as is. The main problem is the printing layers of the model. Silicon molds take the shape of everything they touch, everything. This means that, for our flat model, any printing marks will be also replicated for every piece created with that mold. This means that we need to post-process our mold, removing those printing marks and making it more suitable for creating the final mold.
For this part, we will be using the following materials:
- 200, 400 and 1200 sand paper.
- Water.
- 3D printing resin.
- UV curing machine.
- Isopropyl alcohol.
- Latex gloves (recommended).
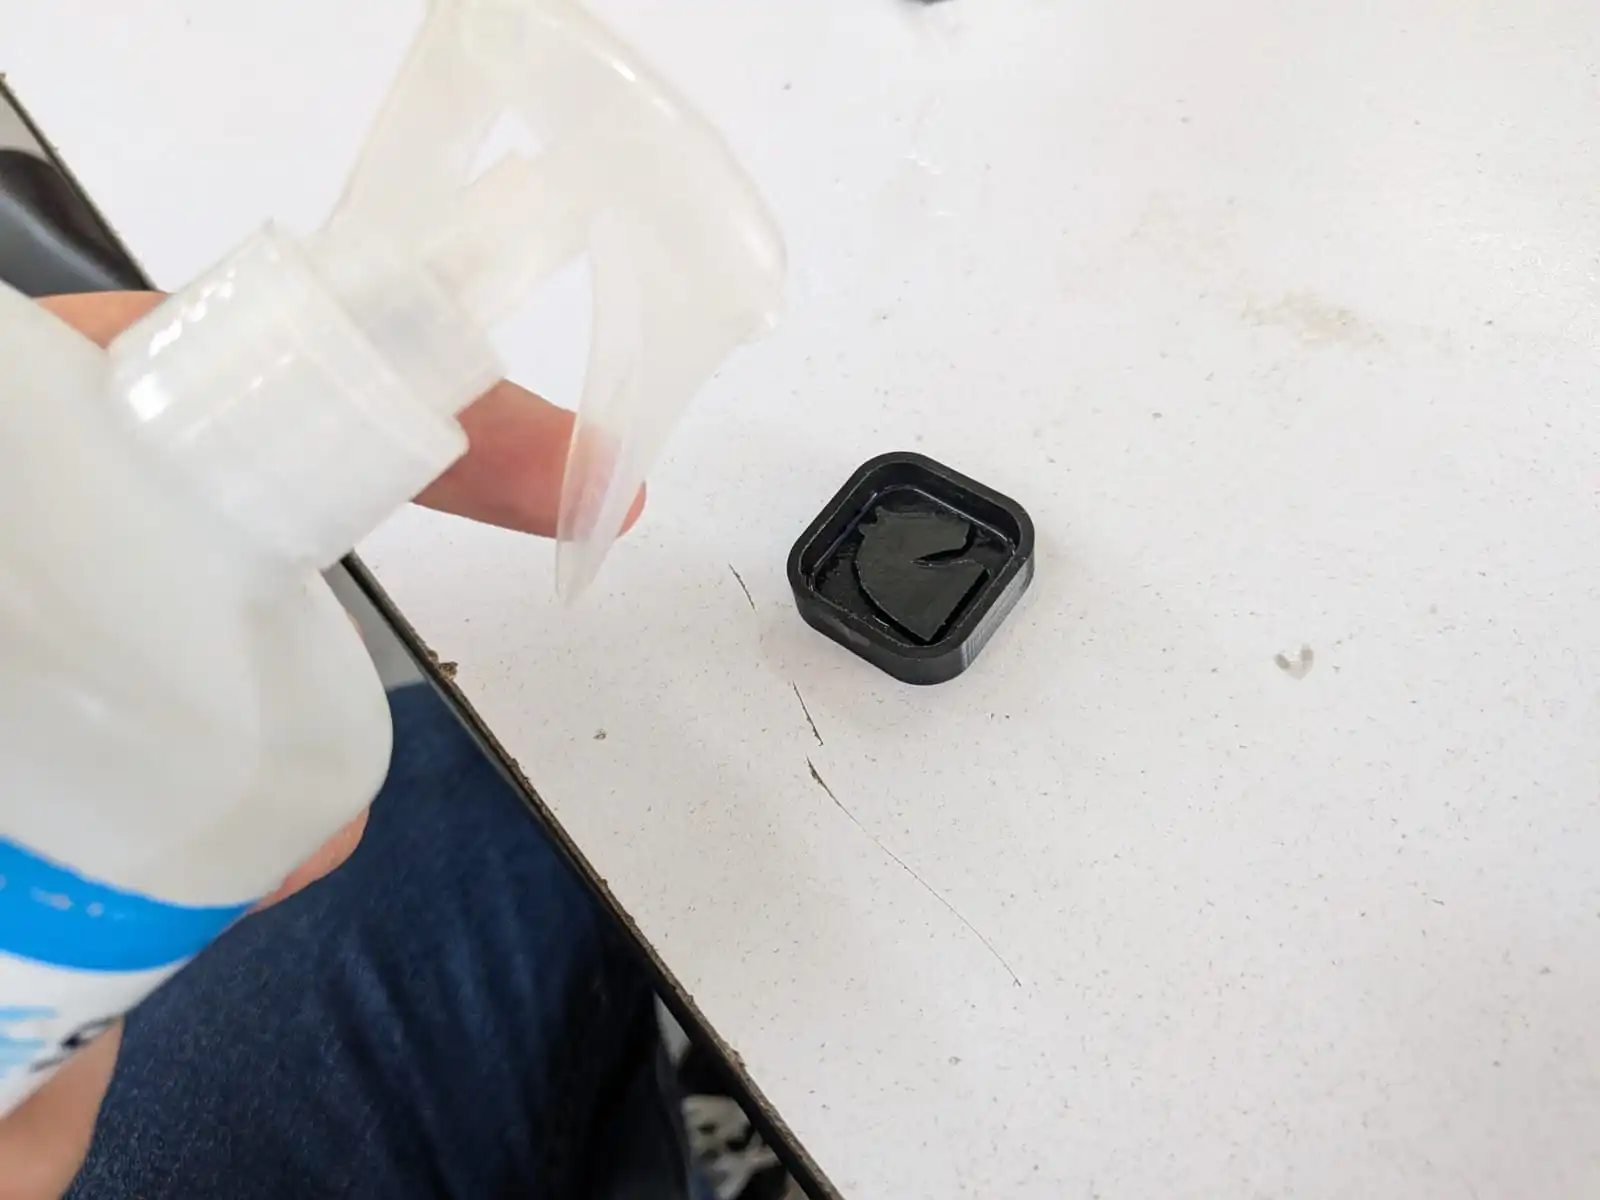
First, we need to add some water into our 3D printed mold and start sanding it with the 200 sand paper. This will remove the first layers of printing marks from our mold. My mold is quite small, but for larger models this process will take some time. Remember, the better sanding the better the quality of the silicon mold.
Now, we need to clean our mold. To do this, we first need to clean all the remaining water inside the mold. Then, we need to spray/apply some isopropyl alcohol in the mold. Now we need to clean the isopropyl alcohol with something like a paper tissue. Isopropyl alcohol is generally safe at contact with human skin, but if your hands are sensible its recommended to use latex gloves. Also, isopropyl alcohol evaporates really quickly, be sure to clean right before applying it.
Note: This next step is optional. If you do not have access to resin and an UV curing machine, you can just keep skip them and just continue with the sanding parts.
Now we will apply our resin. The resin will help our mold to have a smoother finish and give it a protective layer. To do this, we simply apply resin to our mold. Given that my mold is quite small, I only needed a small amount. I used a painting brush to facilitate this process. Keep in mind, the less amount of resin you pour the better, as applying to much resin can cause bulges to form, which will be replicated in the final mold.
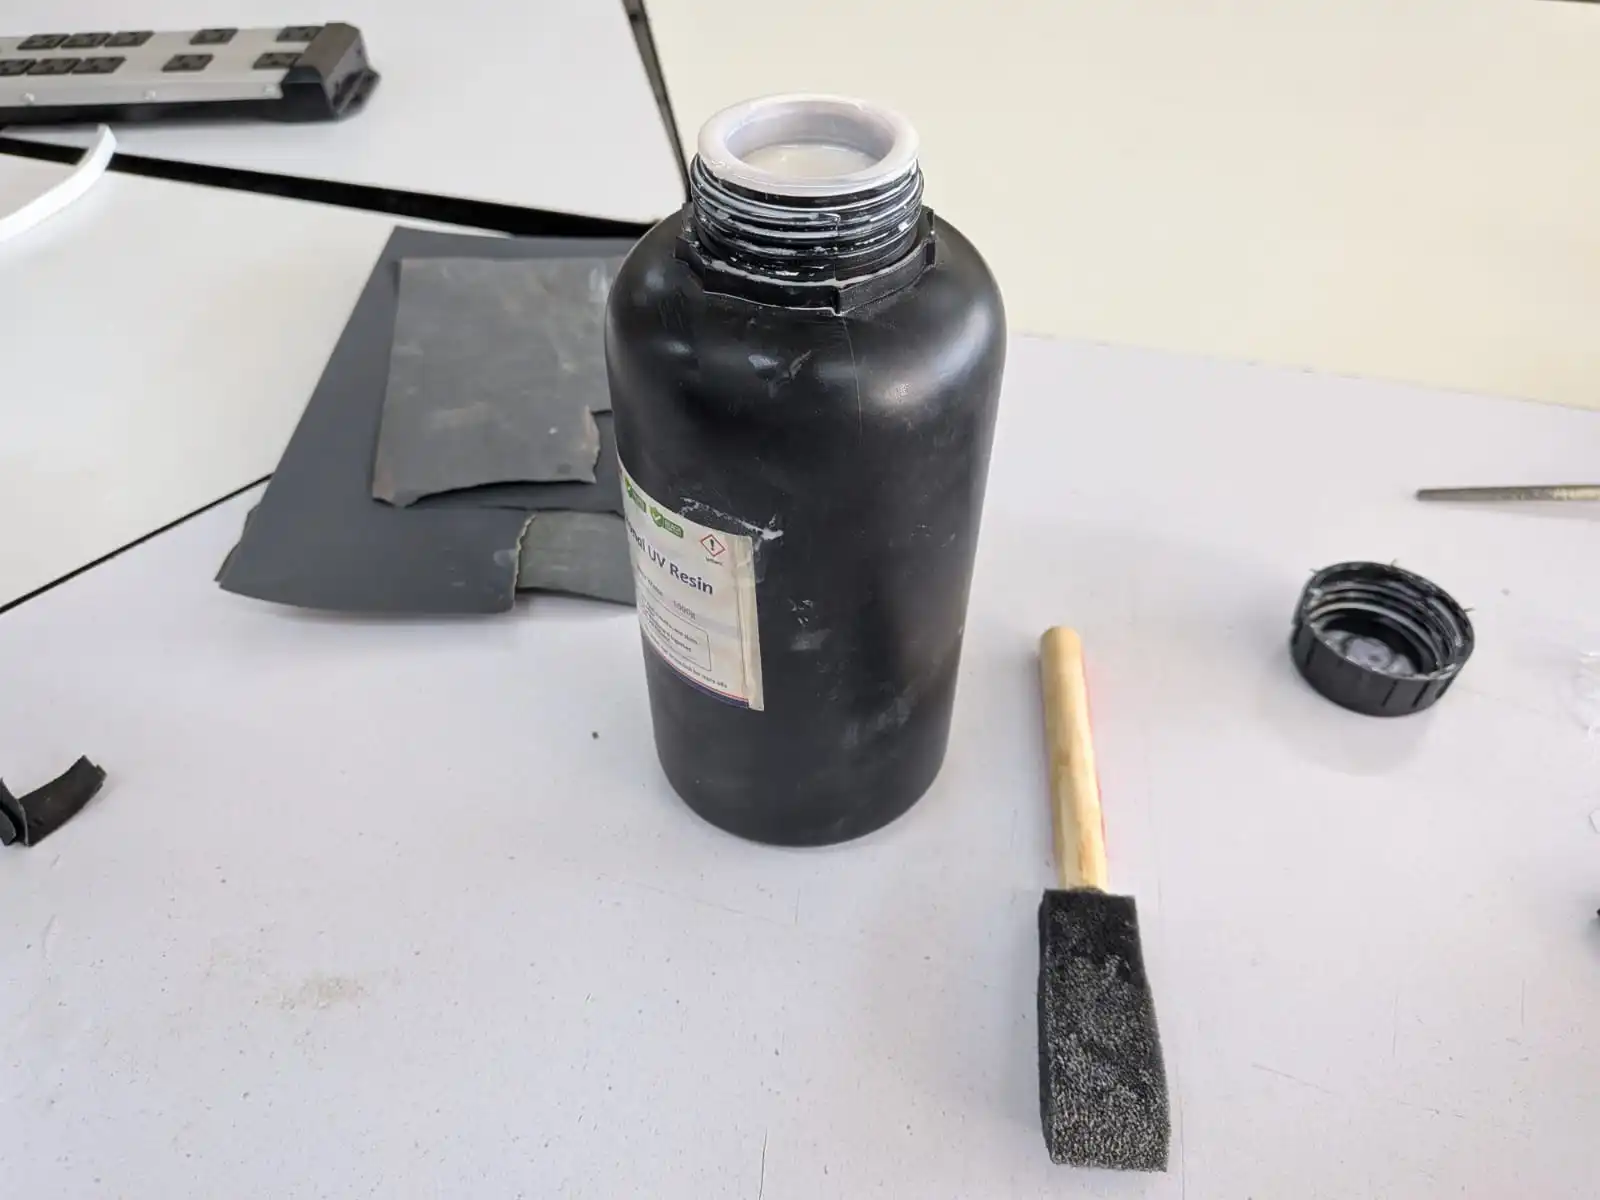
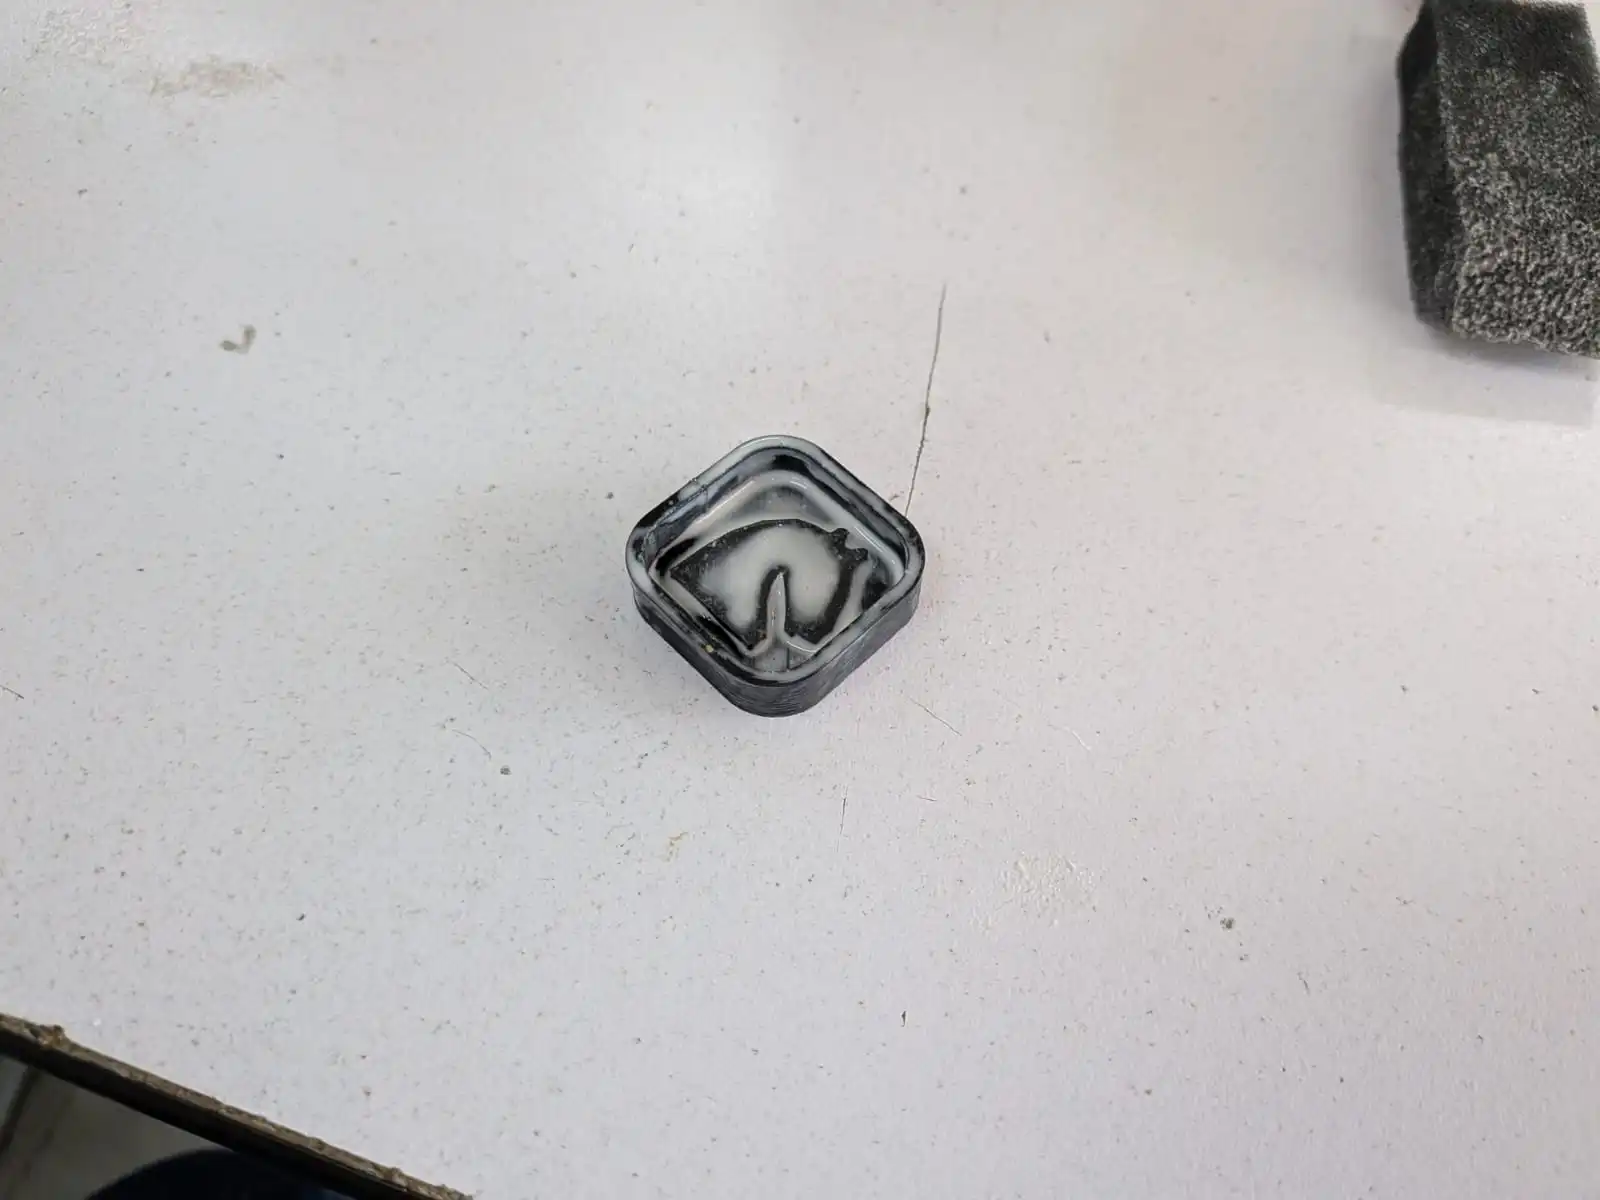
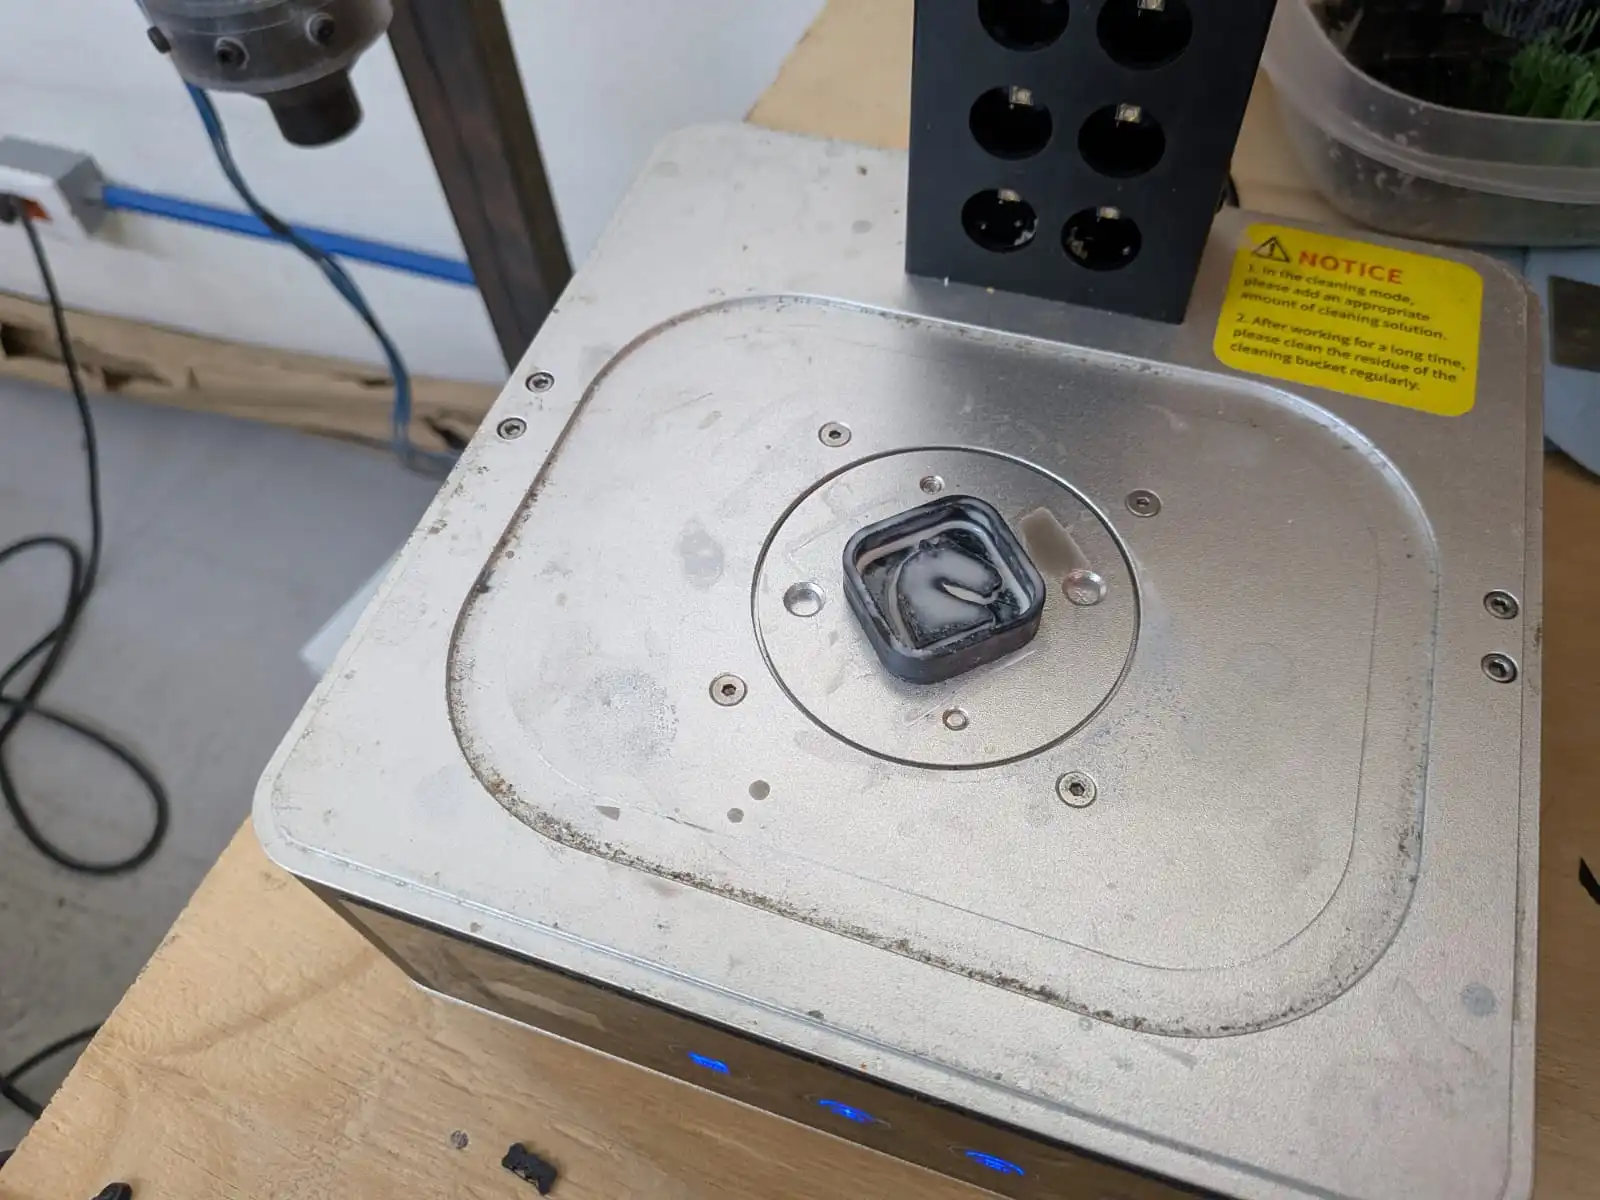
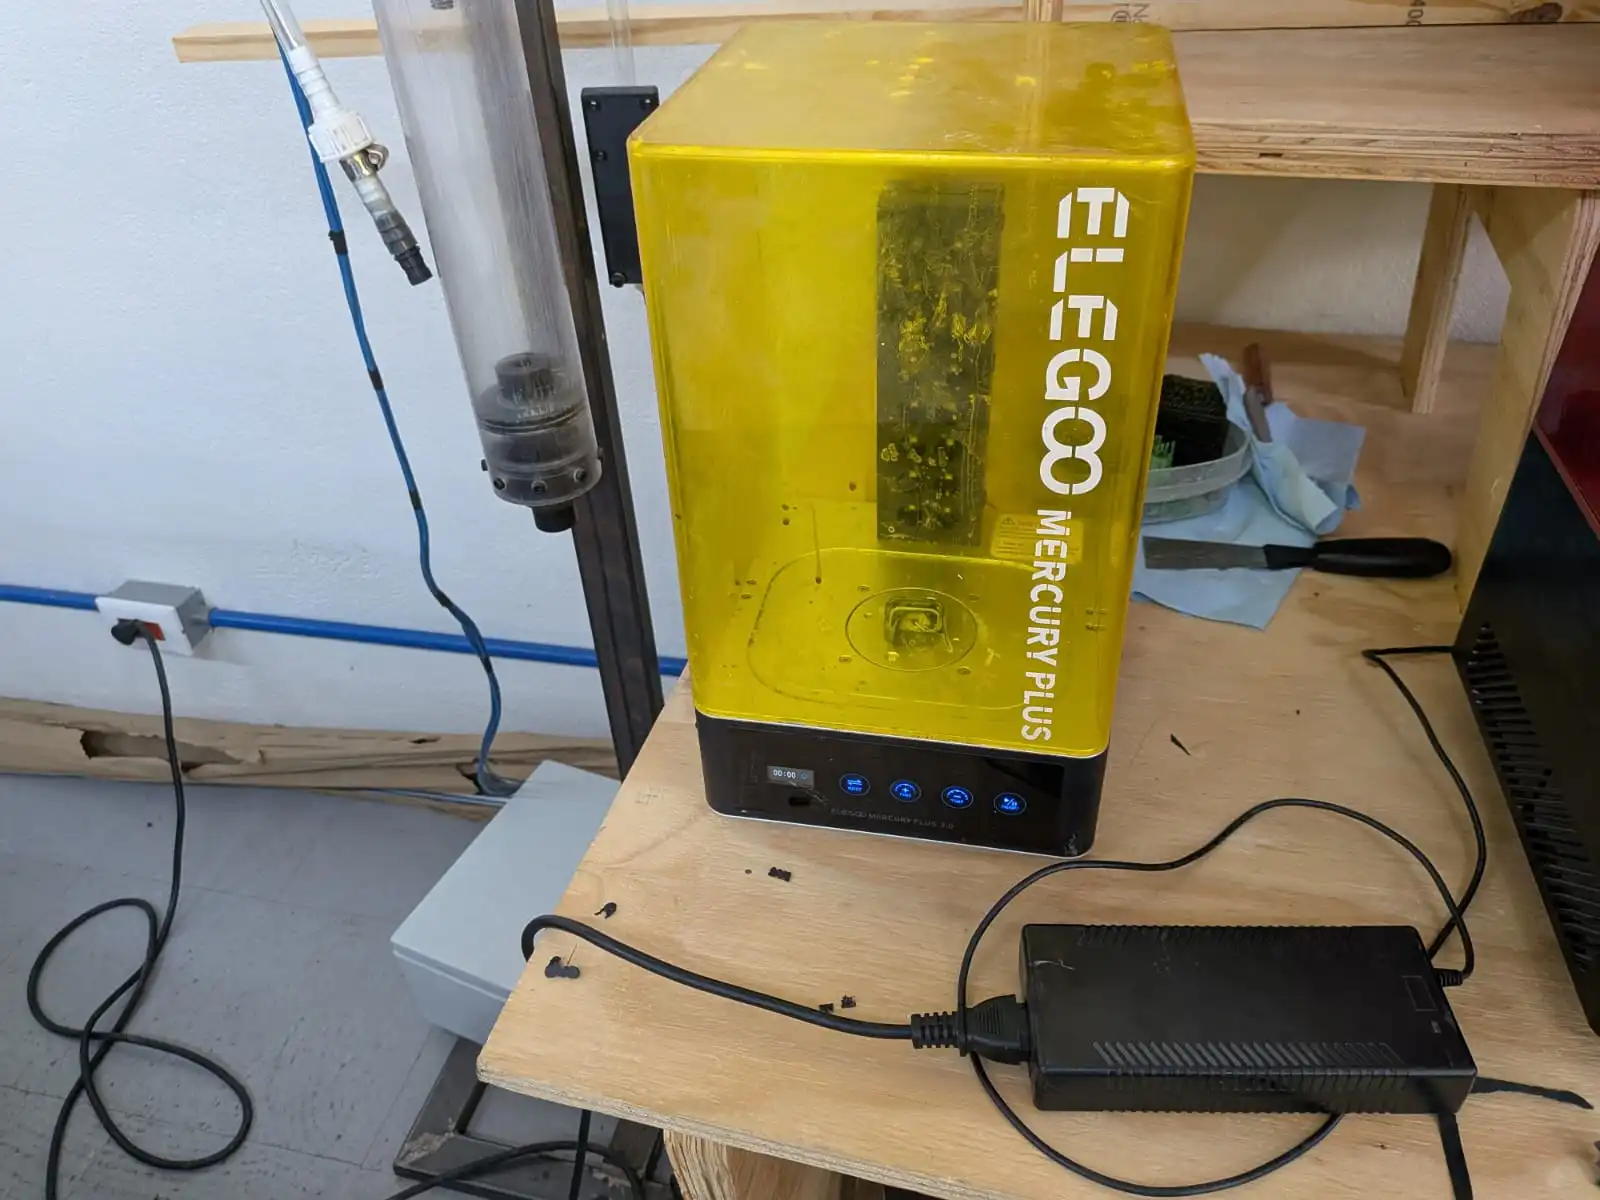
Now, we need to put our mold into our UV curing machine. To do this, place your mold in the bed of the UV machine and place the lid. We will cure our mold for 3 minutes, then we will rotate our mold 90 degrees and cure it for another 3 minutes. This will ensure our mold gets evenly cured. If, after this 6 minutes, your resin layer still feels “gloppy”, give it another 3 minutes with another 90 degree turn.
Once our piece is ready, we will now sand will repeat our process, now with a 400 and 1200 sand paper:
- Apply water and sand.
- Clean with isopropyl alcohol.
- Apply an even smaller layer of resin.
- Cure it for 6 minutes in total.
Repeating these step will result in a perfectly smooth final mold.
Safety Datasheets
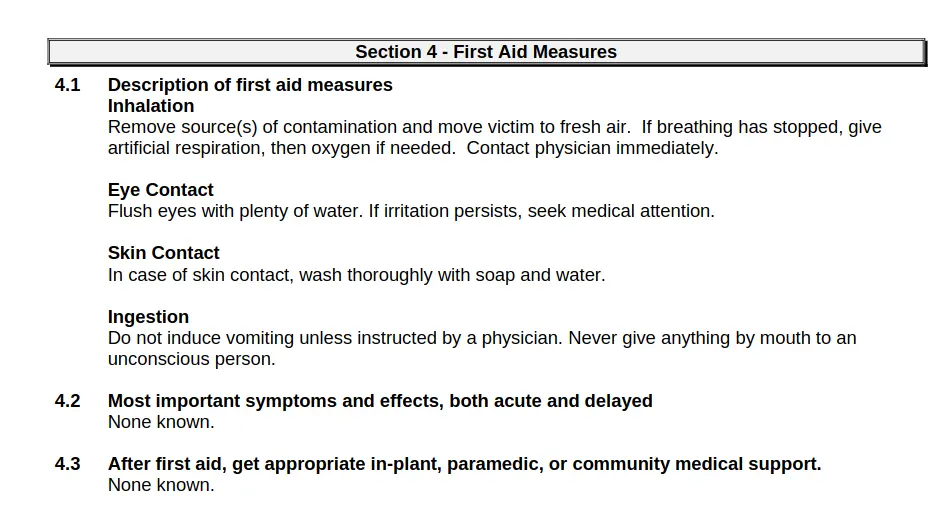
Before starting to use our silicon for our mold, we first need to read our Silicon’s Safety Datasheet This datasheet gives us instructions on how to handle and store our chemicals, plus first aid and exposure instructions. Remember, safety is the priority. The recommended protection instructions involve using water-thigh gloves and protective clothing (lab coat and latex gloves). Generally speaking, this silicon is easy to manipulate and safe to use. However, other materials could need specific considerations when using them. Always check the safety datasheet of your materials before using them. The following is a screenshot of the first aid measures to take in case of exposure to the silicon.
With our safety considerations in mind, we can start using our silicon!
Step 3: Silicon Mold
We now need to prepare our silicon for our silicon mold. For this we will need the following material:
- Lab coat and latex gloves.
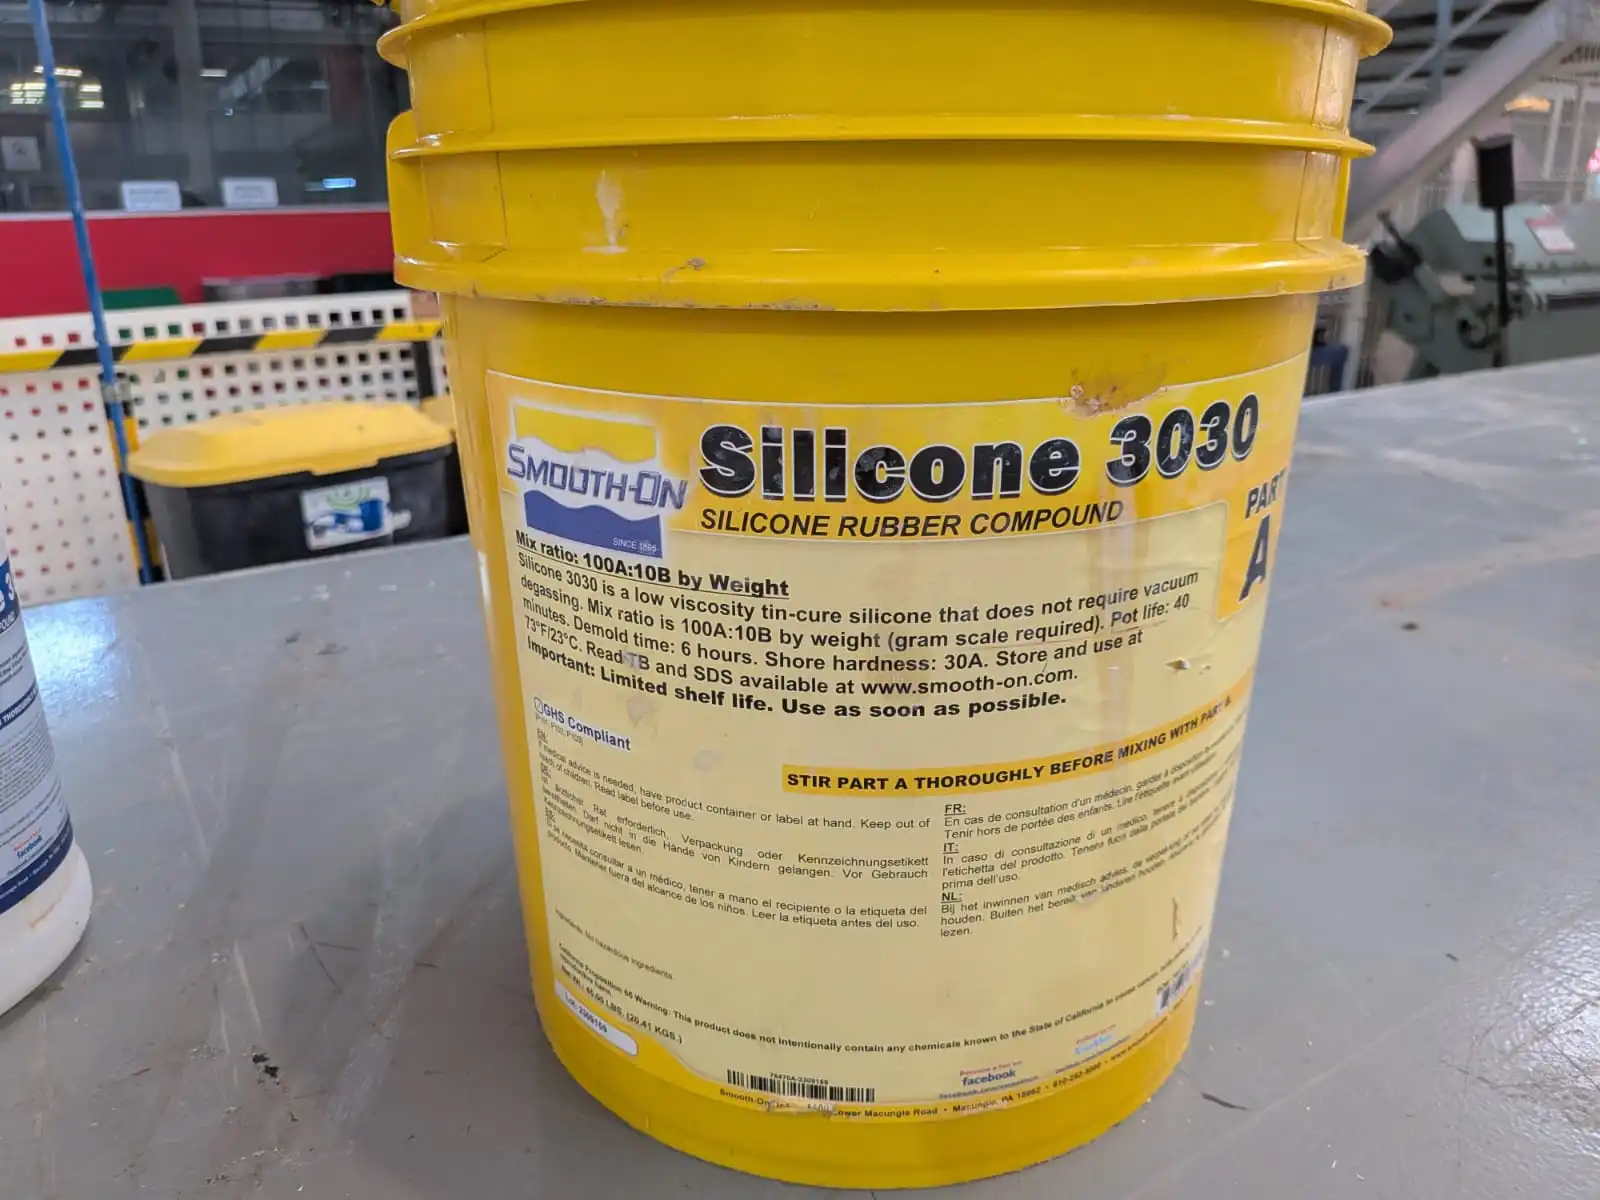
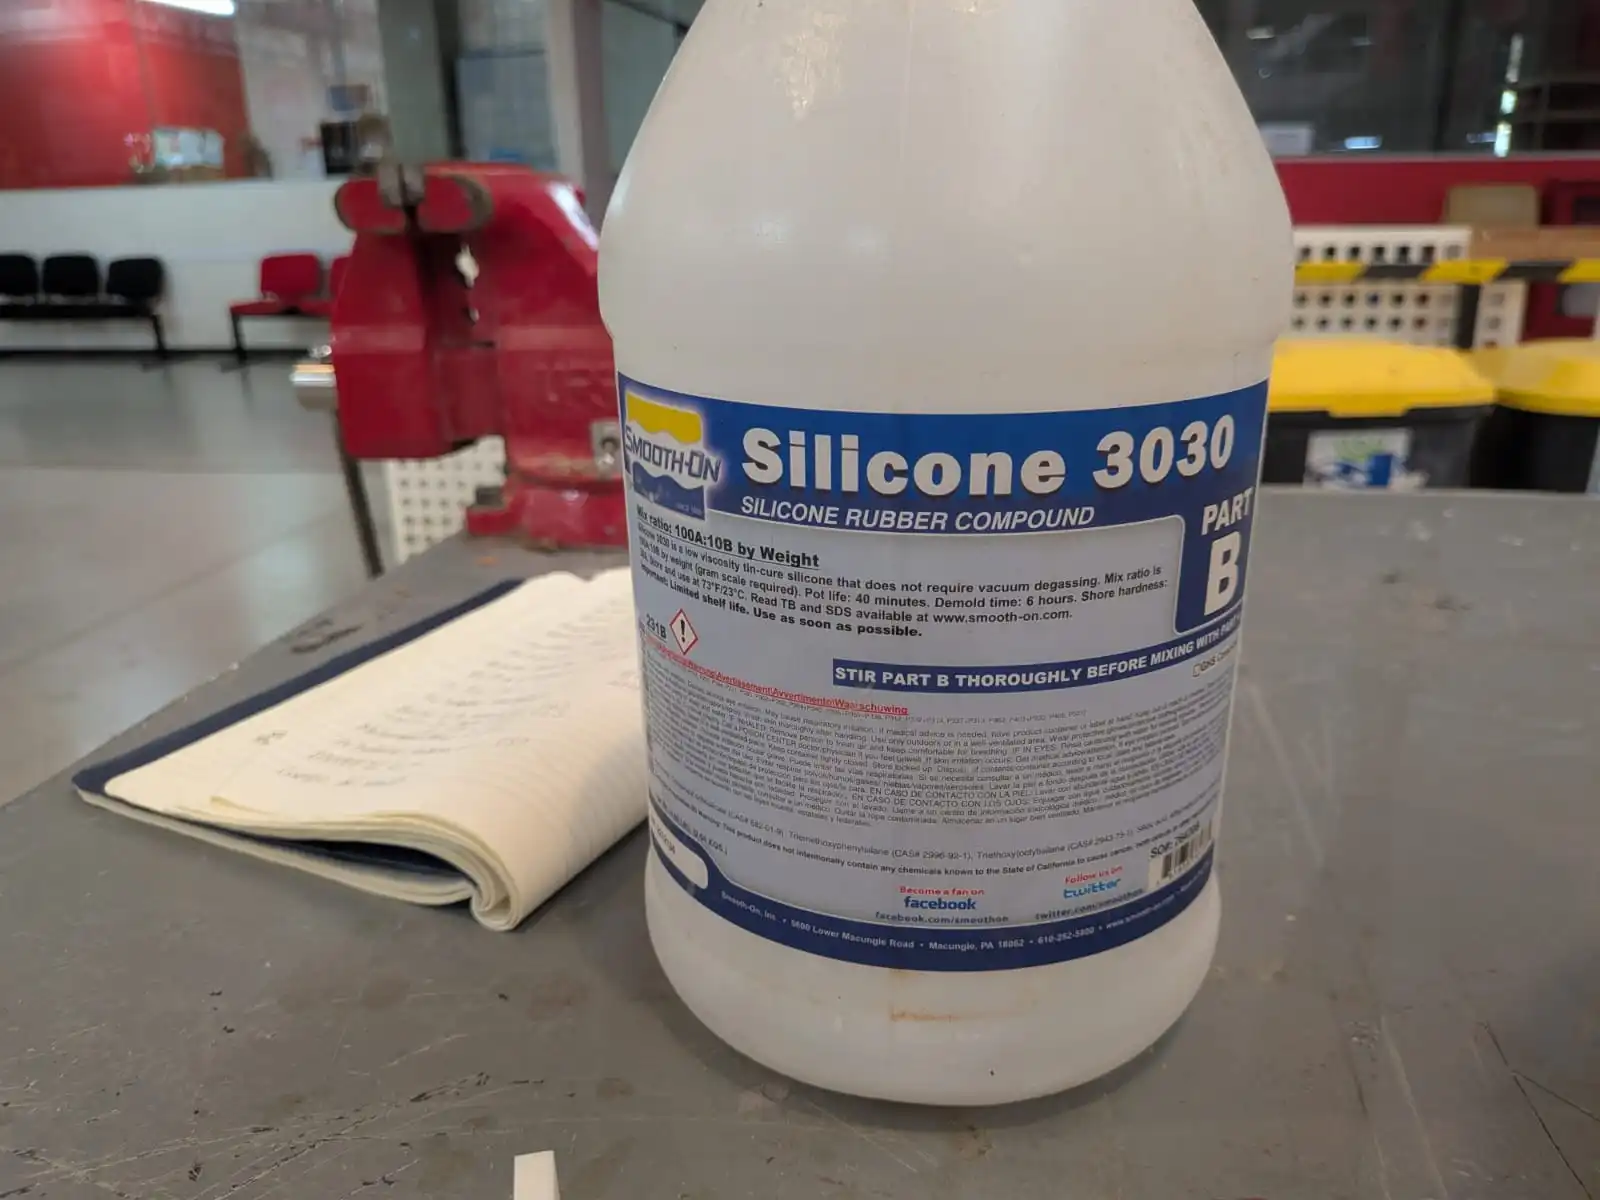
- Silicon A and B compounds.
- A digital scale.
- Plastic cups and tongue busters.
- Our post-processed mold.
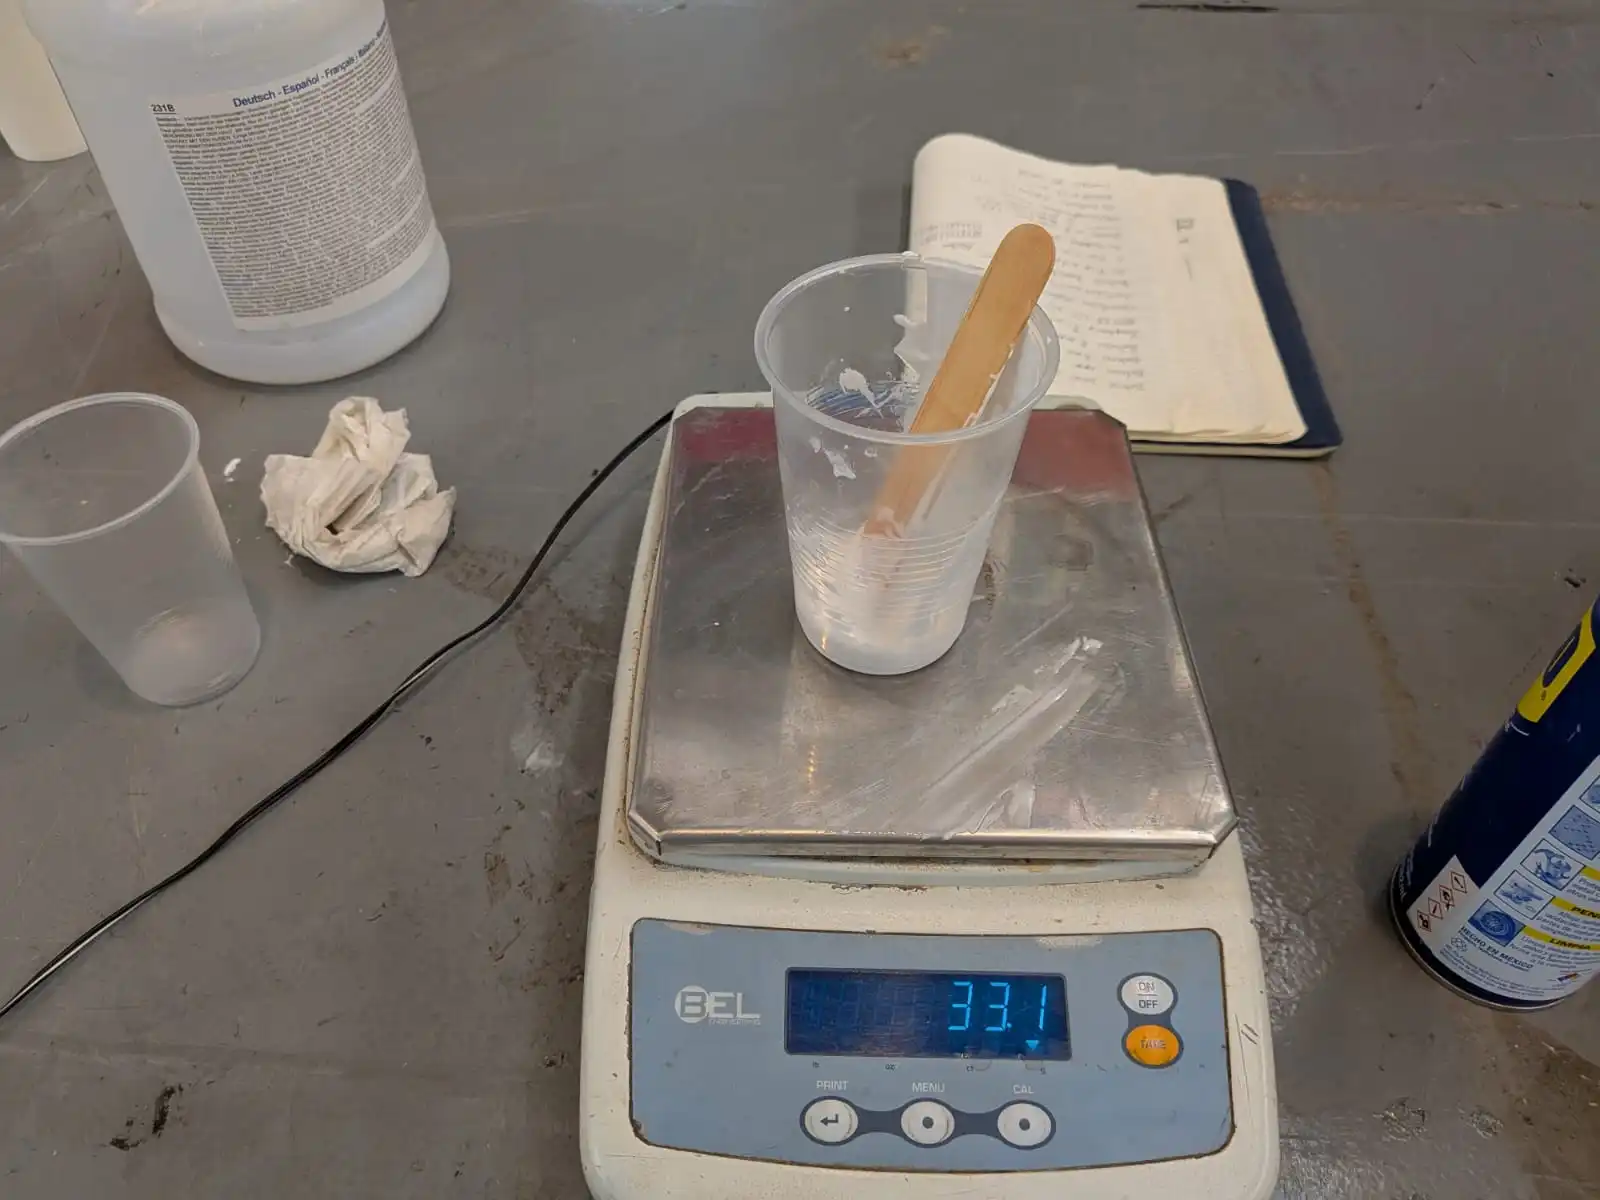
First of all, we need to calculate the exact measurements for our mold. We need to calculate 2 values: Our mold’s volume and our A and B compounds ratio. The first one is easy. We need to fill our mold with water. Then, using a digital scale and a plastic cup, we need to measure the weight of the water inside our mold, by just pouring it into the plastic cup. The value we get will be the amount of silicon we need to prepare. I recommend preparing 10% extra, as silicon can stick to our plastic cups, reducing the amount of usable material. So, if our scale gave us 30g of water, we should prepare 33g of silicon.
The second value is the compound ratio. Remember, our silicon come in two parts, A and B. in their containers there should be a ratio of mixture for each compound. In our case, this ratio is 100A:10B. This means that, for each 10g of compound A, we need 1g of compound B. Returning to our example, we need 33g of silicon. So, in another plastic cup, we need to mix 30g of compound A and 3.3g of compound B. This will give us a complete weight of 33.3g of mixture, giving us 33g of silicon overall.
Let’s start preparing our mold’s silicon! We started by preparing 33g of silicon. For that, I poured 30g of compound A and 3.3g of compound B into a plastic cup. My actual mold only required around 10g of silicon, but I made more for a classmate that needed more for his mold. Then, using a tongue beater, I mixed it well until it had a more liquid consistency. Some classmates used dyes to better visualize the mixture, as if you do not mix well your silicon won’t solidify.
Now, we just need to pour this mixture into our mold. Its recommended to pour this silicon in a single corner of the mold, in a single thin stream of silicon. This will prevent air bubbles from forming inside our mold. After pouring the silicon, lightly tap your mold in you table and shake it horizontally. This will remove air bubbles from the bottom of the mold. After this, our mold should be ready to go.
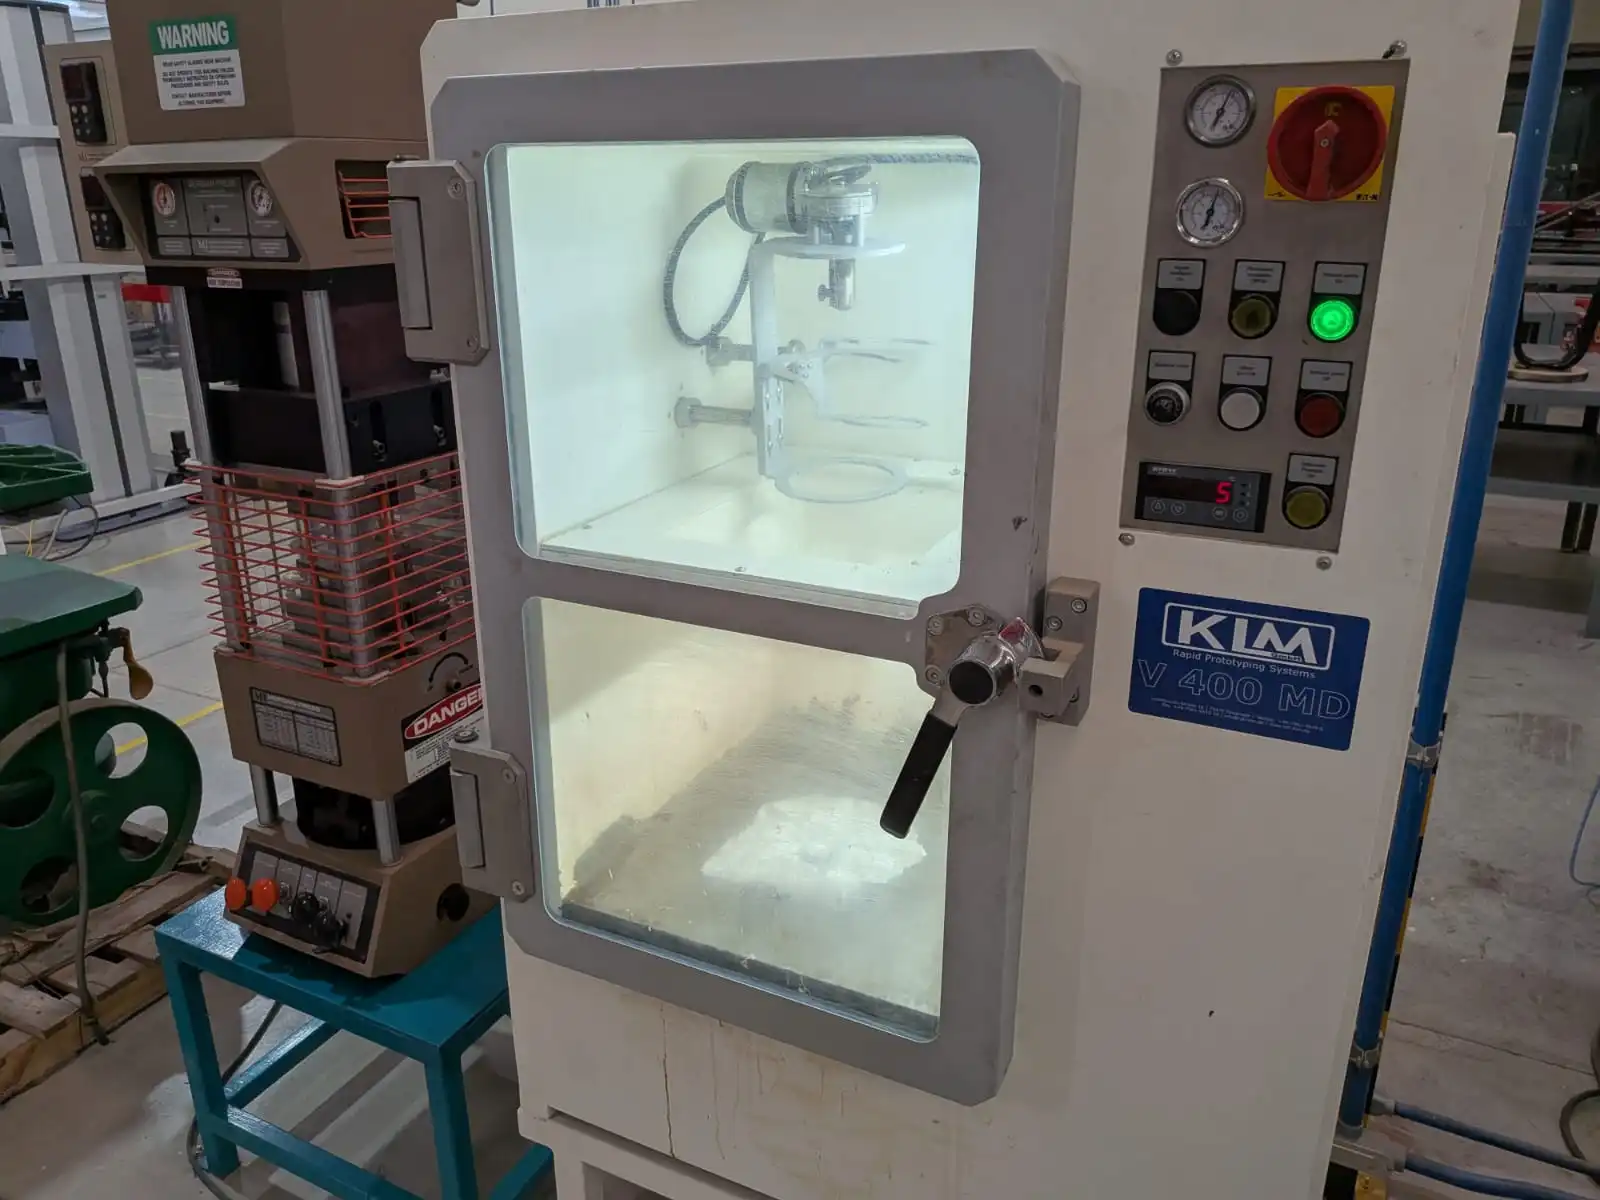
Here at Ibero Puebla we have a vacuum machine at our disposal, so I used this machine to remove the most amount of bubbles from our mold.
Note: This next steps with the vacuum machine are not mandatory. A good pouring technique and enough tapping and shaking of the mold should be enough for most cases.
To use this machine we need to turn it on, open the door, place our mold inside the machine and close it.
Now, we need to press the green “Vacuum On” machine. The dials on the machine will start to rise, indicating the pressure inside the machine. We need to keep a close eye at our mold, as too much pressure can cause the silicon to spill. If you notice your silicon is about to spill from the mold, press the black “Air Inside” button. This will let air inside the machine’s chamber, reducing the pressure. Now its just a dance of letting pressure rise and and letting air in. You can know when you mold is ready when bubbles stop appearing the more the pressure rises. When you think you mold is ready, press the red “Vacuum Off” to stop the vacuum inside the machine. Then, you can press the black button again, until all the pressure inside the machine has been removed. Once the pressure in the machine is 0 (you can verify this in the pressure dial) you can open the door and retrieve your mold.
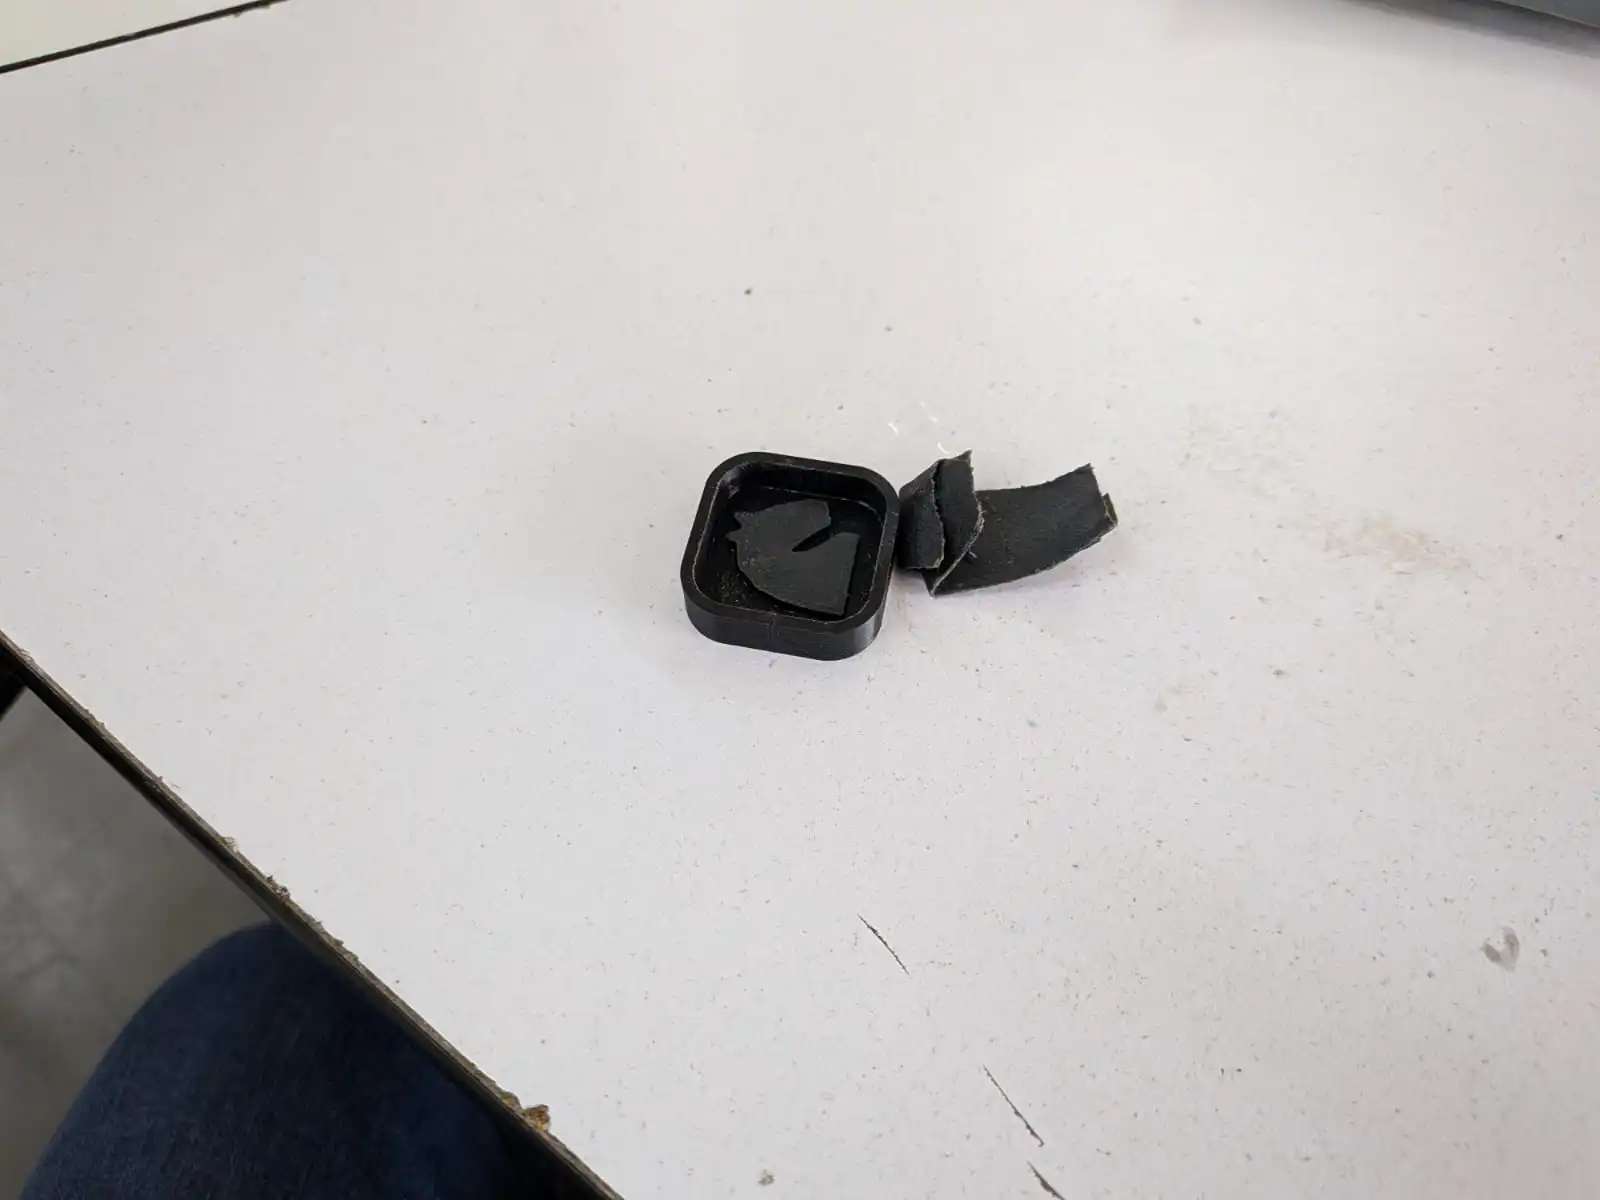
Now, you silicon mold is ready. You need to leave your mold to rest for at least 6 hours, depending on your mold’s size. I recommend just leaving it overnight somewhere safe with good ventilation. You know you silicon mold is ready to retrieve when you can firmly touch it with out feeling it sticky. Another verification step you can make is trying to separate one edge of the silicon mold, where it and the 3D printed mold meet. If the silicon separates from the mold’s edge without sticking, the silicon is ready!
Step 4: Producing Pieces
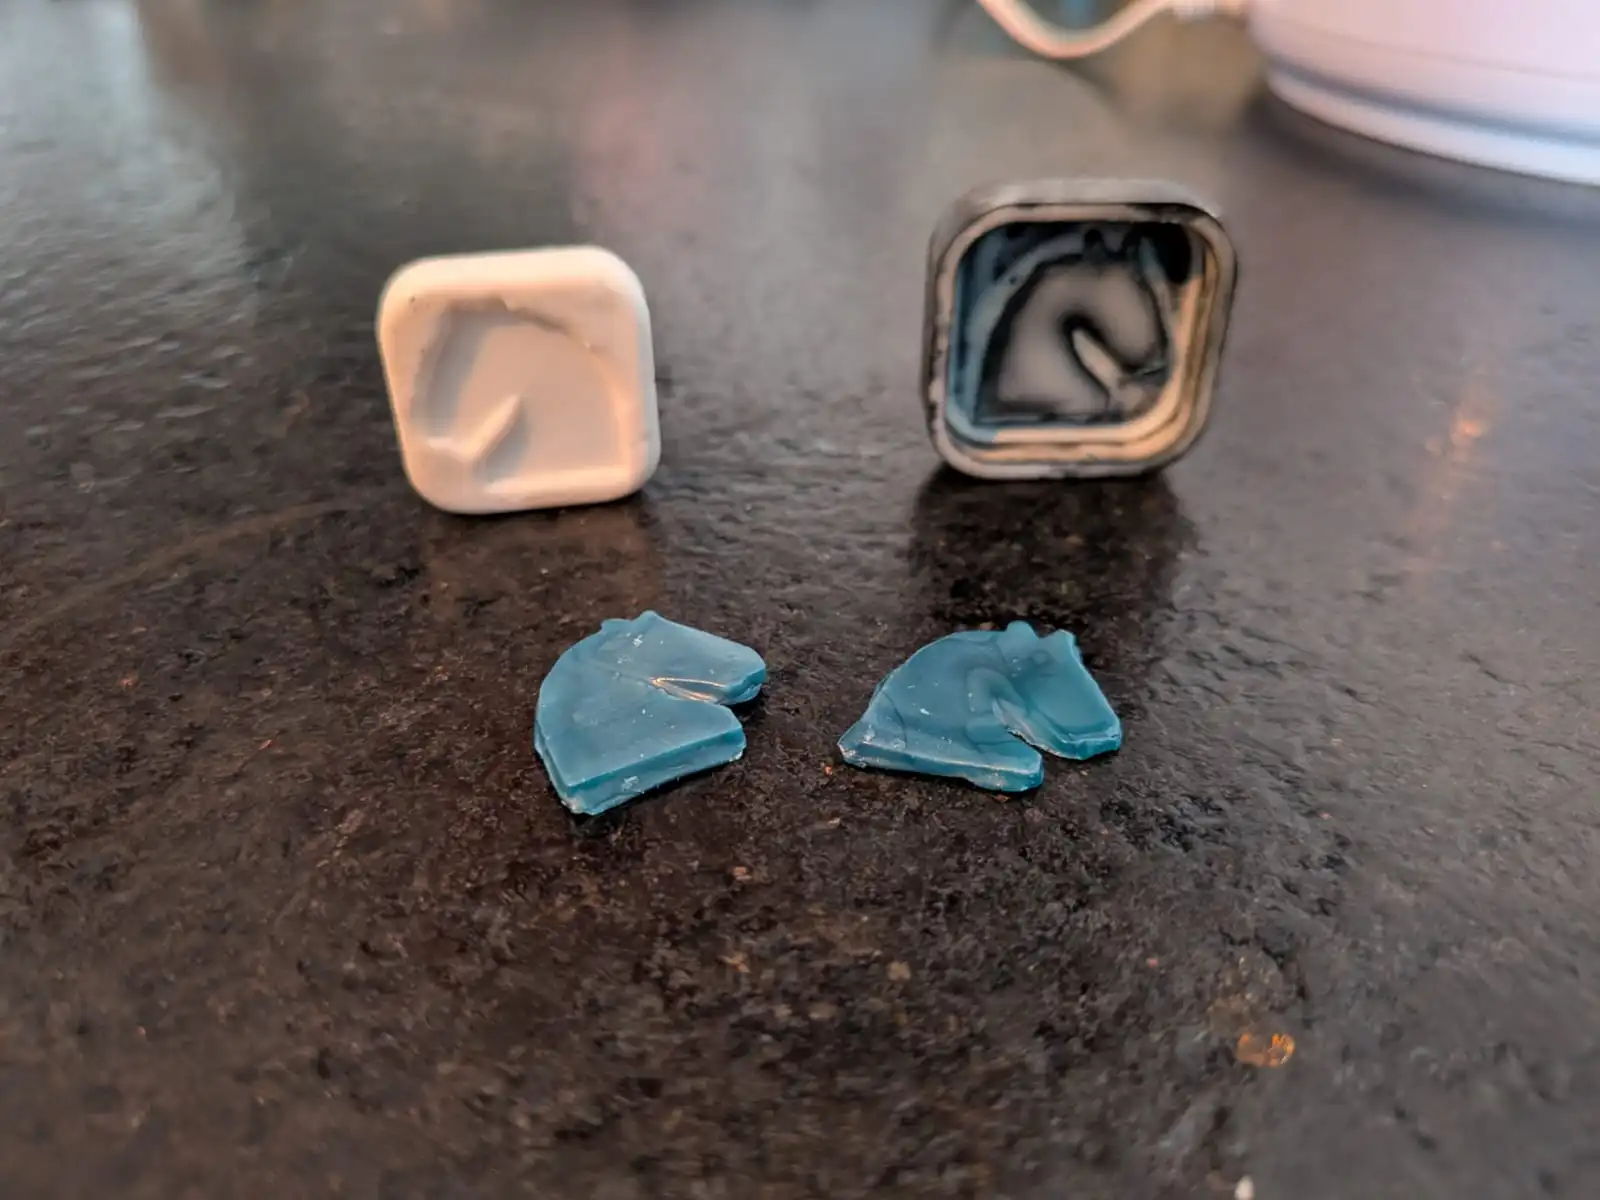
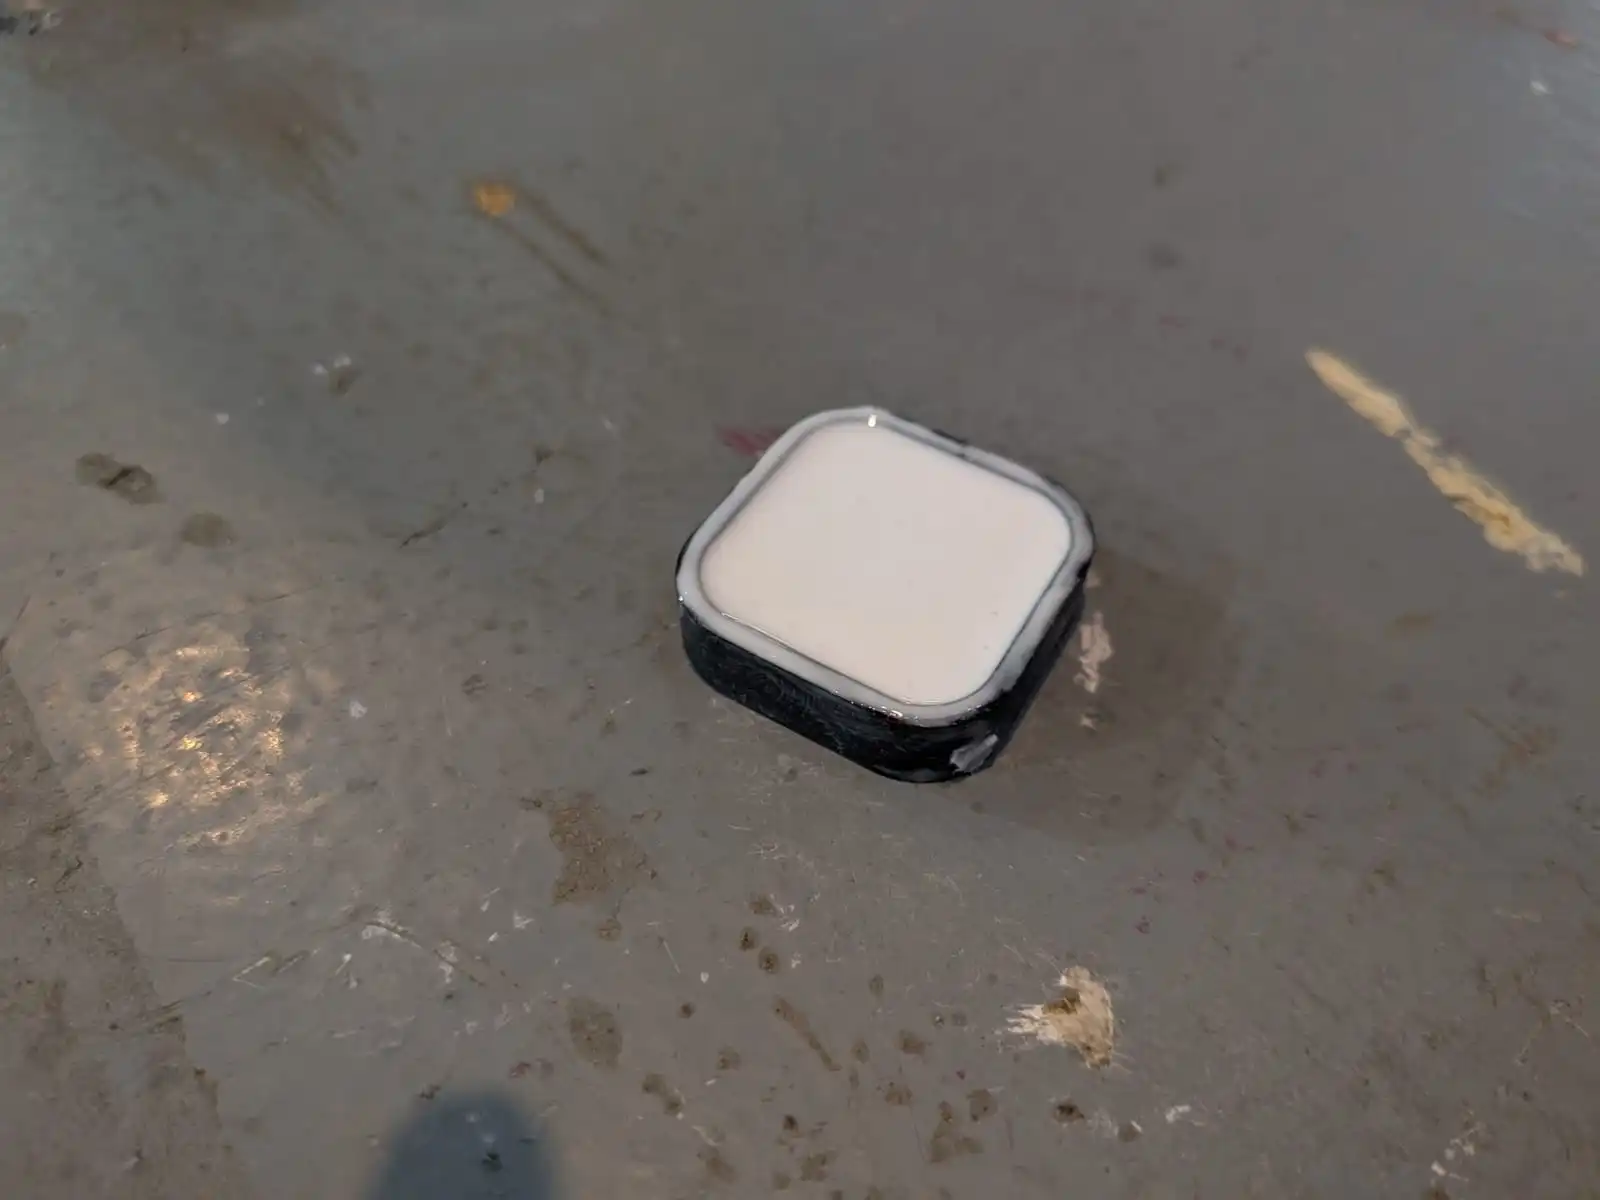
Now comes the easiest step: Pouring out material into the mold. I removed my silicon mold from the printed mold, and got a perfectly firm silicon mold. The only caption I could give was that the dept of the final mold was smaller than I anticipated, but still enough to pour material into it.
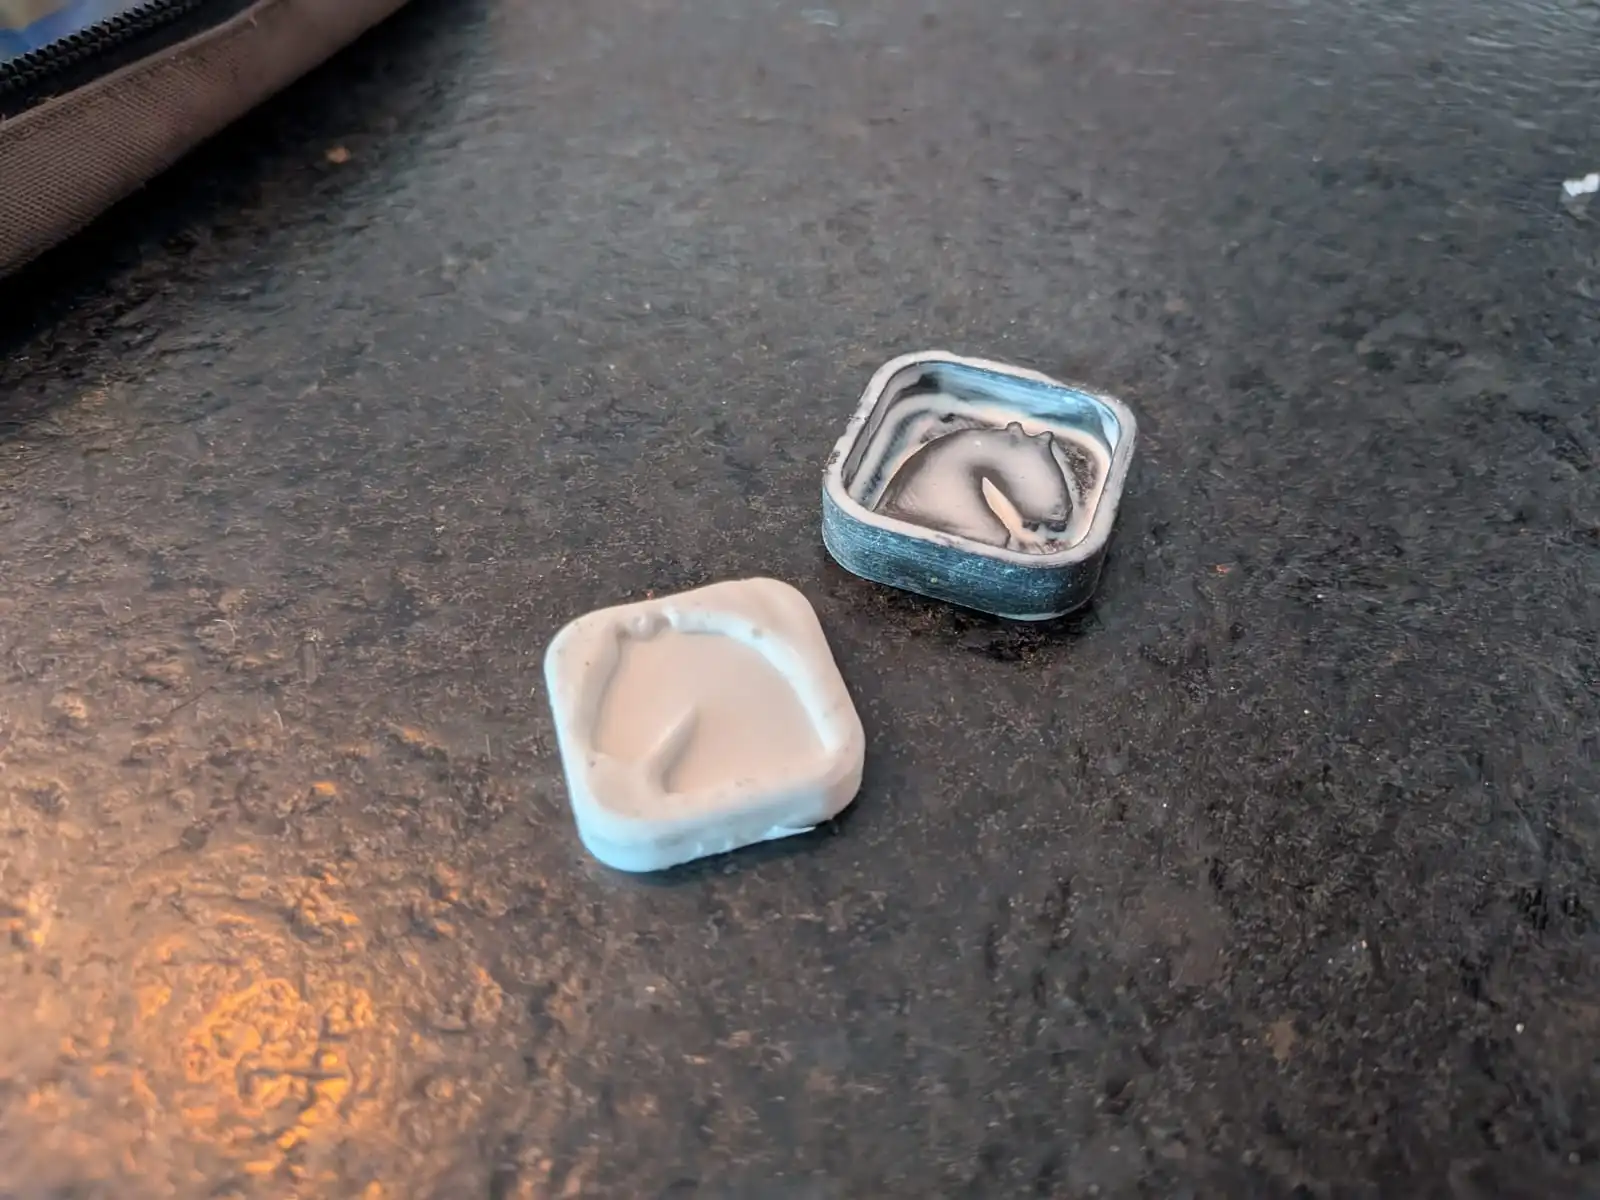
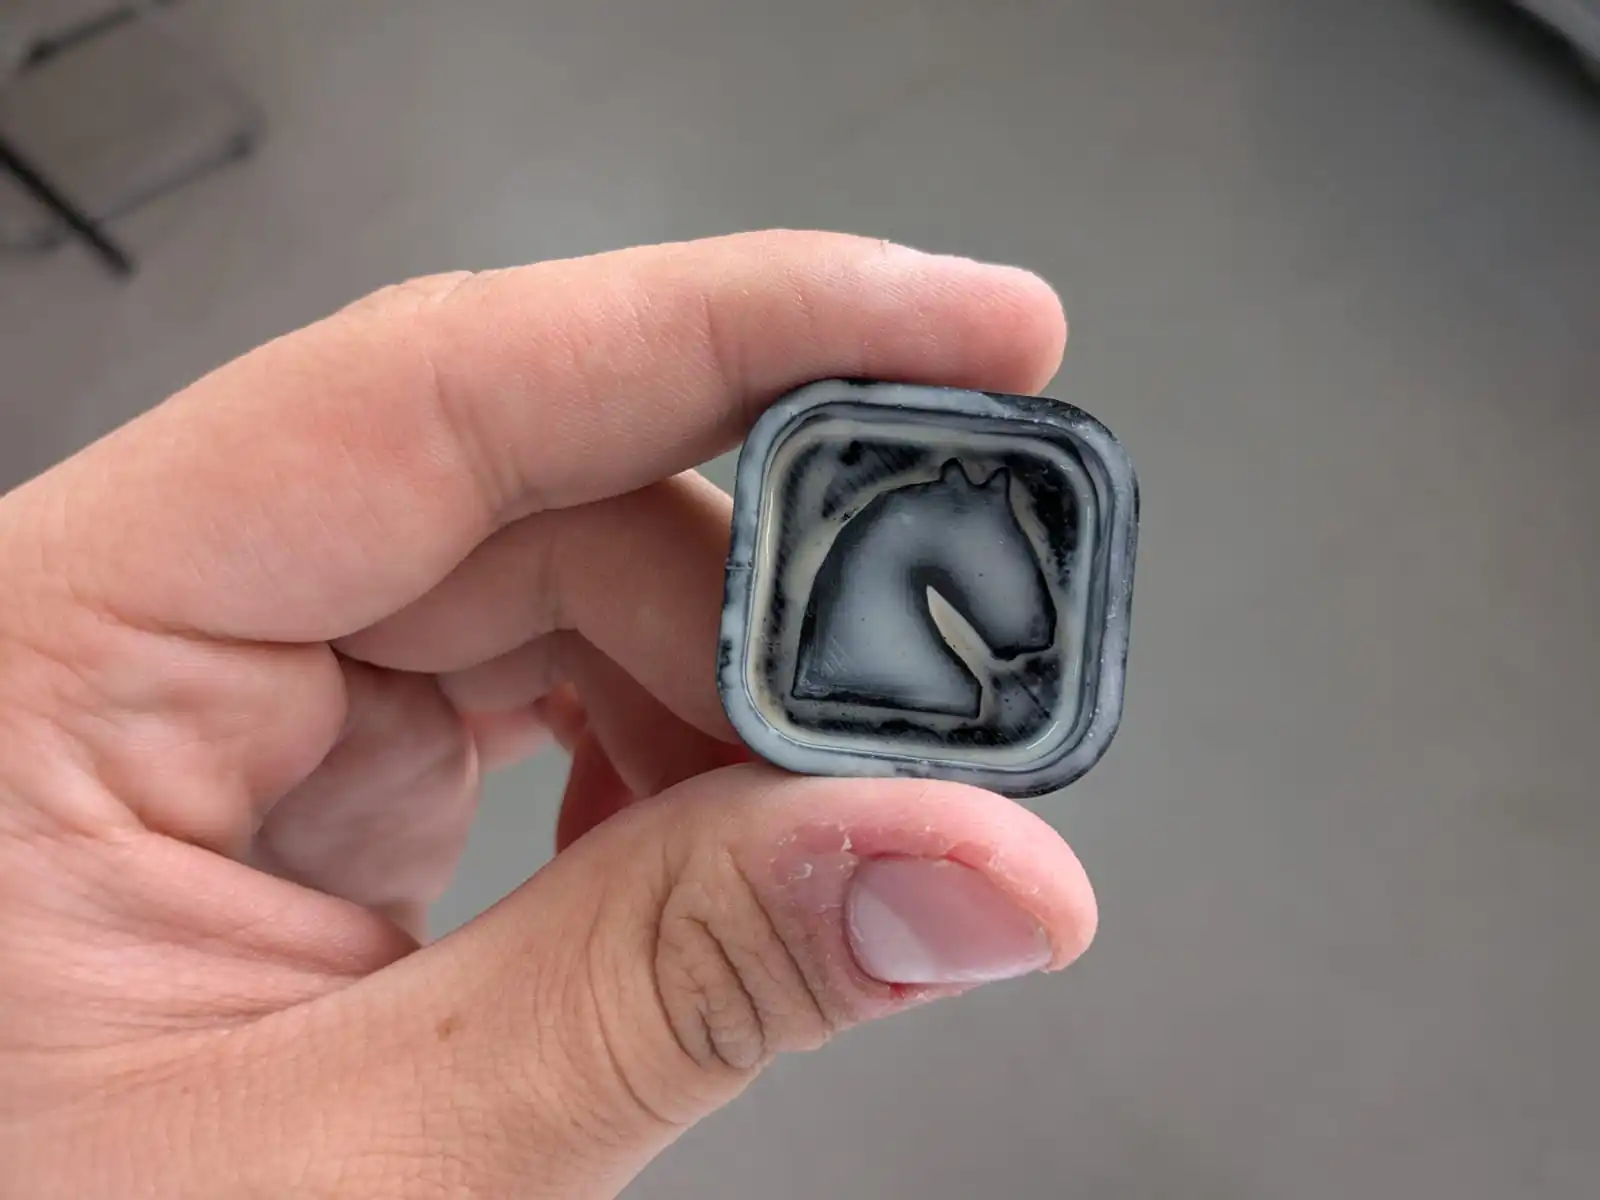
I decided to use wax, as my girlfriend has a wax melting machine and some candle wax I could use from a candle creation class. We connected the wax melting machine and poured the candle wax into it. I used one of my tongue beaters to mix the wax until it reached a liquid state. Now, I just poured the wax into my mold and removed excess wax from it. And after a couple of minutes of cooling down, I removed the piece from the mold and got a perfectly made 2D chess piece! My girlfriend also made her own piece, see if you can guess which one is whoose!
The Bottom Line
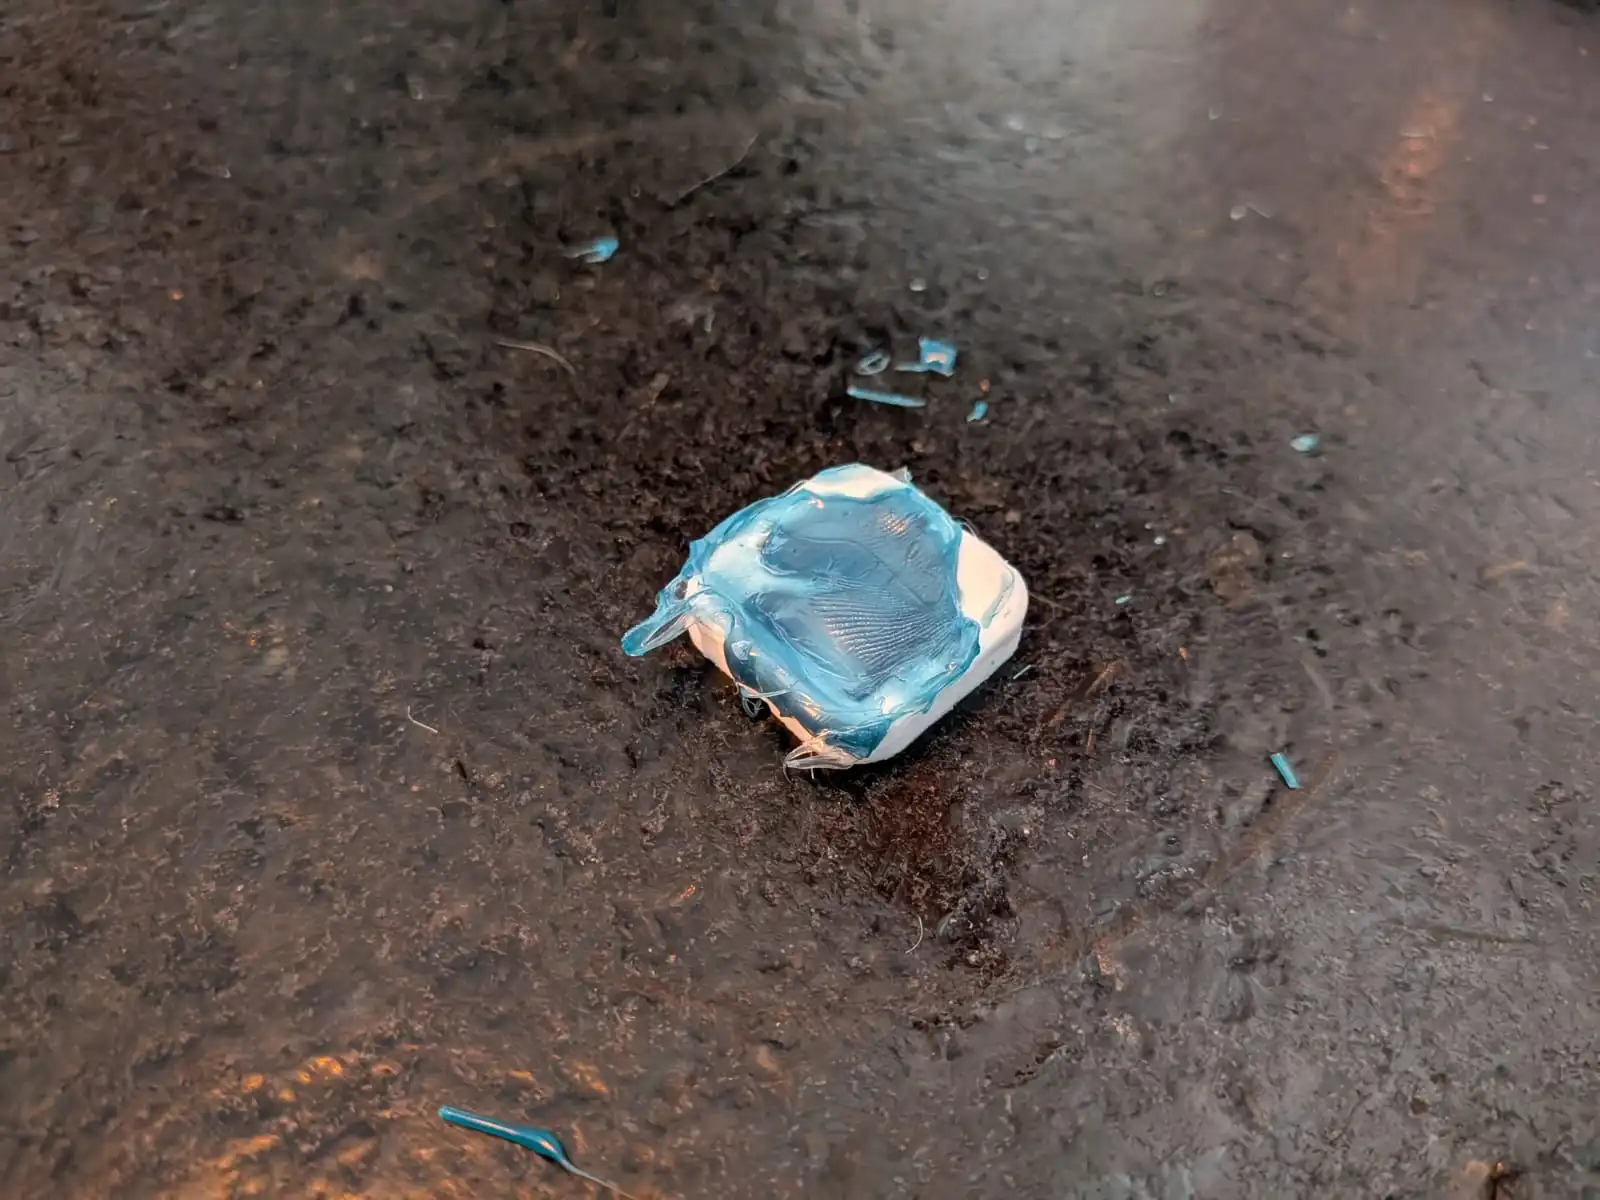
There are a few things I would like to point out for future molds. First of all, some resin cured in a way that created a sort of “fillet” between the mold and the extruding shape on it. This was not much of a problem really, just a consideration to have. The second, and most important issue, is the size of the mold itself. Yes, my original idea involved a small final piece, but I did not expect it to be this small. You could say that my mold’s final pieces could be reproduced with a “cookie cutter” with that exact shape. Regardless, all this worked was more than enough to showcase the mold creation process. For future molds, even if I decide to complete this real life 2D chess set, I will make sure to create a deeper mold and apply a little bit less resin. Overall, I call this week’s work a success, as I not only learned how to create silicon molds, I learned the theory needed to create a mold for (almost) anything. Molding and casting has turned out to be one of the most interesting topics in the FAB Academy syllabus. I know I will be coming back to this week in the future for more projects, I have so many ideas I want to bring to life, some involving materials like ceramic!