
Personal and Group Assignment
This week's personal assignment was to read and understand the data sheet of a microcontroller as well as perform a simulation of the microcontroller in use.
Group Assignment
Here's also the link to our group assignment of this week.
What is embedded programming?
It is the development of software that runs on embedded systems — computing devices built into larger systems to perform dedicated tasks. Unlike general-purpose computers, embedded systems are optimized for specific functions.
Languages used in embedded programming
The languages used in embedded programming are C/C++ and Python.
The most widely used language for microcontrollers due to its efficiency, low-level hardware access, and portability. It is commonly used in embedded systems development (TencentCloud, 2025).
An extension of C with object-oriented features, used in more complex microcontroller applications where modularity and code reuse are important (TencentCloud, 2025).
A high-level language used in microcontrollers that support interpreted languages, often for prototyping or educational purposes (TencentCloud, 2025).
Microcontrollers
A microcontroller unit (MCU) is essentially a small computer on a single chip. It is designed to manage specific tasks within an embedded system without requiring a complex operating system (Schnider & Smalley, n.d.).
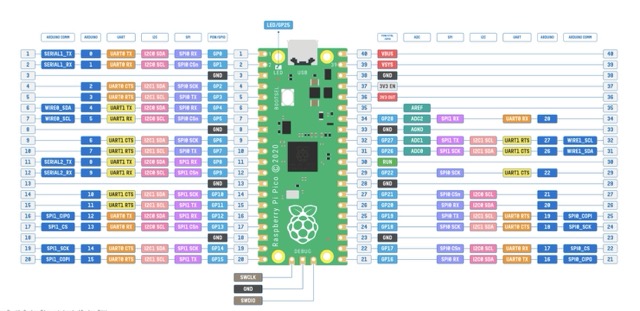
I'll be using Wokwi for this simulation, so before starting with the simulation we will learn how to use it. For this I'll be using the RP2040 microcontroller.
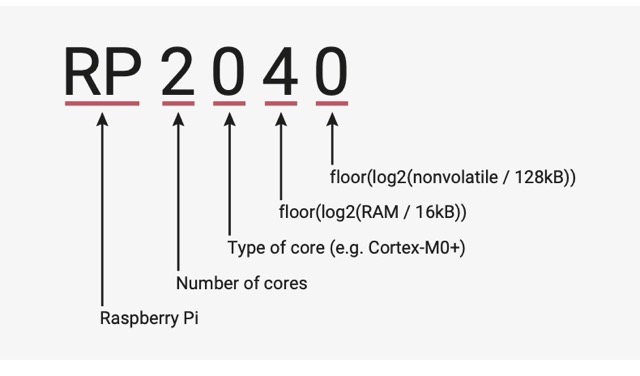
You can know certain features with its name like this.
Before choosing any microcontroller, the first thing you can do is go through its datasheet, and see if it works for the type of project that you are developing. Some features you can take into account are these:
You can find the datasheet used here.
| Feature | RP2040 |
|---|---|
| SRAM | 264 kB |
| Flash Memory | Not internal; supports up to 16 MB |
| GPIO Pins | 30 multifunction GPIO pins |
| Analog Inputs | 4 ADC inputs (12-bit, up to 500 ksps) |
| Communication | 2× UART, 2× SPI, 2× I²C, USB 1.1 Host/Device, Programmable I/O (PIO) |
| Languages | C/C++, MicroPython (official SDK support) |
| Wireless | Not included |
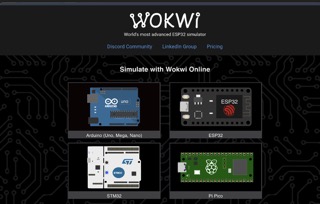
How to use Wokwi?
Now, let's run a small test using Wokwi for our simulation.
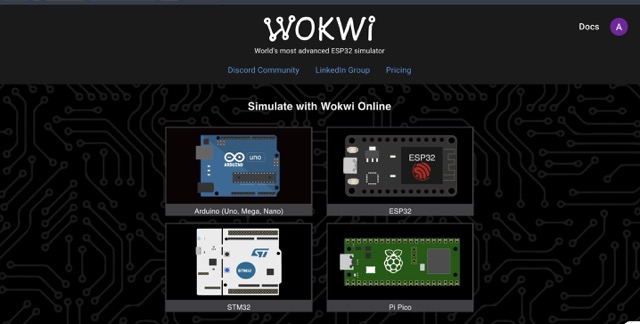
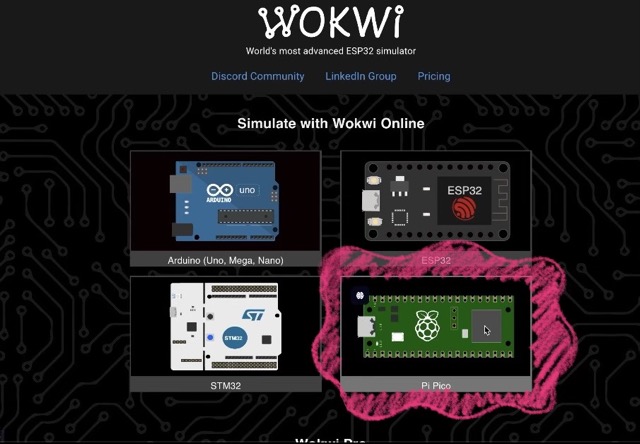
02. Select Board
Then, we need to select Raspberry Pi Pico MicroPython, as it is the microcontroller we will be using.
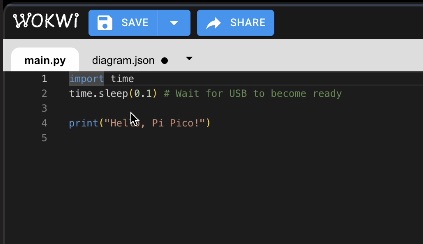
03. Writing Code
After that, where it says "sketch.ino" in the code editor, you can start adding your code.
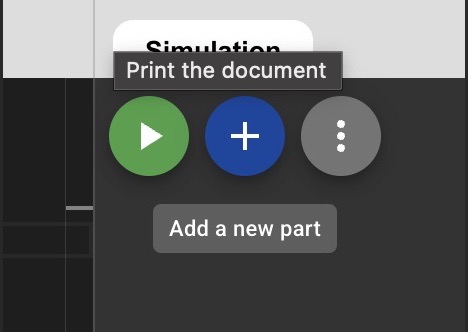
04. Add Component
If you need another component, you can add it by pressing the Add button.
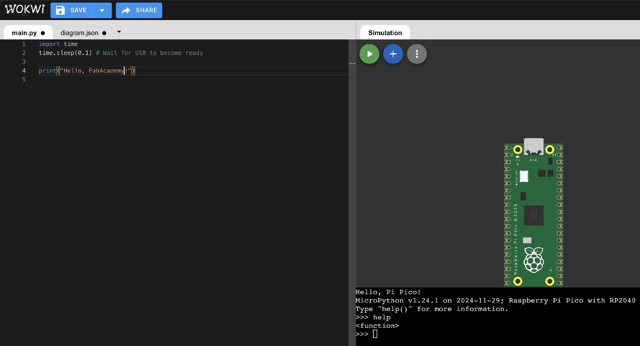
05. Play Simulation
Finally, you can run the simulation by pressing the Play button.
Final Project IMU Simulation
Now, let's make a simulation related to my project.
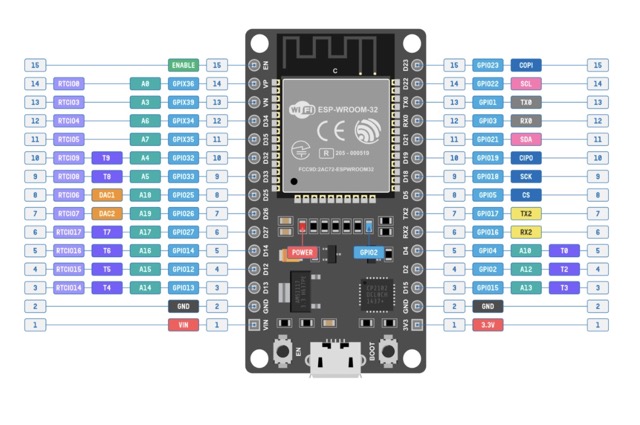
After researching different microcontrollers for my project, one of my main options is the ESP32. I have not made the final decision yet, but I chose this microcontroller because it has integrated Wi-Fi and Bluetooth, offers high processing power, and is well suited for interactive projects.
You can find the datasheet used here.
| Feature | ESP32 | Why it matters |
|---|---|---|
| CPU | Dual-core Xtensa LX6 up to 240 MHz | High processing power for multitasking and real-time control |
| SRAM | 520 kB on-chip SRAM | Allows more complex programs and buffering |
| Flash Memory | External flash (commonly 4 MB) | Enough space for firmware and libraries |
| GPIO Pins | Up to 34 programmable GPIOs | Supports multiple sensors and actuators |
| Analog Inputs | Up to 18 ADC channels (12-bit) | Good for reading analog sensors |
| Wireless | Wi-Fi 802.11 b/g/n + Bluetooth (Classic & BLE) | Enables IoT connectivity without extra modules |
| Communication | UART, SPI, I²C, I²S, CAN | Flexible connection with peripherals |
| Low-Power Modes | Light sleep, Deep sleep, Hibernation | Important for battery-powered projects |
| Special Features | Touch sensors, PWM, RTC, ULP coprocessor | Useful for interactive and low-power designs |
| Languages | C/C++, MicroPython, Arduino framework | Flexible development ecosystem |
Step by step IMU Simulation
Step 1: Select ESP
First, open Wokwi and select the ESP option.
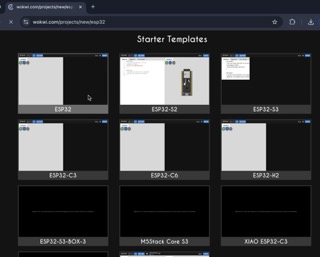
Step 2: ESP32
From the available boards, select the ESP32, which will be the microcontroller used in this project.
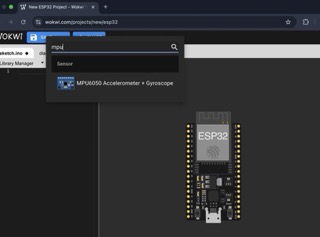
Step 3: IMU Sensor
Click the "+" button to open the components menu and search for the MPU6050 sensor.
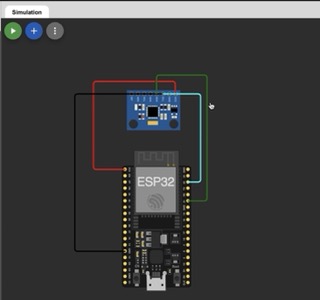
Step 4: Connections
- imu1: VCC → esp: 3V3 — Powers the IMU.
- imu1: GND → esp: GND — Shares common ground.
- imu1: SDA → esp: GPIO21 — Sends motion data via I²C.
- imu1: SCL → esp: GPIO22 — Provides the clock signal.
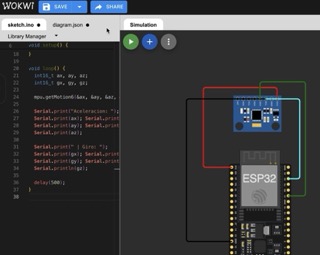
Step 5: Programming
Implement the C++ code that appears after this section.
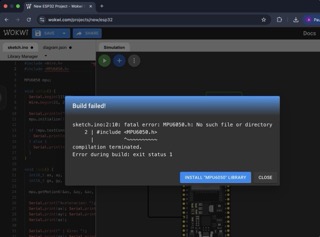
Step 6: Libraries
Don't forget to install the "MPU6050" library for it to run properly.
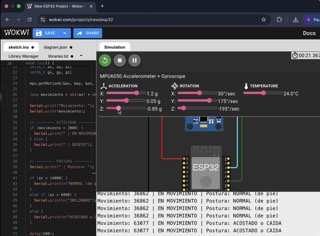
Step 7: Testing
Open Serial Monitor (115200 baud), move the MPU6050, and verify real-time values.
C++ Code Used
#include <Wire.h>
#include <MPU6050.h>
#include <BLEDevice.h>
#include <BLEServer.h>
#include <BLEUtils.h>
#include <BLE2902.h>

MPU6050 mpu;
BLECharacteristic *pCharacteristic;
bool deviceConnected = false;

void setup() {
  Serial.begin(115200);
  Wire.begin(21, 22); // SDA, SCL

  // ----- MPU -----
  Serial.println("Inicializando MPU6050...");
  mpu.initialize();

  if (mpu.testConnection()) {
    Serial.println("MPU6050 conectado correctamente");
  } else {
    Serial.println("Error de conexión con MPU6050");
  }

  // ----- BLE -----
  BLEDevice::init("FajaPerritoBLE");
  BLEServer *pServer = BLEDevice::createServer();
  BLEService *pService = pServer->createService("1234");
  pCharacteristic = pService->createCharacteristic("5678", BLECharacteristic::PROPERTY_NOTIFY);
  pCharacteristic->addDescriptor(new BLE2902());
  pService->start();
  BLEAdvertising *pAdvertising = BLEDevice::getAdvertising();
  pAdvertising->start();
  Serial.println("BLE listo para conectar");
}

void loop() {
  int16_t ax, ay, az;
  int16_t gx, gy, gz;
  mpu.getMotion6(&ax, &ay, &az, &gx, &gy, &gz);
  long movimiento = abs(ax) + abs(ay) + abs(az - 16384);
  Serial.print("Movimiento: ");
  Serial.print(movimiento);

  if (movimiento > 2000) { Serial.print(" | EN MOVIMIENTO"); }
  else { Serial.print(" | QUIETO"); }

  Serial.print(" | Postura: ");
  String mensaje;

  if (az > 14000) { mensaje = "NORMAL"; Serial.println("NORMAL (de pie)"); }
  else if (az > 6000) { mensaje = "INCLINADO"; Serial.println("INCLINADO"); }
  else { mensaje = "ACOSTADO"; Serial.println("ACOSTADO o CAIDA"); }

  pCharacteristic->setValue(mensaje.c_str());
  pCharacteristic->notify();
  delay(500);
}