Software
SolidWorks, UltiMaker Cura and KiriEngine
Fab Academy 2026
Exploring additive manufacturing, design rules and 3D scanning workflows.
SolidWorks, UltiMaker Cura and KiriEngine
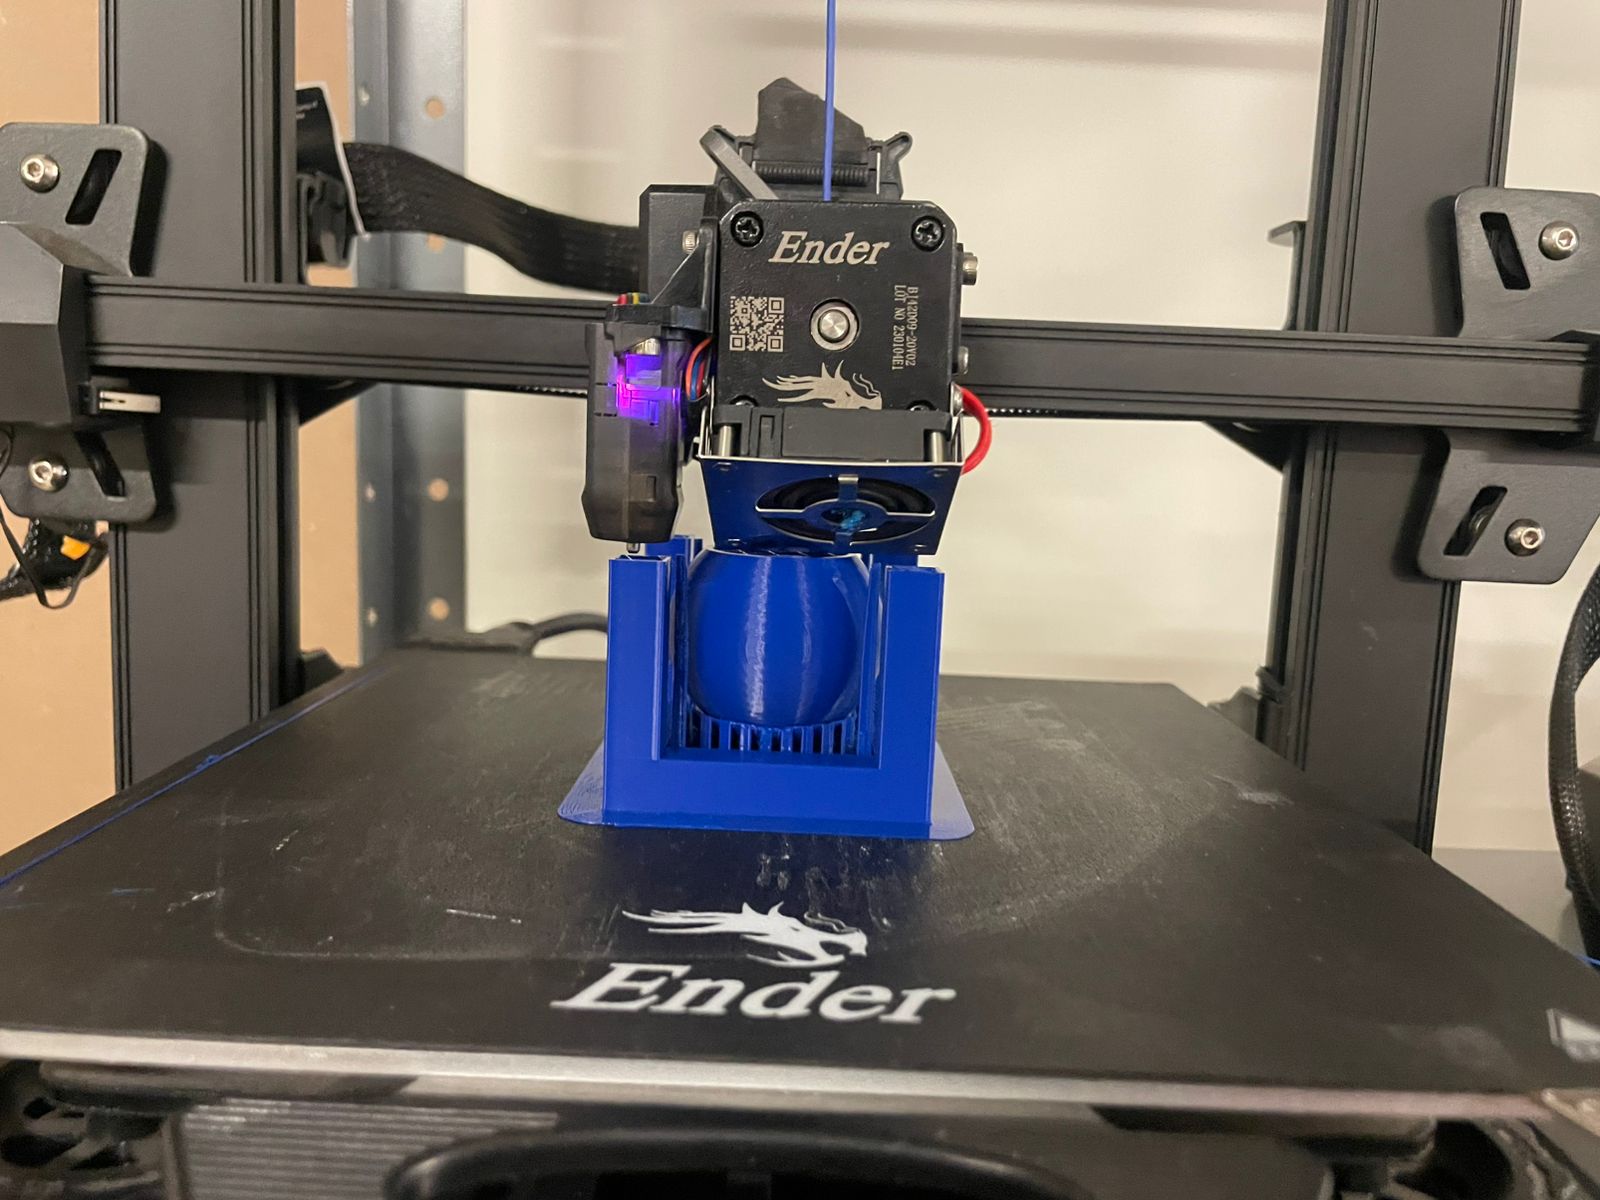
Creality Ender-3 S1 Pro
3D modeling, additive manufacturing and photogrammetry scanning
During the group assignment I learned more about the capabilities and limitations of FDM and MSLA 3D printing technologies.
3D printing is a manufacturing process where objects are created layer by layer from a digital model. Unlike traditional manufacturing methods, additive manufacturing only uses the necessary material, reducing waste and allowing more complex geometries.
In FabLab Puebla, the main technologies used are FDM and MSLA printing. FDM printing is commonly used for functional and mechanical parts, while MSLA resin printing is ideal for highly detailed models and smoother surface finishes.
An important part of this week was understanding the design rules for FDM printers. Since the material is deposited layer by layer, factors such as gravity, layer adhesion and nozzle size directly affect the final print quality.
Understanding these design limitations helped me improve print quality, reduce supports, save material and create stronger designs.
Design the 3D model in SolidWorks.
Prepare the model in Cura and configure the print settings.
Print the object using the Ender-3 S1 Pro and PLA filament.
Capture and process an object using photogrammetry with KiriEngine.
For this week I used SolidWorks to design my piece and then prepared the model for printing using UltiMaker Cura.
I used a Creality Ender-3 S1 Pro with the default PLA profile provided by Cura for this printer.
SolidWorks
UltiMaker Cura
PLA filament
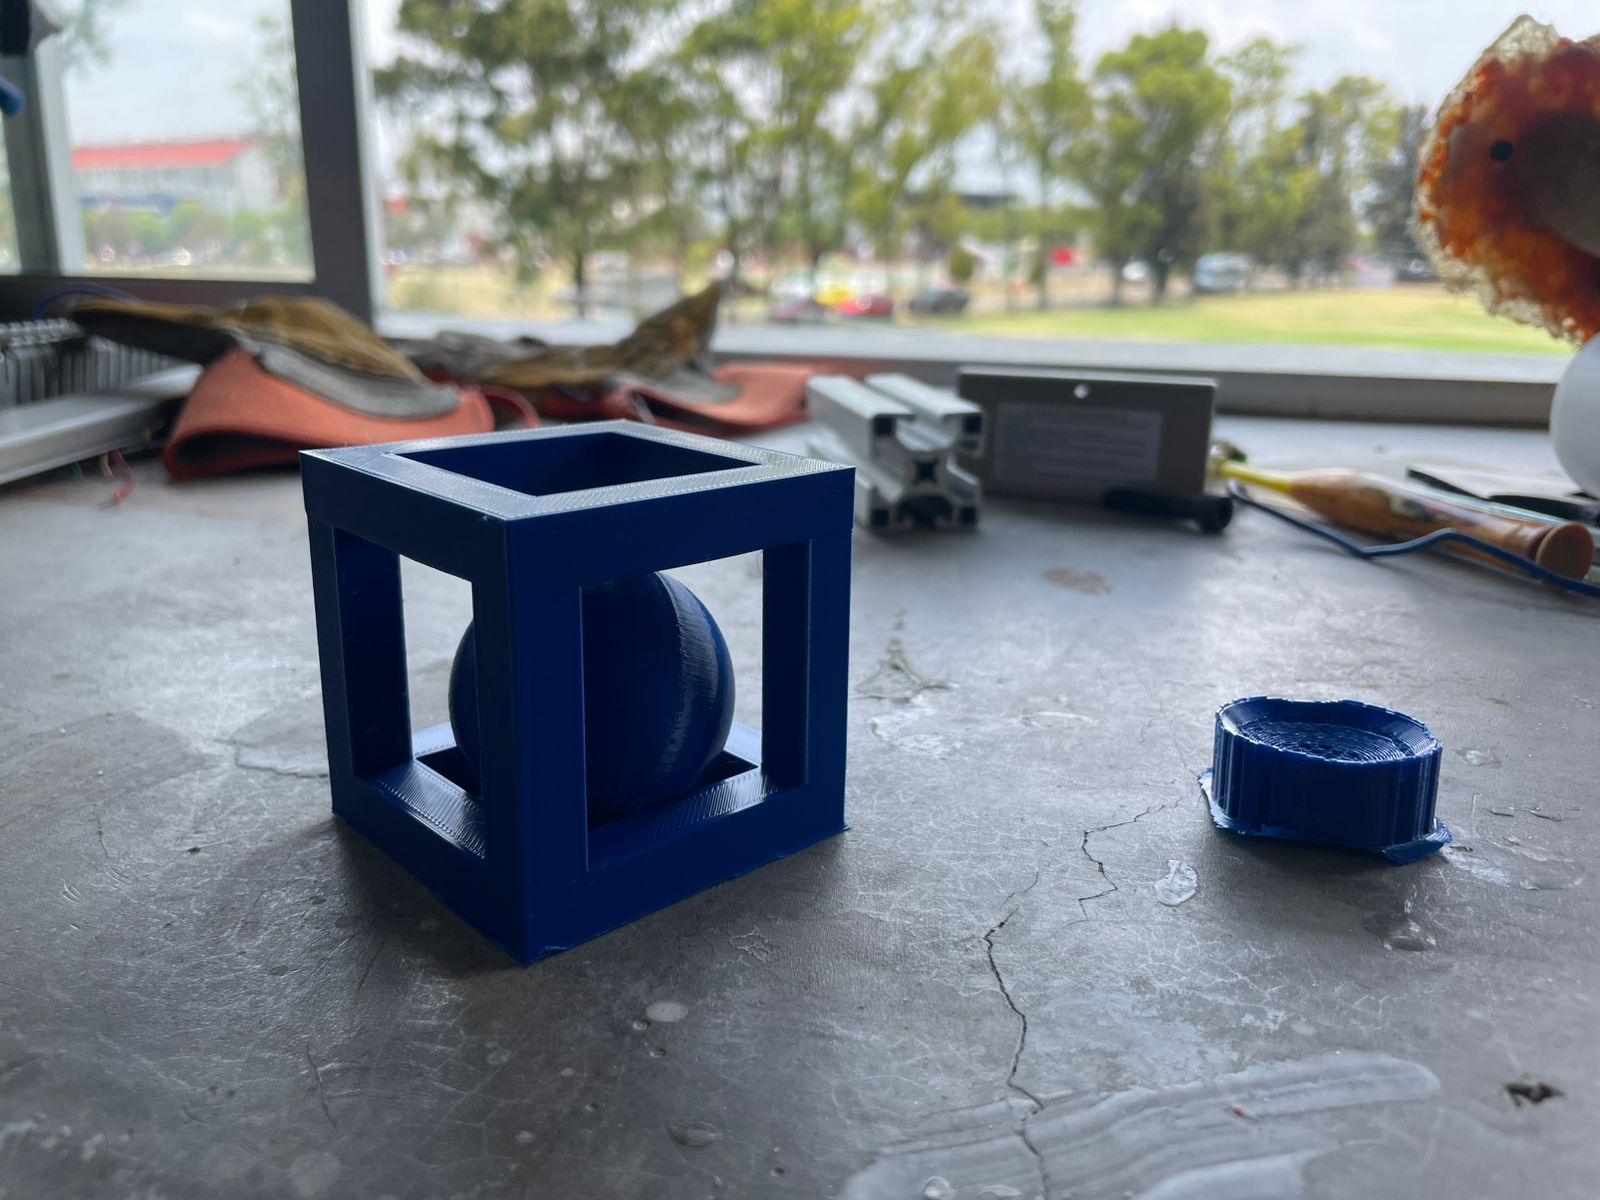
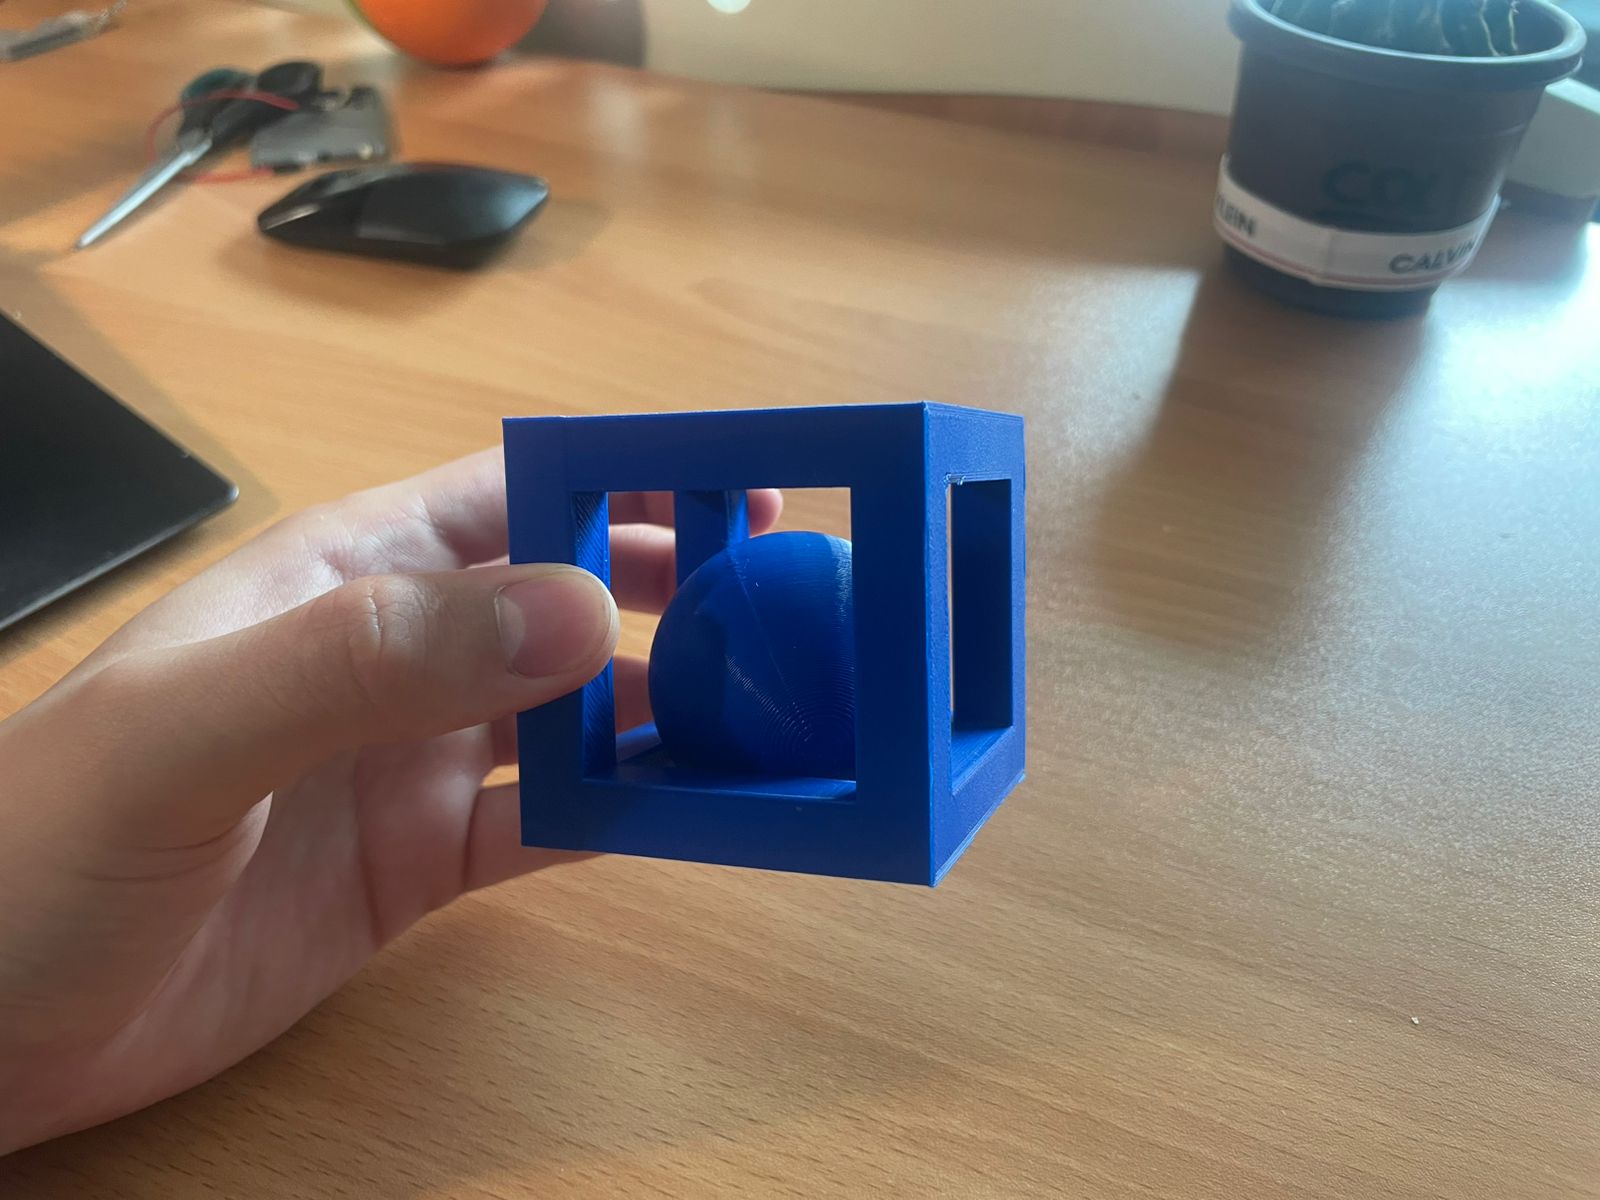
This piece is a good example of how 3D printing can create geometries that would be very difficult to manufacture using traditional subtractive methods.
The sphere is trapped inside the cube, but both parts were printed together as a single object without any assembly process.
Using conventional manufacturing, this design would require multiple separate parts, molds or complex machining operations.
In contrast, additive manufacturing allows the printer to build the cube and the sphere layer by layer at the same time, making the entire piece possible in a much simpler and more efficient way.
This assignment helped me better understand one of the biggest advantages of 3D printing: the ability to create complex internal geometries and moving parts directly from a digital model with minimal material waste and no additional assembly.
For the scanning process I used KiriEngine because it can be used directly from a phone, making the workflow simple and accessible.
I decided to scan my Alebrije, (it is a brightly colored Mexican folk art sculpture depicting a fantastical, mythical, or surreal creature) using the automatic photo mode.
During the process, the application automatically captures photos while moving around the object. In total, the app captured around 150 images and then processed them to generate the 3D model.