

14. Moulding and Casting
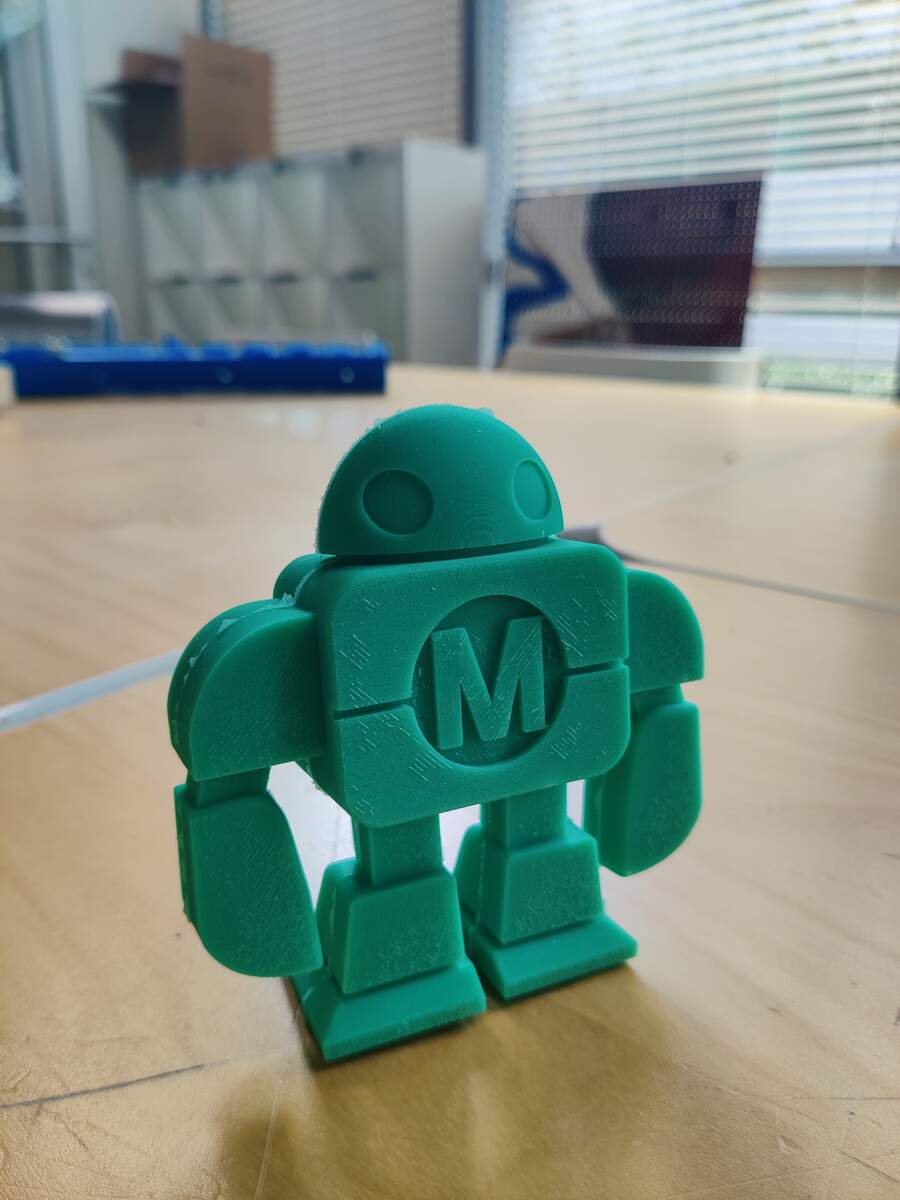
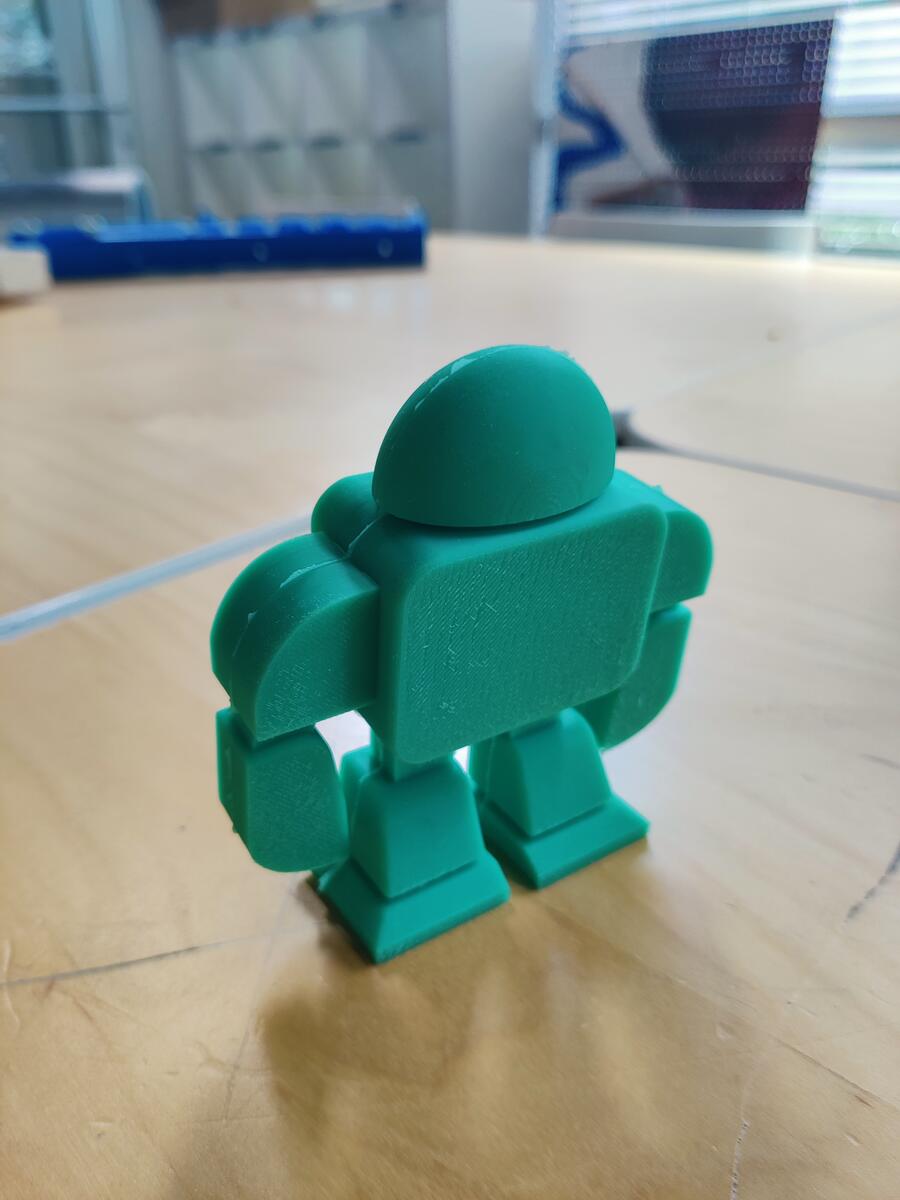
This week we will be exploring the techniques of moulding and casting, which I used to create little Makey Robots.
Nicpro 2-Part Silicone Mold Making Kit — Safe Use Guide
Platinum-cure RTV-2 silicone | Non-toxic, odorless, food & skin safe | Not a hazardous substance (OSHA 29 CFR 1910.1200)
Technical Specifications
| Property | Details |
|---|---|
| Mix Ratio | 1A : 1B by weight |
| Pot Time | ~30 minutes |
| Cure Time | 3–5 hours at 73°F (23°C) |
| Hardness | 15A (translucent) or 20A (jade green) |
| Mold Life | 500–1,000 uses |
| UV Resin Compatible | No — will NOT cure with UV resin ⚠ Important |
Safety & PPE
- Gloves — wear liquid-tight gloves (included); safety glasses recommended
- Ventilation — work in an open area; respiratory protection not required under normal use
- Skin contact — wash thoroughly with soap and water
- Eye contact — flush with water; seek medical attention if irritation persists
- Storage — cool, dry, sealed container; away from strong acids, bases, and moisture
- Transport — not regulated by DOT/IATA; no special requirements
Step-by-Step Instructions
- Prepare — Cover your workspace, put on gloves and glasses, and have all tools ready.
- Measure — Weigh equal parts Part A and Part B (1:1 by weight) into separate cups.
- Mix — Combine and stir continuously for at least 5 minutes, scraping sides and bottom. Incomplete mixing is the #1 cause of cure failure.
- Rest — Let the mixture sit up to 2 hours to self-degas. Bubbles rise and pop on their own — no vacuum needed. You have ~30 minutes of working time.
- Pour — Pour in a slow, thin stream into the lowest point of your mold box and let the silicone flow up around the master object.
- Cure — Leave undisturbed for 3–5 hours at room temperature. Warmer = faster cure. ⚠ Do NOT use with UV resin
- Demold — Gently peel the cured silicone away from the master. Rinse before first use.
Troubleshooting
| Problem | Fix |
|---|---|
| Tacky or uncured mold | Wrong ratio or incomplete mixing |
| Bubbles on surface | Pour slower from greater height; rest mixture longer |
| Silicone sticks to master | Apply petroleum jelly before pouring |
| Slow or incomplete cure | Room too cold — warm with a heat lamp |
| Want a colored mold | Add mica powder or silicone pigment before pouring |
Sakrete Crack Resistant Concrete Mix (50 lb) — Safe Use Guide
Professional-grade blend of cement, sand, gravel & alkali-resistant fibers | Exceeds ASTM C 387 | 4,000 psi at 28 days
⚠ Hazard Warning (OSHA 29 CFR 1910.1200): Contains Portland cement / crystalline silica. Causes skin irritation, serious eye damage, allergic skin reaction, and lung damage with prolonged exposure. May cause cancer. Keep out of reach of children. Emergency: CHEMTREC 800-424-9300
Technical Specifications
| Property | Details |
|---|---|
| Compressive Strength | 2,500 psi at 7 days | 4,000 psi at 28 days |
| Water per 50 lb bag | ~2.5 quarts (2.4 L) — adjust for stiff, forming consistency |
| Working Temperature | 40°F–90°F (4°C–32°C) |
| Foot Traffic | 24 hours |
| Vehicular Traffic | 72 hours |
| Min. Application Depth | 2 inches (50 mm) |
| Control Joint Spacing | Every 3–4 ft; expansion joints every 8 ft x 12 ft |
Safety & PPE
- Respiratory — wear an N95 dust mask; do not breathe dust when mixing
- Eyes — wear safety goggles at all times; flush with water for 15+ minutes if contacted; seek medical attention
- Skin — wear waterproof gloves and long sleeves; wet concrete can cause chemical burns with prolonged contact
- Hygiene — wash hands and face thoroughly after handling; do not eat, drink, or smoke while working
- Environment — do not allow uncured concrete to enter drains, waterways, or aquatic habitats
Step-by-Step Instructions
- Prepare — Remove all debris and loose material. Add gravel base for drainage on slabs. Dampen existing concrete before repairs.
- Set forms — Install and stake forms. Clean reinforcing steel to bare metal.
- Mix — Add ~2.5 qts of water per 50 lb bag into a crater in the dry mix. Mix until stiff and uniform with no dry pockets. Avoid a soupy mix — excess water reduces strength and causes cracking.
- Place & consolidate — Pour into forms to full depth, working mix into corners. Strike level with a straight edge.
- Finish — Float surface smooth. Edge along forms. Cut control joints every 3–4 ft. Apply broom finish once stiffened.
- Cure — Keep surface moist for several days using wet burlap, plastic sheeting, or a curing compound. In cold weather protect from freezing for at least 24 hours.
- Open to traffic — Foot traffic after 24 hours; vehicles after 72 hours.
Troubleshooting
| Problem | Fix |
|---|---|
| Mix too stiff | Add small amounts of water until forming consistency is reached. |
| Mix too soupy | Add more dry mix. Do not use as-is — weak, crack-prone result. |
| Surface cracking | Cut control joints; keep surface moist during curing; shield from wind and direct sun. |
| Set too slow | Temperature too cold. Use warm water; insulate if below 40°F. |
| Set too fast | Temperature too hot. Use cold water; work early morning; mist surface. |
| Weak / dusty surface | Do not add water to the surface during finishing. |
Storage & Disposal
- Store bags off the floor in a cool, dry place between 40°F–90°F
- Dispose of empty bags and debris at a permitted municipal disposal facility
- Do not use crushed concrete as fill near aquatic habitats
Based on Sakrete Crack Resistant Concrete Mix TDS and SDS (rev. March 2022). Technical support: 866-725-7383. Emergencies: CHEMTREC 800-424-9300.
Casting Concrete
I can not share the 3D model for this project so I decided to use it for my group work experimentation.
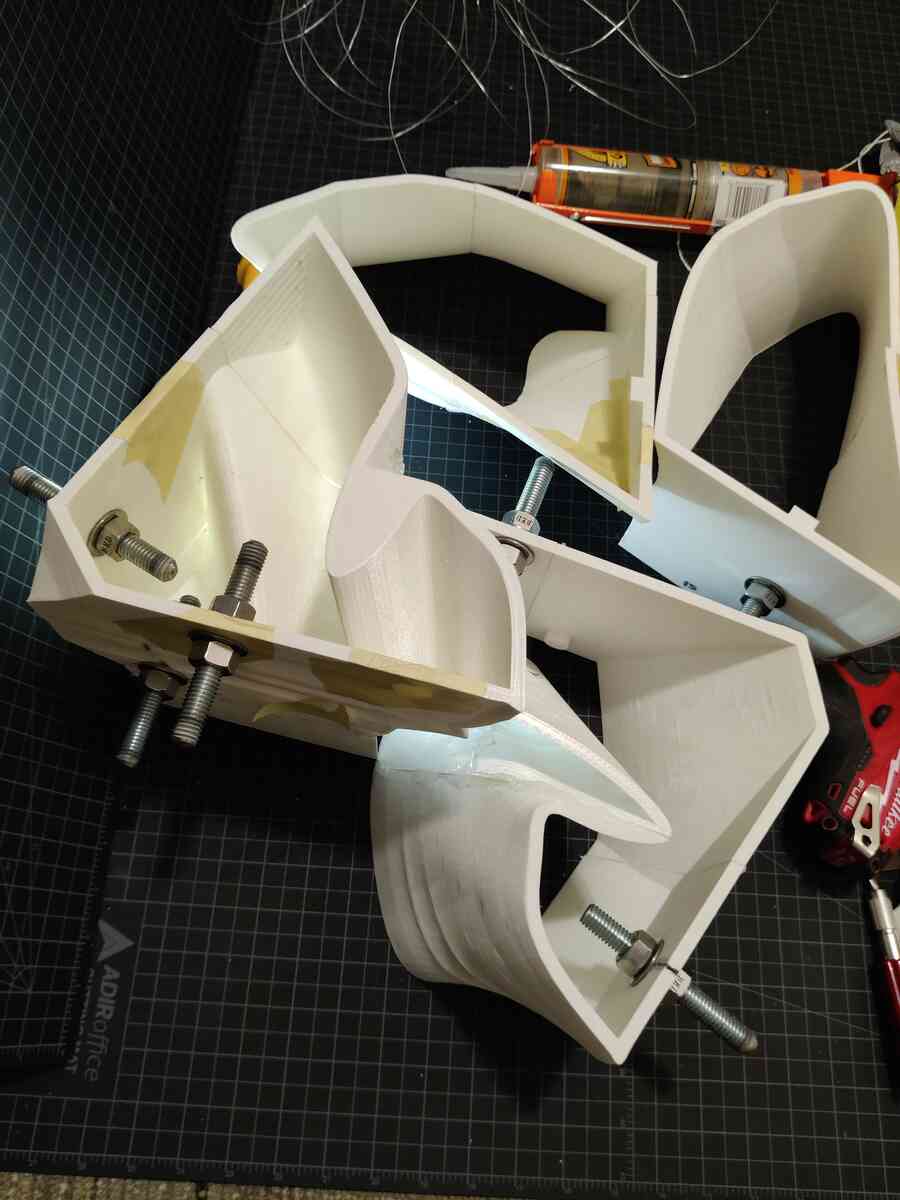
I 3D printed the molds from PLA and designed places for threaded rods and nuts to be embedded in the concrete when cast. This component was designed to connect to other parts of a larger structure and I needed the rods to be precisely placed.
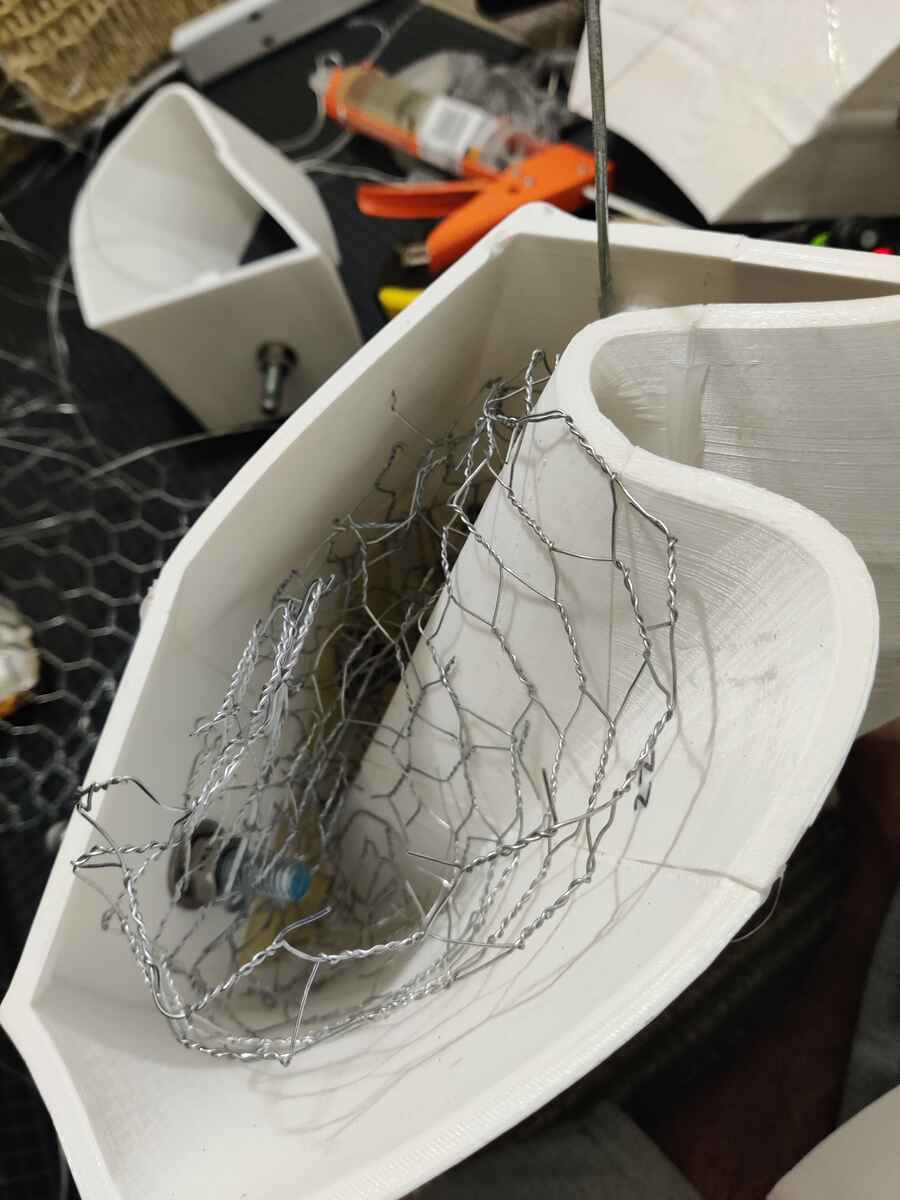
To add reinforcement, I added chicken wire mesh and thick rigid wires.
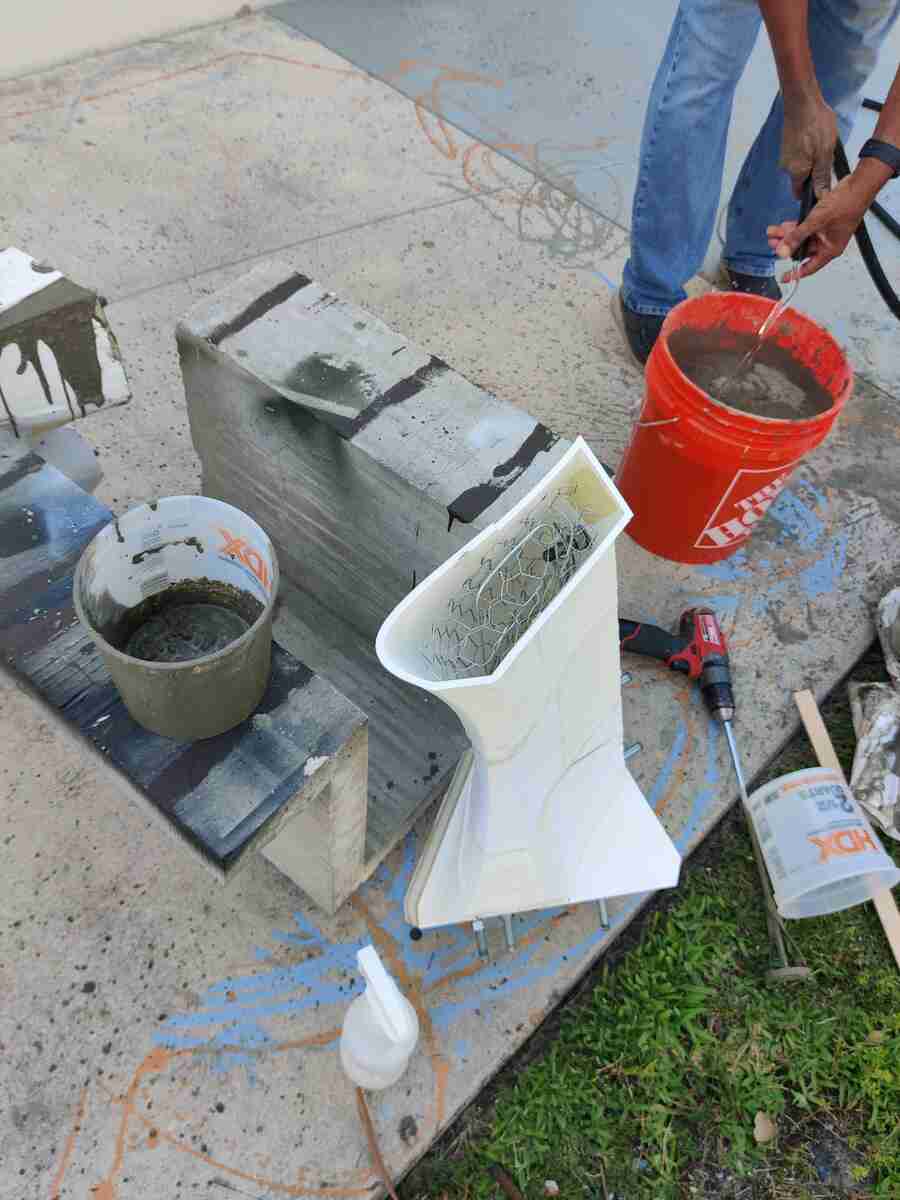
I leaned the molds against a stable concrete object while my dad and I mixed the concrete in a bucket. We aimed for an oatmeal consistency when adding the water and used a drill with a mixer attachment to combine the materials uniformly. We also sprayed the inside of the molds with a mixture of castor oil in isopropyl alcohol that would act as mold release.
Note that We are outside in a well-ventilated area. We are also wearing appropriate PPE because working with concrete can be hazardous.

We tied the molds to the support object with ropes before pouring the concrete. When it was full, we added 2 pieces of rebar kept in place with a flat piece of wood. The concrete used had fiber for additional reinforcement.
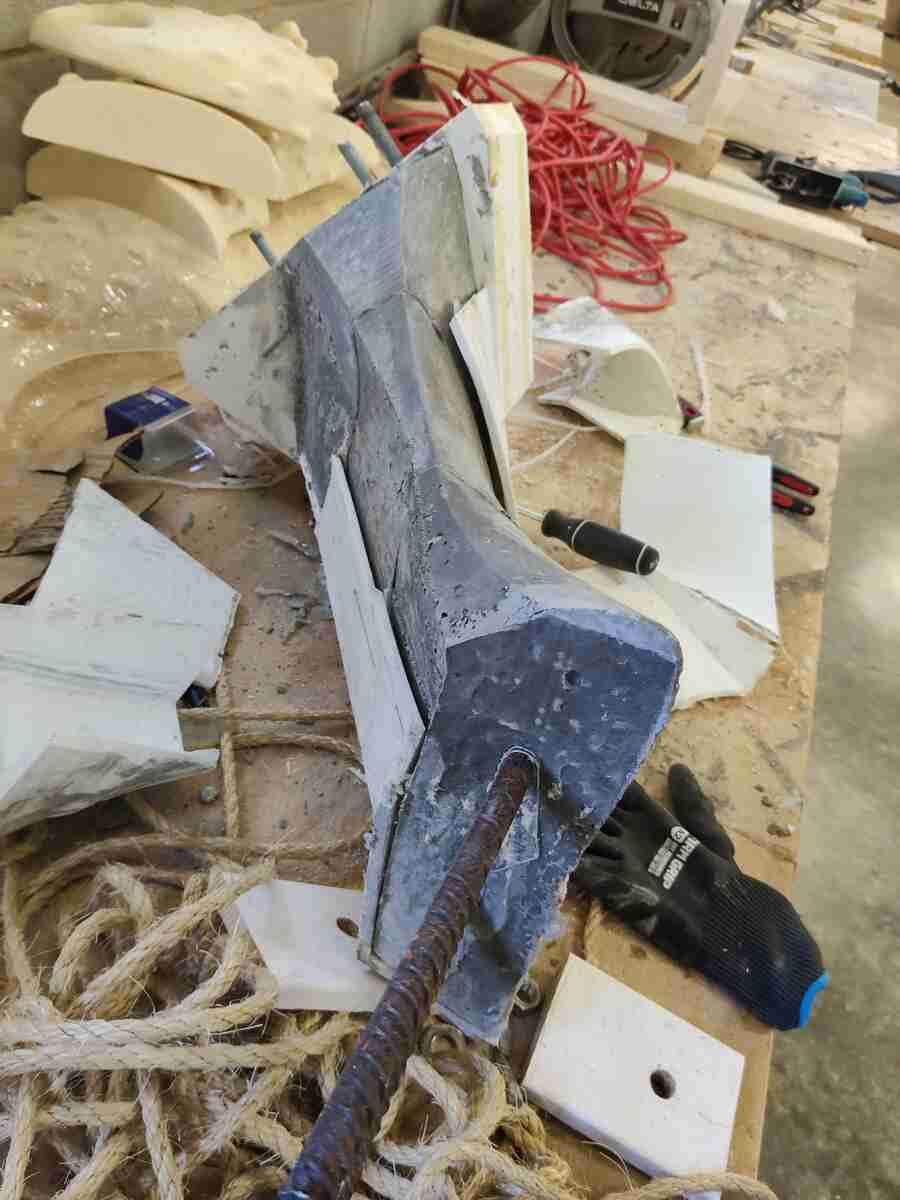
After 3 days, the concrete had cured sufficiently for the molds to be removed. I began breaking the seams of the 3D printed molds. I used multiple tools to break the PLA but it was not an easy process. I even used a soldering gun to melt and cut away sections of the mold.
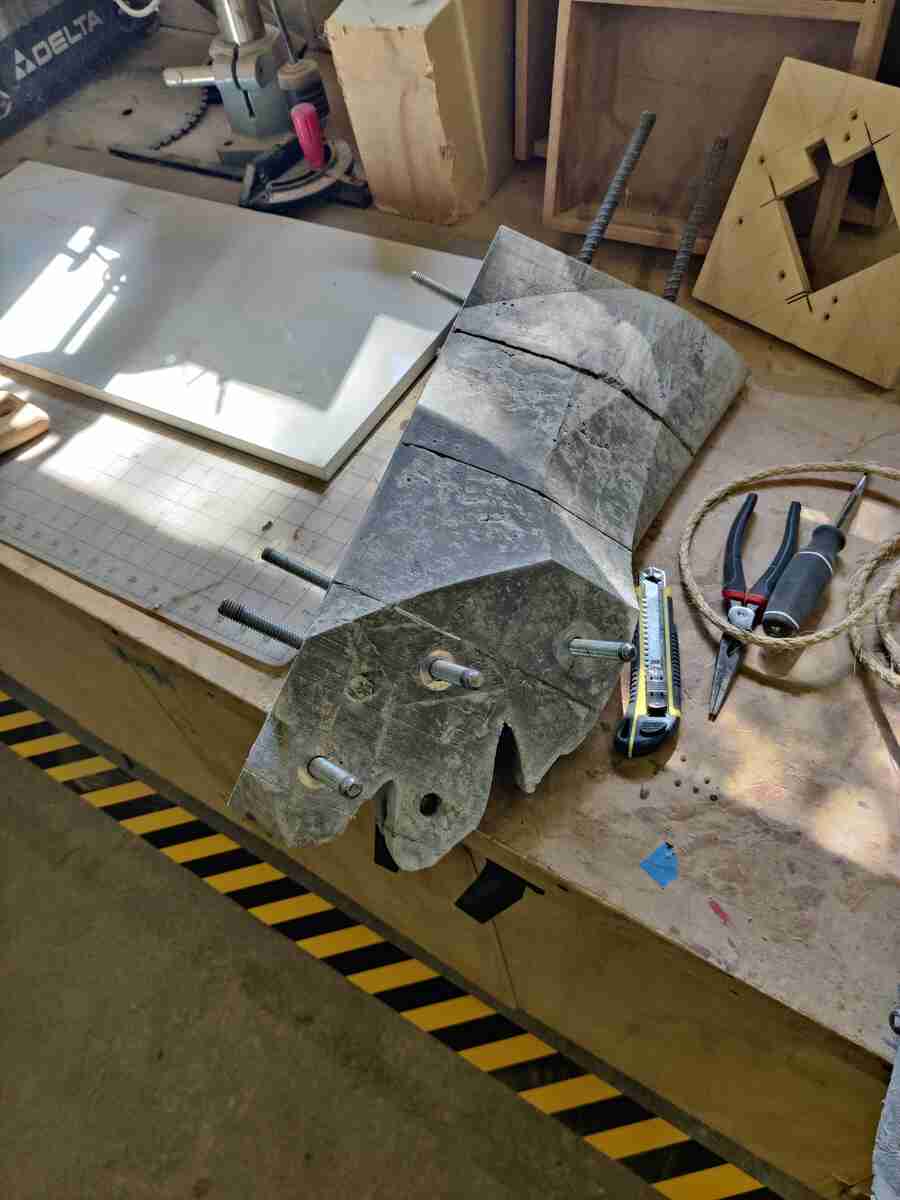
When the mold pieces were removed, the seam and joint lines were very pronounced. This was an interesting consequence of this process that I actually liked. The rods also bonded to the concrete very well.
I learned that there are a lot of variables to consider when casting concrete, especially when using 3D printed molds. The molds need to be strong enough to manage the weight of the concrete. The seams are the likely points of failure during the initial pour; however, this is only a concern in the first 3o minutes to hour. Once the concrete starts to set, everything stabilizes. The seams and joints also need to be designed in a way that avoids grooves or ridges in the casting.
Casting Silicone

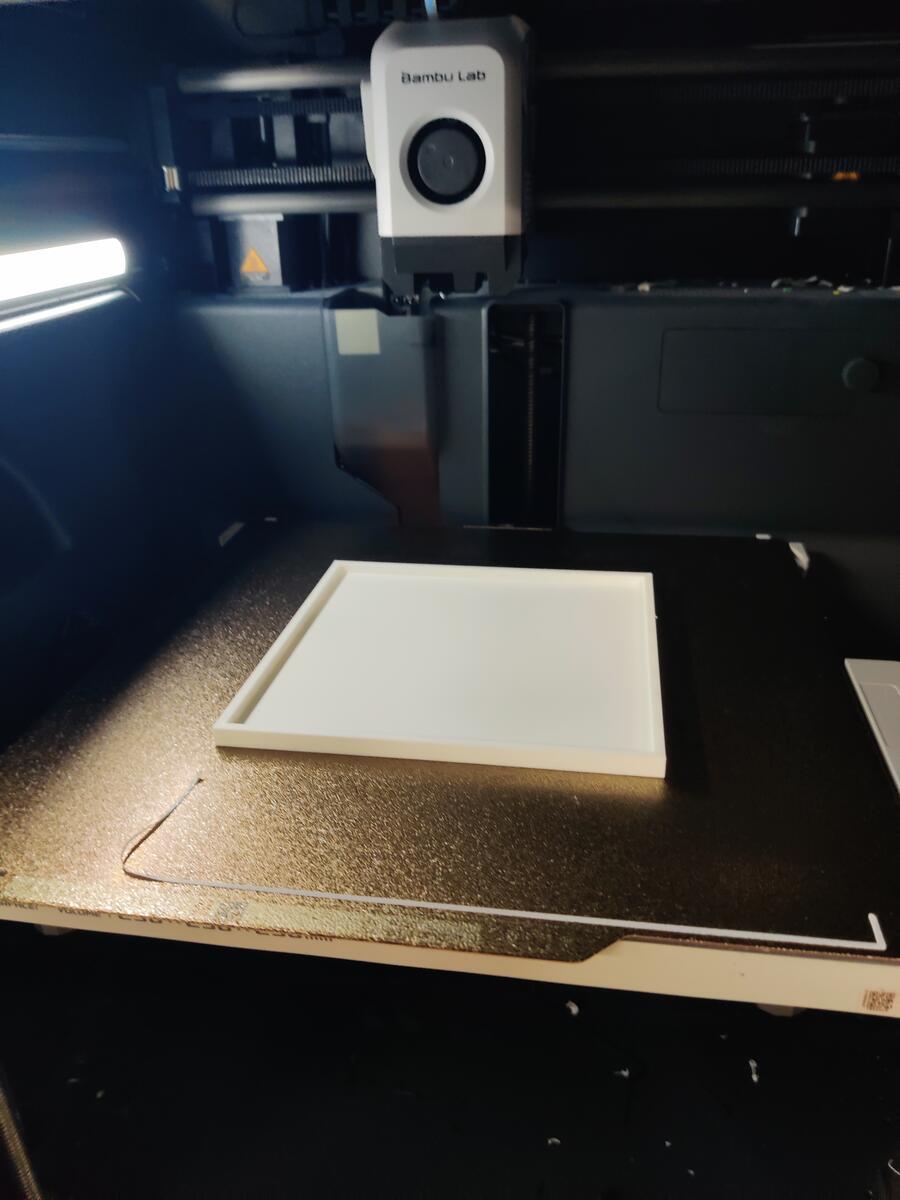
I designed the 2 part molds in Rhino 8 considering the holes to pour the silicone and stumps to help with alignment of the parts. I also added vent holes and clamping pieces to hold the mold together. There are also plugs to push the silicone firther into the mold. I exported the model as an STL and opened it in Bambu Studio. The Print was set to an A1 printer with a texture plate and a 0.4 nozzel. The Bambu PLA was Matte and the print quality was standard. If I try again, I would set it to a higher quality. The infill was 10 percent grid and I adjusted the variable layer height to make teh curves smoother.
I sent the print with all of the parts on one plate.
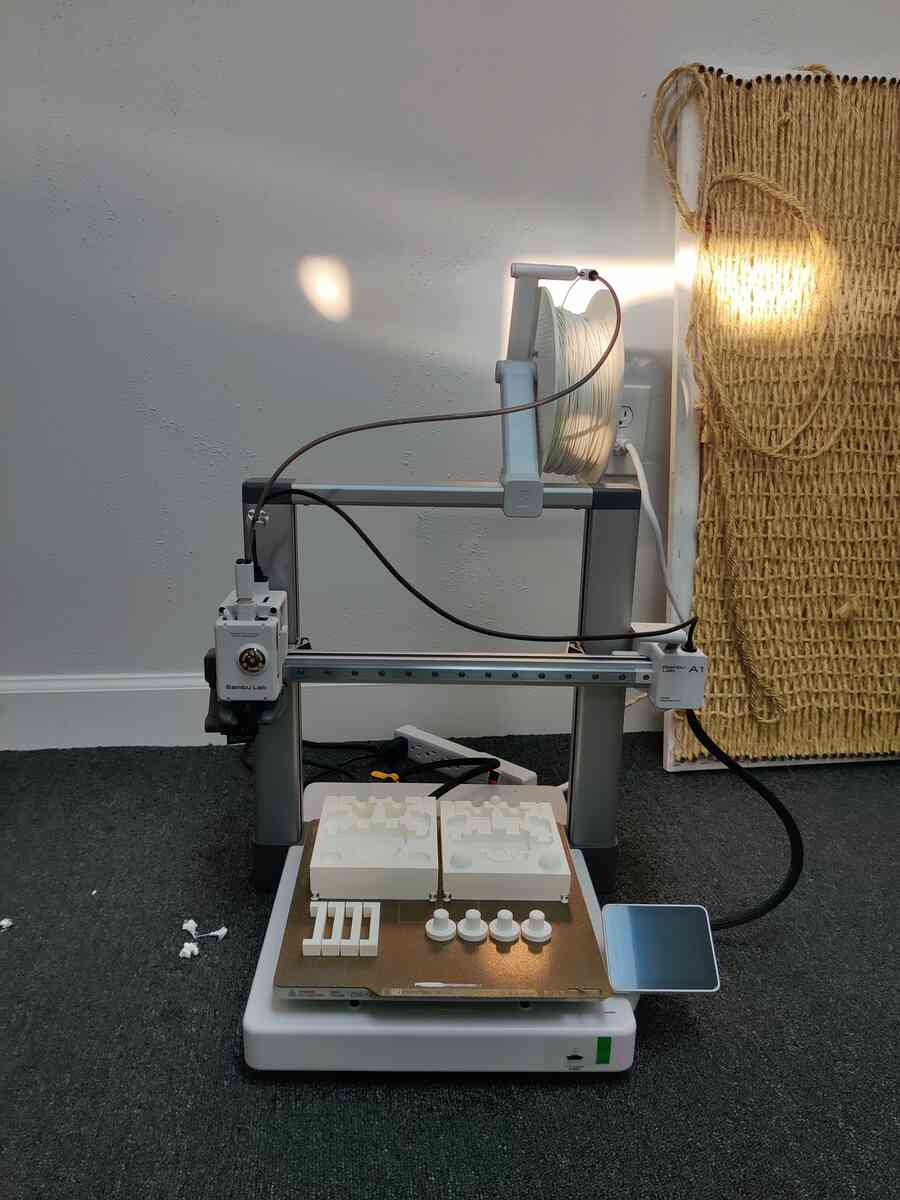
The print went well.
I assembled the mold parts and added tape around the seams to seal them and hold teh part together more securely. I then poured the silicone into the mold. The silicone is a 2 part mixture at a 1:1 ratio. poured each part into a separate disposable cup and mixed them together until well incorporated. I waited a few minutes after mixing to allow to bubble to float up and reduce the amount of trapped air in the cast. After the wait, I was able to pour the silicone into the mold making sure the silicone got into all areas of the mold.
The silicone was allowed to cure for 3-6 hours. I released the mold and took the silcone out. it came out easily thanks to the petroleum jelly I added to the mold before assembly.
The silicone needed to be cleaned up after demolding to remove excess material.
I learned that the process benefits from careful attention to detail in mold design and assembly. Mold release agents are crucial for easy demolding.
Silicone Mold Making
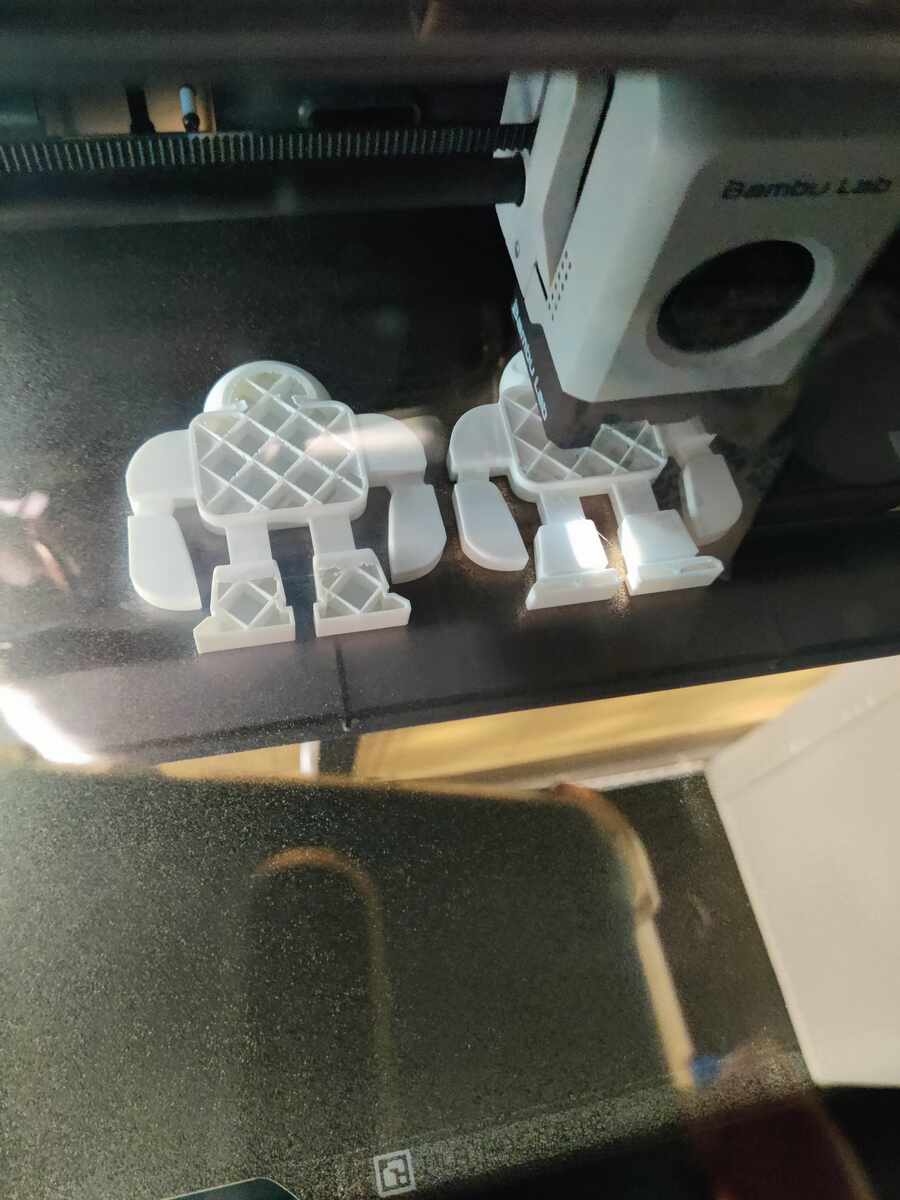
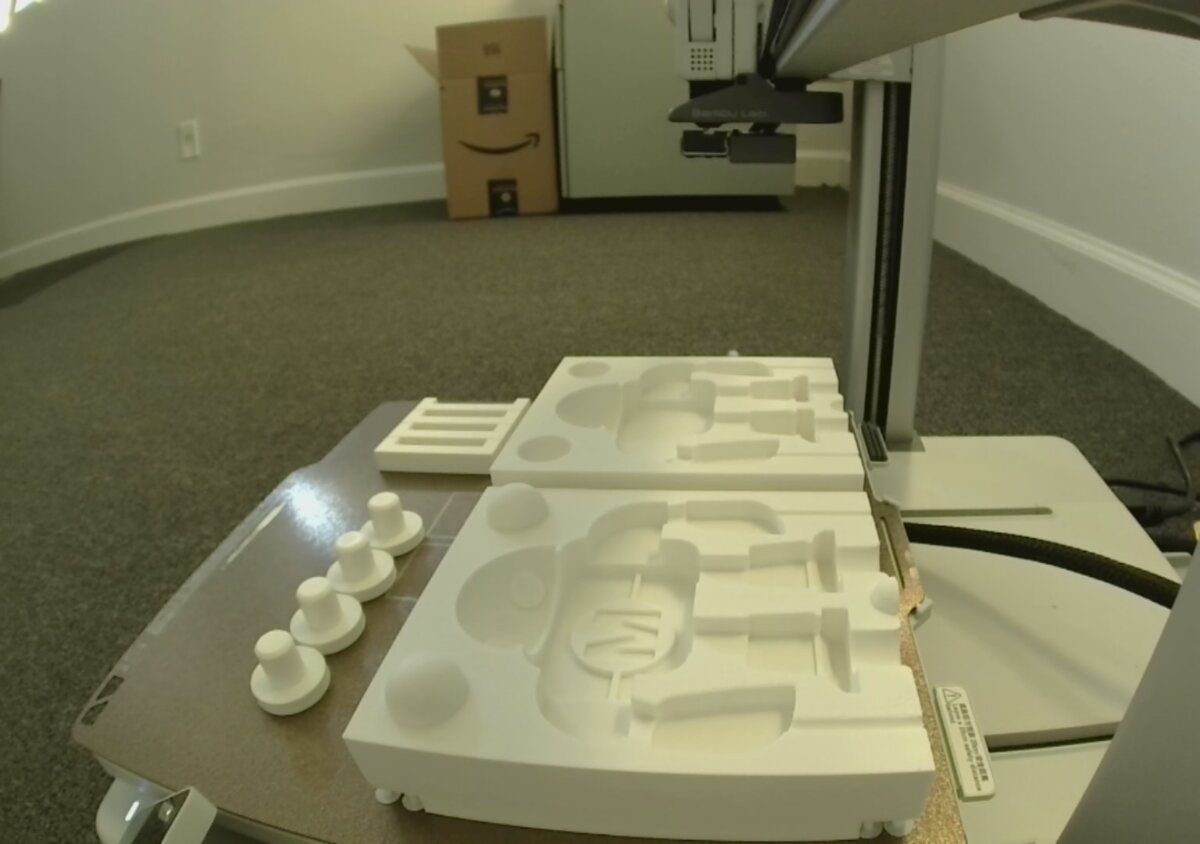
Using the same setting as before, I printed 2 halves of the makey robot as the positives of the mold I wanted to make. I printed these in 2 sizes and on Bambu P1S printers.
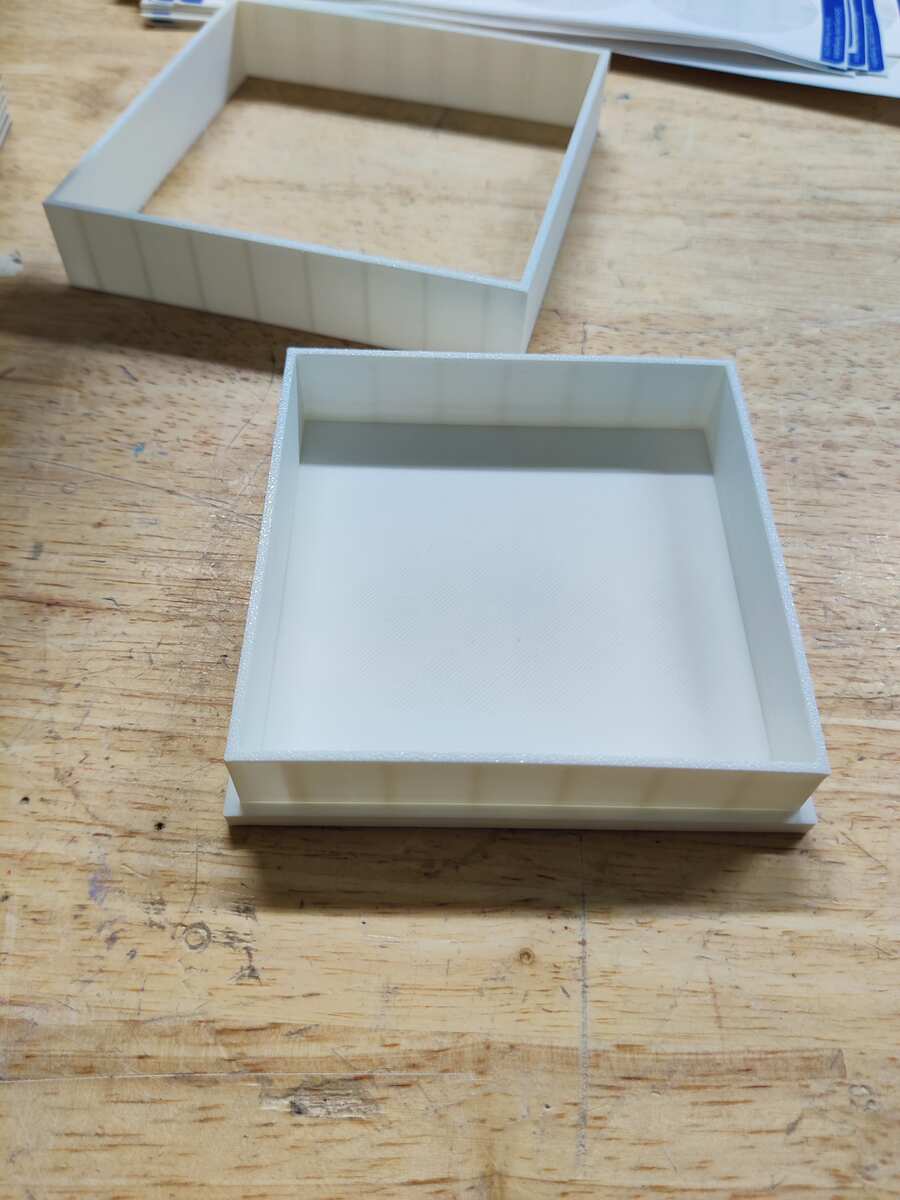
I designed a base and walls to contain the silicone when I would do the pours. I printed them in the P1S printers as well.
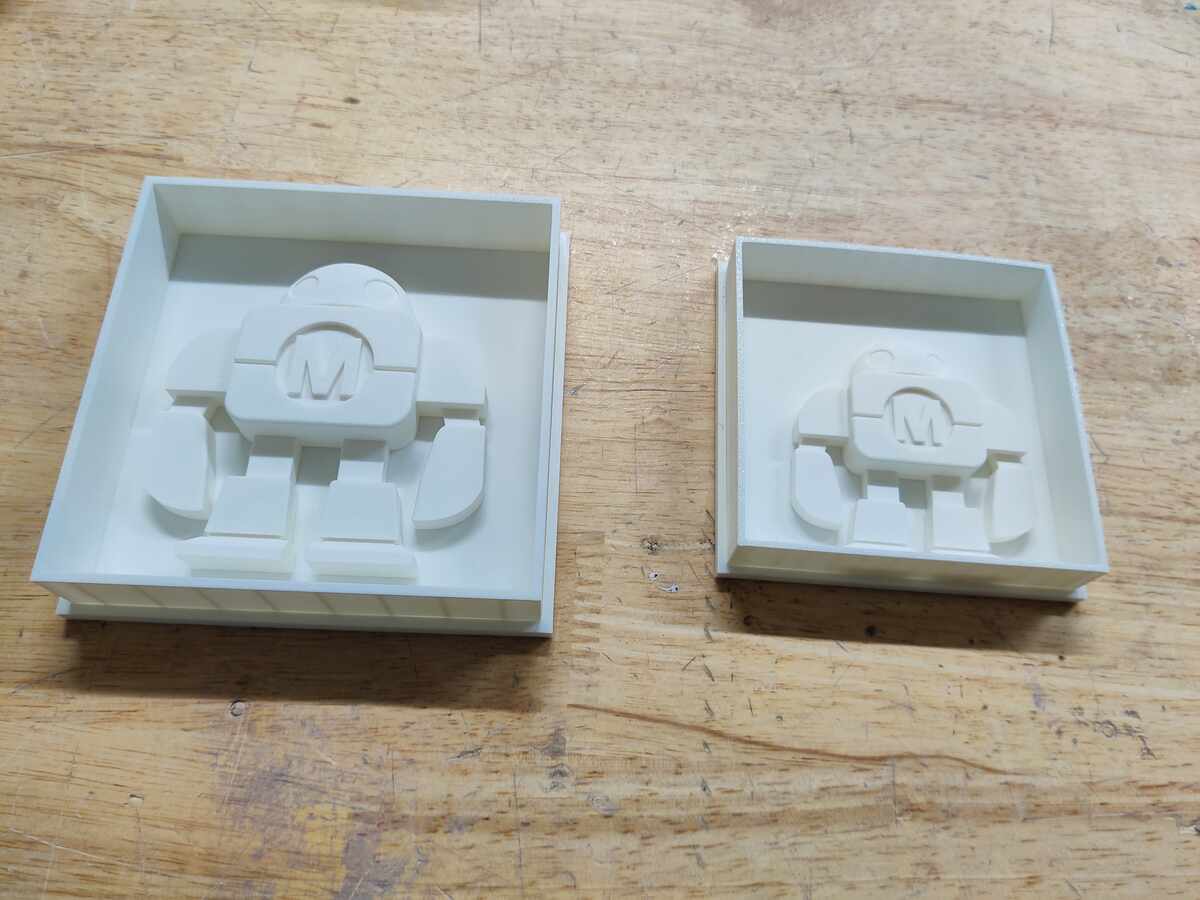
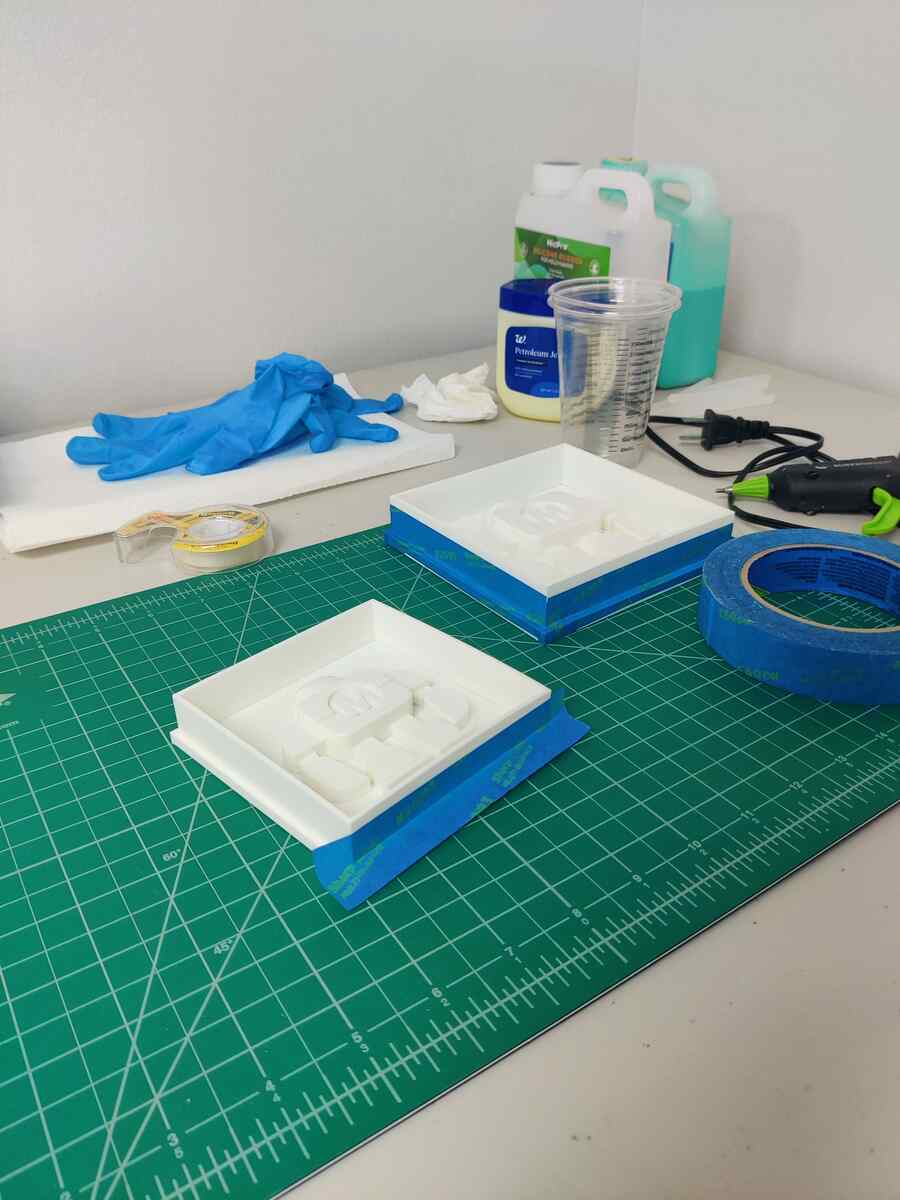
The robot positives are placed face-up inside their respective mold boxes, one large and one small.

The full workspace laid out: two assembled mold boxes, isopropyl alcohol, Q-tips, petroleum jelly (mold release), a mixing cup, NicPro silicone rubber Parts A and B, and a hot glue gun to seal any gaps.
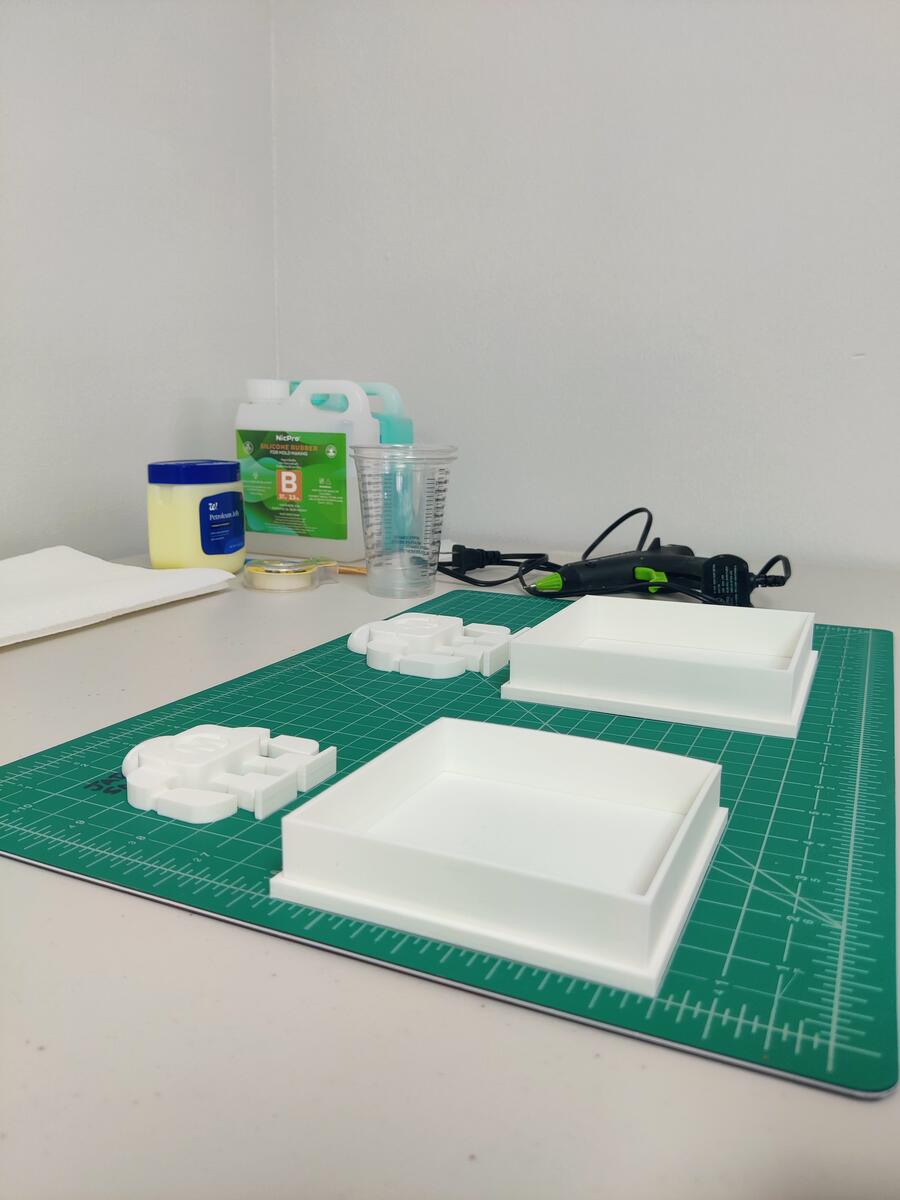
A closer view confirming all materials are present: NicPro Silicone Rubber Part B, petroleum jelly for release, a calibrated mixing cup, and the hot glue gun for sealing the mold box joints.
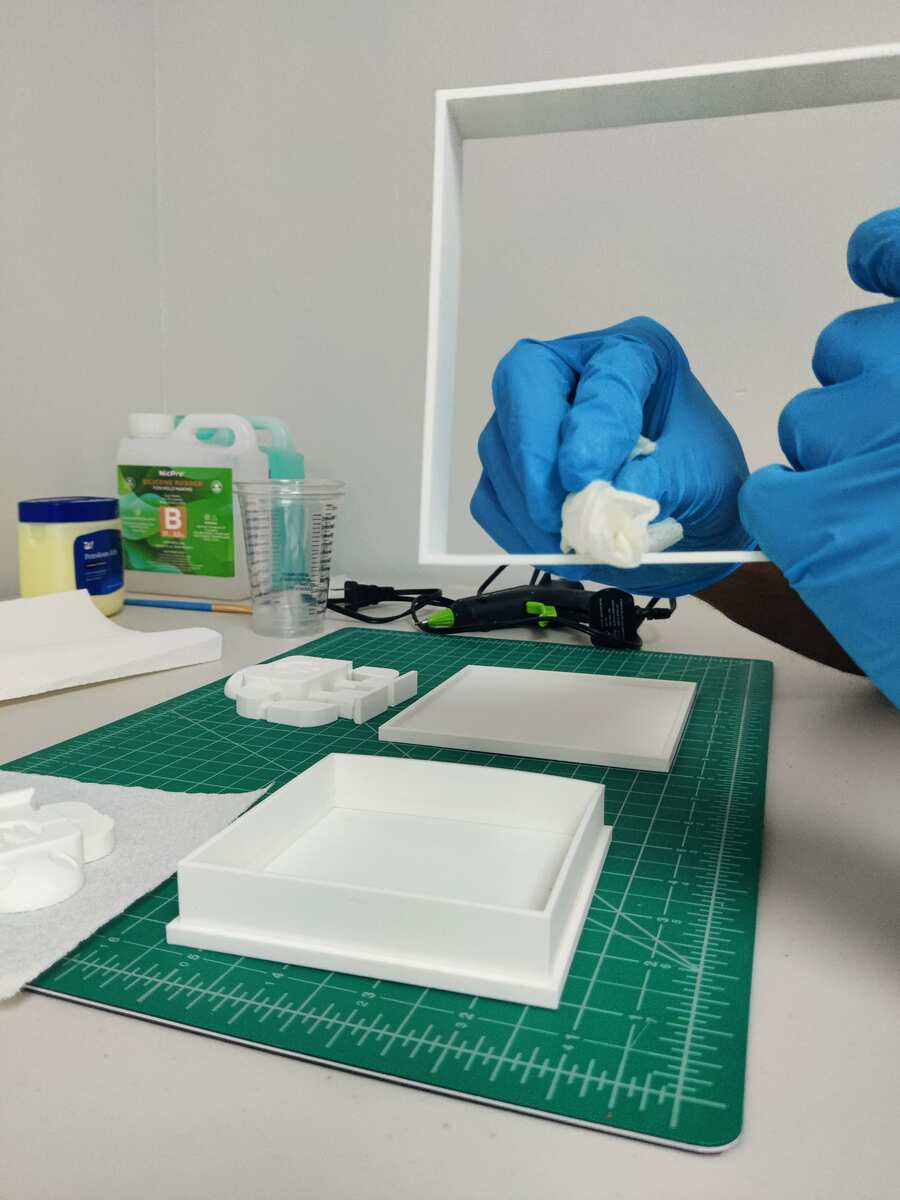
Wearing nitrile gloves, the mold box frame is wiped down with isopropyl alcohol on a paper towel. Removing dust, oils, and any 3D print residue ensures the molds are able to be properly sealed.
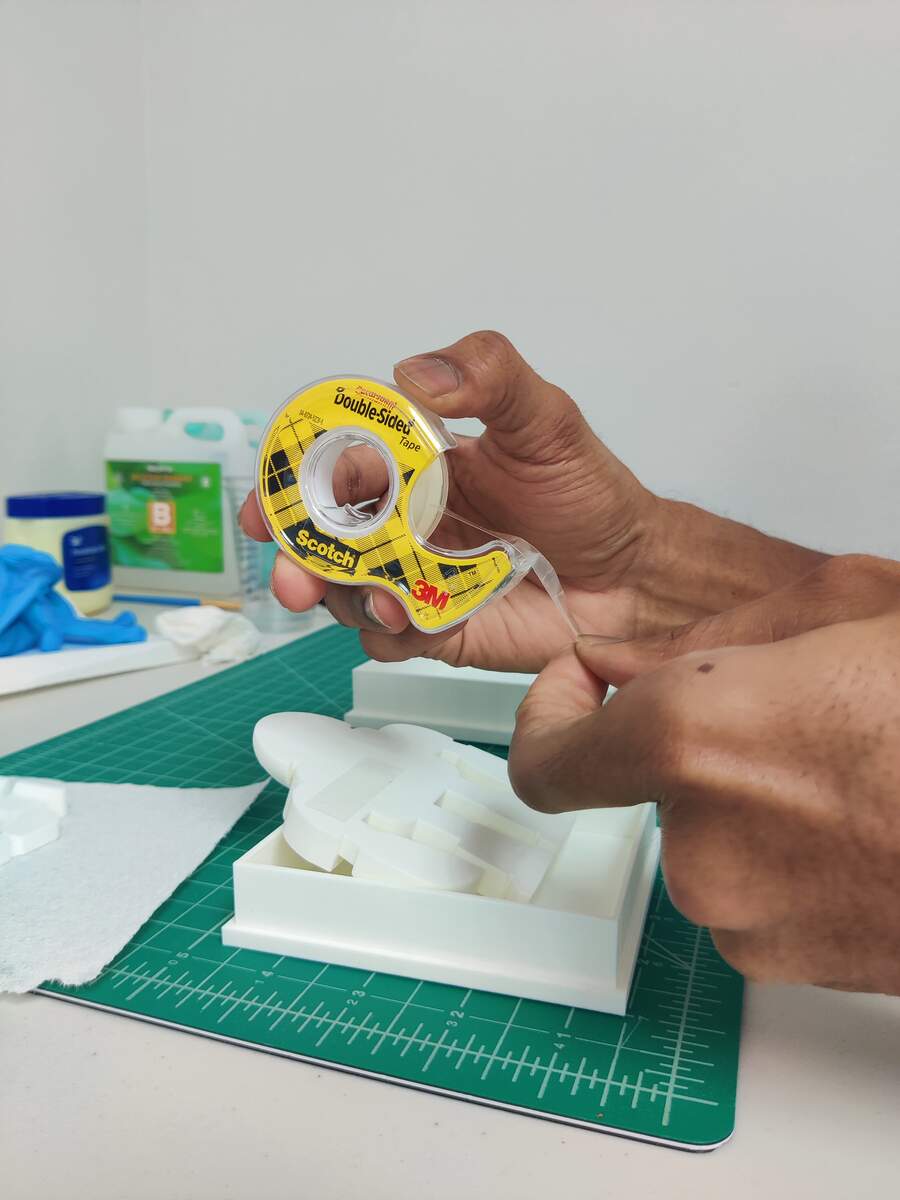
Double-sided Scotch tape is applied to the underside of the robot positive to anchor it firmly to the mold box floor. This prevents the positive from floating or shifting when the silicone is poured.
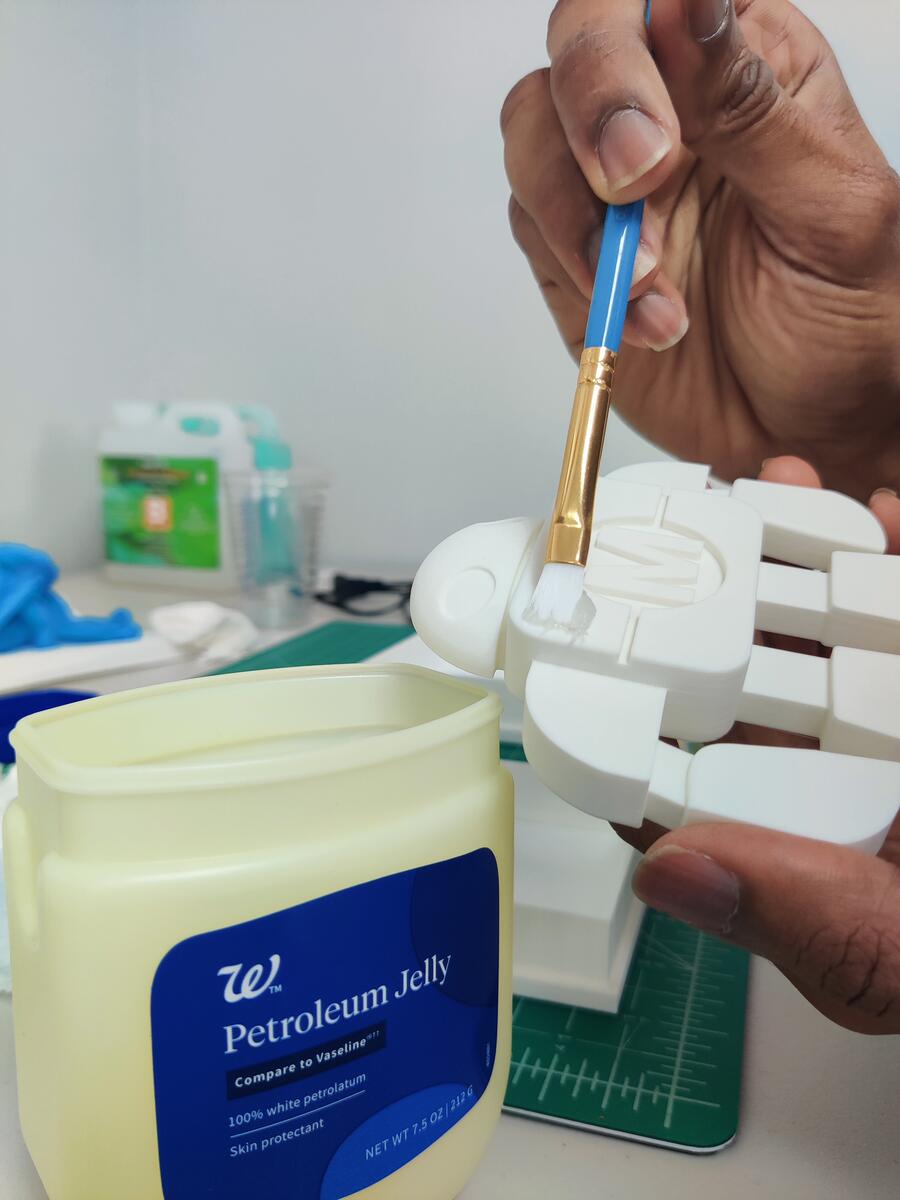
Petroleum jelly is brushed over every surface of the robot positive using a fine paintbrush. This release agent prevents the cured silicone from bonding to the 3D print, allowing clean demolding.
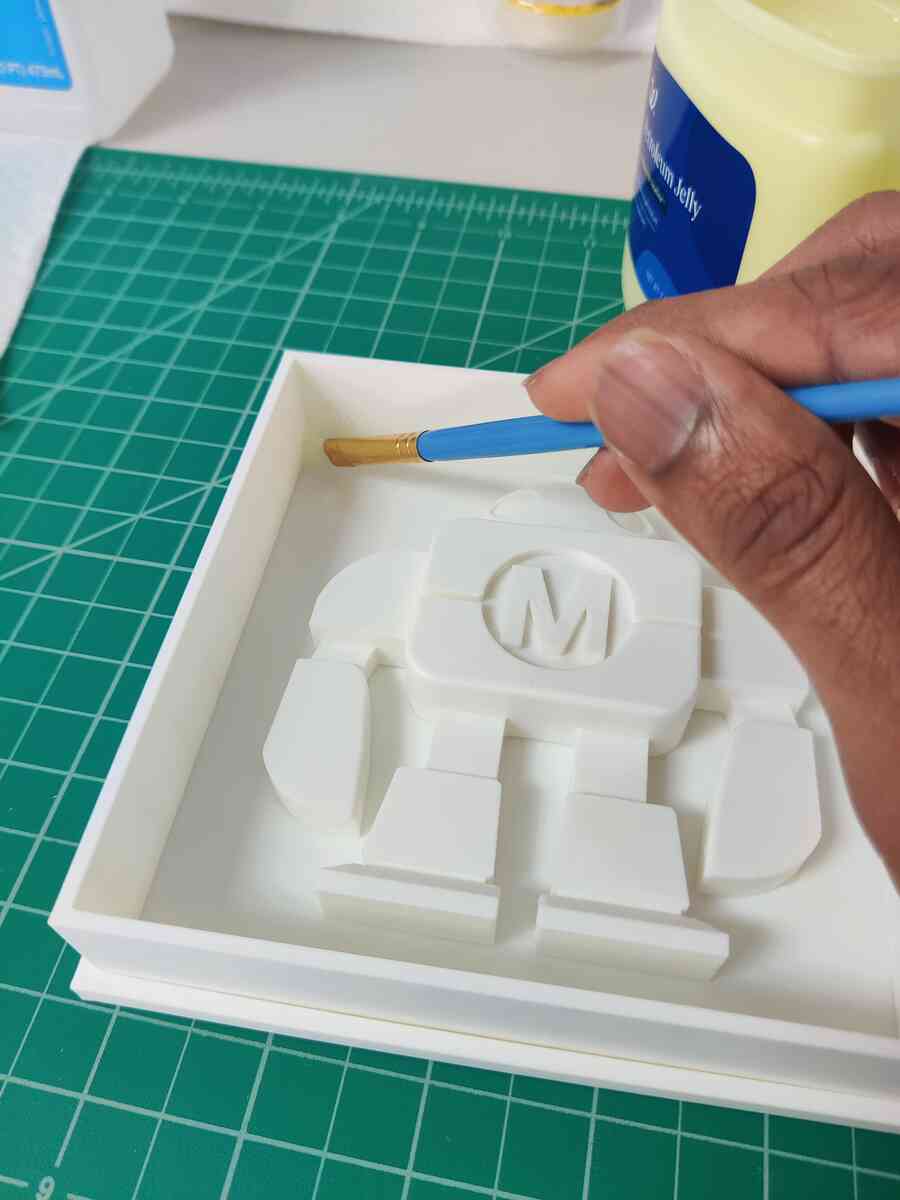
The petroleum jelly coat is continued inside the mold box, covering all interior walls and the floor around the positive. Full coverage ensures the cured silicone releases from every surface.
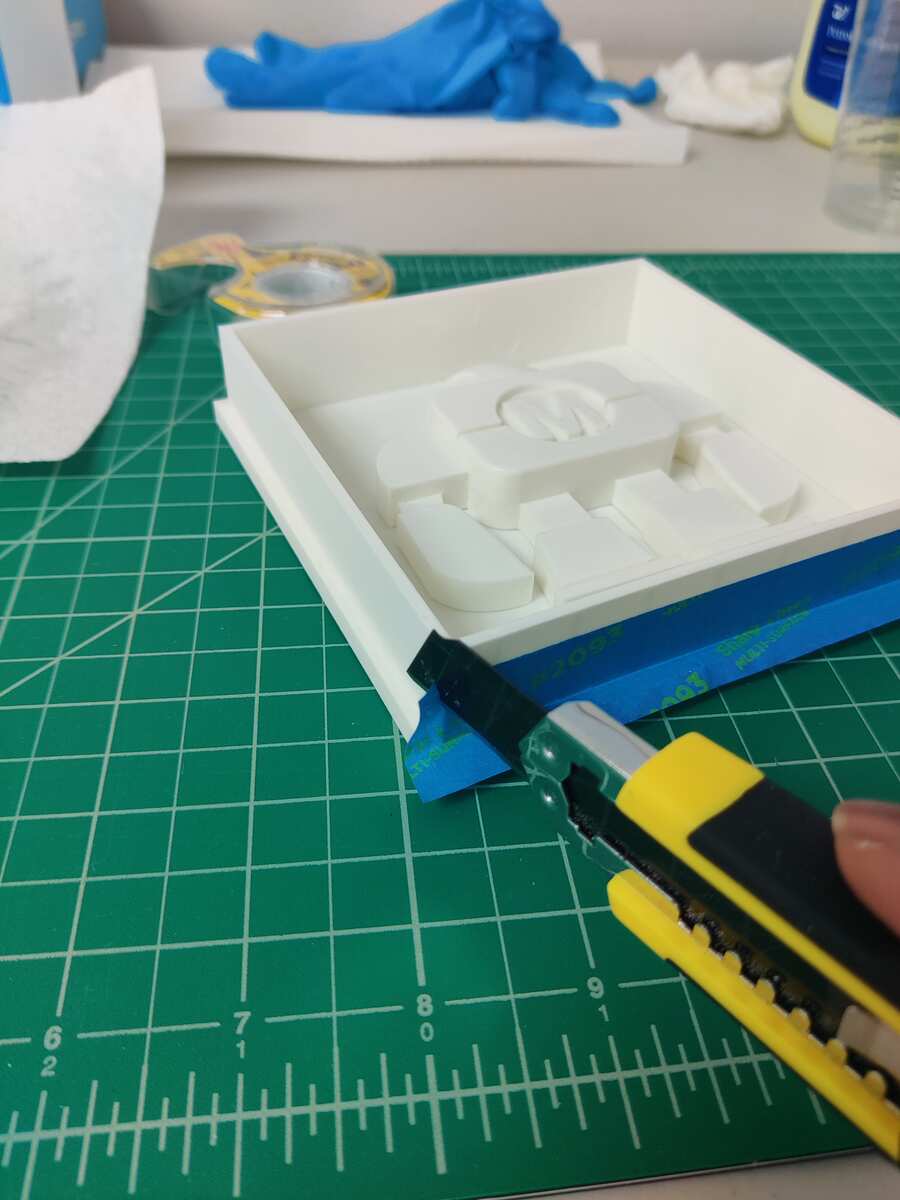
Blue painter's tape is applied around the joint between the box frame and base tray. A utility knife trims the tape flush so there are no gaps for the liquid silicone to seep through.
Both mold boxes are prepped and sealed with blue painter's tape around their bases. The robot positives are coated in release agent and taped down — ready to receive the silicone rubber.
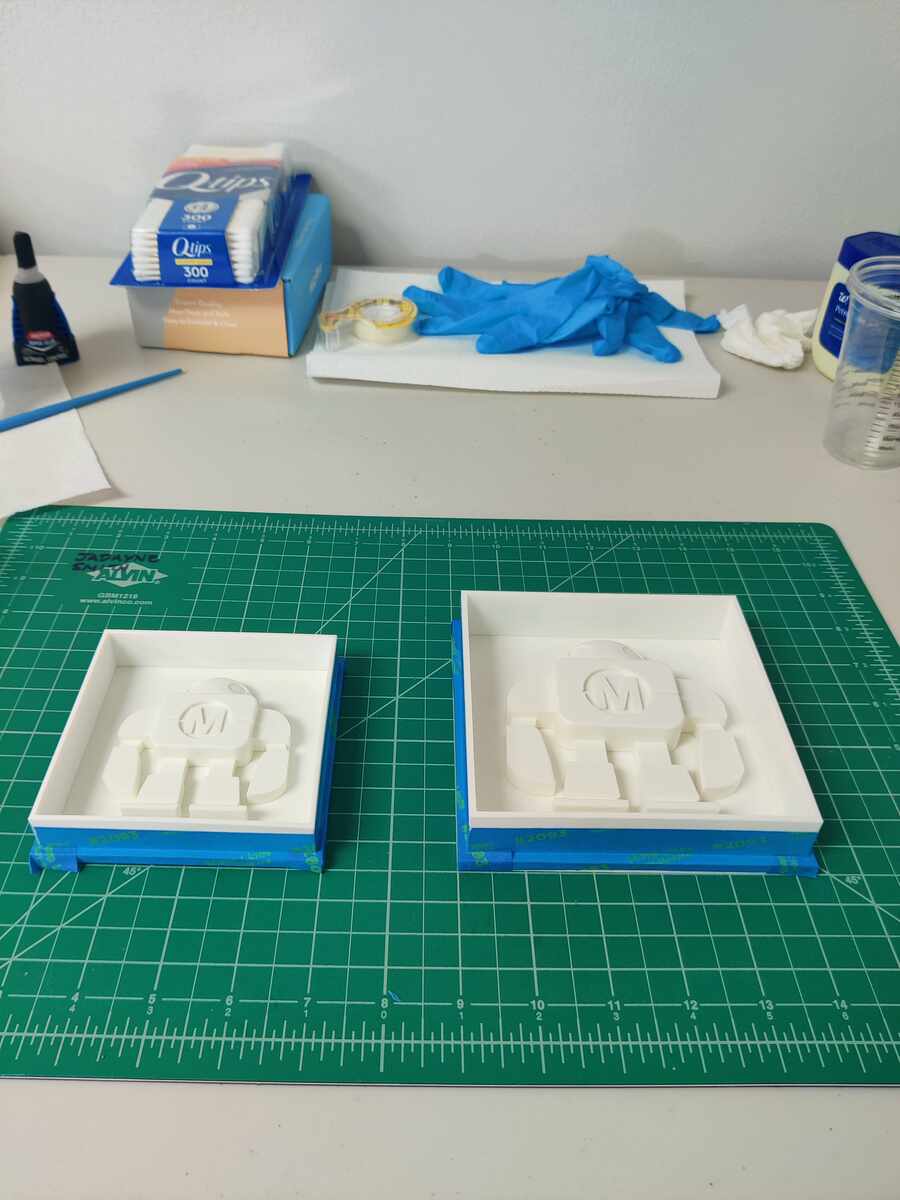
A top-down view of both mold boxes positioned on the cutting mat. The positives are centered, the tape seals look tight, and the workspace is clear for a controlled pour.
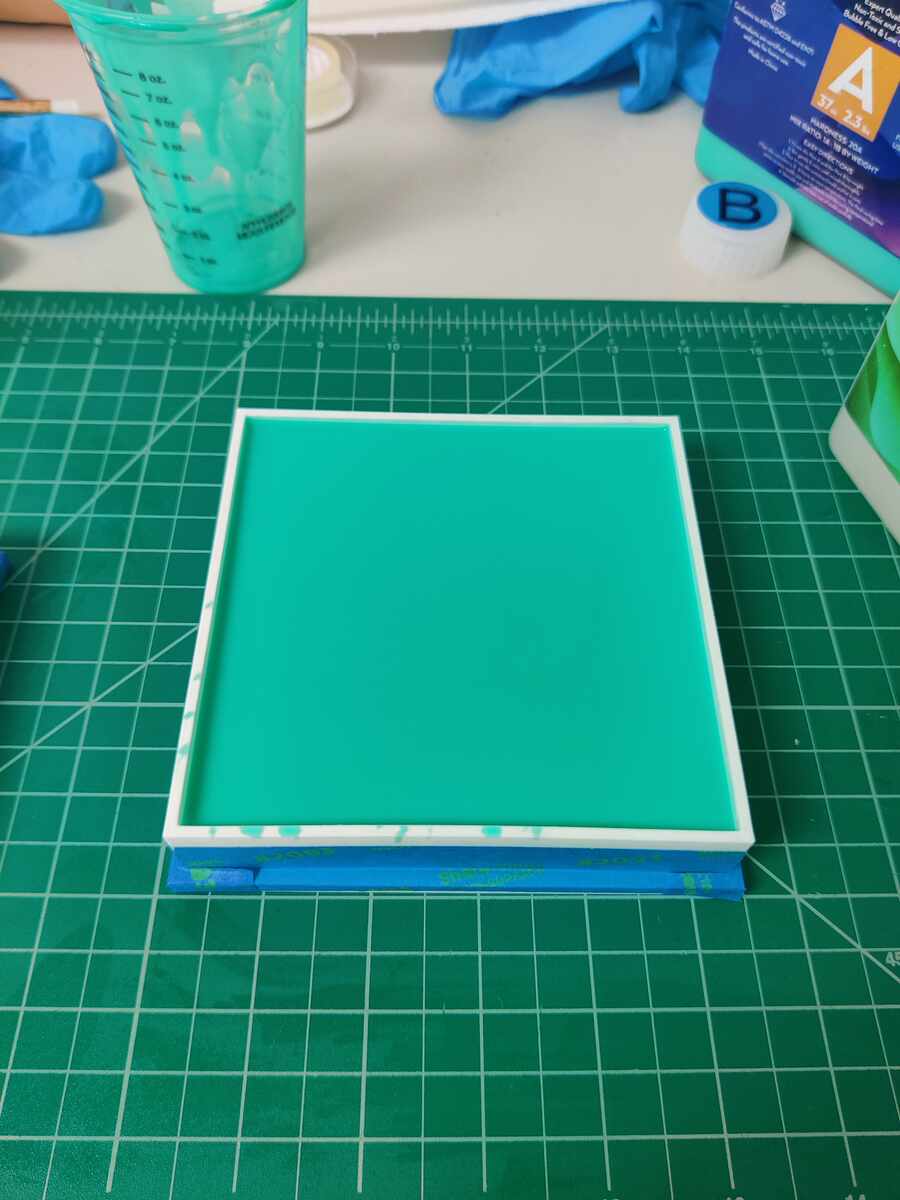
The mixed NicPro silicone rubber (Parts A and B combined) has been poured into the large mold box. The teal liquid completely covers the robot positive. The mold is left undisturbed to cure.
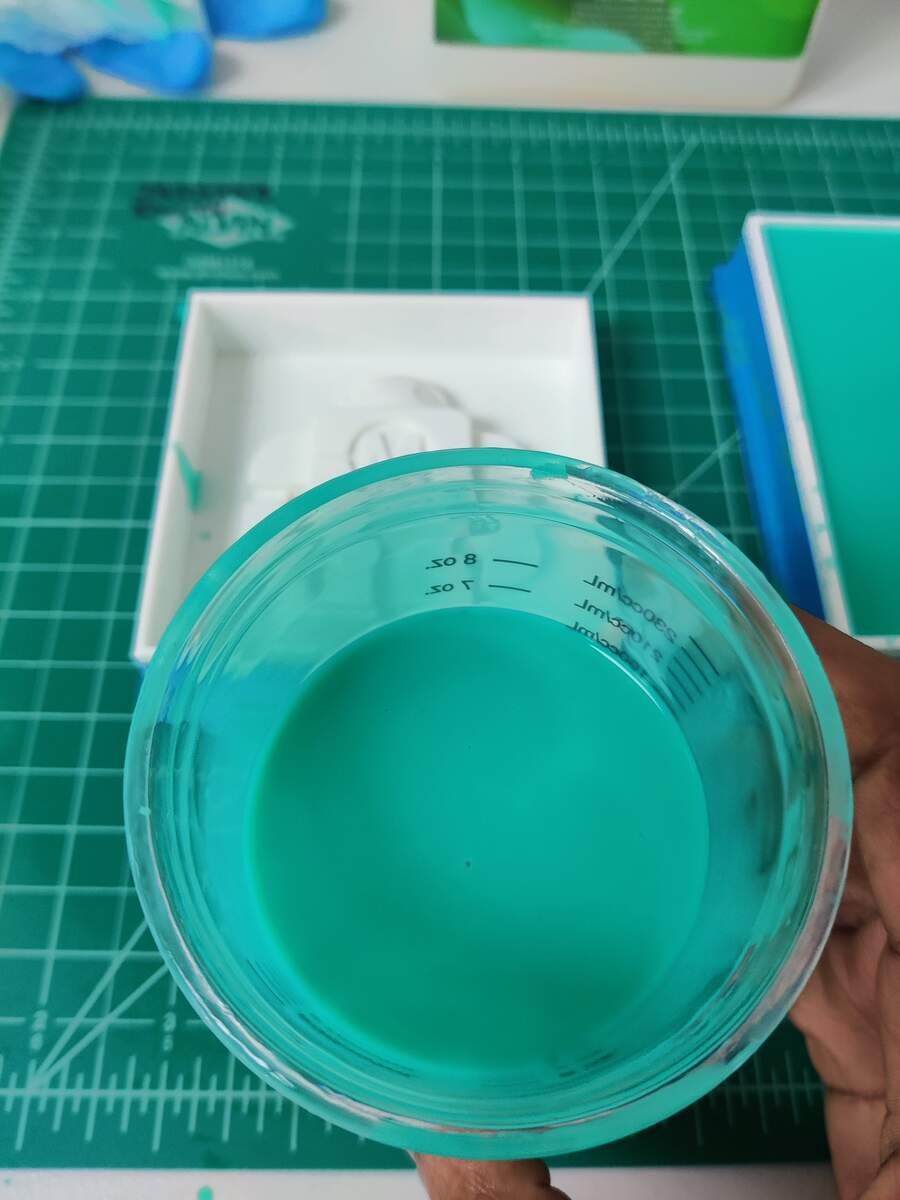
The combined Parts A and B in the mixing cup show the vibrant teal color of the NicPro silicone rubber after mixing. The cup is tilted over the mold box to begin the slow, steady pour.
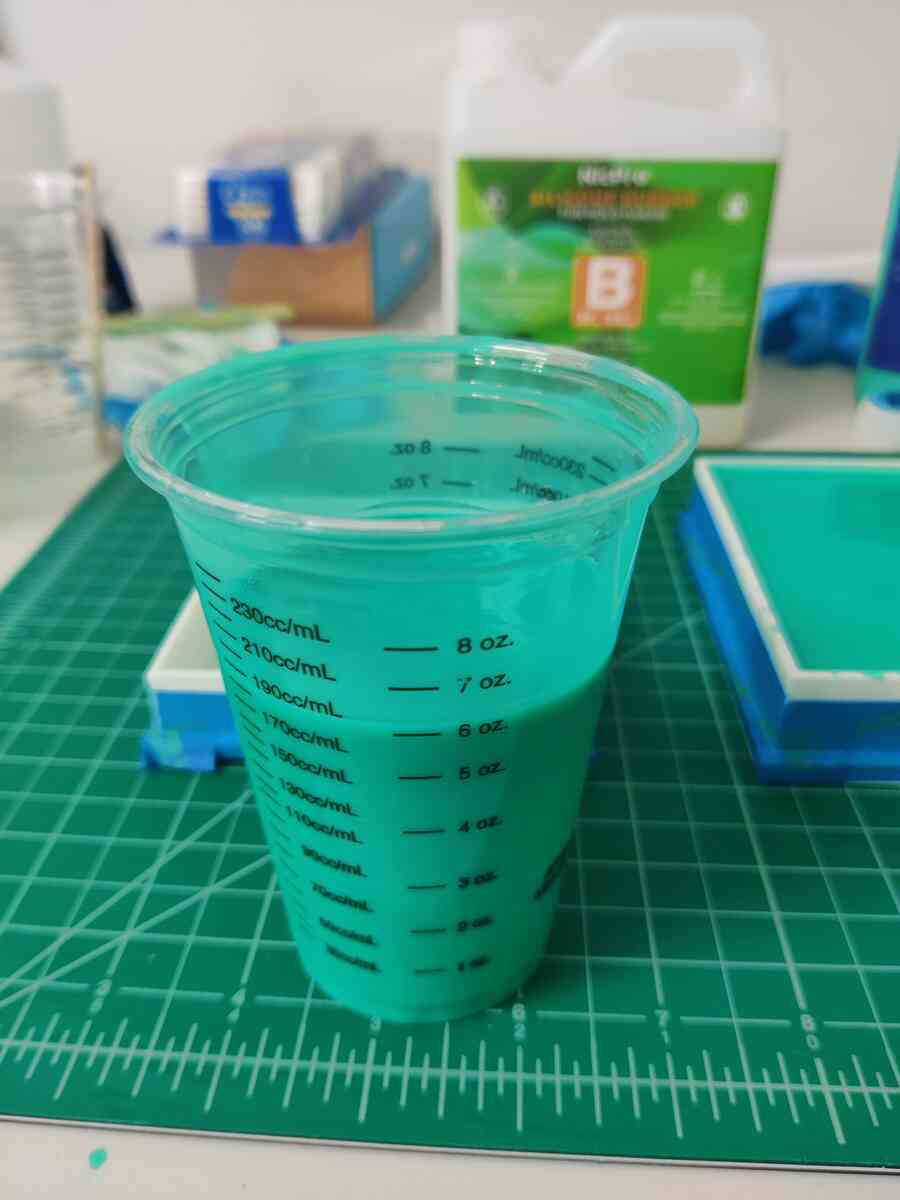
The full mixing cup holds approximately 6 oz of combined silicone. Getting the volume right before pouring ensures the positive is fully submerged with enough silicone thickness above it for mold durability.
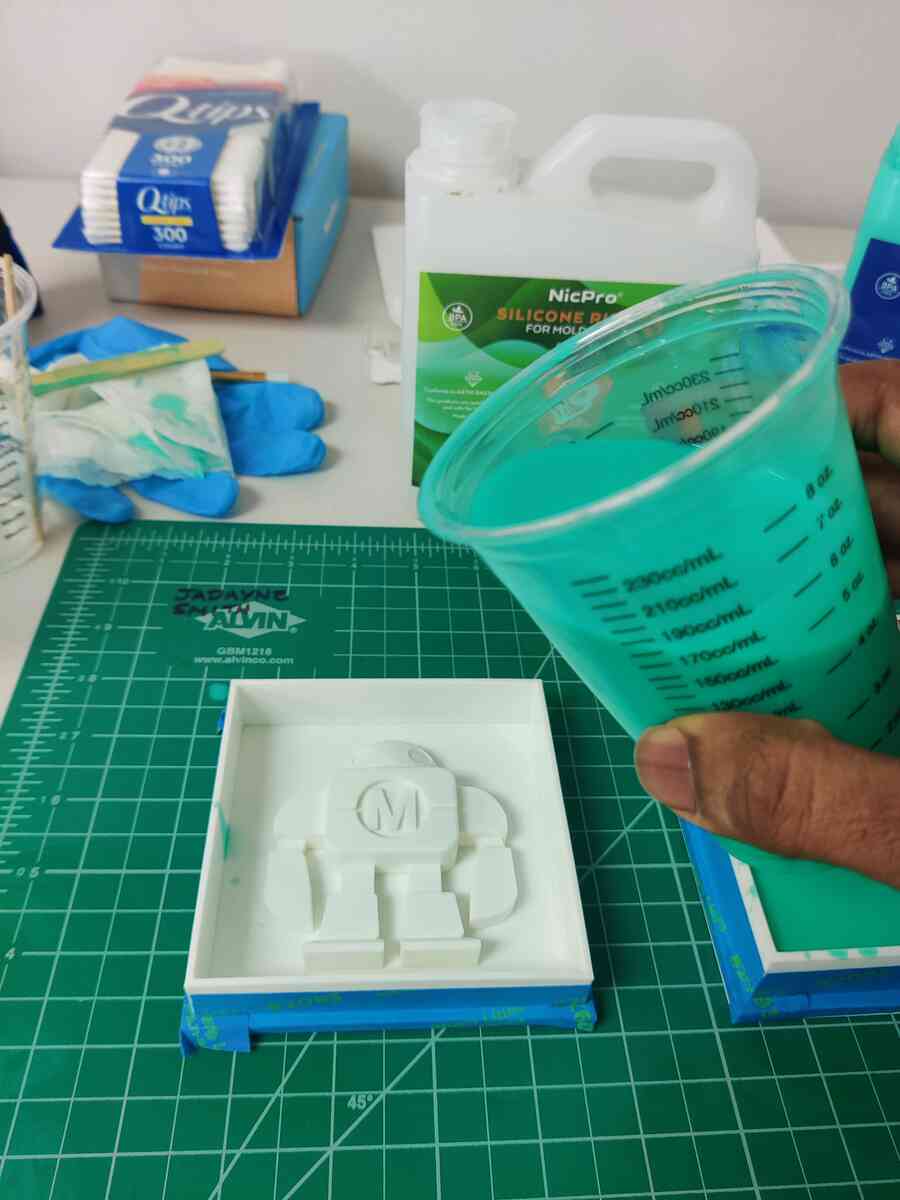
The mixed teal silicone is poured directly into the mold box over the robot positive. The pour is slow and from a height to help break up air bubbles as the material flows into the details of the robot shape.
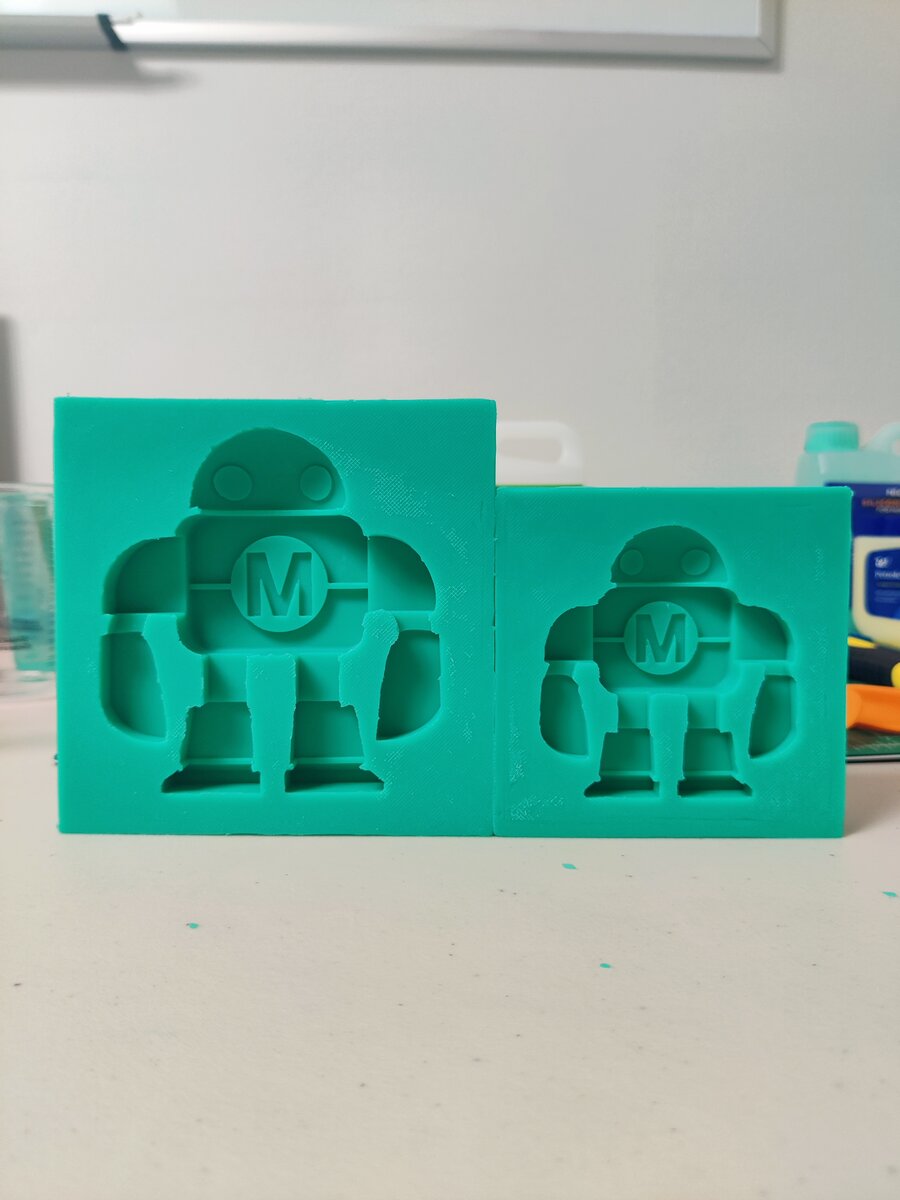
After curing, the silicone is removed from the 3D printed boxes. The two finished molds reveal clean, flexible robot cavities with sharp detail in the head, chest logo, arms, and legs.
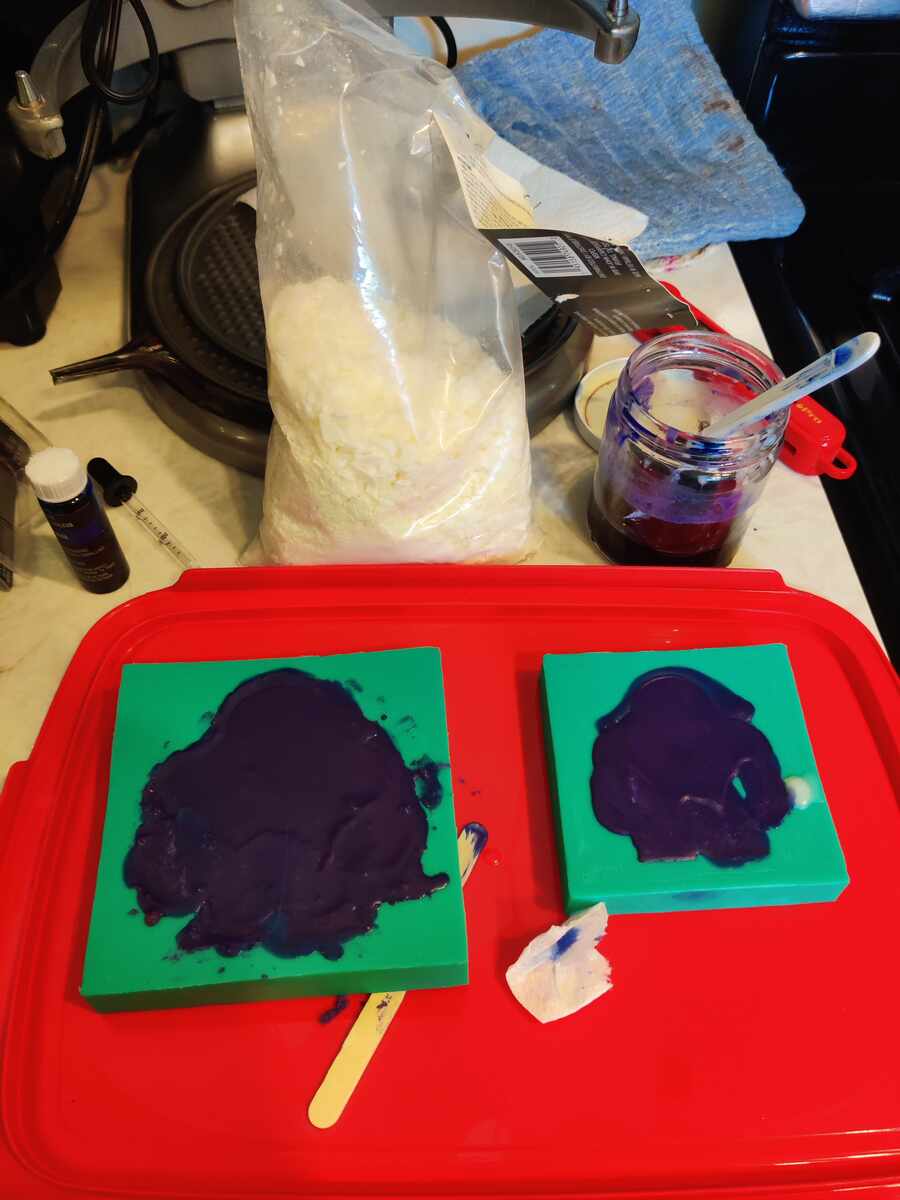
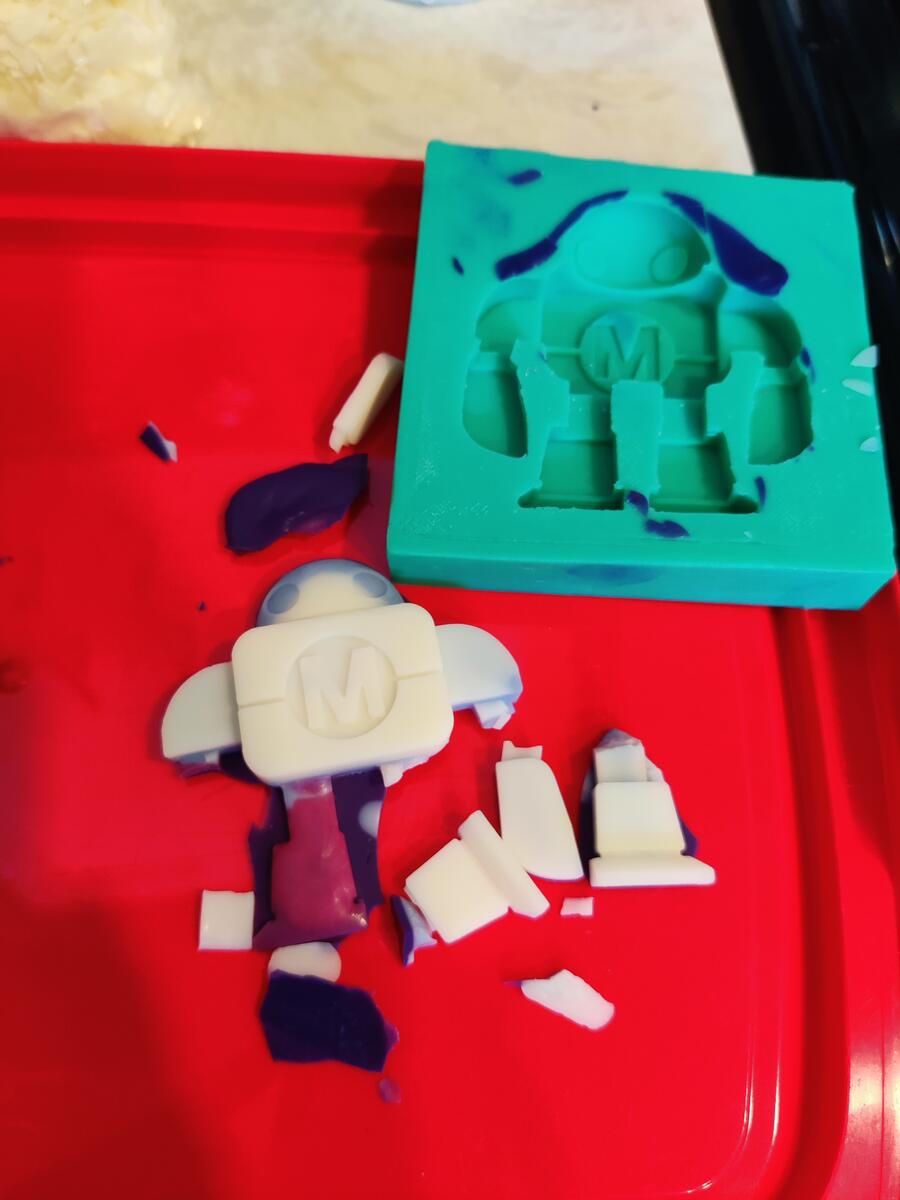
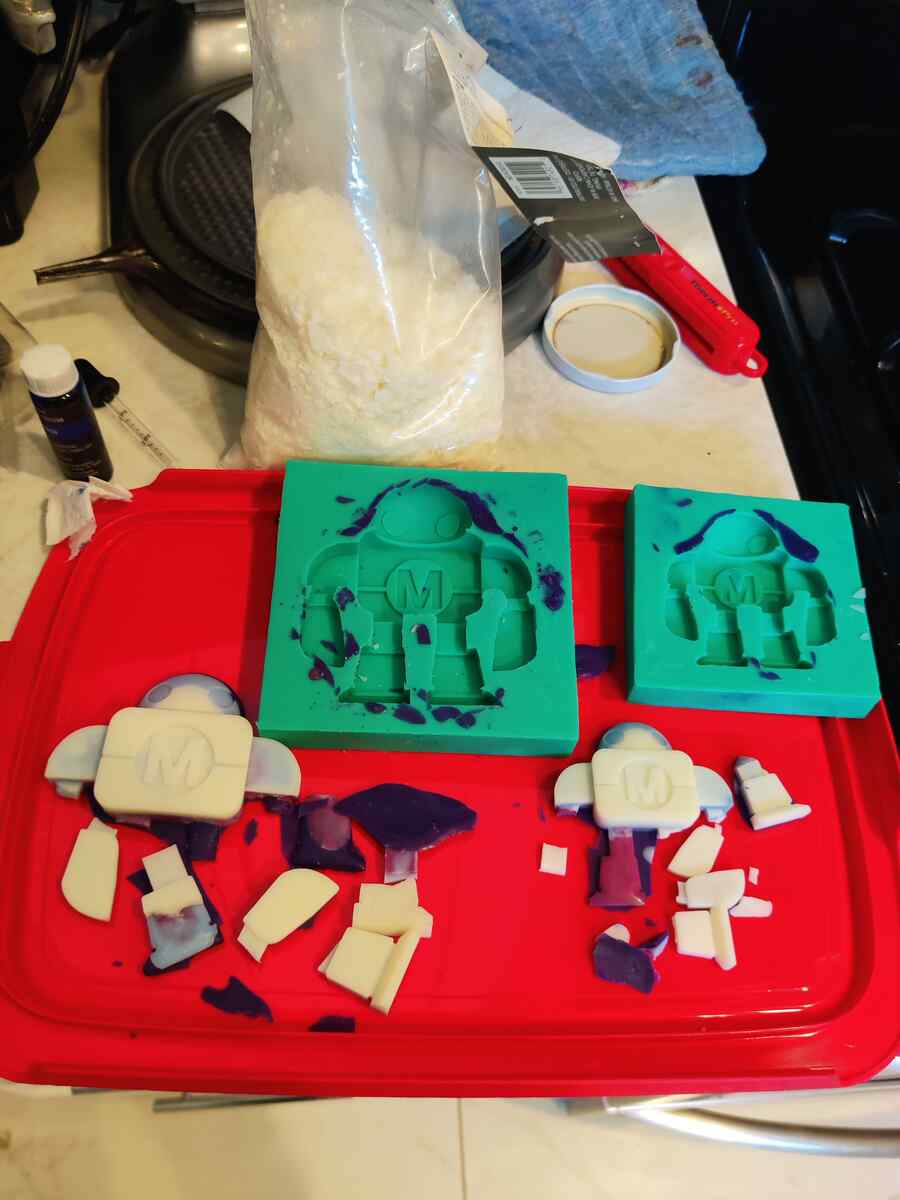
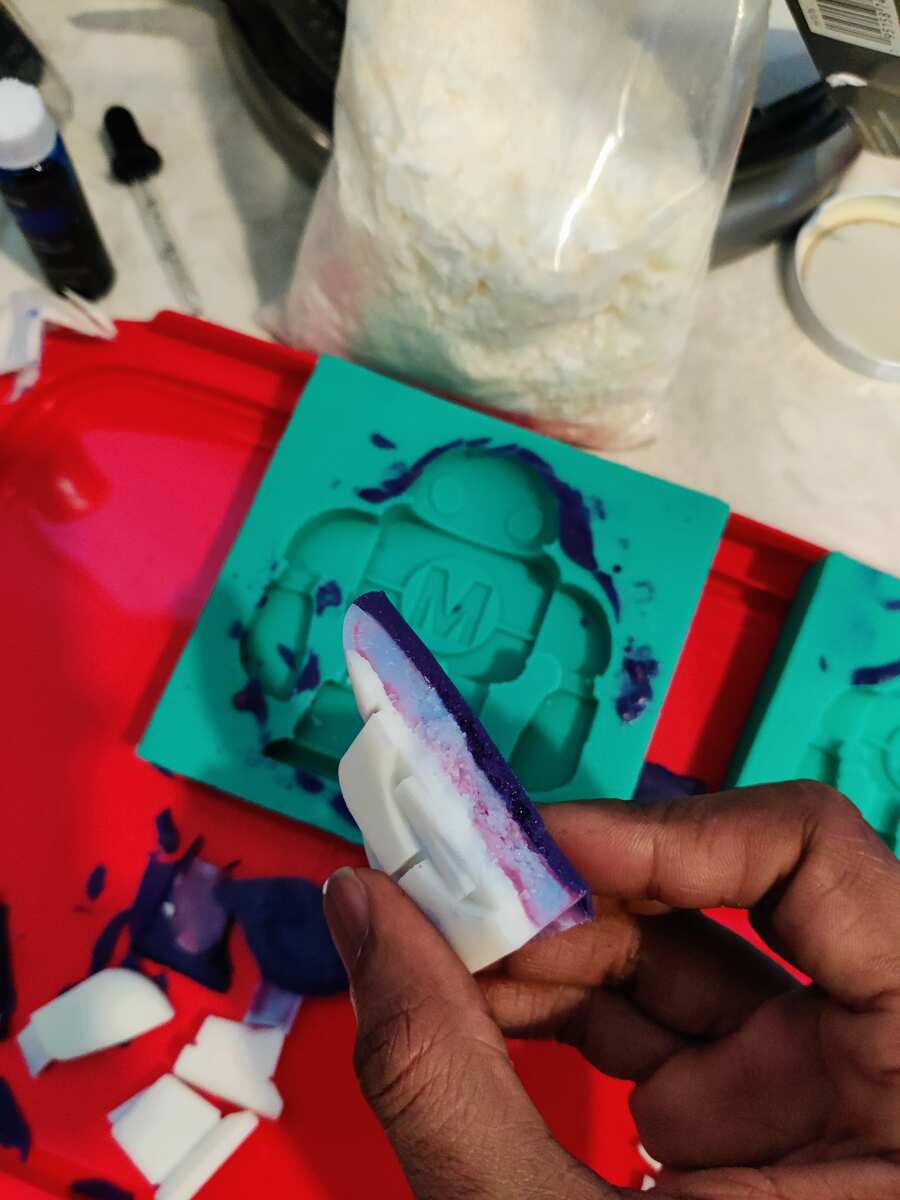
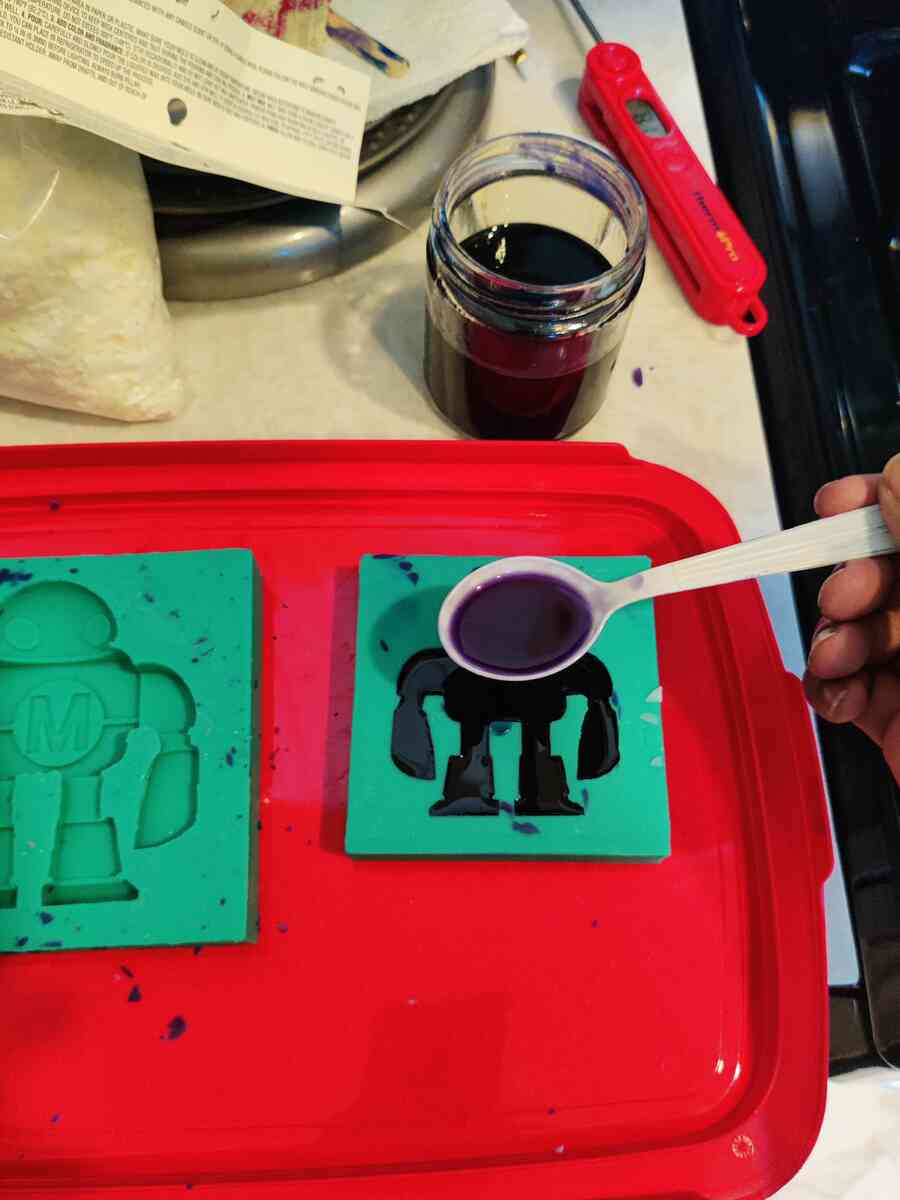
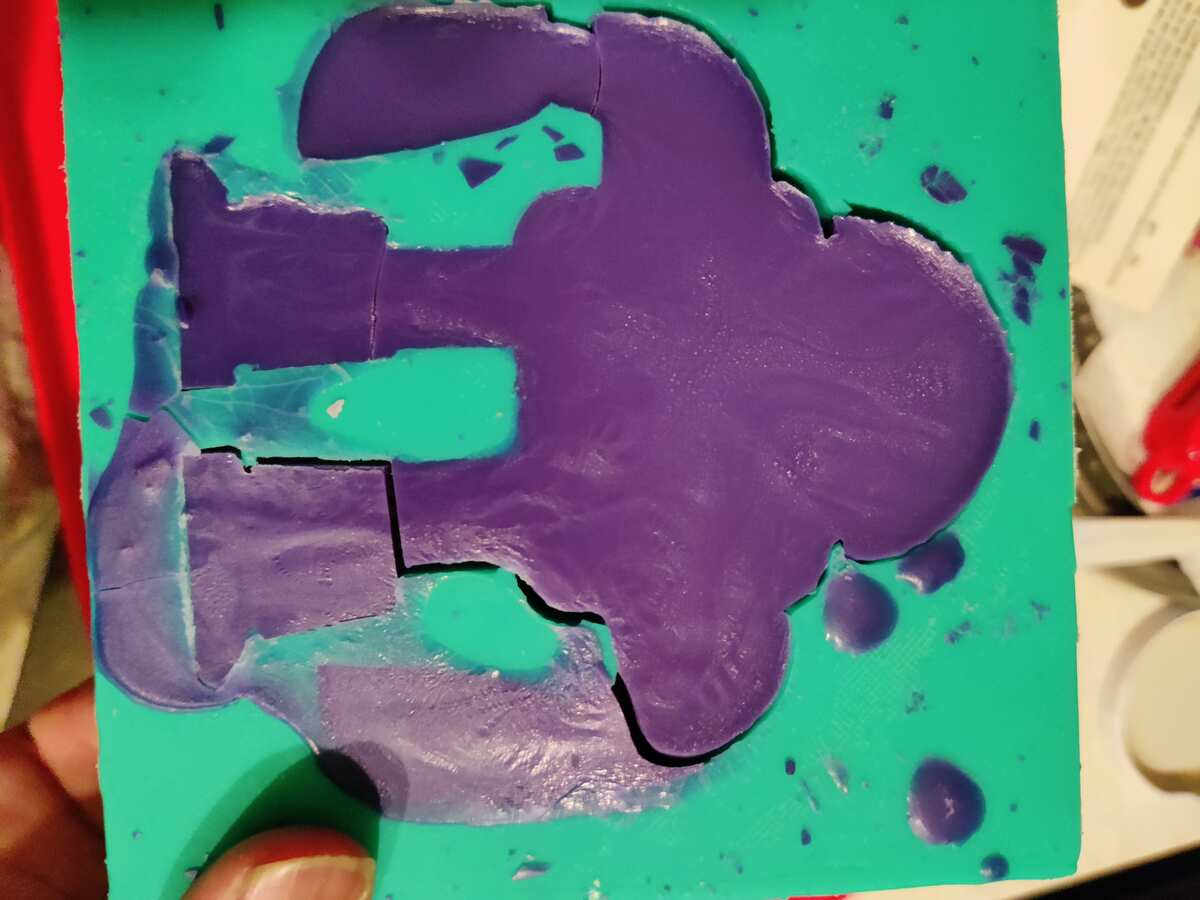
I melted soy wax and added candle dye and fragrance oil to see if my molds would work. After multiple attempts, I learned that wax does not like to be poured in layers on cold joints. I also found that my mold was causing the wax to break very easily. A few attempts in, I understood that the problem was that I had too many diferences in depth in my design. The legs and arms would need to be deeper with less dramatic joint when meeting the torso. The cast was smooth otherwise.
Final Comparison of Materials and Methods
I believe that each material is suitable for different applications, and the choice depends on the specific requirements of the project. That said, casting silicone was the easiest process, most forgiving and balanced quality and speed.
The downside to silicone is that it does not have a clean option for post processing. Concrete however, can be filled, sanded and finished after casting. This makes it better suited for a final, long lasting product. It is also a strong, durable composite material that can be used in structural and decorative applications. Concrete also has the most safety concerns which is why I worked outside in well ventilated areas and used PPE gear when working.
the soy wax had the fastest setting time and had a professional finish when cast in the silicone mold. the issue was that it was very brittle and had no resistance to cracking. This makes its applications limited.