Week 01
Principles and Practices/ Project Management
Principles and Practices - Assignment:
°Plan and sketch a potential final project
Project Management - Assignment:
°Read, sign the student/instructor/lab agreements,and commit to your repos
°Work through a git tutorial
°Build a personal site in the class archive describing you and your final project
Have you answered these questions?
- I. Linked to the group assignment page. ✅
- II.Documented how you designed your object and made your CAM-toolpath✅
- III.Checked your board can be fabricated ✅
- IV. Documented how you milled and assembled your final product (including setting up the machine, fixturing, feeds, speeds etc.). ✅
- V. Described problems and how you fixed them ✅
- VI.Included your design files and 'hero shot' of your final product✅
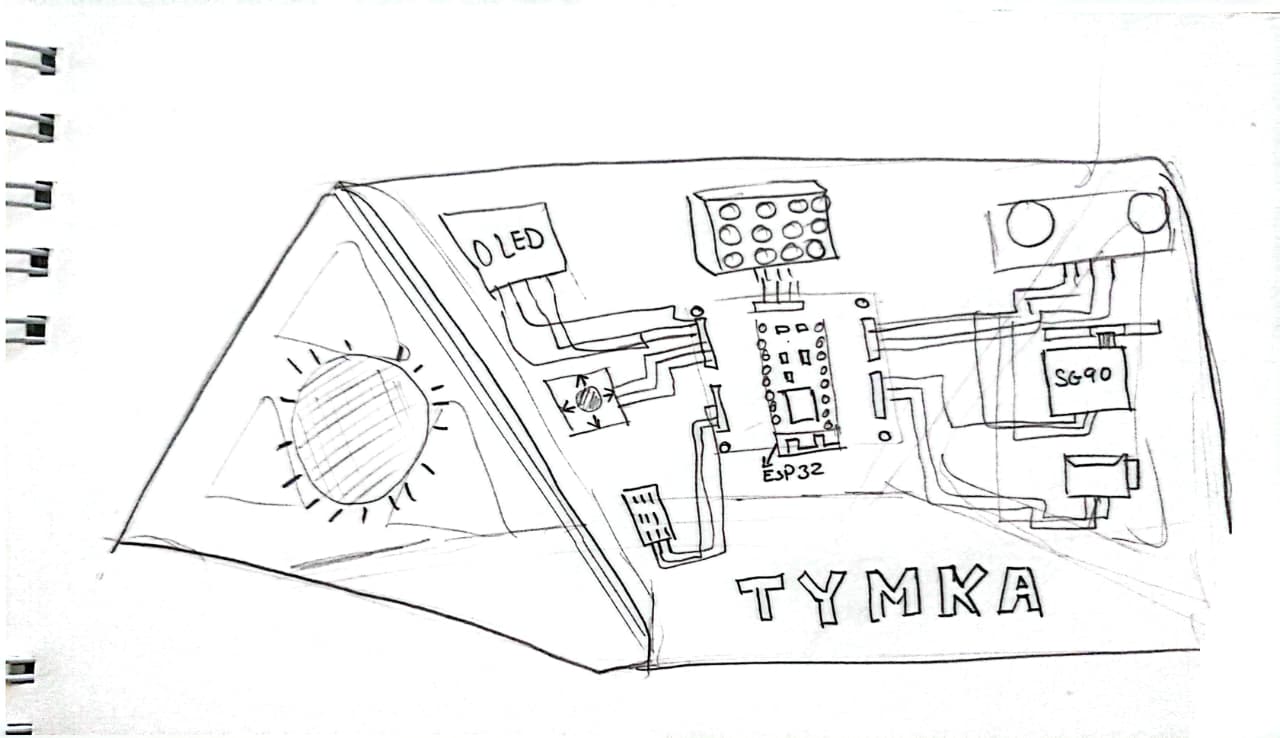
Sketch of my final project
The TYMKA (Thank You Mama Katty) training kit is a comprehensive integration of the Fab Academy curriculum into a single modular ecosystem. The project begins with Week 02 (CAD) for design and Week 03 (Laser Cutting) for the 5mm acrylic plate engraved with data flow diagrams. The structural support is built during Week 07 (CNC Machining) using press-fit wooden joints. For the brain, instead of commercial boards, a custom Fab-ESP32 is developed through Week 06 (Electronics Design) and Week 08 (Electronics Production) using high-precision milling. The interconnections utilize Week 16 (Wildcard) through conductive vinyl paths that make the circuitry visible and intuitive for beginners
Input and output components like joysticks, buttons, and OLED screens are managed through Week 09 (Input Devices) and Week 10 (Output Devices), all housed in robust, Week 05 (3D Printed) enclosures with magnetic connectors. The system's intelligence is handled in Week 04 (Embedded Programming), while Week 11 (Networking) enables Bluetooth/Wi-Fi communication. The final experience culminates in Week 14 (Interface Programming), where a real-time dashboard visualizes the hardware's state. By Week 15 (System Integration) and the Final Project, TYMKA stands as a professional, student-proof tool that transforms complex electronics into an accessible, open-source learning journey.
>
Principles and Practices:
This project aims to develop an intelligent pill dispenser for visually impaired users that uses computer vision, voice interaction, and automated dispensing to ensure safe and correct medication intake.
The development process includes research and system design, AI implementation, electronic and mechanical prototyping, software integration, and final testing. Each phase contributes to building a reliable, accessible, and functional prototype for Fab Academy. You can see the details of the project Here,
Project Management
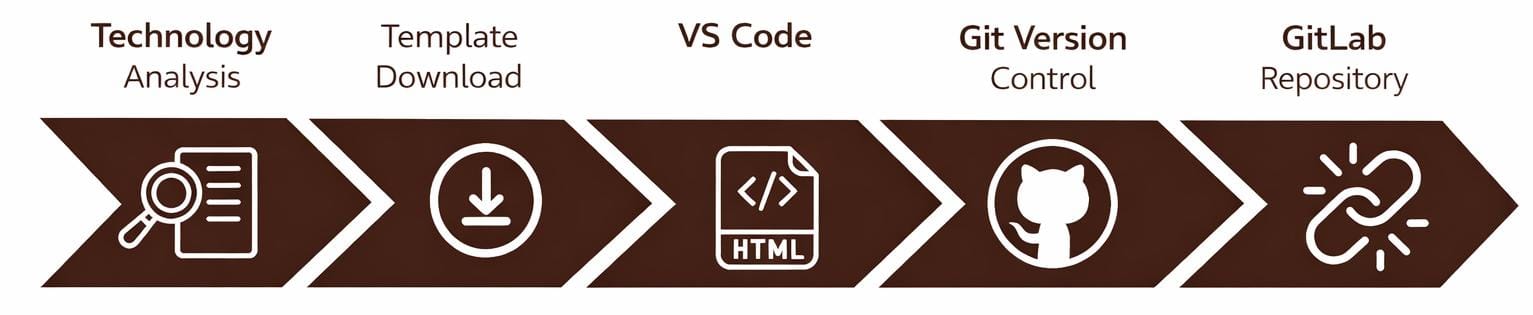
1. Technology Analysis for Website Development
For the development of my personal Fab Academy website, I analyzed the main tools needed for documentation, version control, and online publishing. I explored how static websites are built using HTML and CSS, learning how content is structured and how styles define the visual layout. This helped me understand how simple files can become a functional website.
I also worked with Git, GitLab, Visual Studio Code, and Git Bash to manage my files and track changes. At first it was challenging, but step by step I learned how local files connect to the online repository, how to commit updates, and how to publish my work. This process helped me understand how modern digital documentation workflows operate.
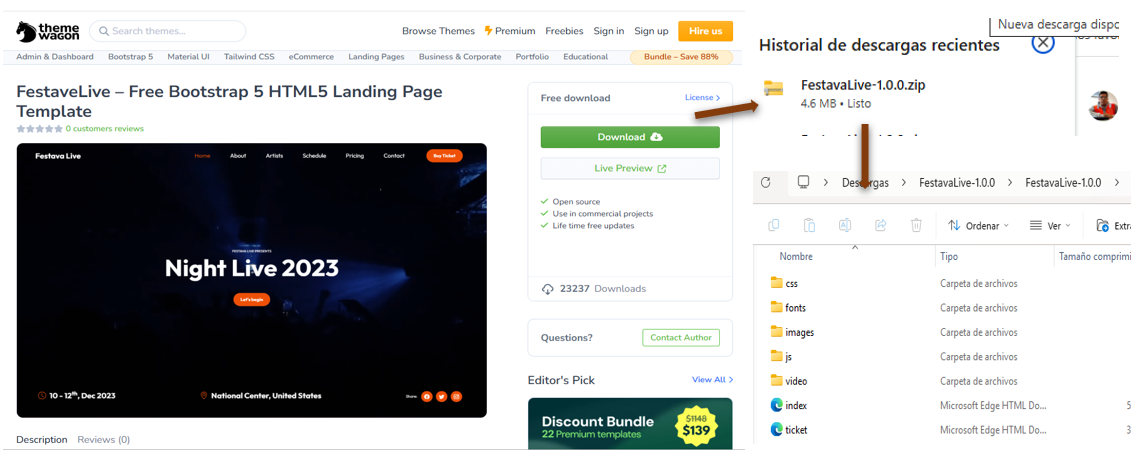
2. Template Download
To download a website template, I searched for free options online and also followed the recommendations of my instructor Evelyn Cuadrado , who suggested platforms such as ThemeWagon, Free Templates, and WordPress.
After reviewing several designs, I chose a template that was functional, easy to customize, and compatible with Visual Studio Code. Finally, I selected a template from HTML5 UP, since it provides clean and well-structured HTML files that can be easily adapted to my project.
3. Development Environment
I chose to use Visual Studio Code as my development environment for two main reasons. First, it was recommended by my instructors, Evelyn and Jhonatan . Second, after reviewing previous Fab Academy students’ assignments, I noticed that many of them also used this tool to develop their projects.
After that, I downloaded and installed Visual Studio Code , which allows me to easily edit, organize, and manage the files for my website.
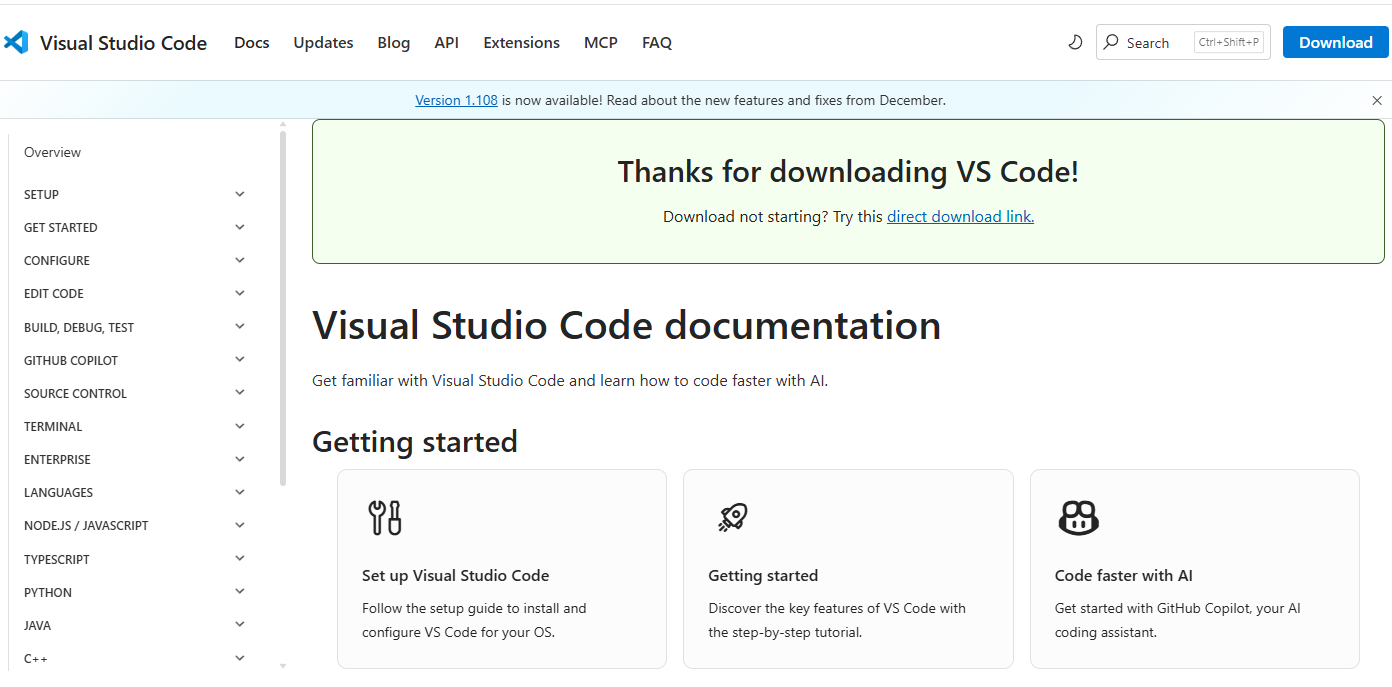
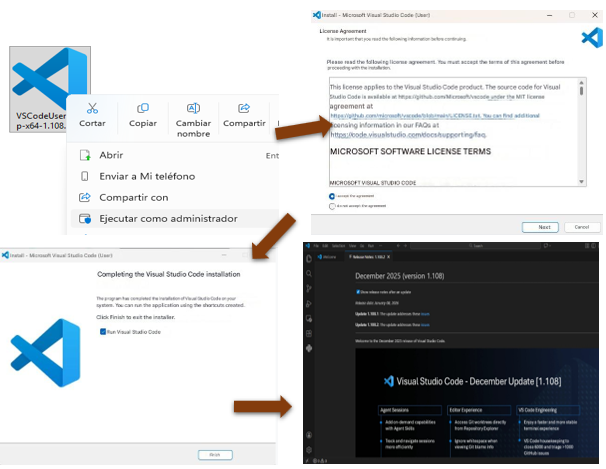
Visual Studio Code Installation
I downloaded Visual Studio Code from the official website and installed it on my computer. The installation process was simple and fast. After opening the program, I configured it to start working on my website project, using it to edit and manage my files.
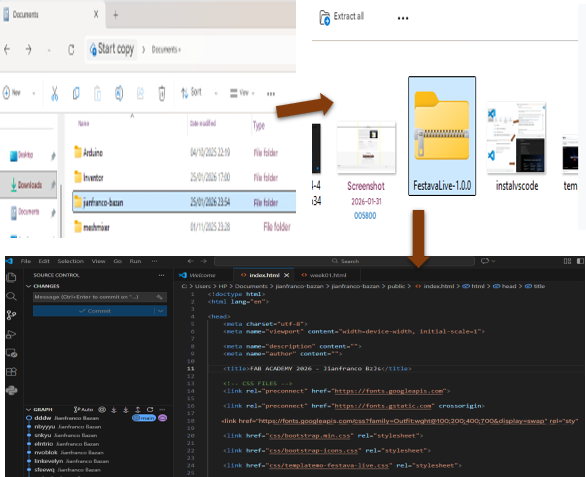
Template Setup
After downloading the Festava Live template from ThemeWagon , the folder named “Fab Academy 2025” was opened in Visual Studio Code to start editing and customizing the project files.
Once the template and the development environment were ready, I began developing the website using code. I reviewed the HTML and CSS structure to understand how the sections were organized and then created a basic layout to efficiently adapt the content for my Fab Academy project.
Template Customization
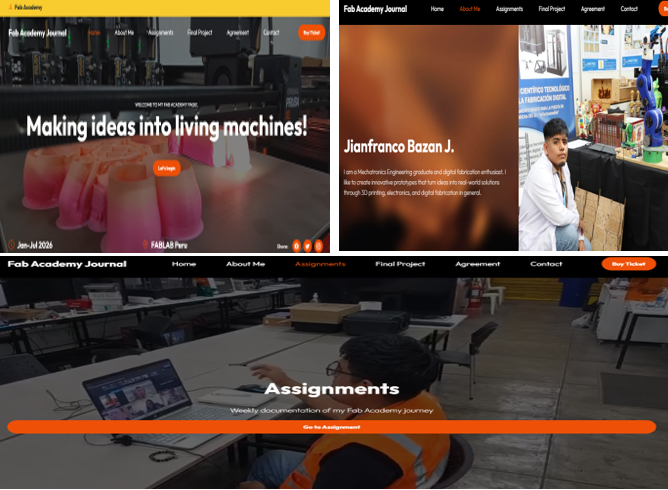
Once I understood the basic structure of the HTML and CSS files, I was able to start working more smoothly on the website. Using the Festava Live template as a base, I customized the design by changing colors, adjusting column and row layouts, and modifying different sections to match the style of my Fab Academy page.
This process allowed me to give the website a more personal and professional look, adapting it to my identity as a Mechatronics Engineering graduate and digital fabrication enthusiast.
4. Version Control System
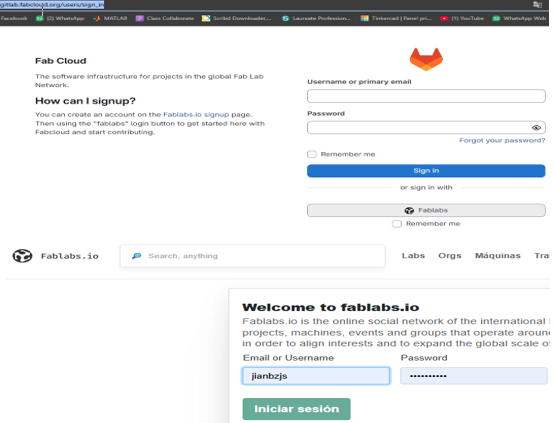
As the next step, I created my account on the Fab Academy platform to access the weekly assignments, review previous students’ projects, and consult tutorials and documentation related to digital fabrication.
To connect with the GitLab repository system, I used my FabLabs.io account, which allowed me to link my profile and manage my project documentation online. This integration helps me organize my work and share my progress throughout the Fab Academy program.
Git Installation
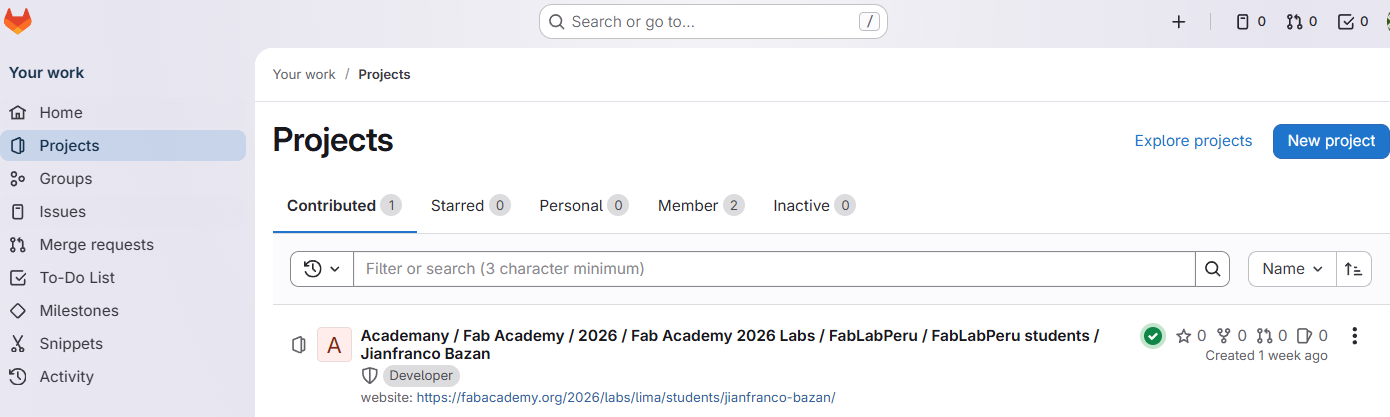
After accessing my GitLab account, I noticed that my repository was empty, which meant I needed a tool to upload and manage my project files. This led me to install Git, a version control system widely used in software and web development.
Git allows me to track changes, manage different versions of my files, and synchronize my local project folder with the Fab Academy GitLab repository. Once Git was installed, I was able to begin the cloning process and prepare my environment for uploading and documenting my assignments throughout the Fab Academy program.
Download of Git
To install Git, I visited the official Git website and downloaded the version compatible with my operating system. The installation process was simple and did not require advanced configuration.
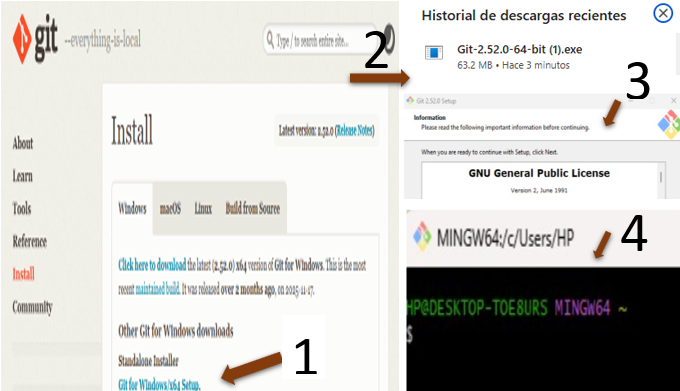
After completing the installation, I verified that Git was working correctly by opening the terminal and checking the version. With Git properly installed, I was ready to connect my local project files with the Fab Academy GitLab repository.
5. Connect to the Repository
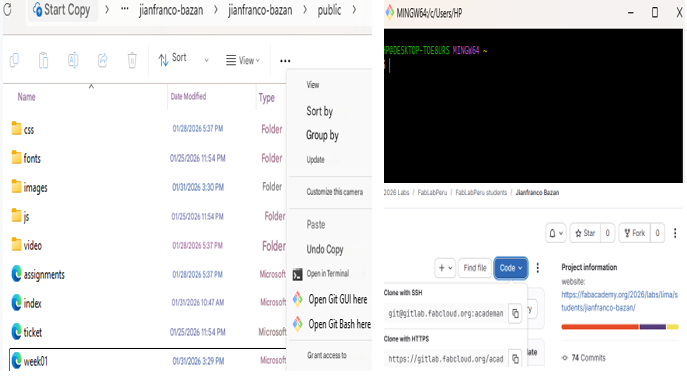
Once Git was installed, I opened the folder where my website project is located and accessed it using Visual Studio Code . Then, I right-clicked inside the folder and selected the option “Open Git Bash Here”, which opened the command line interface.
From there, I started the cloning process to connect my local project folder with the online Fab Academy GitLab repository. This step allowed me to synchronize my files and prepare them for uploading and version control.
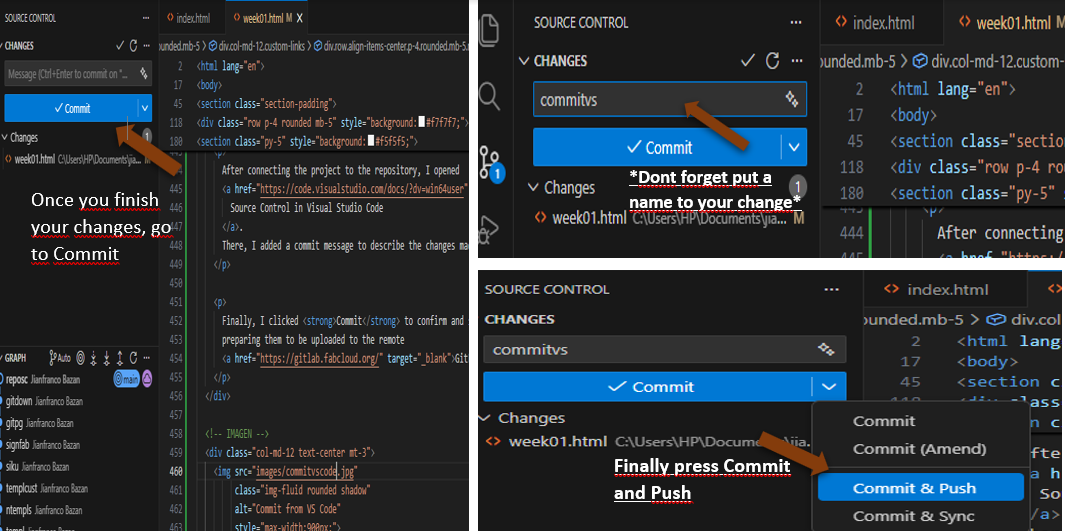
After connecting the project to the repository, I opened Source Control in Visual Studio Code . There, I added a commit message to describe the changes made to the files.
Finally, I clicked Commit to confirm and save the changes locally, preparing them to be uploaded to the remote GitLab repository.
During the process of linking my website template to Git Bash, I faced a problem that prevented my changes from being updated in the GitLab repository. The main issue was that I had not added some required commands in Git Bash to correctly link the local folder with the online repository. In addition, without realizing it, I had deleted some files from my GitLab repository, which caused the changes made in Visual Studio Code to not appear in the online link.
To solve this problem, I contacted my instructor Evelyn Cuadrado , and we reviewed the issue together. Since we could not find a similar case in previous projects, we decided to ask Jhonatan for help. Thanks to his experience, he provided me with the correct Git Bash commands that I needed to use.
After applying these commands, the connection worked properly, and I was finally able to edit my project and update my repository without any issues.
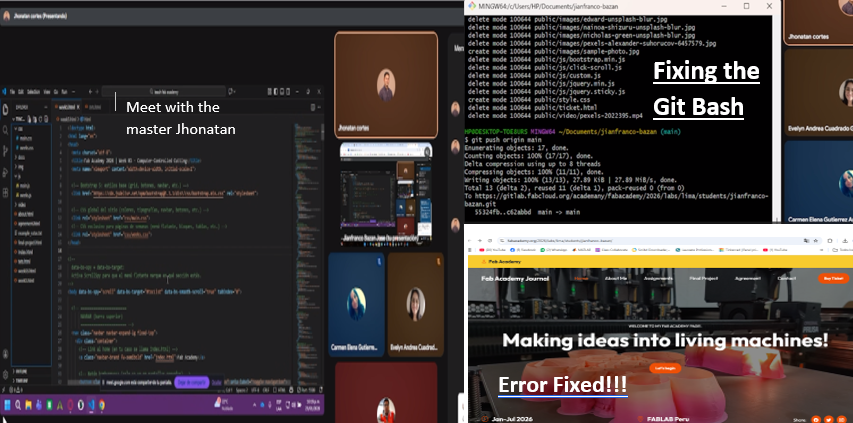
Once the problem was solved, I was finally able to correctly visualize my website on my Fab Academy page. Now, every time I make a change in Visual Studio Code and use Commit and Push, the updates are reflected automatically in my GitLab repository and online page.
This confirmed that the connection between my local files and the Fab Academy platform is now working properly, allowing me to document my work and progress without issues.

Reflections
Week 01 was challenging at the beginning, especially because it was my first time working with Git, Visual Studio Code, and a web template at this level. At first, many things were confusing, but step by step I started to understand how everything connects.
Using a template helped me move forward faster. I customized colors, fonts, and layout, and with the help of ChatGPT I learned how to make my images responsive. Git was one of the hardest parts, but through practice and mistakes I learned how to upload and update my files correctly.
Even though it was not an easy week, it helped me build a strong foundation and gave me more confidence to continue with my final project.
Finally, I will work on optimizing my vector files to ensure clean and accurate cuts. Moving from screen to physical fabrication will be a big challenge, but also a key step to validate that my design works not only digitally, but in the real world.