WEEK 01
Principles and Practices (part 1 of 2)
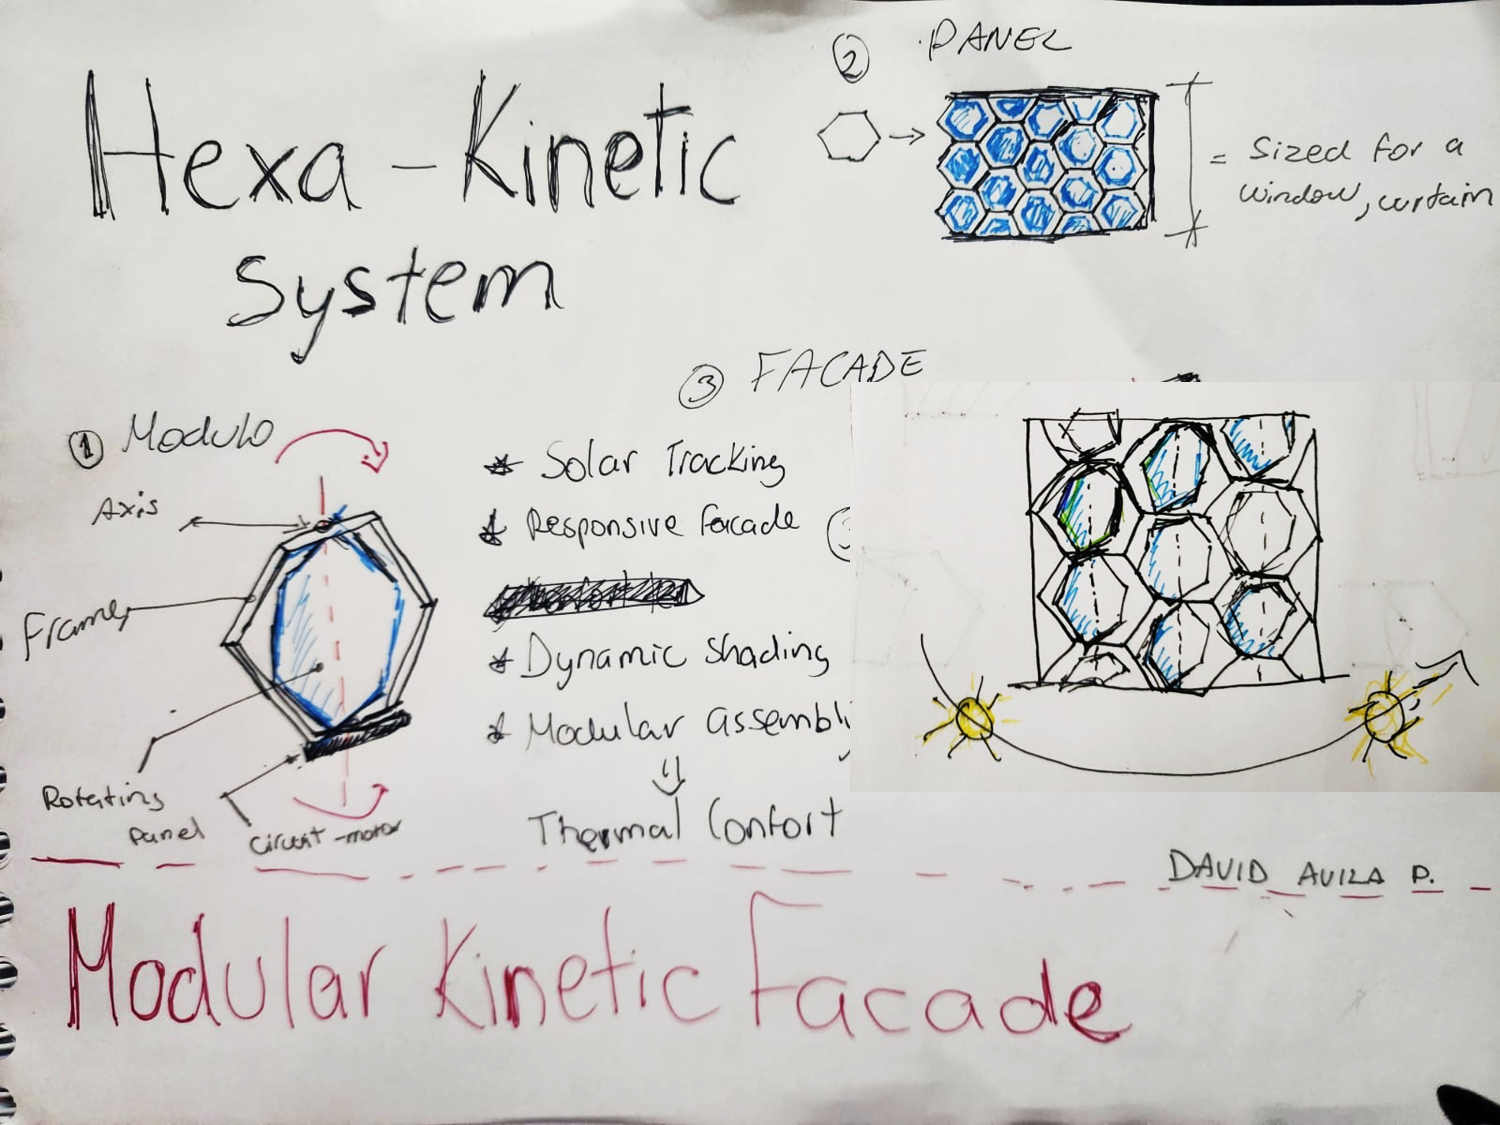
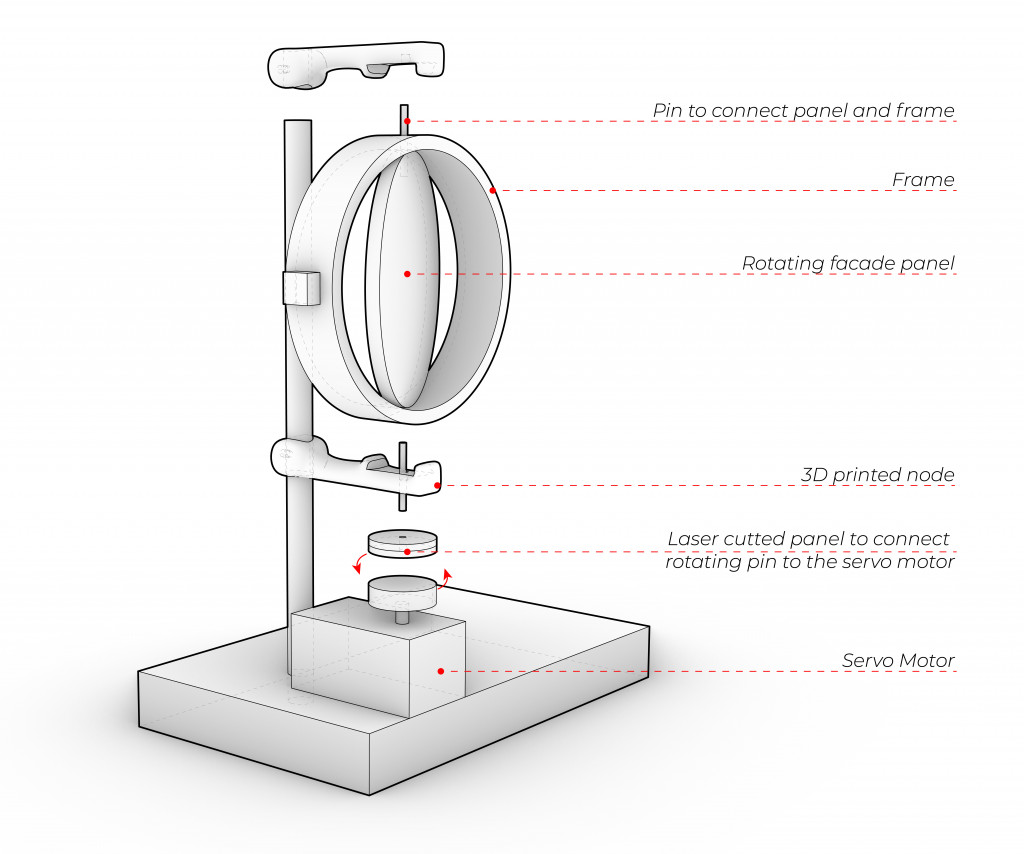
My proposed final project is a kinetic modular panel designed for windows, curtain walls, or facades. The idea comes from the search for thermal comfort within the bioclimatic context of Peru. It also explores the different forms and patterns that adaptive facades can create through the interaction of light and shadow based on the sun's position.
The project will be developed in three phases:
1. Designing the hexagonal module, including its mechanical and electronic components.
2. Assembling the modules into a panel or facade using a simple and optimized interlocking system.
3. Testing the system as a sun-responsive shading facade.
Inspiration and Reference Material:
Dynamic Facades: Buildings Show Off New Move click

RMIT Design Hub / Sean Godsell (AUSTRALIA)
Program: Kinetic Facades / Light Sensitive Systems click
by aniket.vijay.sonawane
by aniket.vijay.sonawane
Inspiration and Reference Material:
"Kinetic Curtains" : Juliana Lozano
FABACADEMY 2023
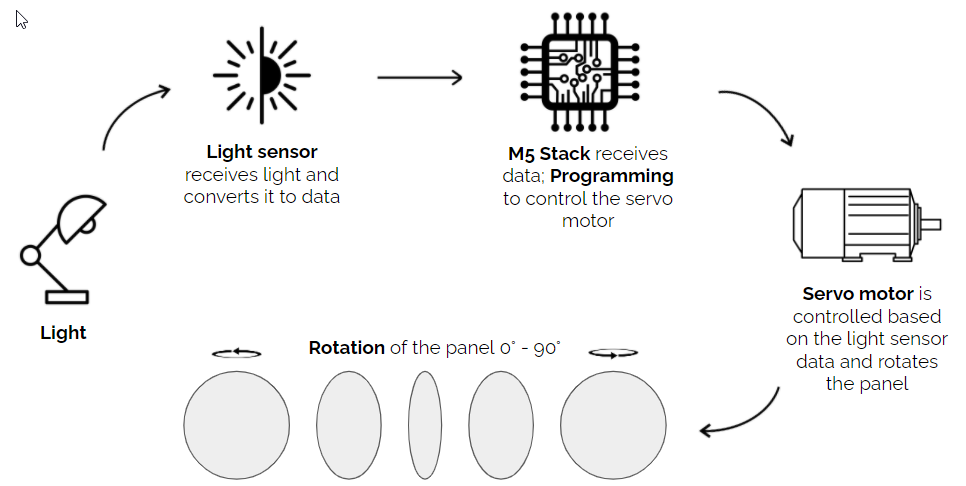
The Kinetic Curtain incorporates a light sensor that detects the amount of light present. This information is then used to determine the appropriate angles at which the modules of the curtain should rotate. By adjusting these angles, the Kinetic Curtain effectively regulates the entry of light into the space.

Project Management (part 2 of 2)
Step-by-Step Website Setup Guide
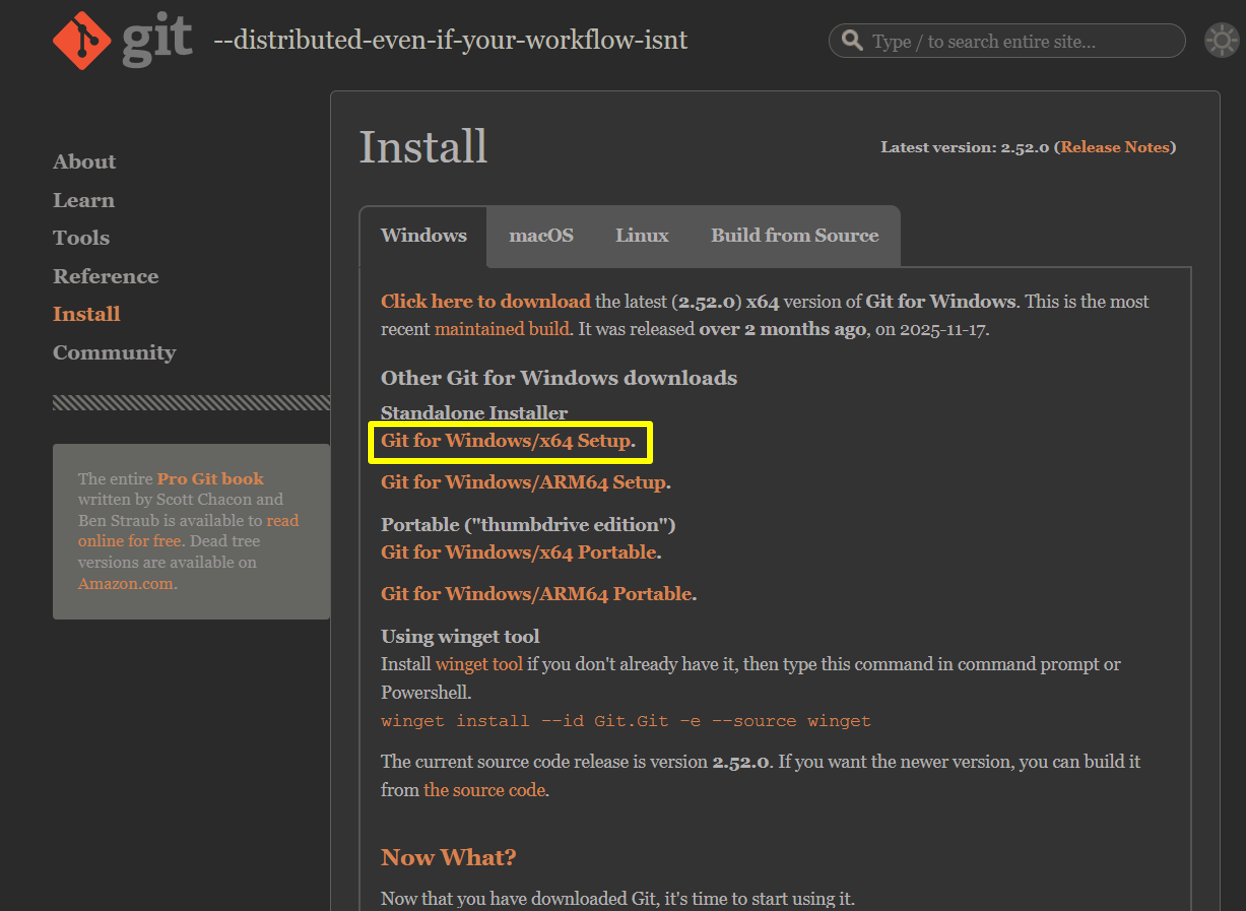
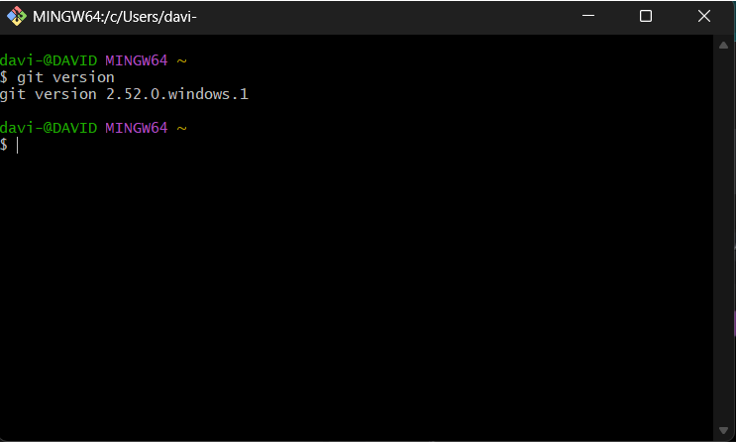
Download and install Git version control software. In my case, I used Git for Windows x64
click
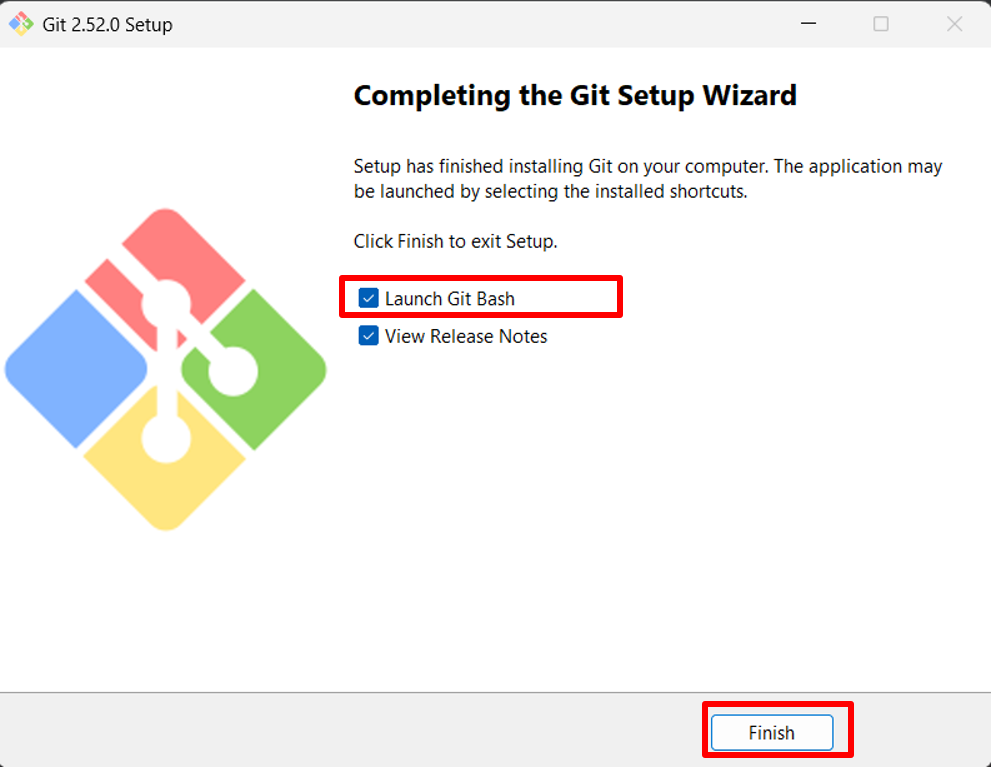
Download and install as administrator. Click 'Next' for all default options. On the last window, check the 'Launch Git Bash' box and finally click 'Finish'. Type the command 'git version' and press Enter; this will verify that Git has been installed correctly.
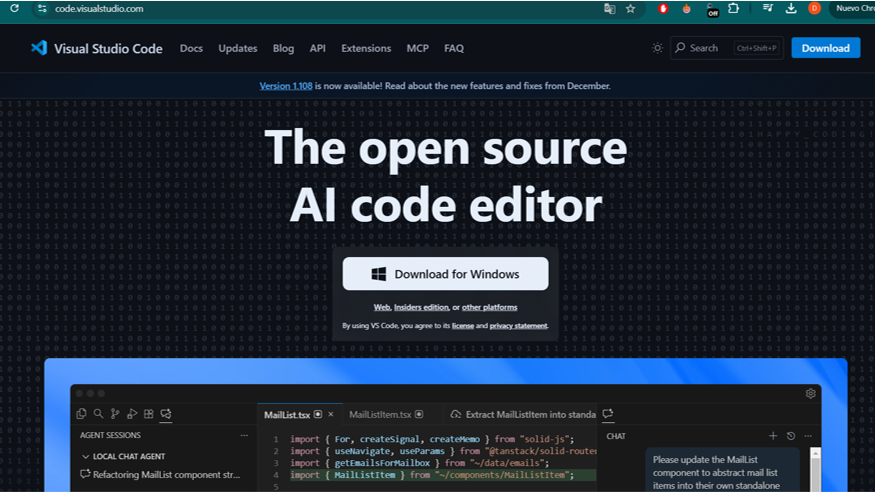
Download and install the Visual Studio Code source code editor.
click
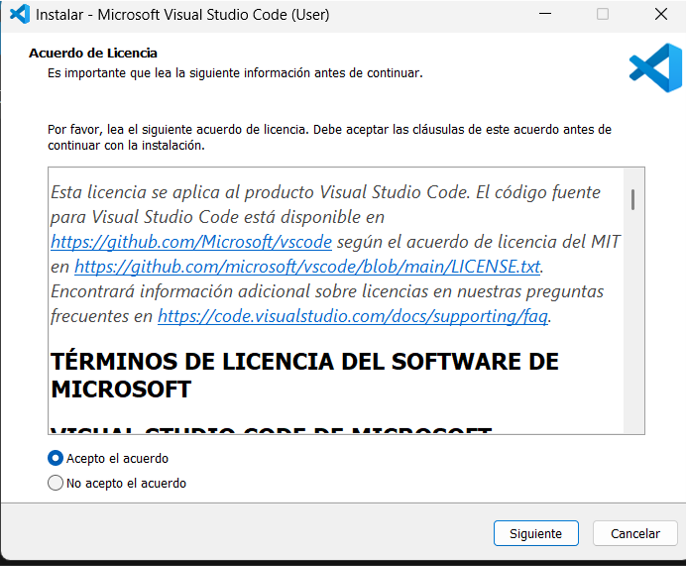
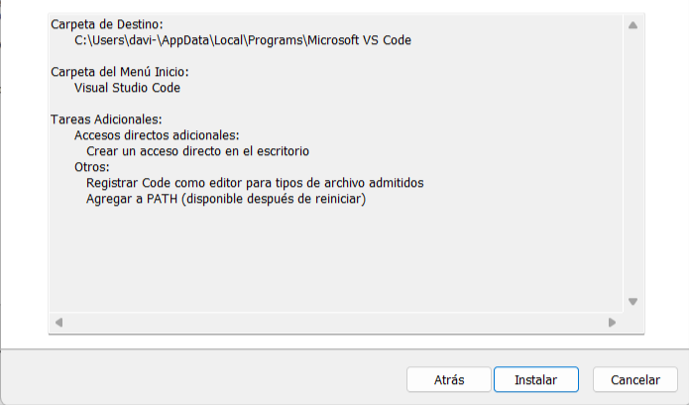
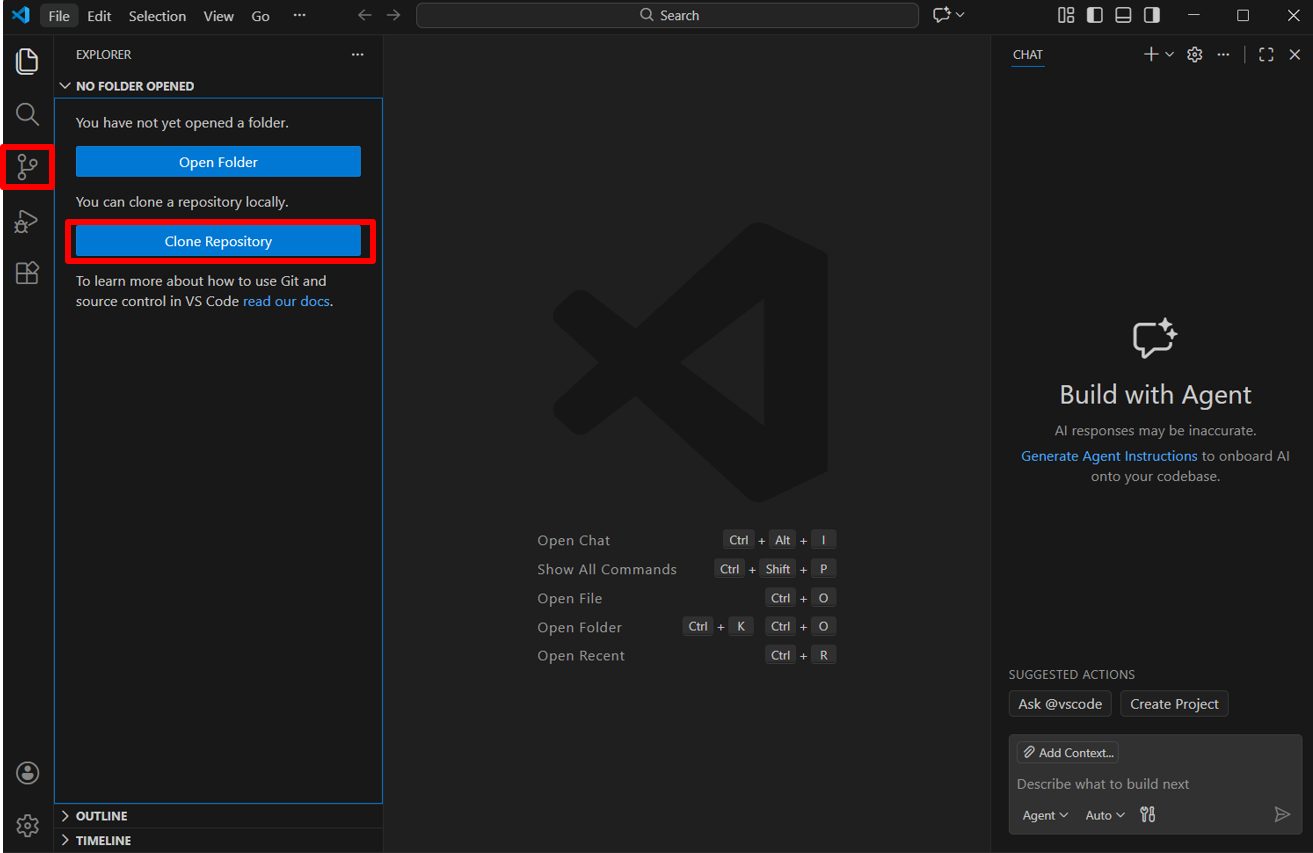
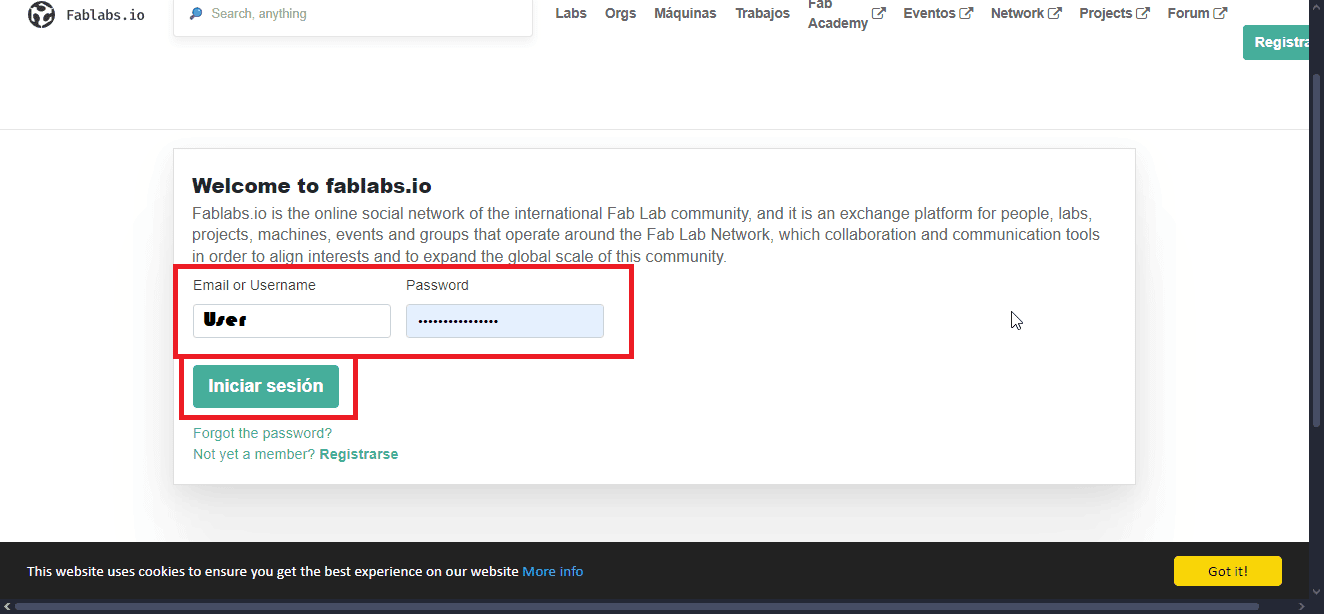
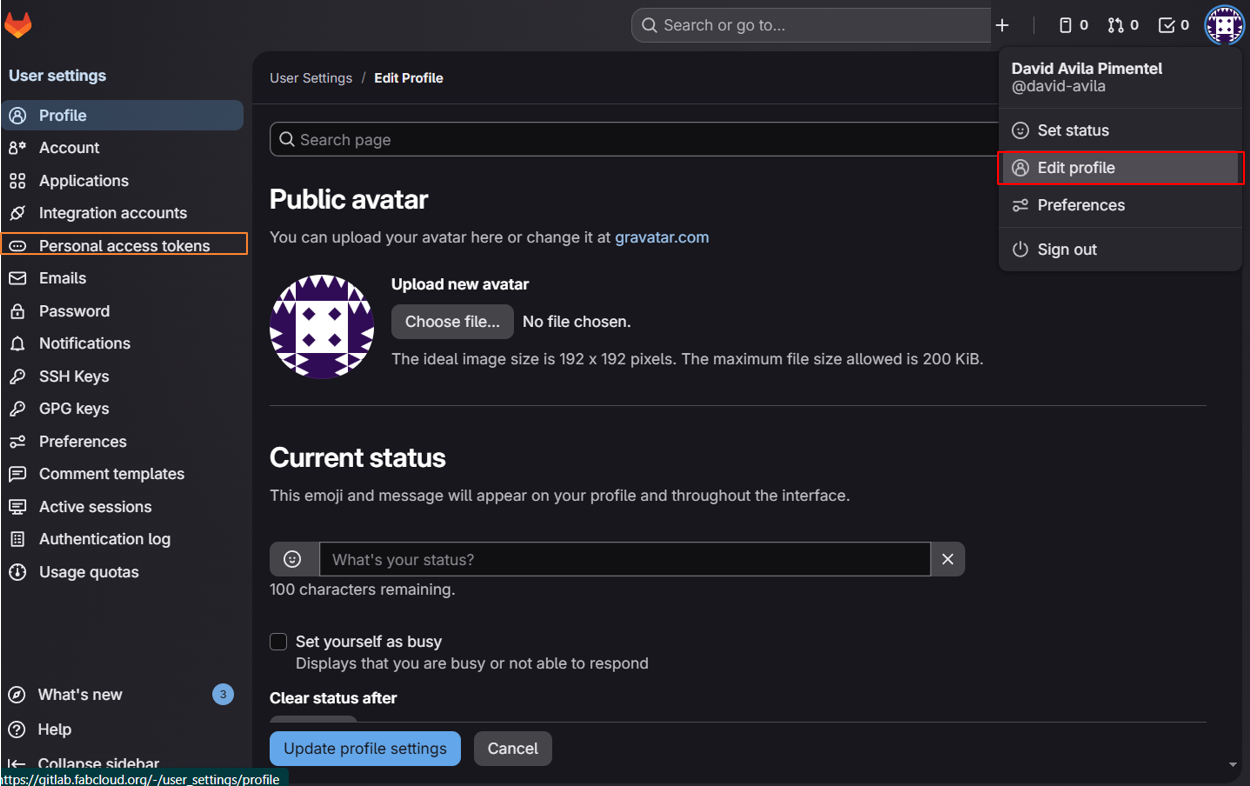
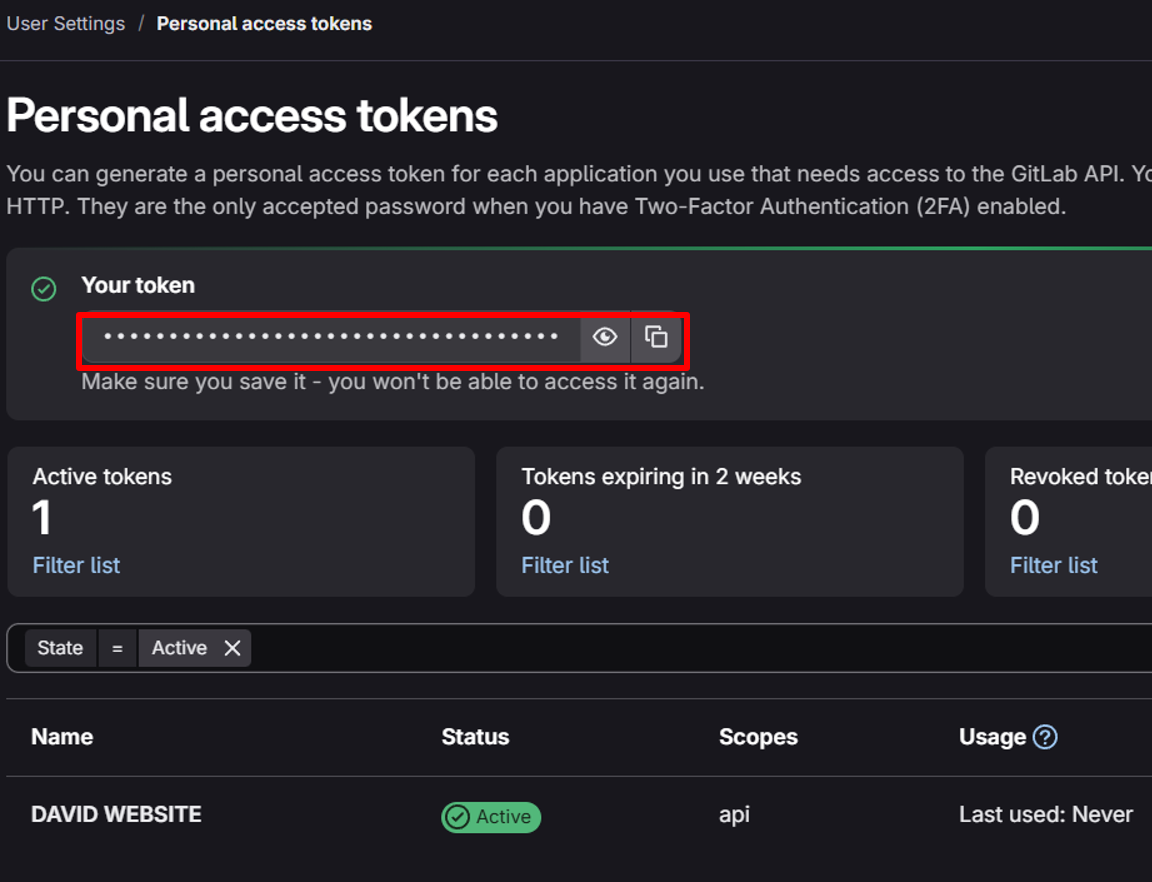
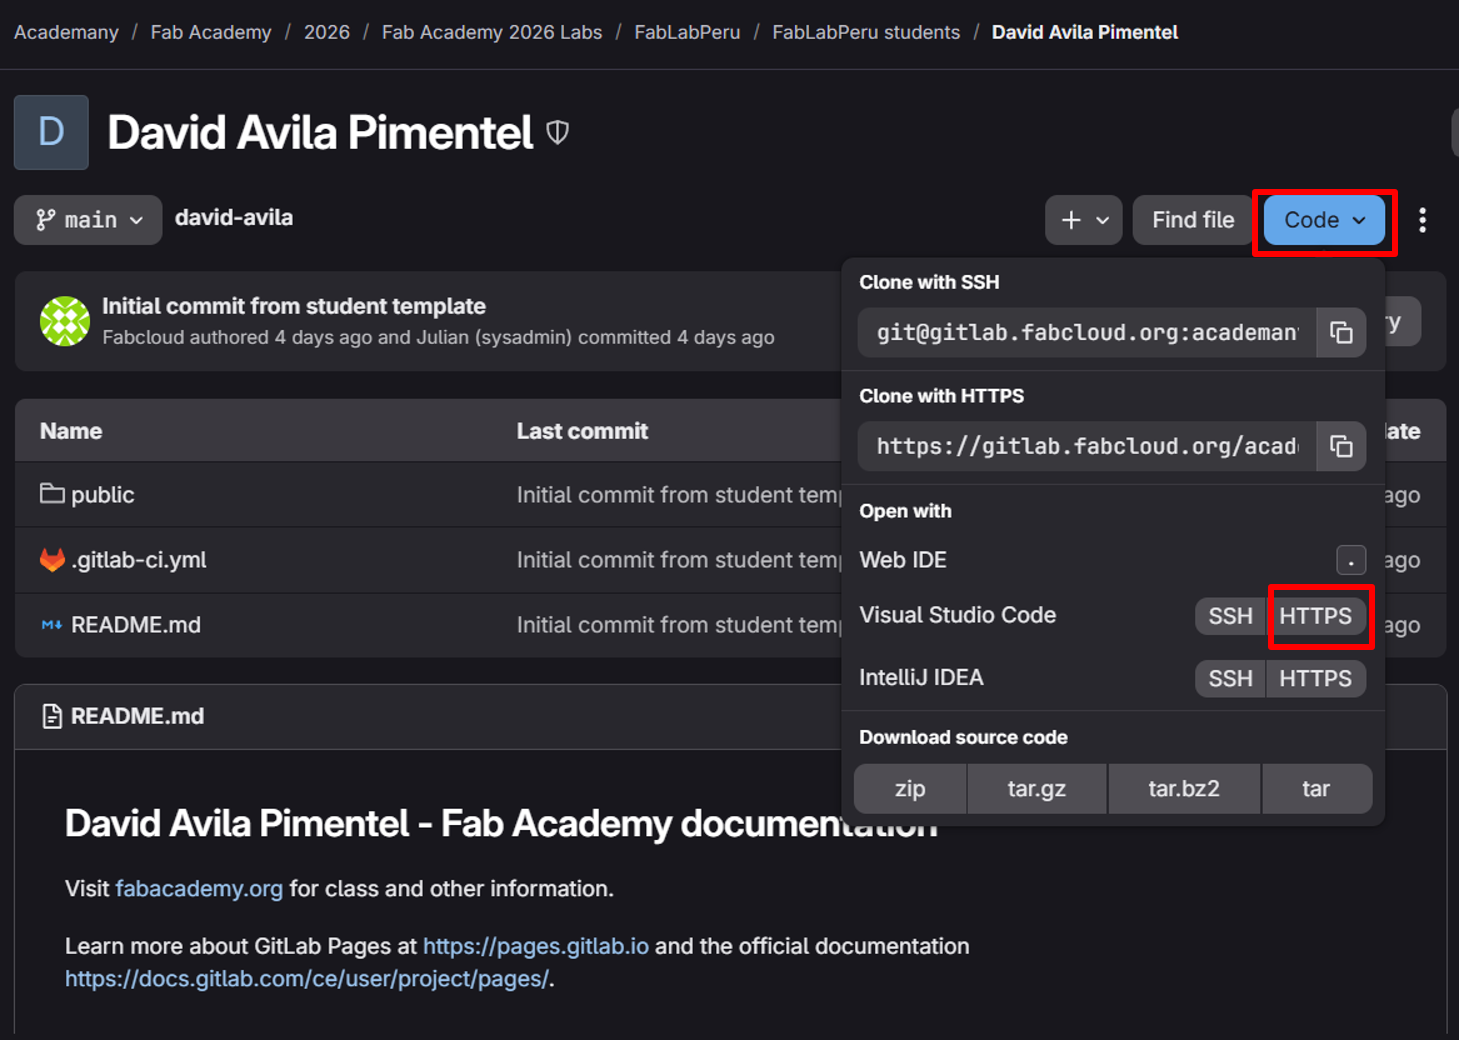
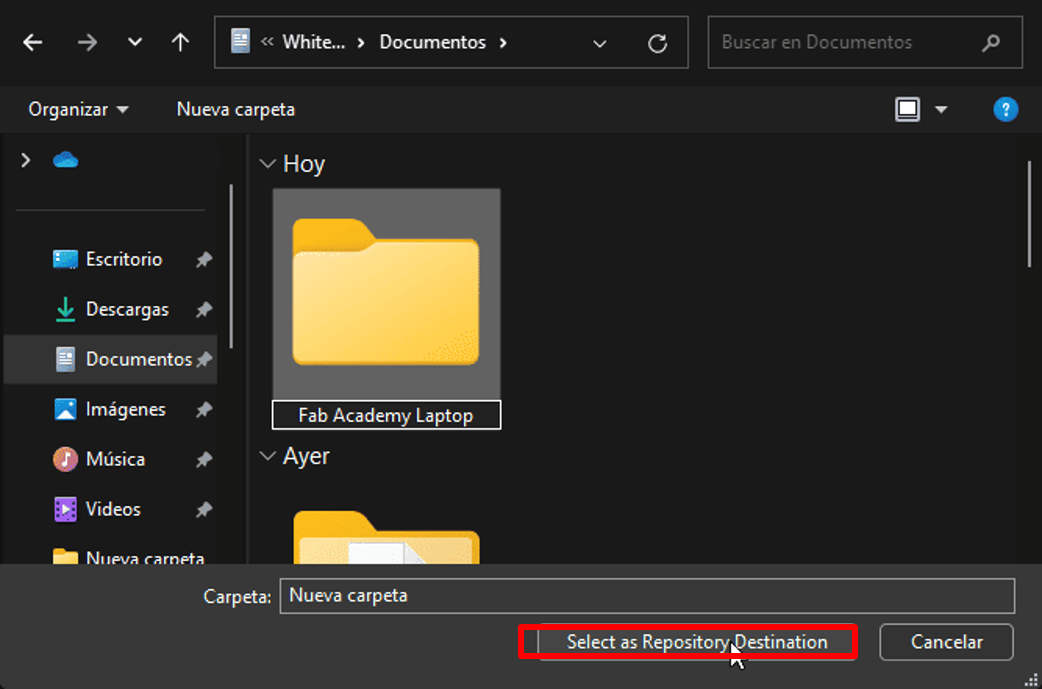
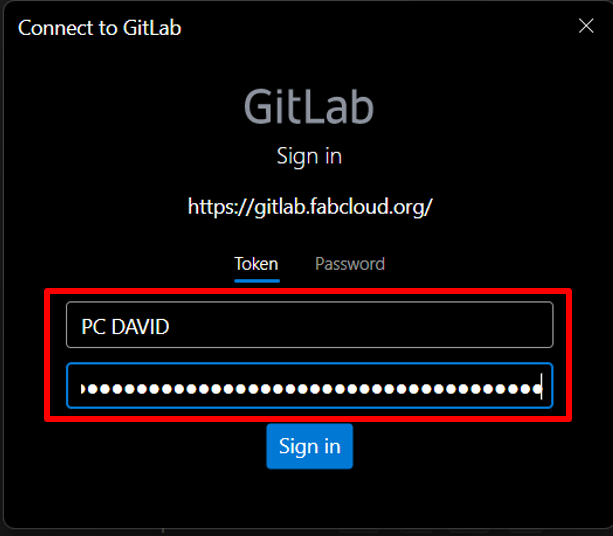
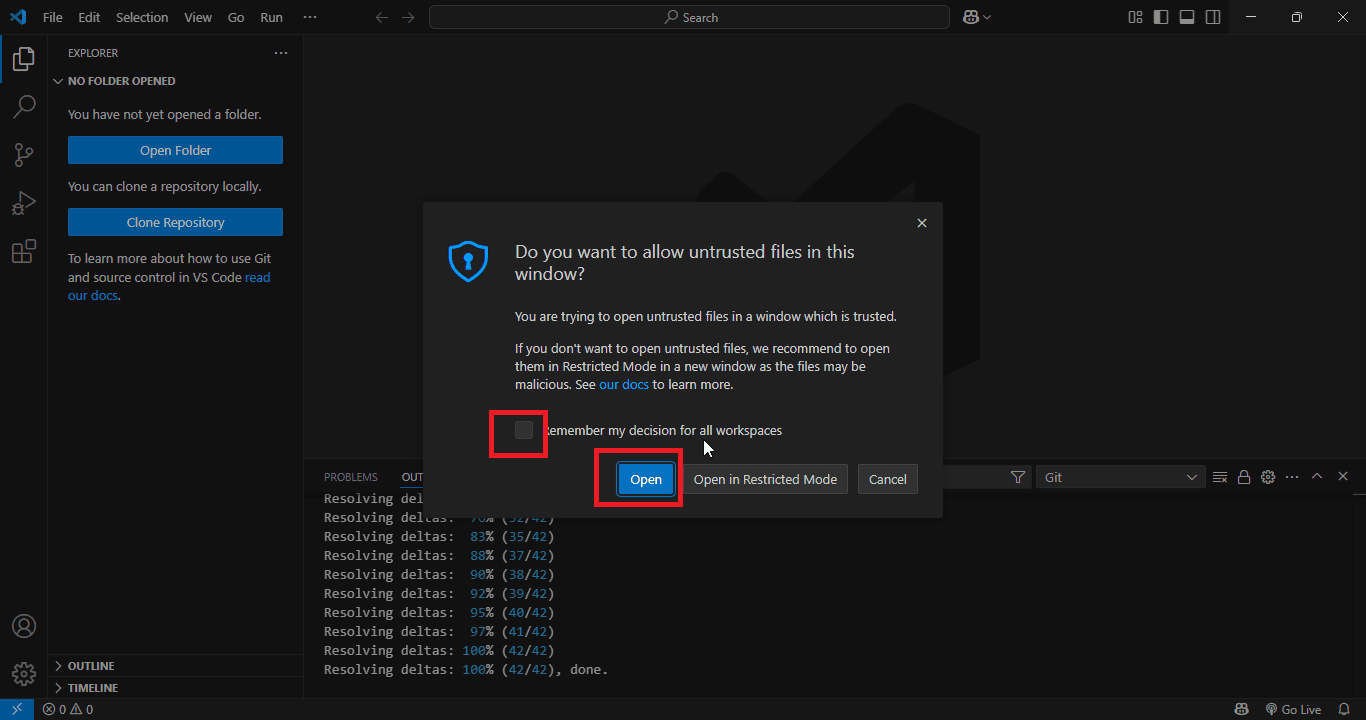
Download and install as administrator. Accept the license agreement and click Next. Keep the default settings and click Install. Click on the 'Source Control' icon and then click "Clone Repository". The "GitLab" sign-in window will appear, but it is better to log in with the Fablabs.io account. Sign in to your account. Click on "Edit profile" and then on "Personal Access Tokens". Add a new token, give it a name and expiration date, then check the "api" box and finish by clicking "Create Token". Save and copy the token in a safe place. Download the repository by clicking on "Code" and selecting the "HTTPS" option for Visual Studio Code. Choose a destination folder for the cloned repository. Then you will be asked to sign in using the token created earlier. Confirm that you want to open the repository in Visual Studio Code.
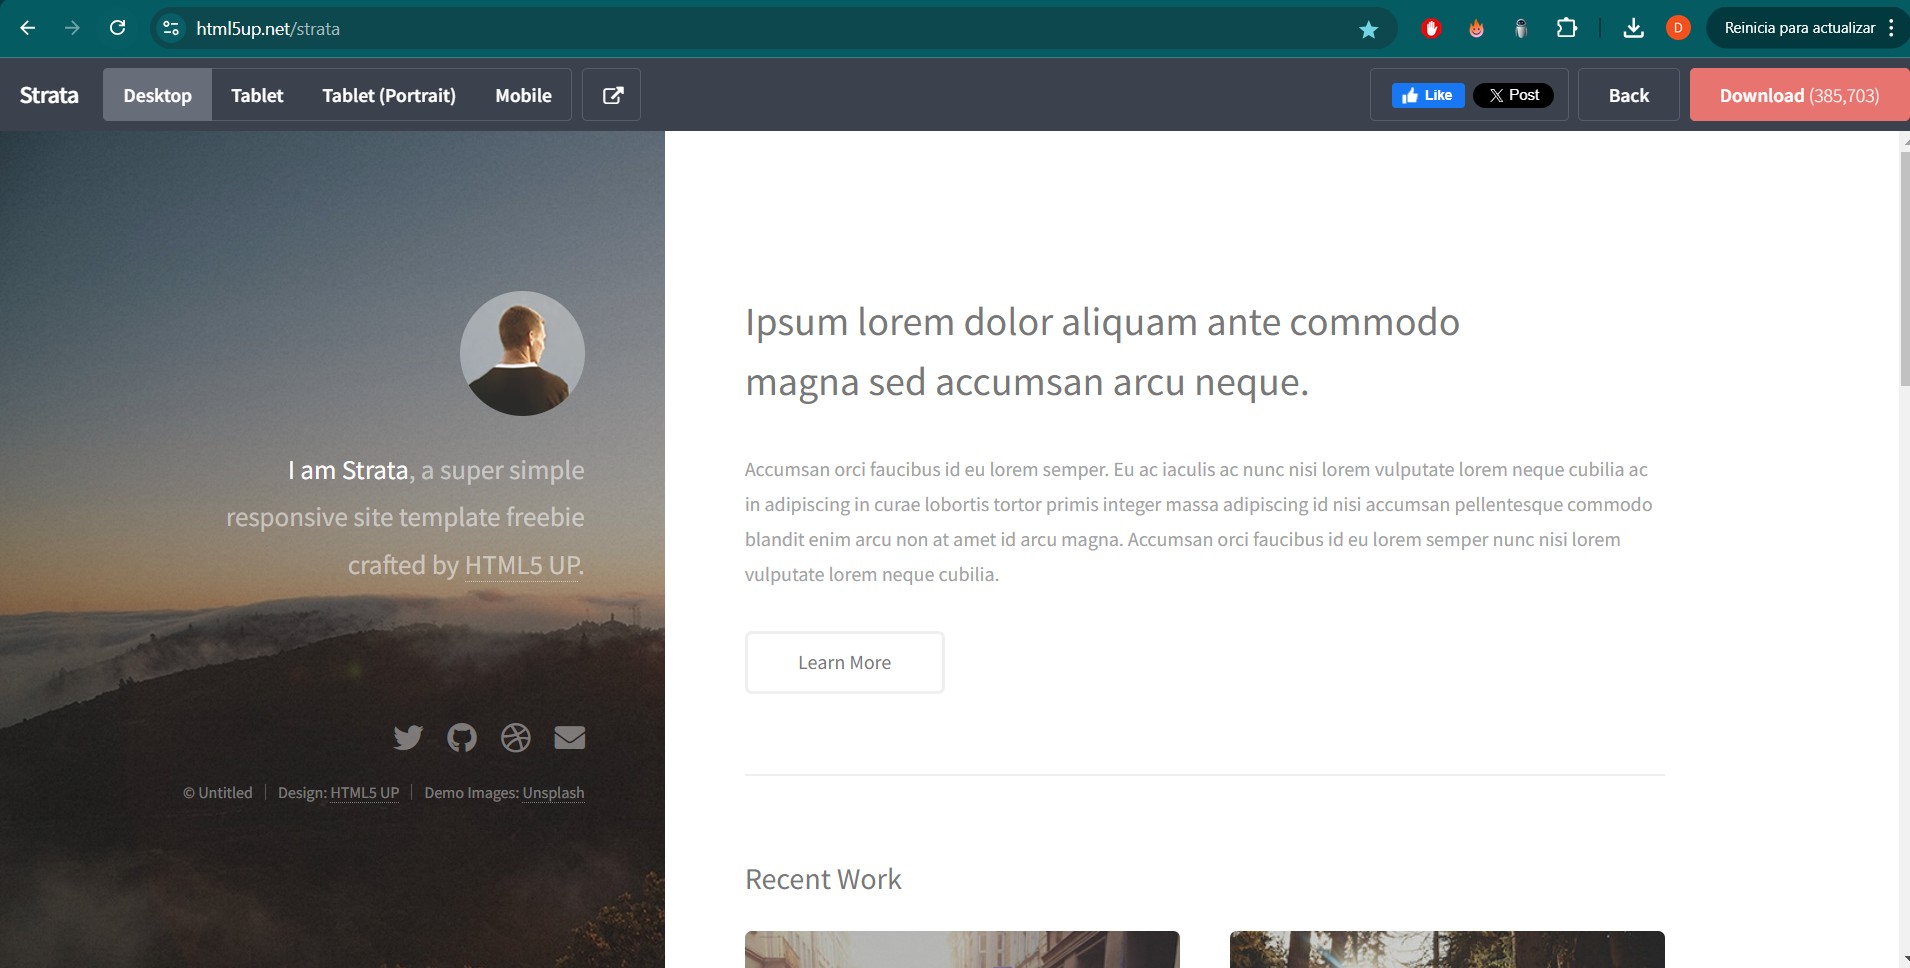
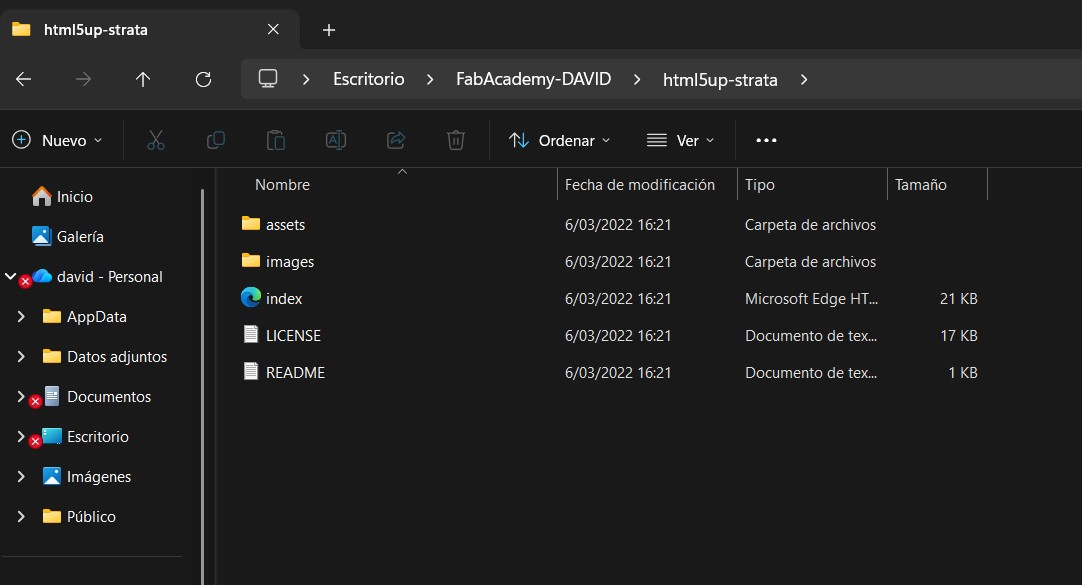
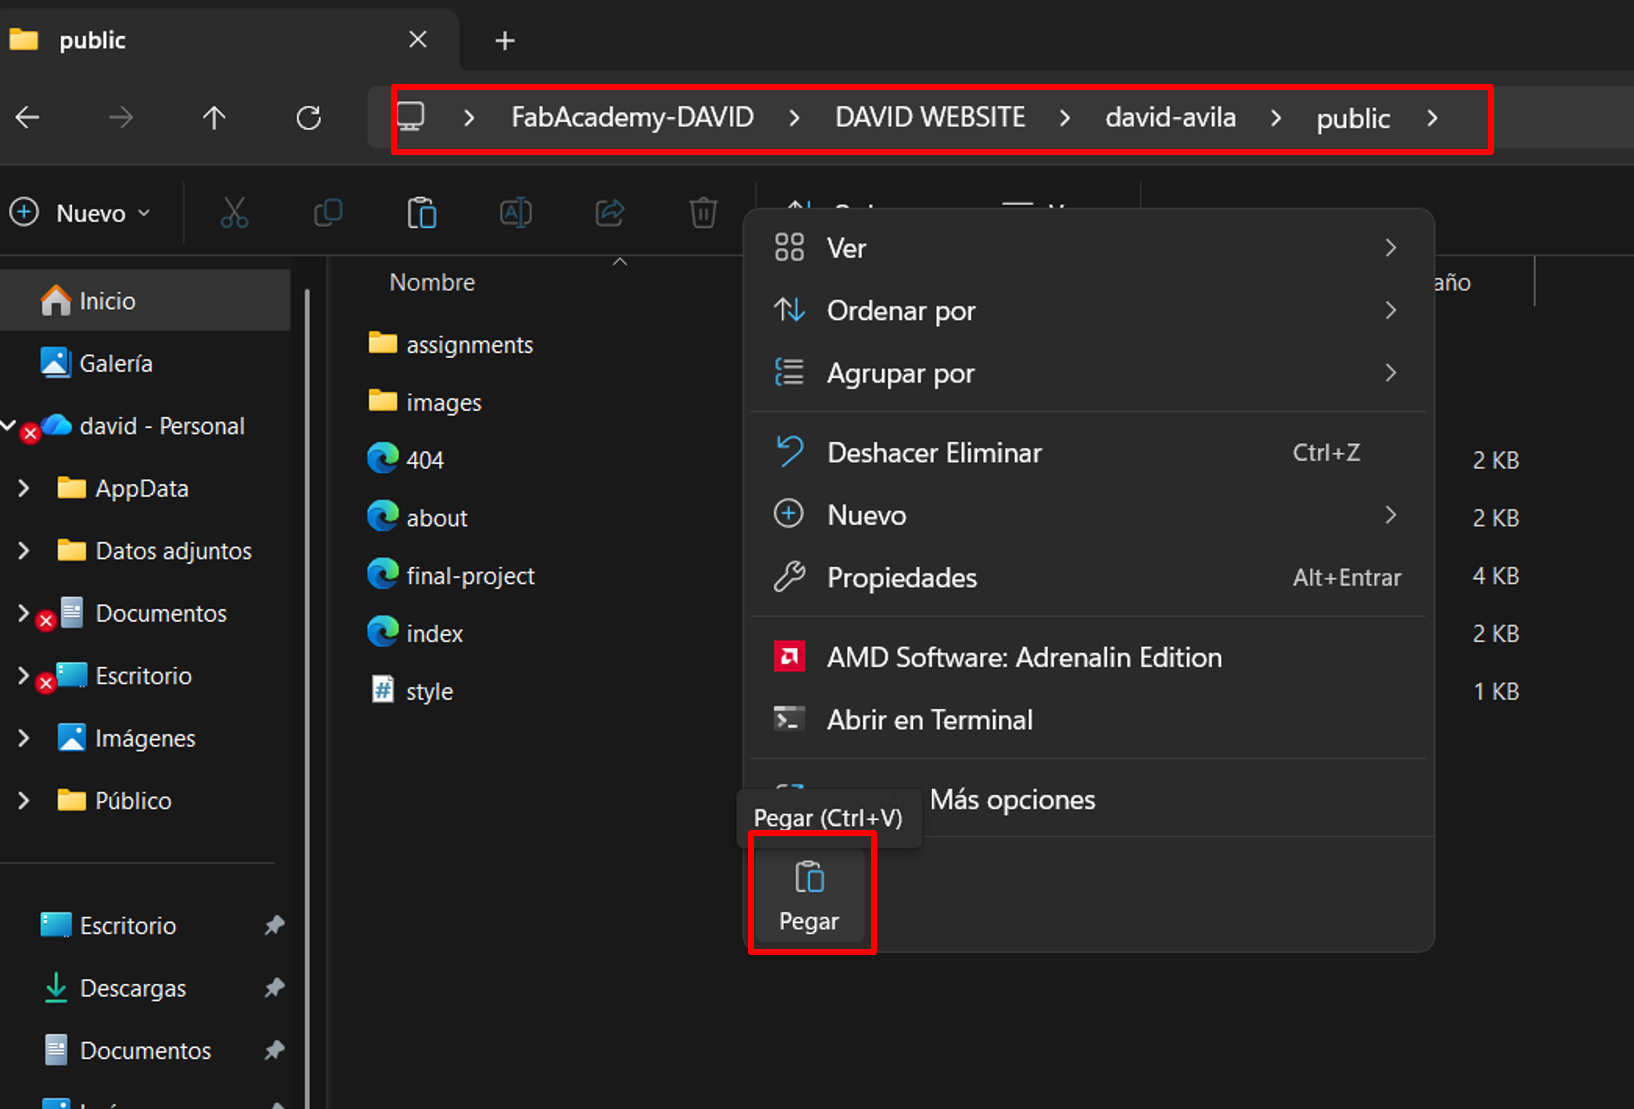
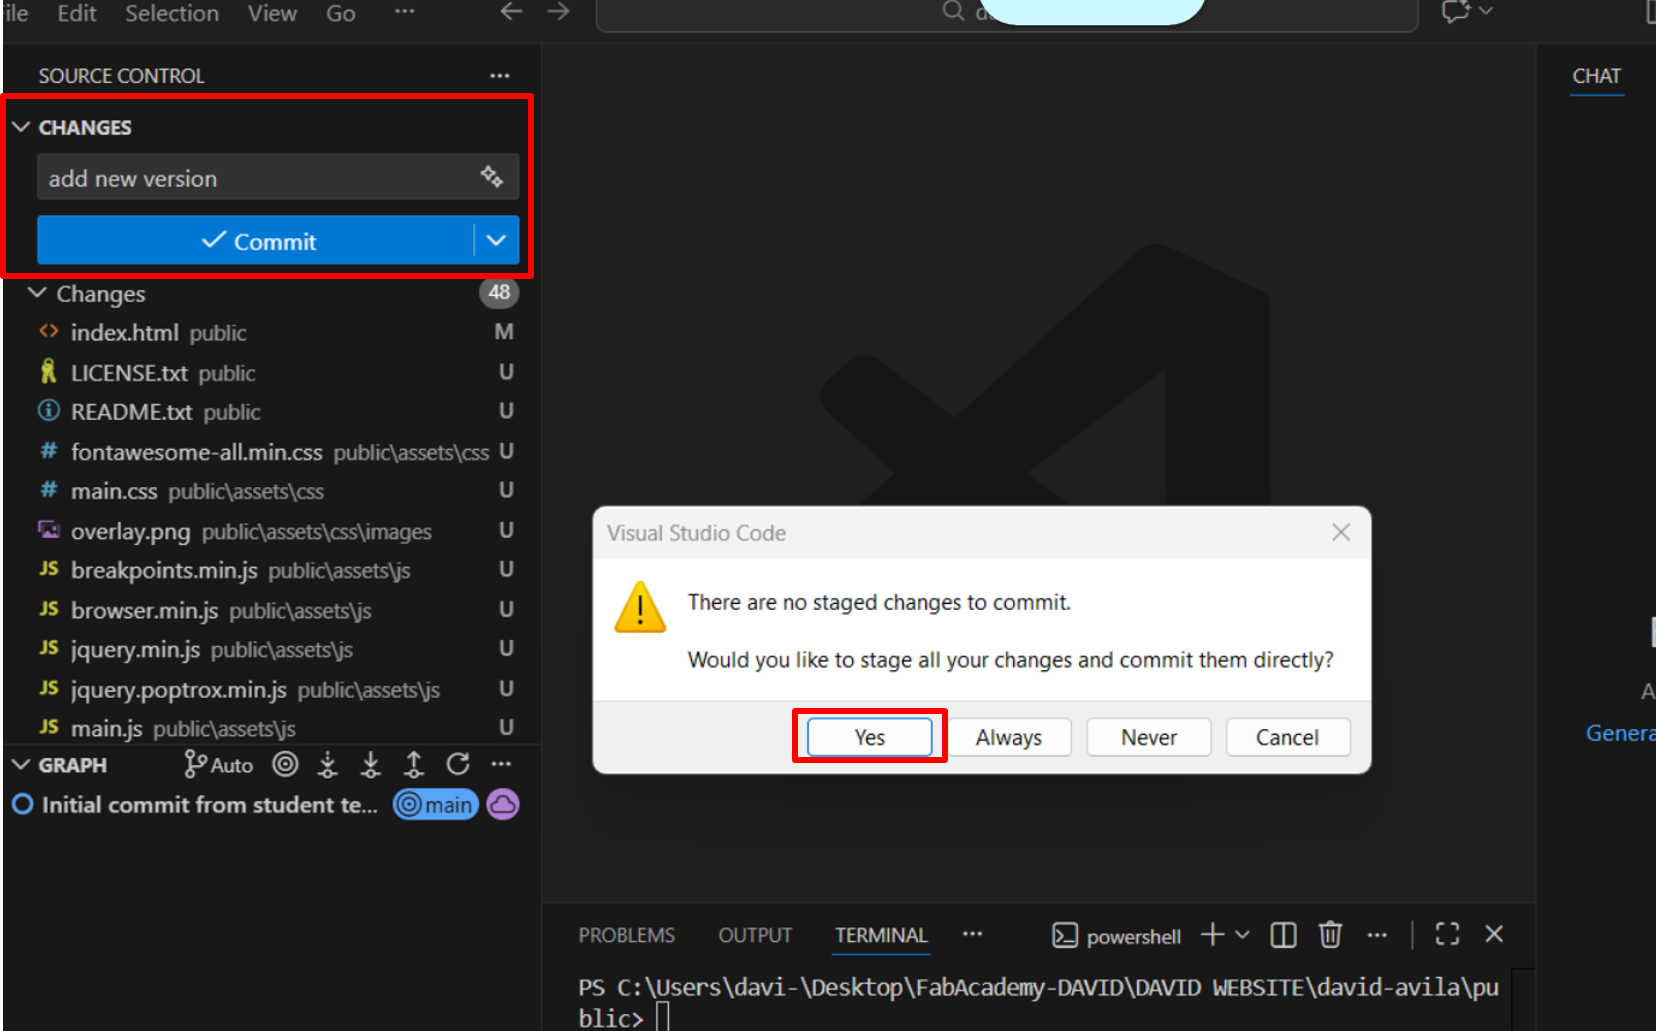
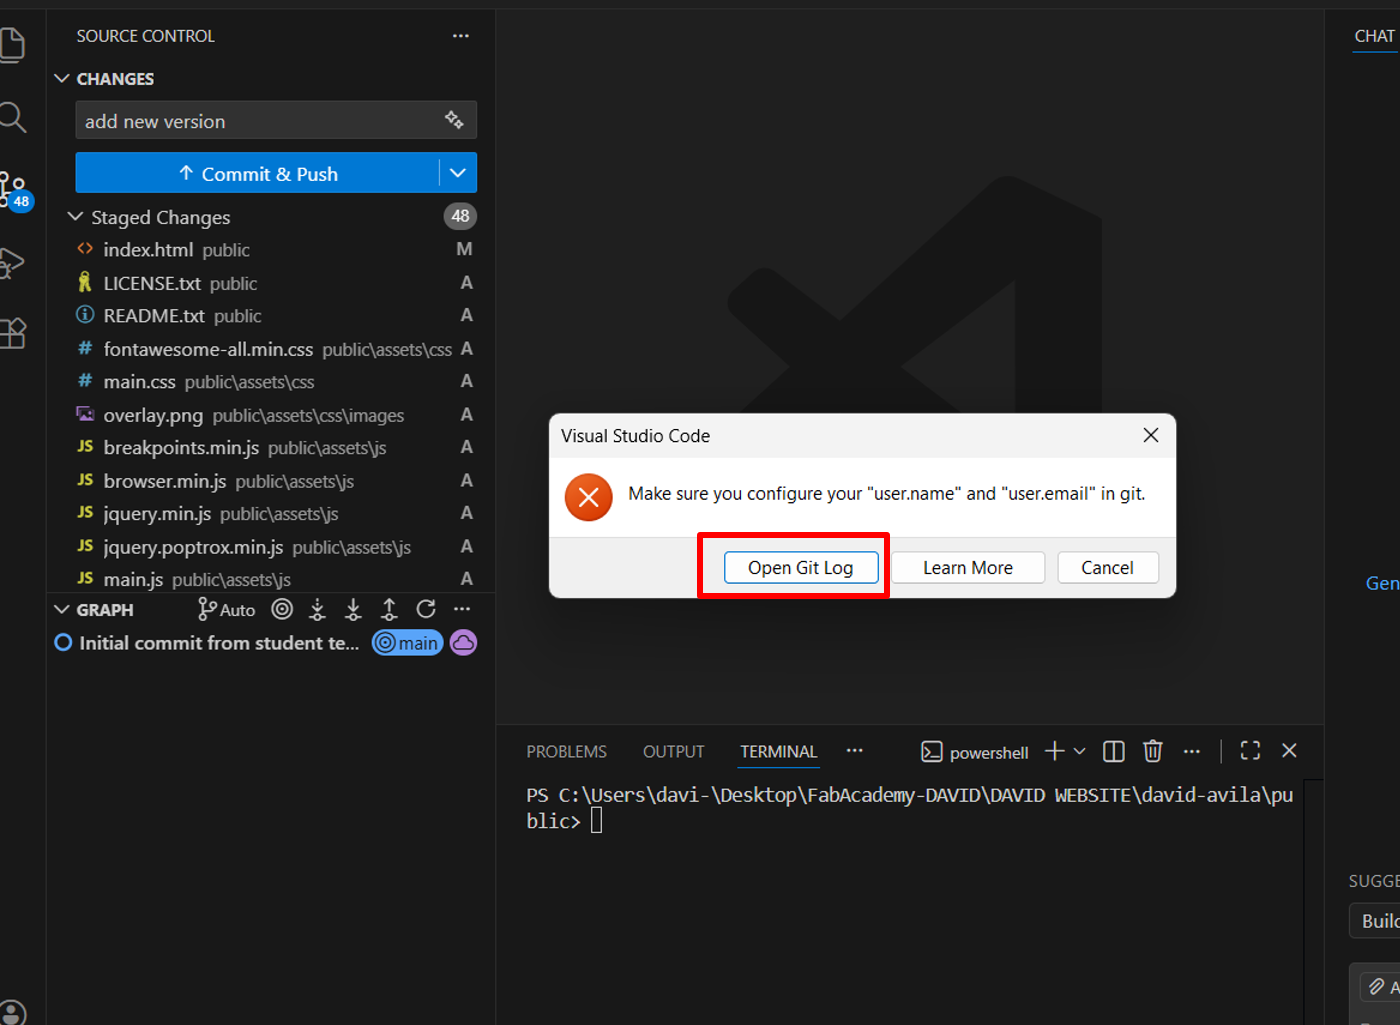
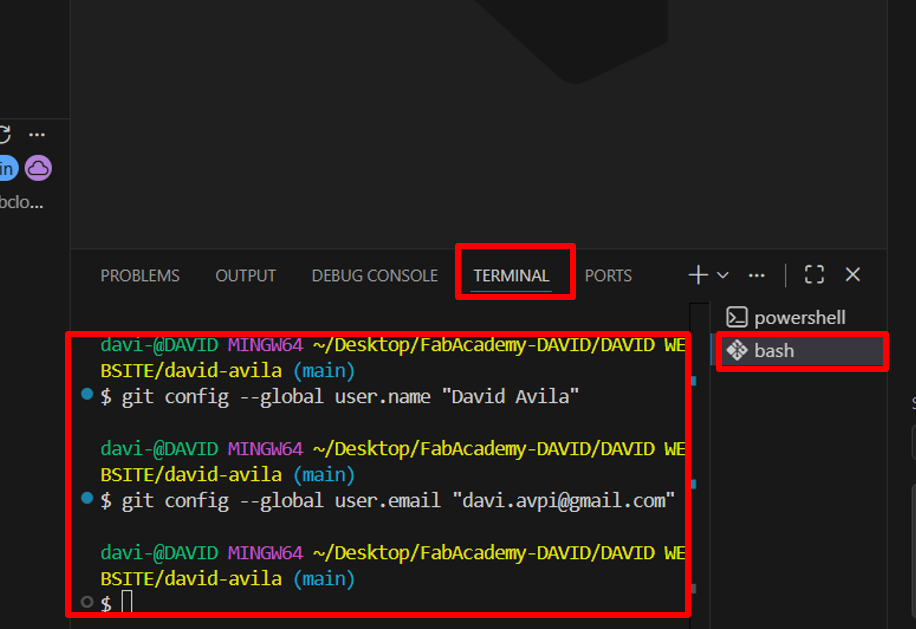
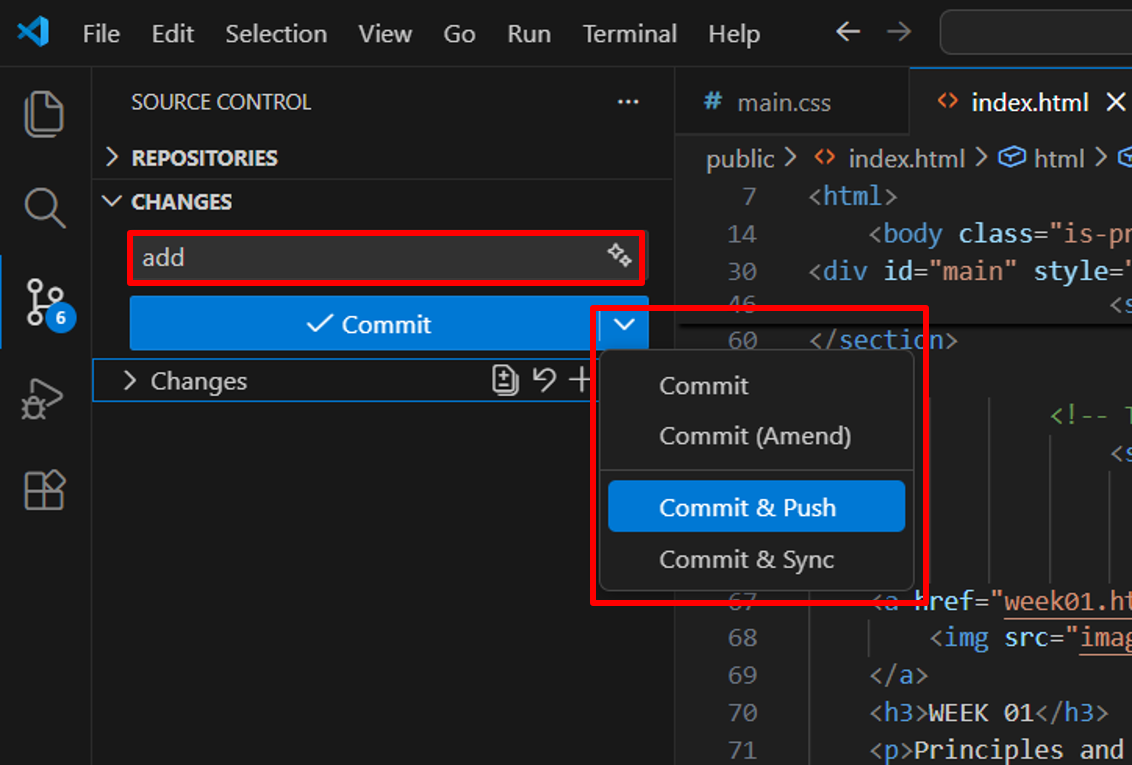
Done! Our repository is now cloned and linked, so the next step is to start styling the website 😉 Download the "Strata" template from the HTML5 UP website. Copy the contents of the folders. Paste them into the corresponding folder in the cloned website. Save the changes so they can be published. To do this, open the Git user settings. Open Git Bash and configure your user information. Now we can commit and push our changes.
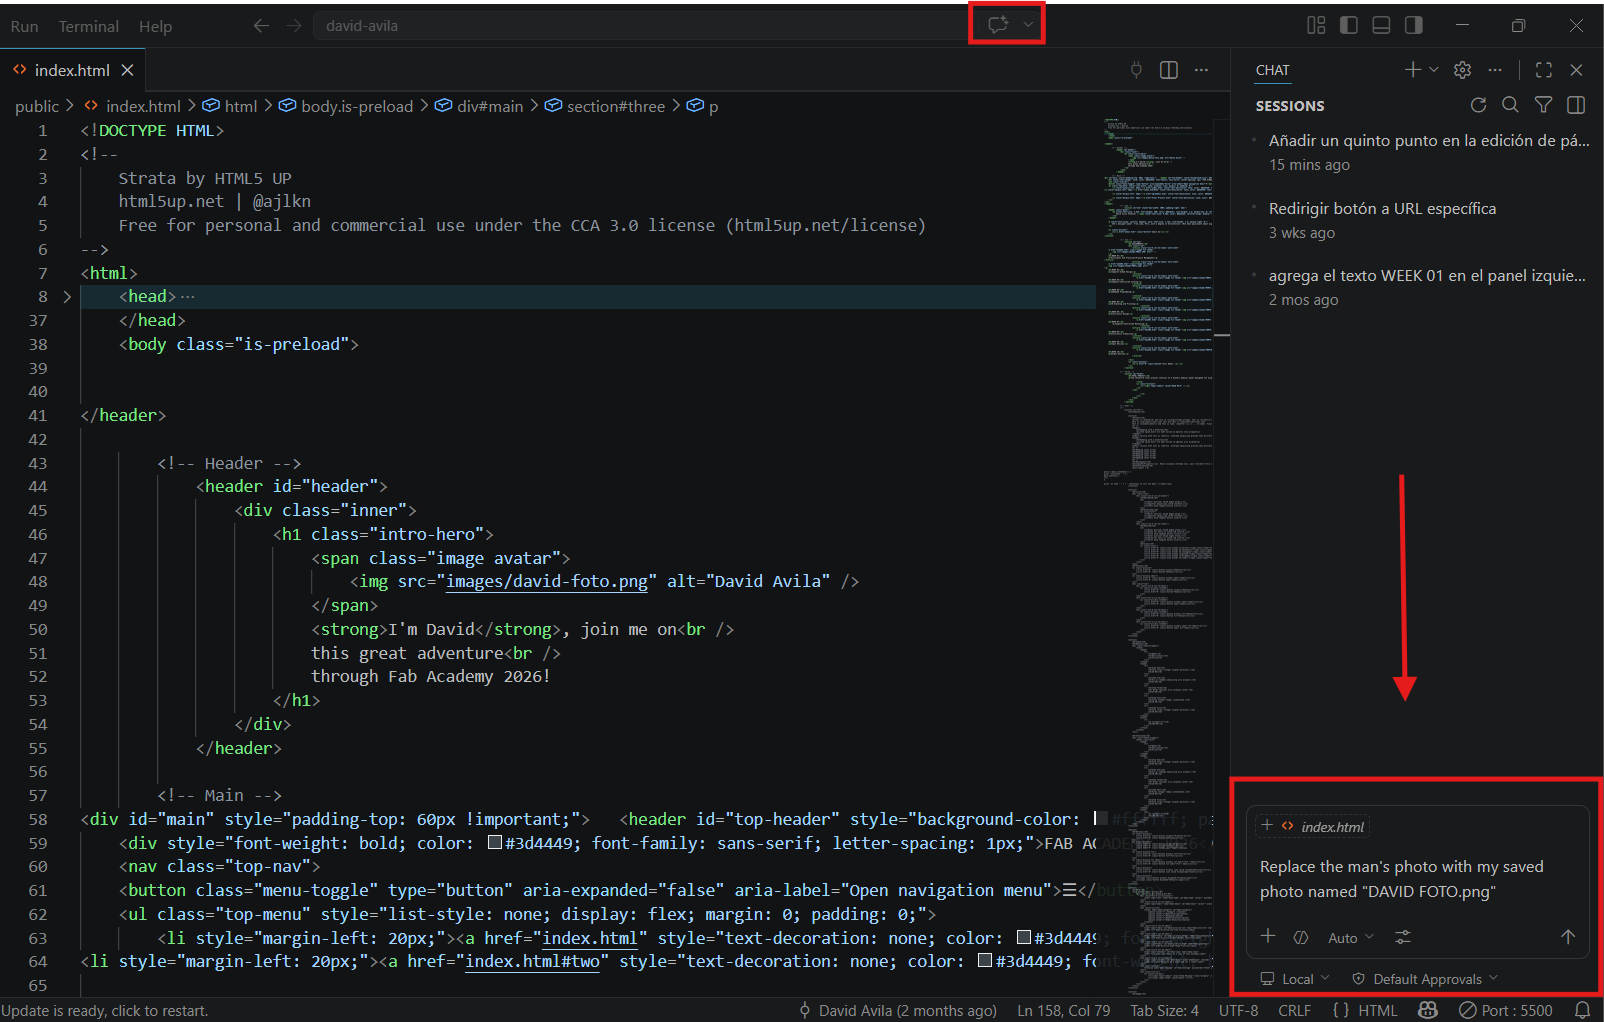
Click on "Toggle Chat" to sign in and use the AI chat as support while editing the page.
In this example, we will change the cover image of the downloaded template.
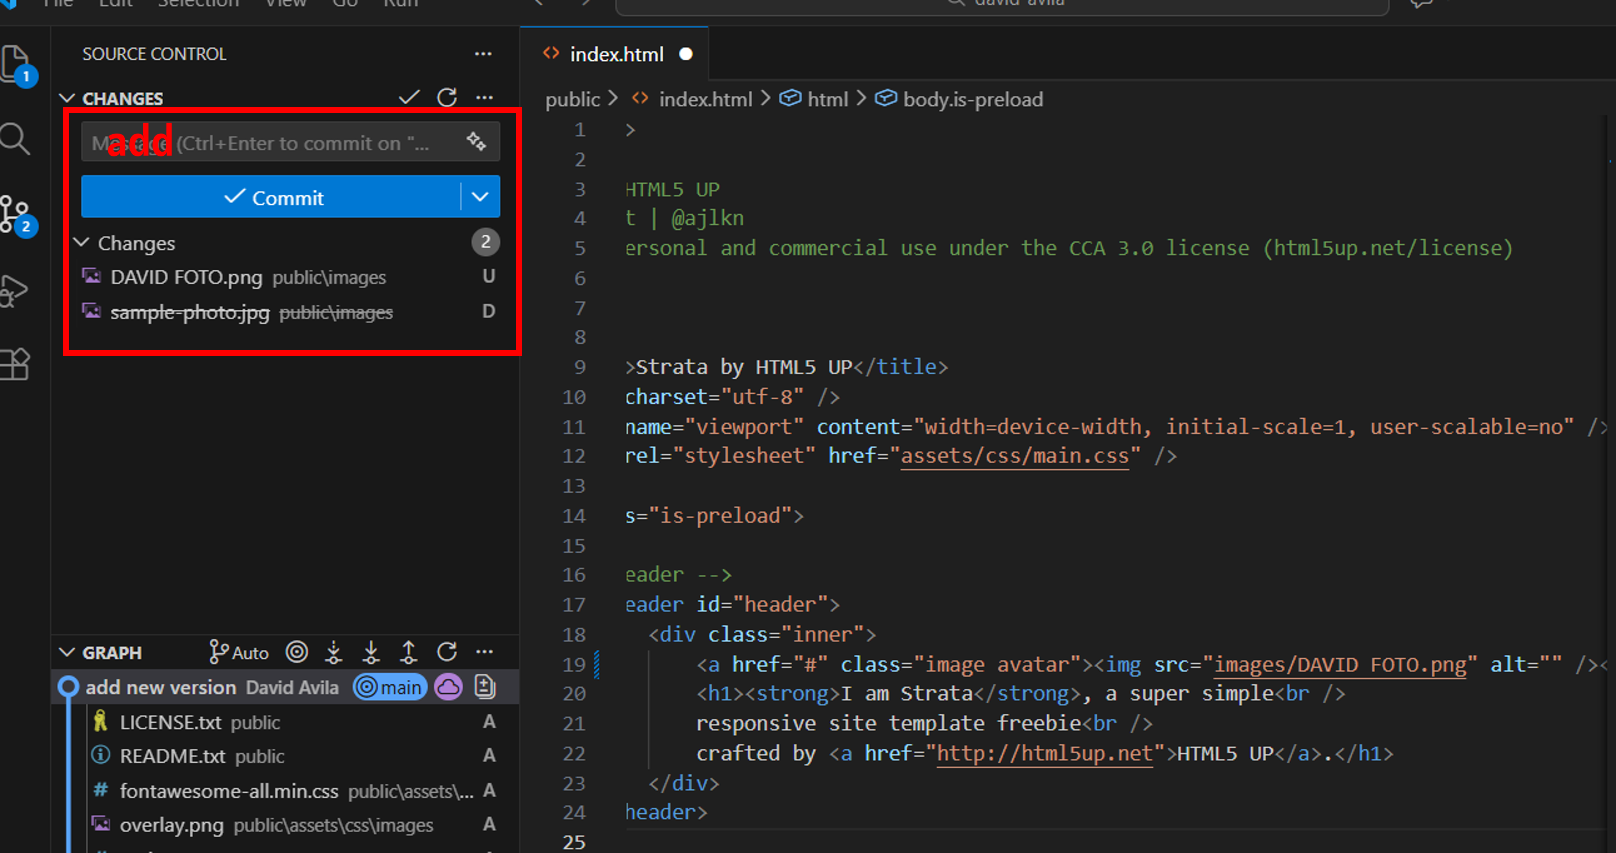
Once the AI has made the change, click on "Keep" to preserve it, then press Ctrl+S to save the file, and finally commit and push the update.
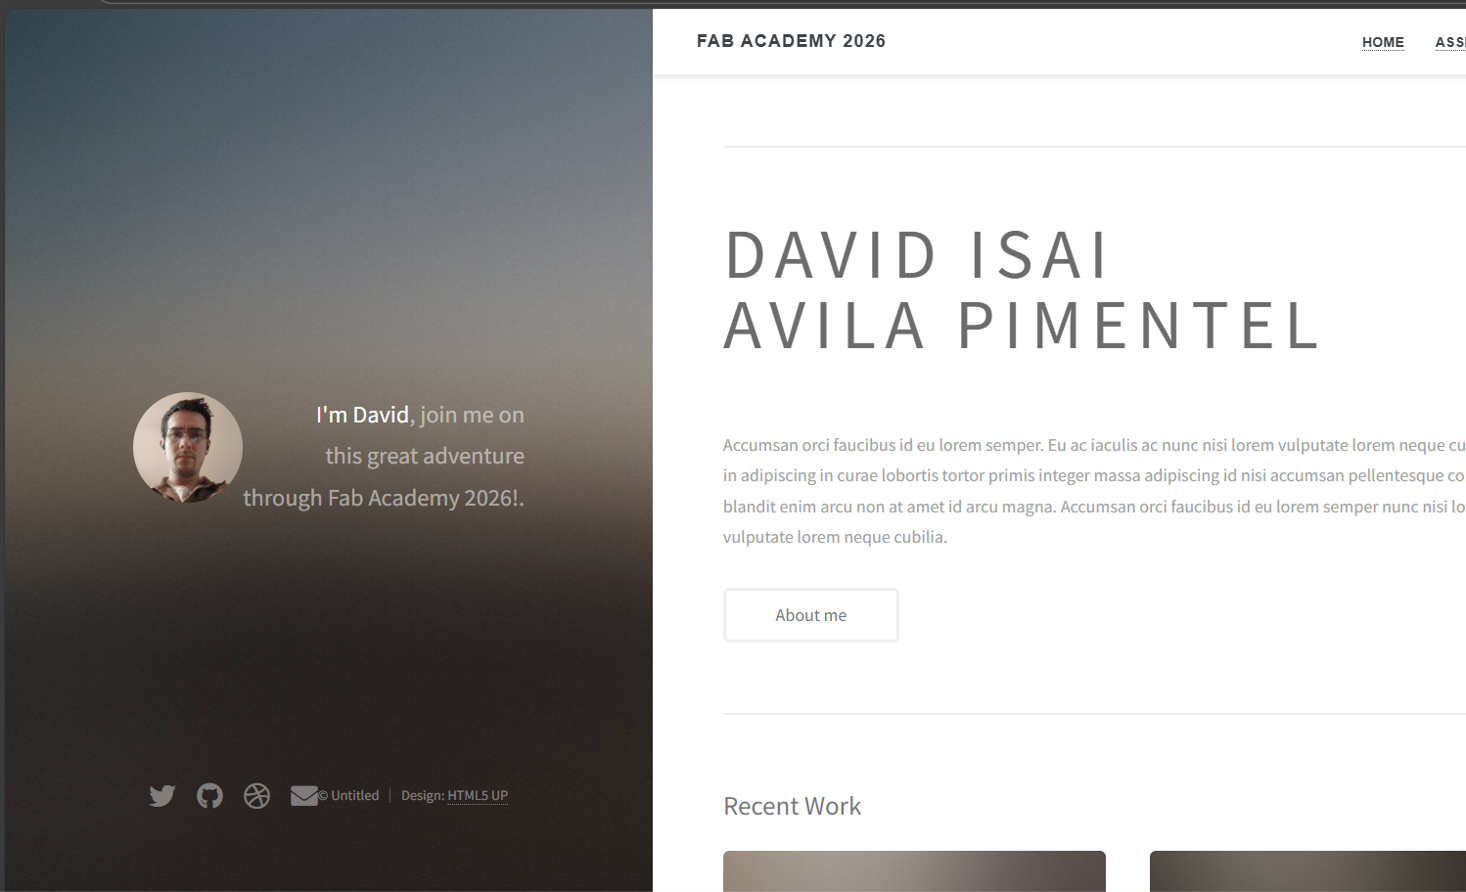
We will continue editing until the page has the desired shape and style; the image below shows part of that process.
1. Git Installation
Step 1
Step 2
Step 3
2. Visual Studio Code Installation
Step 1
Step 2
Step 3
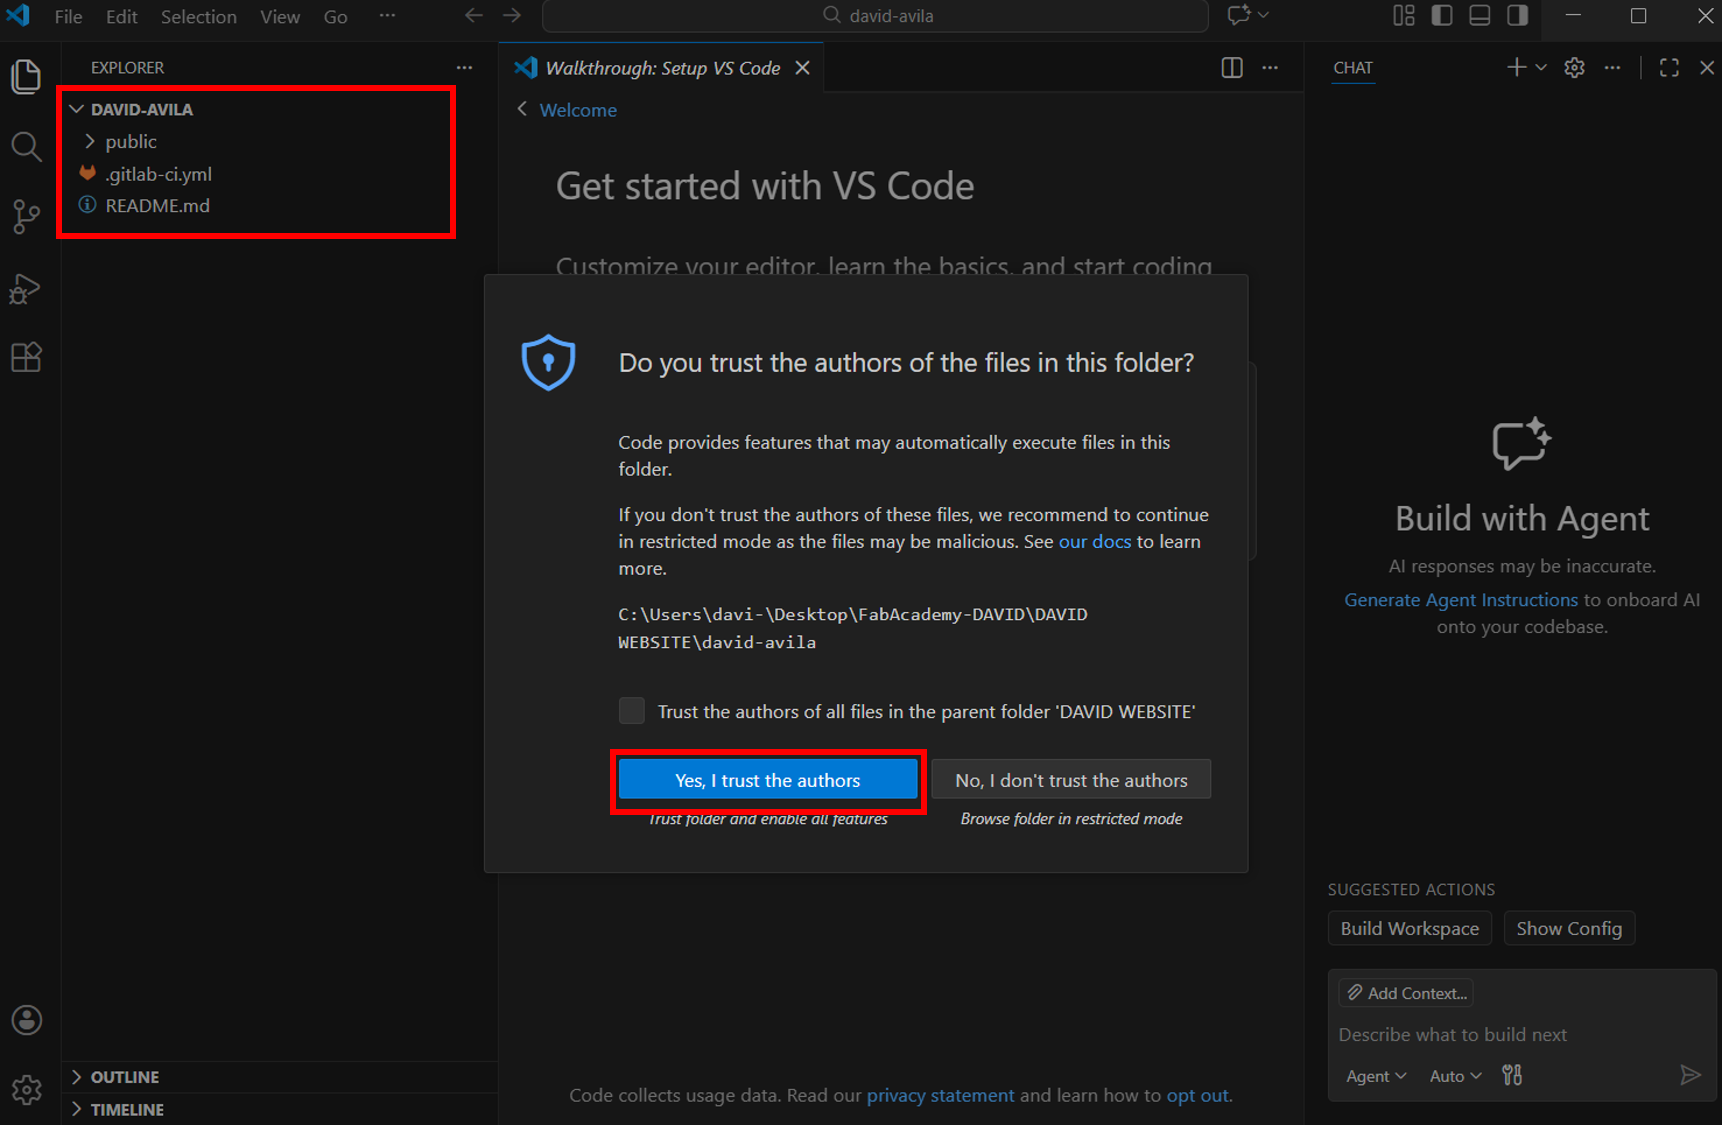
3. Repository Cloning
- Select "Clone Repository" in the Source Control section, or use the easier option of cloning directly from your GitLab repository.
- Access the Fab Lab Git repository by signing in with your Fab Lab credentials.
- Generate an access token in your Git account settings.
Step 1

Step 2
Step 3
Step 4

Step 5
Step 6
Step 7
Step 8
Step 9
Step 10
4. Installing an HTML Template
Step 1
Step 2
Step 3
Step 4
Step 5
Step 6
Step 7
5. Editing My Page with AI