Principles and Practices
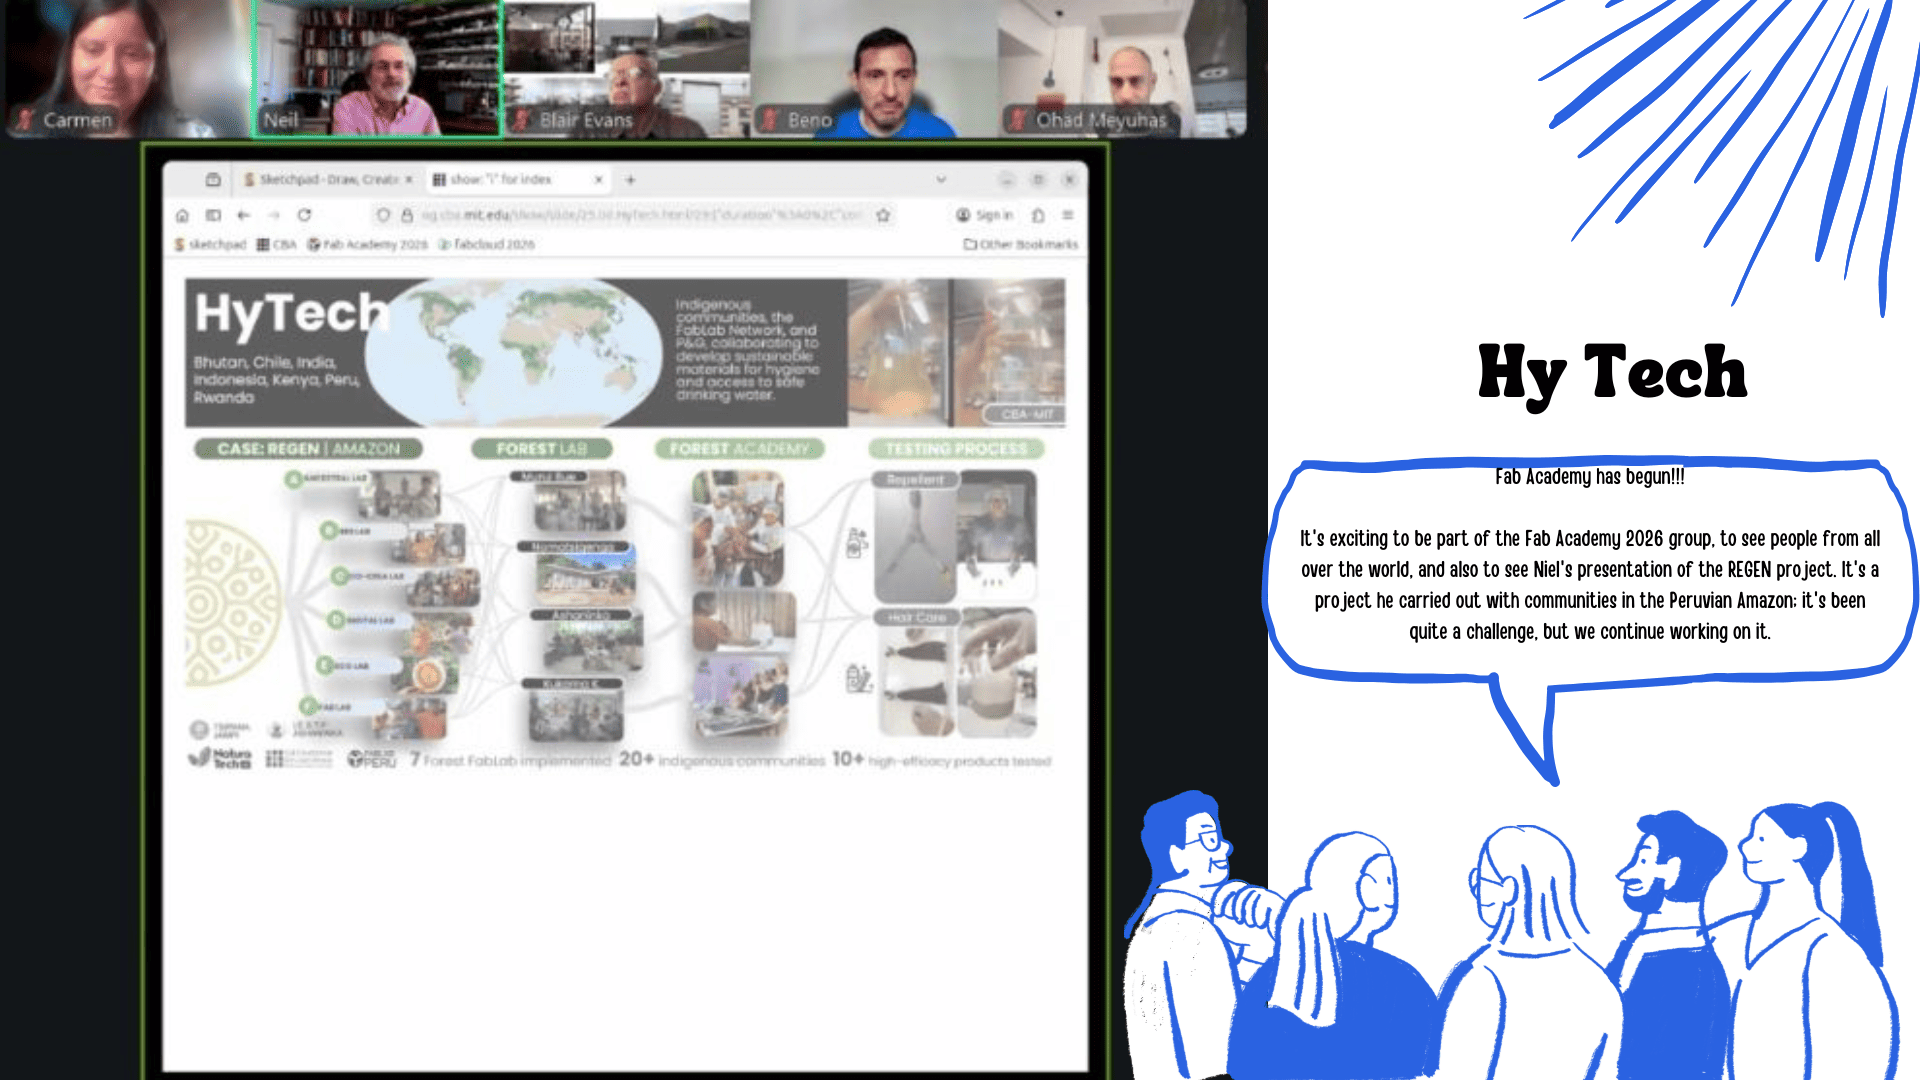
Project Summary
Target User
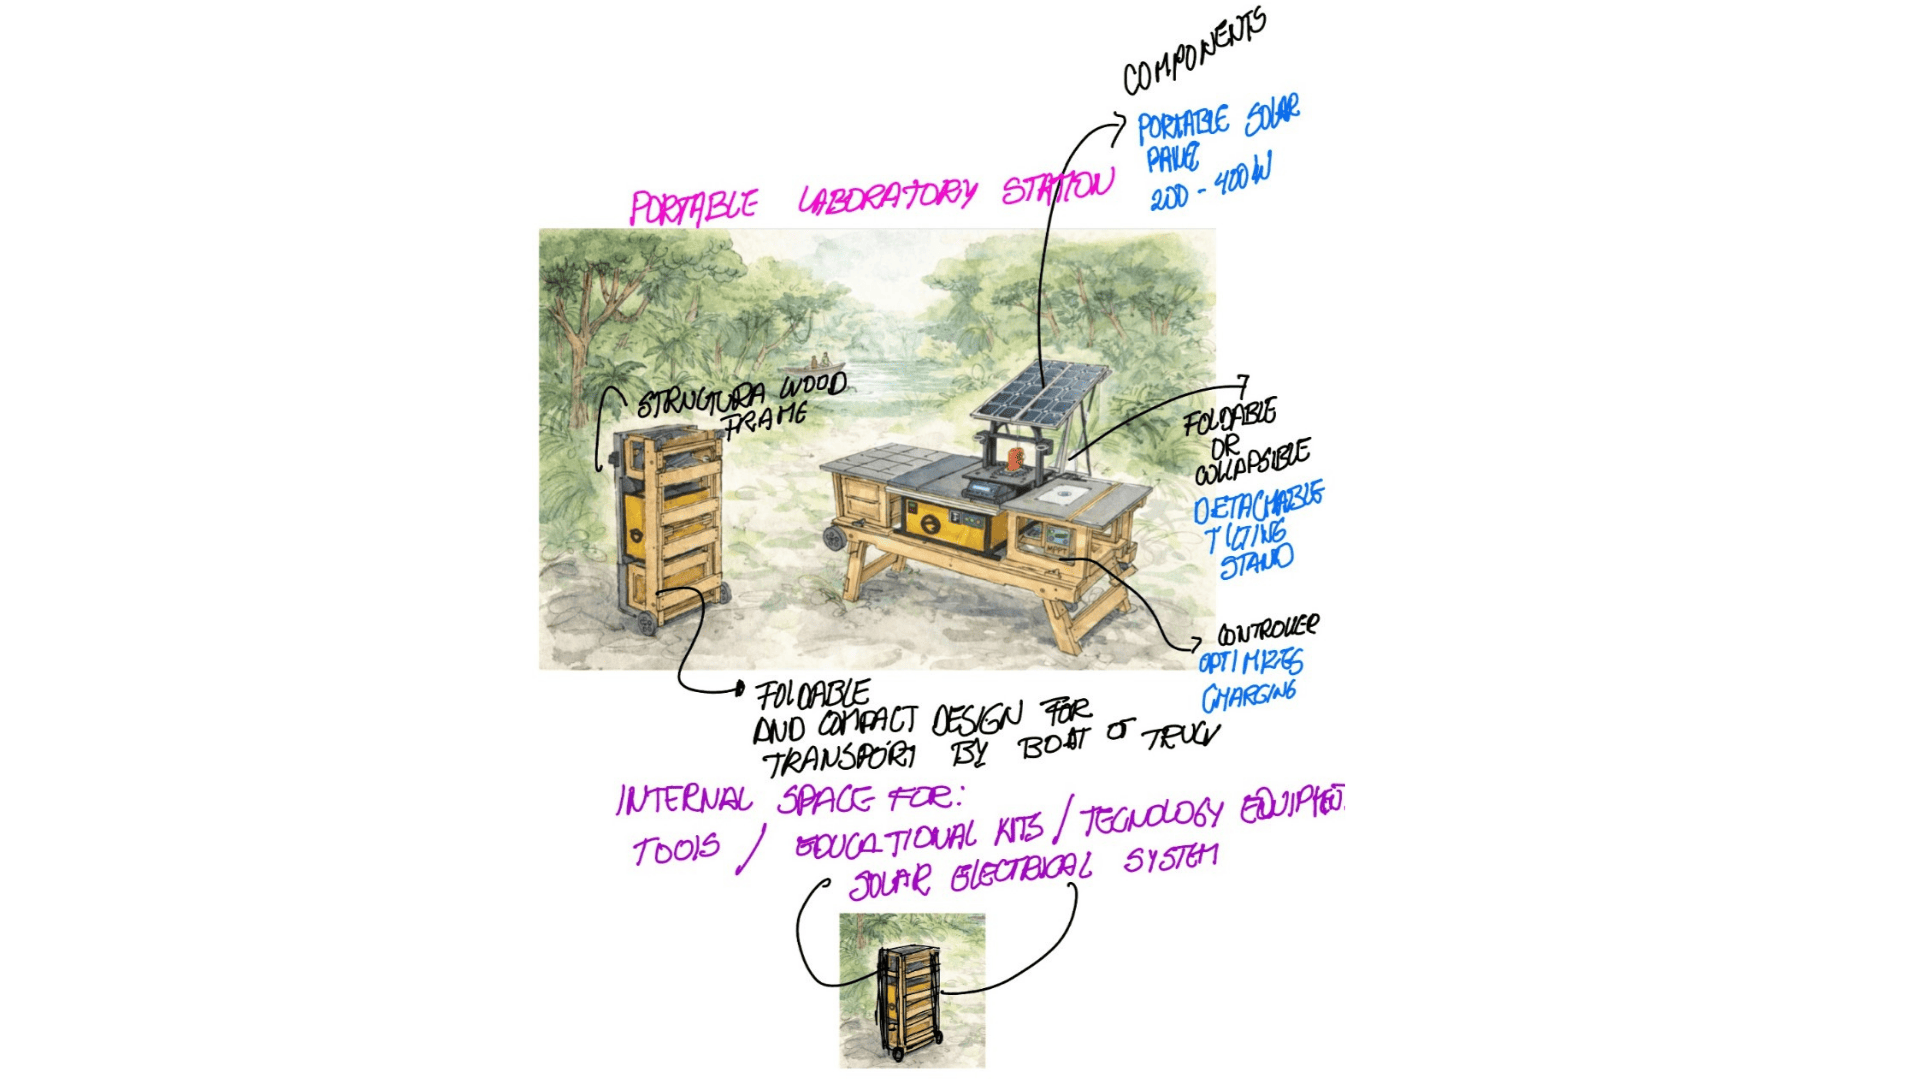
- A mobile furniture unit conceived as a mobile storage module, designed for easy transport in a car trunk or boat, in response to the territorial and riverine conditions of the Peruvian Amazon. This unit allows for the safe transport and storage of mobile workshop and laboratory kits, functioning as a robust trunk resistant to humidity, rain, and continuous use in the field. When unfolded, it transforms into a foldable and extendable table, creating a functional workspace in communities where access to basic furniture is limited or nonexistent. It also incorporates an autonomous solar panel system, providing renewable energy for charging cell phones, lamps, and essential equipment, given the scarce or nonexistent electrical infrastructure present in much of the territory. This mobile FAB (Family-Based Learning Unit) promotes the development of educational, technological, and community activities, facilitating access to tools, clean energy, and learning spaces adapted to the Amazonian context.
Problem
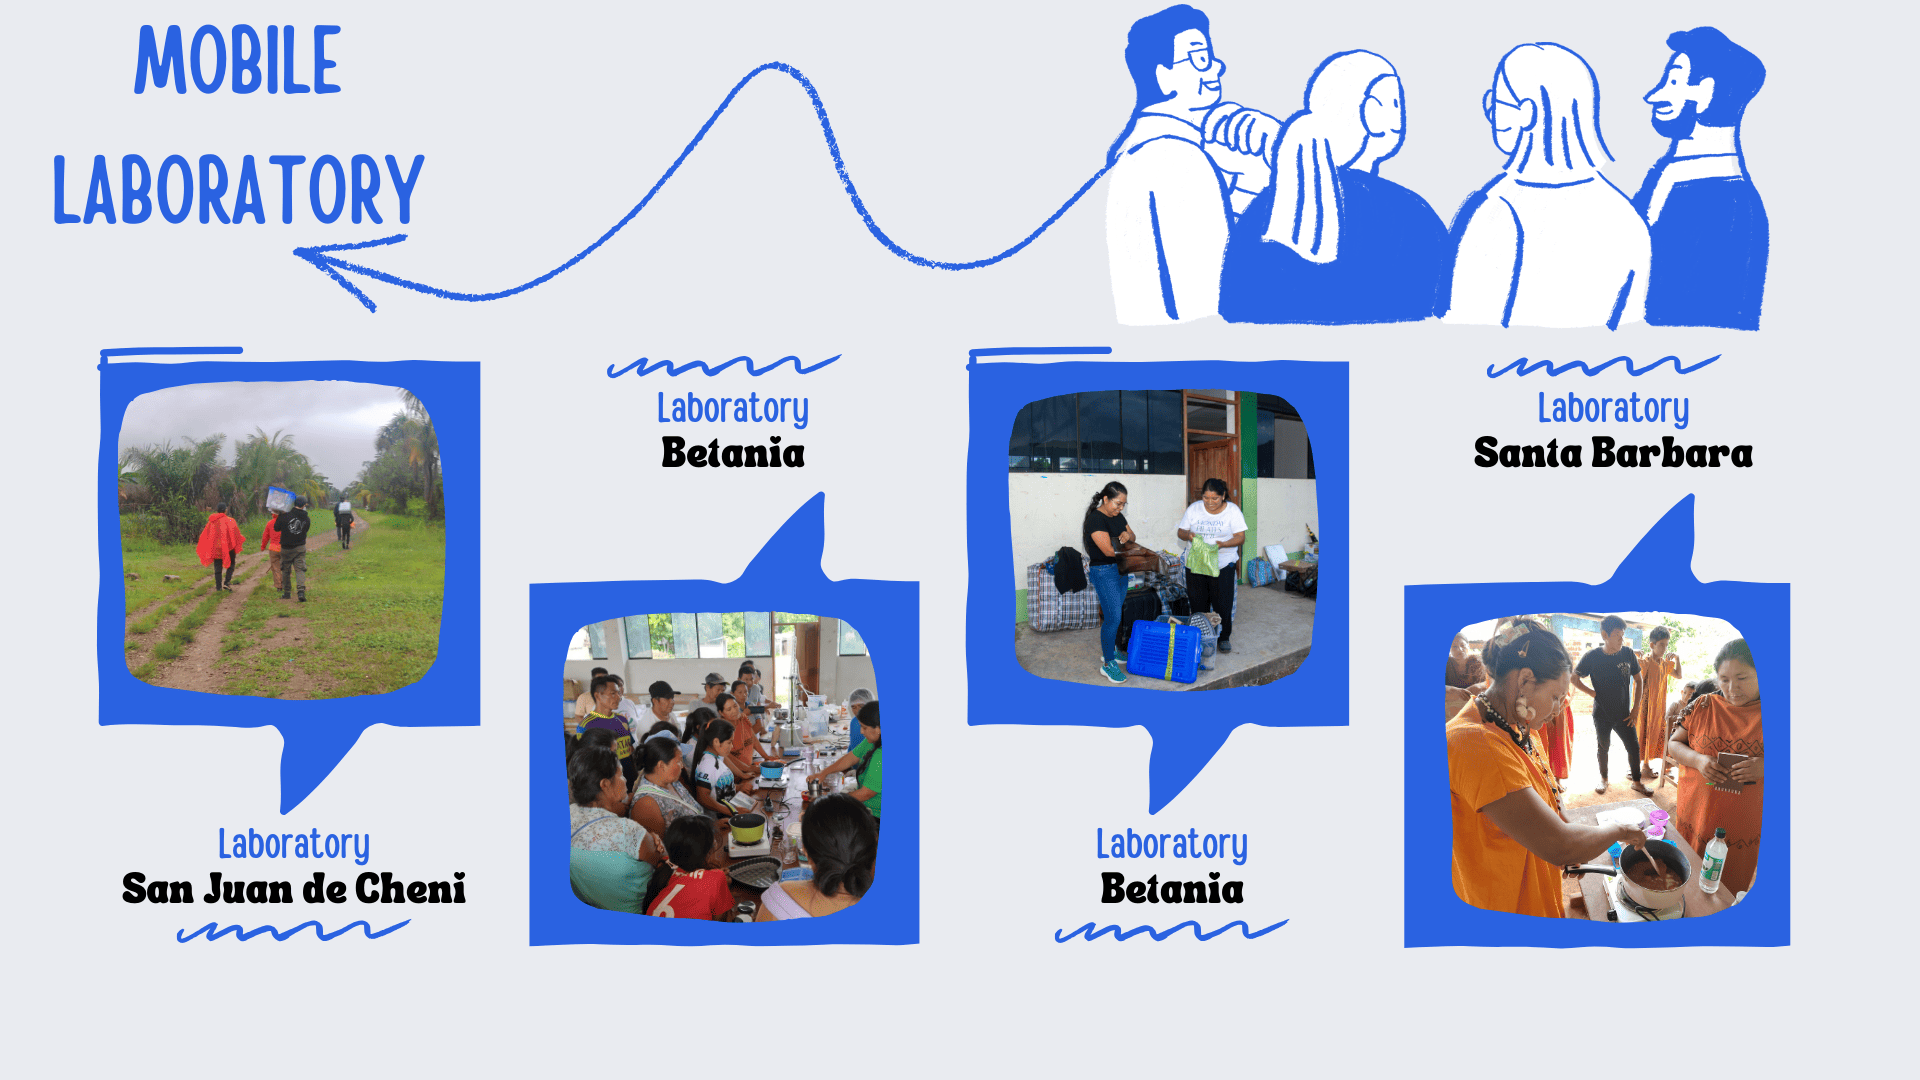
- Transporting the work kits to the communities often presents a significant challenge, as journeys are made by both cars and boats, involving long distances, humidity, rain, and constant movement. On several occasions, the equipment and materials have been damaged during these trips, impacting the workshops. Furthermore, many communities lack electricity, limiting the use of technological tools and hindering the continuity of activities. This reality highlights the need for mobile, durable, and self-sufficient solutions that protect the work kits and guarantee basic access to renewable energy.
proposal
Target User
- The use will take place in native communities and in any territory where workshops are held, as it will allow the safe transport of work kits, provide functional furniture and autonomous energy, thus facilitating the development of educational and technological activities in diverse contexts.
Key Features
- Modular and detachable design, adaptable to different types of workshops and needs. 1
- Mobile format, suitable for transport by car or boat.
- Secure storage system to protect kits and equipment.
- Built-in solar panel with storage battery.
- Ports for charging cell phones, lamps, and basic equipment.
To learn more about my Final Project, you can explore it here: Final Project
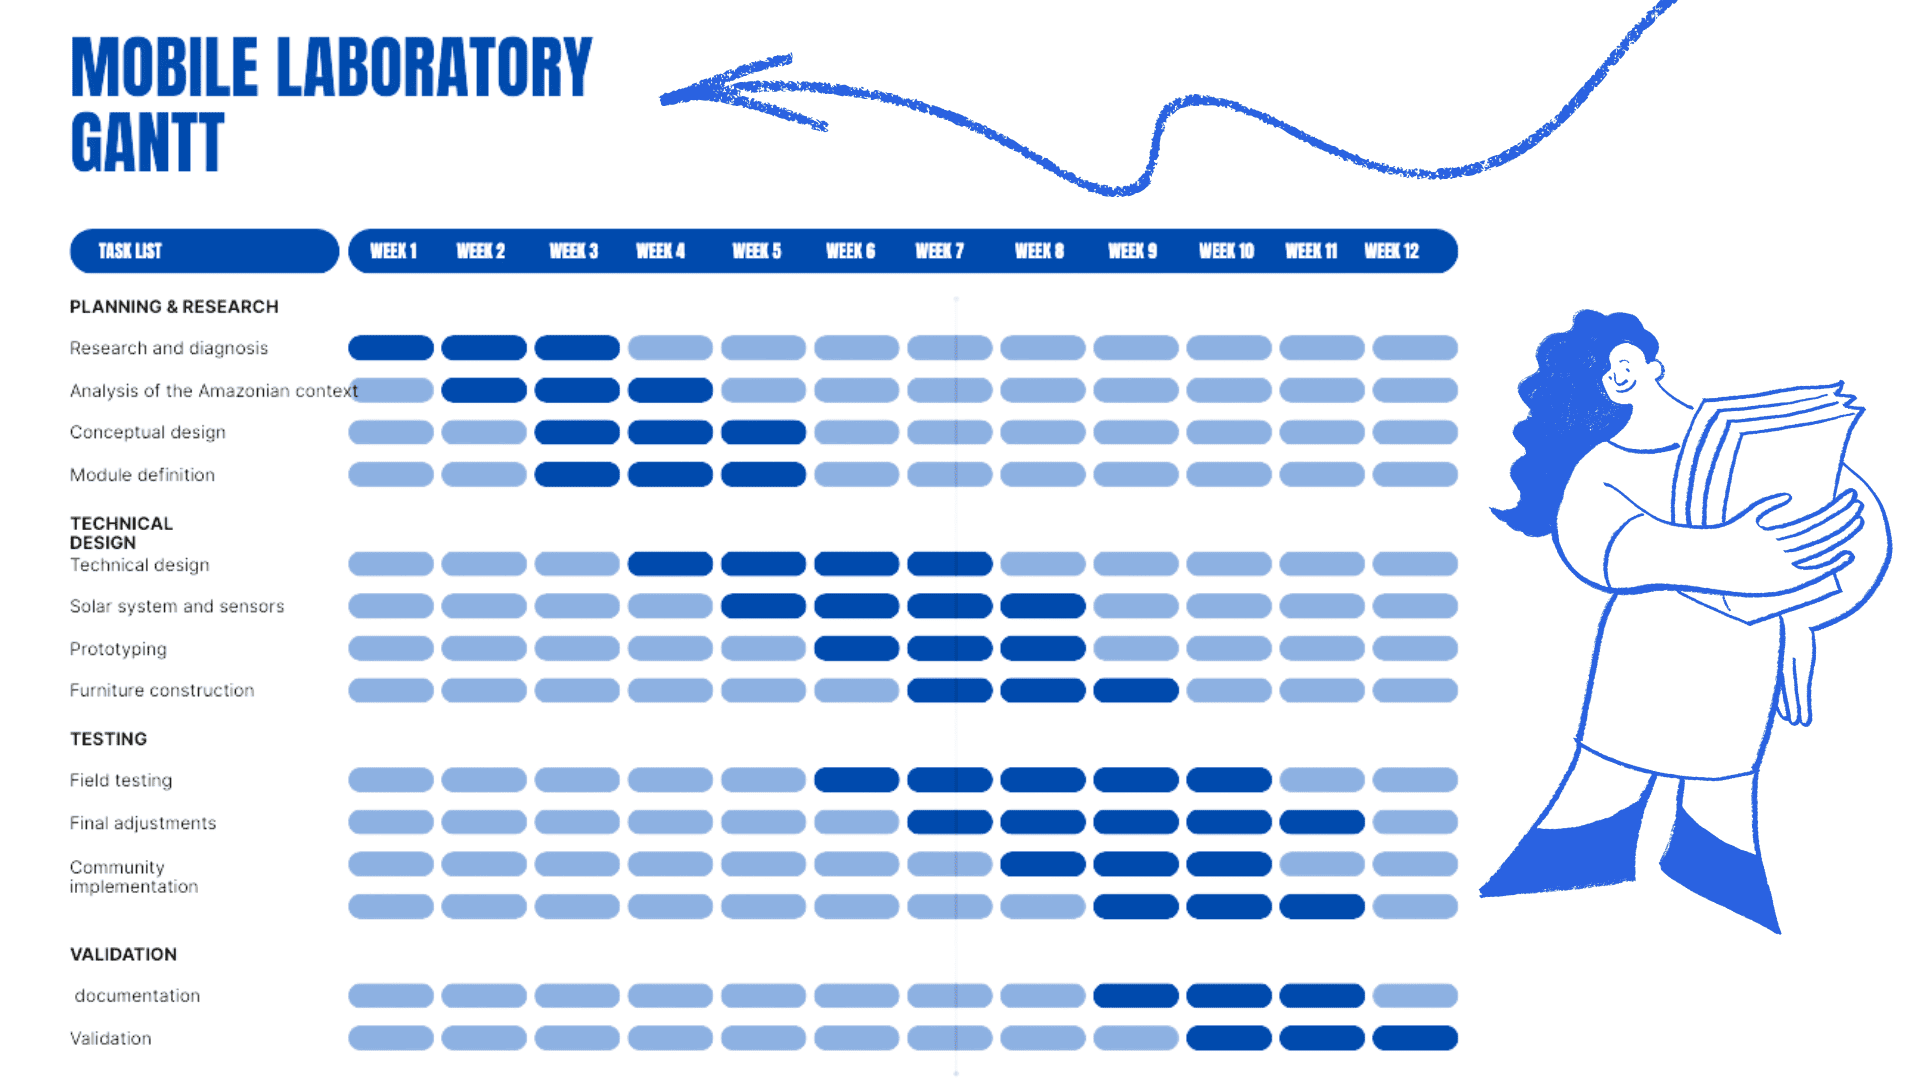
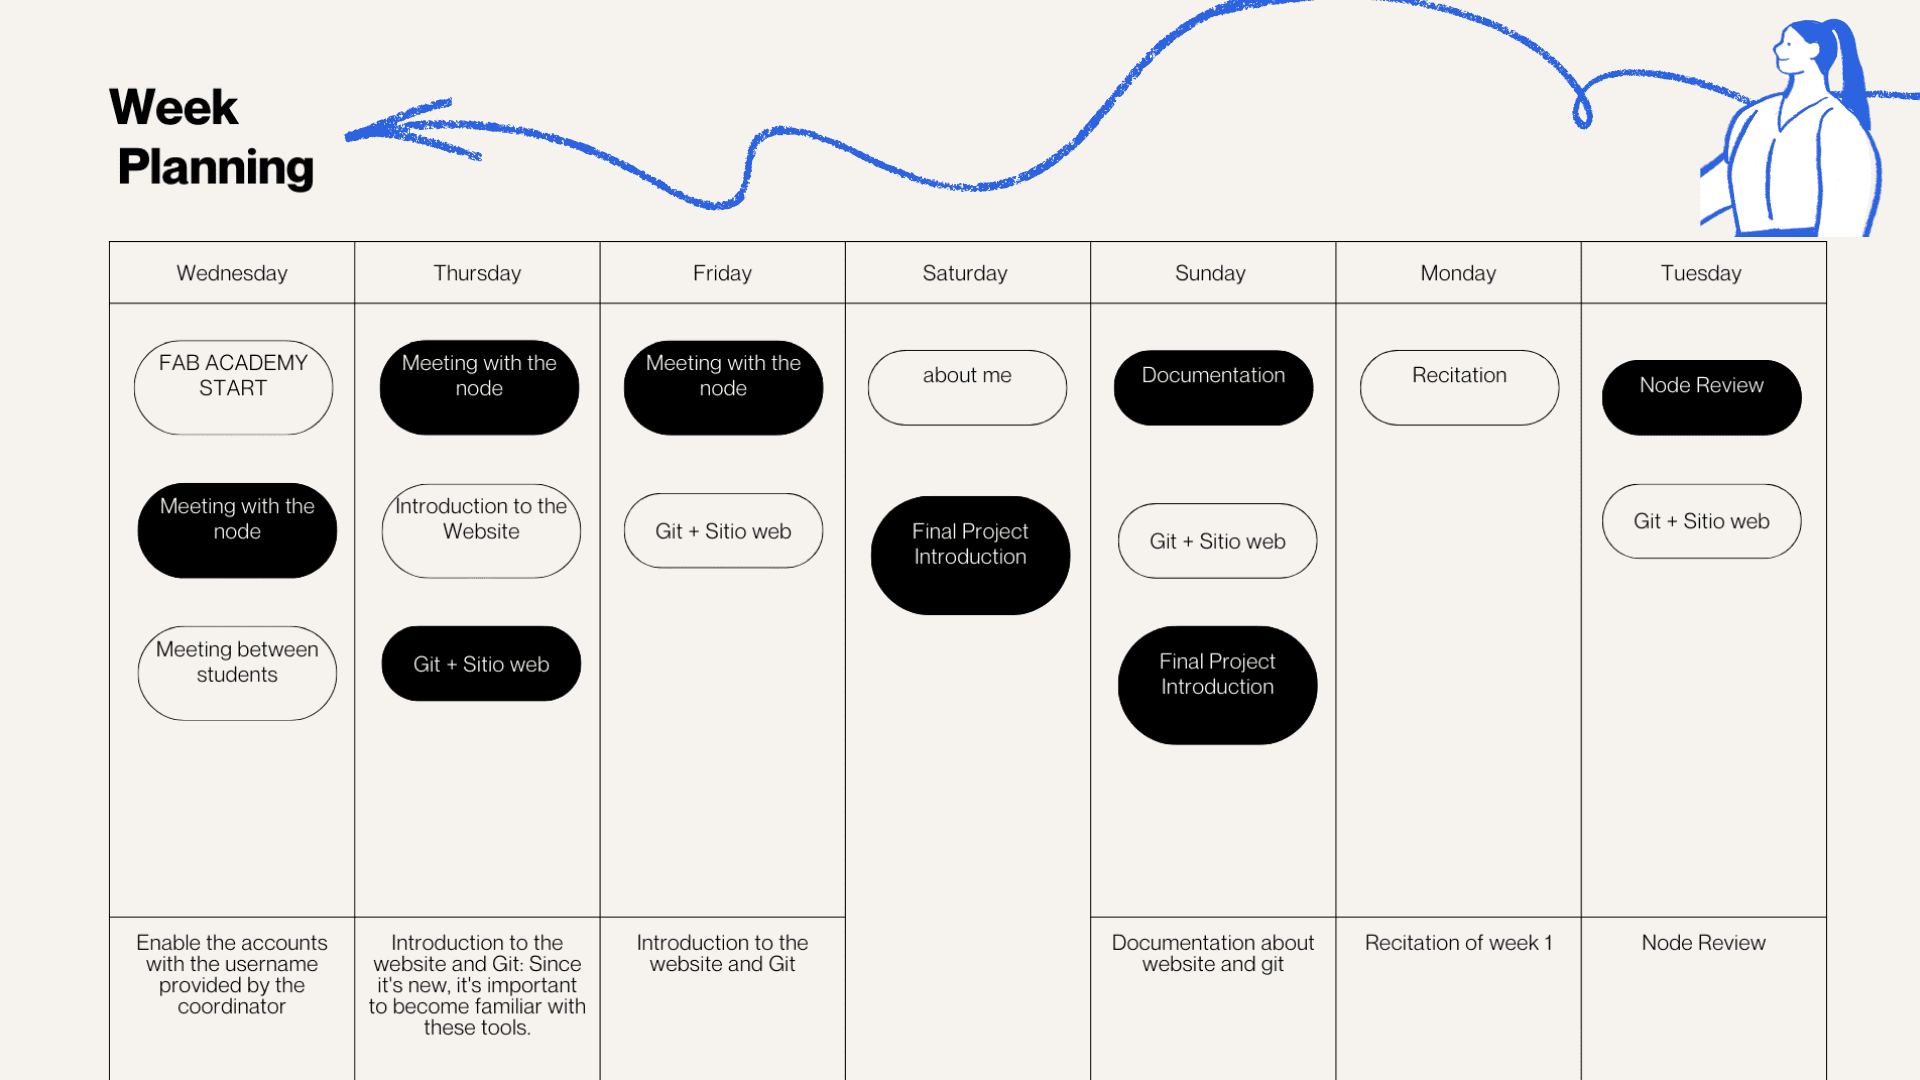
Mobile Lab Gantt
Project Management
Project Summary
Learning outcomes
- Communicate an initial project proposal.
- Work through a git tutorial..
- Build a personal website in the class archive describing yourself and your final project. Refer to the lecture material for examples.
- Upload parts 1 and 2, to the class archive.
Have you answered these questions?
- Sketched your final project idea(s) ✅
- Described briefly what it will do and who will use it ✅
- Made a website and described how you did it ✅
- Created a section about yourself on that website ✅
- Added a page with your sketch and description of your final project idea(s) ✅
- Documented steps for setting up your Git repository and adding files to it ✅
- Pushed to your class GitLab repository ✅
- Signed and uploaded Student Agreement ✅
Git Tutorial
Linking Accounts
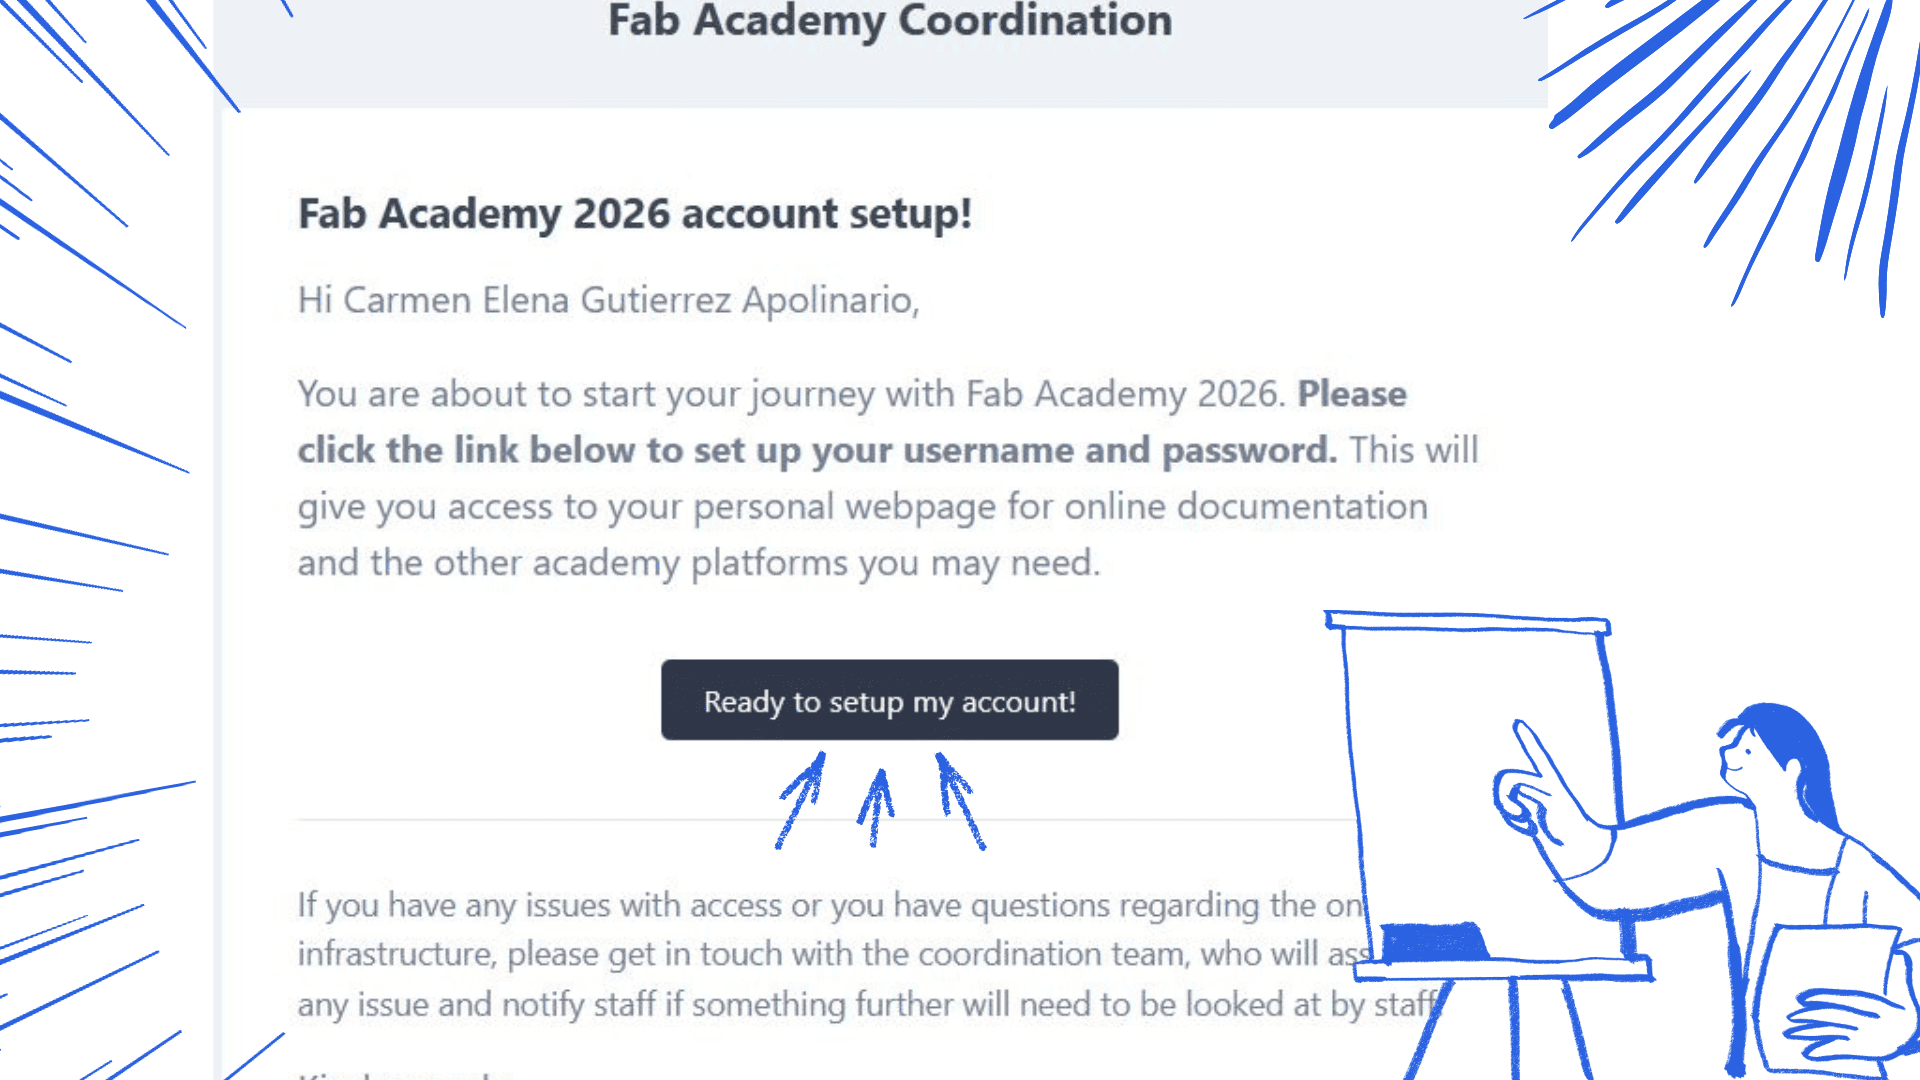
1)Initial Setup
- I registered and configured my Fab Academy 2026 account to gain access to the necessary platforms and link the institutional repositories to my local work environment.
- I used the following tools for development
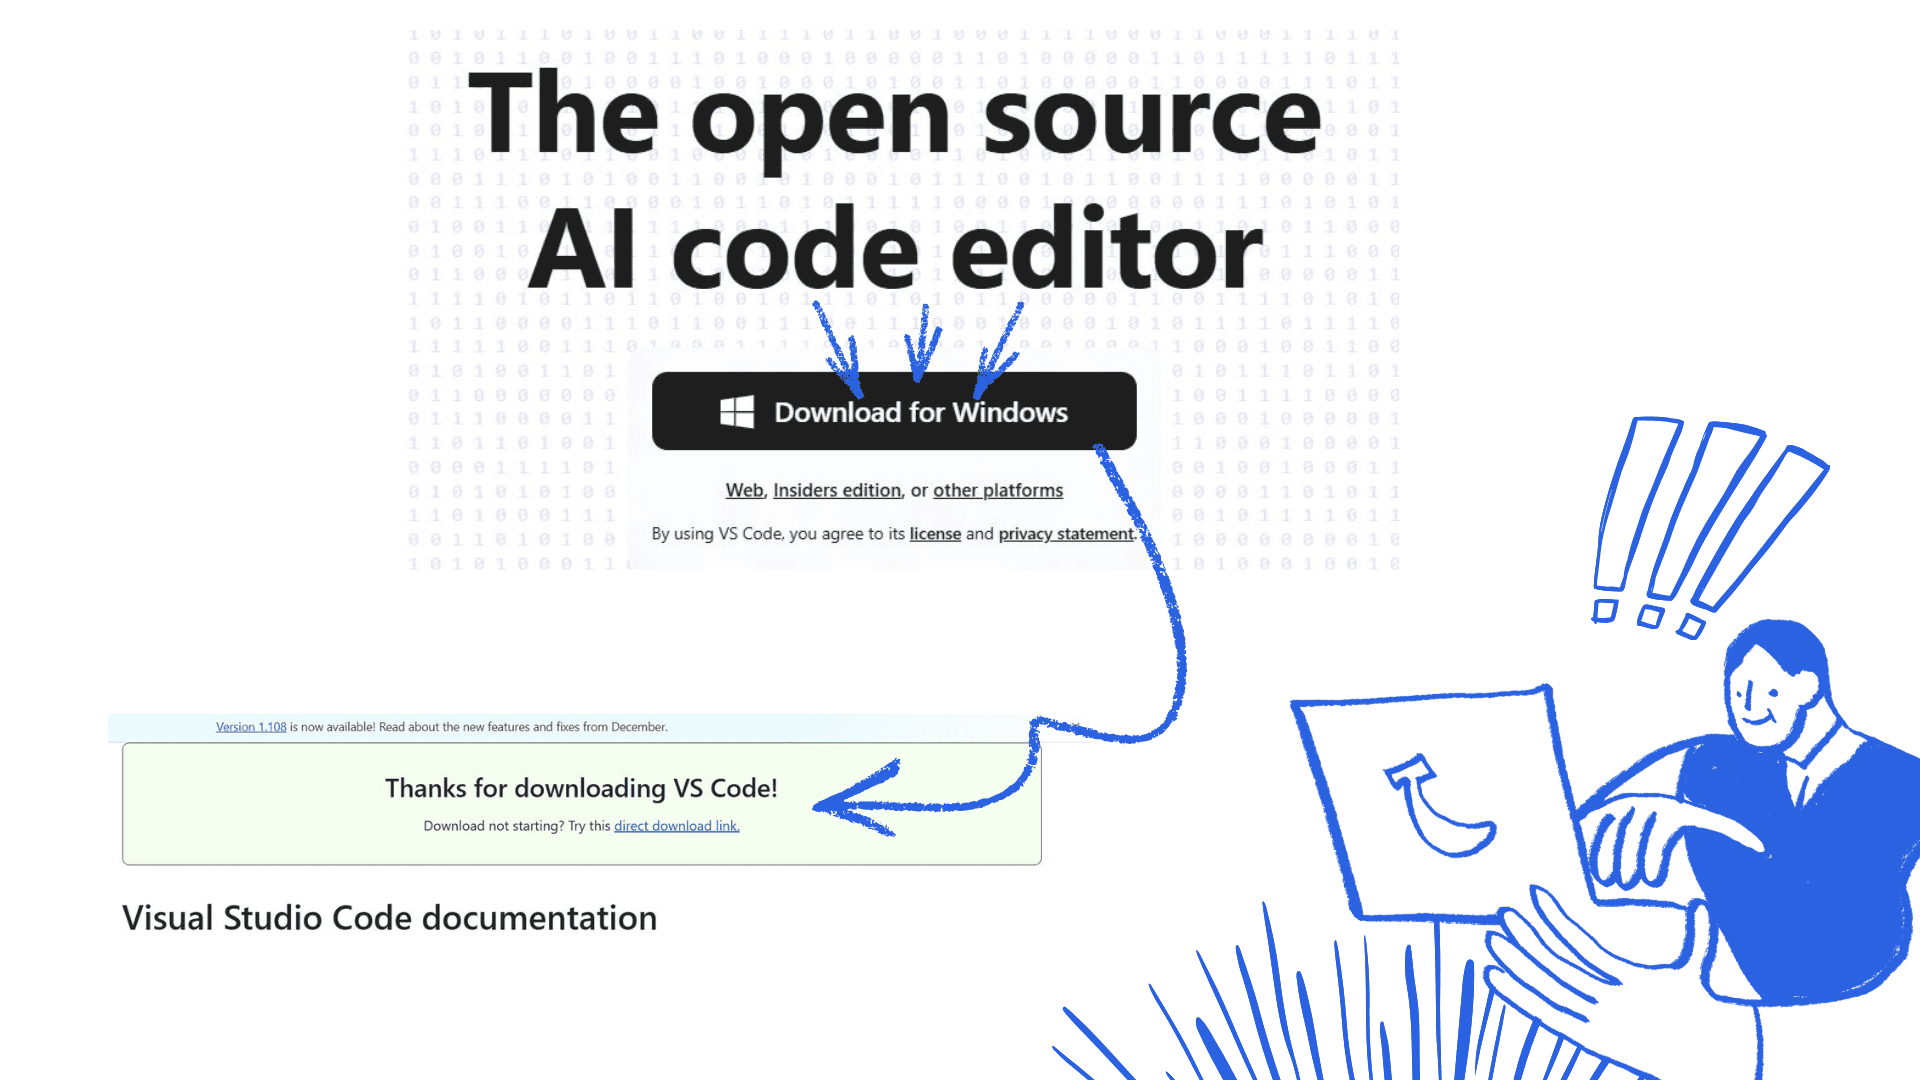
- Visual Studio Code (VSCode) as my main code editor Refer to the lecture material for examples
- Git for version control
Productivity Boosters
- To optimize my workflow, I configured
- Custom code snippets
- VSCode extensions for HTML, CSS, and Git
- Auto-completion and automatic formatting
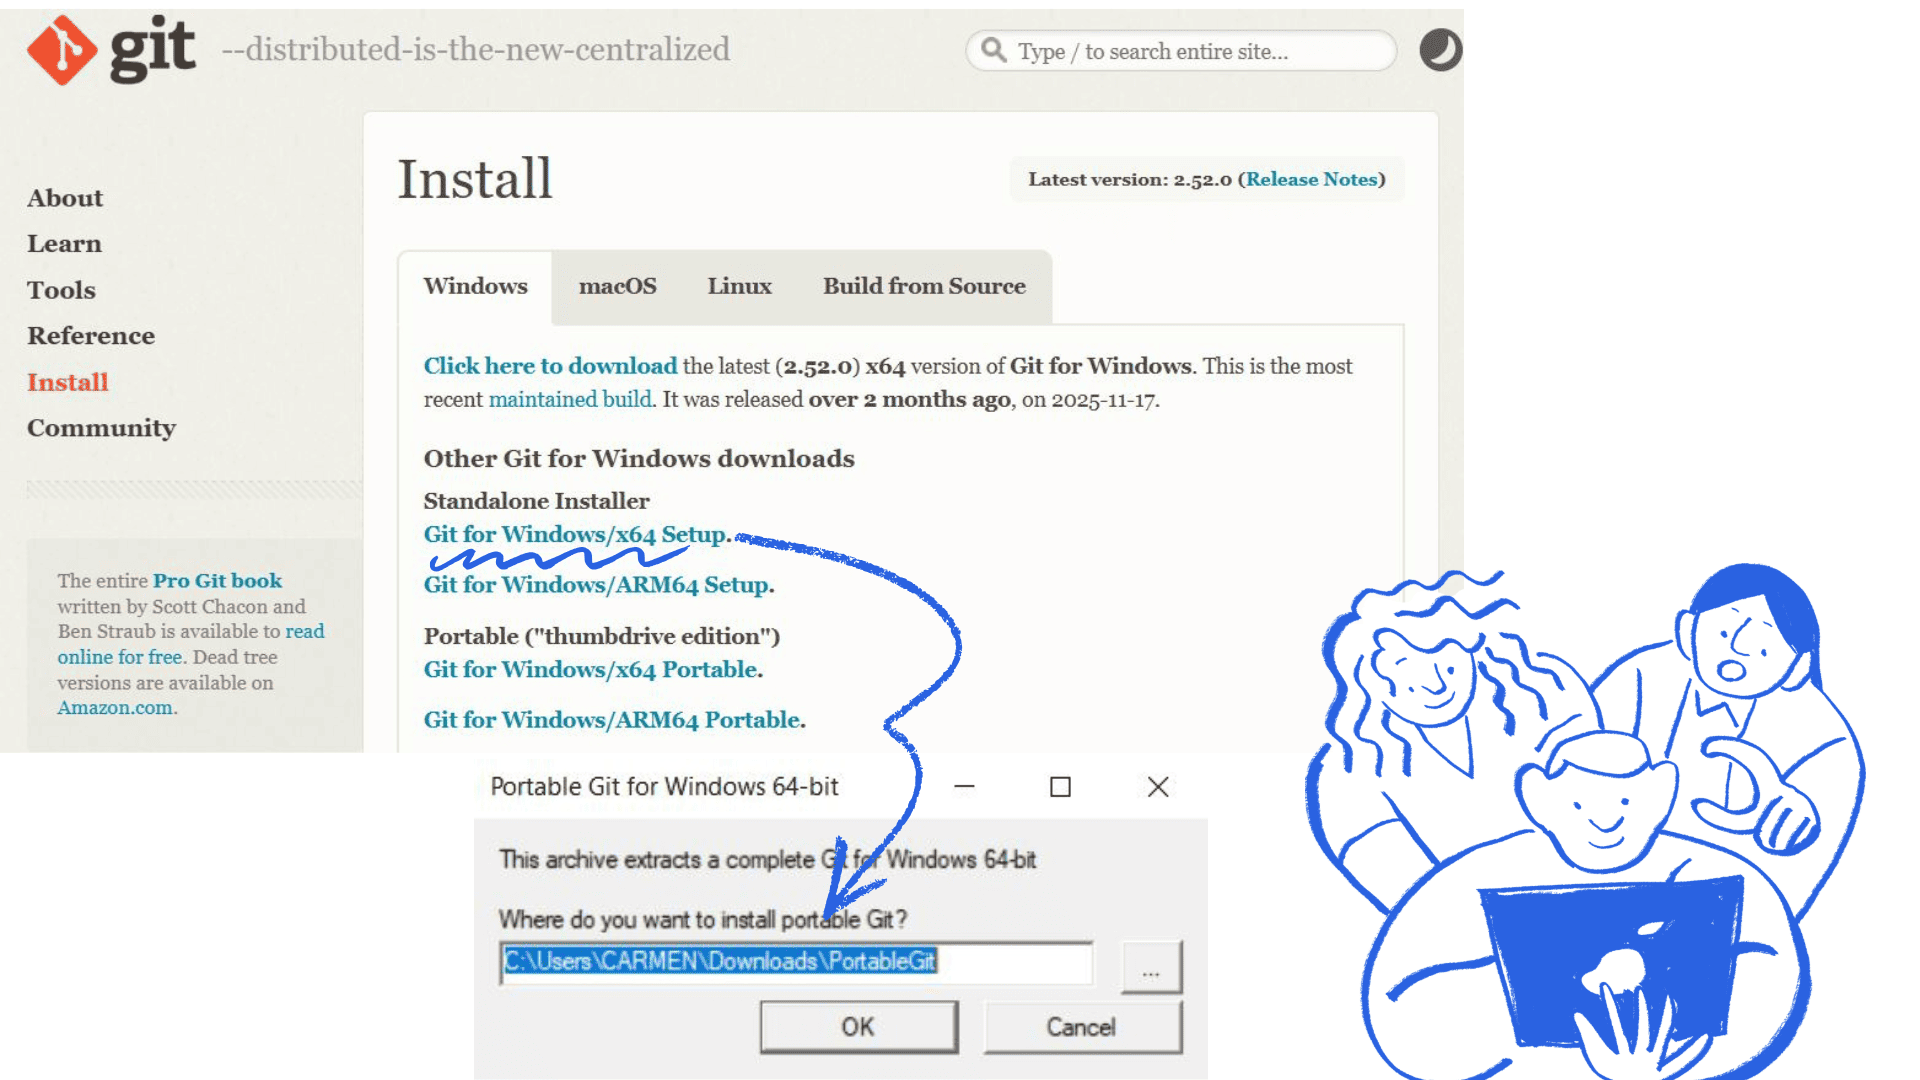
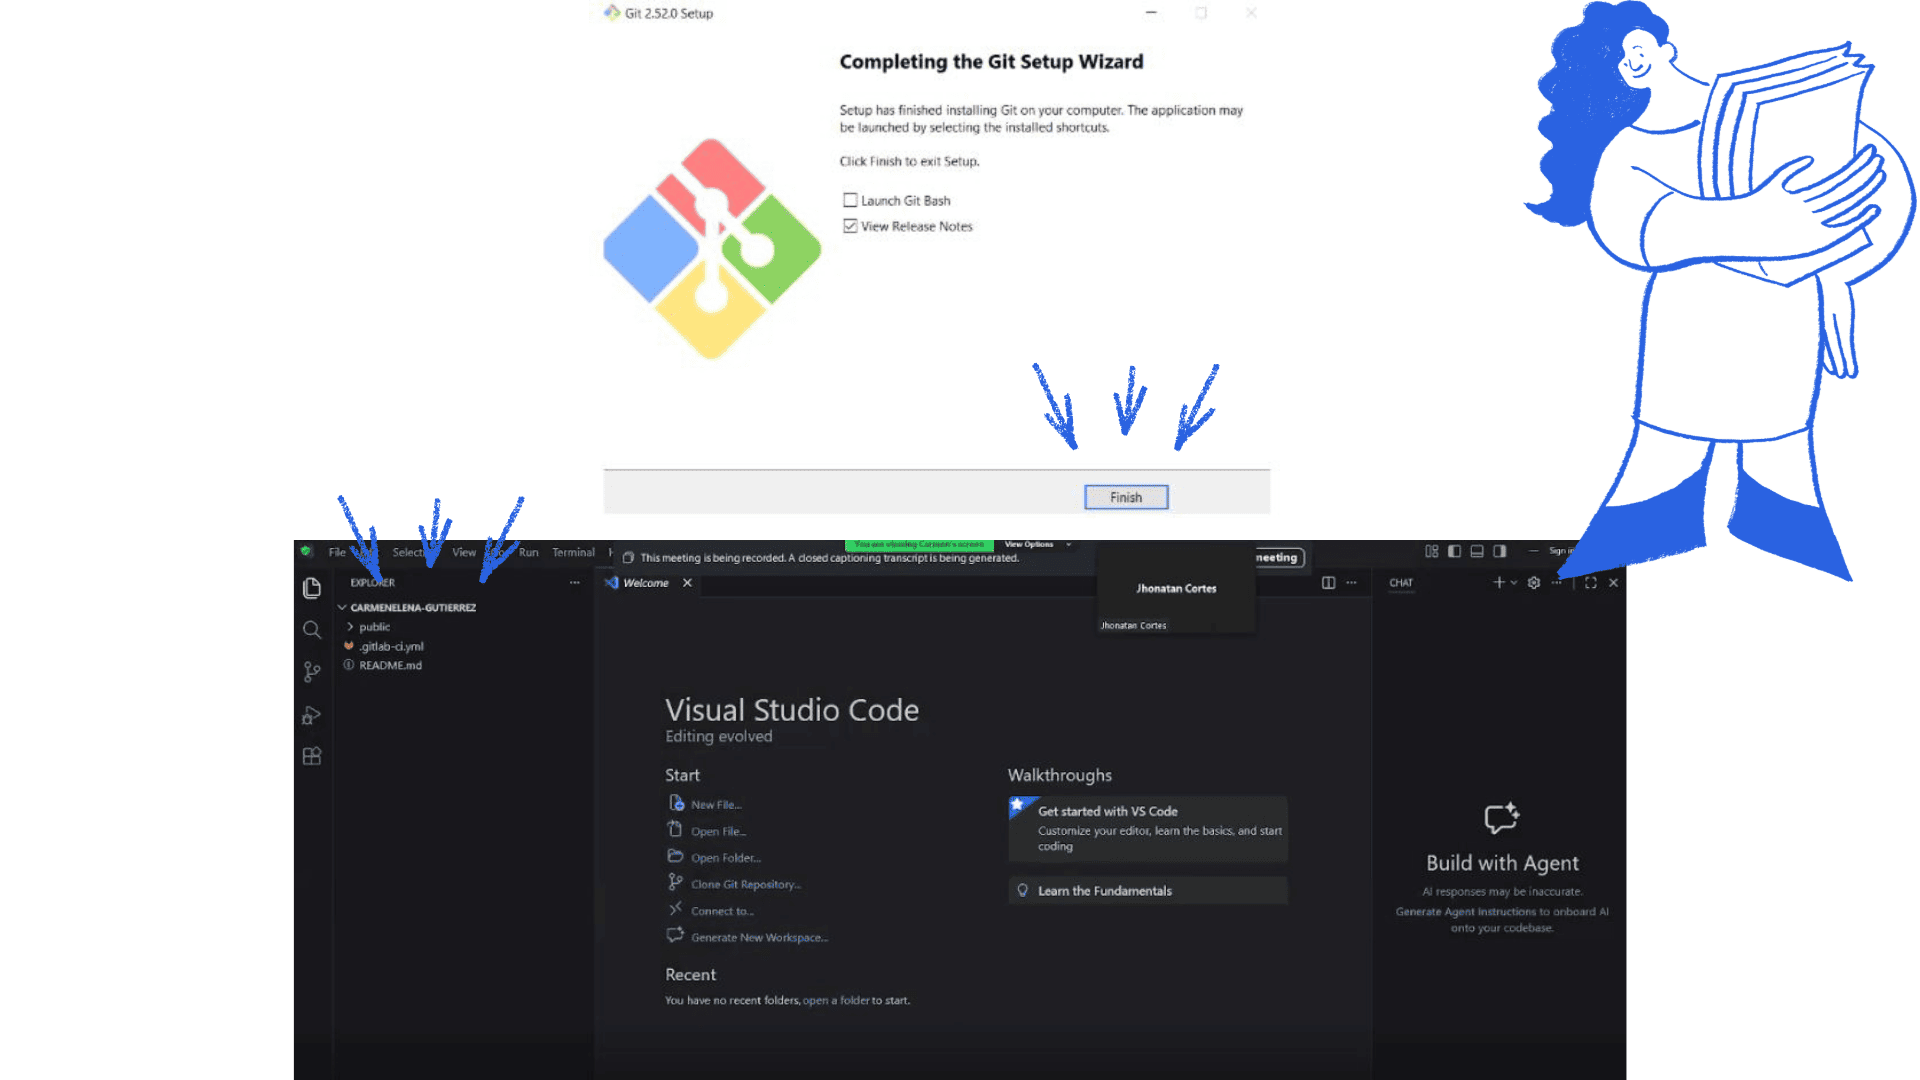
2) Git Installation
Initial Setup
- For me, as for my classmates, the topic of programming was new, but we had meetings with teacher Jonathan from the node, and with his help we were able to understand and achieve an introduction to coding.
- Open Visual Studio Code
- Access the Version Control panel
- Follow the instructions to install Git (64-bit)
- Complete the installation and restart VSCode to ensure it is working correctly
Open Visual Studio Code

Access the Version Control panel
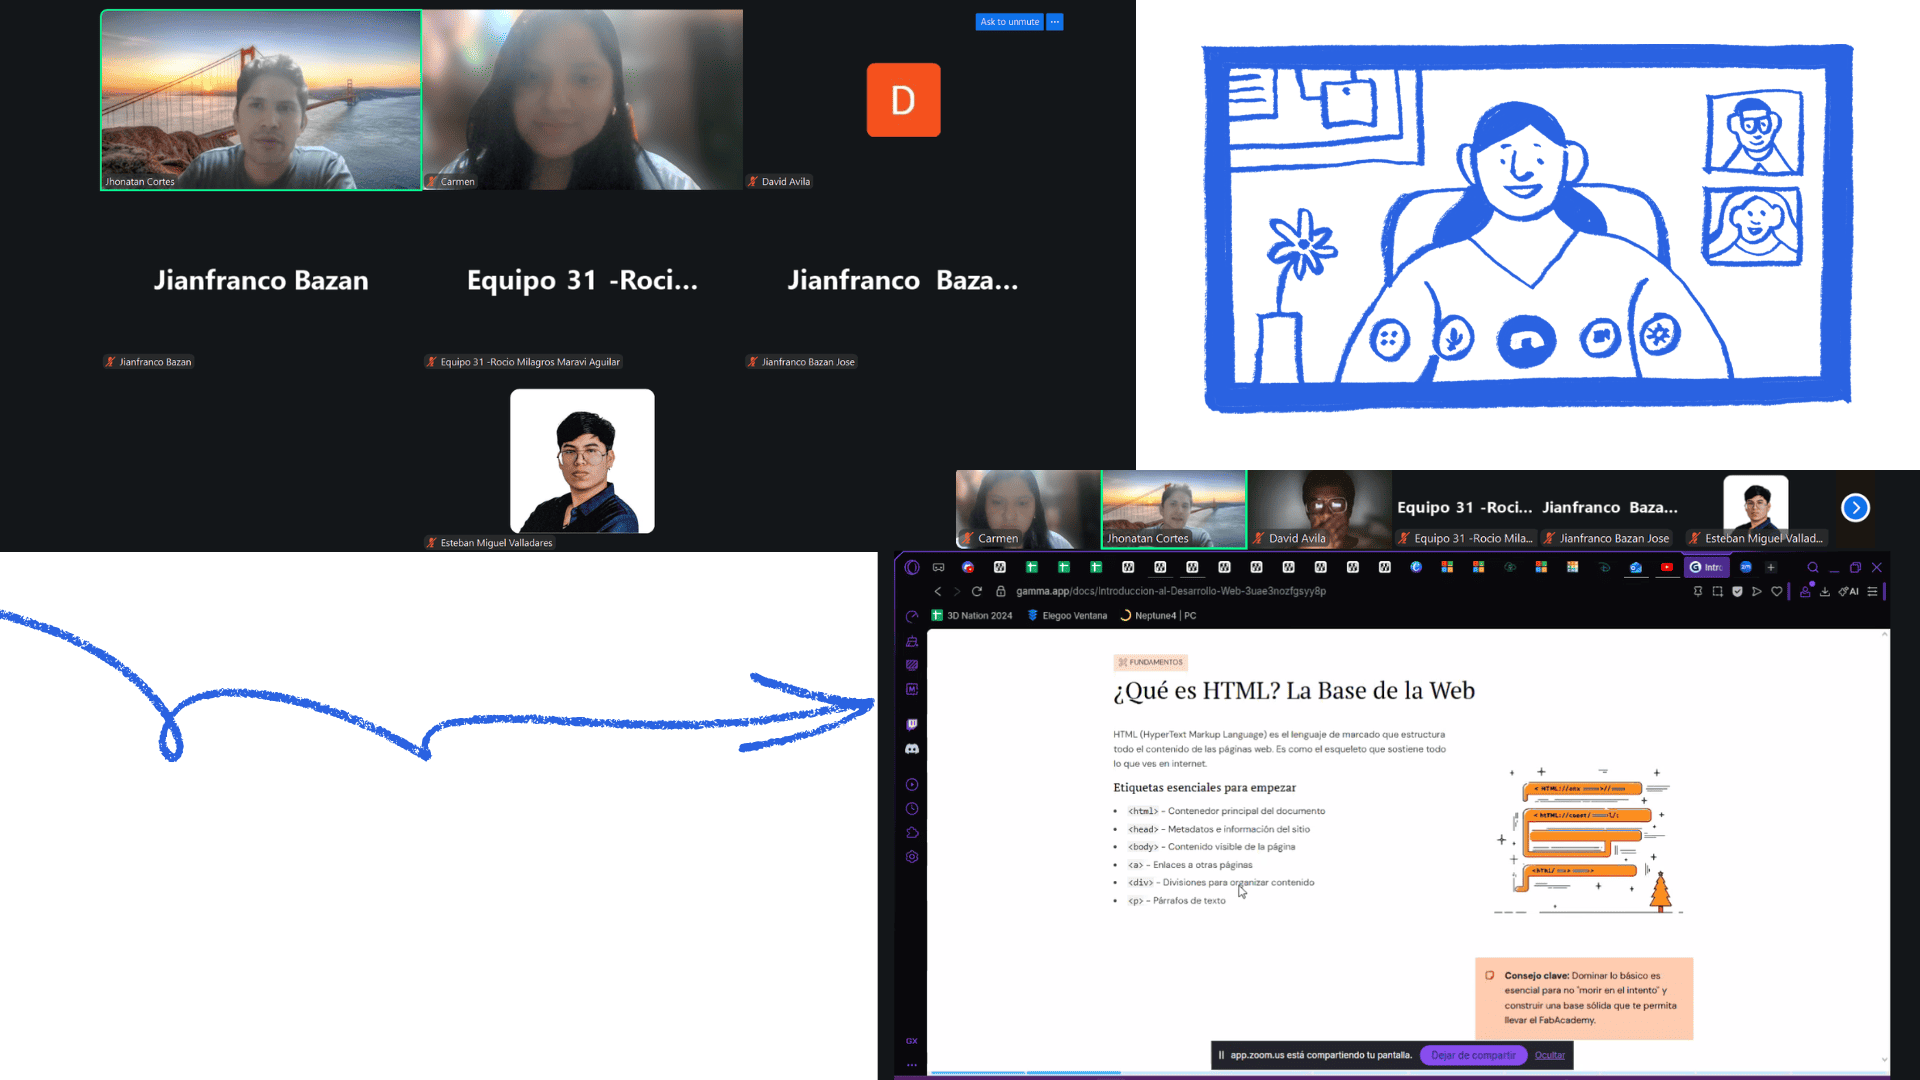
Meeting with teacher Jonathan
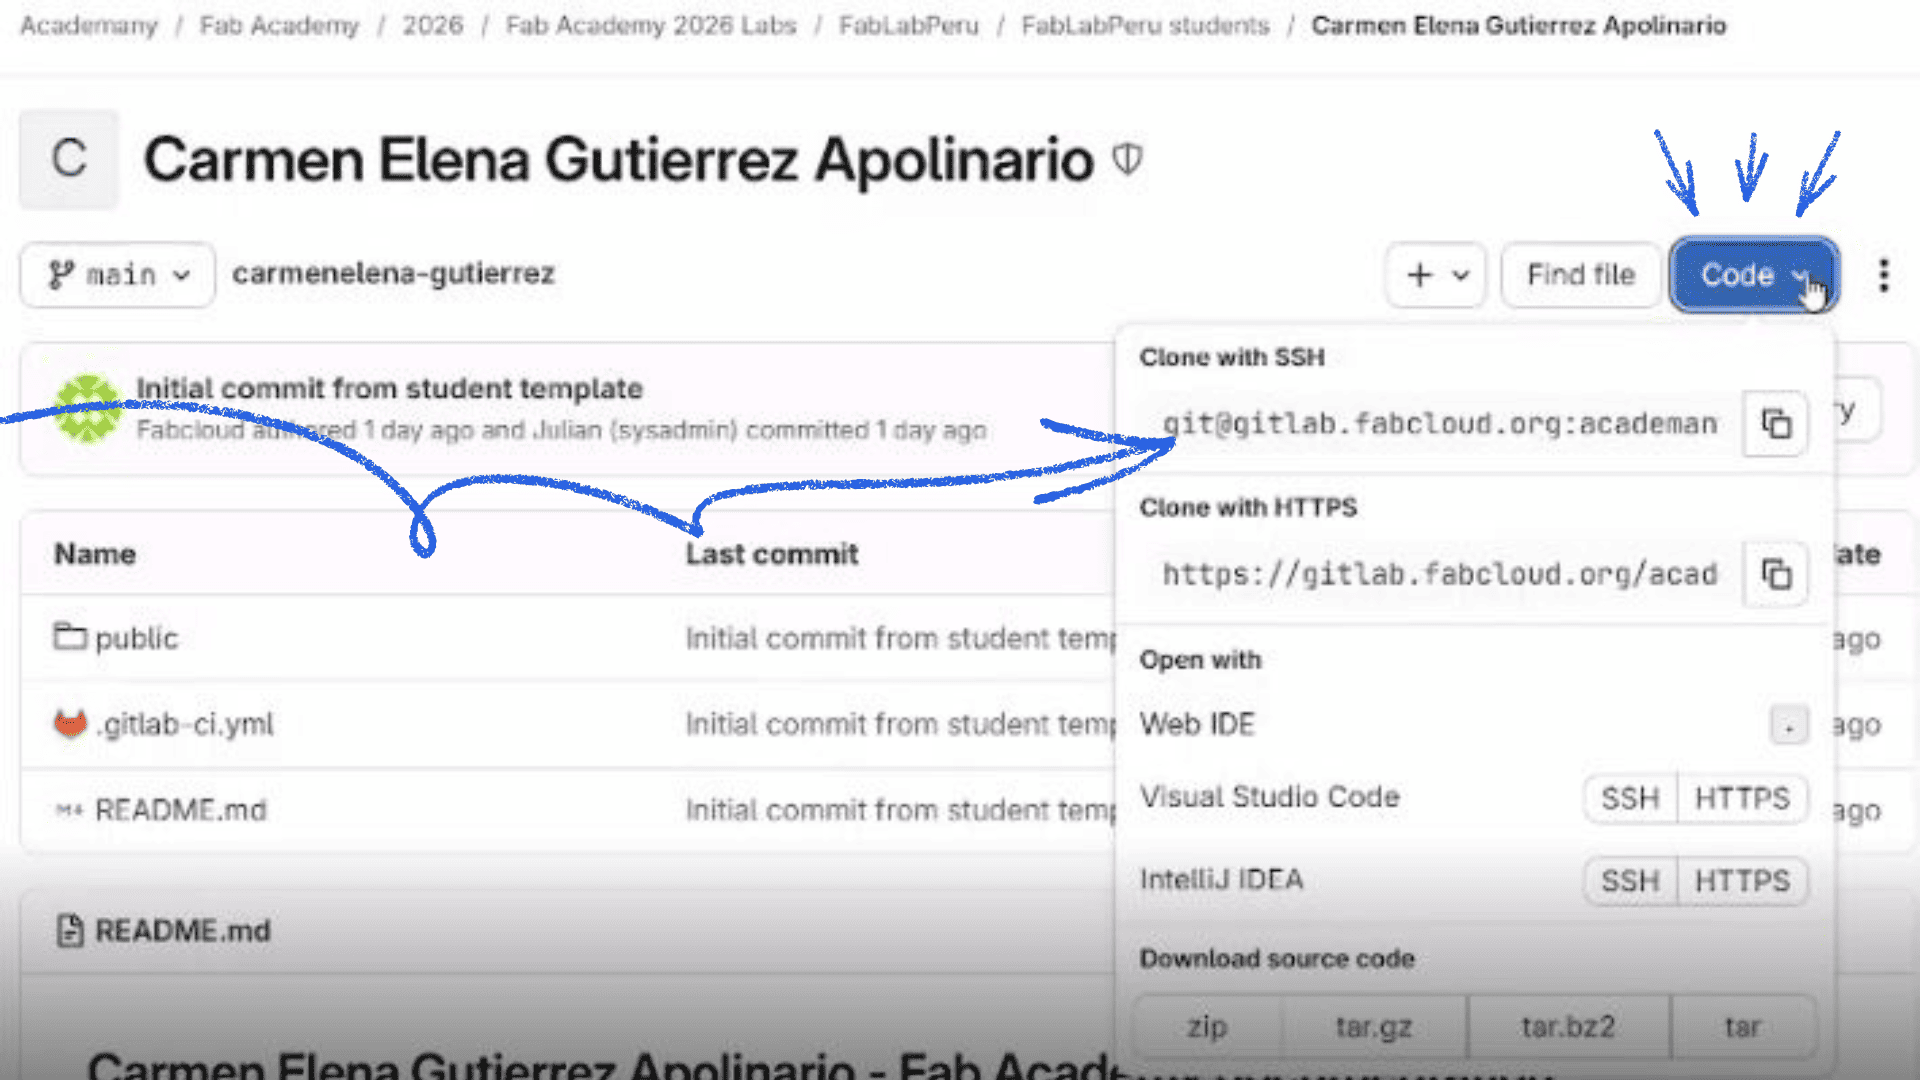
3) Cloning
Initial Setup
- Select "Clone repository" in the version control section, or use the simpler option to clone directly from your repository in GitLab
- Link to the FabLab Git repository by logging in with your FabLab user account.
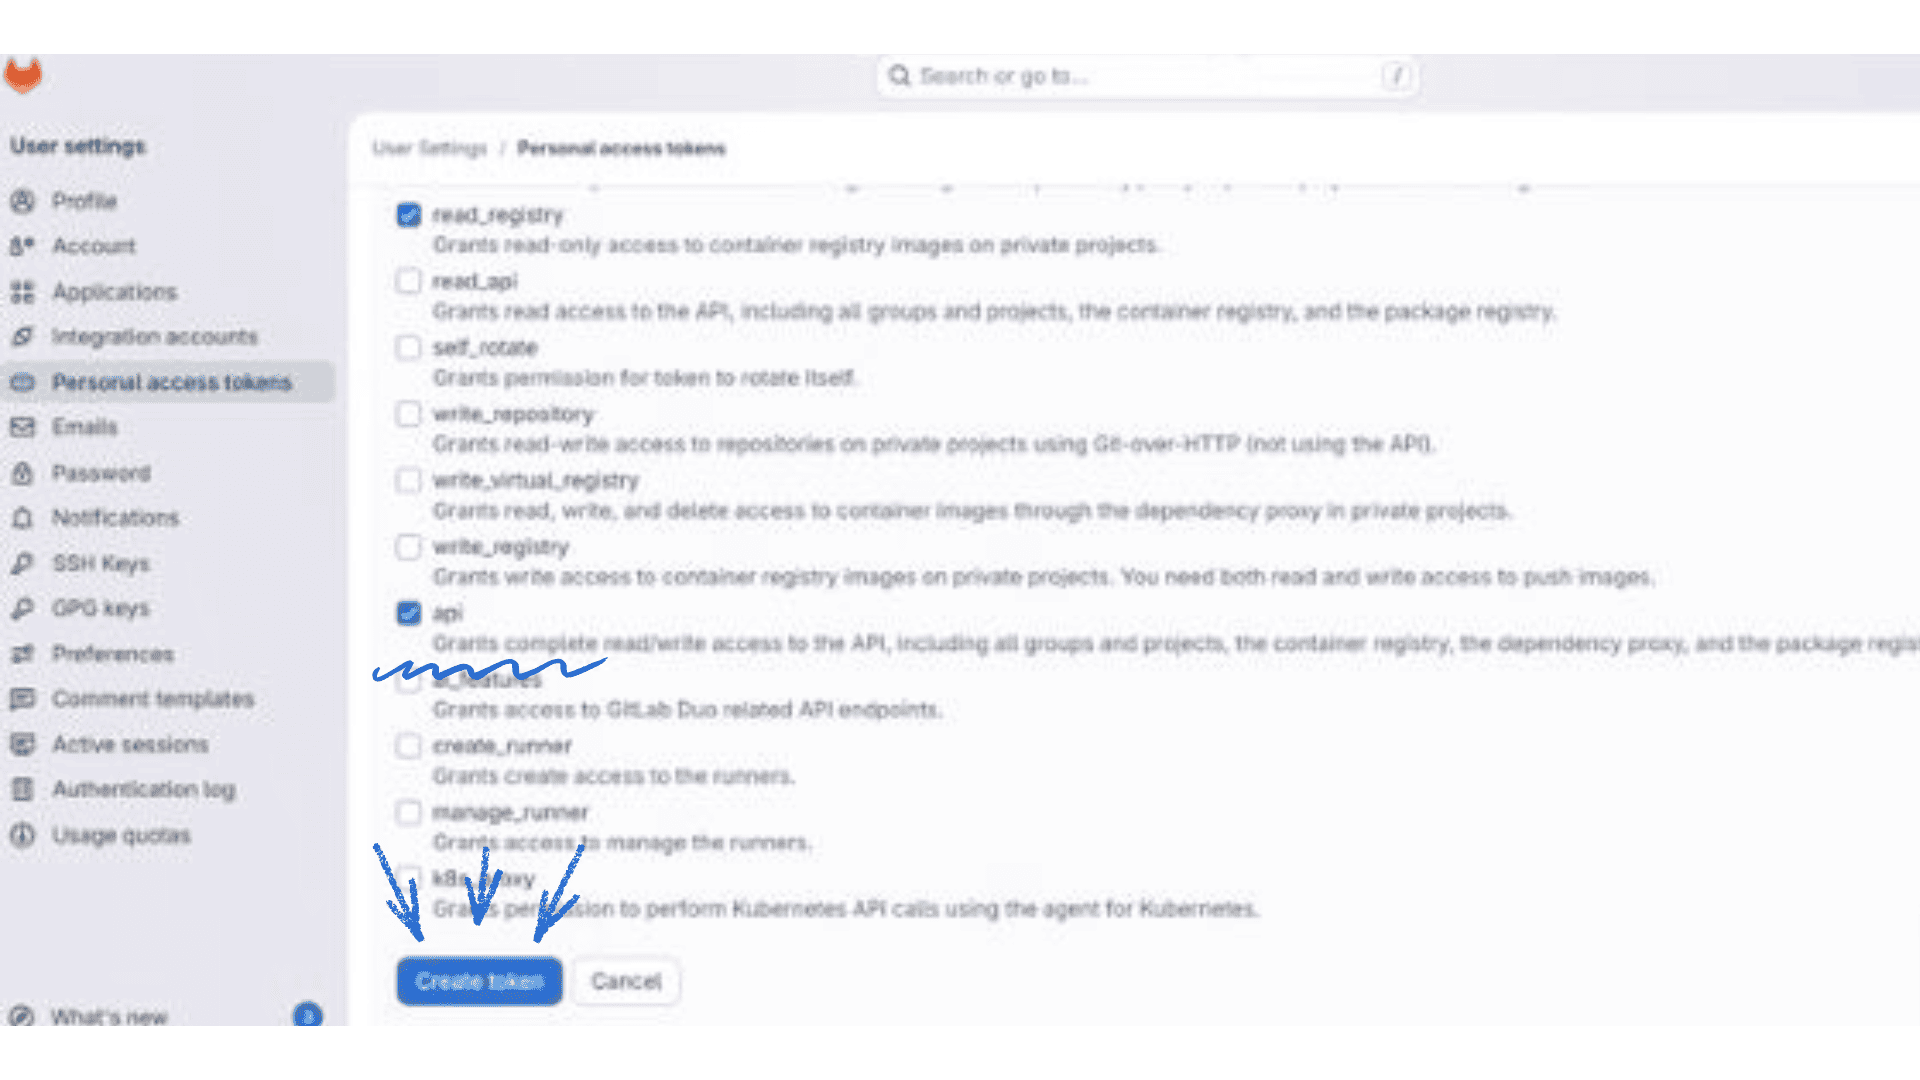
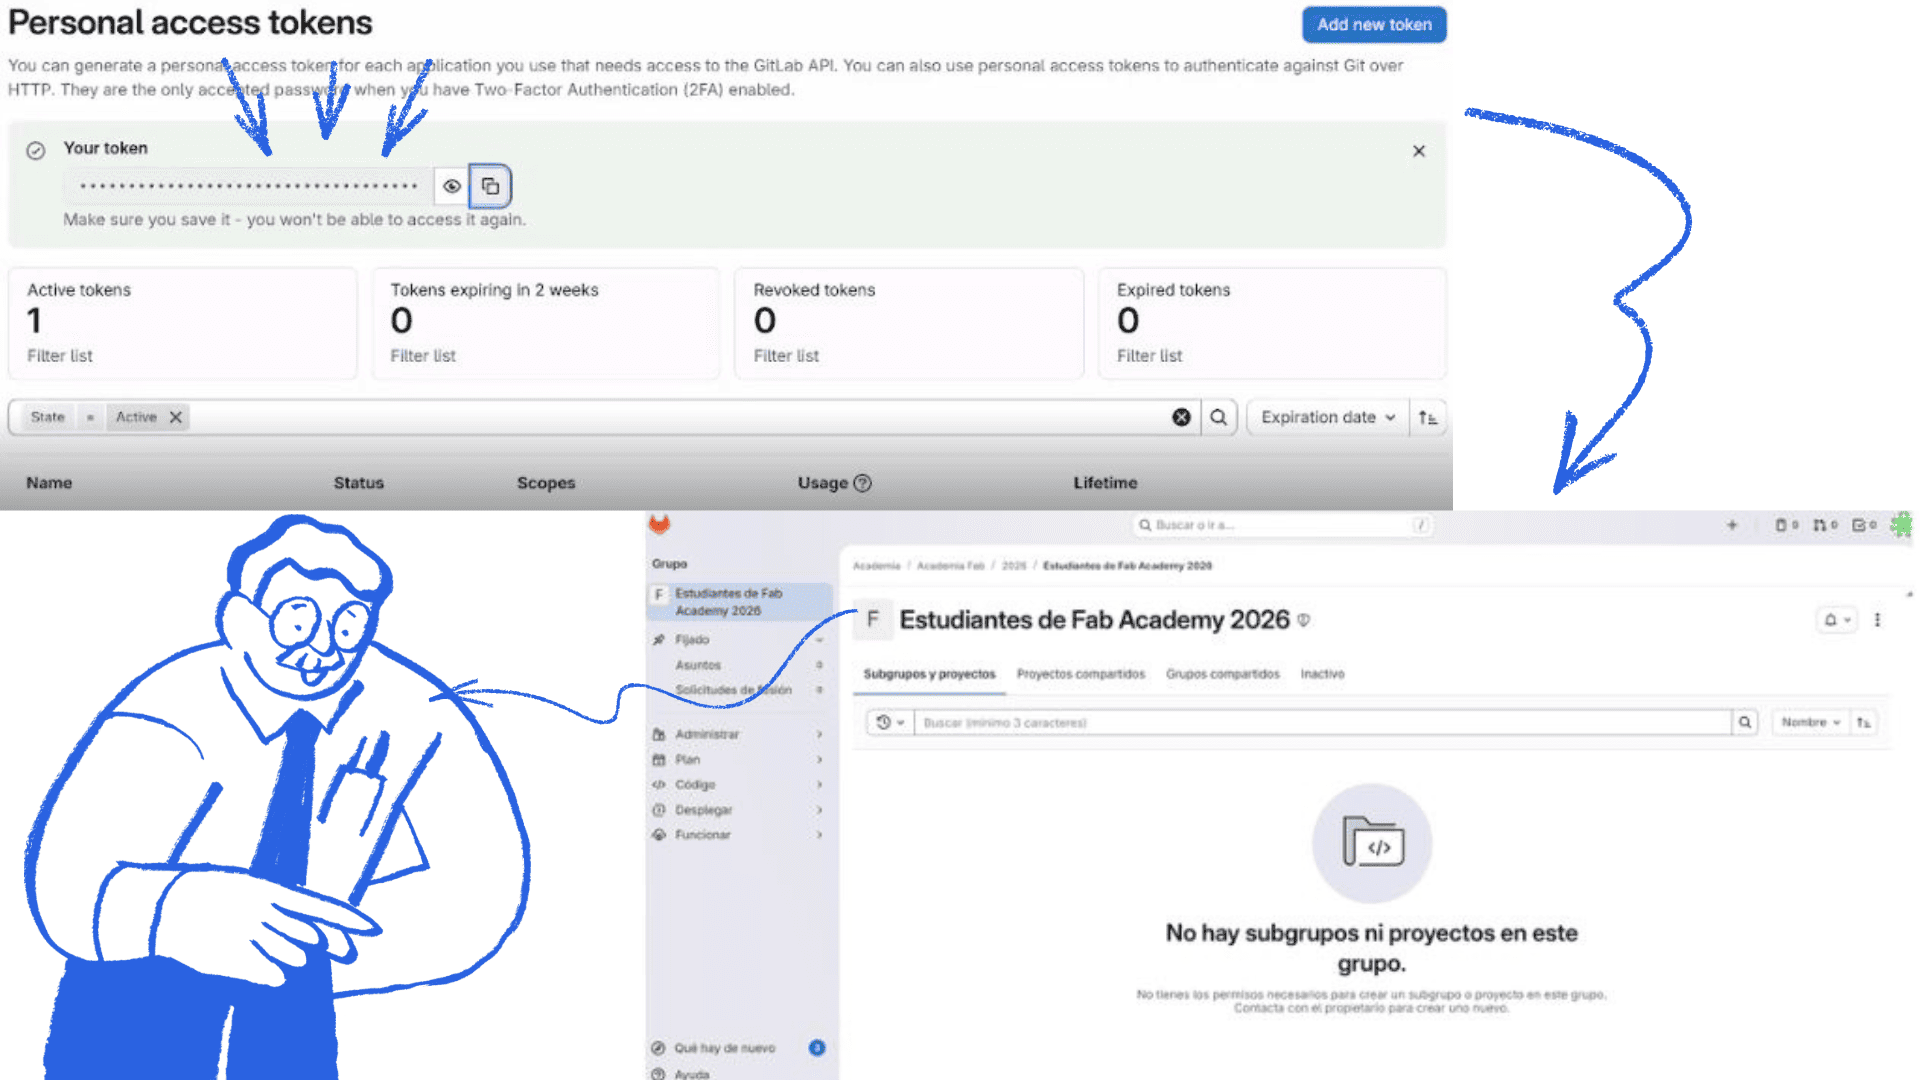
- Generate an access token in your Git account settings (code in the blue bar; you will also need to enter some information such as the dates of use on the computer and the token name)
Git
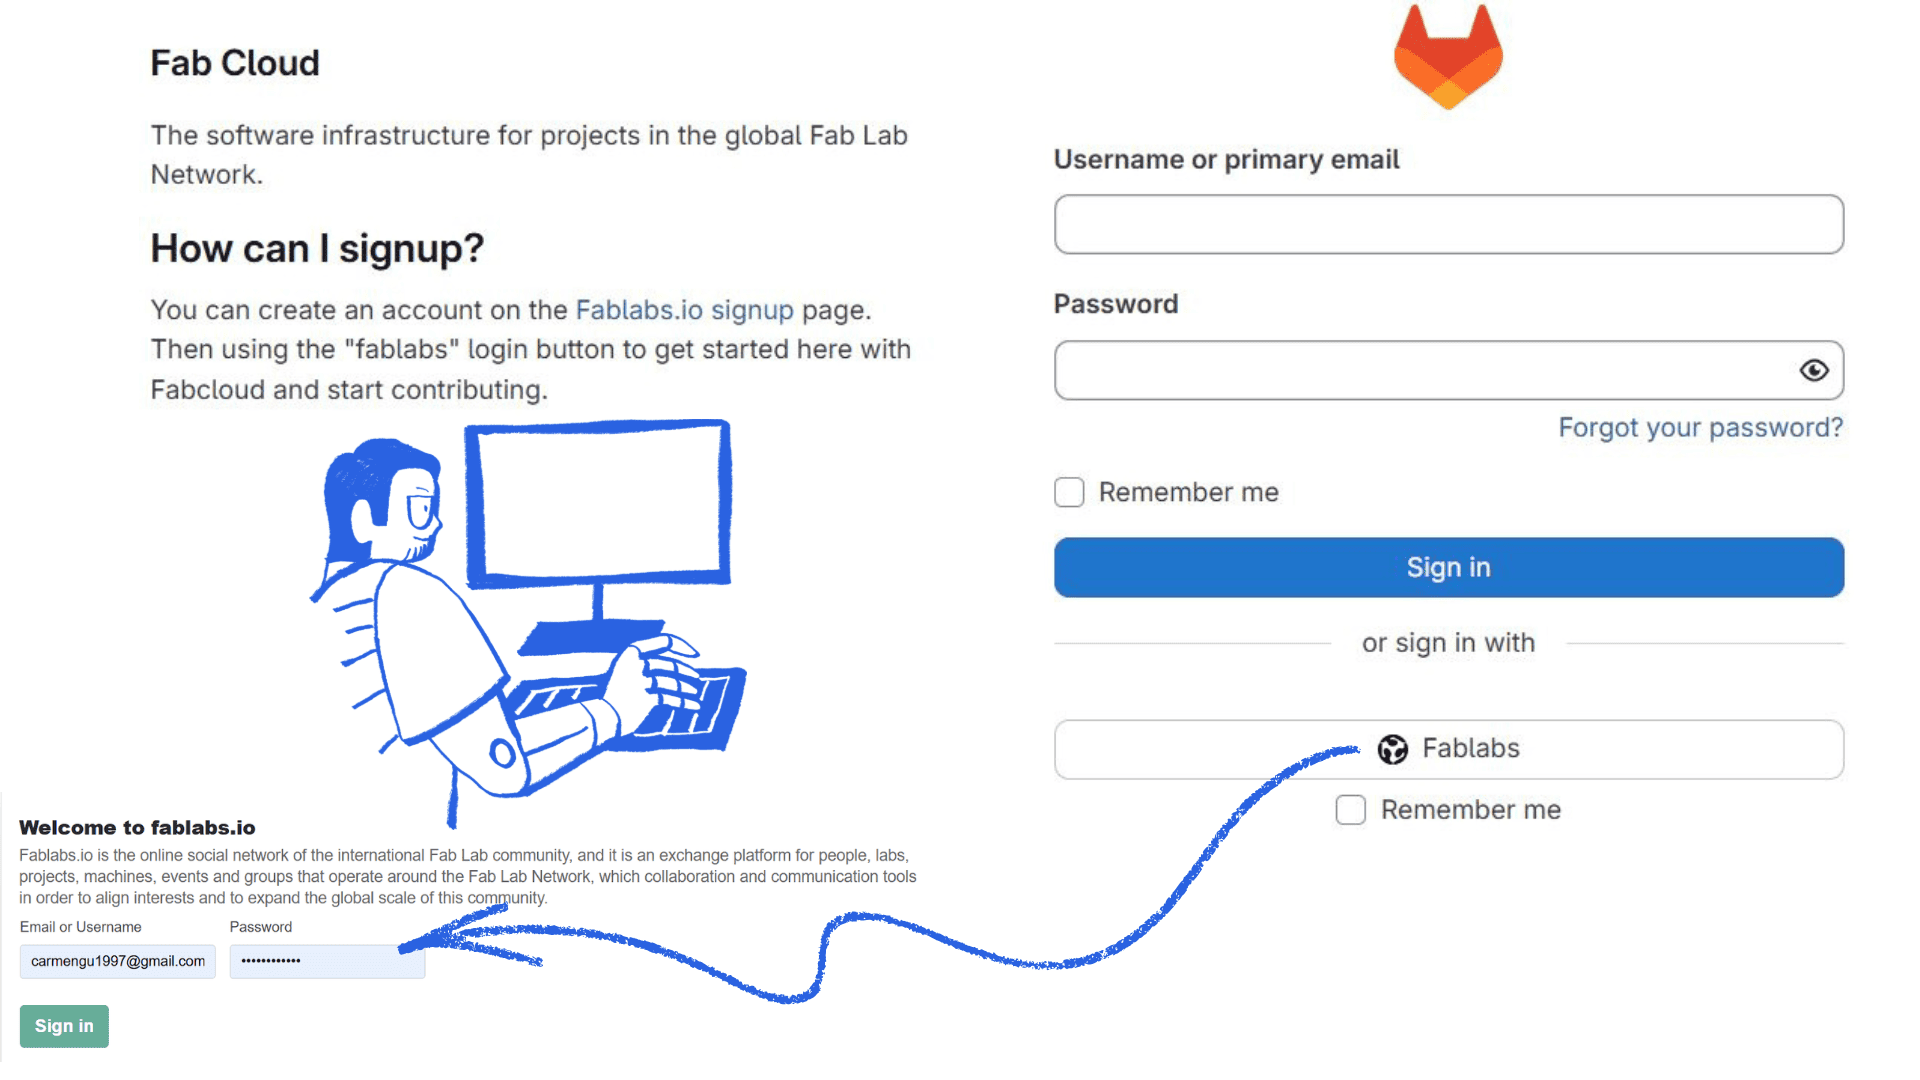
Access Fab Cloud
clone the code
configure the settings
4) Token Configuration
Create a new token with read and write permissions
- Go to your GitLab profile, click the dropdown menu, and select "Clone" using HTTPS to avoid network blocks.
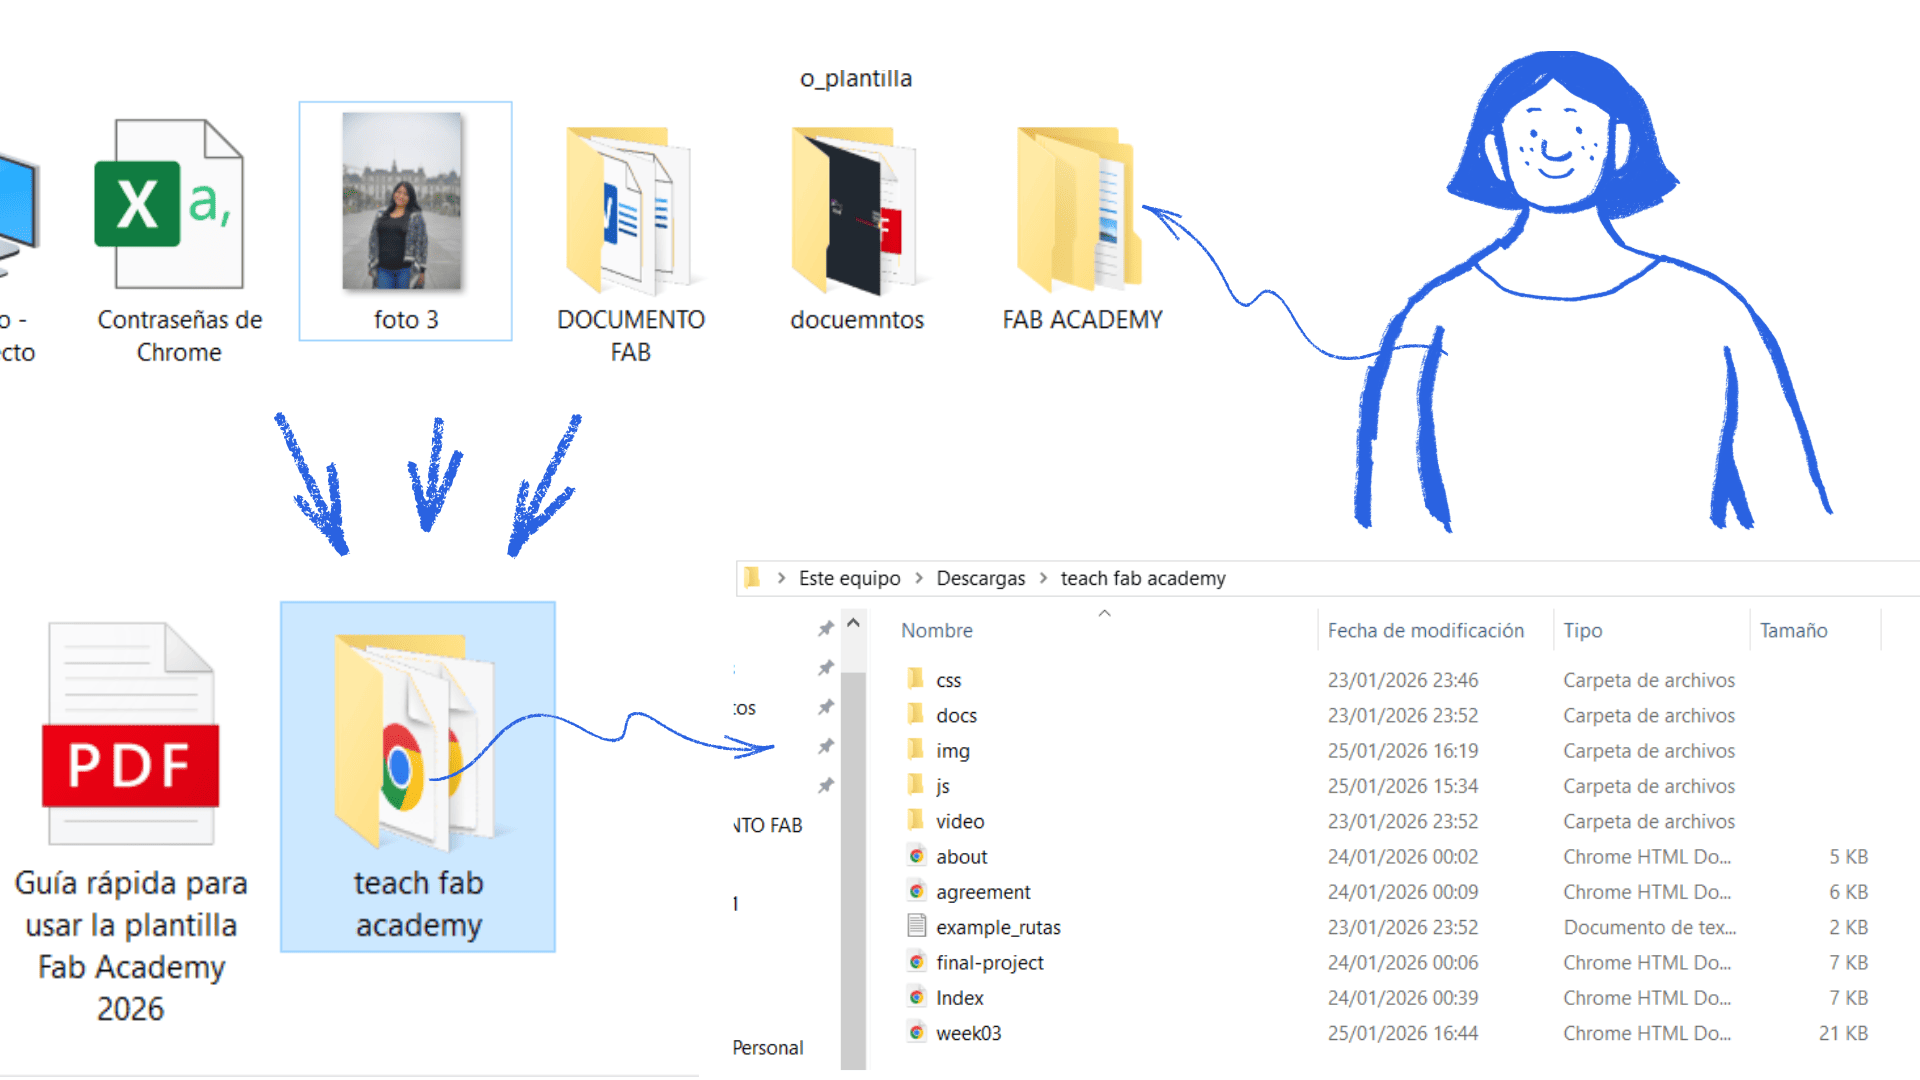
- Select the local folder where you want to clone the repository in VSCode
- When prompted to authenticate, use your FabLab username and the previously generated token (created for this PC; to complete the process, in my case, I placed a shortcut folder on the desktop)
Copy the access code and configure
Complete the Git configuration and link it to Visual Studio.
5) Final Configuration
Initial Setup
- I accepted the authors and verified that all files were cloned correctly
- I opened the cloned HTML file to view the webpage
- The template I used is a base created by Professor for the Fab Lab node, as well as a GUI which was very helpful in making the necessary configurations.
- I verified the website's functionality and ensured that everything worked as expected
- I implemented modifications to the HTML template as needed
- I configured custom code snippets to accelerate development
link the desktop folder with visual
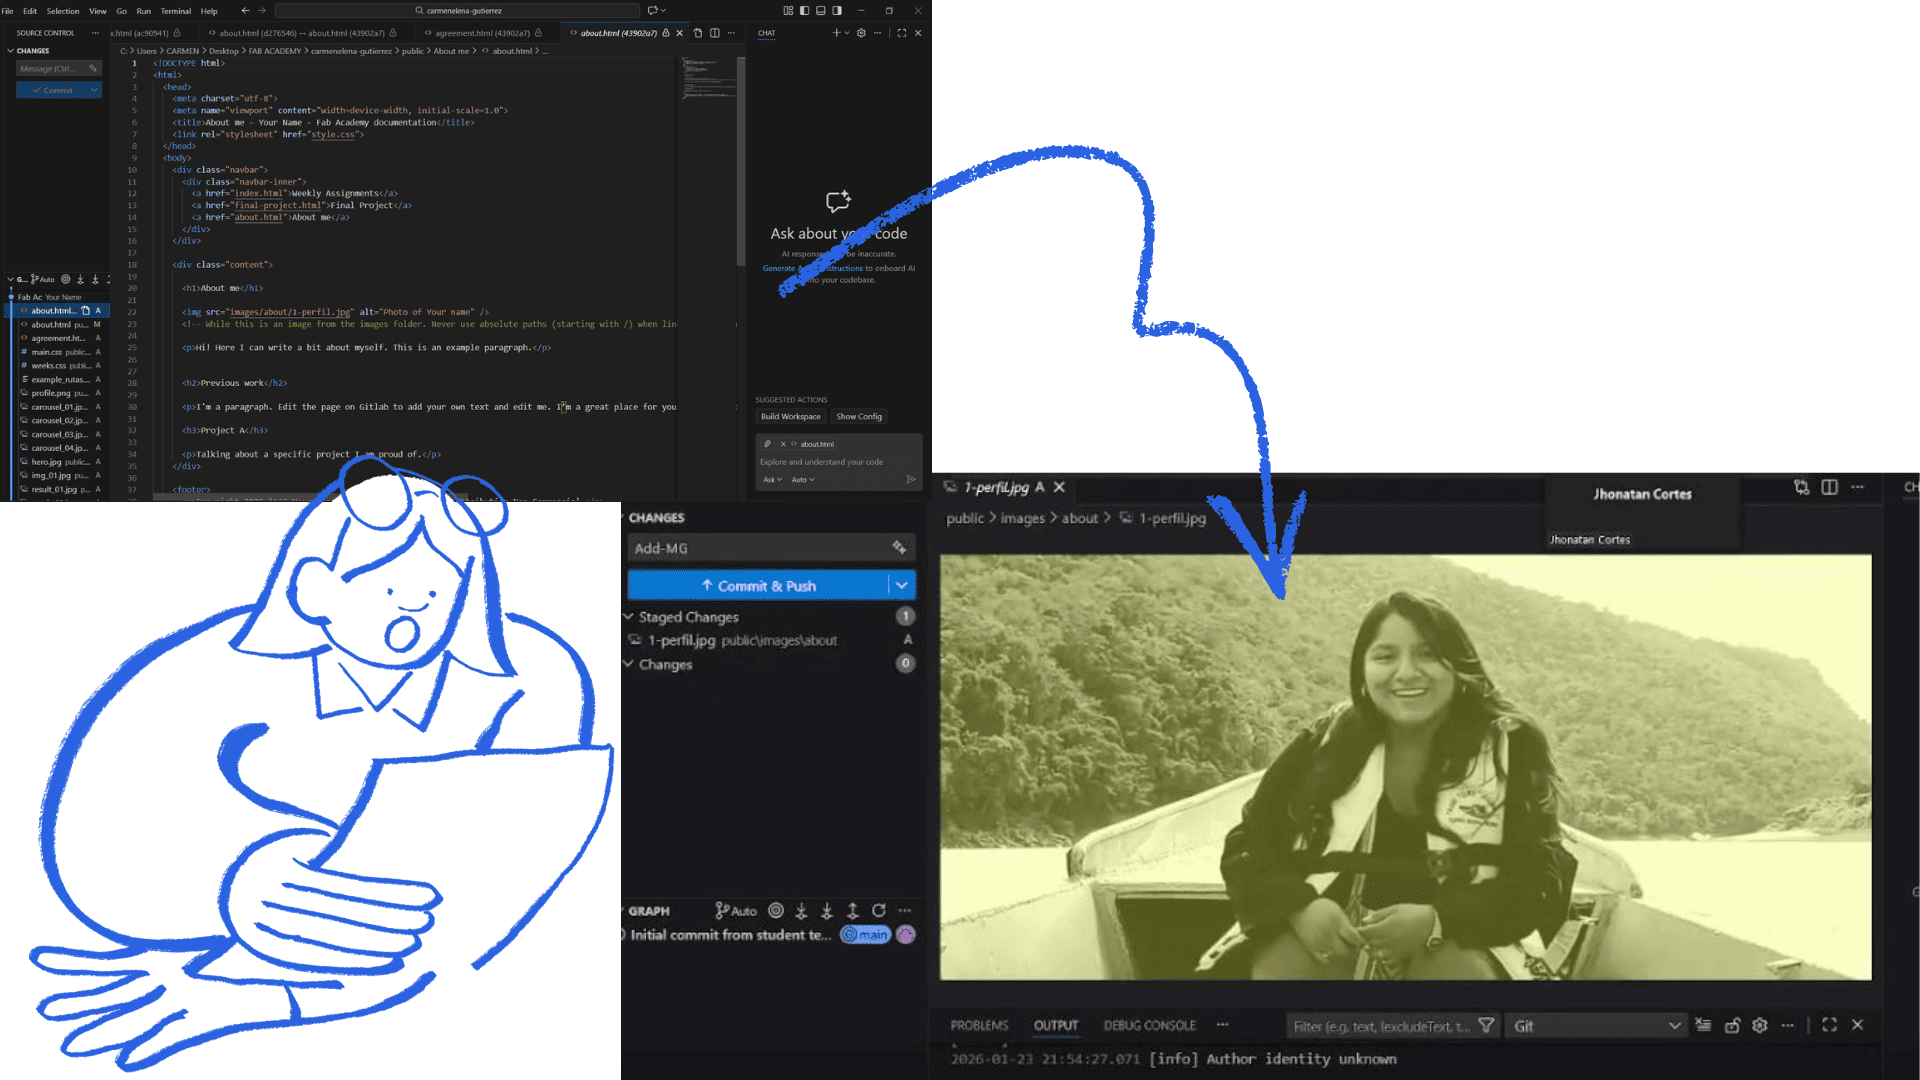
configure the website, for example, to edit my about me
6) Final Configuration
Website Customization
- I organized the changes using `git add .` in the terminal or through the VSCode source control interface.
- I committed the changes with a descriptive message using `git commit -m "Descriptive message here
- I pushed the changes to the remote repository using `git push origin main` (replacing `main` with my branch name when necessary)
- I verified in GitLab that the changes were uploaded correctly
- I continue developing my website, and the changes will be visible over the next few weeks
Pieces and first assembly
Reflection on the Website Creation Process
Creating my website was a new and very interesting experience for me. Many of the programs, commands, and tools were unfamiliar at first, which made the learning process challenging but also motivating. I discovered how web development works, from the initial setup and linking of accounts and repositories to the design and customization of the site. I especially enjoyed being able to adapt the site to my own style, make design decisions, and understand how each element influences the organization and functionality of the site. This process allowed me to develop both technical and creative skills. Although there were difficult moments, each problem became an opportunity to research, test commands, and learn new solutions. In the end, I was able to resolve them, and that gave me more confidence in my ability to work with digital tools.
Things that went well
- I successfully configured the necessary programs and tools (VSCode, Git, linking)
- I learned new commands and gained a better understanding of how web development works
- I was able to design the page with my own style and customize it to my needs
- I organized the images by compressing them and unifying them into a single format, which improved the page's layout and performance
- I independently solved problems by researching and testing solutions
- I successfully completed the project
Things that were difficult or didn't go so well
- At first, the programs and commands were confusing because they were new to me
- Some modifications didn't work as expected
- I made mistakes linking or configuring certain elements
- I wasted time looking for commands or fixing technical issues
- I needed to repeat several steps before I got them working correctly
Final Lessons Learned
- Final Lessons Learned This process taught me that web development requires patience, practice, and experimentation. Mistakes are part of the learning process and help you better understand the tools. Now I feel more confident to continue creating and improving digital projects.