Assignment Requirements
Learning outcomes
- Evaluate and select 2D and 3D software.
- Demonstrate and describe processes used in modelling with 2D and 3D softwares.
- Demonstrate image and video compression.
Have you answered these questions?
- Modelled experimental objects/part of a possible final project in 2D and/or 3D software✅
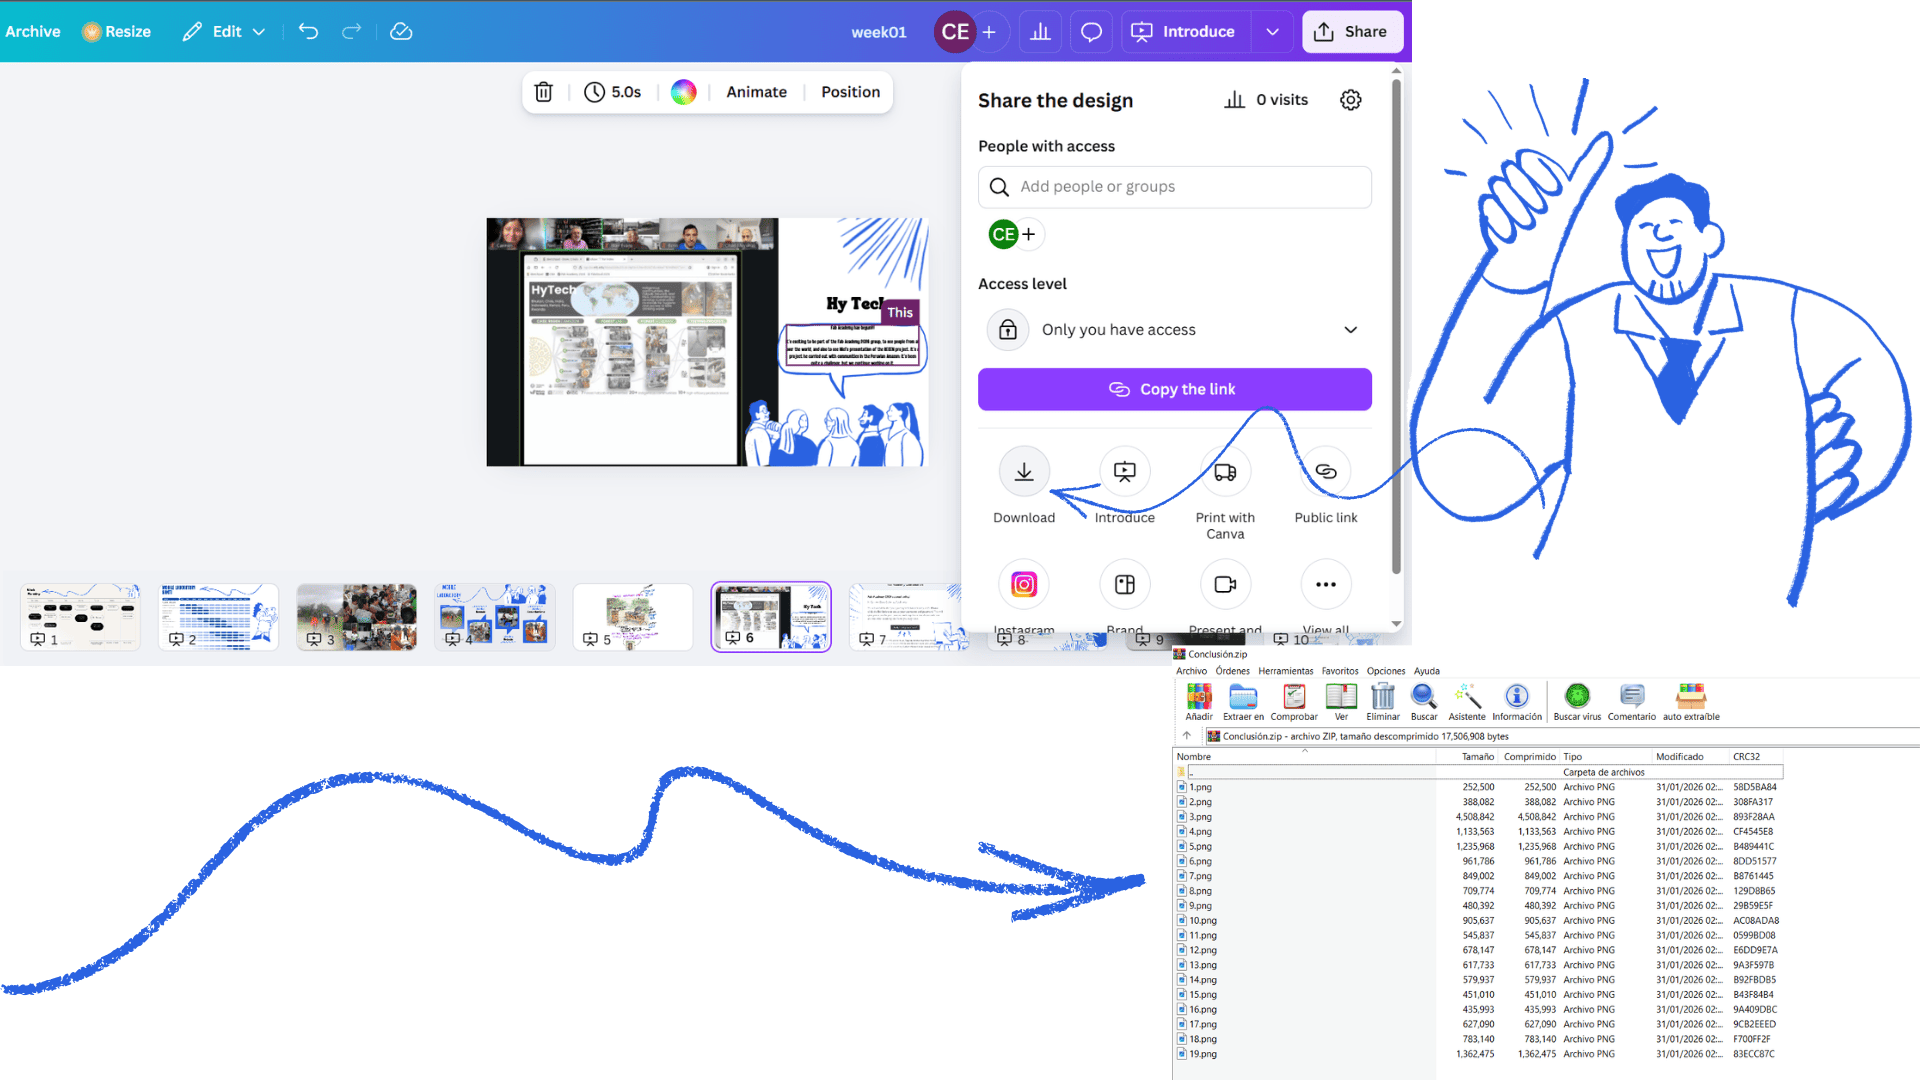
- Shown how you did it with words/images/screenshots✅.
- Documented how you compressed your image and video files✅.
- Included your original design files✅.
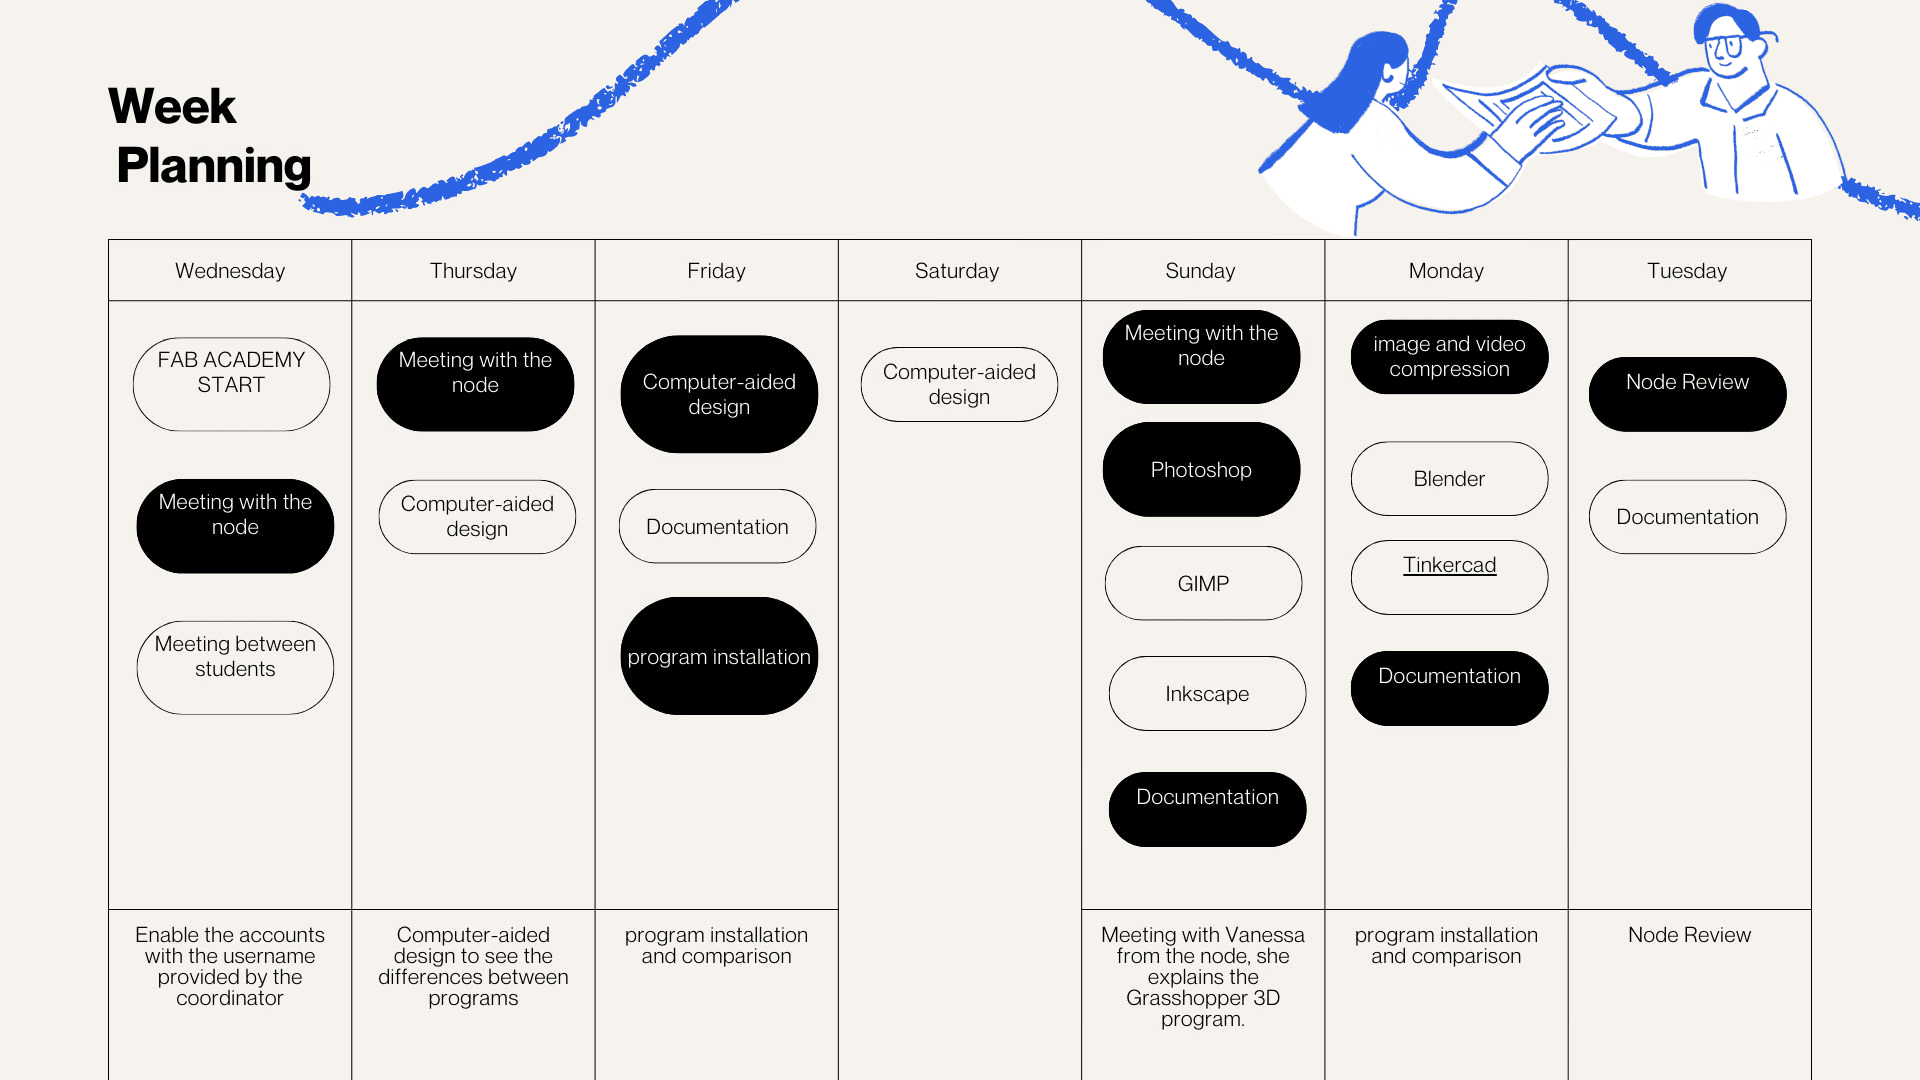
Weekly planning
Model (raster, vector, 2D, 3D, render, animate, simulate, ...) a possible final project, compress your images and videos, and post a description with your design files on your class page
feedback
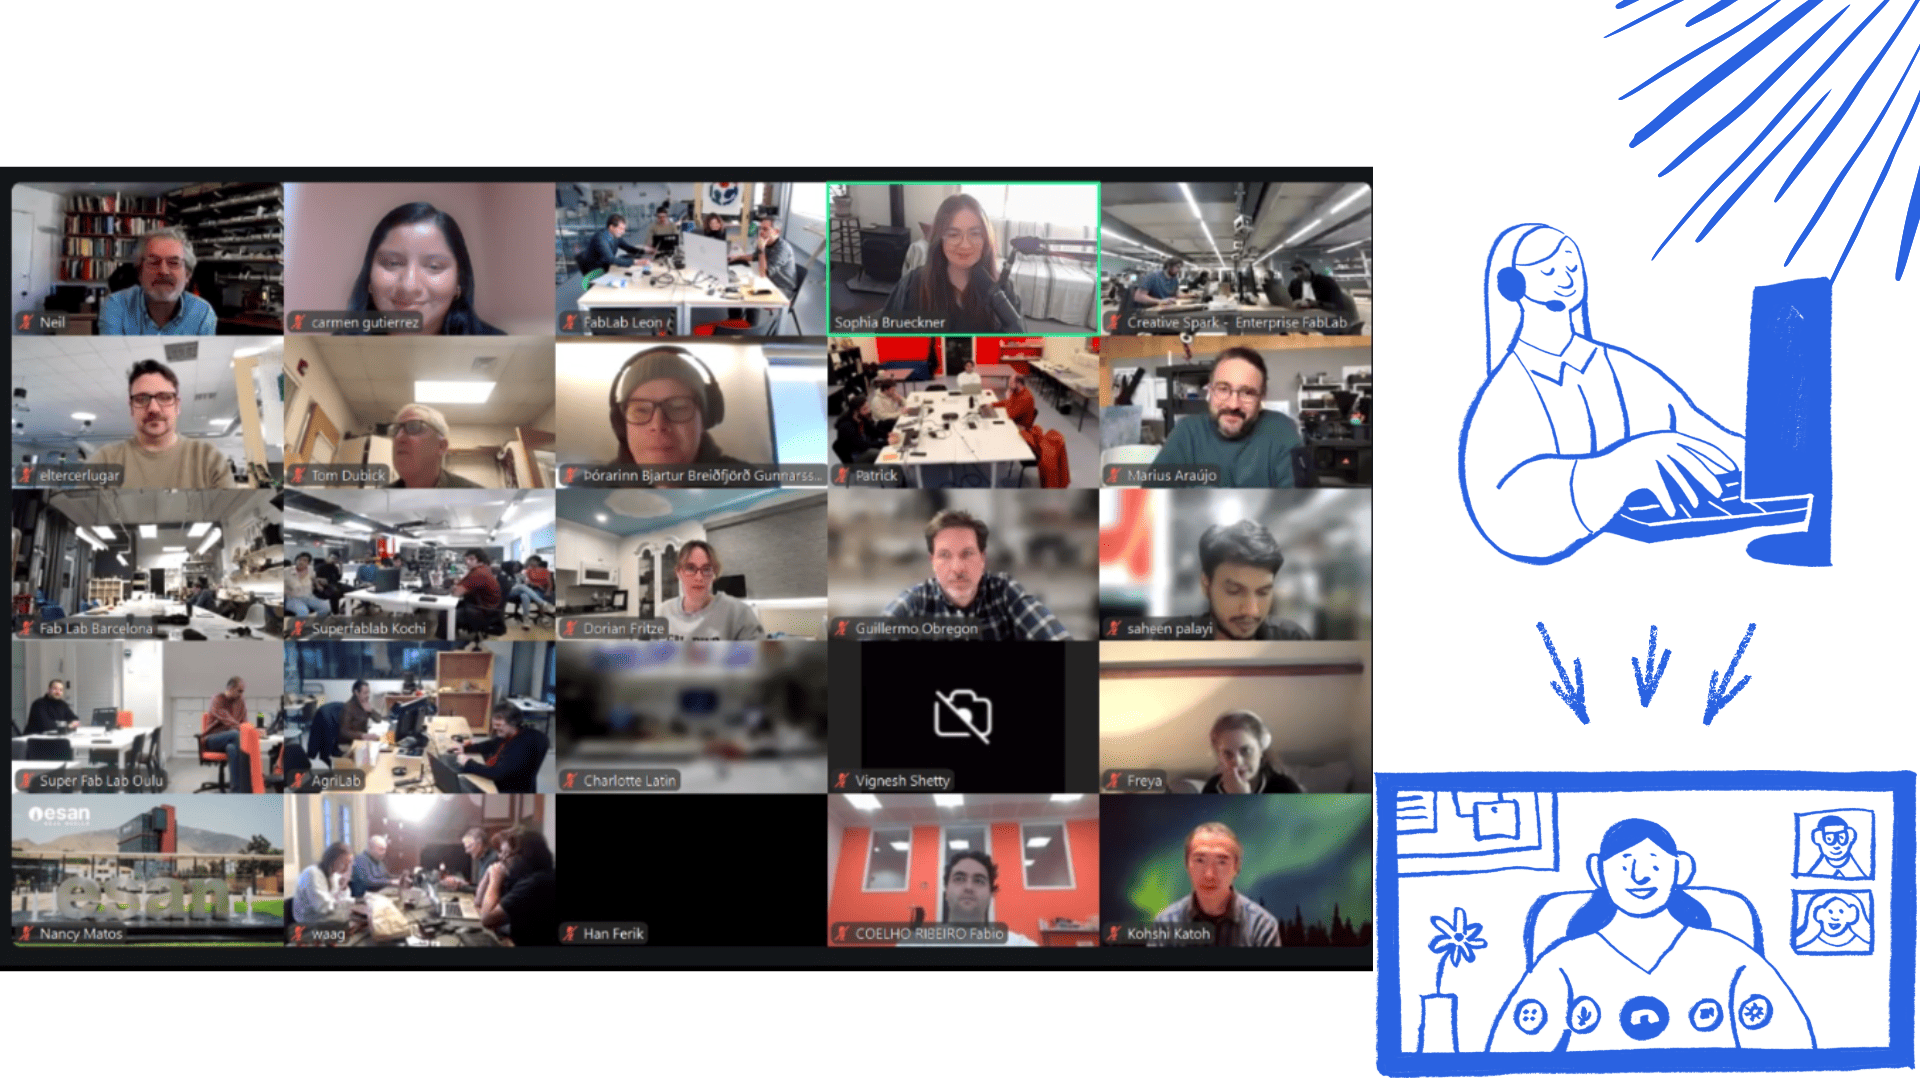
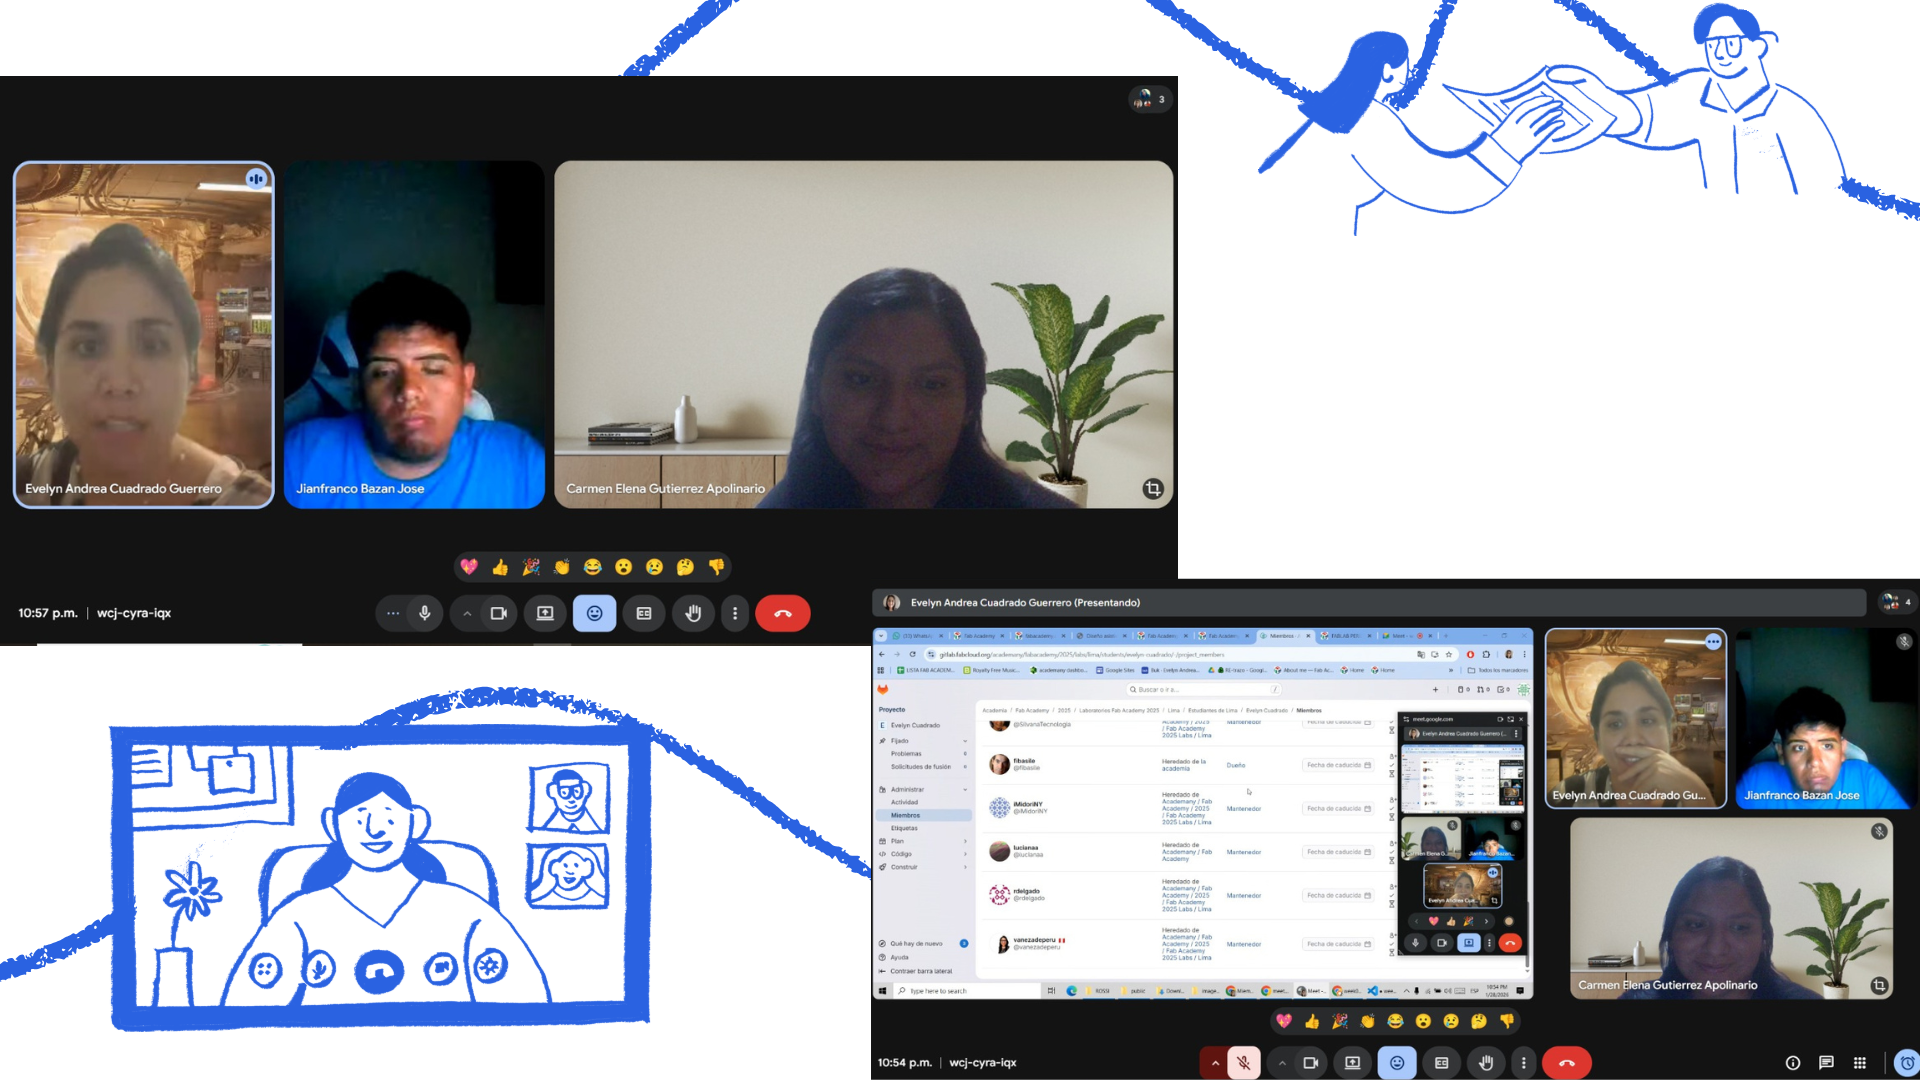
Before starting the Week 2 assignments, we had a feedback session with our instructor Evelyn Cuadrado . Her support has been invaluable, helping us identify and correct mistakes. However, the most valuable aspect was the group discussion, which allowed us to reflect on the week's summaries and learnings, reinforcing concepts and improving our teamwork.
2D Modeling
GIMP
Install GIMP
- Go to GIMP downloads
- Download the latest version and follow the installer's instructions.
GIMP
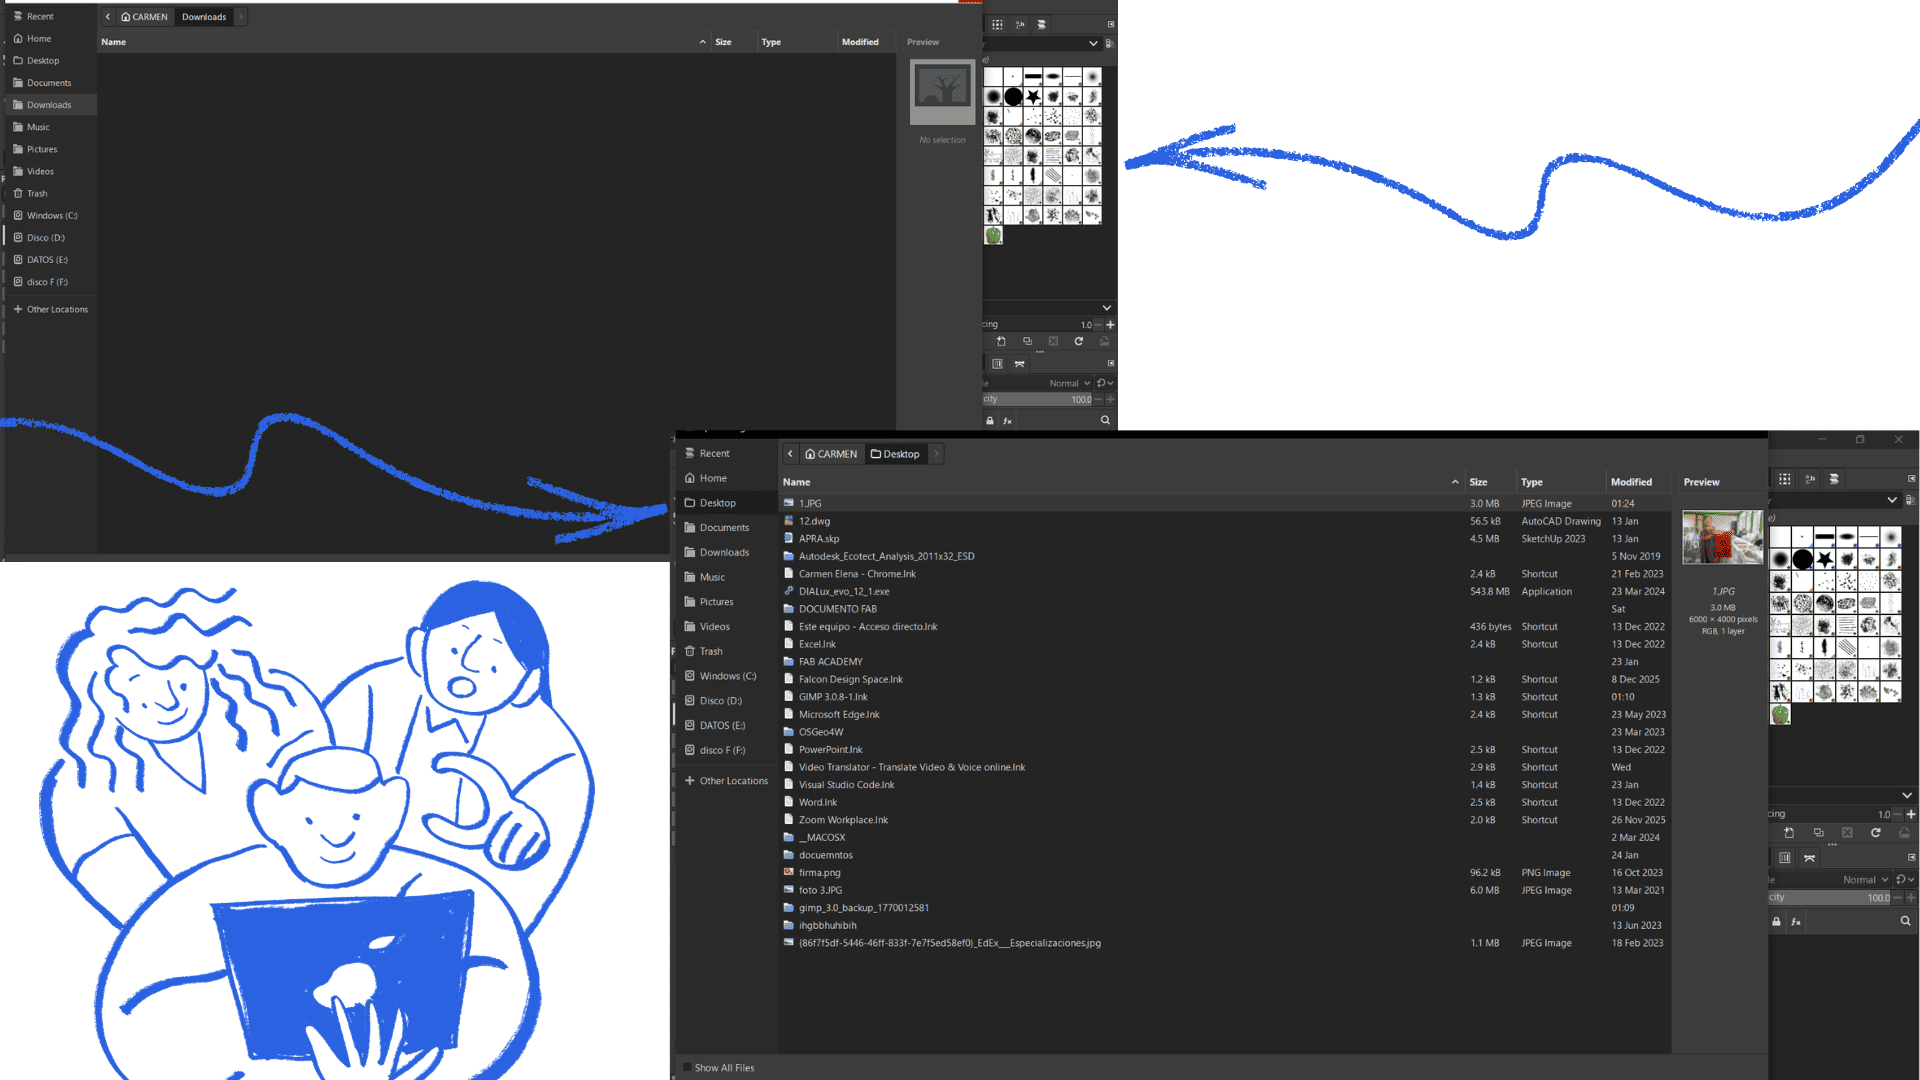
- Open GIMP
- Go to File → Open as Layers.
- A dialog box will appear asking you to choose the size/resolution.
- Choose the desired resolution (1920 × 1080).
Pieces and first assembly
Edit or Rasterize
- You can edit the image with GIMP's tools.
- Save as PNG, JPG, etc.
- You can watch some reference videos here: YouTube video
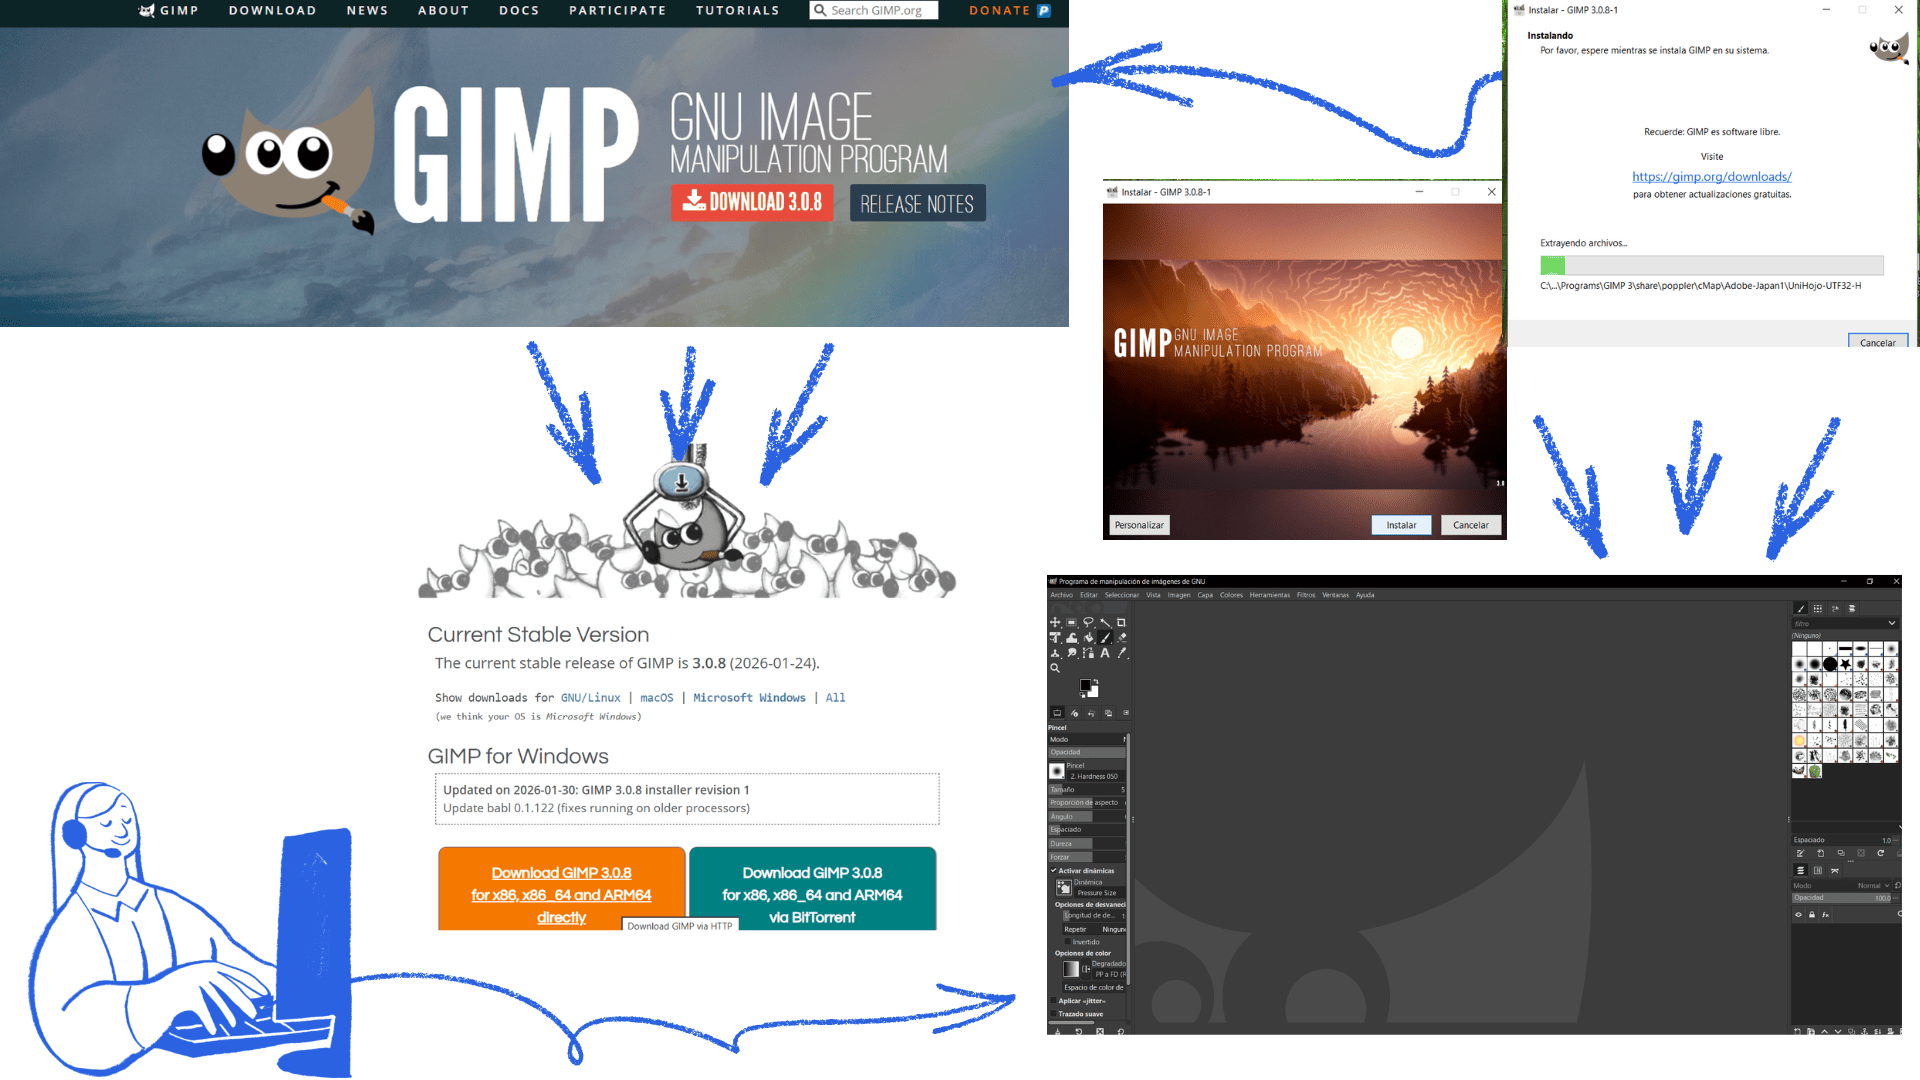
Go to GIMP downloads
Exploring GIMP
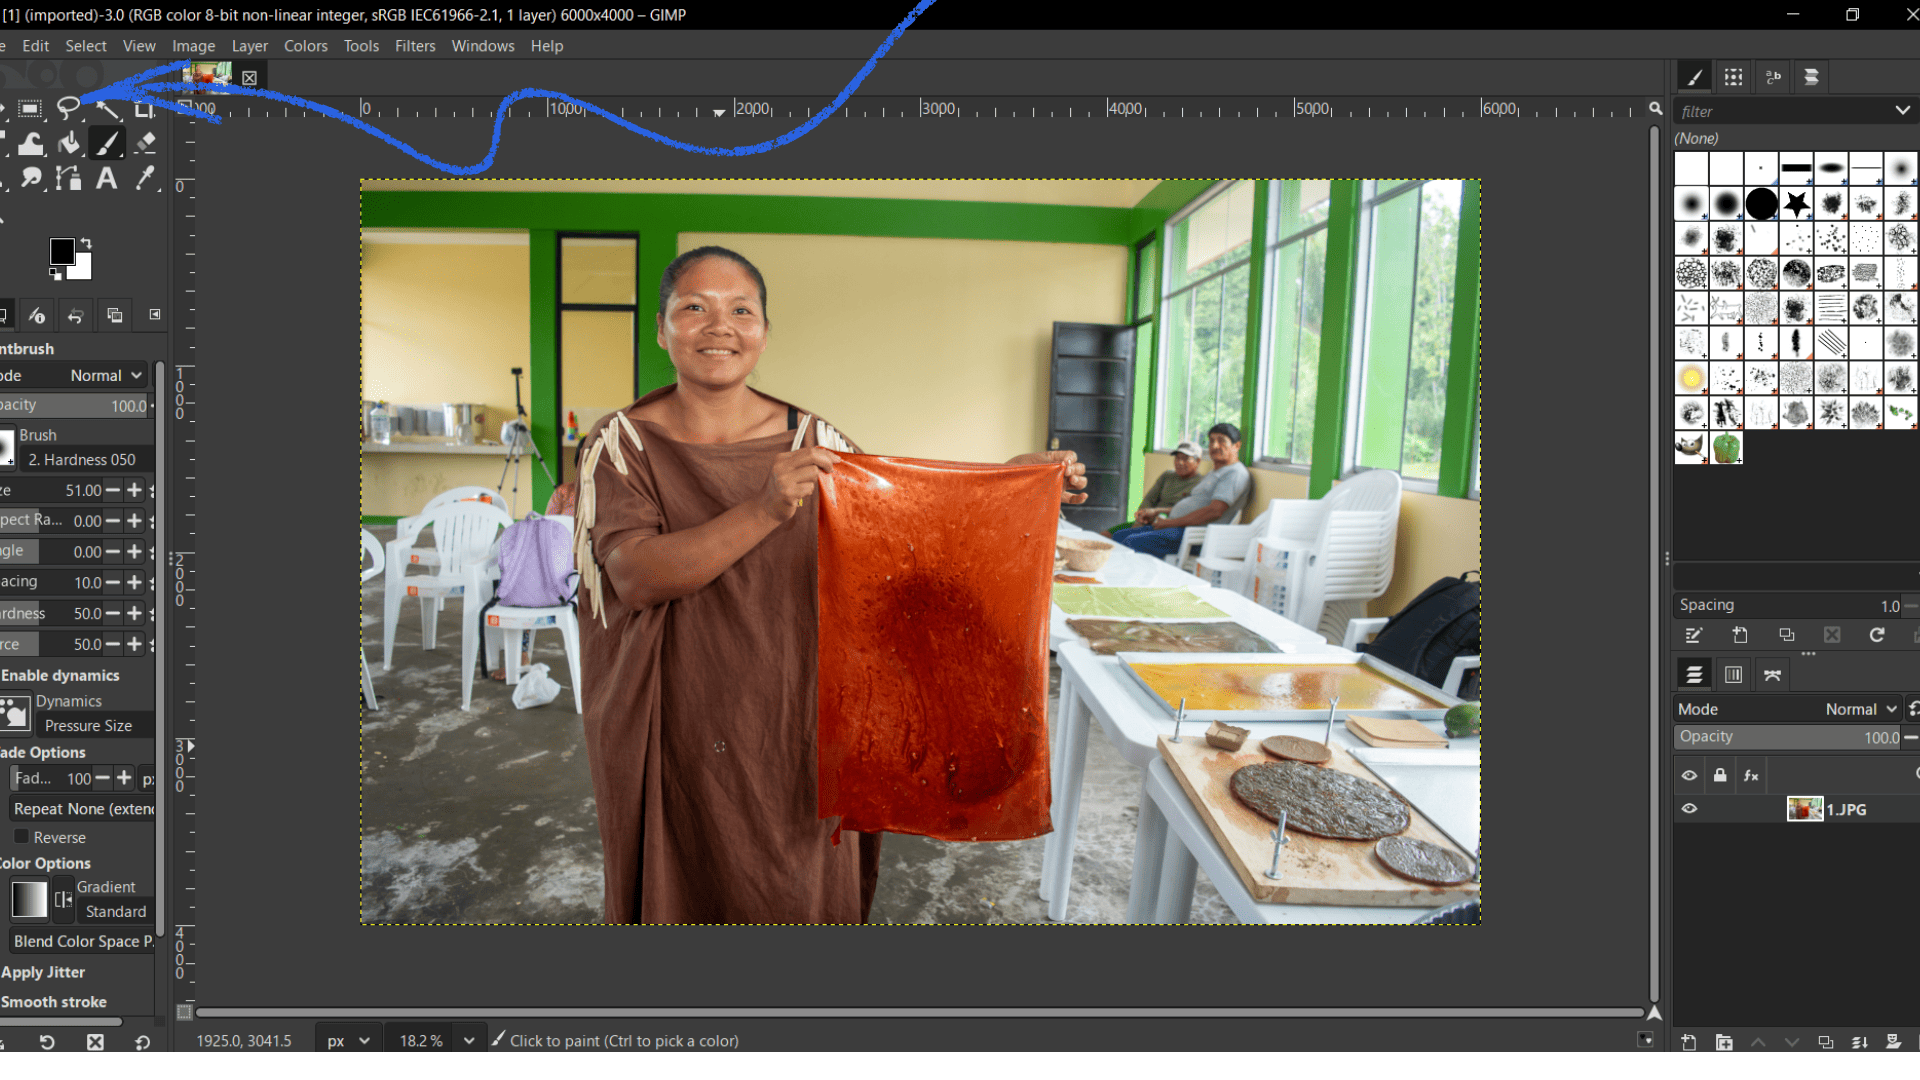
Exploring GIMP
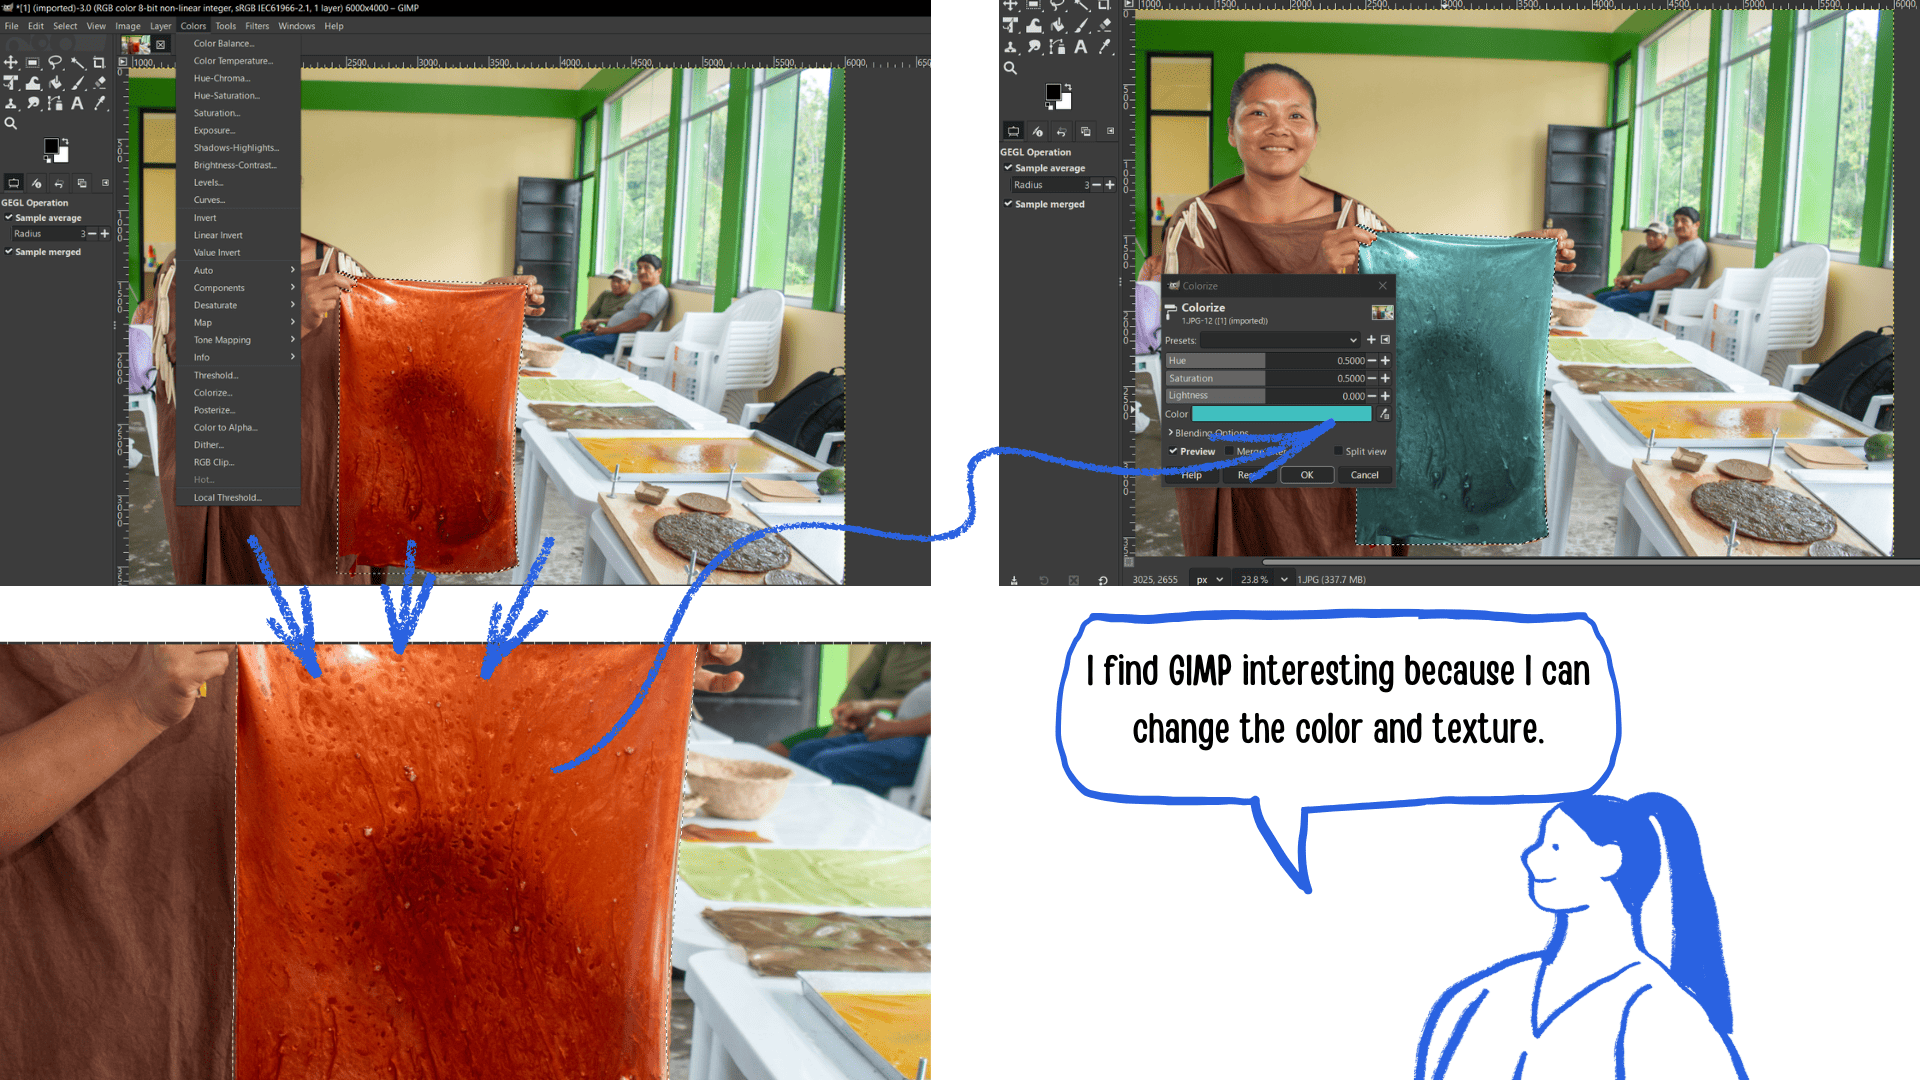
image re-restored and textures changed
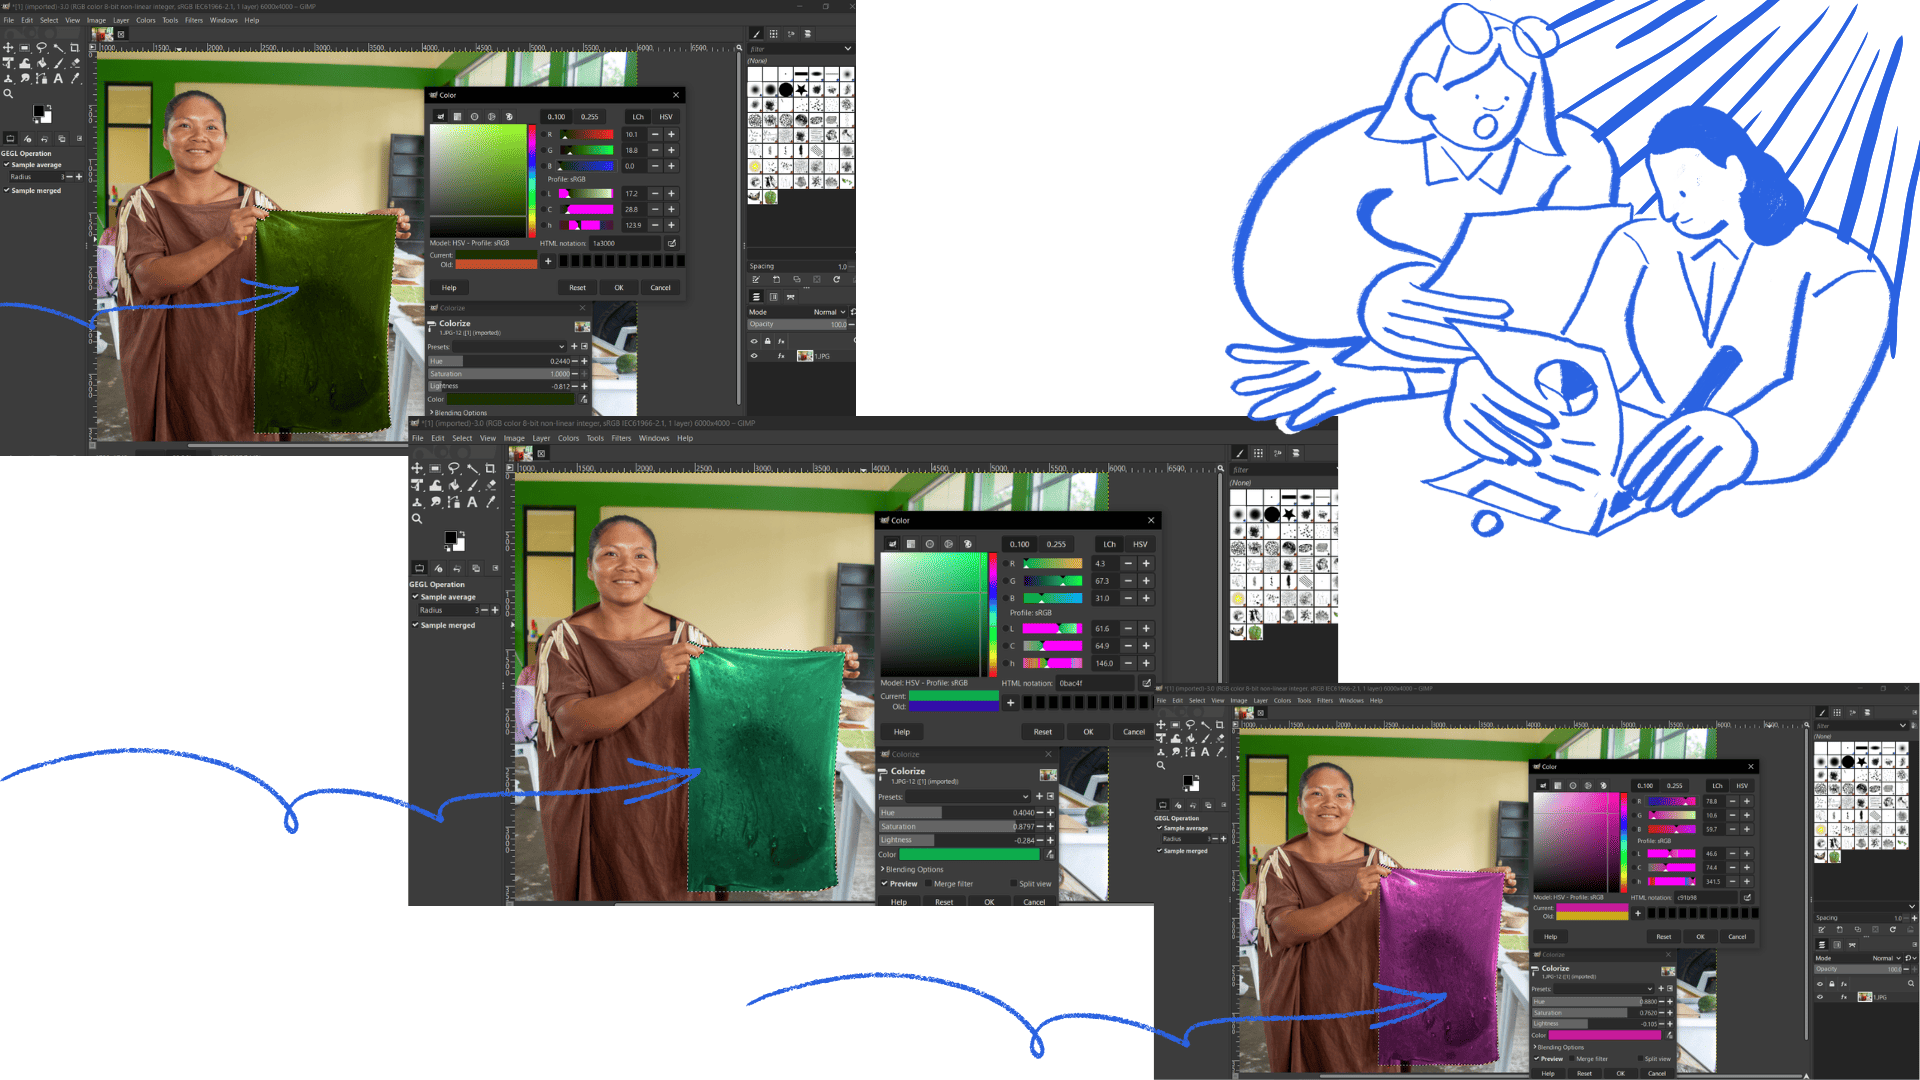
image re-restored and textures changed
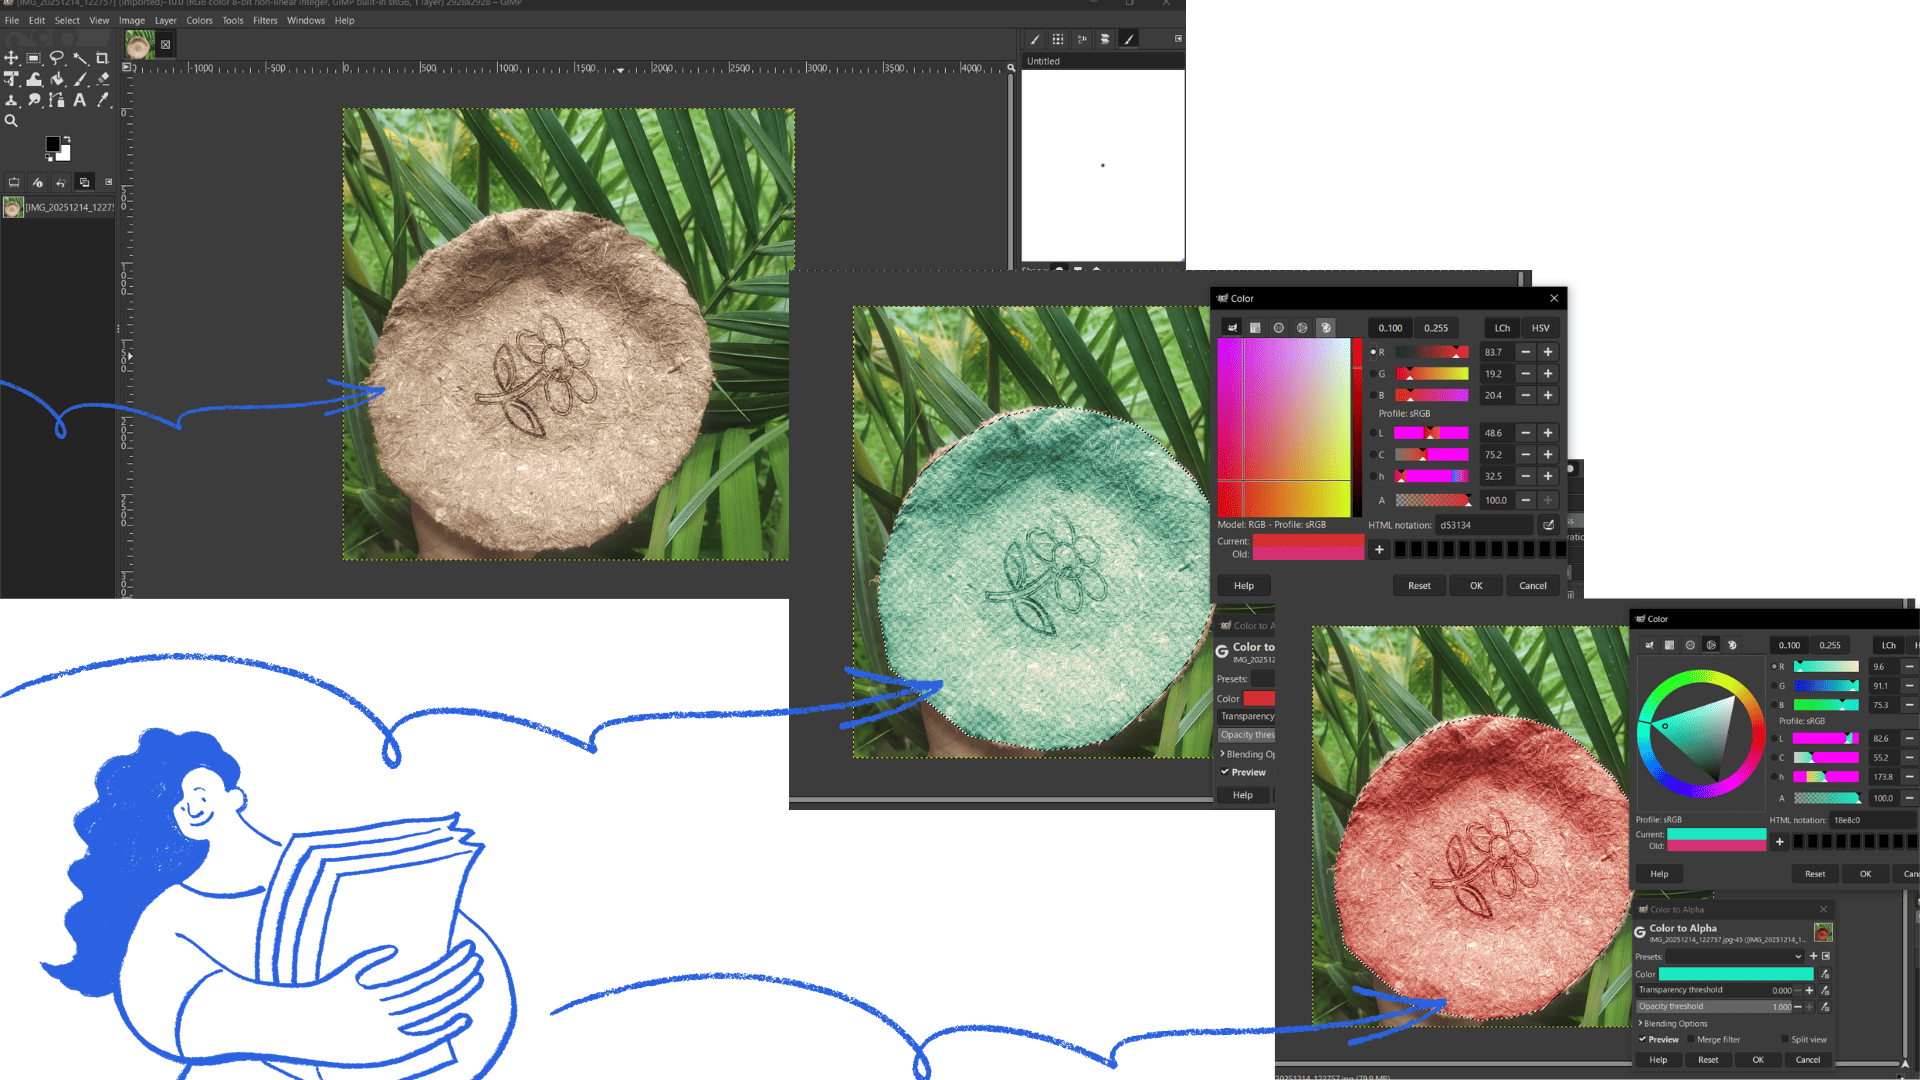
image re-restored and textures changed
Adobe Photoshop
Open the file in Photoshop
- Download and install Adobe Photoshop
- Go to File Open
- You can browse the available options
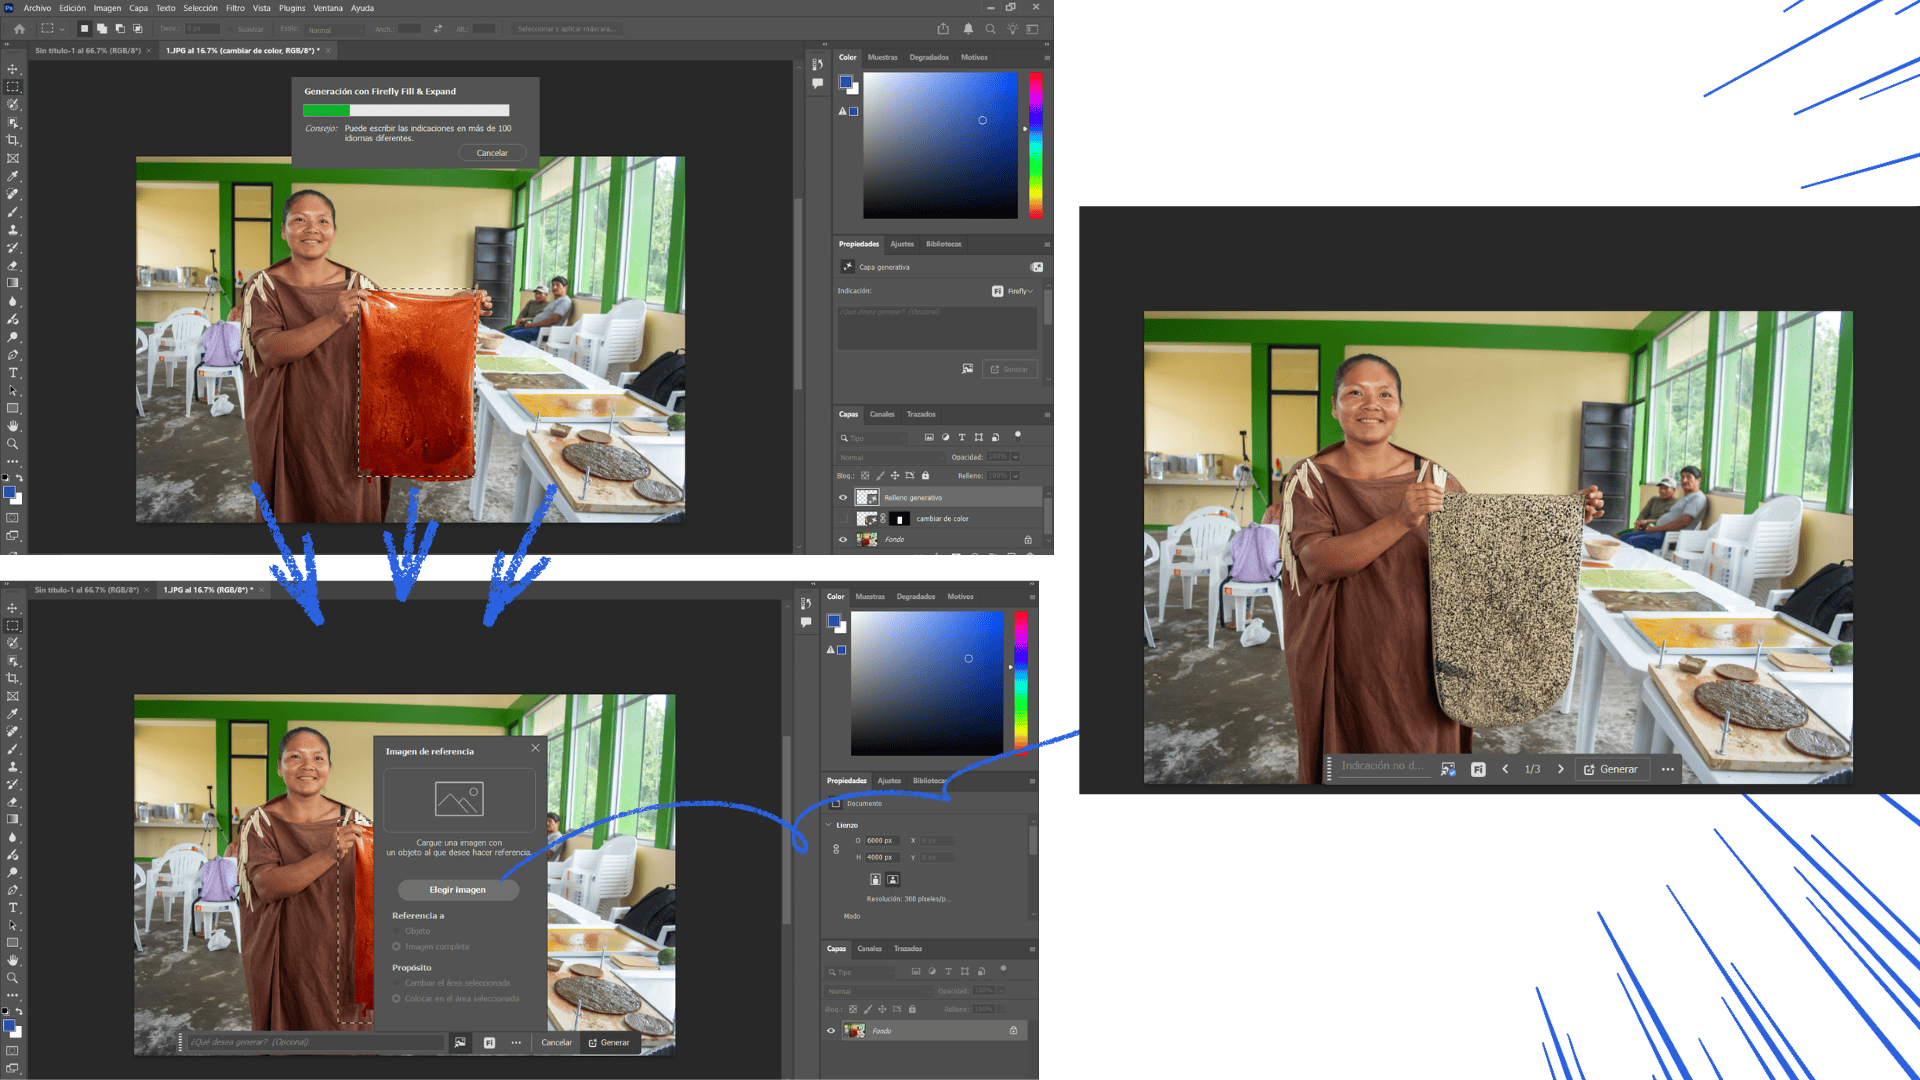
When opening the file in Photoshop, a window called Rasterize will appear. In this window, you must define the resolution according to the final use of the image. For web use, a resolution between 72 and 144 dpi is recommended, while for screen or presentation purposes, a higher resolution between 144 and 300 dpi provides better quality. Next, set the image size; for example, a common size for presentations is 1920 × 1080 pixels. The color mode should be set to RGB, which is ideal for web and screen display. Finally, choose the background type, which can be white or transparent, depending on how the image will be used.
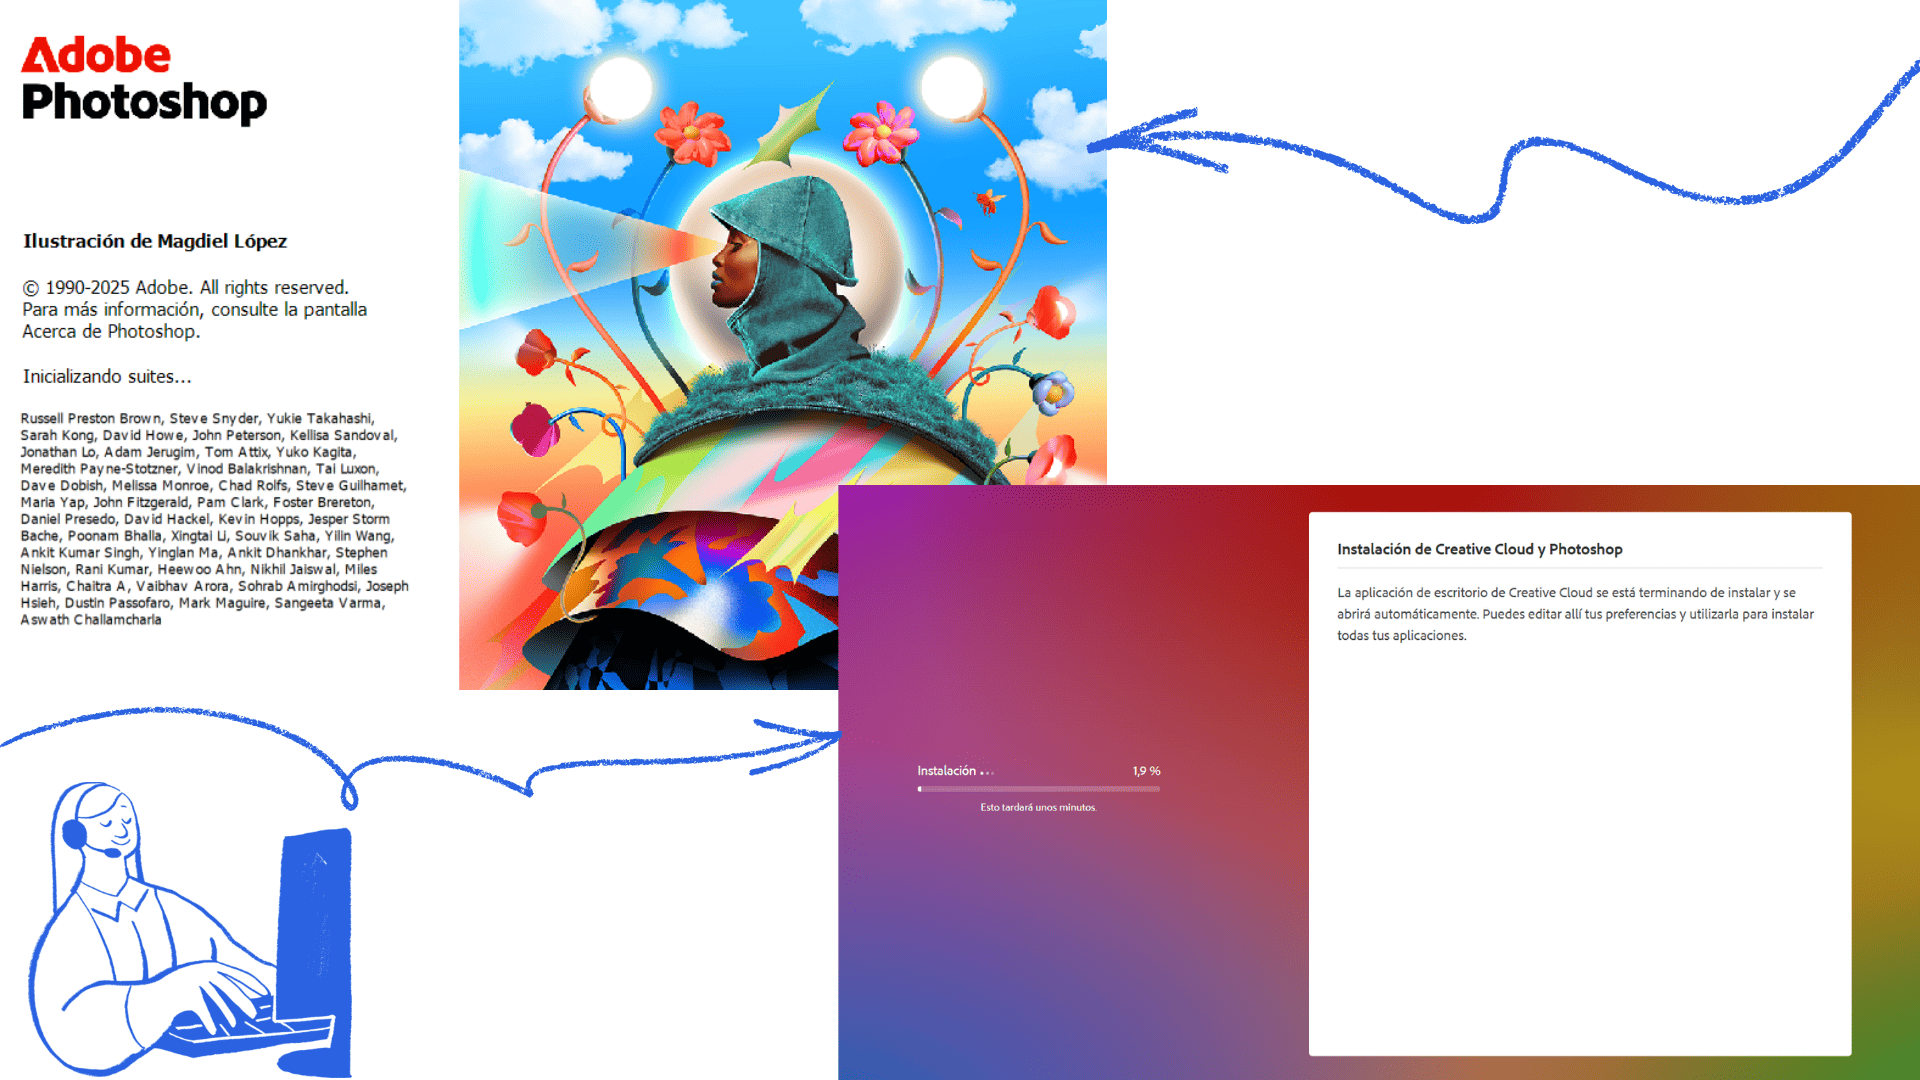
Open Adobe Photoshop
Adobe Photoshop
Inkscape
Open the file in Inkscape
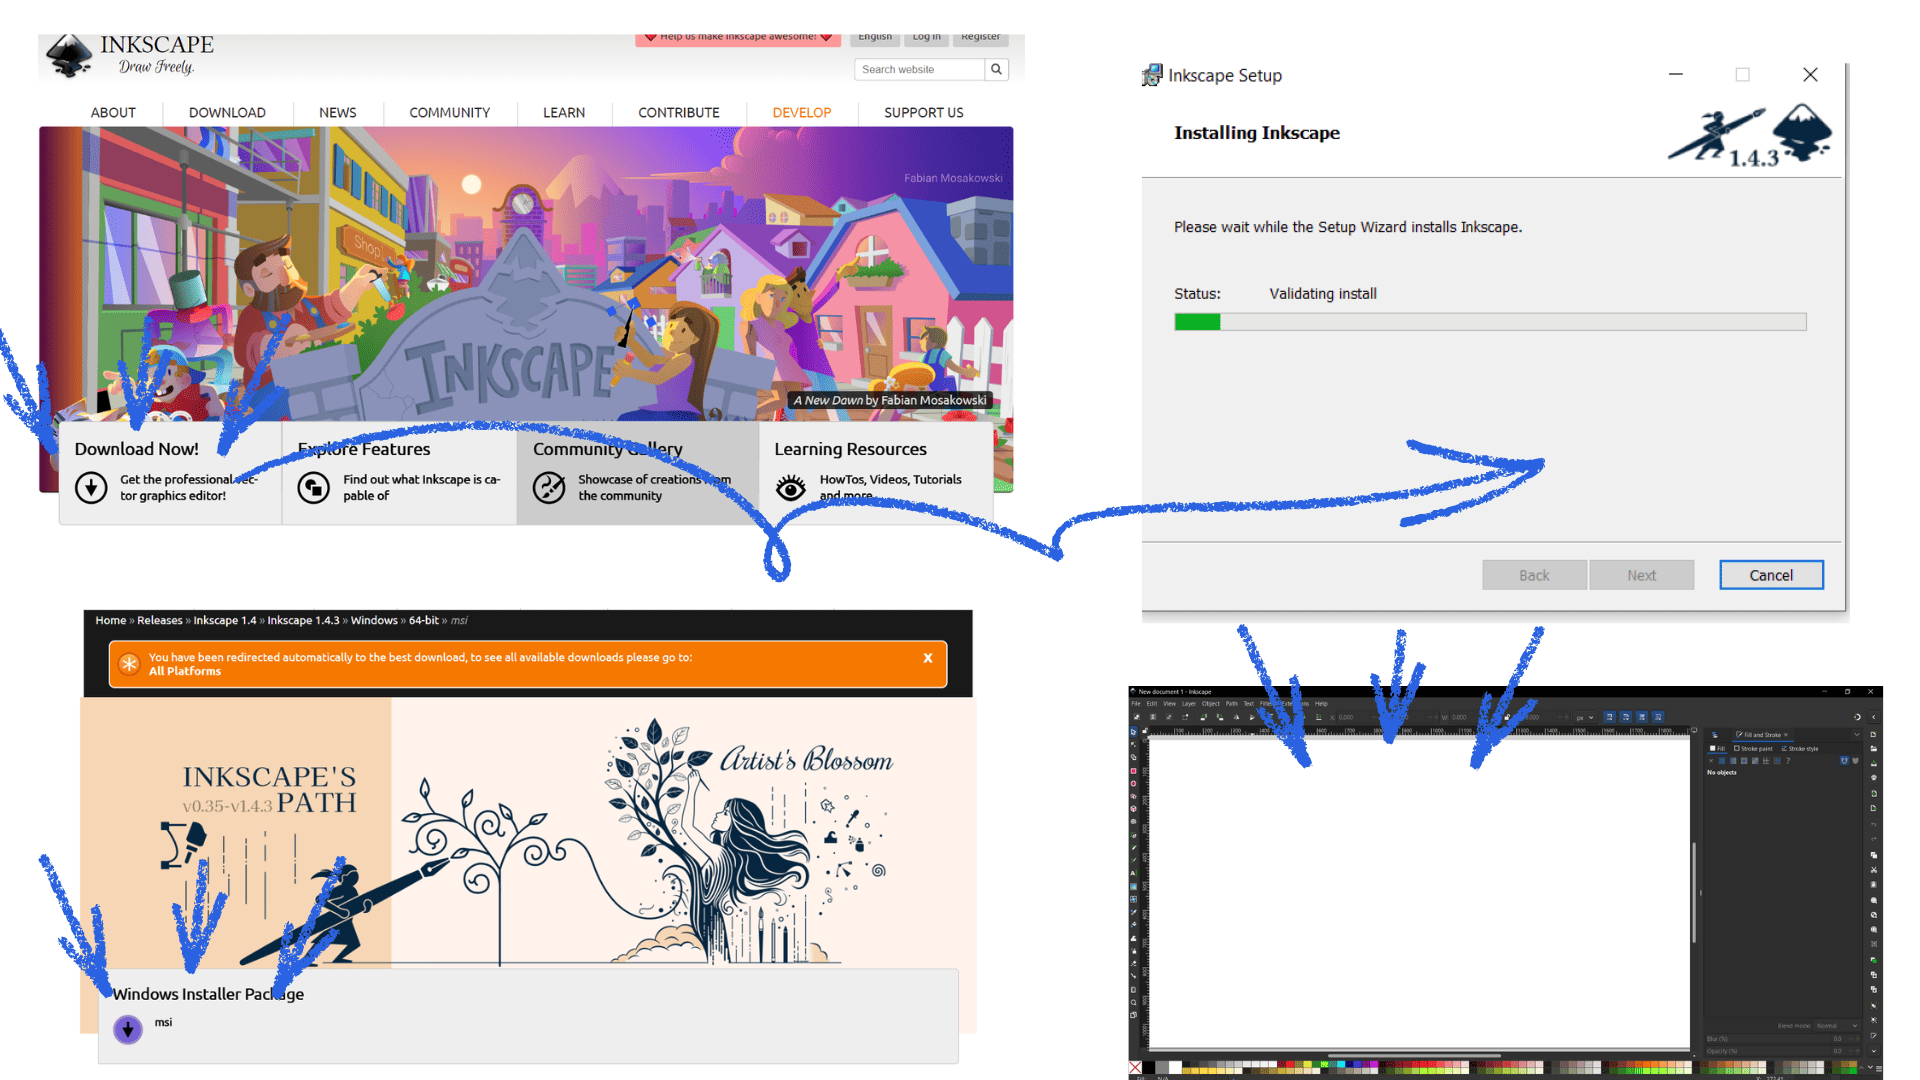
- Download and install Inkscape
- Go to File Open
- You can browse the available options
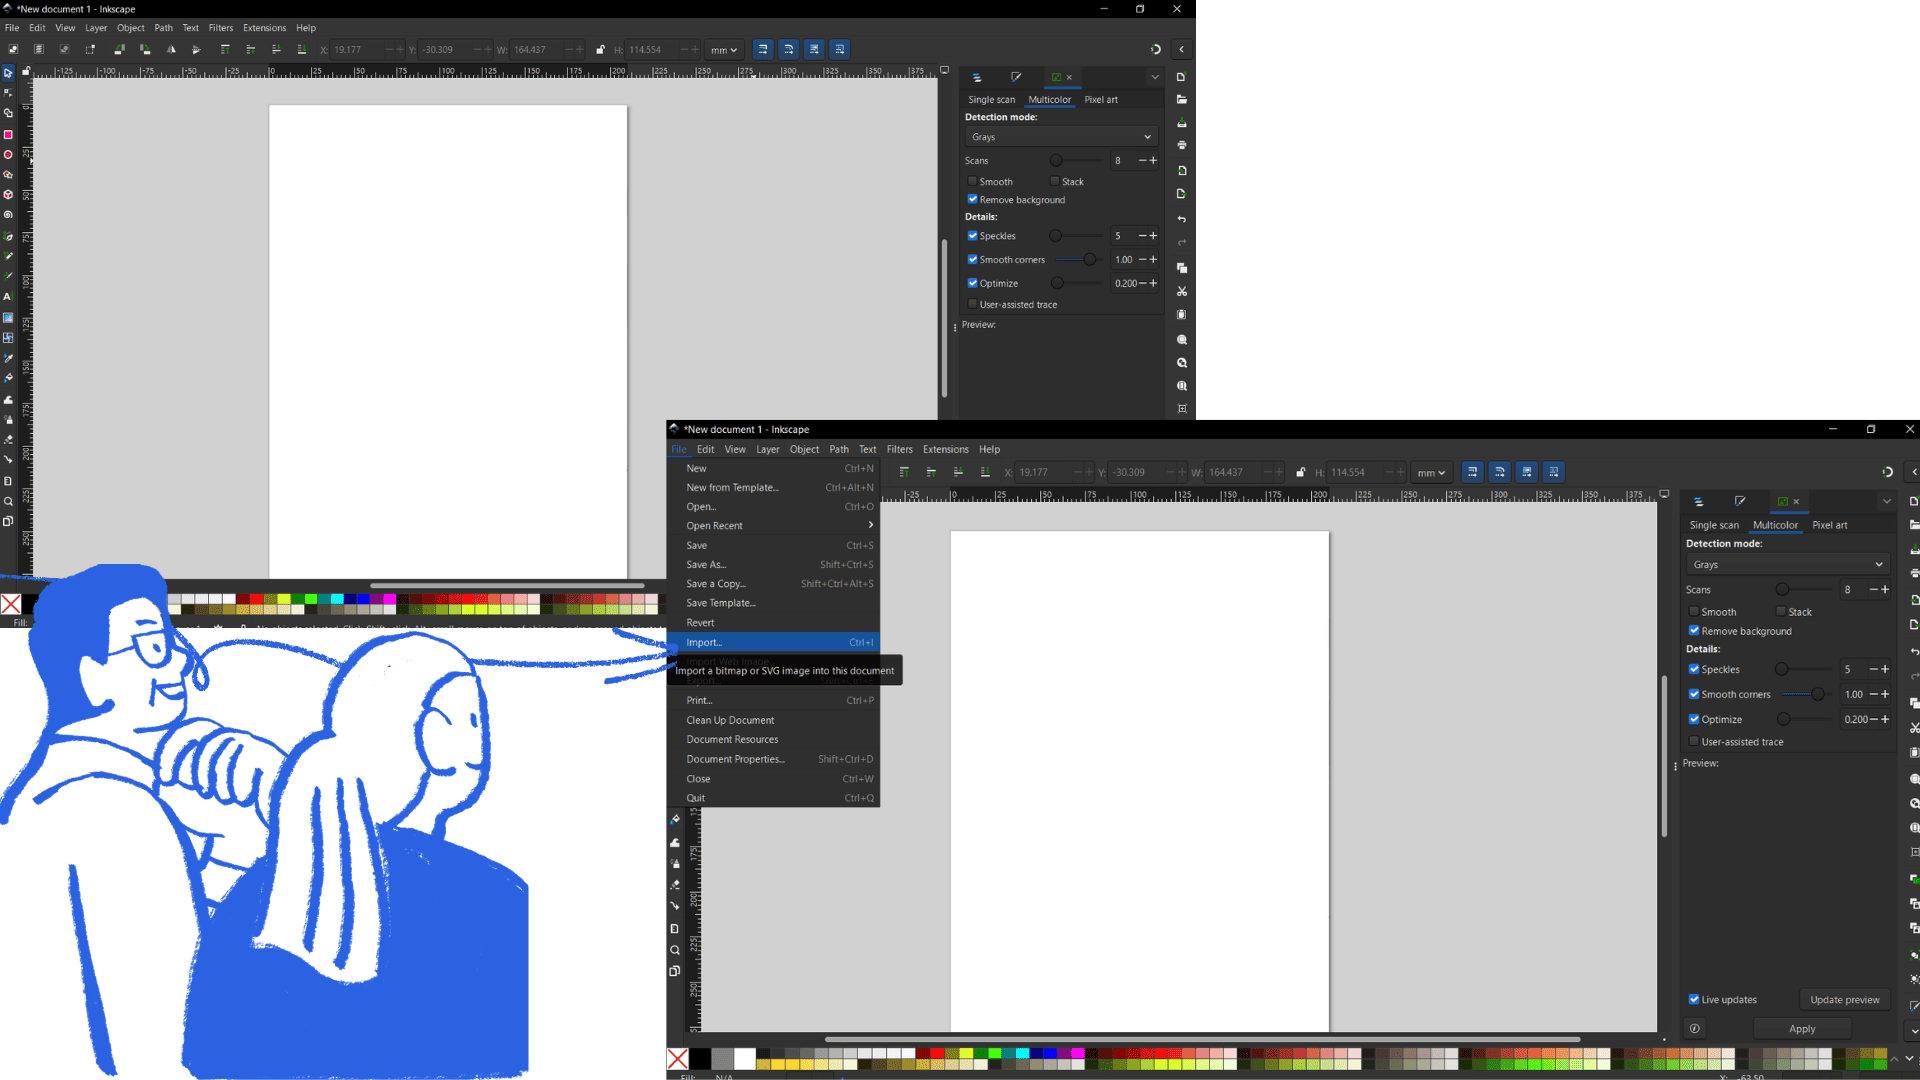
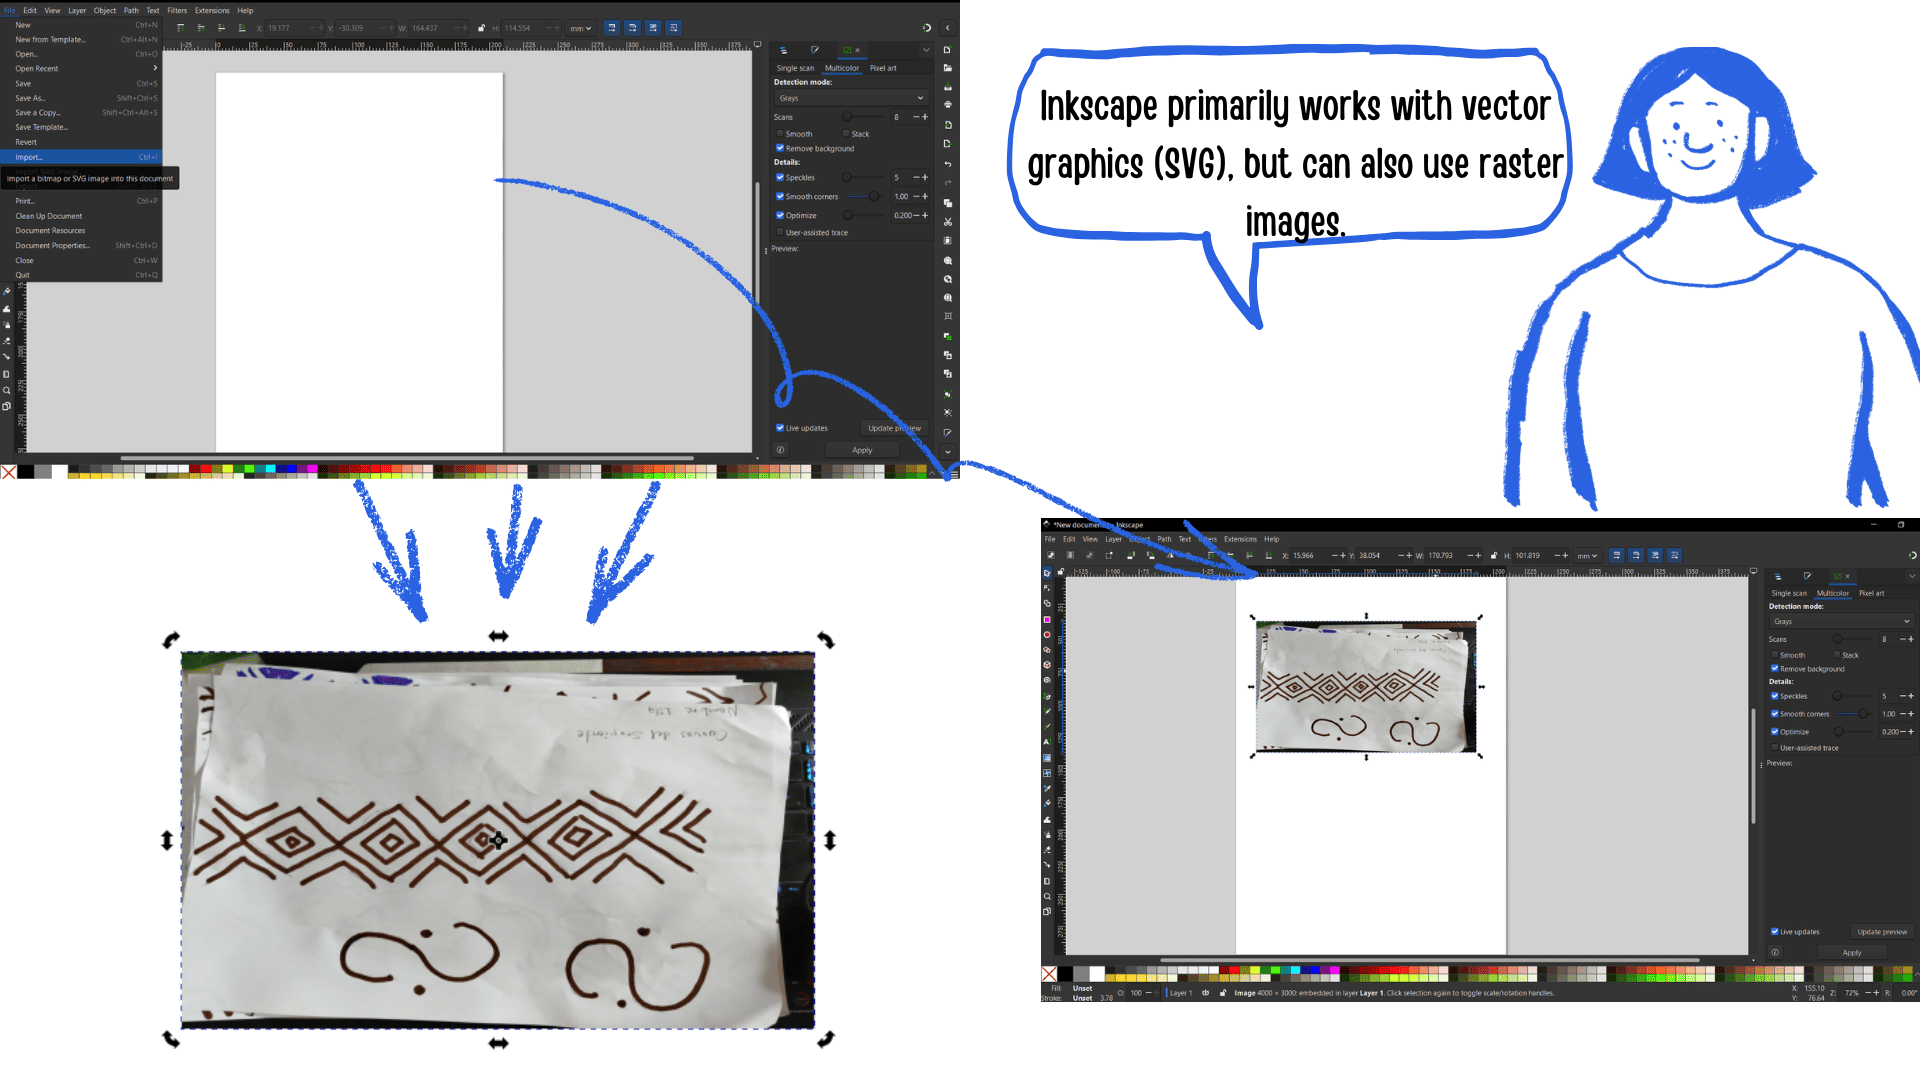
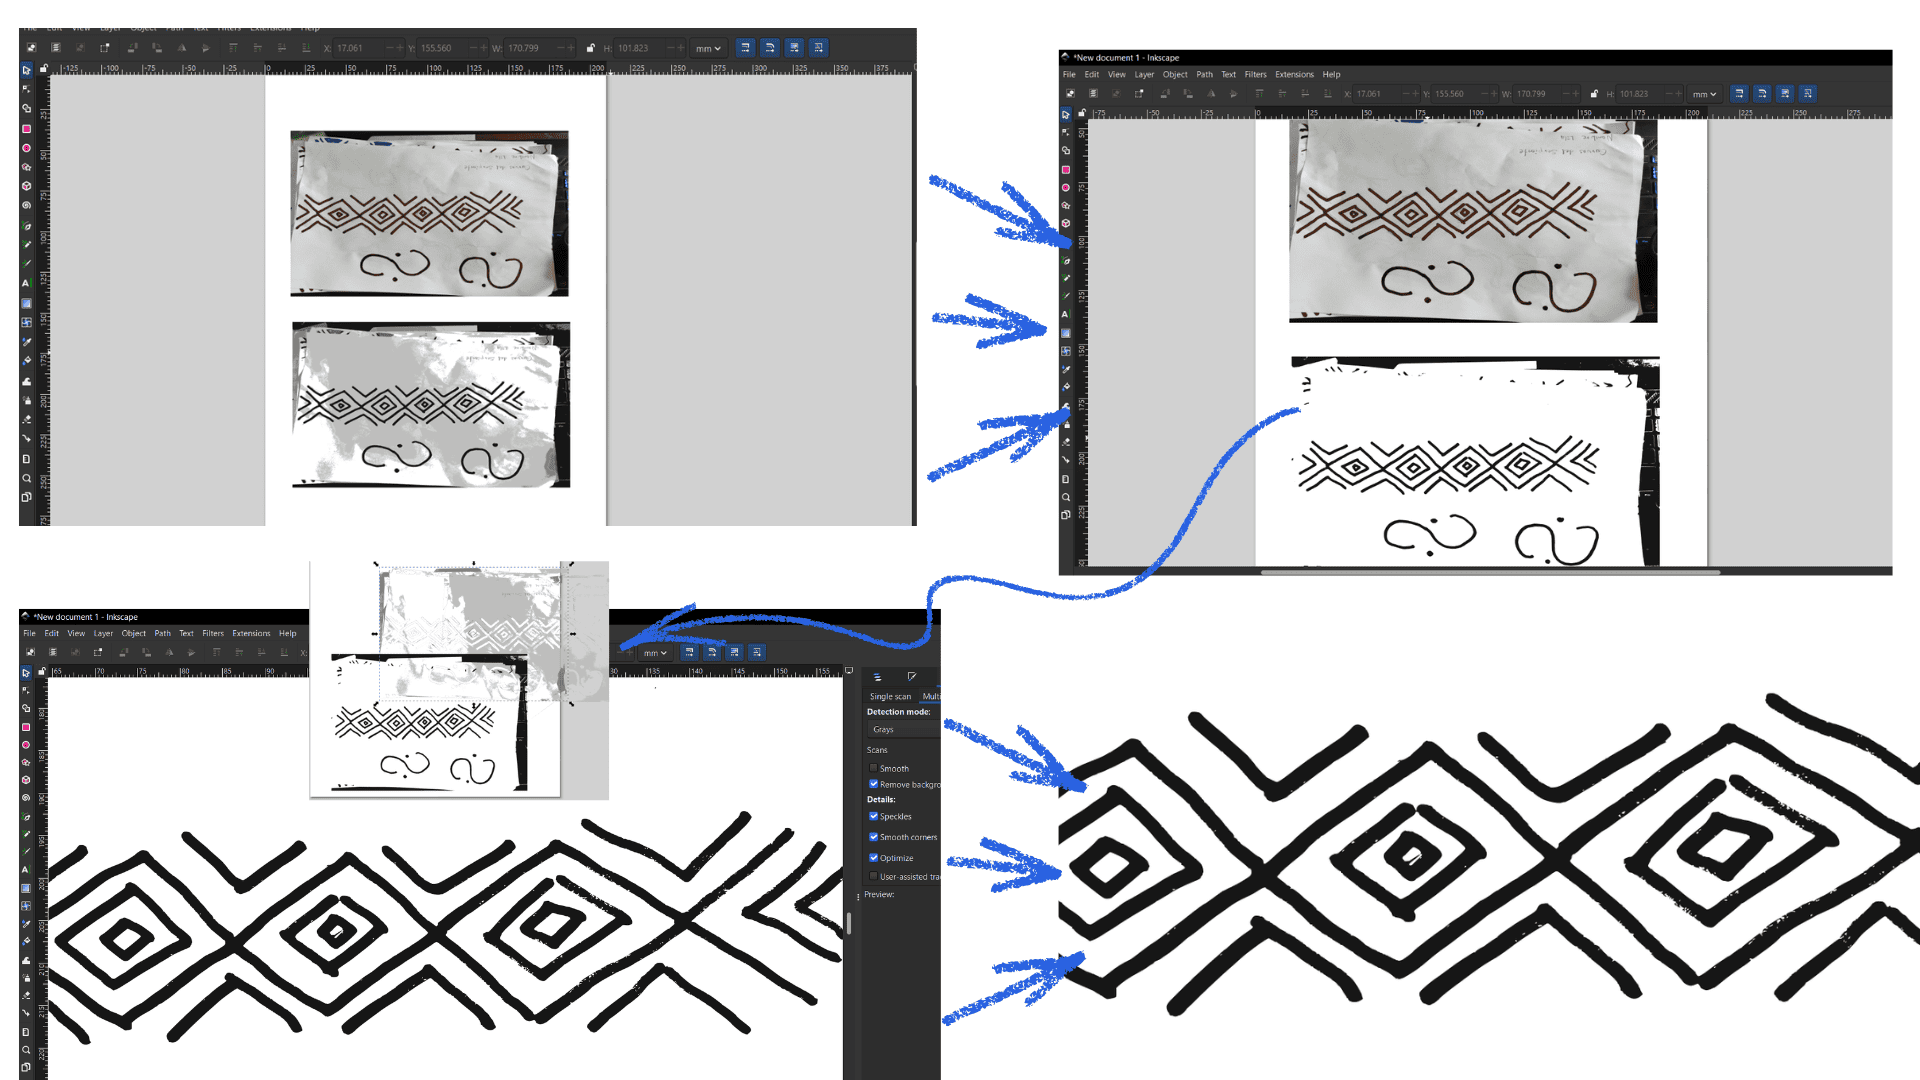
To start using Inkscape, a free and open-source vector design program, first visit the official website at https://inkscape.org/release and download the version for your operating system. After downloading, run the installer and follow the instructions to complete the installation. Once opened, familiarize yourself with the interface: the toolbar on the left contains selection, drawing, and text tools, the main canvas in the center is where you create your designs, and panels on the top and right allow you to adjust colors, layers, and object properties. To create your first design, open a new document via File → New, then use selection tools to move objects, shapes to draw rectangles, circles, and stars, freehand tools for custom curves, and the text tool to add editable text. Customize each object by adjusting fill and stroke colors, line thickness, and style, and organize your work using layers to control stacking order. When ready to save, choose File → Save As → SVG to keep it editable, or export to PNG for use online or in other programs. You can also explore combining objects with Path operations, applying filters and effects, or vectorizing imported raster images with Path → Trace Bitmap, allowing you to fully leverage Inkscape’s vector design capabilities while practicing and experimenting with different tools and techniques.
Open Inkscape
Inkscape
Inkscape
Inkscape
2D Modeling Comparison
| Software | Main Design Type | Raster (Pixels) | Vector | Recommended Use |
|---|---|---|---|---|
| GIMP | Raster | ✔ Fully supported; edit pixels, layers, filters, brushes | ✖ Limited; can import SVG but mostly rasterizes automatically | Photo editing, digital painting, pixel art |
| Adobe Photoshop | Raster | ✔ Fully supported; advanced raster editing, layers, filters, retouching | ✔ Limited; can work with vector shapes, paths, text, smart objects | Professional photo editing, web design, digital art |
| Inkscape | Vector | ✔ Limited; can import and embed raster images | ✔ Fully supported; create shapes, paths, layers, scalable designs | Logo design, illustrations, SVG graphics, print or web vectors |
Introduction to 3D
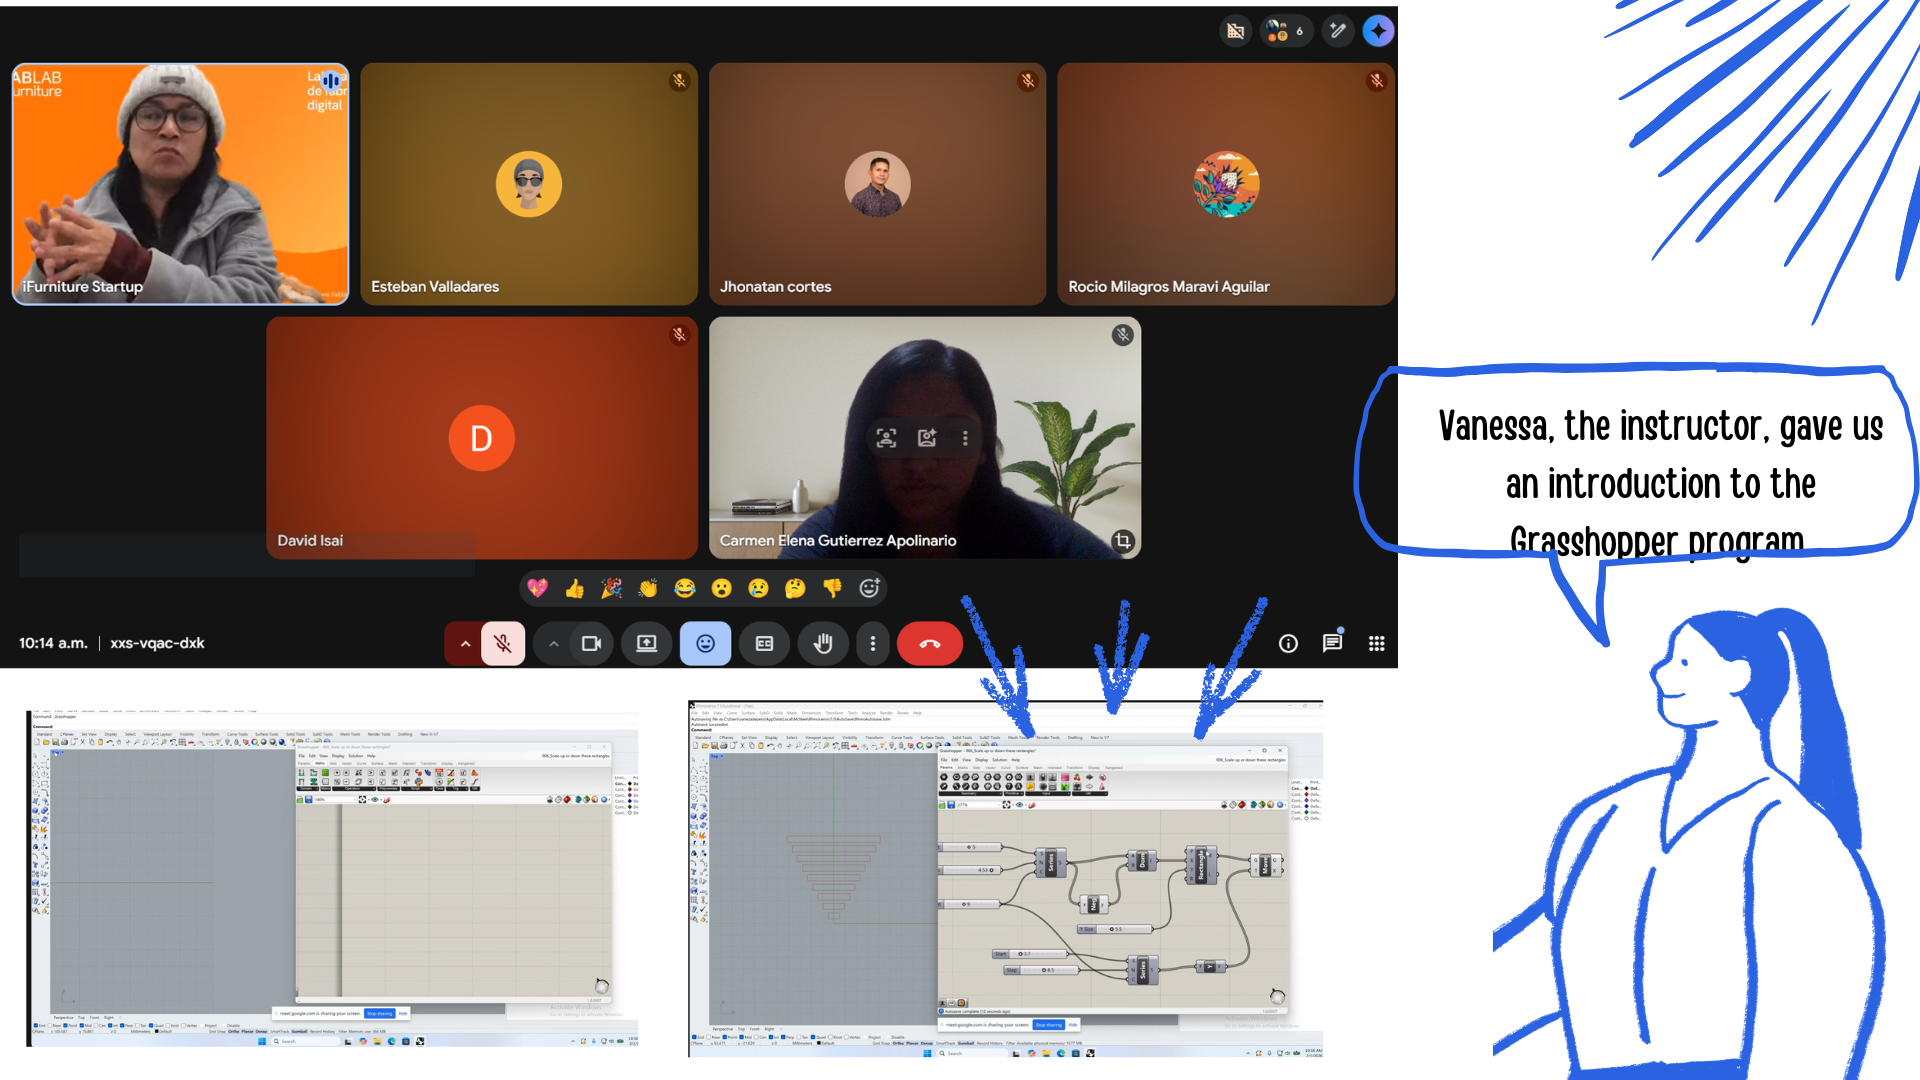
Vaneza , the instructor, gave us an introduction to the Grasshopper program. It was very interesting; for most of us, the program was new, but we related it to other similar programs. So she taught us not only how to use it, but also a combination of practice, theory, and mathematics.
Blender
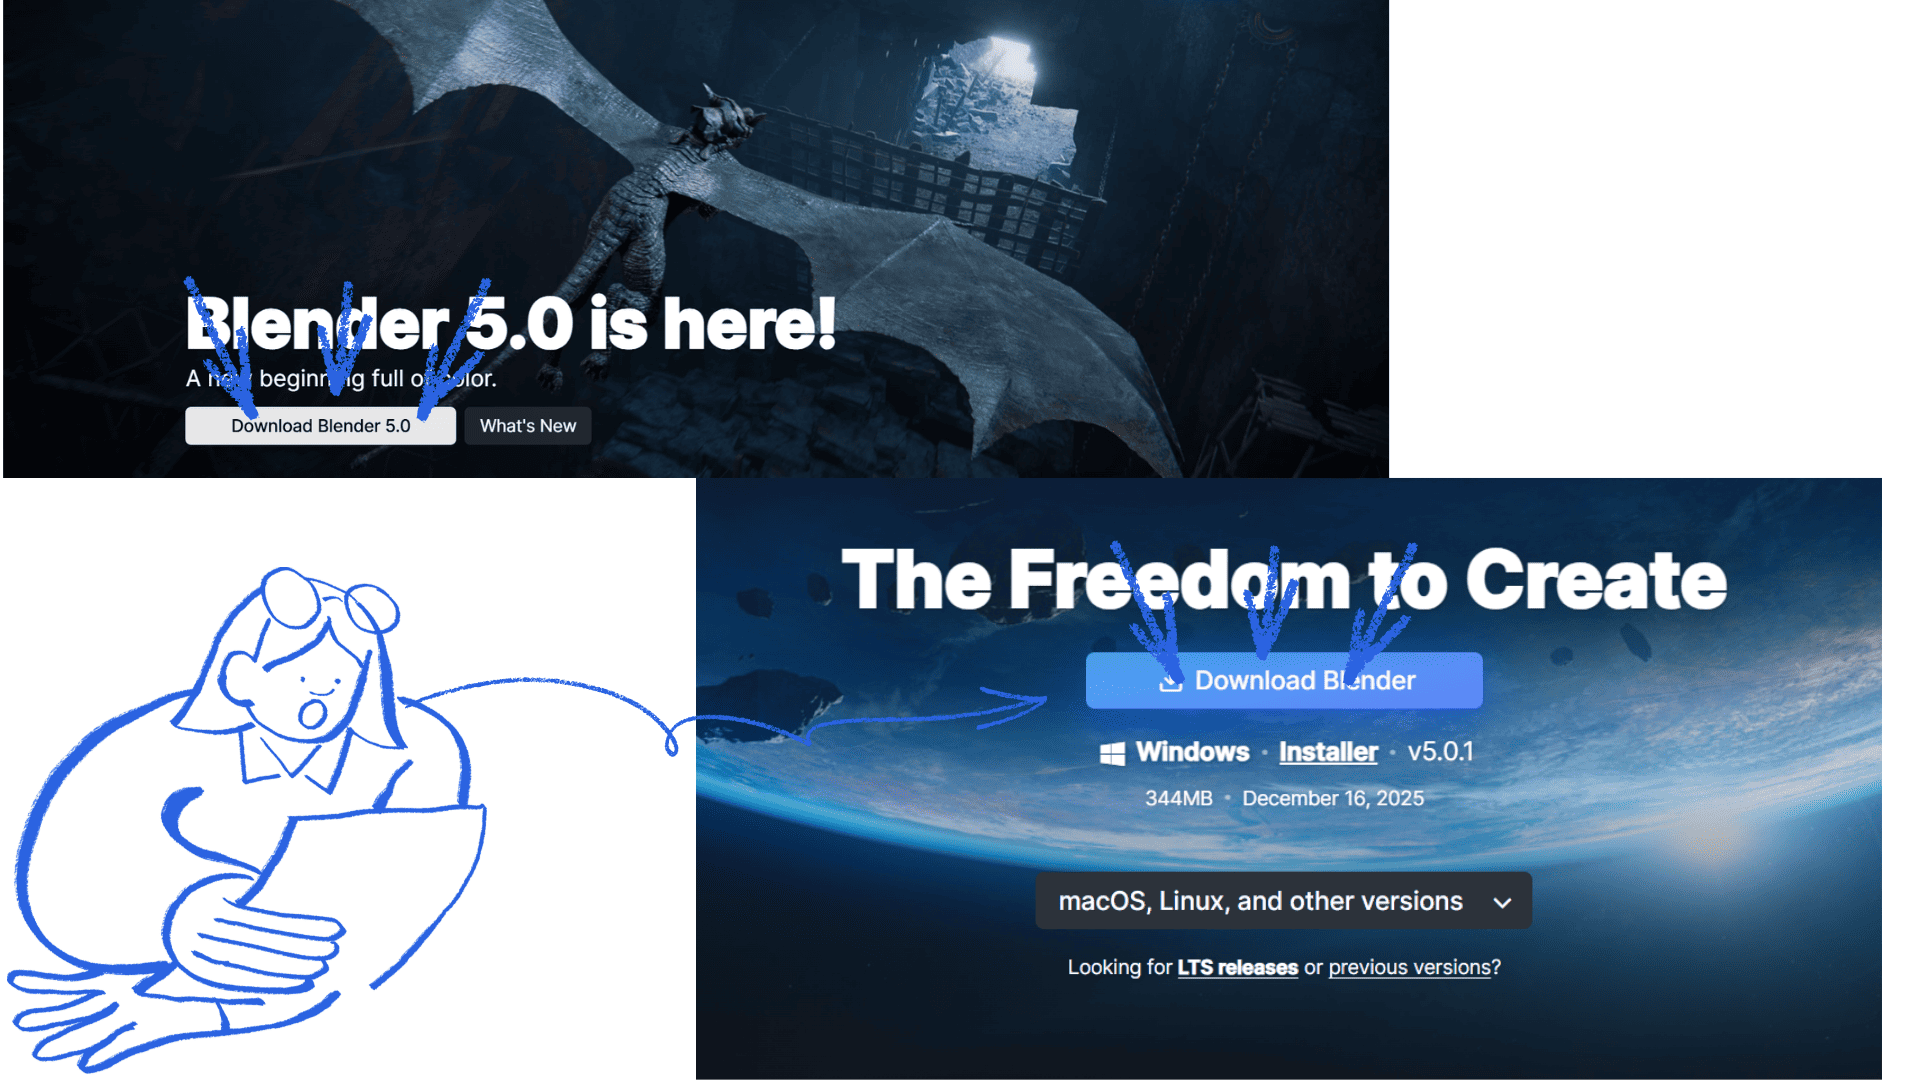
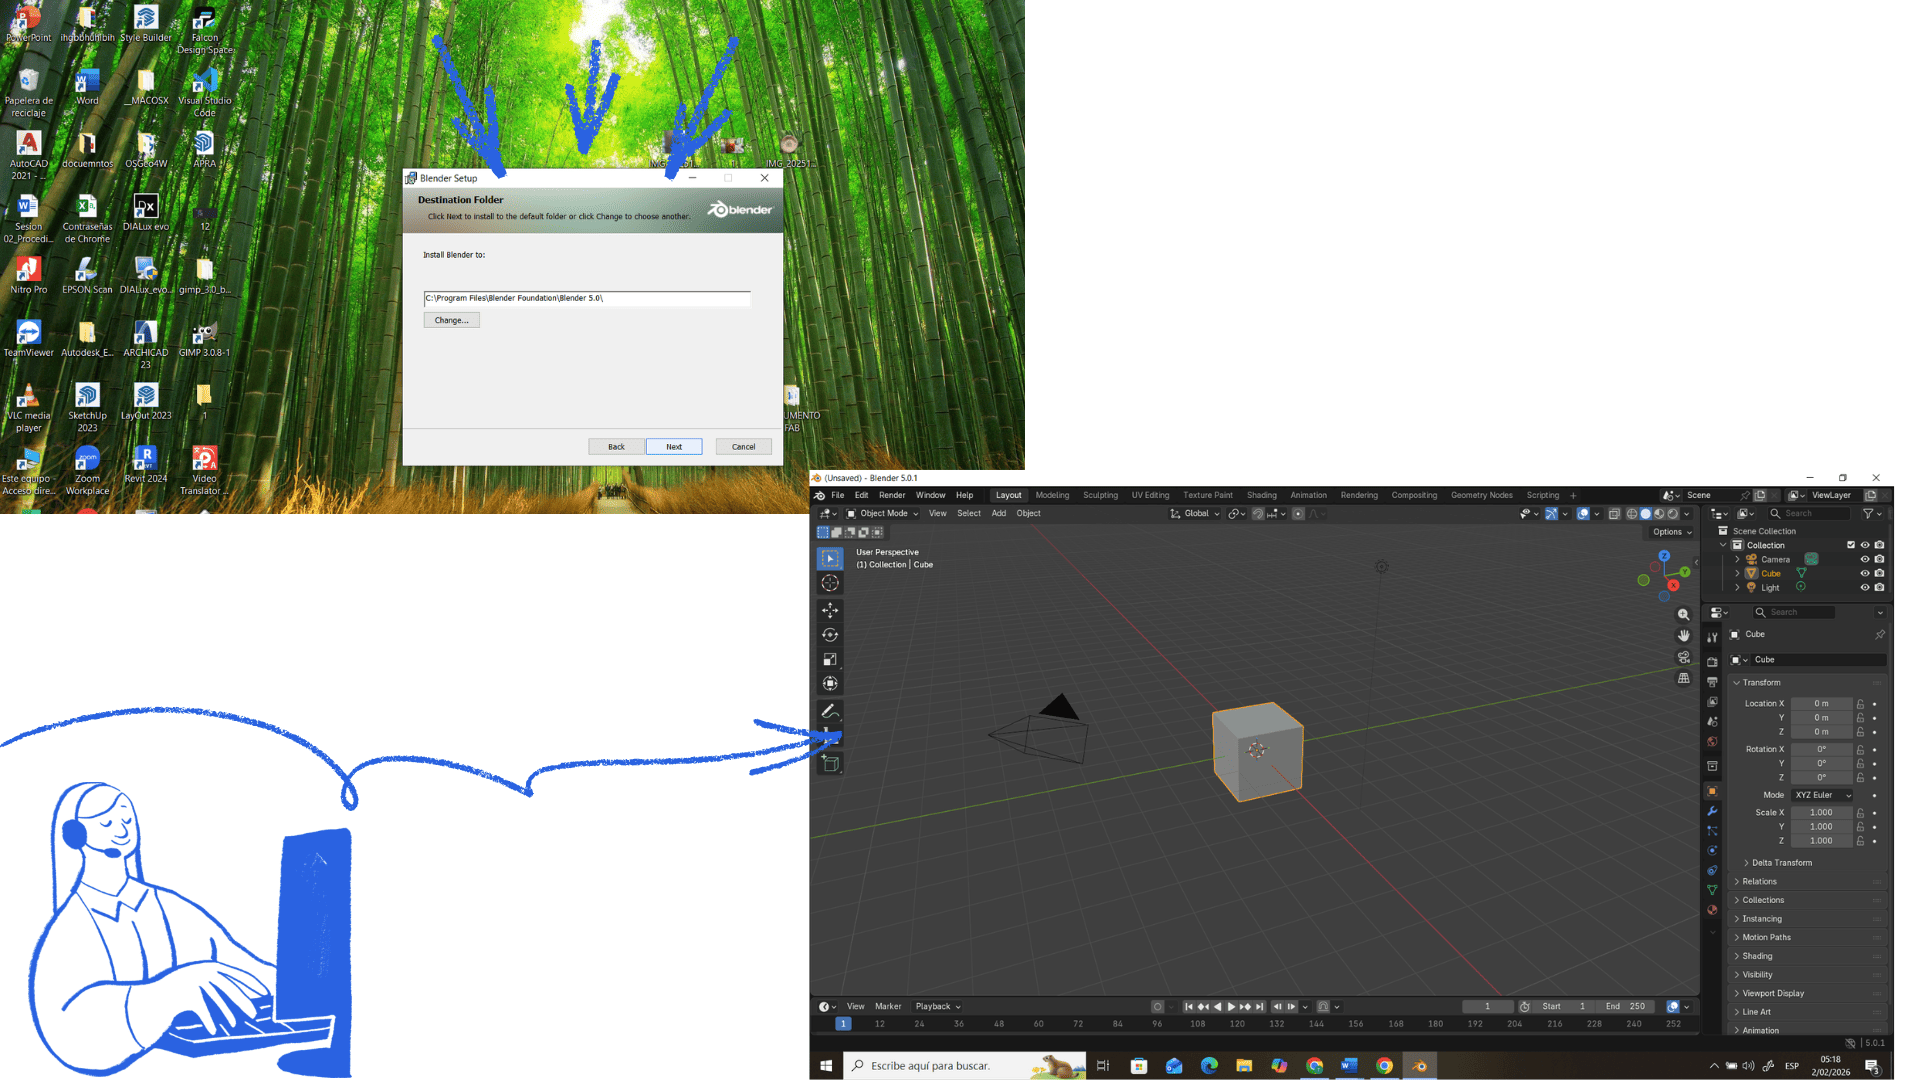
First, go to blender.org, download Blender, and install it. When you open the program, you'll see a cube, a camera, and a light; that's the basic scene. To move around the view, use the middle mouse button to rotate, Shift + middle mouse button to pan, and the scroll wheel to zoom.
To transform objects, select one with a left click and use G to move, R to rotate, and S to scale. With these commands, we can move in space.
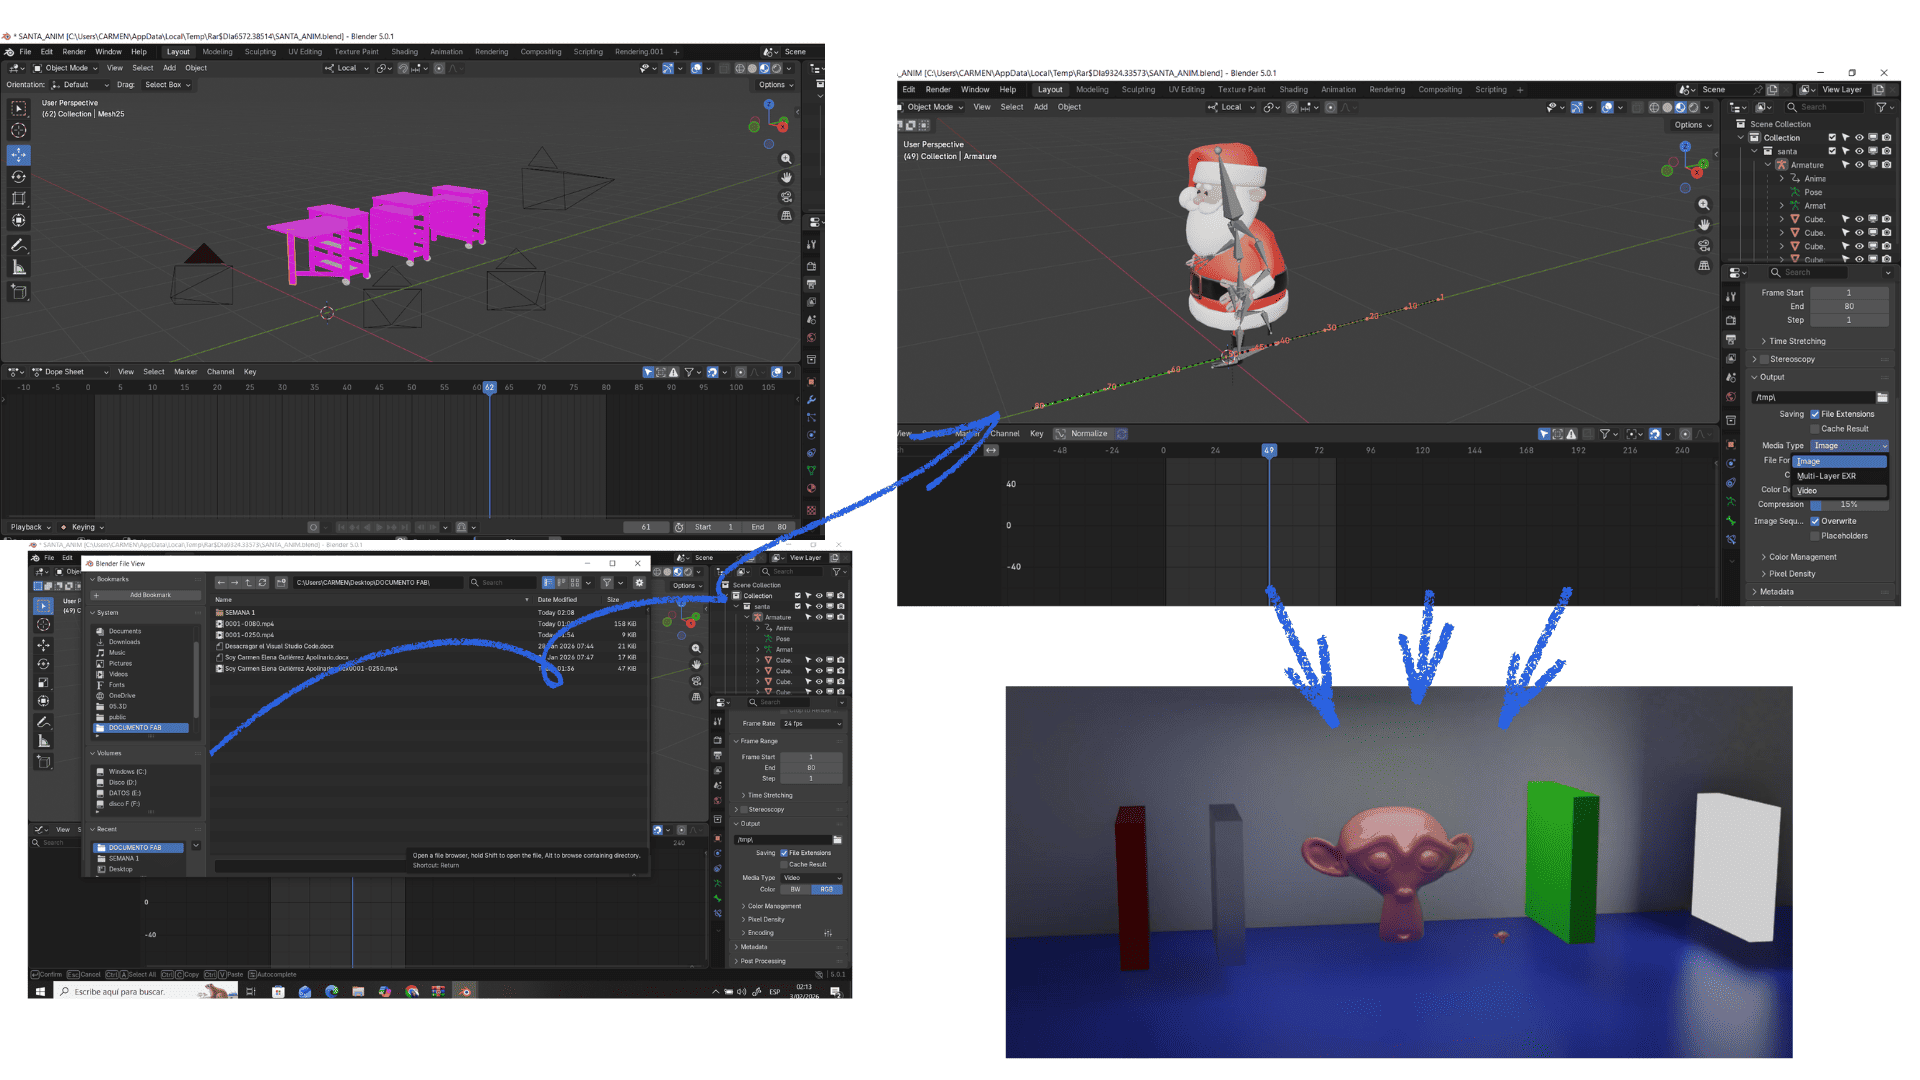
The camera defines what will be seen in the render. To view it from the camera's perspective, press Numpad 0. You can move it by selecting it and using G to move and R to rotate, just like any other object. The camera must be pointed at the model you want to render.
Para crear un video primero necesitas una animación con cuadros de movimiento. Luego ve a Output Properties, elige la carpeta donde se guardará el archivo y selecciona el formato MP4 (H.264). Ajusta el rango de cuadros en la línea de tiempo. Finalmente, presiona Ctrl + F12 para renderizar toda la animación y generar el video.
Blender
Blender
Blender
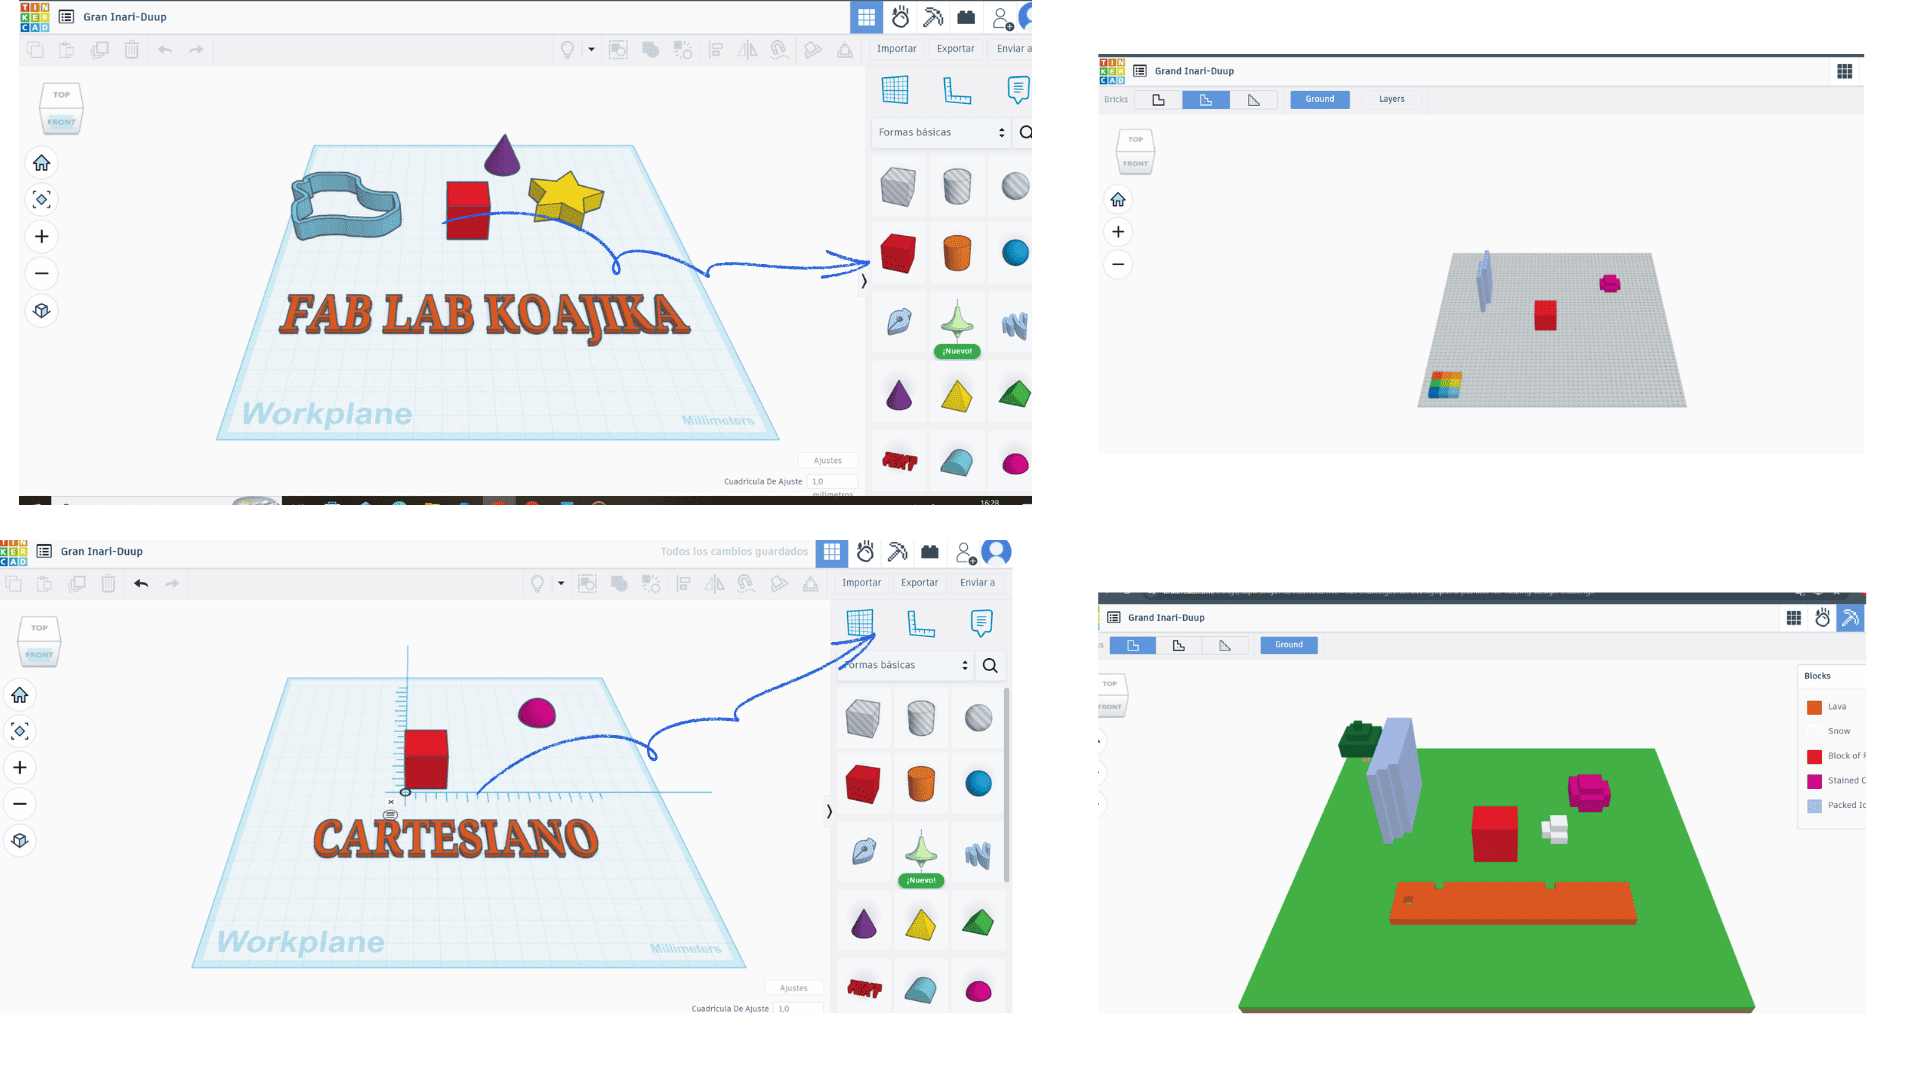
Tinkercard
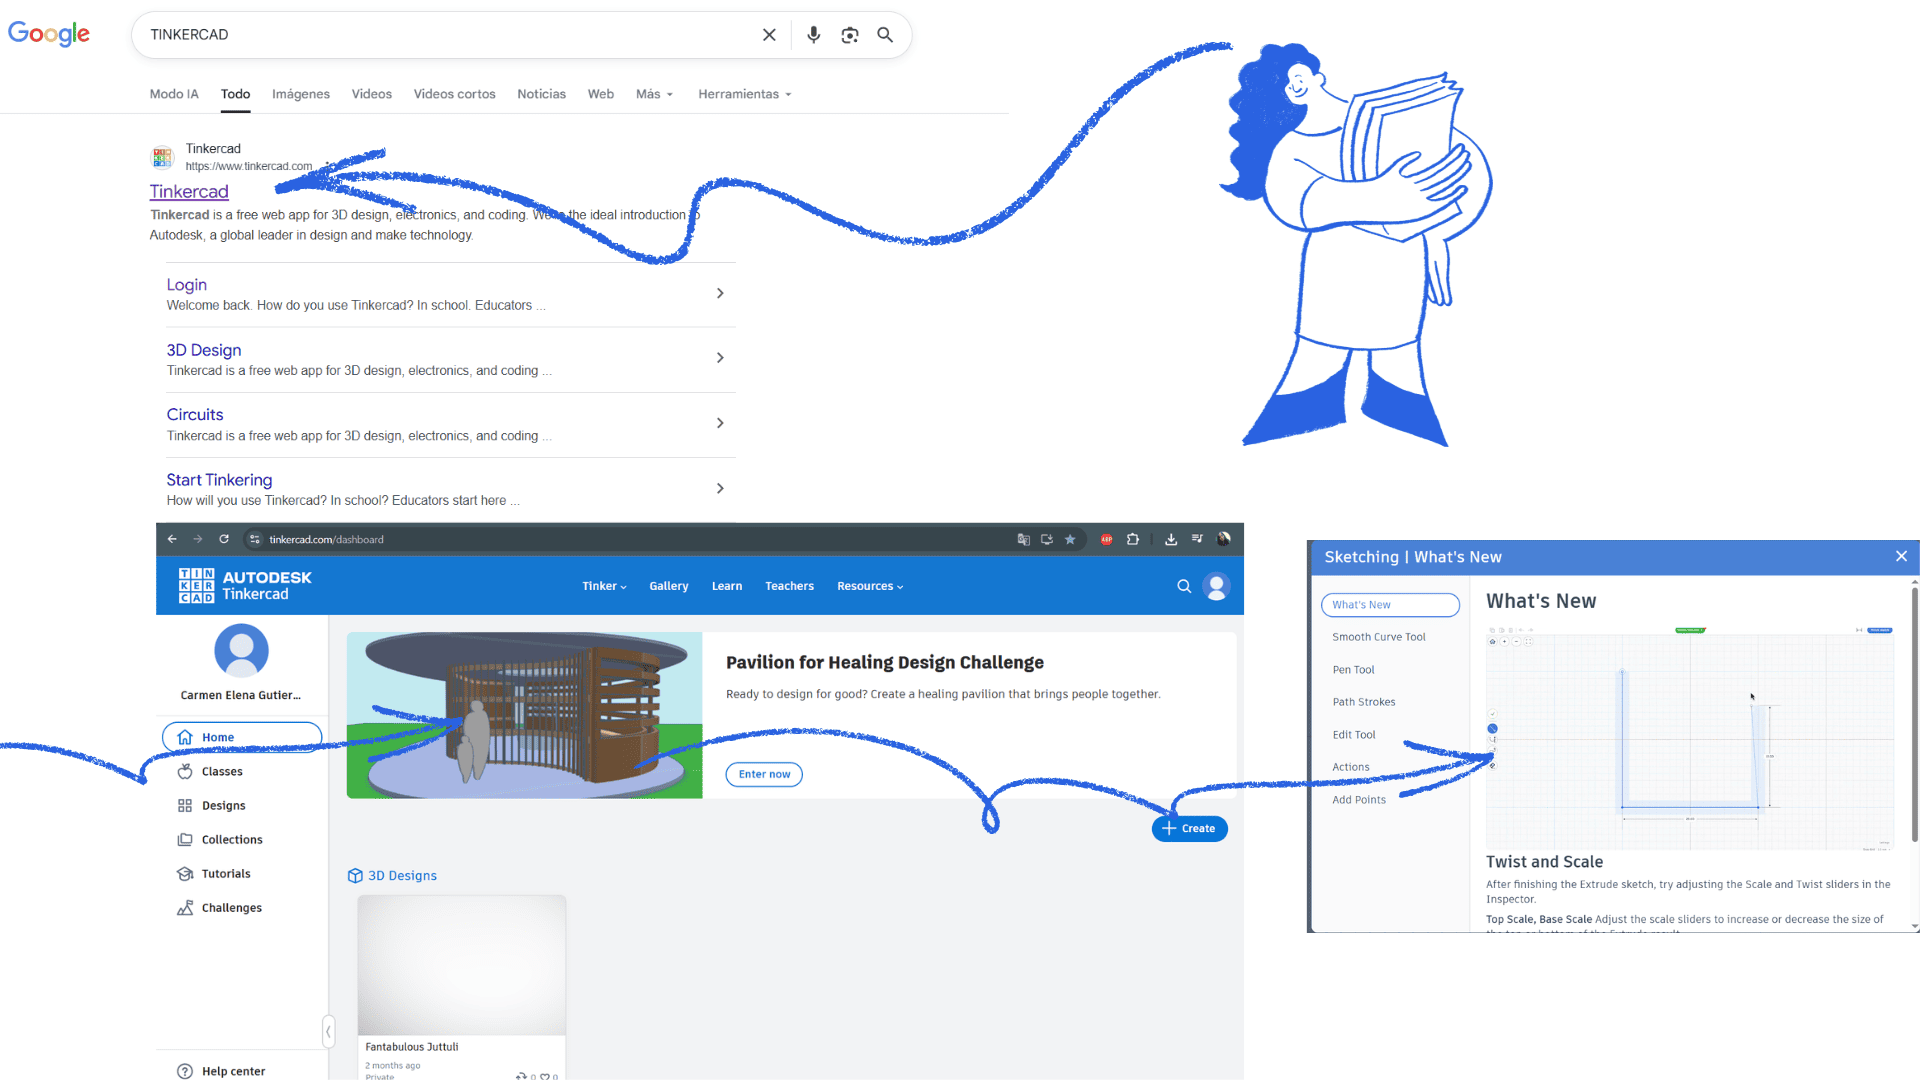
Tinkercad is an online program, so it doesn't require installation. It's used directly from a web browser, allowing quick and easy access from any computer with internet access.
The platform offers a variety of design tools that allow you to intuitively create 3D models, electronic circuits, and simulations. Its user-friendly interface, based on drag and drop, facilitates rapid interaction even for those without prior experience.
Thanks to its tools, Tinkercad allows you to connect ideas quickly, combining geometric shapes, adjusting sizes, and creating joints or cuts between objects. This makes it an ideal option for learning, rapid prototyping, and technology education.
Furthermore, as an online program, projects are automatically saved to the cloud, allowing you to continue working from anywhere and easily share designs.
Open Visual Studio Code
Meeting with teacher Jonathan
SketchUp
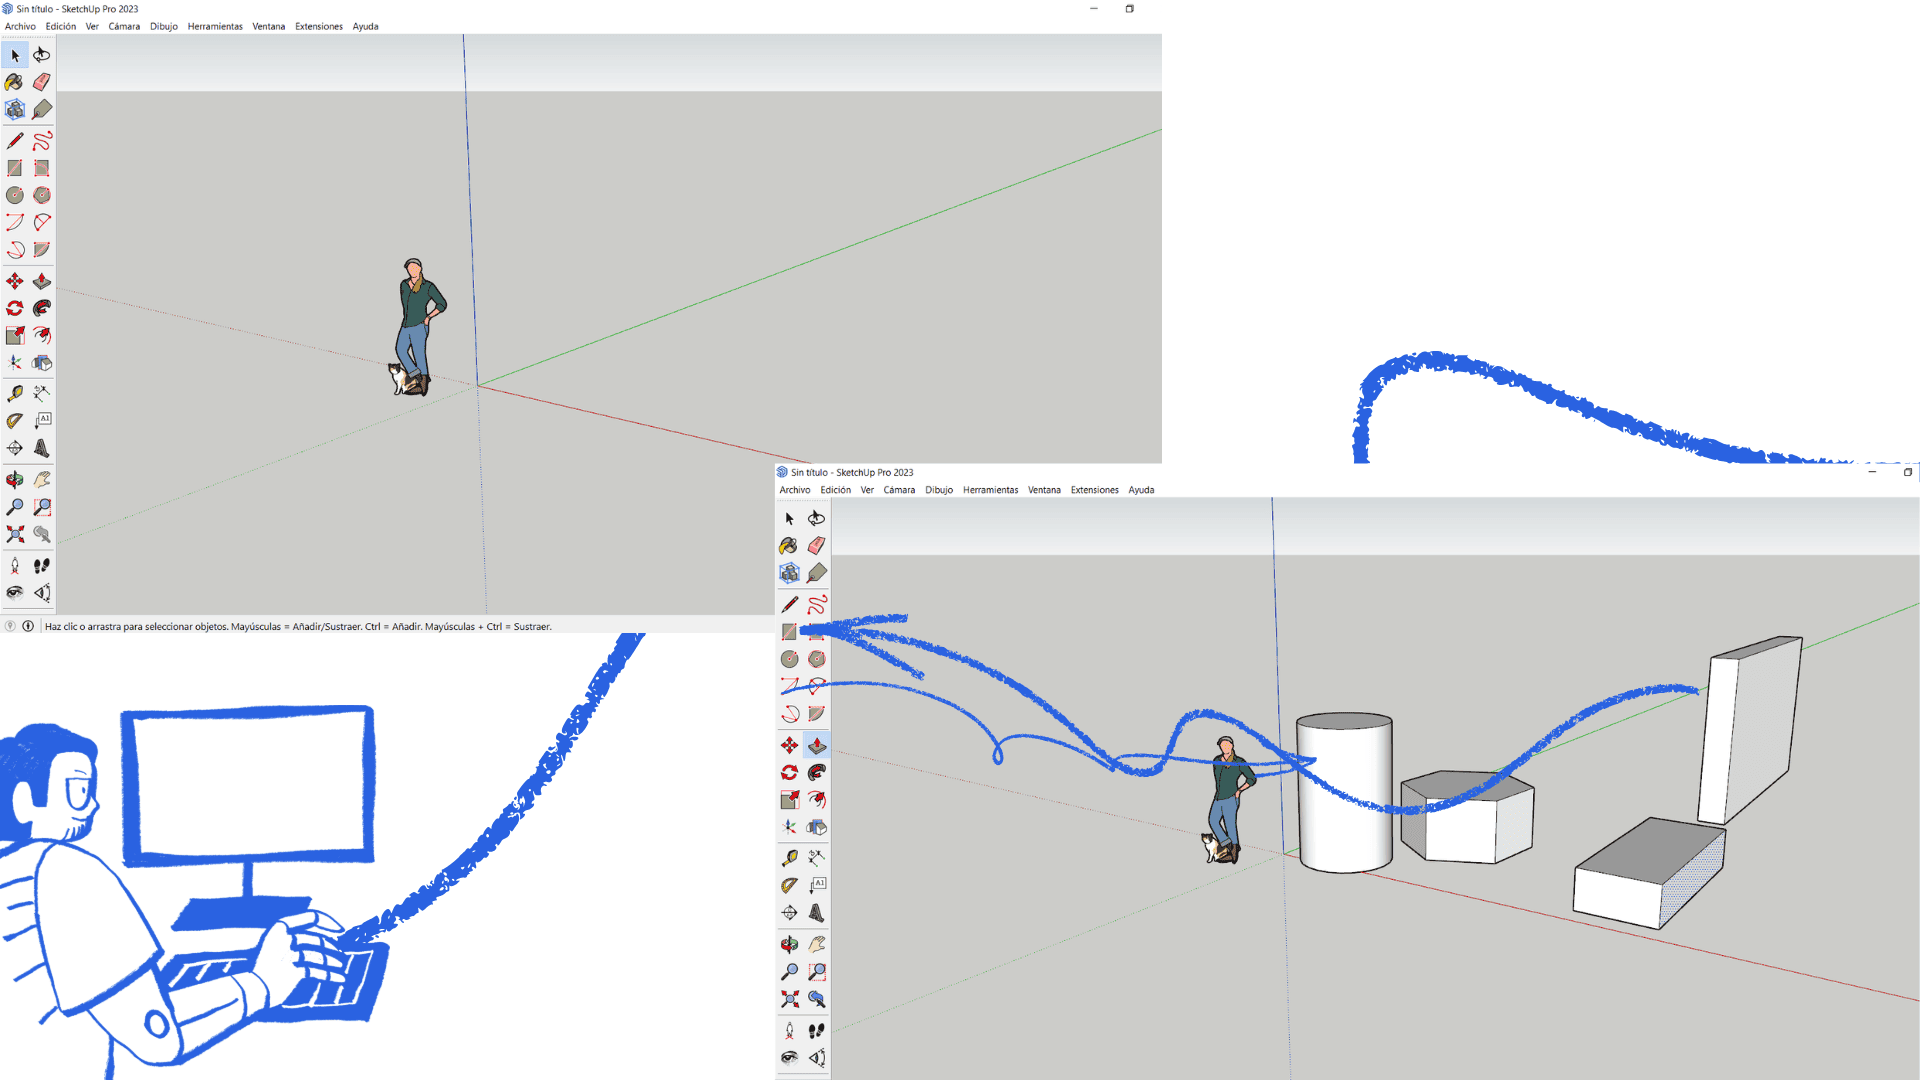
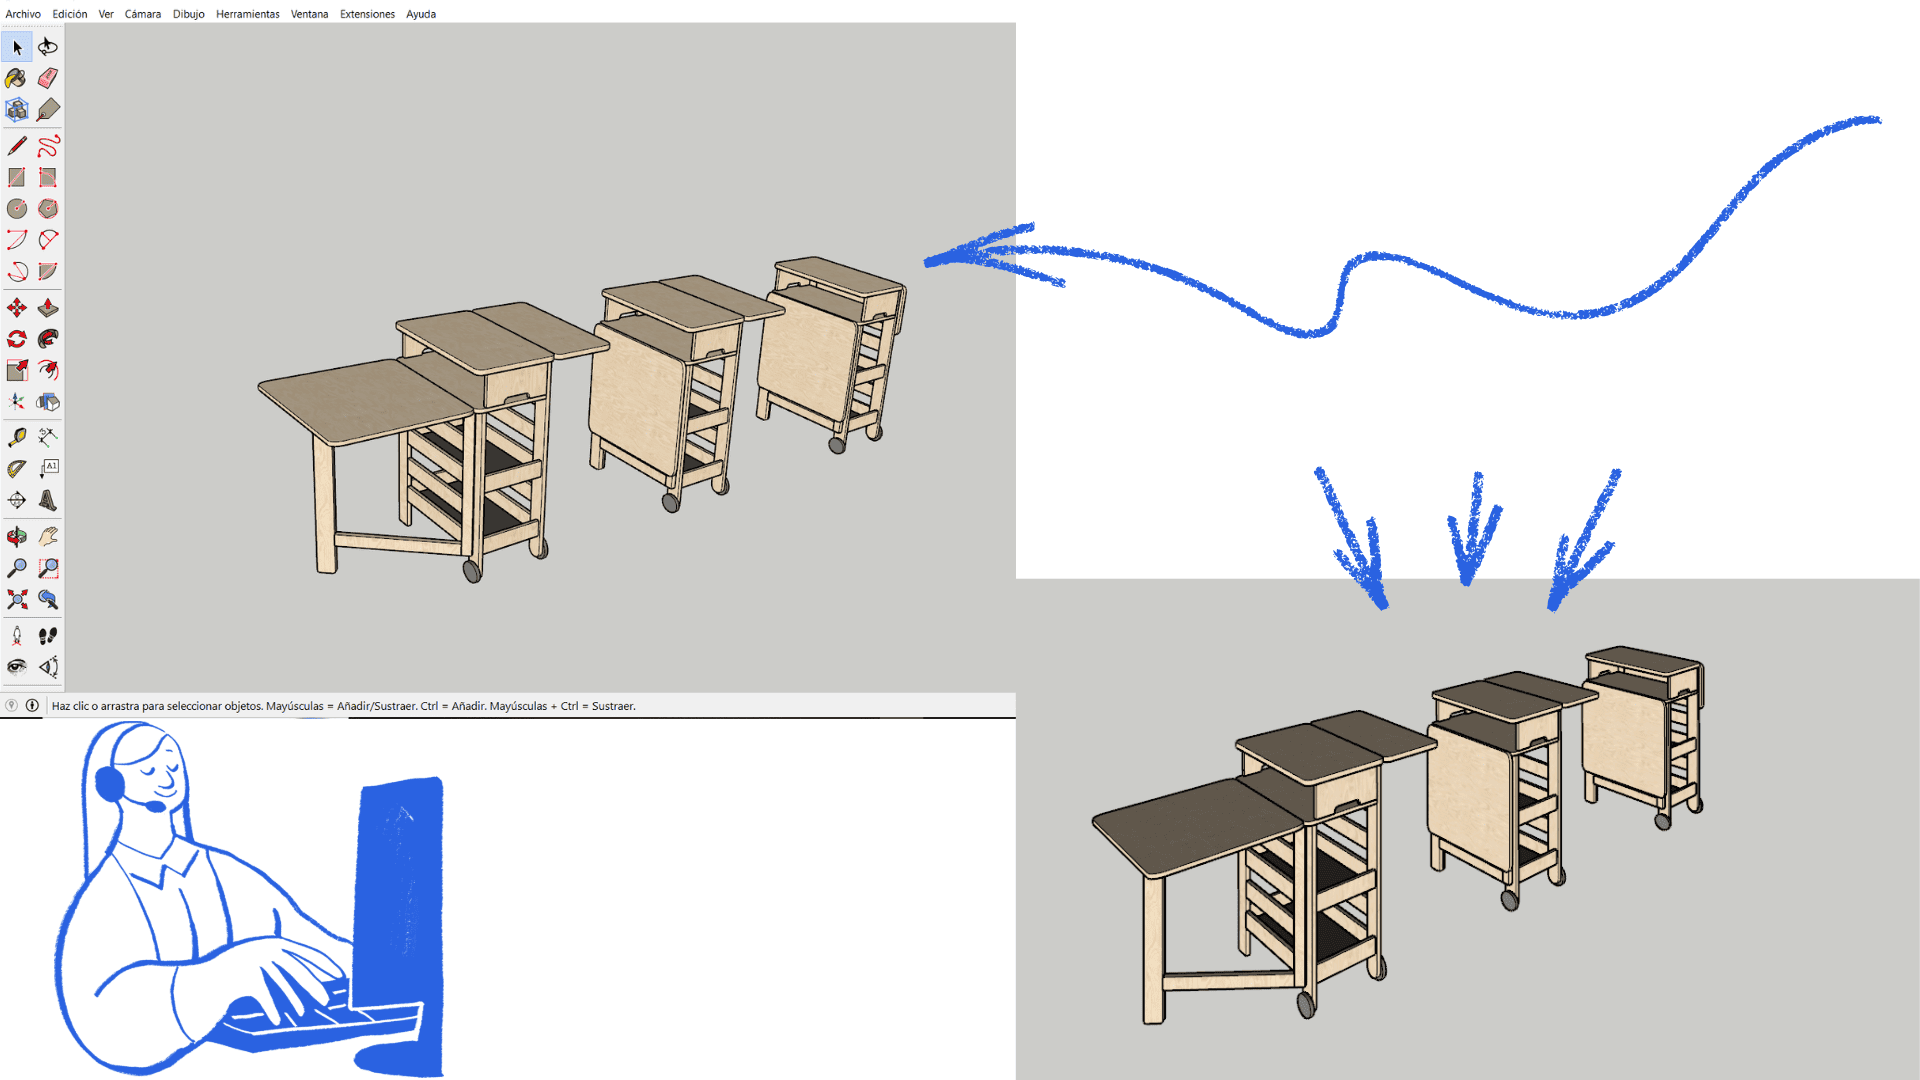
On the official SketchUp website, click Download, then select the desktop version for your operating system (Windows or macOS). An installer file will then be downloaded; open it to begin the installation. Accept the terms and follow the wizard's steps until the process is complete. Once installed, SketchUp can be opened from your desktop or Start menu, and you can sign in with a Google or Trimble account to start using the program.
The program allows for more free and flexible 2D and 3D modeling. In 2D modeling, tools such as Line, Rectangle, Circle, and Arc are primarily used, enabling the precise drawing of planes, shapes, and outlines.
2D shapes can be easily modified by moving vertices, adjusting measurements, or combining them, giving the user greater creative freedom. From these 2D drawings, SketchUp allows you to extrude the shapes to convert them into 3D models using the Push/Pull tool.
With its freedom of drawing and editing, SketchUp is widely used in design, as it allows for fast, clear, and direct work.
SketchUp
SketchUp
3D Modeling Comparison
| Software | Main Design Type | 3D Modeling Capabilities | Ease of Use | Recommended Use |
|---|---|---|---|---|
| Blender | 3D modeling, animation, and rendering | ✔ Advanced; sculpting, animation, simulations, realistic rendering | Medium–High (requires learning) | Animation, video games, film production, digital art |
| Tinkercad | Basic 3D design and circuits | ✔ Basic; simple drag-and-drop shapes | Very easy | Education, beginners, 3D printing, school projects |
| SketchUp | Architectural 3D modeling | ✔ Intermediate; free drawing, push/pull tools, spatial precision | Easy–Medium | Architecture, interior design, construction |
image compression
To compress an image using a search engine, first open your web browser and type something like "compress image online" into the search bar. Then select one of the websites from the search results. On the site, click "Select files" or "Upload image" to locate the file on your computer. Once you've chosen the image, the system will compress it automatically, or you can do so by clicking the compress button. Finally, download the compressed image to your computer.
Open Visual Studio Code
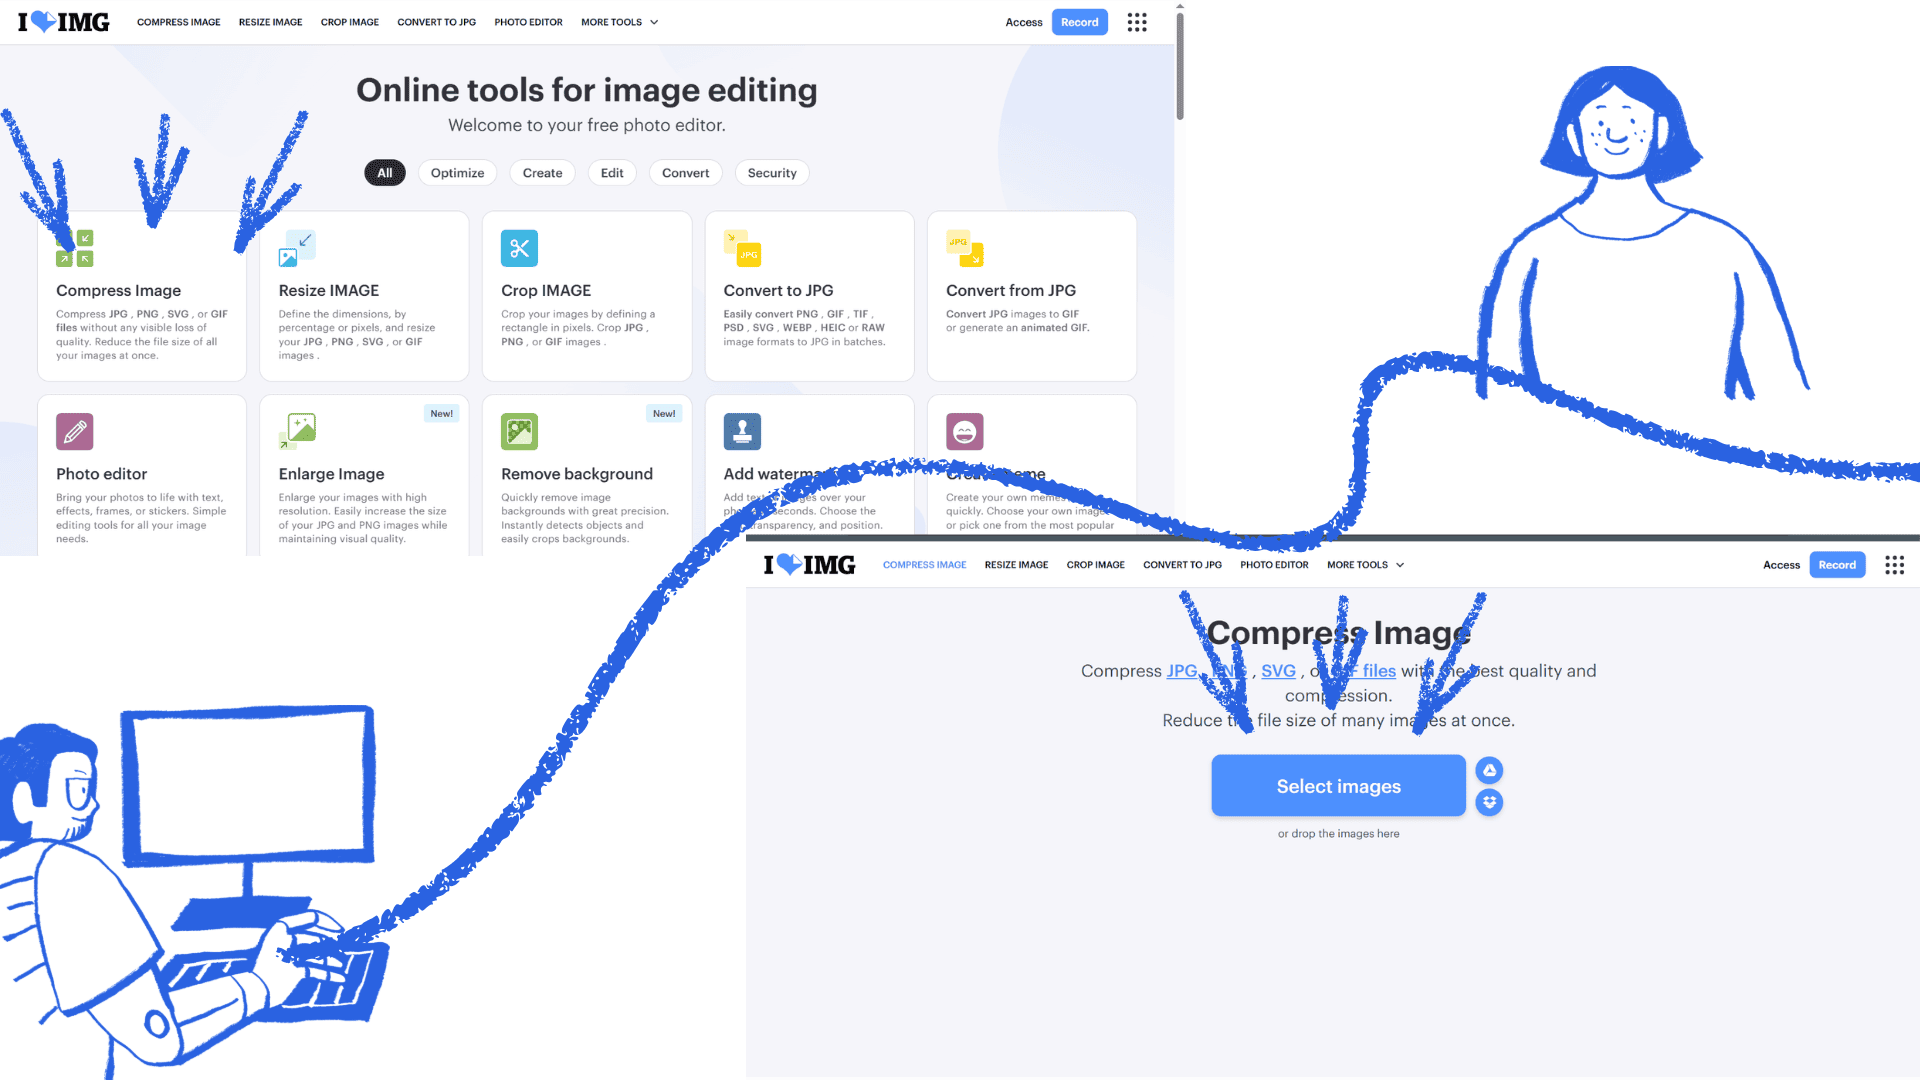
image compression
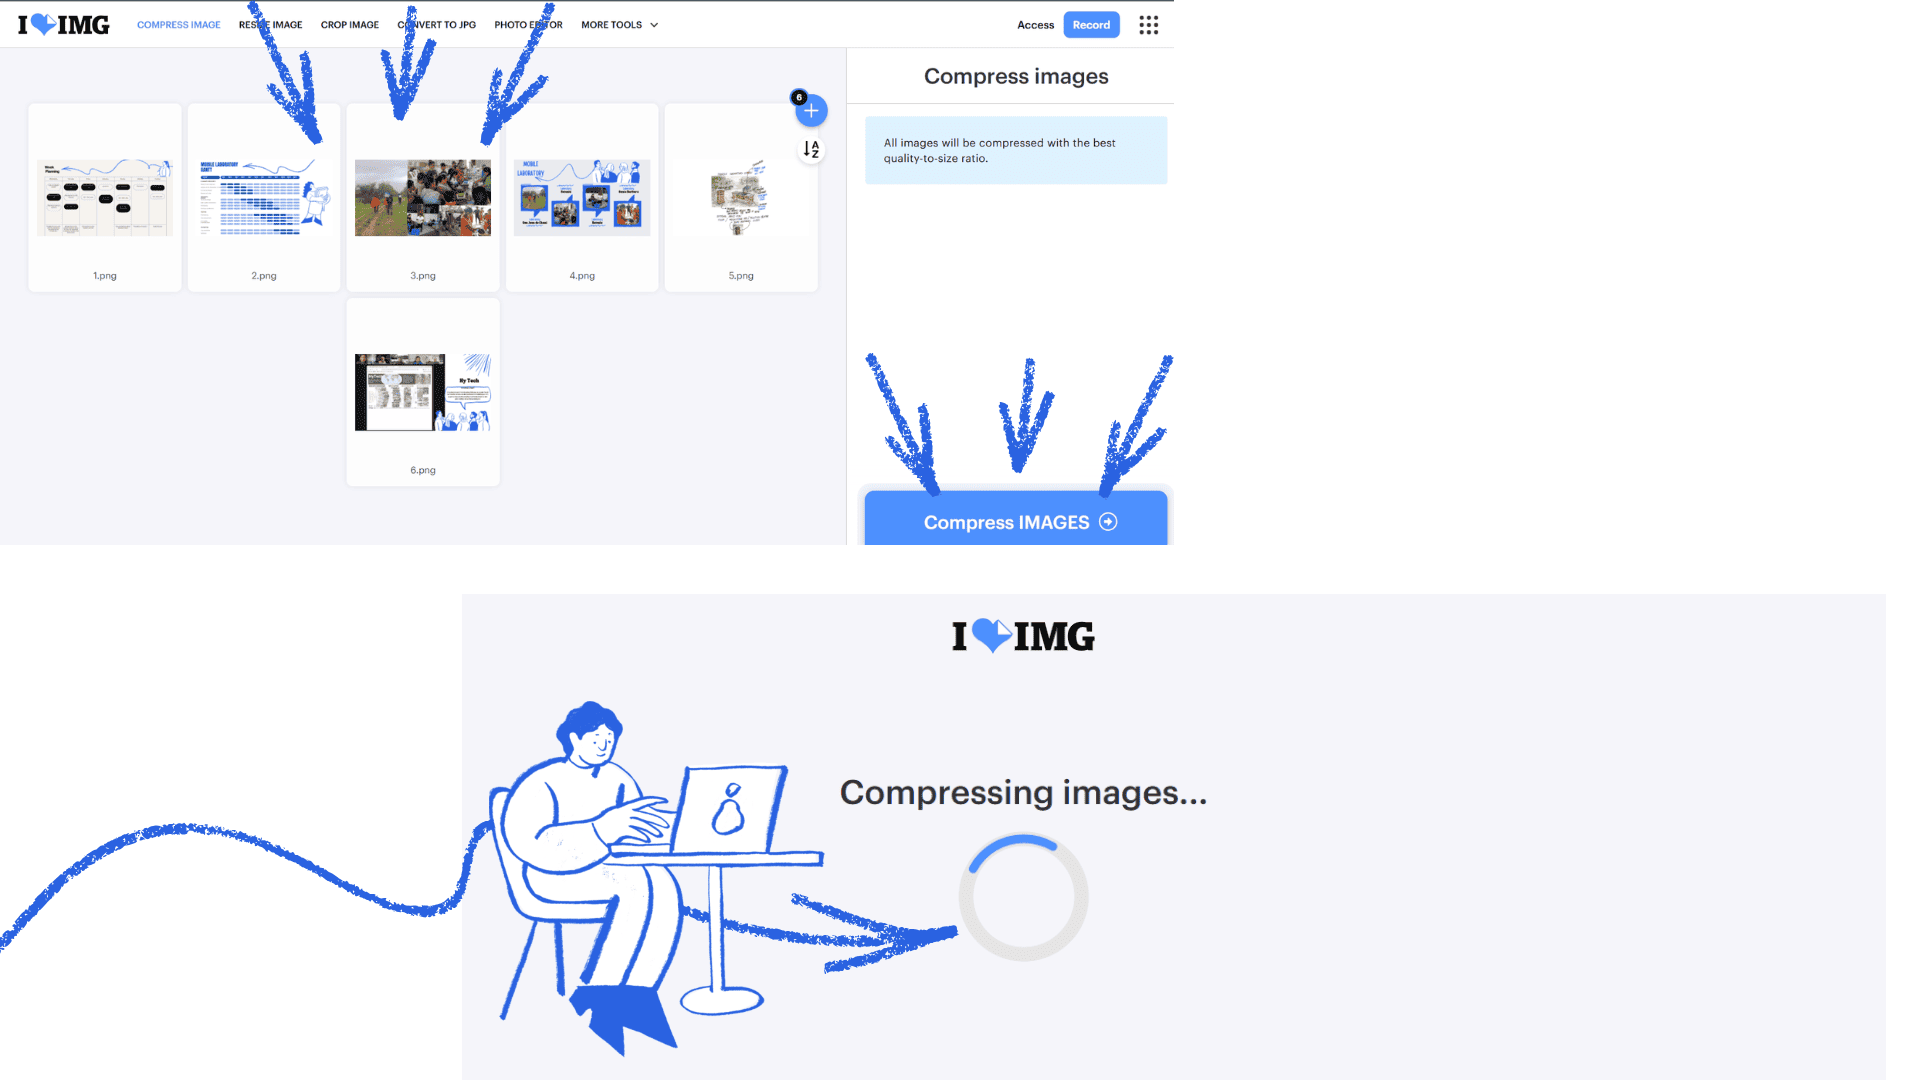
image compression
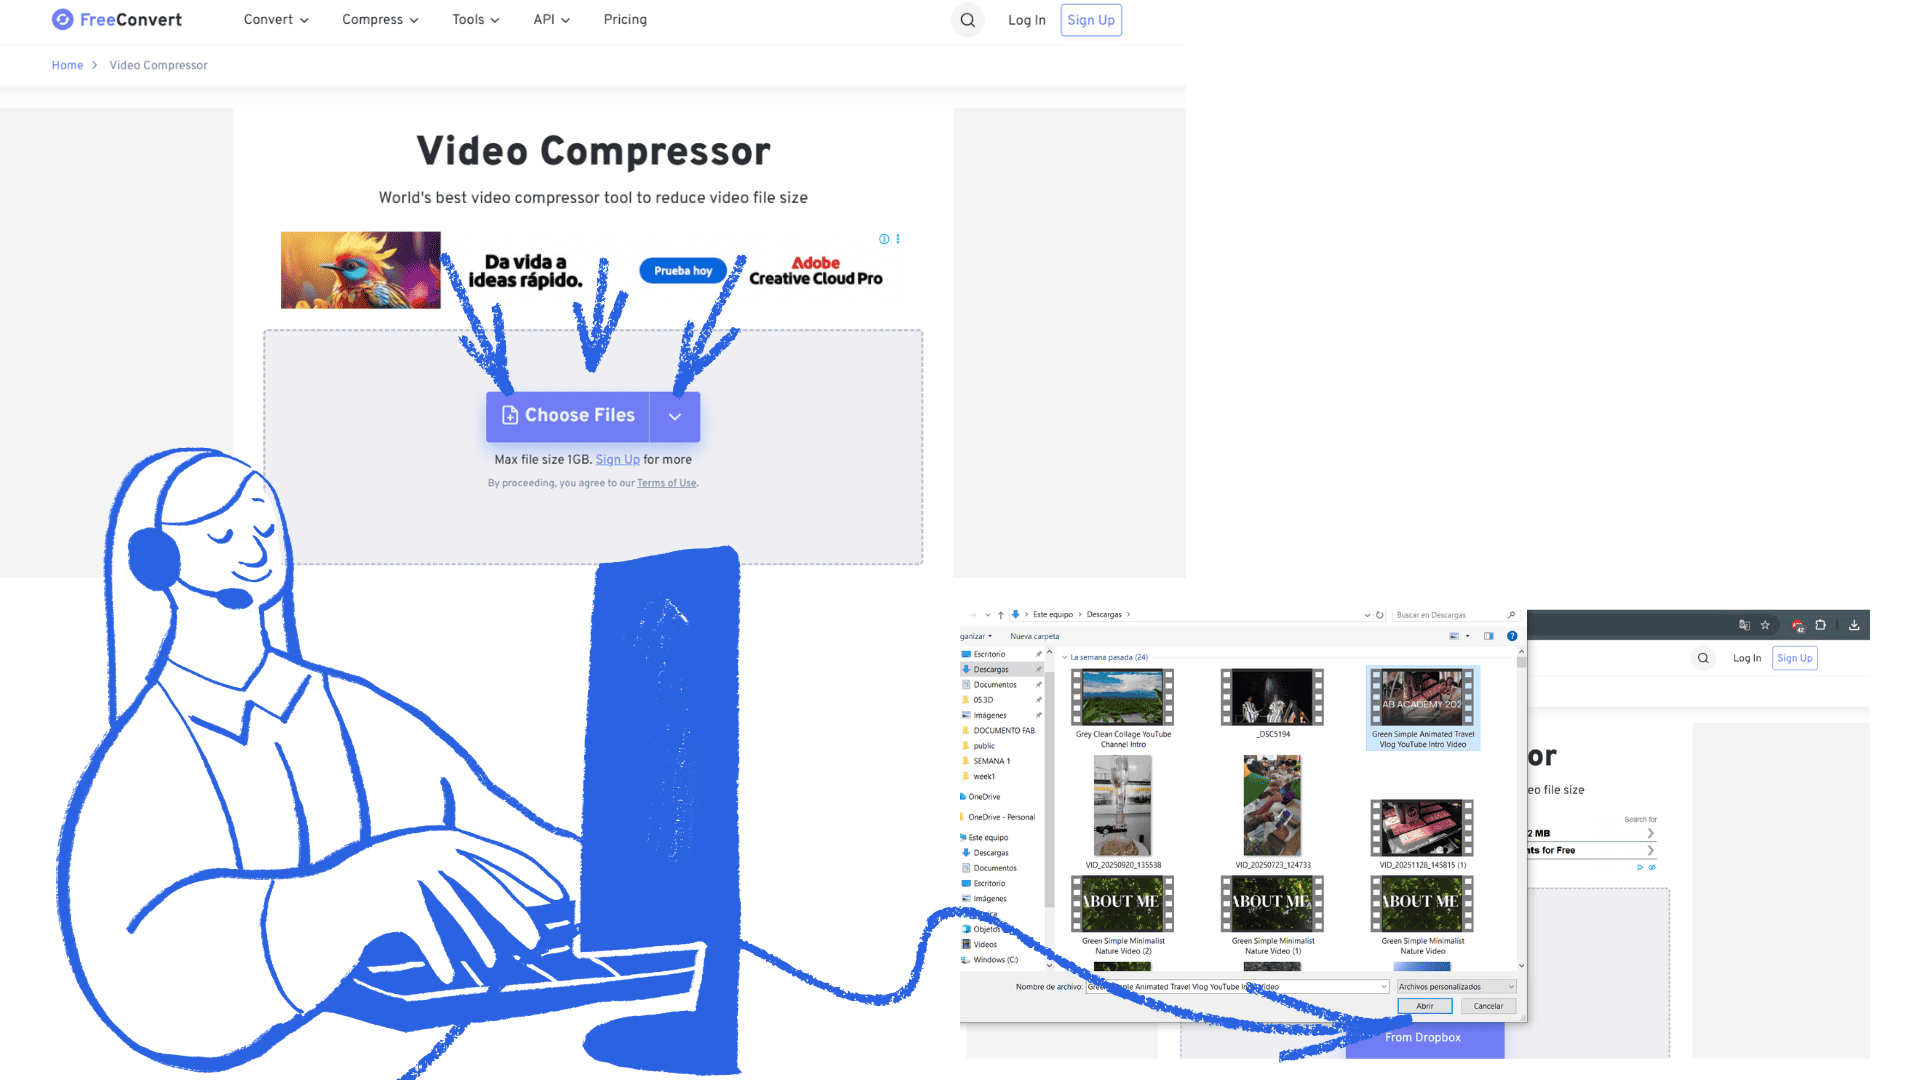
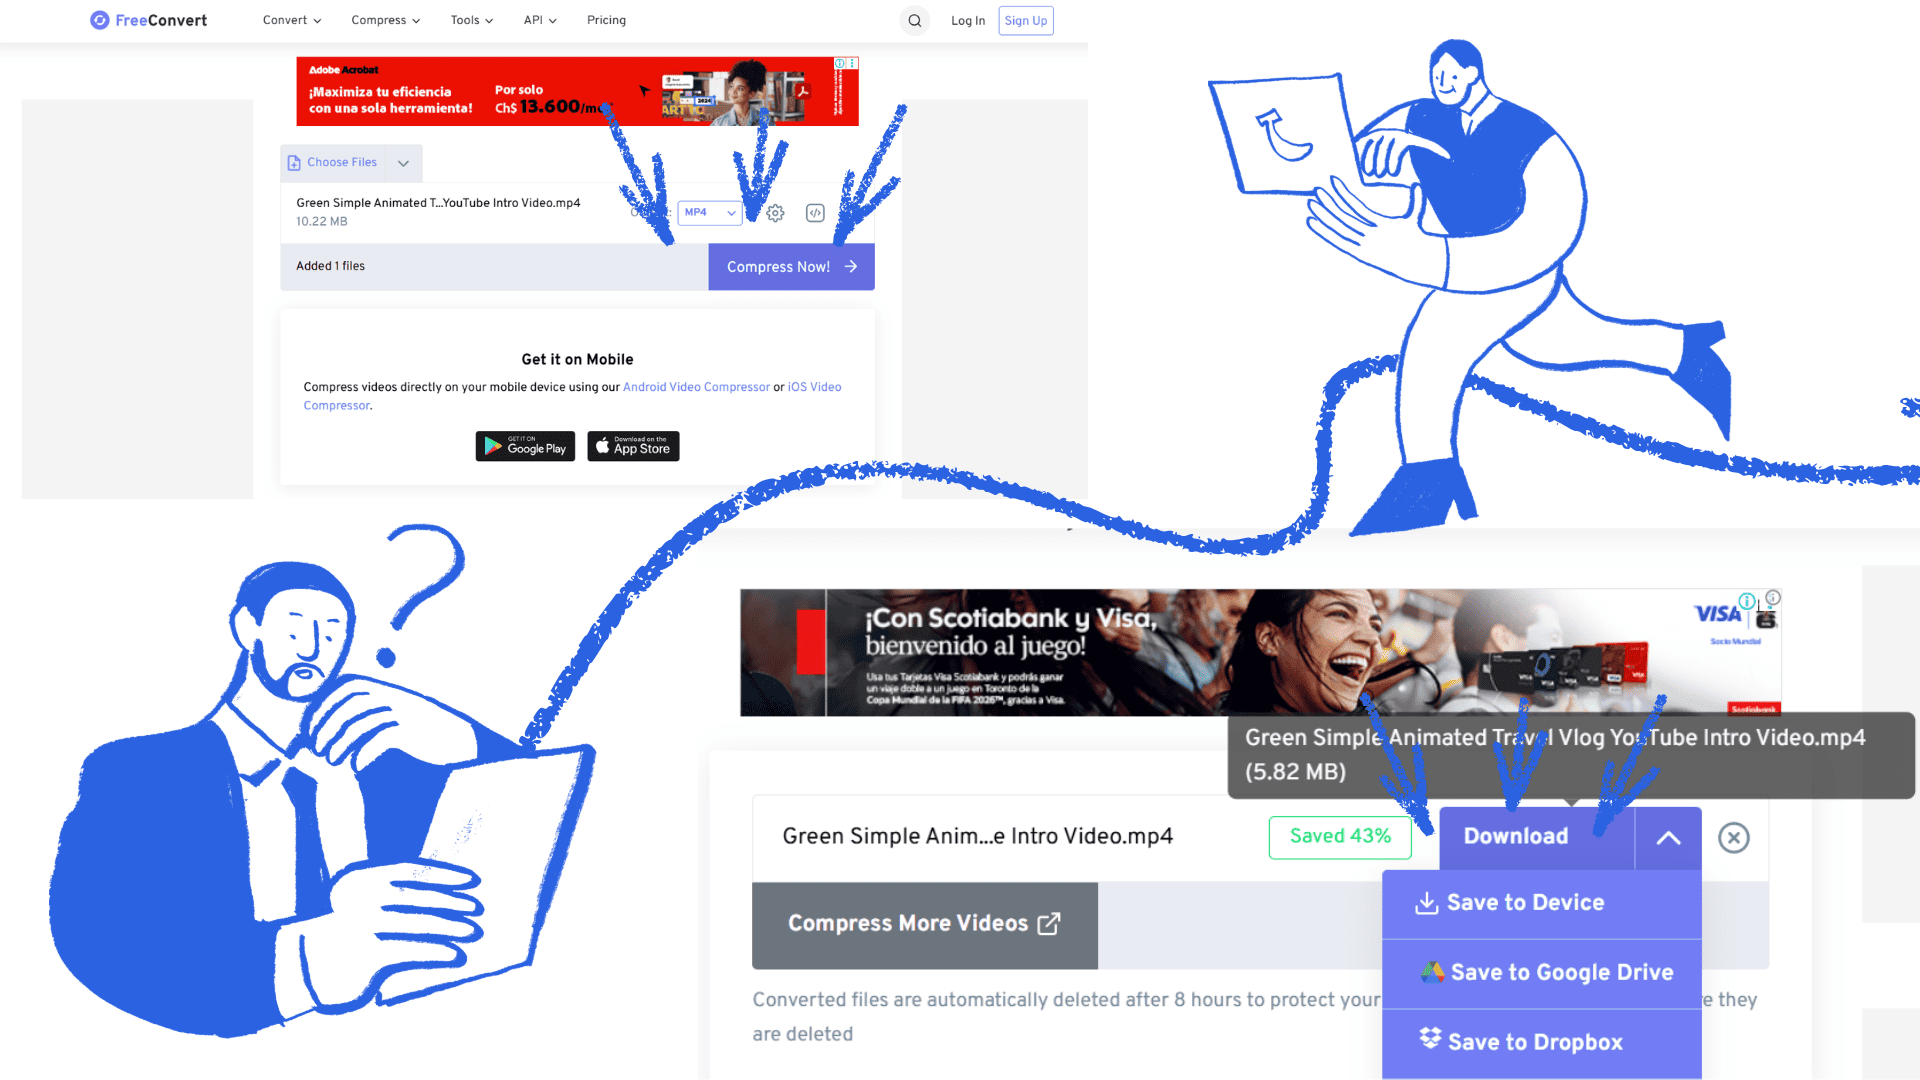
compress video
To compress a video, first open your web browser and type something like "compress video online" into the search bar. Then select one of the websites that appears in the search results. On the site, click "Select file" or "Upload video," which will allow you to locate the video on your computer. Once you've chosen the file, the platform will compress it automatically or by pressing the compress button. Finally, download the compressed video to your computer.
compress video
compress video
Reflection
2D and 3D design programs play a fundamental role in current creative and technical processes. 2D programs allow you to work on flat surfaces, facilitating the creation of drawings, plans, illustrations, and graphic designs. Their simplicity makes them ideal for initial conceptualization, rapid visual communication, and the development of basic ideas. On the other hand, 3D programs expand these possibilities by allowing you to represent objects with volume, depth, and realism. Thanks to them, it is possible to visualize spaces, products, or structures from different angles, simulate materials, and better understand the spatial relationship of elements. This is especially useful in areas such as architecture, industrial design, and animation. These two types of programs are not mutually exclusive; rather, they complement each other. 2D design is usually the starting point for sketches and diagrams, while 3D design allows you to transform those ideas into more complete and realistic models. Together, the appropriate use of 2D and 3D tools strengthens creativity, improves design accuracy, and optimizes learning and production processes.