Week 13 – Molding and Casting
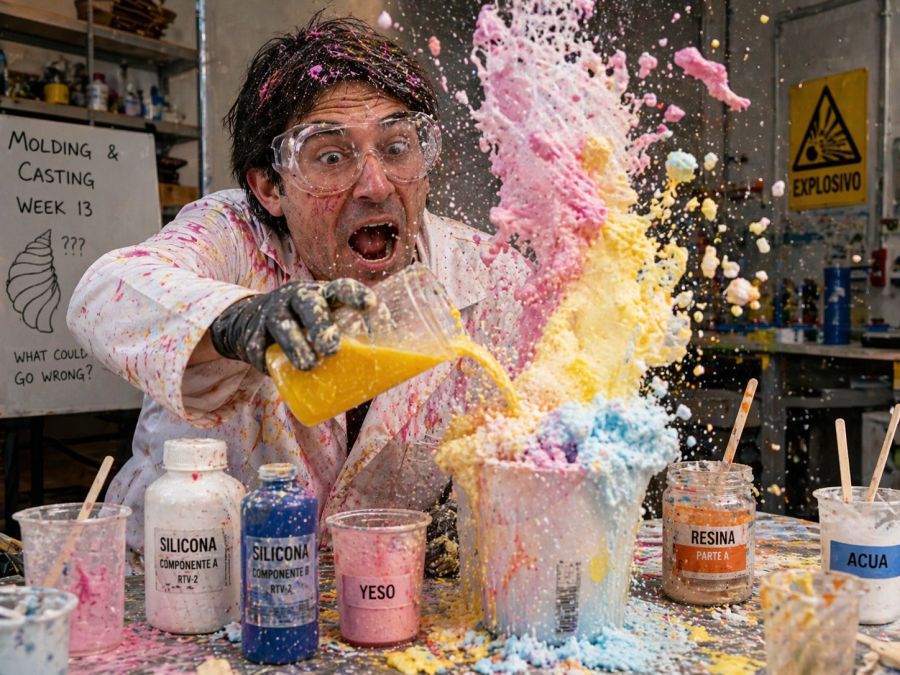
This week is focused on Molding and Casting. The goal was to understand different molding processes, review the safety information of the materials, design a mold, fabricate it with a smooth surface finish, and use it to cast a final object.
On this page I document:
- The group assignment: material safety, test casts and comparison of processes.
- My individual assignment: design, fabrication and casting of a 3D mold.
- The materials used for molding and casting.
- The safety precautions followed during the process.
- The machine settings and fabrication workflow.
- The problems I found and how I fixed them.
- The design files and final hero shot.
Assignment and Learning Outcomes
The weekly assignment is:
- Group assignment:
- Review the safety data sheets for each molding and casting material.
- Make and compare test casts with different materials.
- Compare mold making processes such as 3D printing and milling.
- Individual assignment:
- Design a mold around the process I used.
- Produce it with a smooth surface finish that does not show the production process toolpath.
- Use it to cast parts.
- Extra credit: use more than two mold parts.
Checklist
- Linked to the group assignment page and reflected on what I learned.
- Reviewed the safety data sheets of the materials used.
- Made and compared test casts with different materials.
- Documented how I designed and created my 3D mold.
- Included machine settings.
- Ensured the mold has a smooth surface finish.
- Shown how I safely made the mold and cast the parts.
- Described problems and how I fixed them.
- Included design files and a hero shot.
Group Assignment – Material Tests and Process Comparison
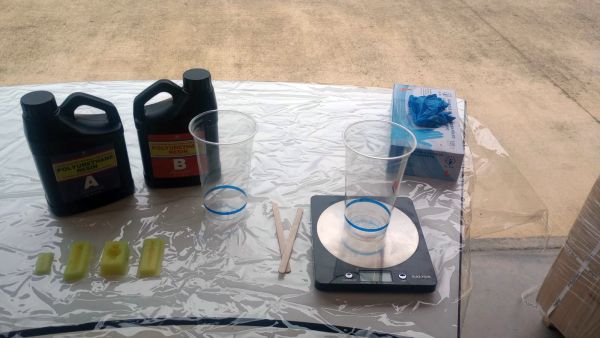
For the group assignment we reviewed the safety data sheets of the molding and casting materials available in the lab. We also made test casts using different materials such as plaster, water, resin, silicone and wax/paraffin.
Materials Tested
- Silicone: used to create flexible molds.
- Resin: used to cast rigid final parts.
- Plaster: simple and low-cost casting material.
- Wax / paraffin: useful for testing shape reproduction.
- Water: useful for checking leakage and mold volume.
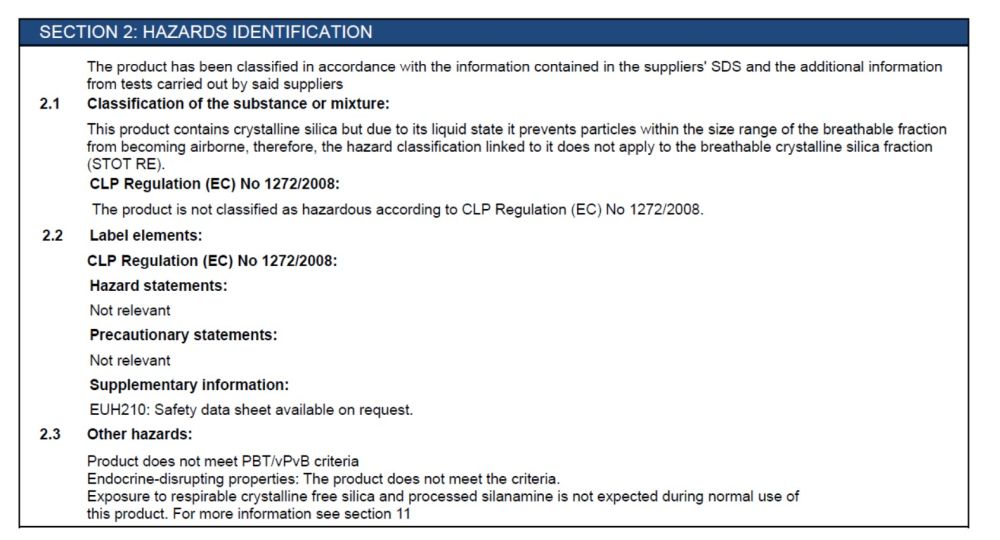
Safety Precautions
Before working with silicone and resin, we reviewed the MSDS and TDS documents. The most important safety precautions were:
- Use a lab coat or old clothes.
- Use safety glasses to protect against splashes.
- Protect the work table and floor because stains are difficult to remove.
- Work in a ventilated area.
- Use nitrile gloves.
- Use a mask when required by the safety data sheet.
- Be careful with resin because it can generate an exothermic reaction.
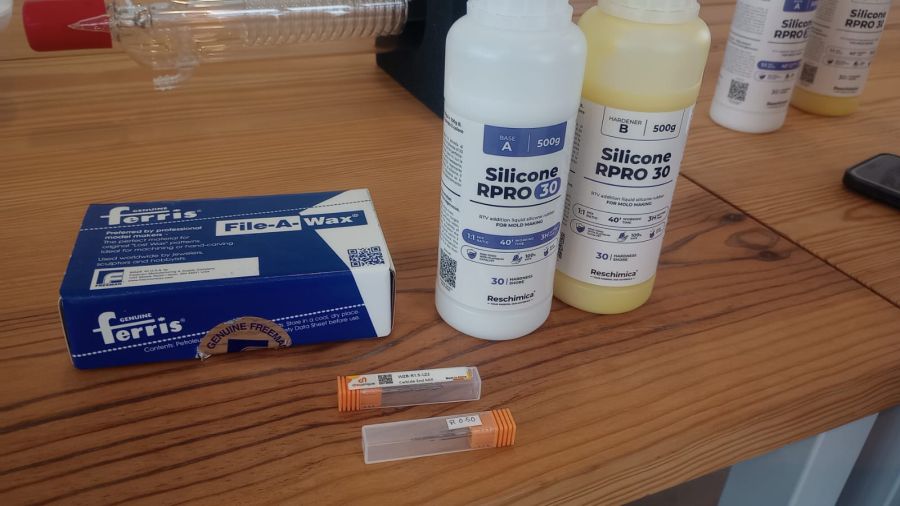
Materials
Silicone :
 R PRO 30 – Silicone:
RESCHIMICA R PRO 30 is a two-part silicone rubber compound (base and catalyst) intended for mould production. It consists of a liquid silicone formulation that, once cured, forms a flexible and dimensionally stable material able to capture fine details with high precision. Based on the technical data sheet, it is not considered hazardous under normal use and handling conditions, which makes it appropriate for workshop applications and prototyping work.
Modeling Plaster :

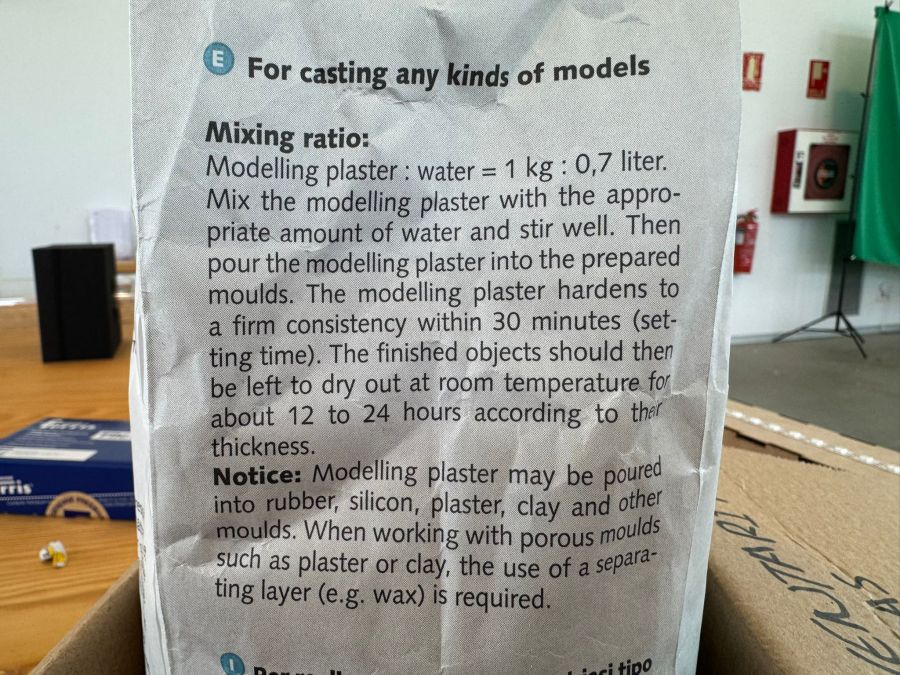
Mixing ratio: Modelling plaster : water = 1 kg : 0.7 litre. Combine the modelling plaster with the required quantity of water and mix thoroughly until homogeneous. Afterwards, pour the mixture into the prepared moulds. The plaster reaches a solid consistency in approximately 30 minutes (setting time). Once demoulded, the finished pieces should be allowed to dry at room temperature for around 12 to 24 hours, depending on their thickness. Note: Modelling plaster can be cast into rubber, silicone, plaster, clay, and other types of moulds. When using porous moulds such as plaster or clay, a release agent or separating layer, for example wax, should be applied.
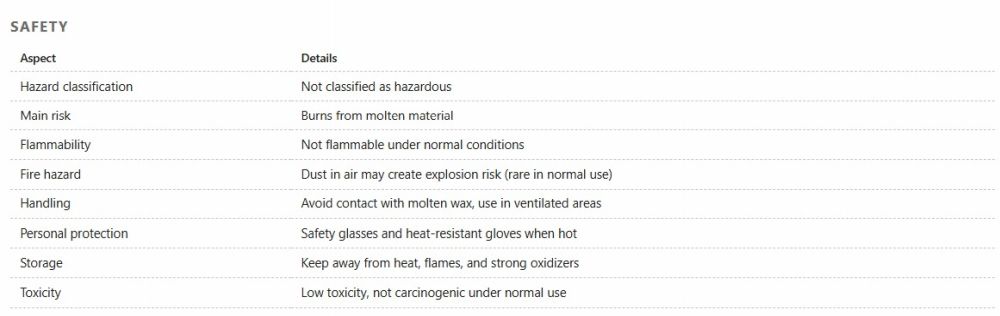
Ferris File-A-Wax Blue :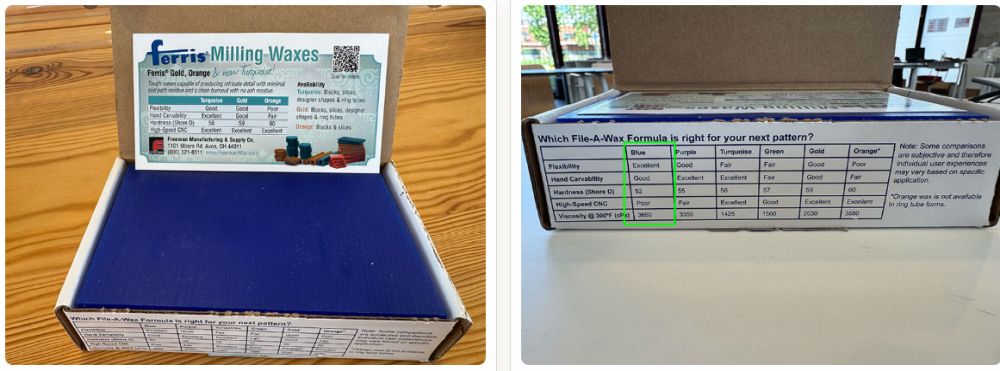
This picture was taken by Beni. You can see his assignment at this link:
Week 14 – Beni ÁlvarezSafety:
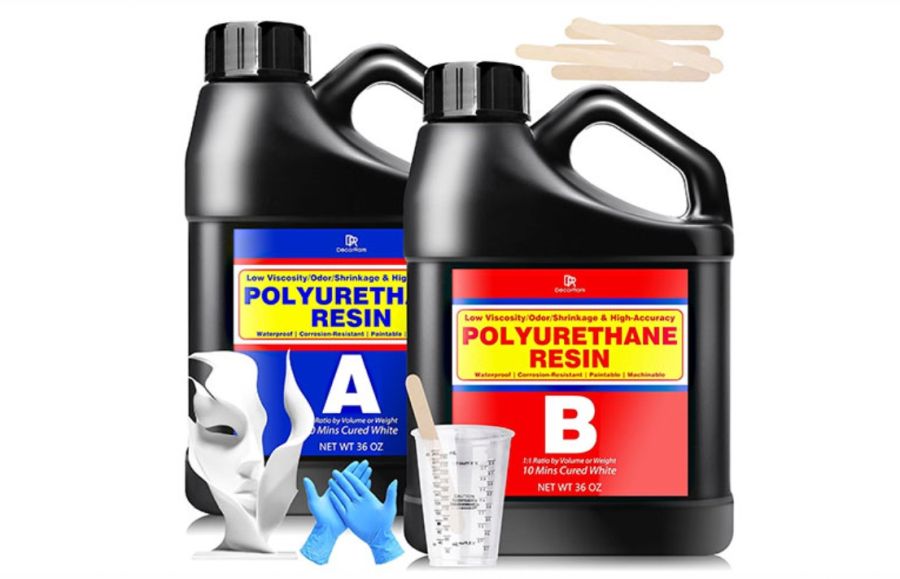
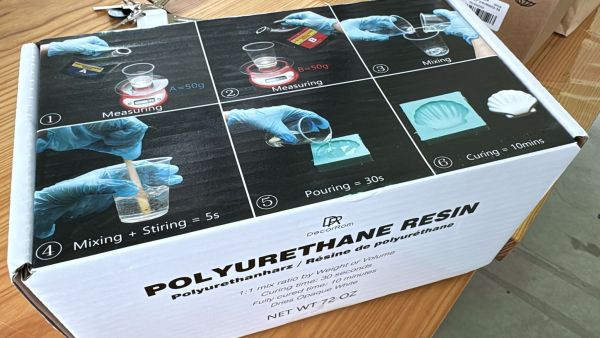
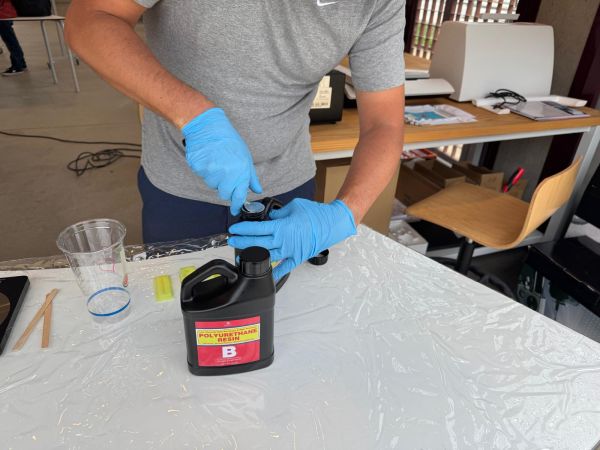
DecorRom two-part Polyurethane Resin :
Safety:
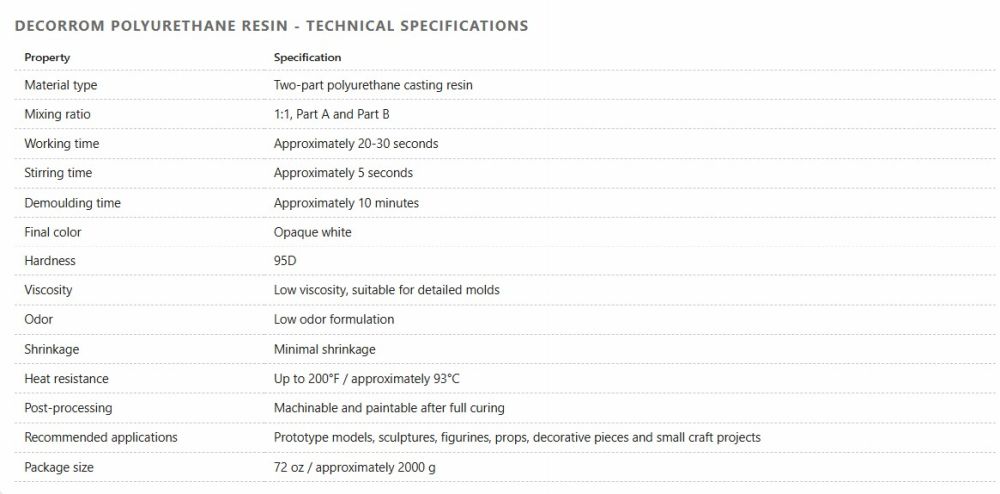
The DecorRom Polyurethane Resin 72oz is a two-component polyurethane system developed for rapid casting applications and the manufacture of highly detailed parts. It is characterised by its 1:1 mixing ratio, short curing time, and low viscosity, allowing the resin to flow easily into intricate moulds and accurately reproduce fine features. After curing, it forms a rigid white material with good hardness and dimensional stability, making it appropriate for prototypes, sculptures, figurines, and modelling projects. Its low-odour formulation improves user comfort during handling, although it remains important to work efficiently because of the limited pot life and to prevent exposure to moisture during the casting process.
Useful Materials
- Plastic tablecloths and newspaper.
- Disposable cups.
- Mixing sticks.
- Precision scale.
- Nitrile gloves.
Process Comparison
| Process | Advantages | Disadvantages | Result |
|---|---|---|---|
| 3D printed mold | Easy to design and produce | Layer lines can appear on the surface | Needs post-processing for smooth finish |
| Milled mold | Good accuracy and smooth surface possible | Requires correct toolpath strategy | Good option using roughing and finishing passes |
| Resin printed mold | Very smooth surface | Can cause silicone curing problems | Useful but needs testing before final casting |
What I Learned from the Group Assignment
- Reading the safety data sheet is essential before using any casting material.
- Different materials behave very differently during mixing, curing and demolding.
- The surface quality of the mold strongly affects the final cast.
- For FDM printed molds, post-processing is necessary to remove visible layer lines.
- Milling requires a roughing and finishing strategy to obtain a good surface.
You can see the group documentation here:
Individual Assignment – Mold Design
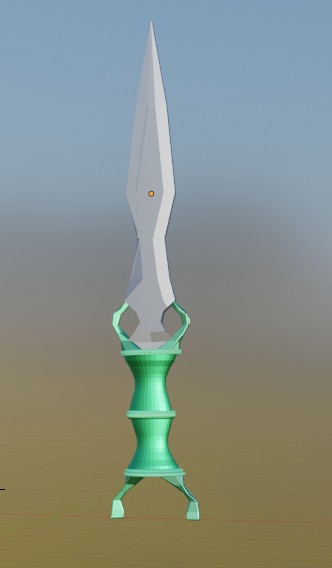
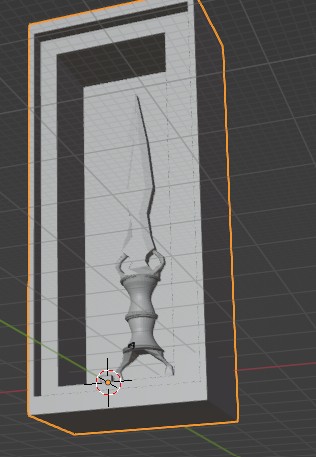
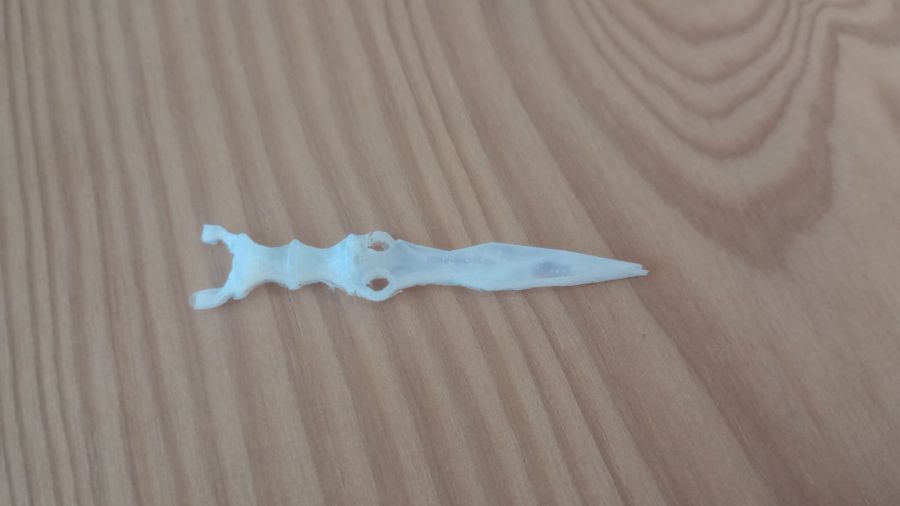
For my individual assignment I designed a 3D mold to cast a spiral-shaped object. I chose this geometry because it has a recognizable shape and allows me to test how well the mold reproduces curved surfaces.
Design Requirements
- The mold had to be designed according to the fabrication process.
- The surface finish had to be smooth.
- The final object had to be easy to demold.
- The mold could not show clear production toolpaths.
Design Strategy
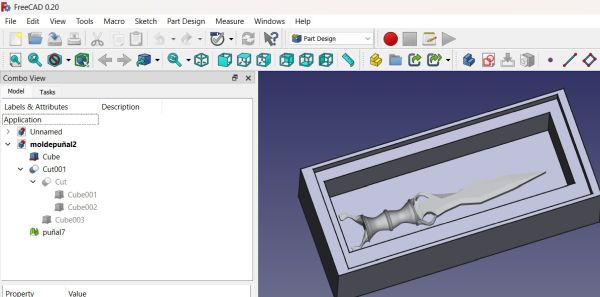
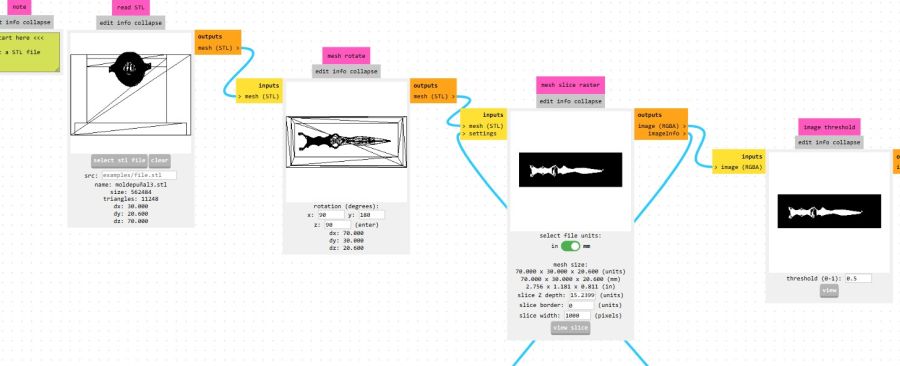
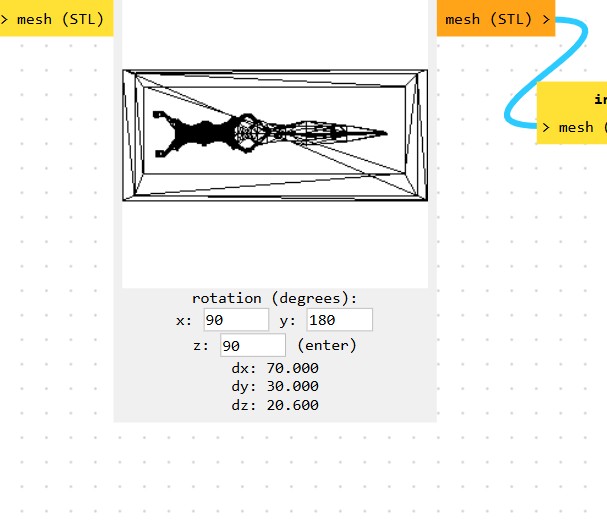
I designed the mold considering the casting direction, the thickness of the object and the demolding process. The main idea was to create a negative mold where the casting material could be poured and removed without breaking the part or the mold. I used FreeCAD. "To create it in CAD, I used the model I had previously designed in Blender and exported it as an STL file. From there, I generated several boxes and subtracted them from the structure to create the mold."

Final design in free cad and I use. I used a fairly complex STL file that I imported into FreeCAD. I had created it a couple of years ago by combining FreeCAD and Blender.
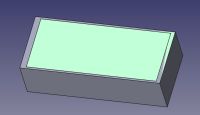
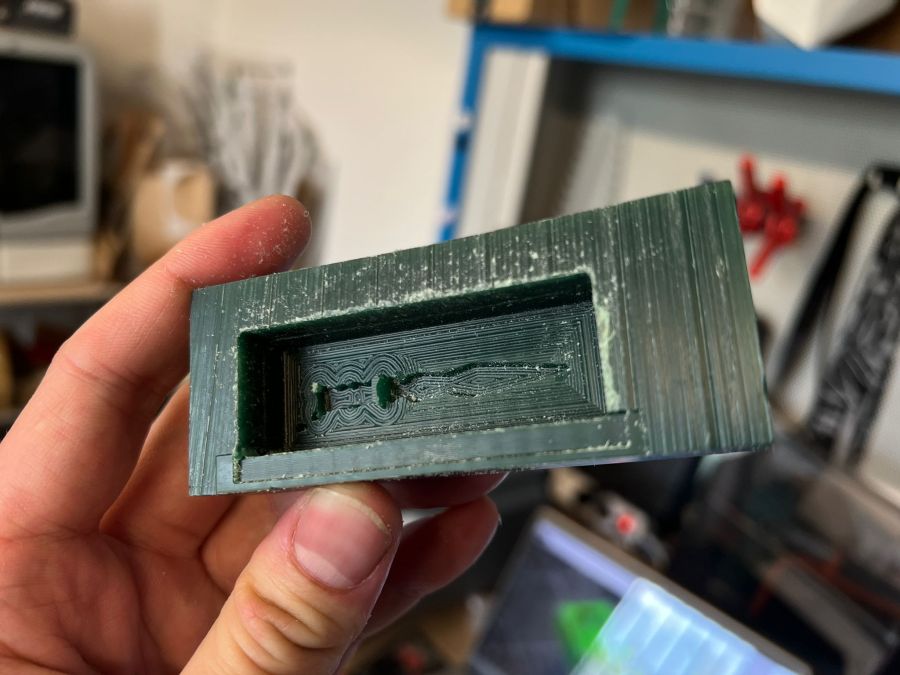
I used rectangular blocks to create the mold and gradually shaped them using subtractive operations.
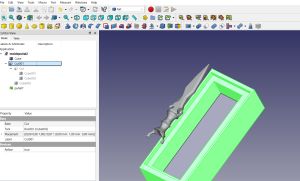
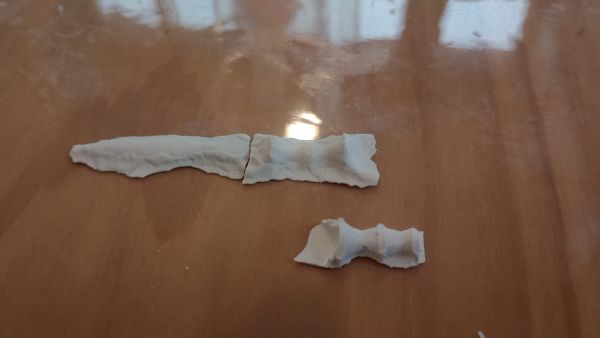
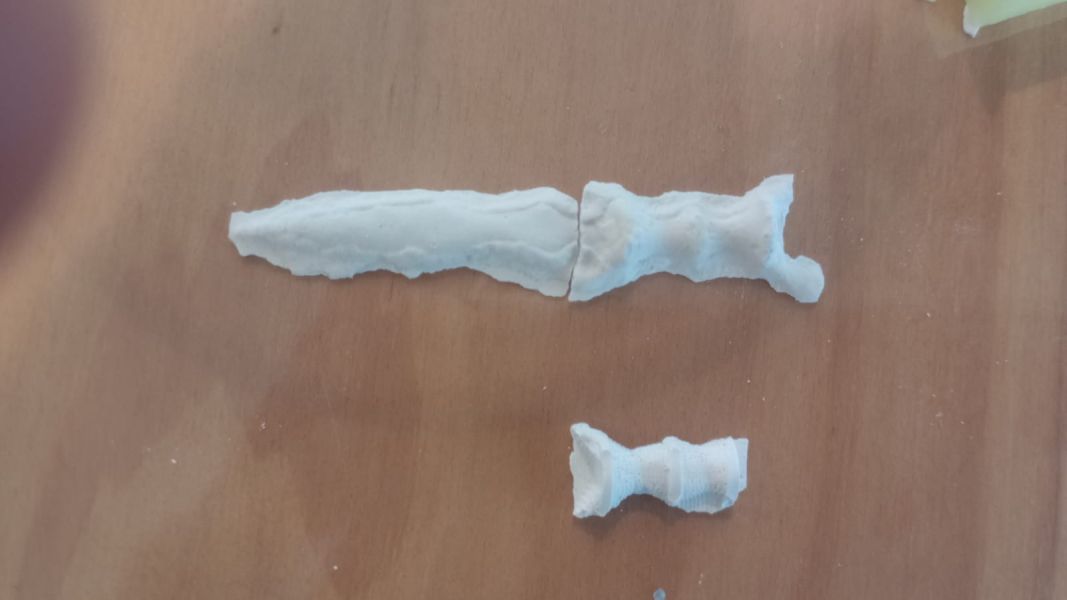
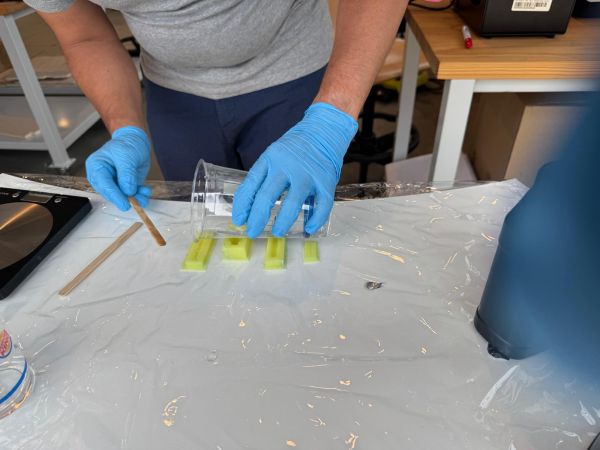
Cut parts for make the mold
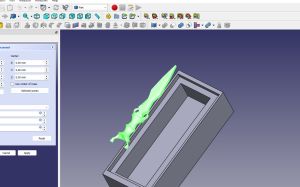
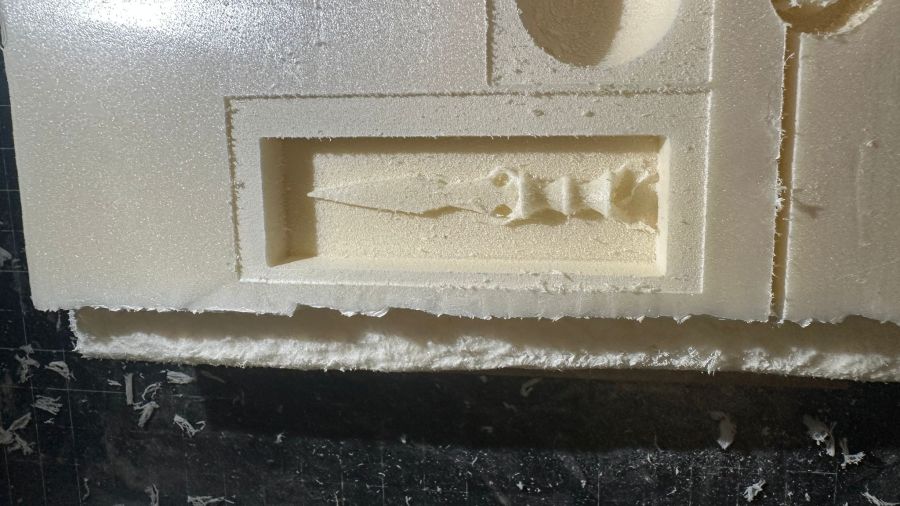
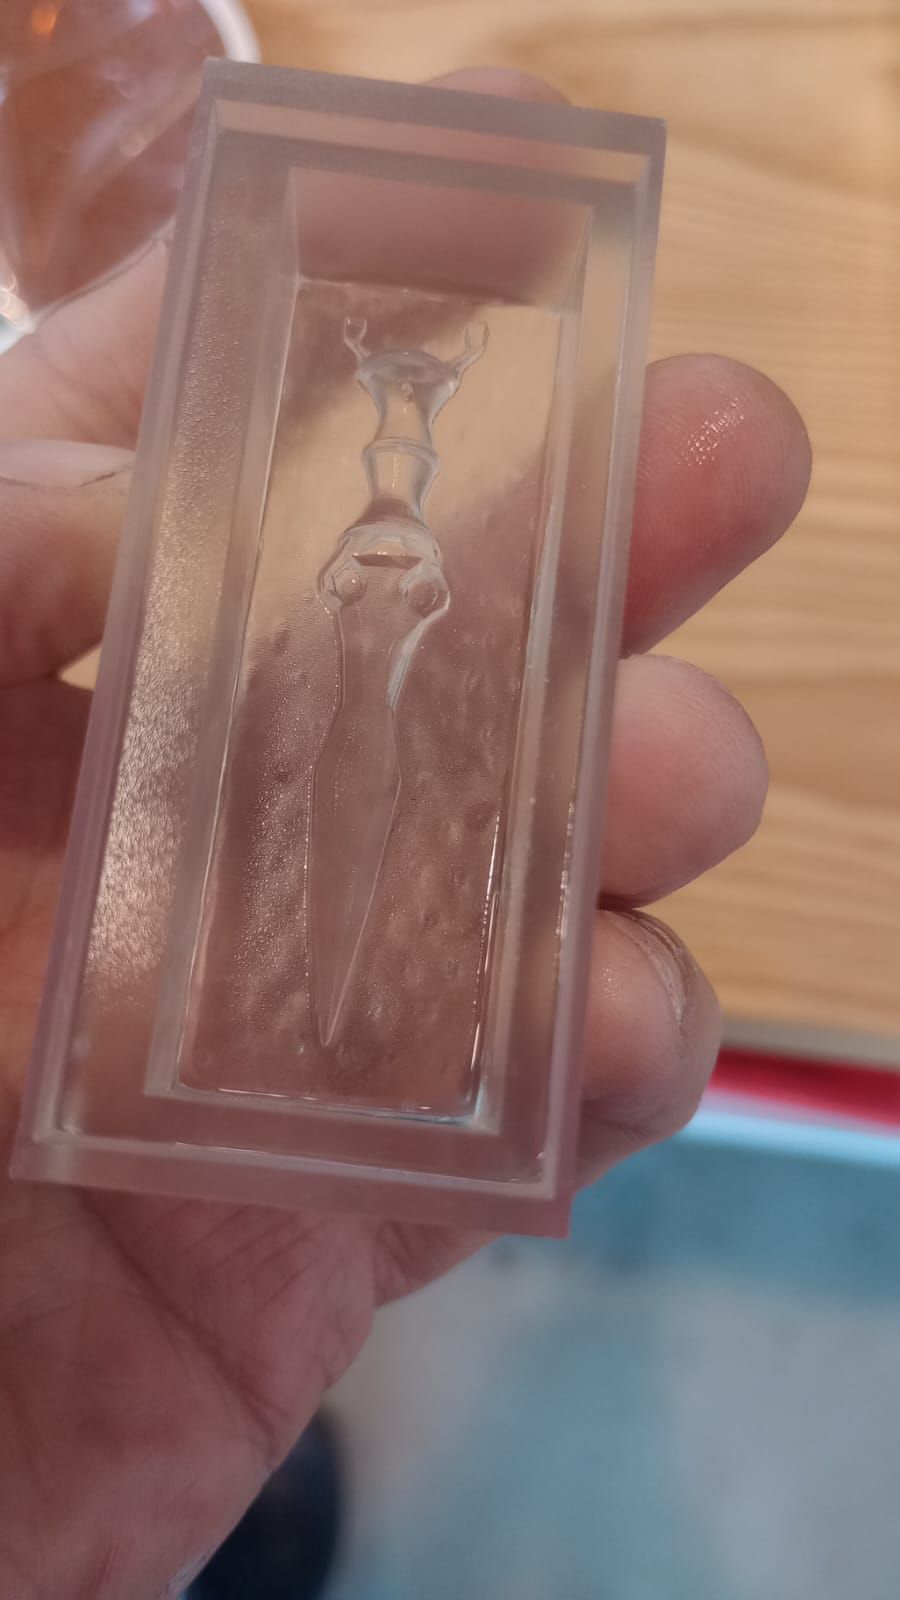
Next, I place the dagger's STL model inside the mold so that only half of it protrudes from the block.
I make sure that there is nothing underneath the dagger so that it sits flush with the base and is not raised.
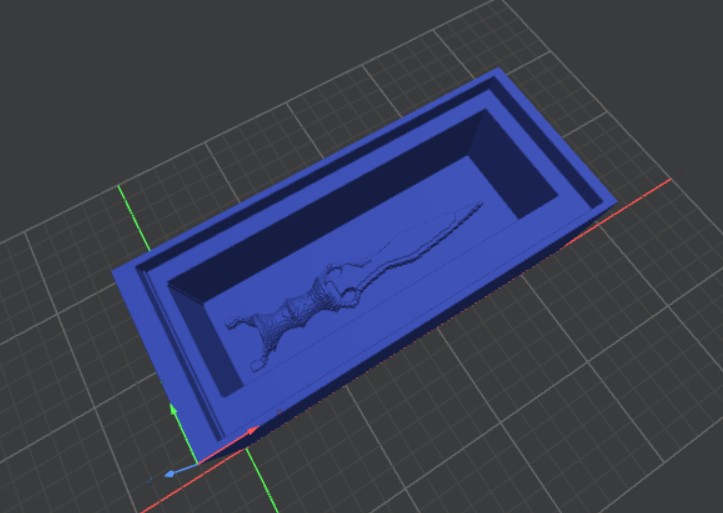
Finnal result
⬇ Download FreeCAD File ⬇ Download STL FileSoftware Used
- CAD software: FreeCAD.
- Slicer or CAM software: used to prepare the fabrication process.
- Fabrication process: milling.
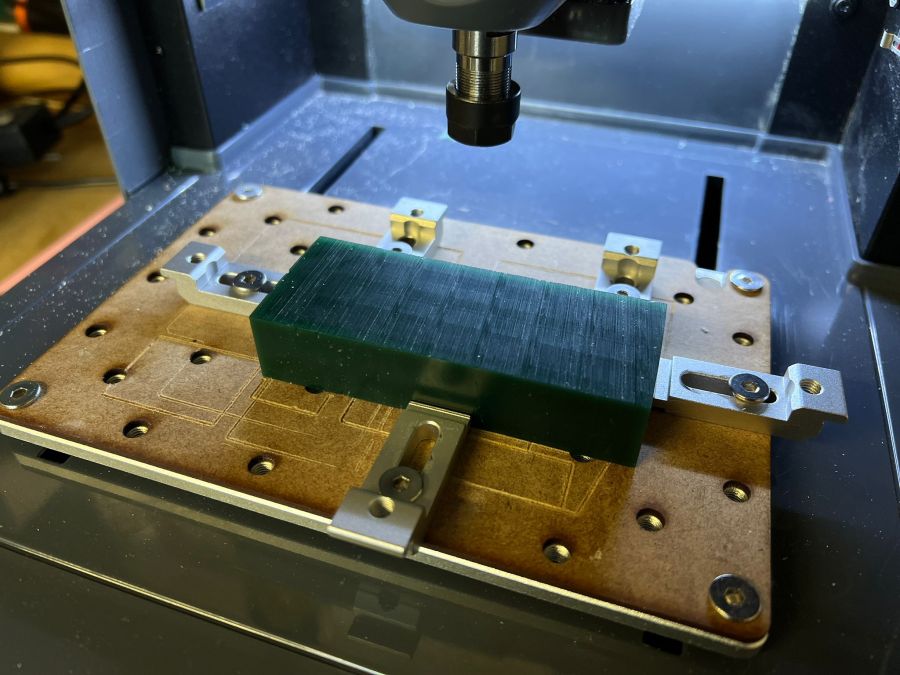
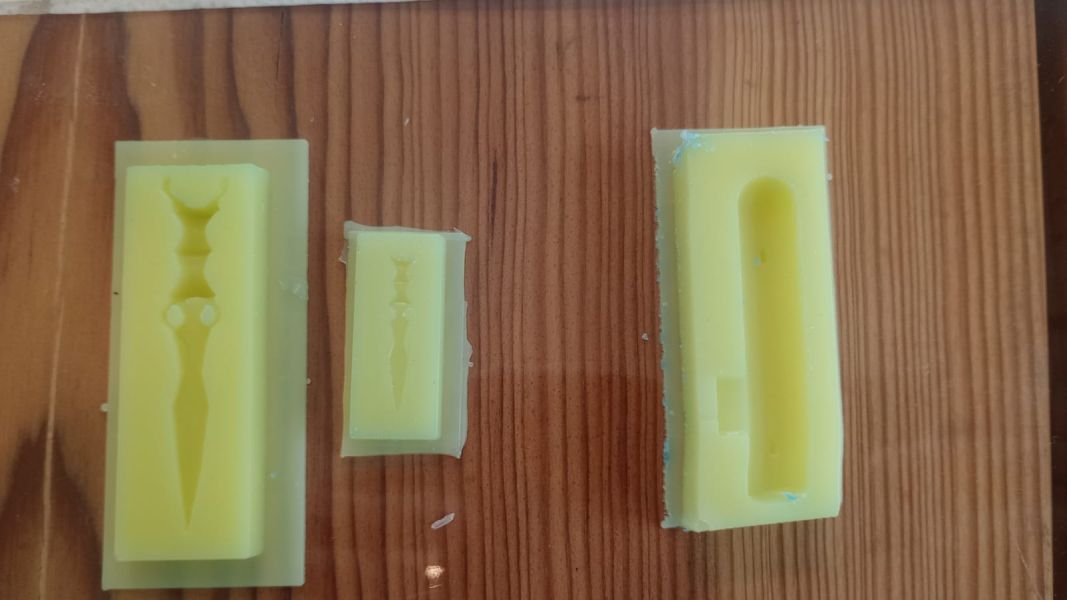
Mold Fabrication Process
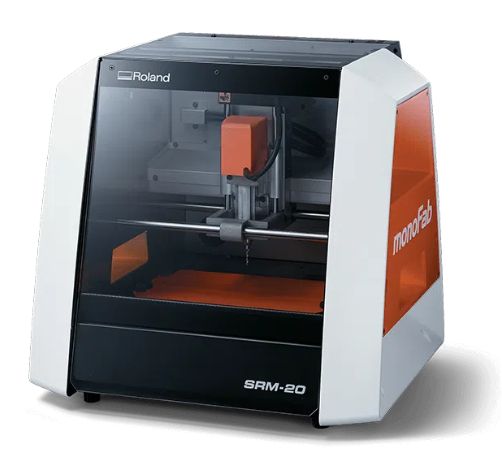
To fabricate the mold I tested different strategies. The first idea was to use wax because it is easy to machine and gives good results for molding. I also considered using the Roland milling machine and, if necessary, the Lunyee machine.
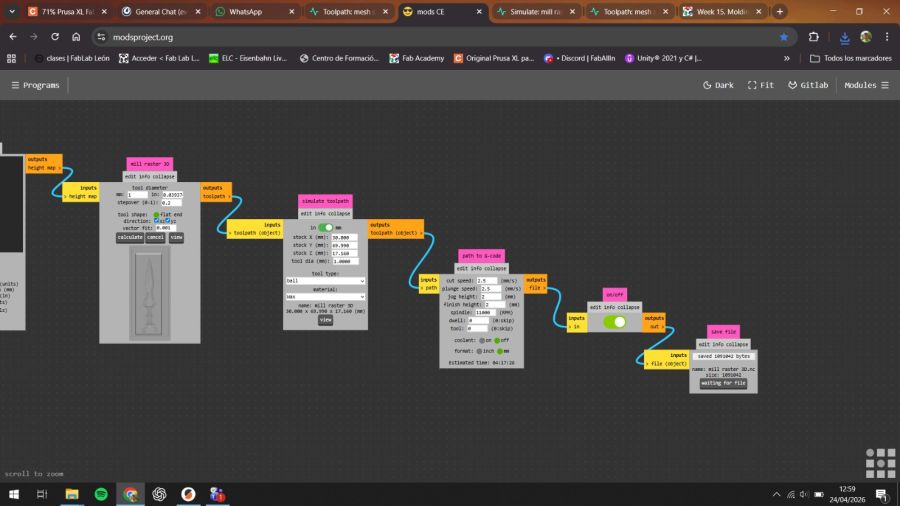
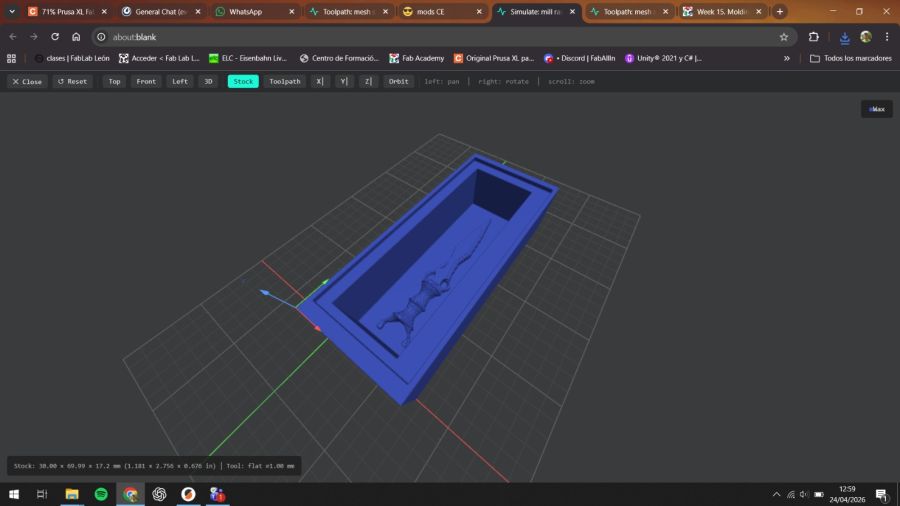
Machine Strategy
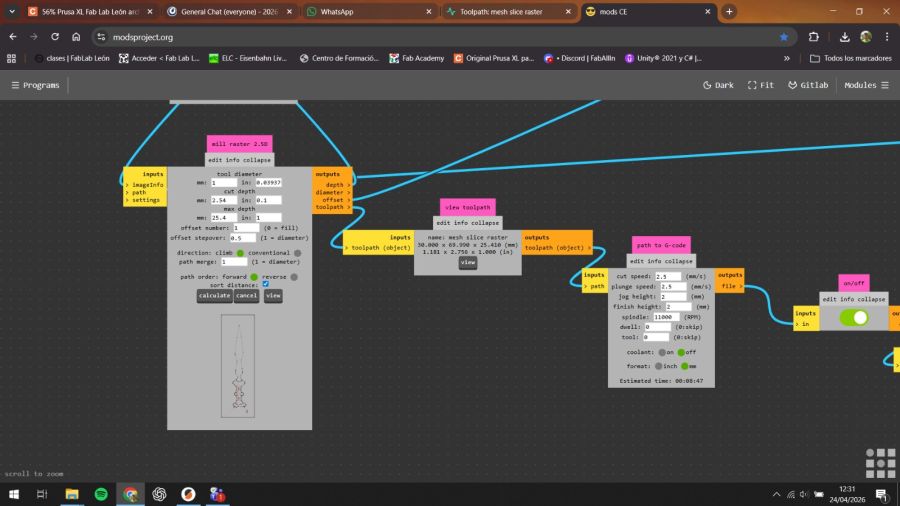
The mold was produced using two main machining strategies using Mods:
- Roughing: removes most of the material quickly.
- Finishing: improves the surface quality and removes tool marks.
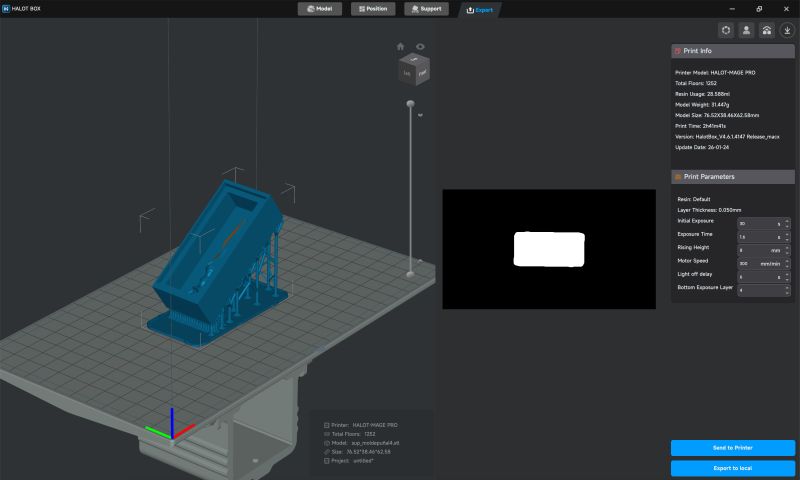
First, select the roughing process for the SRM-20 mill. In this case, the file is a 2.5D STL.
Import the STL file and set the position.
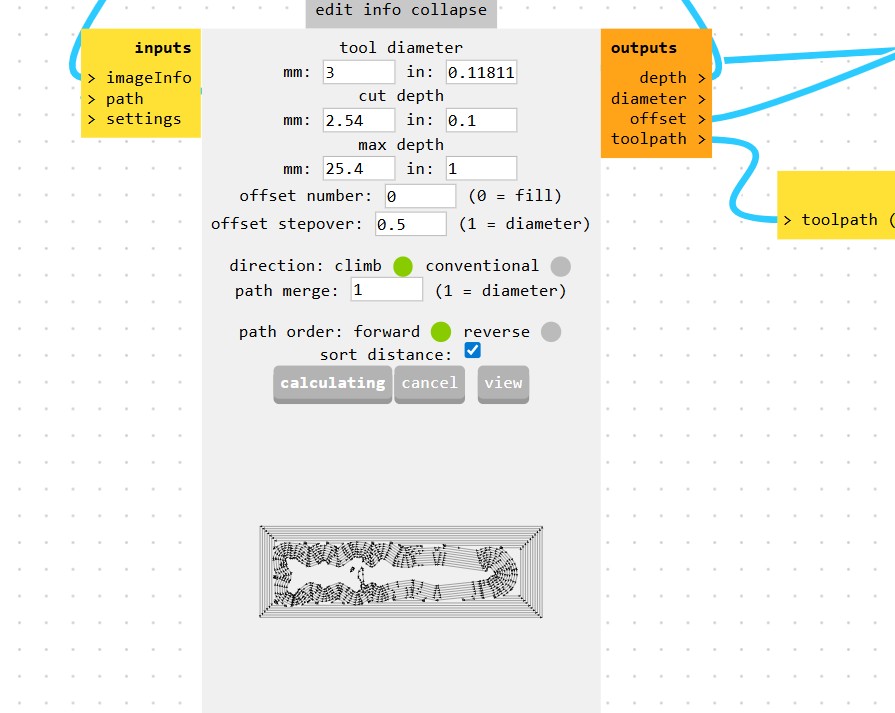
Select the tool diameter for this job and generate the roughing file.
Select the 3D STL milling process for finishing the work.
Import the STL file and set the position.
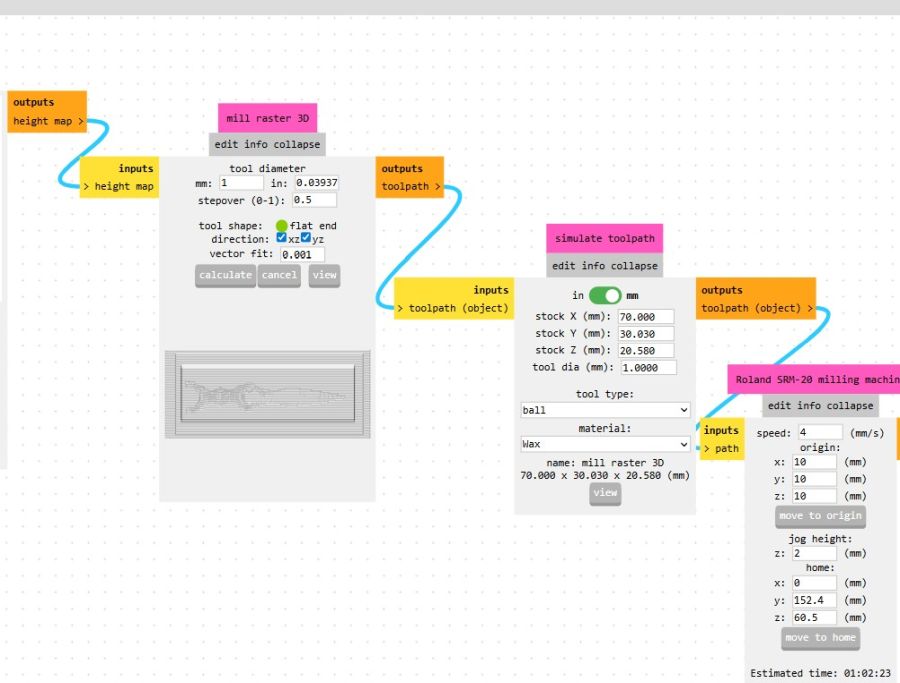
Select the tool for finishing.
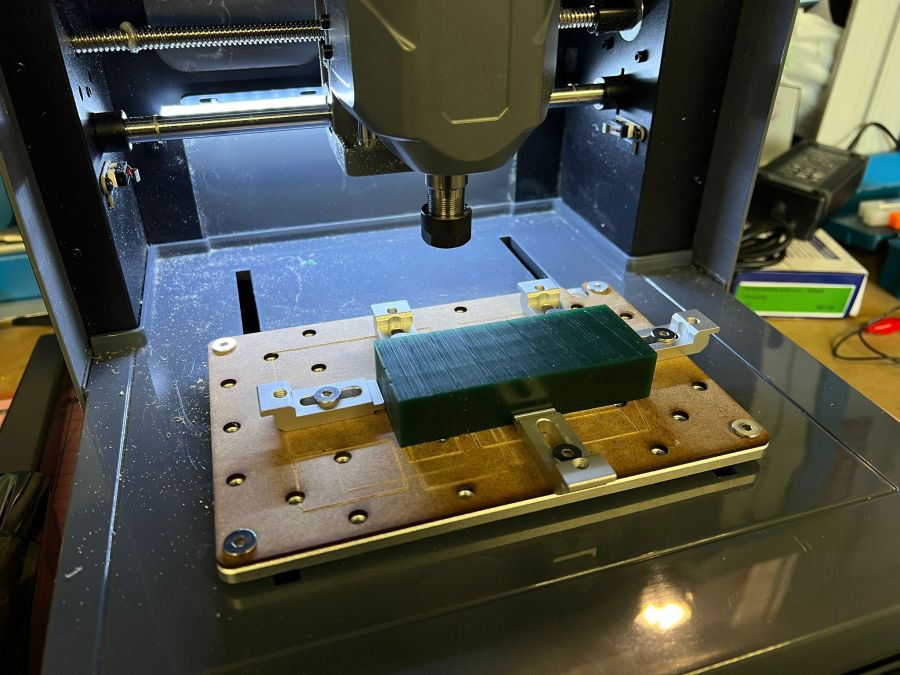
Generate the finishing file and start milling.
We asked Adrian for help, and we restarted the process on another machine. The Roland Monofab was malfunctioning due to excessive vibrations, so we had to use the Modela machine at Fab Lab León.
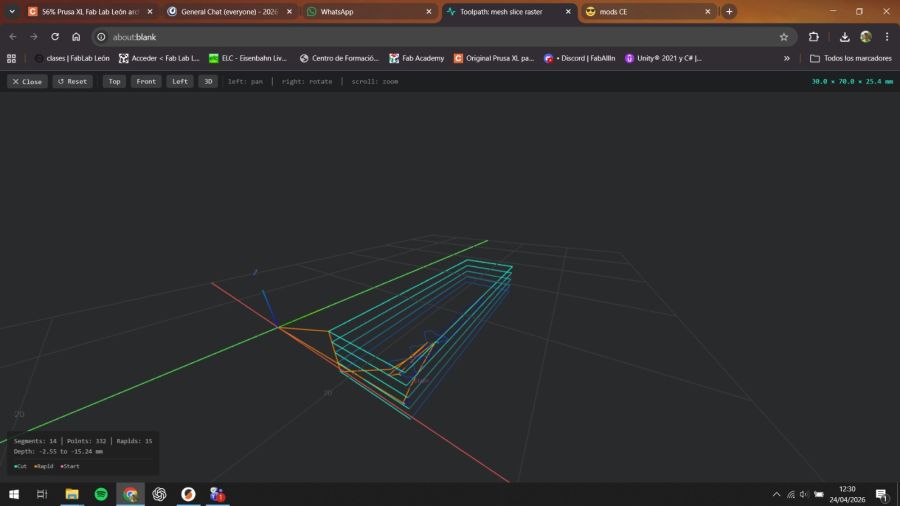
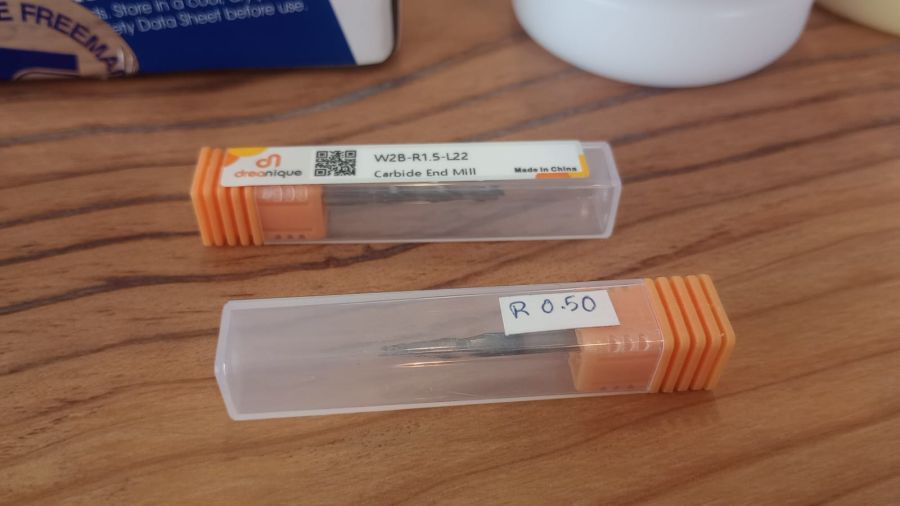
Adrian had problems with the position of the STL file and with the roughing process in Mods. He used a 1 mm tool, as you can see in the next picture.
Selecting the 1 mm tool and changing the position of the STL file.
The machine started to work, but with the wrong position.
Set the axis

Select the tool
Import the STL file and set the position.
Everything went well.
Everything went wrong. The roughing strategy did not work in Mods, so we tried polystyrene and the finishing strategy.
Great! It worked. Now Nuria will try the process with wax.
Oh... the tool was released from the spindle, so it was necessary to start again.
Finally, we have it.
⬇ Download roughing CNC files ⬇ Download finishing CNC filesLet’s try it with resin 3D printer
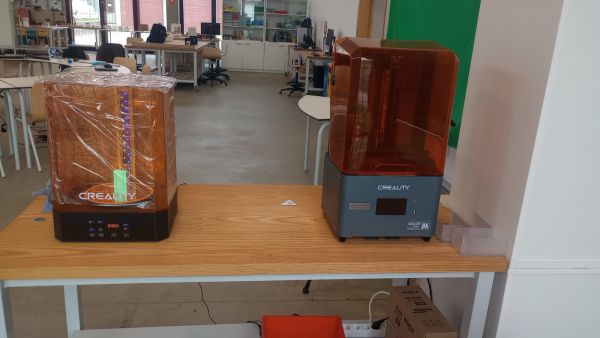
This is the Creative 3D resin printer.
We used the same STL file and adjusted the parameters in the 3D printer.
Great! It has a nice appearance.
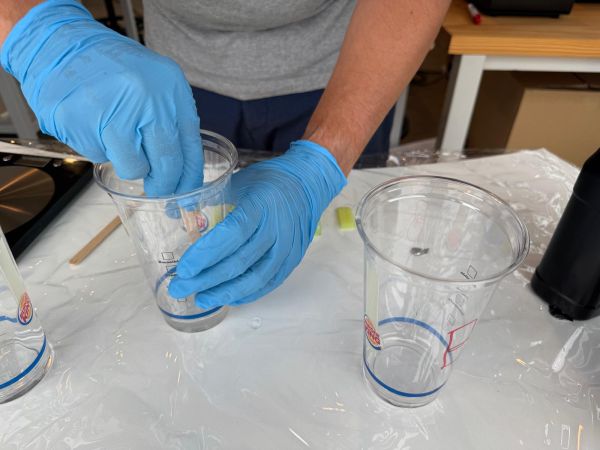
Casting Process
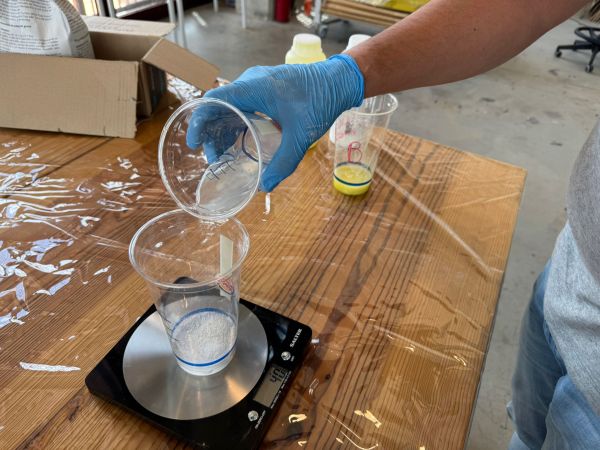
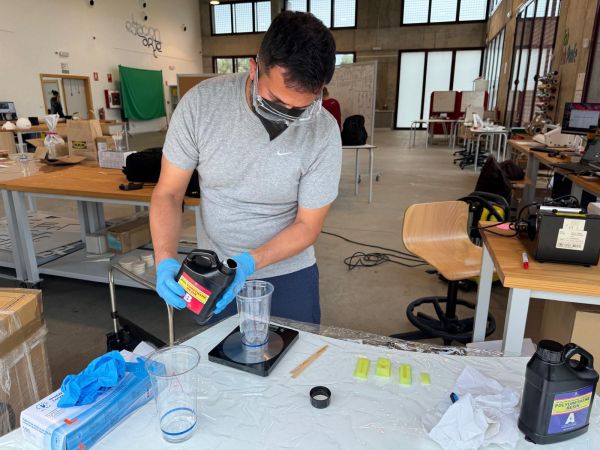
Once the mold was ready, I prepared the casting material. I measured the components using a precision scale and mixed them according to the manufacturer’s instructions.
Steps
- Prepare the work area and protect the table.
- Put on nitrile gloves and safety glasses.
- Measure the casting material components.
- Mix the components carefully.
- Pour the material slowly into the mold.
- Remove bubbles if necessary.
- Wait for the curing time.
- Demold the final part carefully.
Safety During Casting
During the casting process I worked carefully because silicone and resin can stain surfaces and may require ventilation. Resin can also generate heat during curing, so I avoided touching the material directly and followed the safety instructions (see the safety data above).
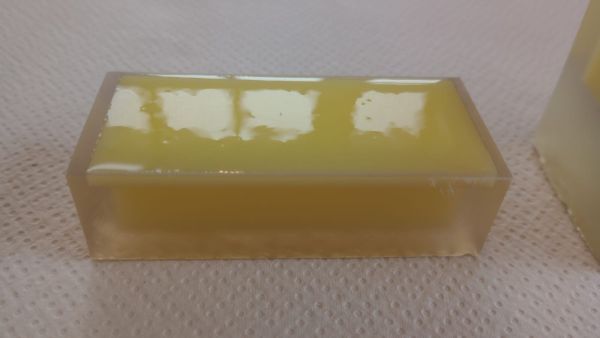
Working with Different Materials
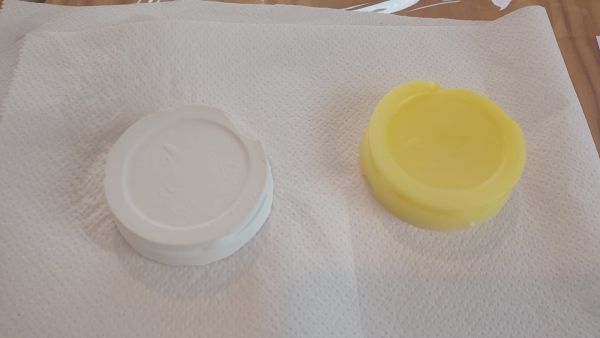
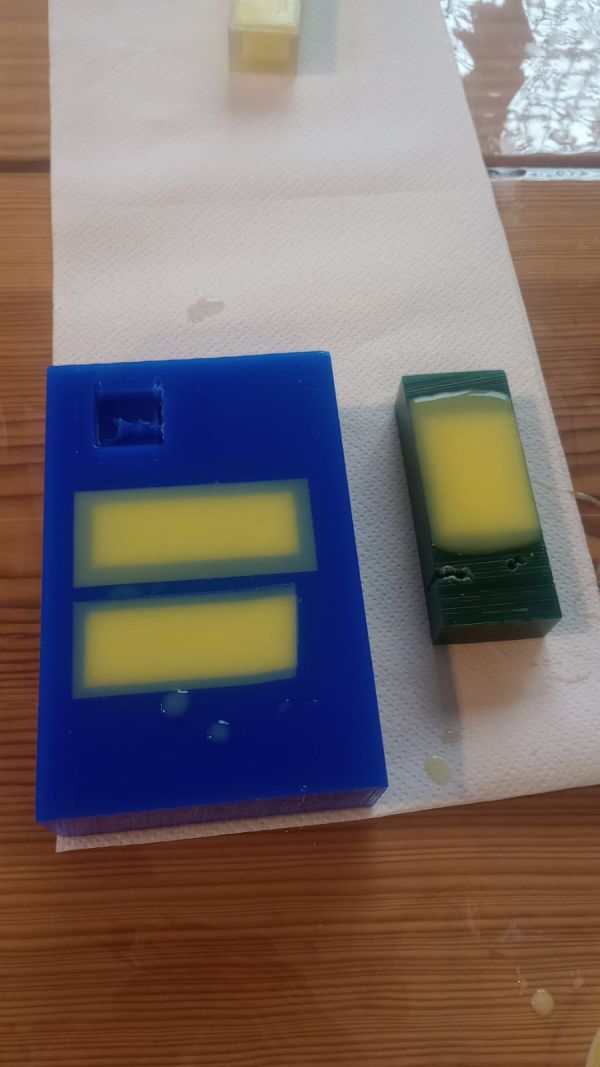
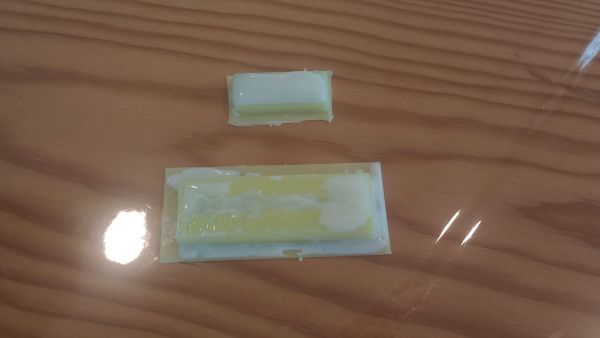
The final cast reproduced the general geometry of the mold. The spiral shape was visible and the mold allowed me to test the complete molding and casting workflow, from design to final object. We started with silicone, mixing the components in a 1:1 ratio.

A component
B component
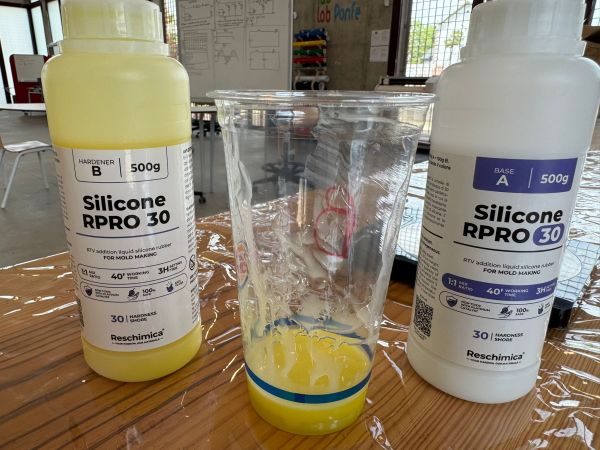
Finally, we mixed the A and B silicone components.
Next, we worked with plaster and water using a ratio of 0.7 parts water to 1 part plaster.
Finally, we mixed the water and plaster.
Now we worked with modelling resin.
It works
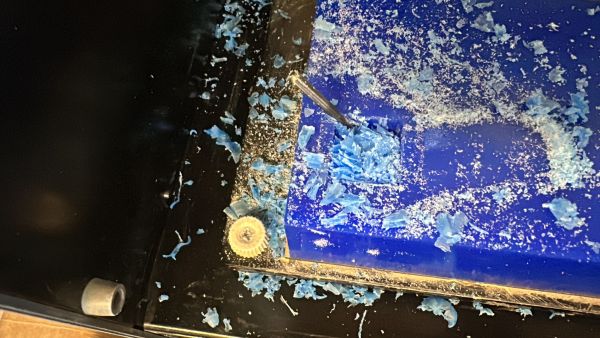
WAX process
Now we will work with Plaster
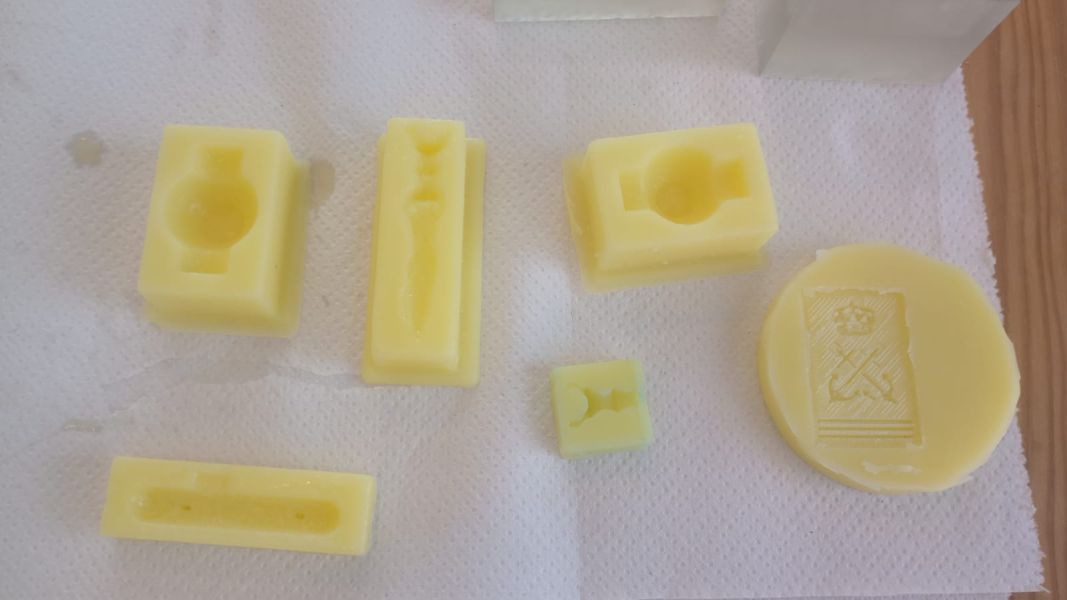
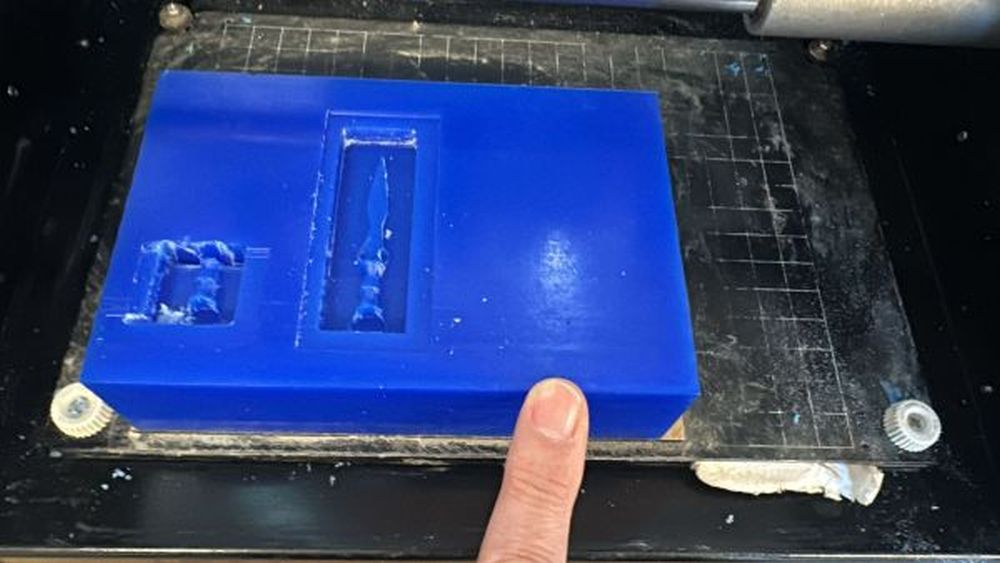
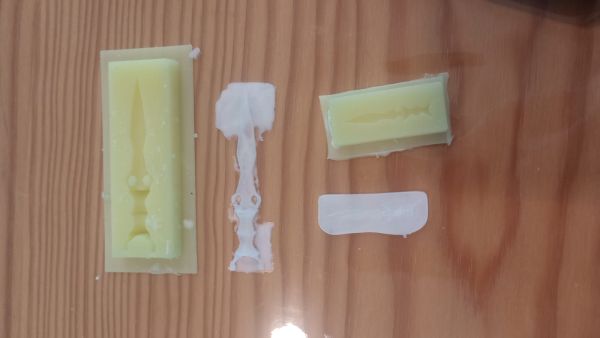
These are the silicone molds.
Plaster works
Now we must wait 24 hours.
The part is very thin and small, and it broke when I removed the plaster from the mold. However, it gave me a good idea of the usefulness of molds, their advantages, and their disadvantages when working with small pieces.
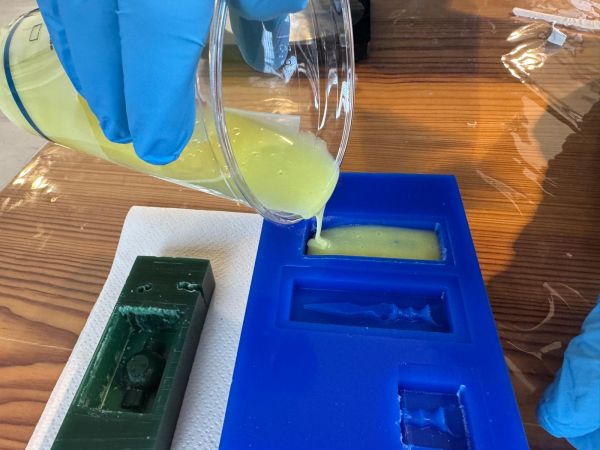
Now we will work with resin.
The resin box
Silicon molding
Everything is ready for work.

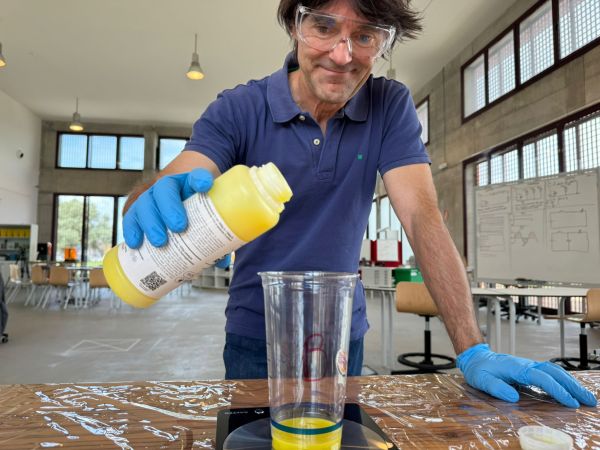
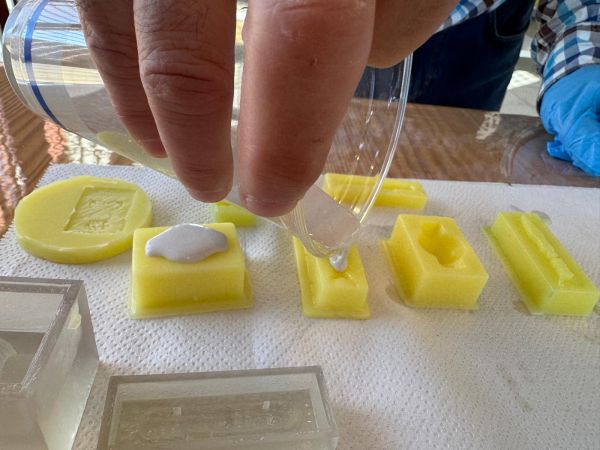
Liquid A and B are mixed in a 1:1 ratio.
Preparing A
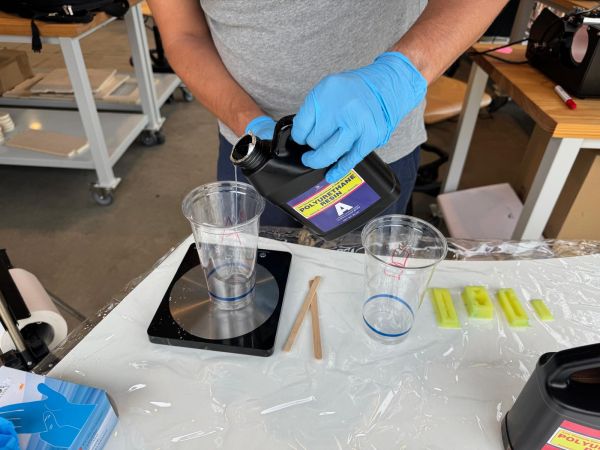
Measure liquid A
The B liquid
Mixing
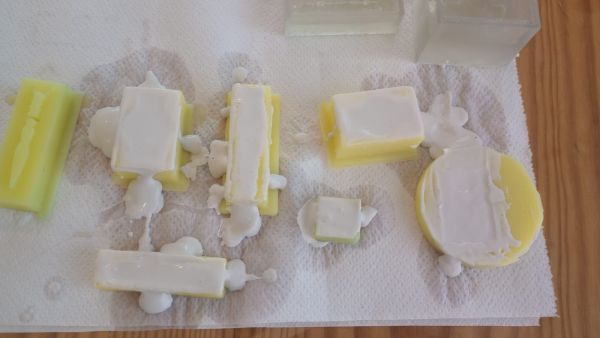
Filling the mold.
Ready
Results
Final result
We followed the same process using beeswax. You can find how we obtained the wax on Beni’s page.
Beni week 14 Fab AcademyResult Evaluation
- The mold was successfully fabricated.
- The casting material filled the cavity correctly.
- The final object could be removed from the mold.
- The surface quality depended strongly on the mold finish.
- The process helped me understand the importance of material selection and preparation.
Possible Problems and Future Fixes
Problem 1 – Surface finish was not smooth enough
- Problem: The mold showed marks from the fabrication process.
- Fix: I used a finishing strategy and considered post-processing the surface.
Problem 2 – Possible curing problems with resin printed molds
- Problem: Resin printed molds can sometimes inhibit silicone curing.
- Fix: I considered testing the material first and using a release agent or post-curing the printed mold.
Problem 3 – Bubbles in the cast
- Problem: Air bubbles can appear when pouring the material.
- Fix: I poured slowly and tried to avoid trapping air inside the mold.
Problem 4 – Demolding
- Problem: Some shapes can be difficult to remove from a rigid mold.
- Fix: I checked the mold geometry and avoided undercuts where possible.
Design Files
The design files used for this assignment can be downloaded here:
Useful Resources
Summary and Reflection

This week helped me understand the complete workflow of molding and casting, but also how important troubleshooting is during digital fabrication. I learned that the quality of the final object depends not only on the design, but also on the material, the mold surface, the casting technique, the machine setup, the CAM strategy, and the safety precautions.
One of the biggest lessons came from the problems we had with the milling process. The Roland machine stopped working correctly, we had unexpected interruptions, toolpath errors, incorrect G-code generation, wrong parameters, and several failed machining attempts. We also had to review spindle settings, zero positions, tool diameter, roughing and finishing strategies, and file preparation many times before getting a usable result. Although frustrating, solving these problems taught me much more than a perfect first attempt.
I also understood that mold making requires careful planning. The part must be designed considering the fabrication process, machining limitations, casting direction, material behavior, curing time, and demolding process. Every step affects the next one.
This assignment is useful for my final project because molding and casting can be used to create custom enclosures, soft parts, decorative elements or functional components with repeated shapes. It also gave me valuable experience in adapting when machines fail, fixing production errors, and continuing until the final result is achieved.