Wild card — machine embroidery.
weekly schedule.
| Time block | Wed | Thu | Fri | Sat | Sun | Mon | Tue | Wed |
|---|---|---|---|---|---|---|---|---|
| Global class | 3 h | |||||||
| Local class | 1,5 h | |||||||
| Research | 1 h | |||||||
| Design | 1 h | |||||||
| Fabrication | 2,5 h | |||||||
| Documentation | 1 h | 3,5 h | ||||||
| Review |
overview.
Wild card week is the one week where there is no single shared assignment. Everyone picks their own digital fabrication process, as long as it is not already covered by another week. Neil framed it as a meta-assignment: pick something, tell us which requirements it meets, and document it well enough that someone else could reproduce it.
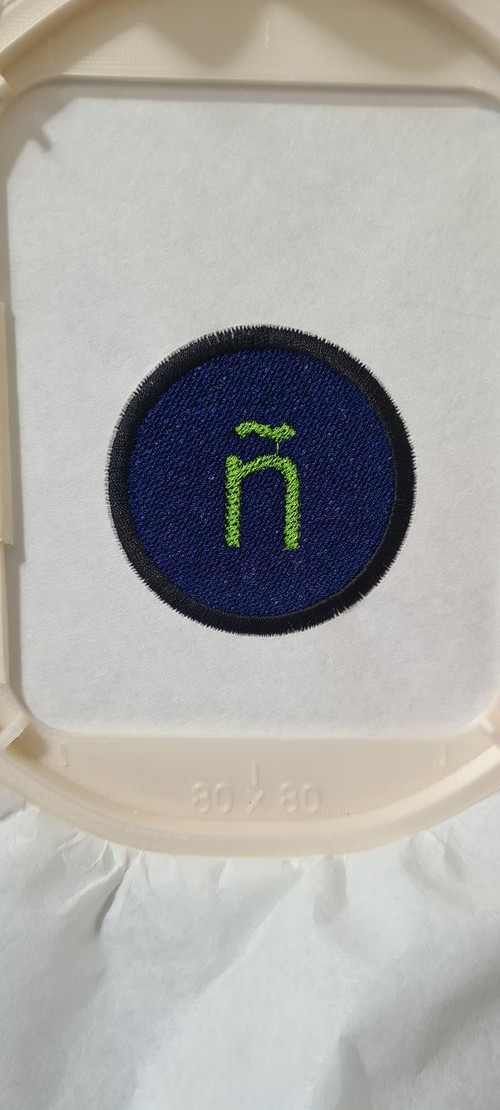
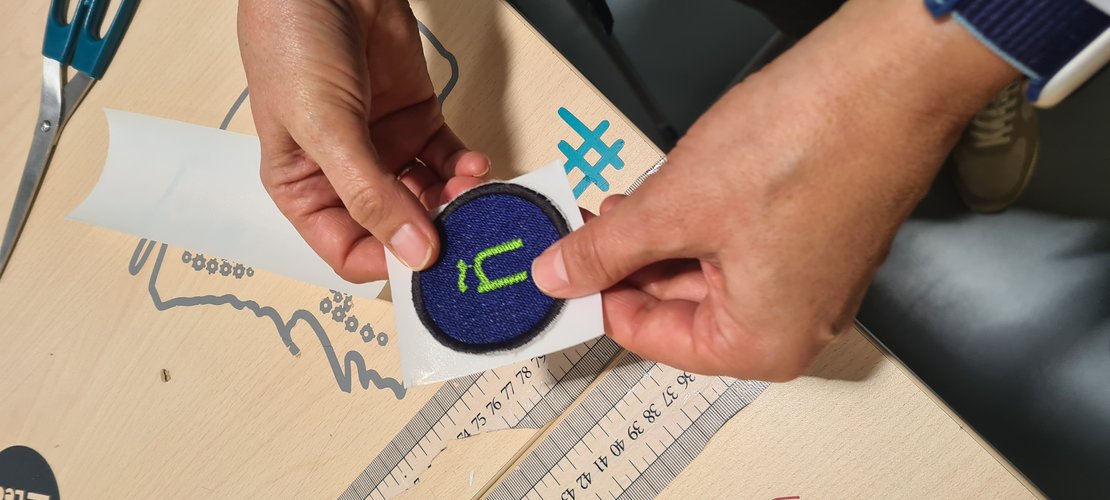
I went for machine embroidery. It fits the rule (digital design → digital fabrication, not covered elsewhere), the lab has a PFAFF creative 3.0 with an embroidery arm, and Nuria knows it well. The plan was a patch with a single character — a lowercase ñ inside a filled circle — and learning the full workflow from vector to finished patch. The ñ is a small joke that also happens to be a real technical problem: an accented Spanish glyph with a separate tilde is a decent test for digitising and stitch ordering.
This is not directly tied to the final project (the standing desk), but the workflow itself — vectorise, define stitch types, order operations so they don’t destroy each other, run, post-process — is the same kind of thinking I keep using everywhere else.
learning objectives.
- Understand the embroidery workflow end to end: design, stitch definition, machine prep, run, finishing.
- Learn the difference between fill and satin stitch and when each one is worth it.
- Understand why colour/stitch order is a design decision and not something to leave to the machine.
- Learn the material setup: stabiliser, hooping, tension, and patch backing.
assignments.
- Individual: design and produce something with a digital process not covered in another week. Document the requirements it meets and everything needed to reproduce it.
what is wild card week.
Neil’s own framing, condensed. The class wrap-up every year produces requests to add topics, and the problem is always: if you add a topic, which one do you remove? Instead of removing anything, they added a week where everyone does a different assignment.
The requirements, as he stated them:
- Design and produce something with a digital process — it has to incorporate computer-aided design and manufacturing. A purely manual skill does not count.
- It must not be covered by another assignment.
- You have to state which requirements your chosen assignment meets.
- You have to include everything needed to reproduce it.
The point he kept coming back to: digital fabrication is a transferable skill. A manual craft you learn word of mouth from a mentor; a digital process is a design that can be sent to a fab process and reproduced. That is the bar for this week.
The official assignment page is fabacademy.org/2026/classes/wildcard. It opens with: “Design and produce something with a digital process (incorporating computer-aided design and manufacturing) not covered in another assignment, documenting the requirements that your assignment meets, and including everything necessary to reproduce it. Possibilities include (but are not limited to):” — in my case the chosen process was embroidery. The evaluation FAQs are at fabacademy.org/2026/nueval/wildcard.
the embroidery workflow.
This is the core of the week. Nuria gave me a training session on the machine. To be honest about what actually happened: it was roughly 75% her operating the machine and explaining, 25% me — we used my own patch design as the demonstration piece, and I documented as we went. So this section is the workflow as she taught it, not a solo run. I’ll do the solo run afterwards.
1. toolchain setup.
Before any design, the software side. I started by installing Inkscape (v1.4.2) — the standard installer wizard, nothing special.
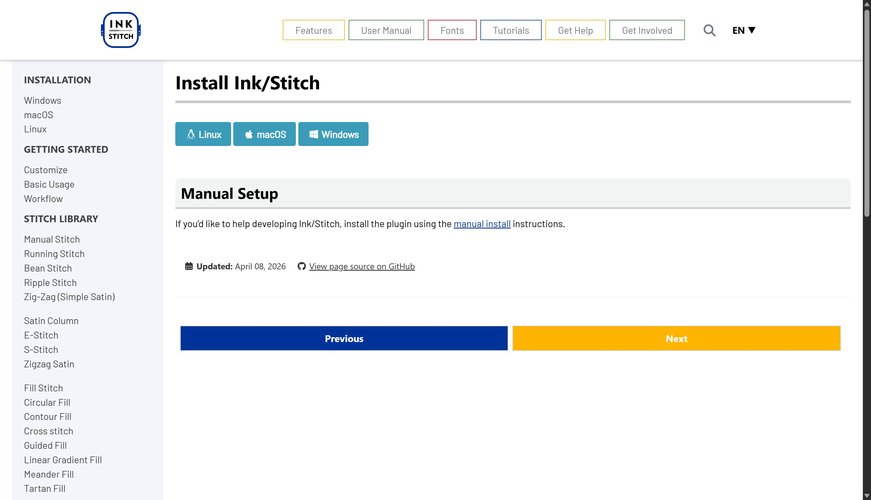
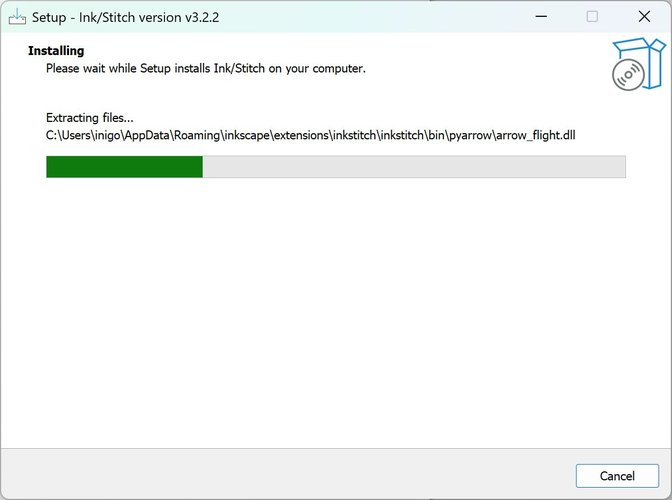
Then the Ink/Stitch extension (v3.2.2), installed from the Windows install guide. The installer drops the extension into C:\Users\inigo\AppData\Roaming\inkscape\extensions\inkstitch\. After it finished I closed and reopened Inkscape so the extension shows up in the menu.
I also installed FontBase, a font manager, so I could browse typefaces and decide which one to use for my ñ. On first launch FontBase only has the pre-loaded Google fonts. The ones I liked for this: Actor, Electrolize, Exo 2, Gluten, IM Fell Great Primer, Imprima, Ubuntu Sans. You activate the families you want, and they then become available in Inkscape.

2. design and digitising.
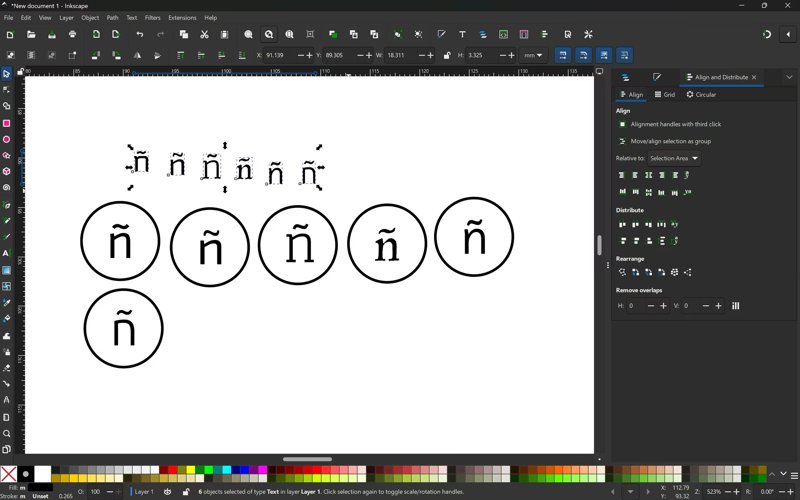
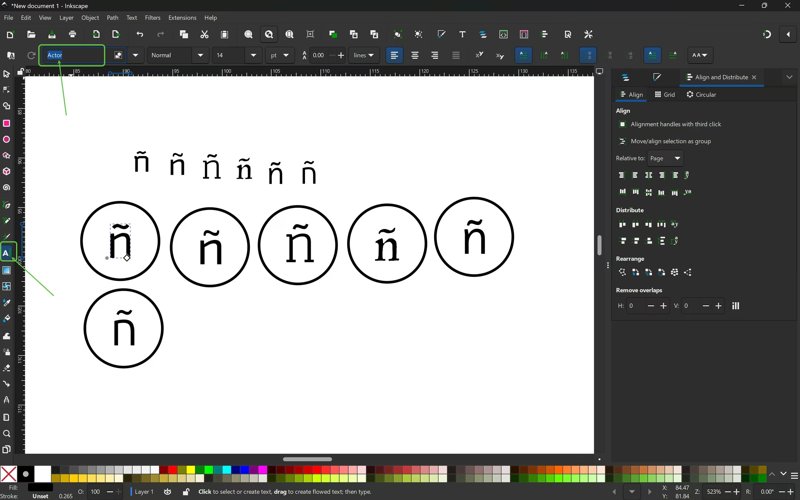
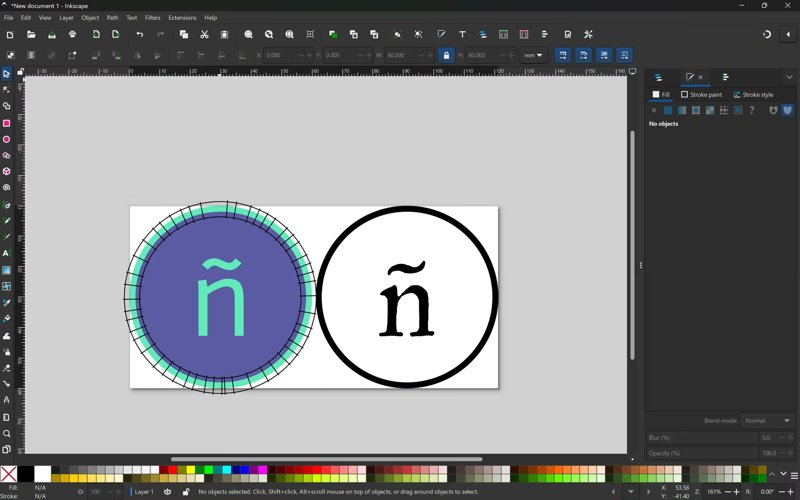
The design starts as a vector in Inkscape with the Ink/Stitch extension. The path matters: I started the ñ as normal text, tried a few typefaces, picked one, then converted it to a path (object to path). From there Ink/Stitch turns paths into stitch objects — you assign each shape a stitch type (fill or satin) and a colour, and it exports the file the machine reads.
Typeface. I tested six candidates from FontBase and ended up with Actor — a clean, fairly even-weight sans that reads well at patch size and doesn’t have hairline strokes the machine would struggle with.
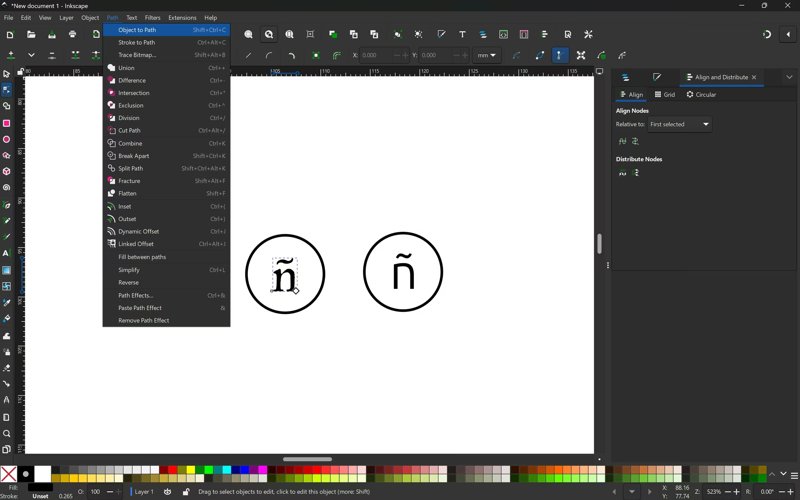
Once the typeface was chosen, the ñ goes from a text object to a path so Ink/Stitch can work on it: Path → Object to Path, then node-level cleanup of the resulting outline.

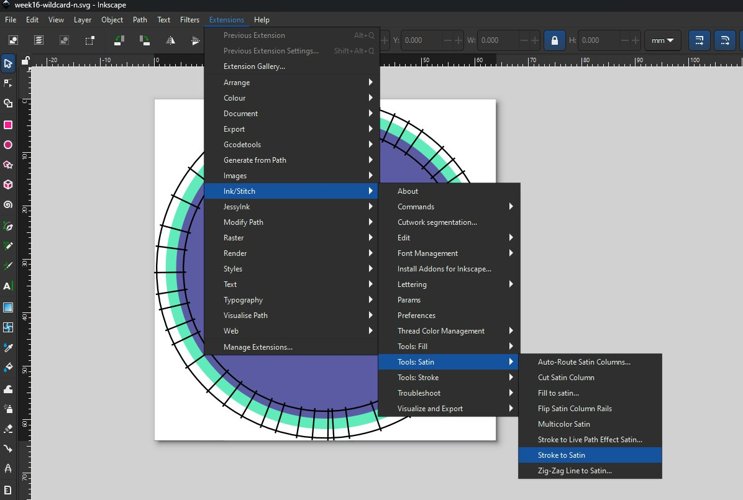
Key thing Nuria stressed here: letters look much better in satin stitch than in fill. The catch is that good satin needs a narrow shape. If you have two thick parallel lines, satin won’t generate well — you need to open up the line so it produces a single satin column. This is the same problem as putting a logo outline on a thick area: the geometry has to suit the stitch, not the other way round. Professional digitising software costs upwards of 10,000 € precisely because doing this well, point by point, is hard. Ink/Stitch gets you there for free if you respect the geometry.
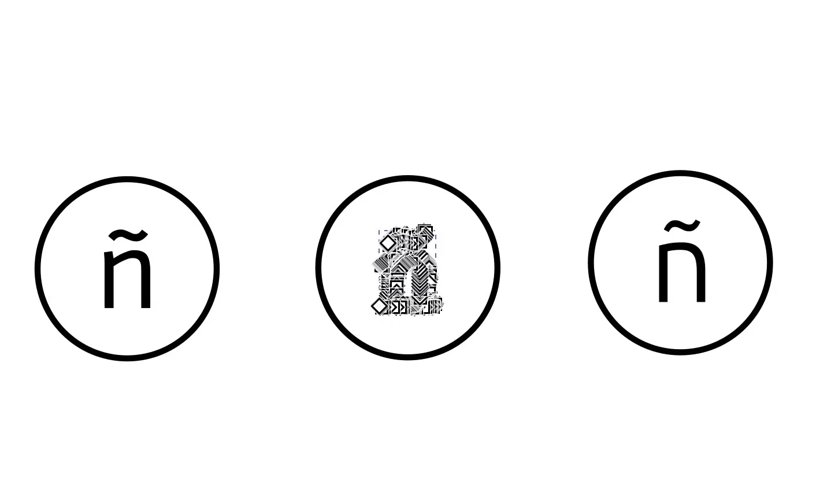
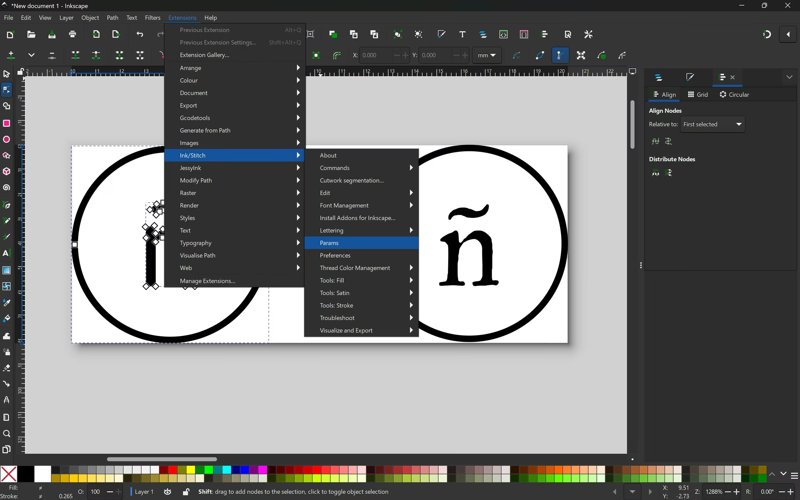
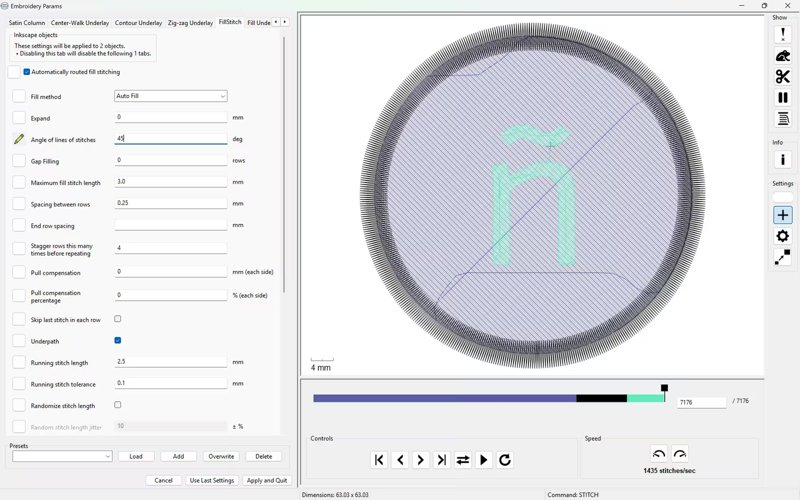
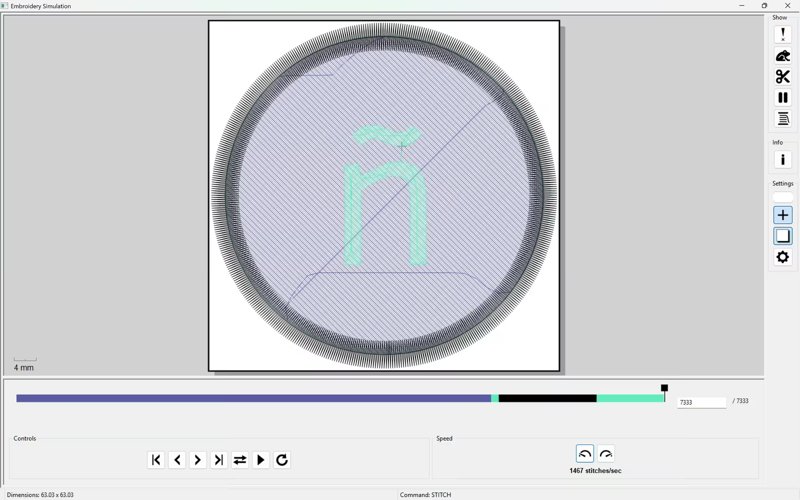
For this first patch I went with fill stitch on a filled circle with the ñ on top, not satin on the letter — satin on a glyph with the tilde detached is exactly the kind of geometry that needs a lot of point-by-point work, and the goal this week was to get a full working pipeline end to end, not a perfect letter. Satin on the ñ is the obvious next iteration. The Ink/Stitch parameters are set in Extensions → Ink/Stitch → Params, on the FillStitch tab: Auto Fill, 45° stitch angle, 0.25 mm row spacing, 3.0 mm max stitch length. The simulation then plays back the whole thing stitch by stitch before anything goes to the machine.

3. material setup.
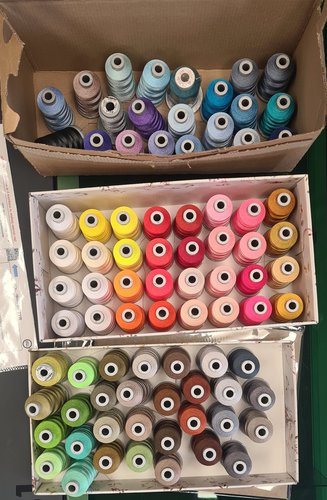
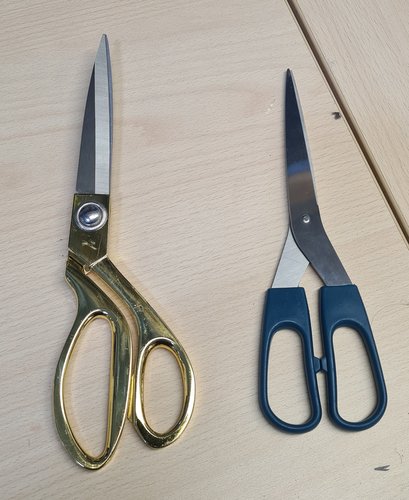
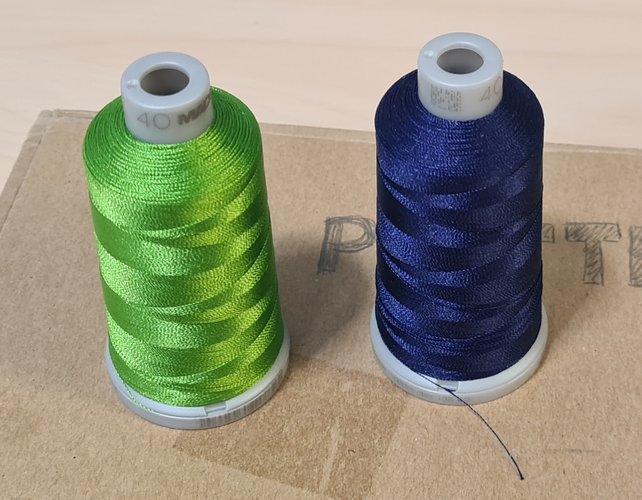
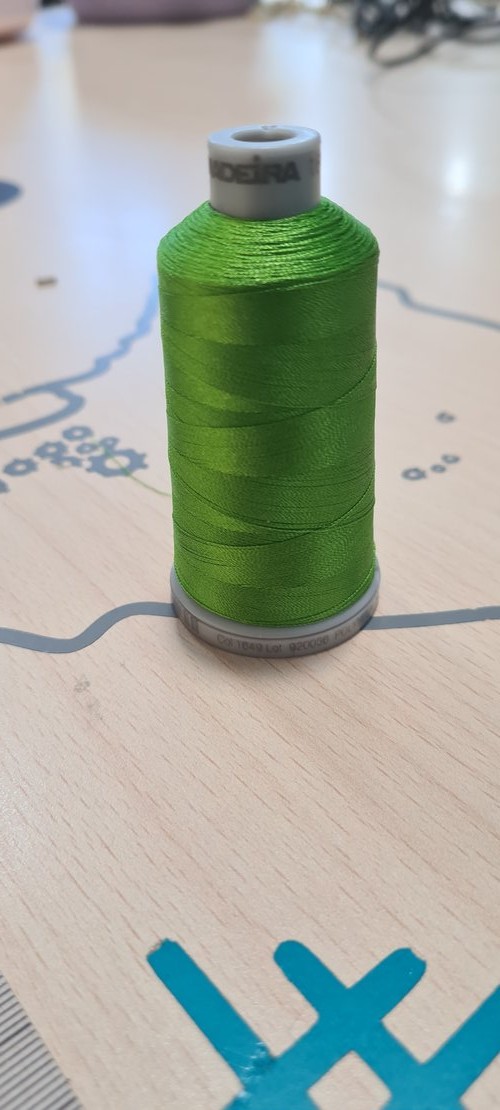
Before the stack, a quick look at what’s available: the lab has a large stock of embroidery thread in many colours, plus the two-scissors rule Nuria is dogmatic about (one pair only ever cuts fabric, the other only paper — mixing them dulls the cut). For this patch I used a lime-green thread.
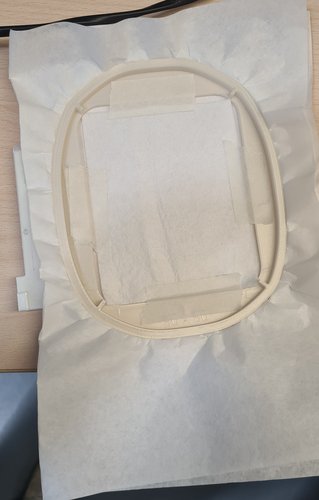
The fabric is not put in the hoop on its own. You build a stack:
- Stabiliser (tear-away backing, “entretela de rasgar” — in English, embroidery stabiliser). Nuria uses two layers. Almost all embroidery has stabiliser inside, you just don’t usually see it. Its job is to keep everything flat. The instructions for these machines literally say the work has to be “like a drum” — taut. On near-paper stabiliser that’s easy; on real fabric it isn’t, and over-stretching the fabric to fake that tension means it comes out deformed once you release it.
- The fabric / patch piece on top. Because a patch only needs a small offcut, you don’t waste a whole tensioned sheet of fabric — you waste a bit of stabiliser (which is fine, it’s basically paper) and a tiny scrap of fabric. Less waste, and offcuts are reusable.
- Everything is fixed with masking tape (“cinta de carrocero”). It does not need to be tight — the stabiliser is what’s tensioned in the hoop; the fabric just needs to stay put. There is a spray adhesive that also works, but it tends to leave glue on the needle and forces stops to clean it. Tape is cleaner and peels off easily.
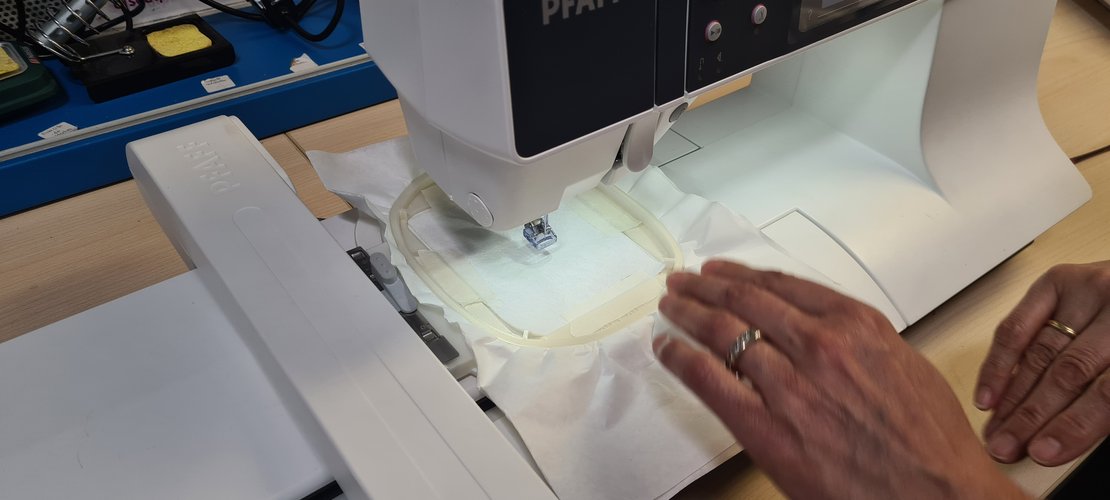
The hoop here is the 80 × 80 one (3D-printed at the lab). That number is the maximum embroiderable area, not the size of the design. The hoop has to be selected on the machine screen later, and getting it wrong makes the machine go out of bounds and break the needle — so it matters.
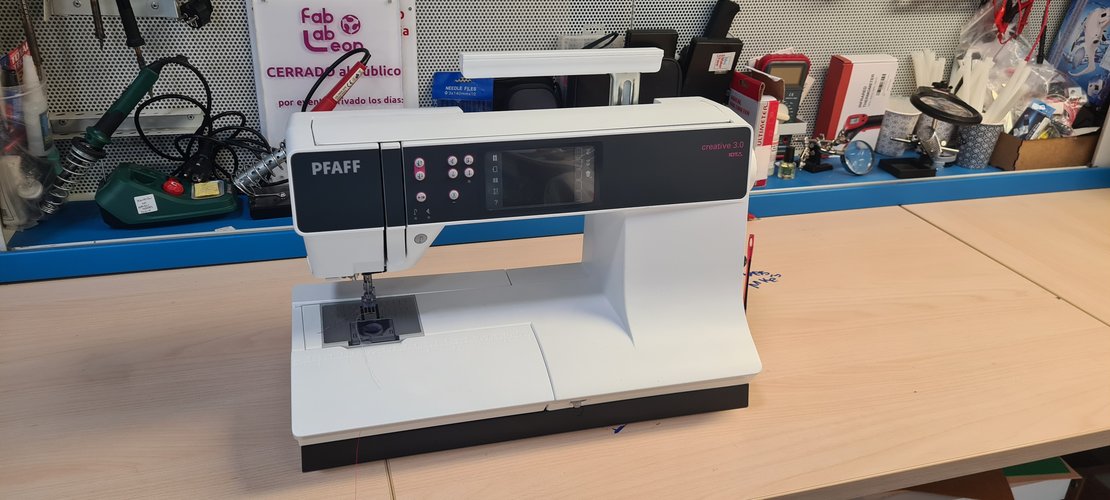
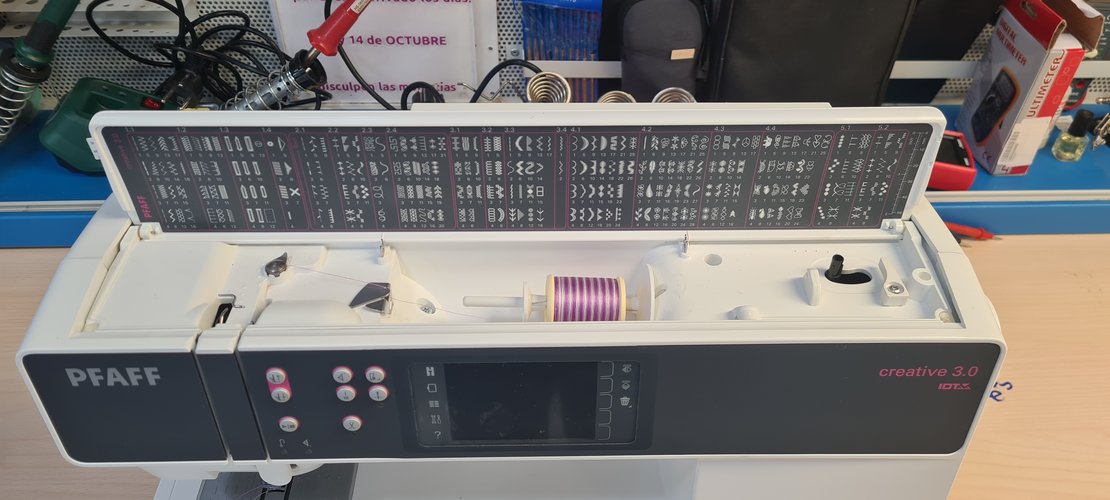
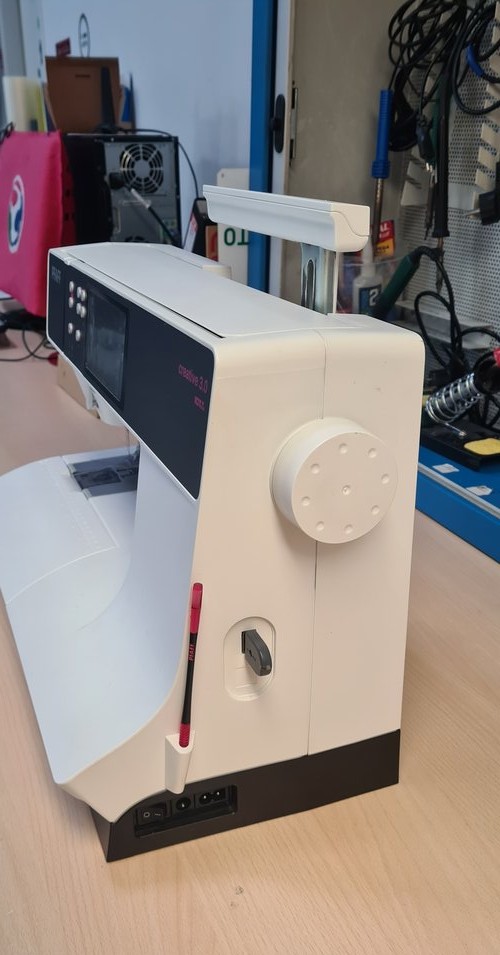
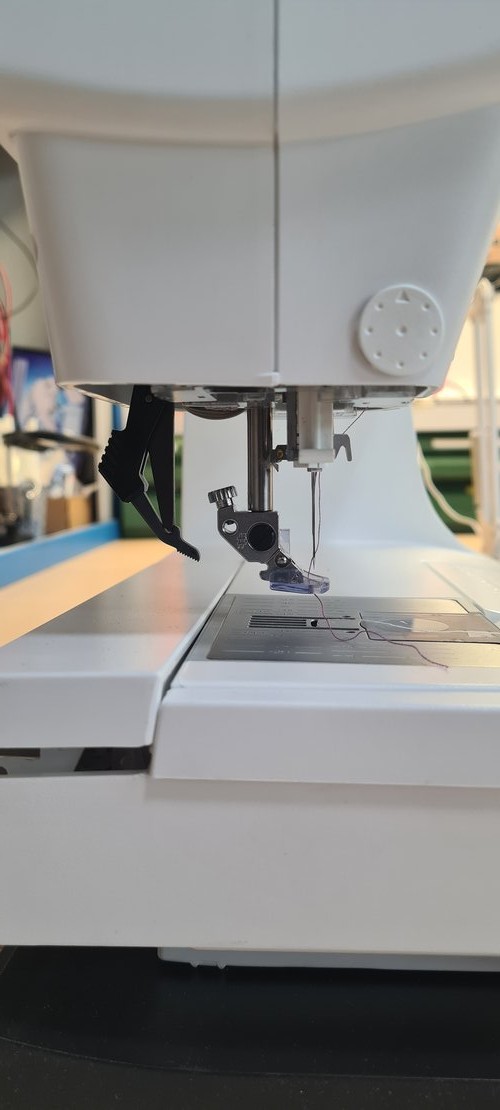
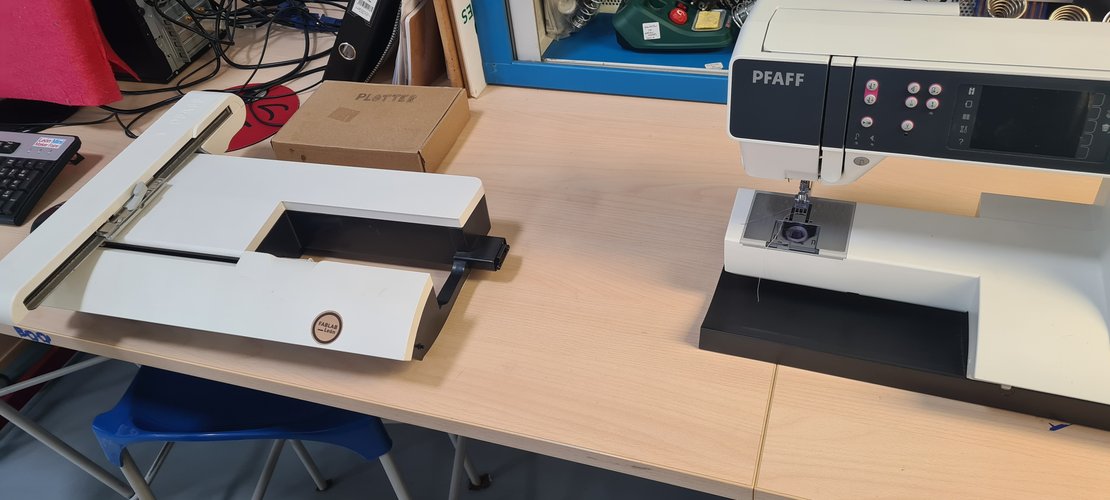
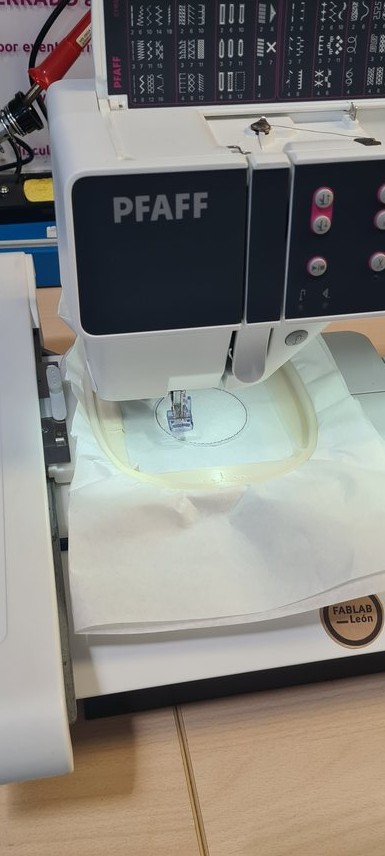
4. machine preparation.
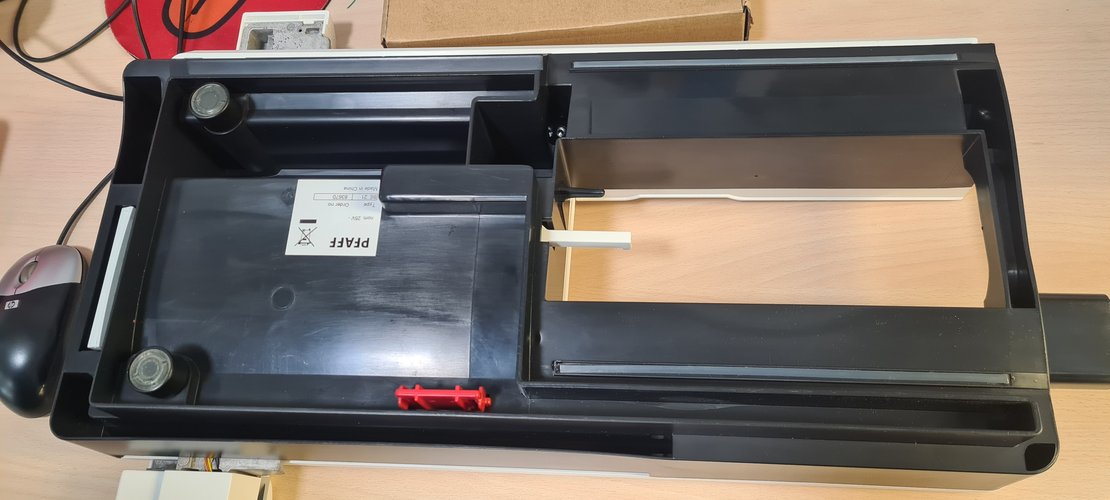
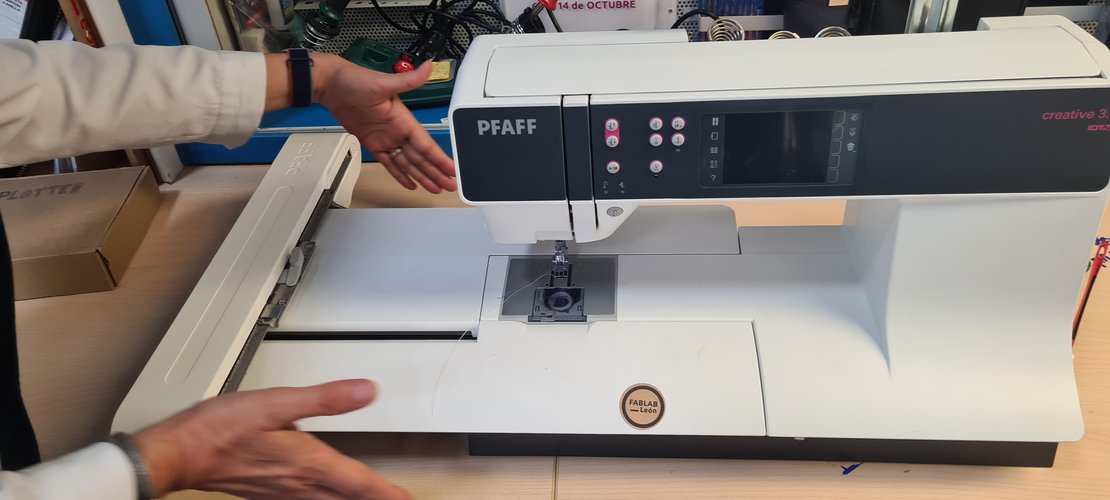
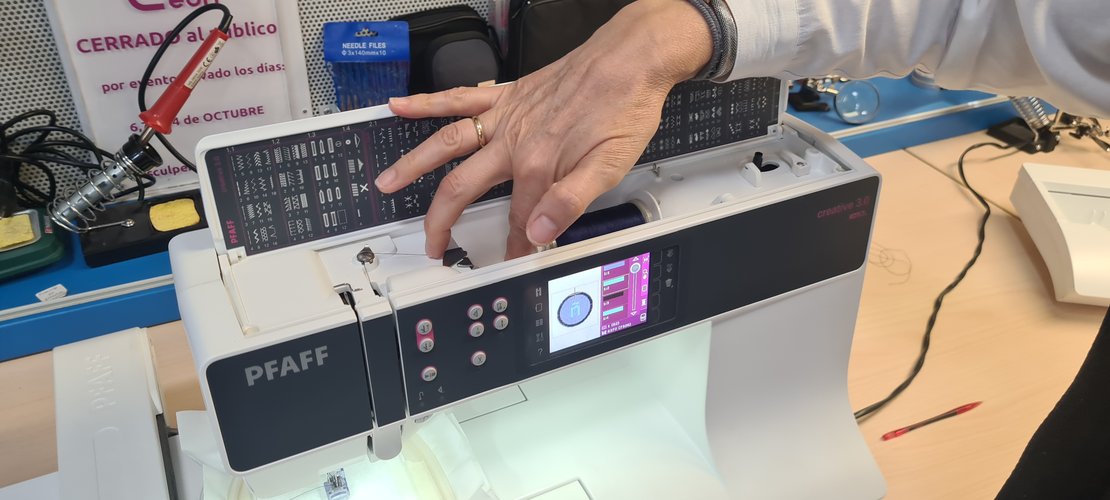
The machine is a PFAFF creative 3.0 (a sewing machine with a detachable embroidery arm), the one set up at Fab Lab León. Nuria walked me through the machine itself first — the body, the top compartment with the bobbin and the built-in stitch chart, the side controls, the needle/presser-foot area — and then how the embroidery arm attaches. The arm clips on from underneath: there’s a red plastic piece on its underside that locks it to the machine. Once the arm is mounted, the unit goes from a normal sewing machine to an embroidery machine.
Like any machine, there’s a software side (done in Ink/Stitch) and a machine side. The machine side:
- Two threads. A top thread (the embroidery thread) and a bottom thread on a bobbin. Nuria’s hard-won advice: use a proper bobbin thread on the bobbin, not the same thread as the top — that’s why bobbin thread is sold separately. The two threads meet, knot inside the fabric, and that crossing is what makes a stitch.
- Feed dogs DOWN. A sewing machine uses feed dogs to drag the fabric in a line. For free embroidery you need them down — if they’re up, the machine embroiders in a line instead of moving freely; if they’re down but you try to sew normally, it just stitches in place. On this machine they toggle, but they don’t actually change state until the machine is restarted.
- Embroidery presser foot. Every technique has its own presser foot; this is the embroidery-specific one. The presser foot has to be lowered before running — if it isn’t, nothing works.
- Threading. Machine-specific, guided by dots/numbers on the machine, same idea as threading a 3D printer filament path. This machine has automatic threading and asks for each colour when it needs it, so you wait for the prompt instead of threading blindly. Keep tension on both sides while threading or it won’t hold. If unsure, unthread and redo it — a hidden knot from doubling back ruins the whole run.
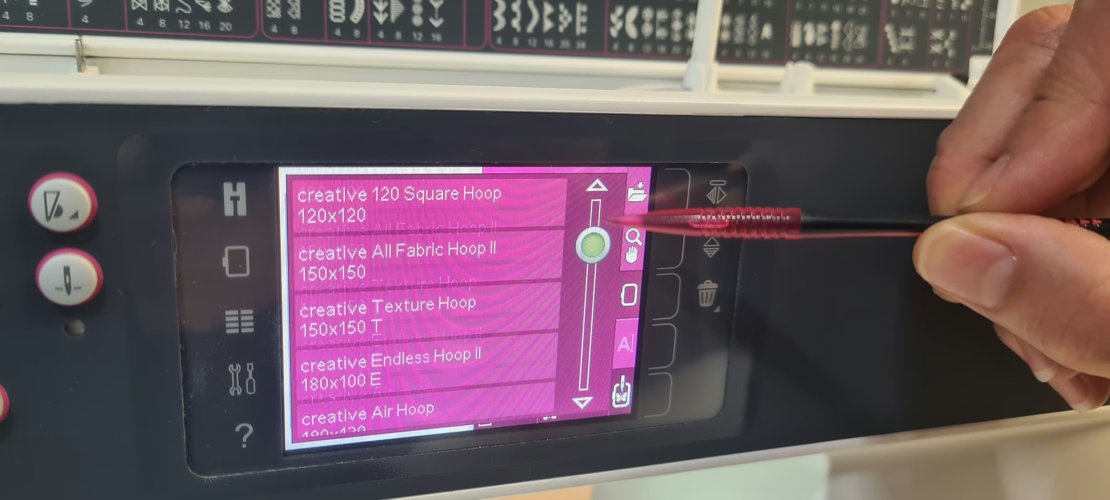
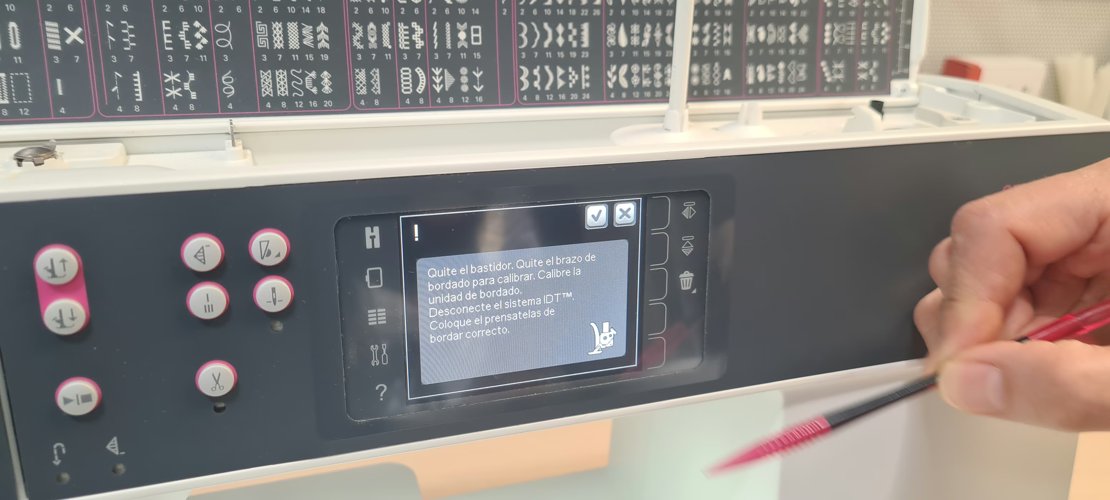
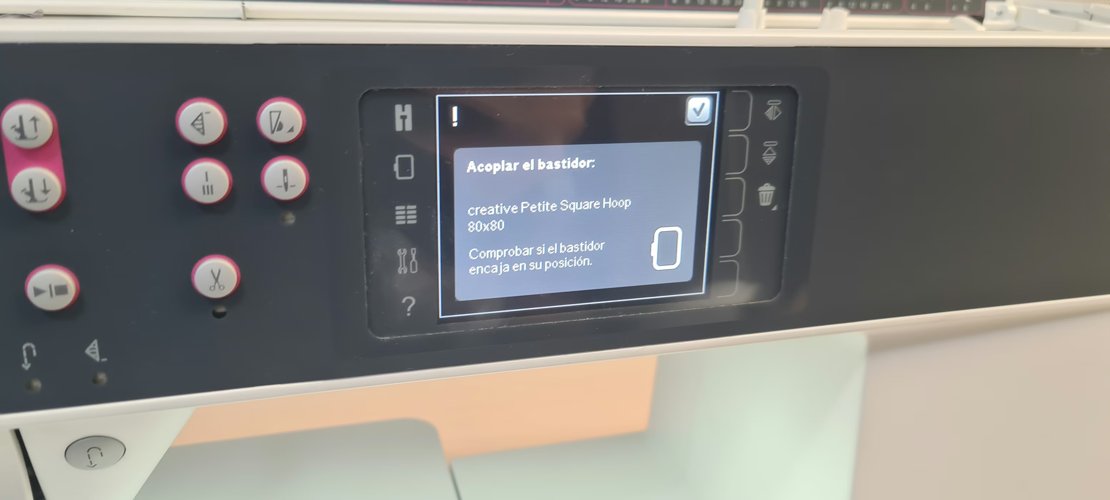
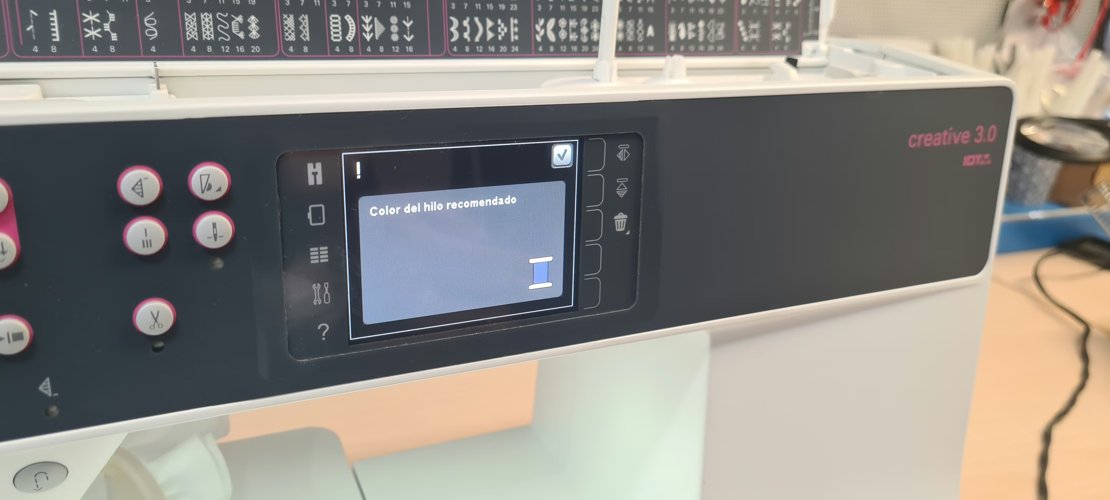
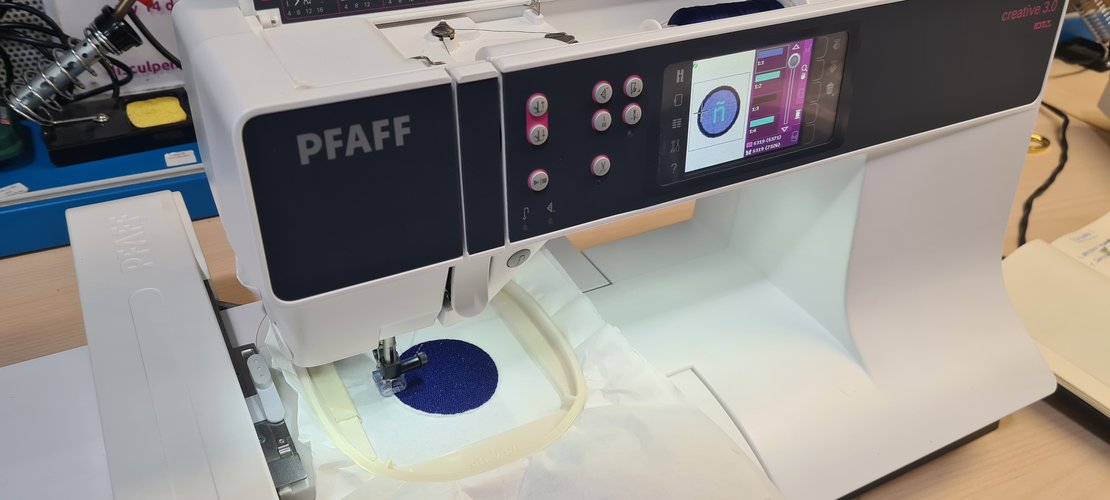
In practice the machine drives this with a sequence of prompts: pick the hoop from a list, a calibration dialog that asks you to clear the arm and IDT system, a confirmation of the exact hoop attached, and a recommended-thread-colour prompt before each block. You mount the hoop on the arm and load the spool when it asks.
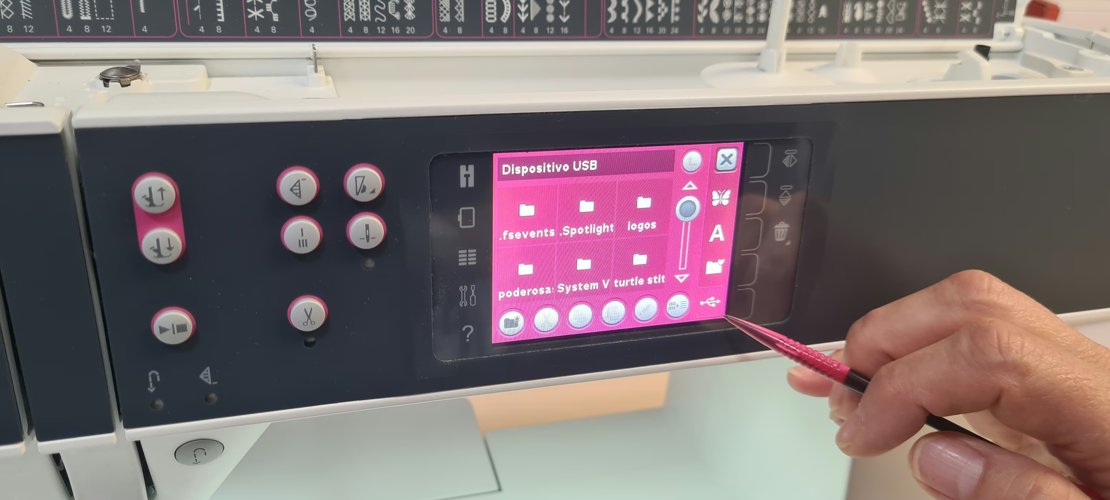
5. loading the file.
The machine does not connect to the computer. You take the file to it on a USB stick — that’s where the design lives. The screen is touch (there’s a stylus). You browse to the file; sometimes there’s a preview, sometimes not. One gotcha Nuria flagged: the machine can treat a multi-part export as a single file you can’t delete individually, so name and organise files carefully before copying them over.
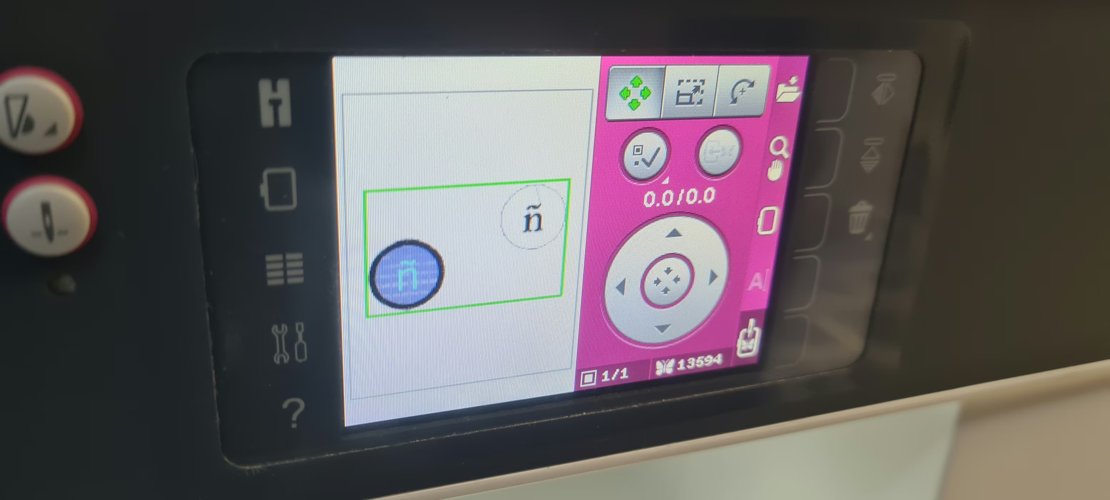
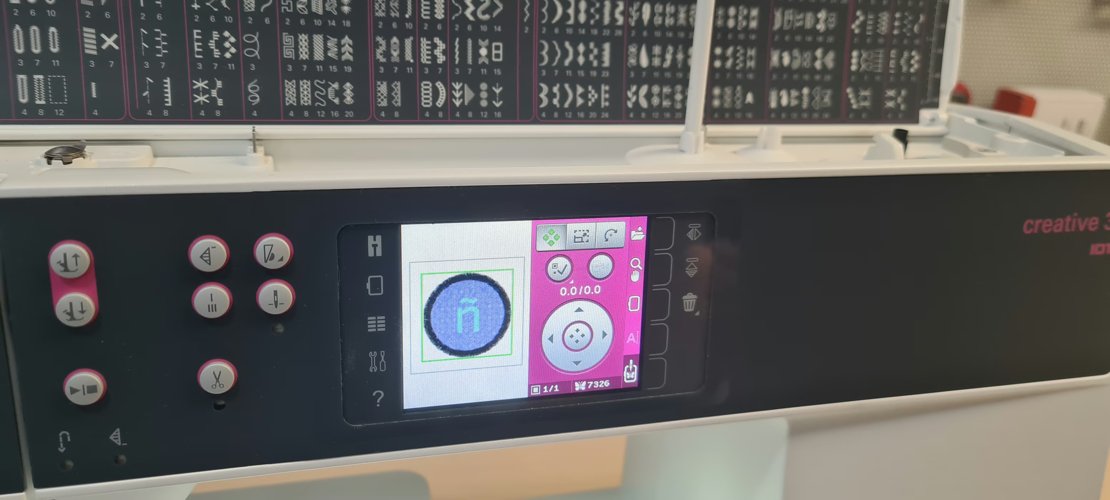
Then you tell it the hoop (80 × 80, near the top of the list) and confirm. The machine asks you to clear the arm, moves into position, and you attach the hoop. This part is done carefully — the hoop mount is exactly where play/slop can creep in.
The export carried a second copy of the design I thought I had deleted in Inkscape. When the file loaded, the machine preview showed two elements: the intended design plus a stray ñ sitting outside the hoop frame. I had removed it in Inkscape — or thought I had — but it survived into the embroidery export. The fix was to drop the extra element so only the centred design remained before stitching. Lesson: the on-machine preview is the last place to catch this, so always check the loaded preview against what you expect, not just the Inkscape canvas.
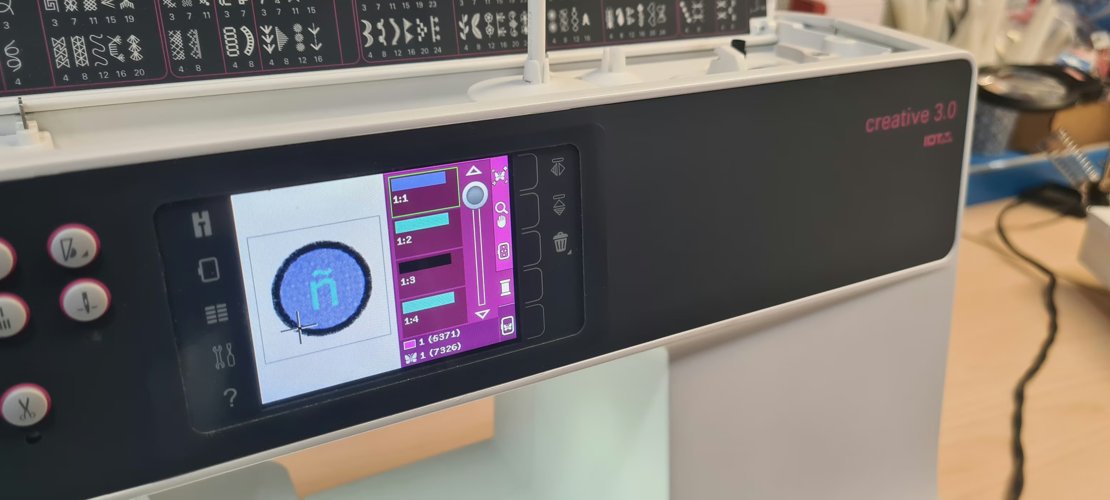
6. stitch order — the actual skill.
This is the part Nuria spent the most time on, and it’s the real lesson of the week.
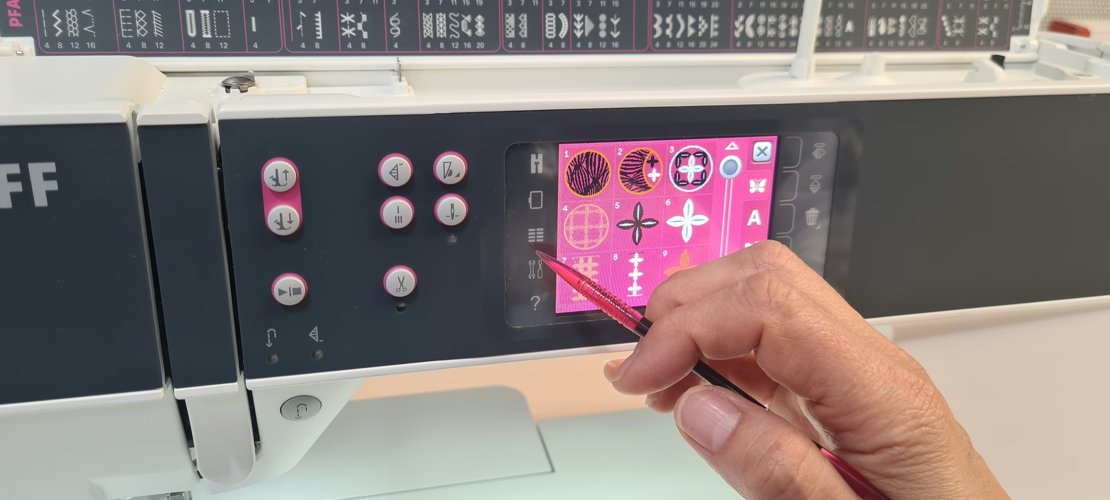
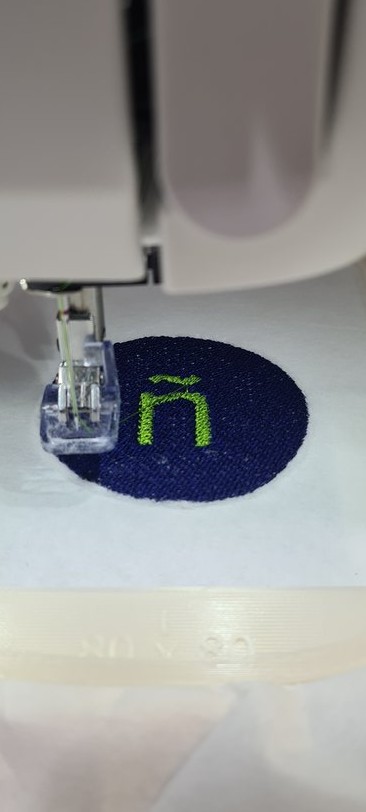
The machine asks for thread colours in its own order. You should not just obey it. On the screen you can inspect each block of stitches before running: how many stitches it has, and what it is (outline, fill, satin). For my patch the breakdown was something like: a large block (the circular fill), a small block (~82 stitches → the border, the part you cut to), a satin block (the ñ).
The trap: if the machine asks for “light blue” and you load it because you assume it’s the fill, but that block is actually the ñ, the machine embroiders the ñ first and then lays the fill on top of it and destroys it. So the order has to be chosen deliberately — fill first, ñ last, border where it makes sense for cutting. One clean trick Nuria showed: make the ñ a cut-out of the fill (fill = circle minus the ñ), so the shapes never fight each other.
Practical optimisation on top of that: changing thread is slow and wastes a lot of time, so group operations by colour. If two non-adjacent blocks share a colour, do them in one pass to avoid an extra rethread. Javi, the local instructor at Fab Lab Ponferrada, apparently spent over two hours stuck on the threading/colour-change step — this is not a trivial part.
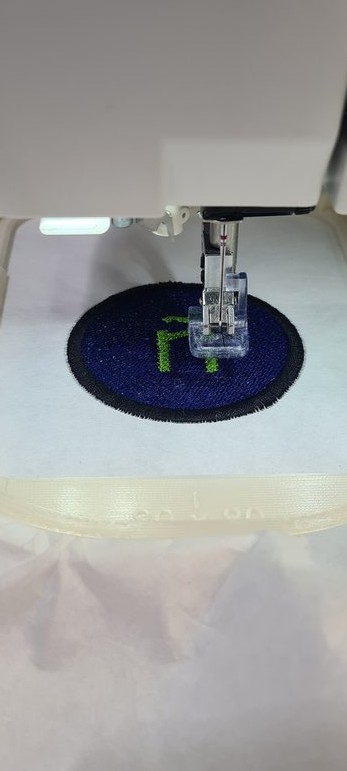
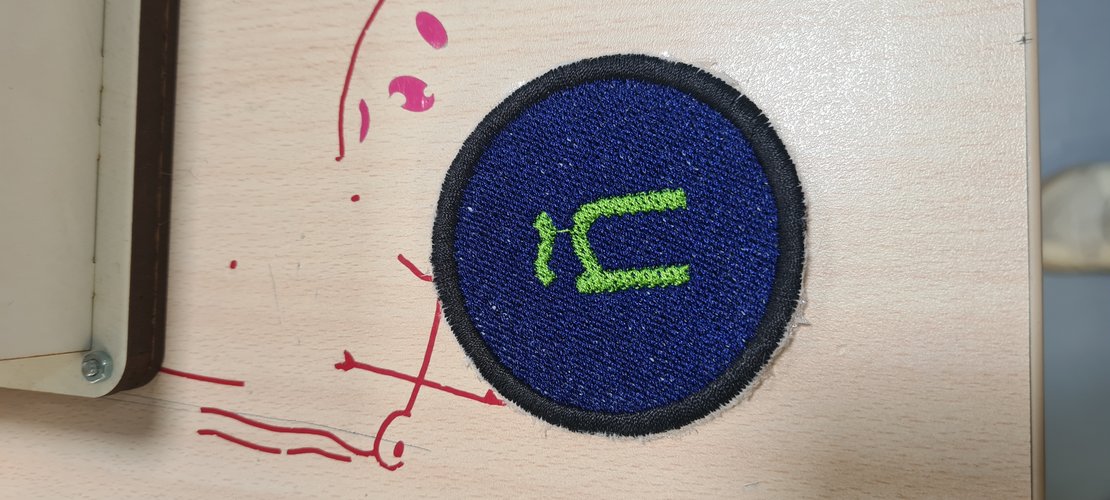
The order plays out on the fabric exactly as planned: a thin outline goes down first as a placement guide, then the blue fill, then the ñ on top of the fill, and the dark satin border last so it frames everything cleanly.
7. tension.
The classic embroiderer’s headache. The knot between top and bottom thread has to form inside the fabric. If the top colour shows underneath, or the bottom colour shows on top, the knot is in the wrong place. Rule of thumb Nuria gave: if the bottom thread shows on top, there’s too much top tension pulling the bottom thread up — so lower the top tension. Bottom (bobbin) tension is adjustable too but needs a screw; top tension is a button, so start there.
Important caveat she repeated: same machine, same tension, different result. (Exactly what happened to Javi.) Tension is not deterministic — change a little, observe, change again. The bigger hoop pandeas (bows) more than the small one, which makes it worse, so hoop choice feeds back into tension.
8. finishing the patch.
After embroidering:
- Pop the stack out of the hoop. Because Nuria always uses two stabiliser layers, the hoop fit is repeatable — no readjusting.
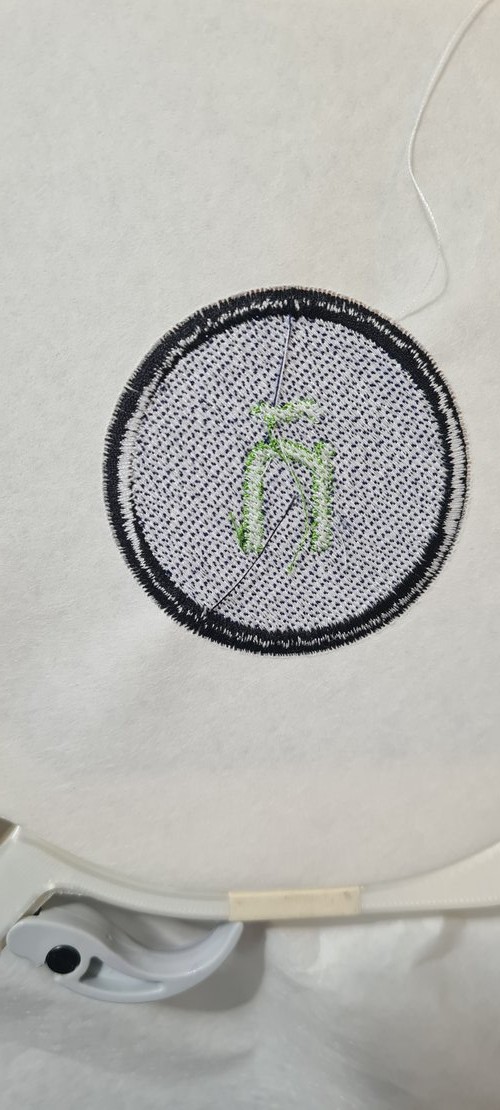
- Tear away the stabiliser (that’s why it’s tear-away). The back shows the bobbin thread and the knot side — a good place to check tension after the fact.
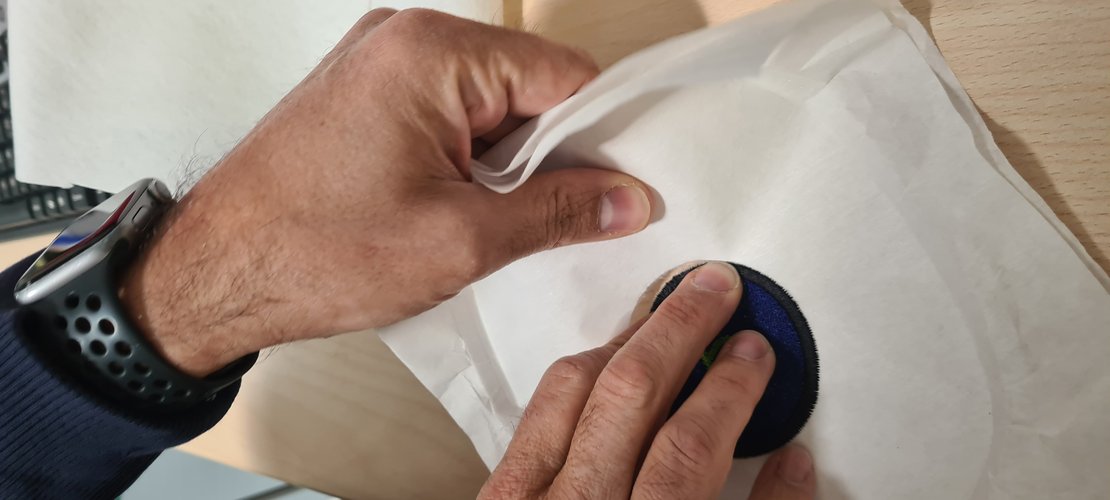
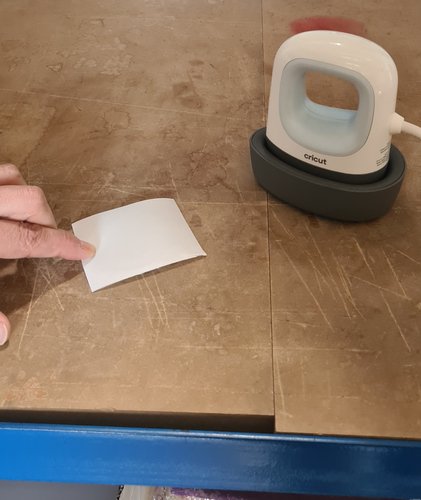
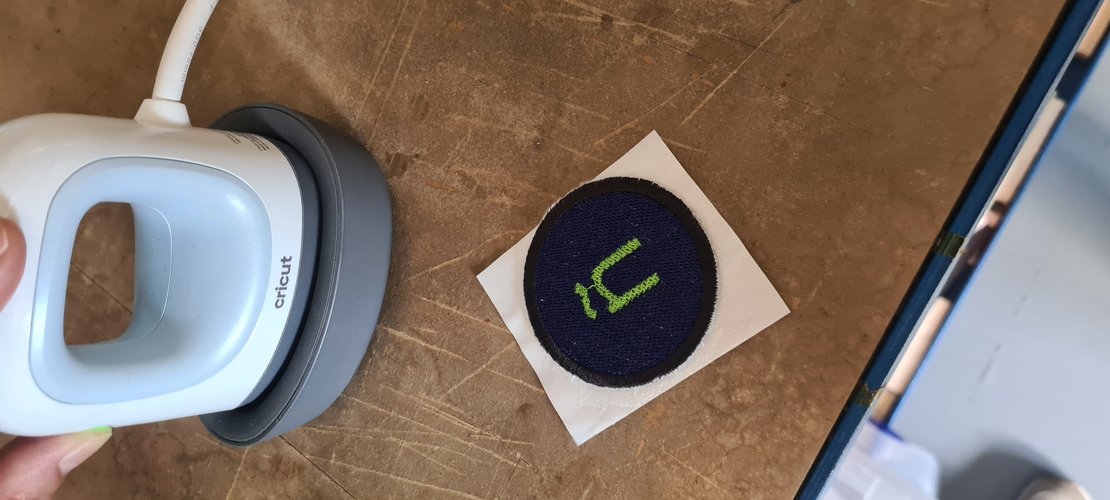
- Heat-set the patch backing. A double-sided adhesive sheet (“looks like fabric but it’s basically paper”) goes on the back. Iron it on with a small iron (heats up fast). Detail she insisted on: iron from the side that holds the heat for the first bond, even if you later iron the patch from the other side — that’s what makes the adhesive grip. Time is by eye; you can stop, check if it’s bonded, and re-iron.
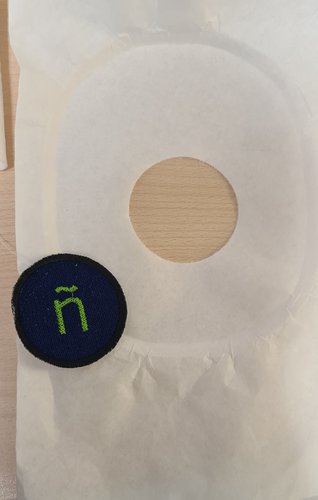
- Peel the backing film when you want to stick it.
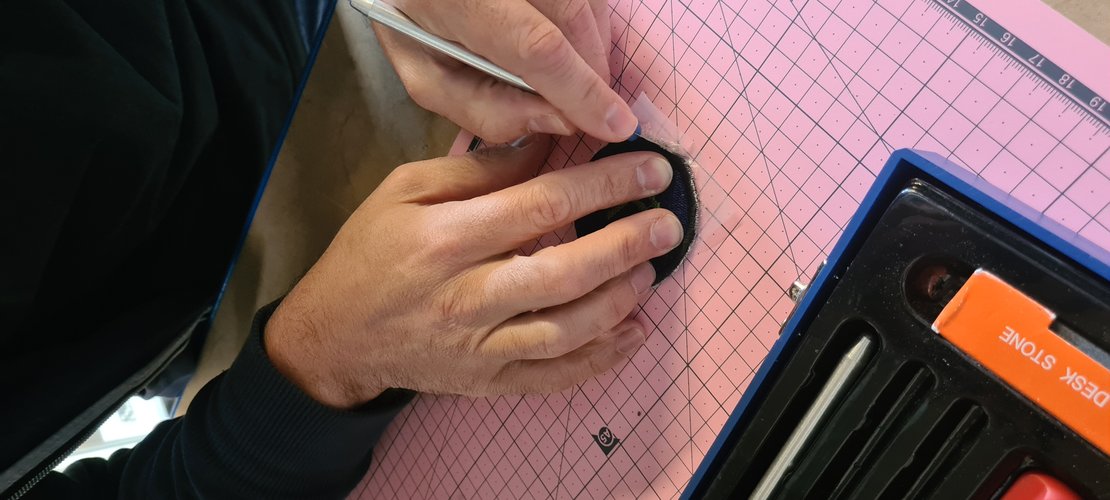
- Trim to shape. Tijera de tela ≠ tijera de papel — Nuria is dogmatic about not mixing scissors, because cross-using them dulls the cut. A cutter works too but scissors are cleaner on the edge. Stray felt fuzz can be cleaned with a soldering iron / lighter pass.
The whole sequence, step by step:
composites — a topic for the future.
Neil spent about half his class on composites. I’m not doing composites this week, but I’m noting the highlights because this is something I genuinely want to come back to when I have time — specifically a skate/surf board, which he mentioned almost directly.
The condensed version of what he covered:
- A composite is a fibre in a matrix: the fibre carries tension (it doesn’t stretch), the resin holds it in place. Wood, concrete, fibreglass, FR1/FR4 board stock, even paper-mache are all composites.
- In a fab lab you typically start from fabric sheets and lay them up. Natural fibres (cotton, linen, burlap, bamboo) are cheap, available and not hazardous. Glass and carbon fibre give better performance but are hazardous — same health profile as asbestos when you sand/drill/trim the cured part, because that releases short fibres that don’t break down in the lungs and embed in skin. The fabric and the wet layup are fine; the post-processing dust is the danger, and it needs a proper respirator, not a dust mask.
- For a skateboard specifically, Neil pointed at the most common method: not fabric layup but a wood-veneer laminate — thin veneers stacked in a mould and bonded into a laminate composite. That’s the route I’d take for a board.
- Resin: he recommended Entropy Resins — bio-based epoxy, lower volatility, doesn’t need hazardous-grade ventilation, and still makes good composites. Boat-builder suppliers are the general place to get composite materials.
- Mechanics worth remembering: when you bend a panel, only the top and bottom faces do the work, so a low-density core (foam, honeycomb, cardboard) in the middle just separates the faces and saves weight. Cut darts in the fabric so it folds into the mould without bunching, and cut it net shape so you don’t have to machine the cured part. The heart of the process is compaction (squeegee < hydrostatic < vacuum bag < mechanical clamping) — minimise resin, the fibres do the work.
Parking it here as a deliberate future project, not scope for this week.
reflections.
-
The real lesson was stitch order, not the machine. I expected the hard part to be threading or tension. It is partly — Javi lost two hours on threading — but the part that actually changes the result is deciding the order of operations so blocks don’t overwrite each other. The cut-out trick (fill minus ñ) is the kind of thing you only learn by watching someone who’s destroyed a design before. Obeying the machine’s default colour order instead of reading what each block does is the failure mode to remember.
-
Honest scope of this session. This was a training session: Nuria operated the machine ~75% of the time, using my patch as the demo piece, while I documented. I’m calling that what it is rather than dressing it up. The solo run is the part where I’ll actually own the workflow, and that’s still pending.
-
Tension is not deterministic. Same machine, same tension setting, different result on two runs — Nuria showed this and it happened to Javi. The takeaway is procedural: change one thing slightly, observe, iterate. Don’t expect a number to be a solution.
-
Geometry has to suit the stitch. Satin needs a narrow column; a thick shape won’t satin. Wanting a result and forcing the software to produce it doesn’t work — you change the vector geometry, not the stitch setting. Same pattern as everywhere else in this course.
-
Wild card framing is the point. Neil’s emphasis on transferable digital fabrication vs. manual word-of-mouth craft is a good lens. The embroidery machine is digital fab; the value isn’t the patch, it’s that the design → process path is reproducible.
design files.
Everything needed to reproduce this patch:
- Inkscape source — week16-wildcard-n.svg. The vector design with the Ink/Stitch stitch objects: the filled circle, the ñ converted to a path, and the FillStitch parameters described in section 2. Open it in Inkscape with the Ink/Stitch extension to inspect or re-export.
- Machine file — week16-wildcard-n.vp3. The Ink/Stitch export in PFAFF’s
.vp3format, the file the creative 3.0 reads from the USB stick. This is the embroidery file that was actually run.
Note: the .vp3 is the version with the stray-element issue from section 5 already resolved — it stitches the single centred design.