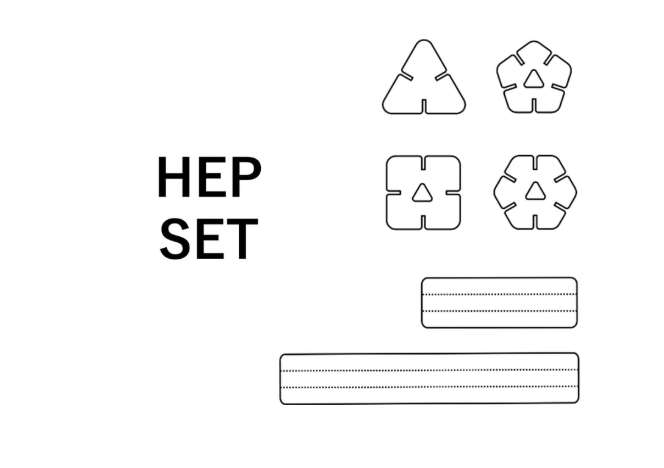
Group Assignment:
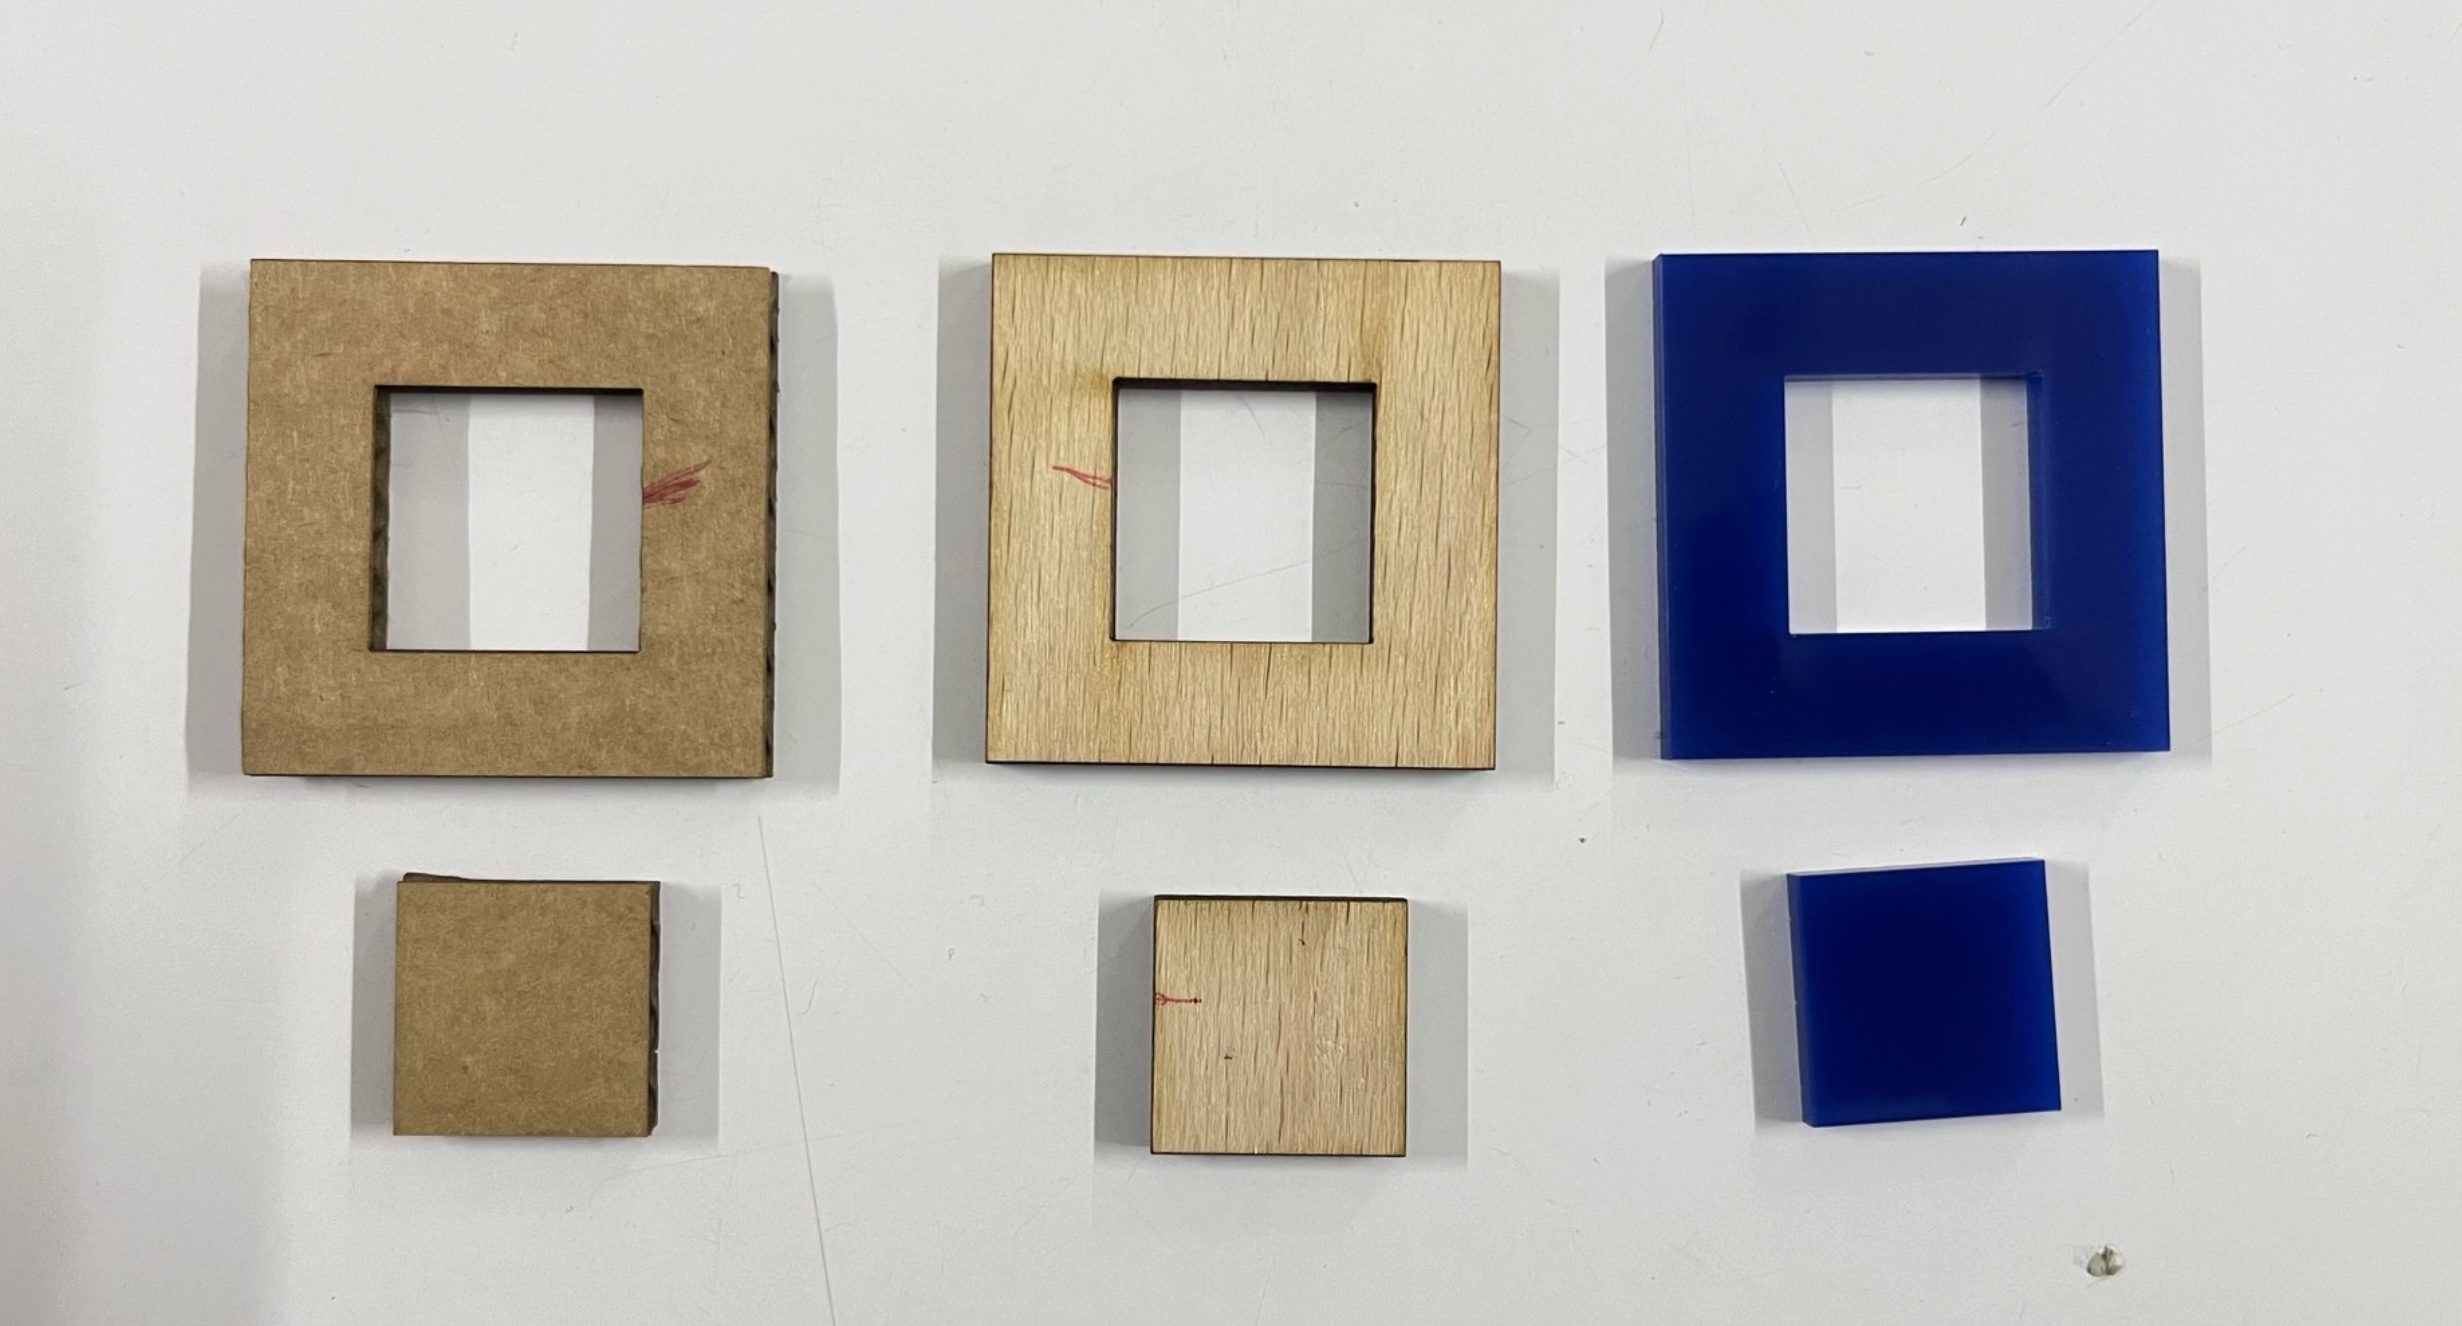
The values we figured for the parametric press-fit pieces for Cardboard are:
Thickness: 3 mm
Compression: 0.2 mm
Kerf: 0.3 mm
The effective kerf was found to be approximately:
0.14 mm for wood
0.1 mm for acrylic
(img Here is the link for the group assignment:
click here
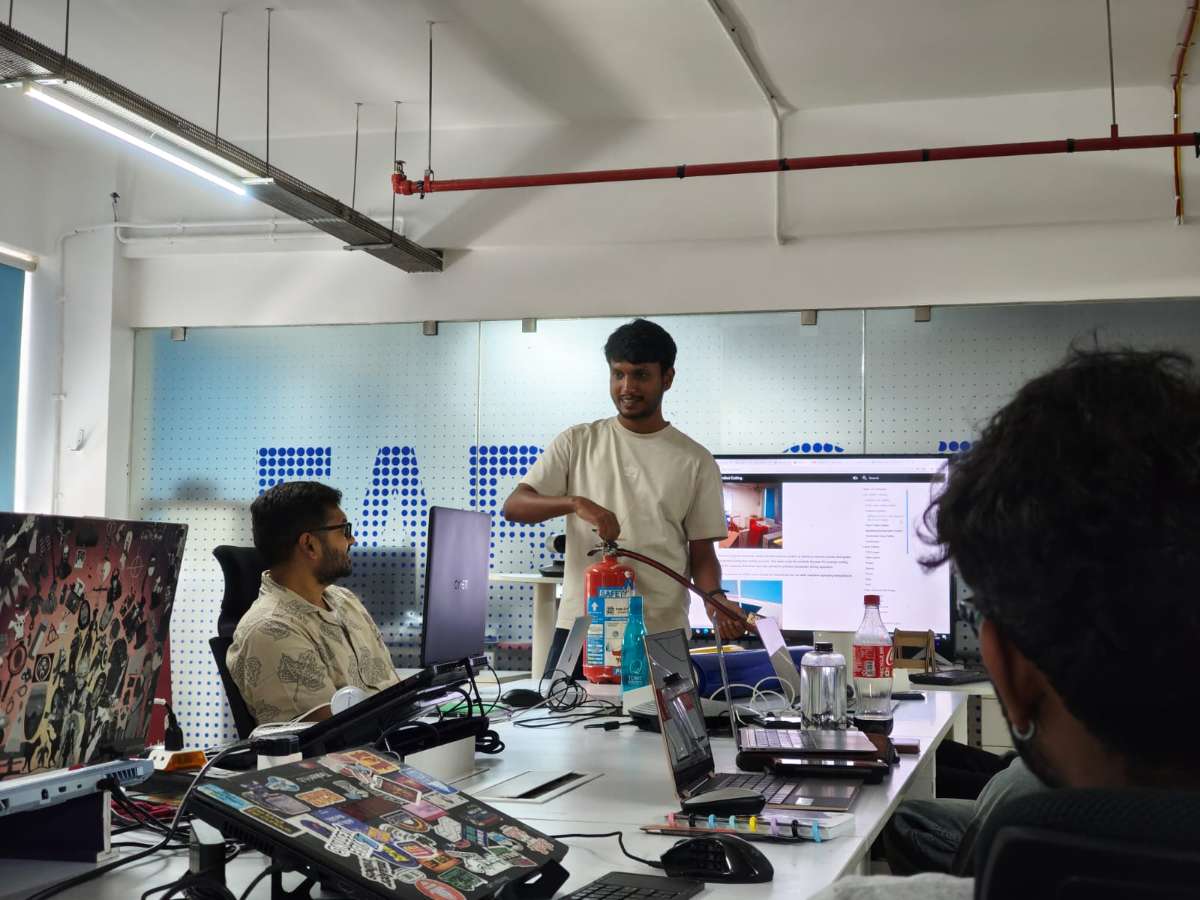
Lab Safety Training(Personal Understanding)
Safety is the highest priority in the lab environment. Before operating any machinery or working with materials, it is essential to understand the potential hazards involved. The lab includes high-powered equipment, sharp tools, chemicals, and pressurized systems, all of which require careful handling.
During the safety training, I learned and followed several key safety practices:
1.Always wear appropriate personal protective equipment (PPE), including safety glasses, gloves, and closed-toe shoes.
2.Avoid wearing loose clothing or jewelry, and ensure long hair is securely tied back.
3.Keep the workspace clean and organized to minimize the risk of accidents.
4.Inspect machines before use and report any malfunctions or concerns immediately.
5.Be familiar with the location and proper use of emergency stops, fire extinguishers, first-aid kits, and eyewash stations.
6.Additionally, the locations of emergency exits, fire extinguishers, and the lab floor plan were clearly explained to ensure preparedness in case of an emergency.
CO₂ Laser Cutter Safety - The CO₂ laser cutter is a highly powerful tool used for precise cutting and engraving, it must be handled with care. The high-intensity laser beam can create serious risks, including fire hazards, potential eye damage, and exposure to harmful fumes. It is especially important to be mindful of the materials being used. Some materials, such as PVC and ABS, should be avoided because they release toxic gases when burned.
The laser cutter is equipped with an exhaust filtration system that removes smoke and fumes generated during cutting.
What to Do If a Fire Starts in the Laser Cutter:
1.Do not open the lid immediately
2.Pause the laser cutter if it is safe to do so
3.Cover small flames with a larger non-flammable material
4.Monitor the situation
5.Use a CO₂ fire extinguisher if needed
6.Call for help and evacuate if the fire cannot be controlled
Vinyl cutter handling:
1.Blade must be installed correctly and adjusted to proper depth
2.Vinyl sheet must be aligned properly
3.Hands should be kept away from moving parts
4.Machine should be paused before clearing jams
5.Excess vinyl should be removed carefully using a weeding tool
Individual Assignment:
Vinyl Cutting
Vinyl cutting is a fascinating process that lets us turn 2D images or vector designs into precise cuts on vinyl using a computer-controlled CNC machine equipped with a small but sharp blade.
Roland GX-24 Vinyl Cutter
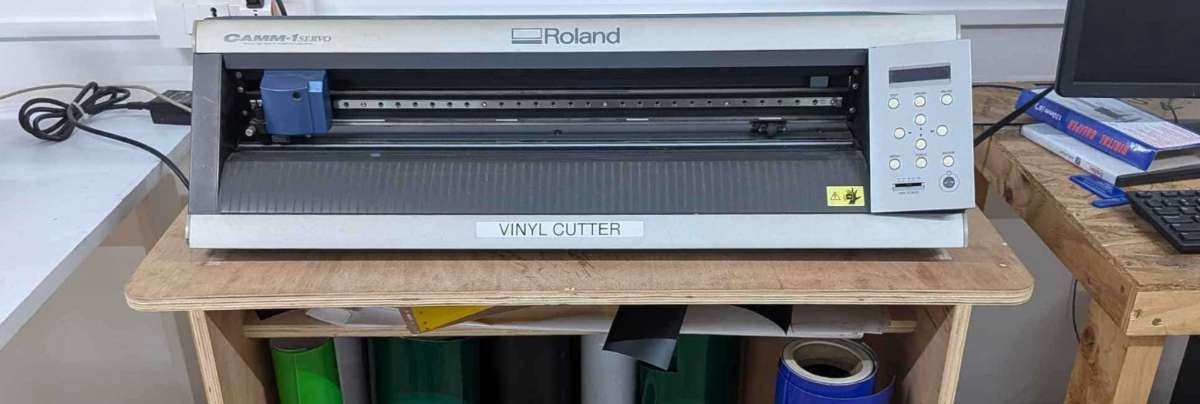
In our lab, we use the Roland GX-24 for vinyl cutting. There are two main types of vinyl cutters: active and passive.
Active cutters use a servo-controlled mechanism to rotate the blade. Passive cutters, like the Roland GX-24, rely on the natural movement of the cutting head—the blade turns in the direction of motion, similar to how a roller coaster wheel follows a track. Even though it’s a passive cutter, the Roland GX-24 is fast, precise, and servo motor-driven, making it ideal for high-quality vinyl cutting.
Controls of the Roland GX-24
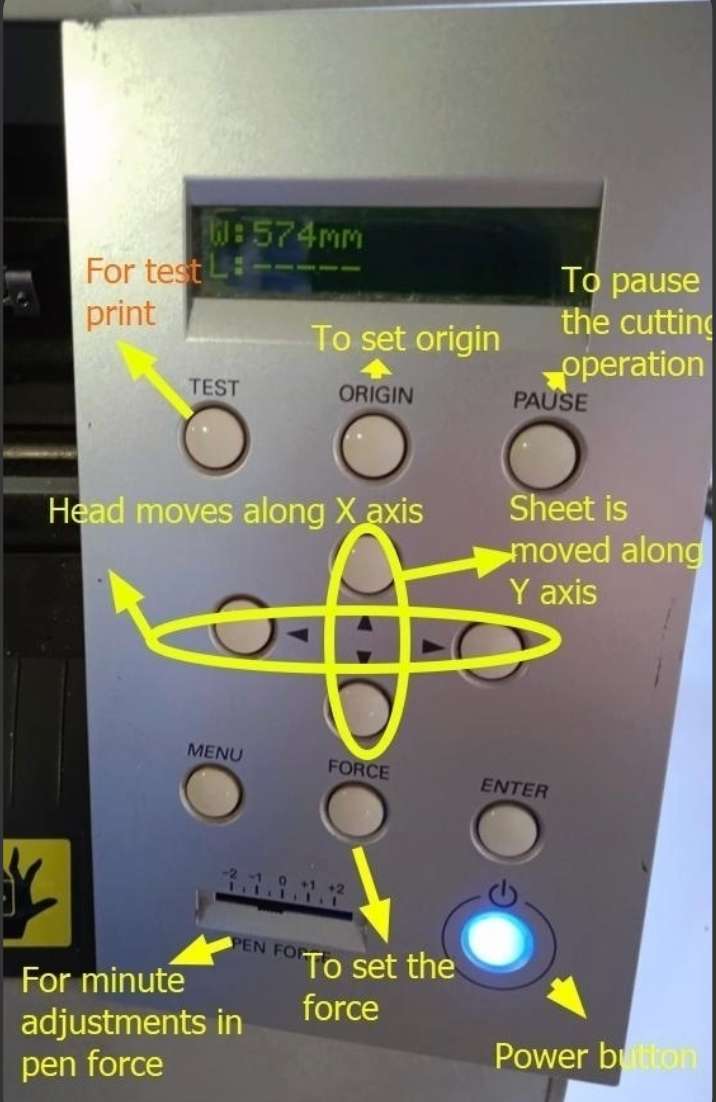
1.Select the vinyl roll you require and place it on the rollers behind the vinyl cutter.
2.Open the lever by pushing down on it, which will unlock the clamp allowing you to feed the vinyl sheet.
3.Add the vinyl sheet, set the rubber wheels at each end of the vinyl sheet to set the position. The wheels should only be adjusted from behind the machine.
4.Pull up lever to secure the roll in place.
5.Push on the on switch to turn on the vinyl cutter. Select 'roll' and then 'enter' and the vinyl cutter will start measuring the vinyl sheet.
6.Adjust the pen to a point from where it can start the cut operation and select 'set origin'.
7.We also need to set the required force, speed and depth. To test this we use a test cut. A good cut is when the outer circle peels off when we pull but the inner square does not come out with the outer circle
8.After some experimentation the settings that worked for us were 100 gf and 2cm/sec.
9.We use an open source tool called ModsCE to control the vinyl machine.
ModsCE (Community Edition) is a cross platform tool first developed at MIT, the idea being you should be able to control multiple machines using one tool/software. At our fablab, We use ModsCE to control the vinyl cutter and PCB milling machine.
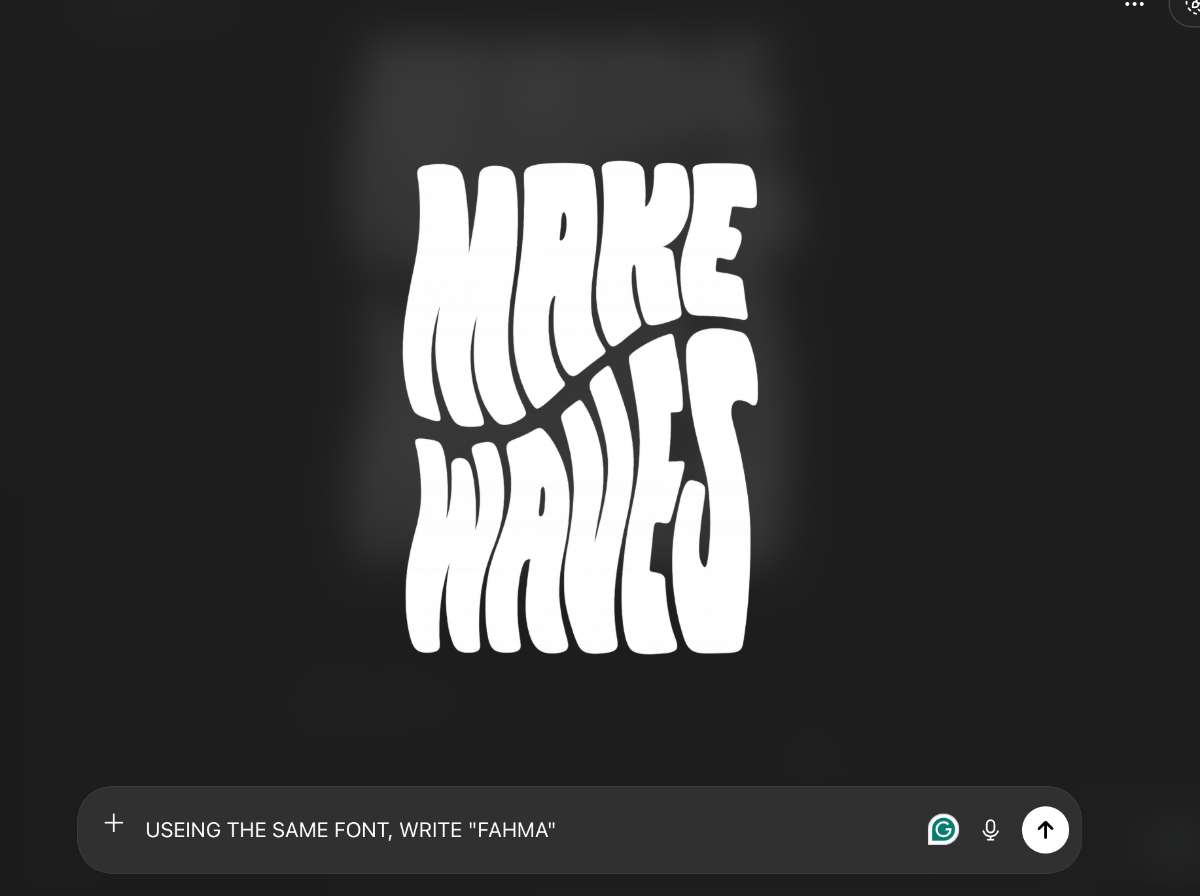
Initially, i was planning on making a batman sticker(because it's easy and risk free), However, both my instructor’s reaction and my own reflection made me question why I was settling for something so basic. Coincidentally, the assignment was given on my friend Fahma’s birthday, which inspired me to personalize the design.
I started with Pinterest, looking for inspiration and came across the phrase "Make Waves" , which resonated with her work as a Women Fellow where she focuses on building communities and creating impact for women in tech.
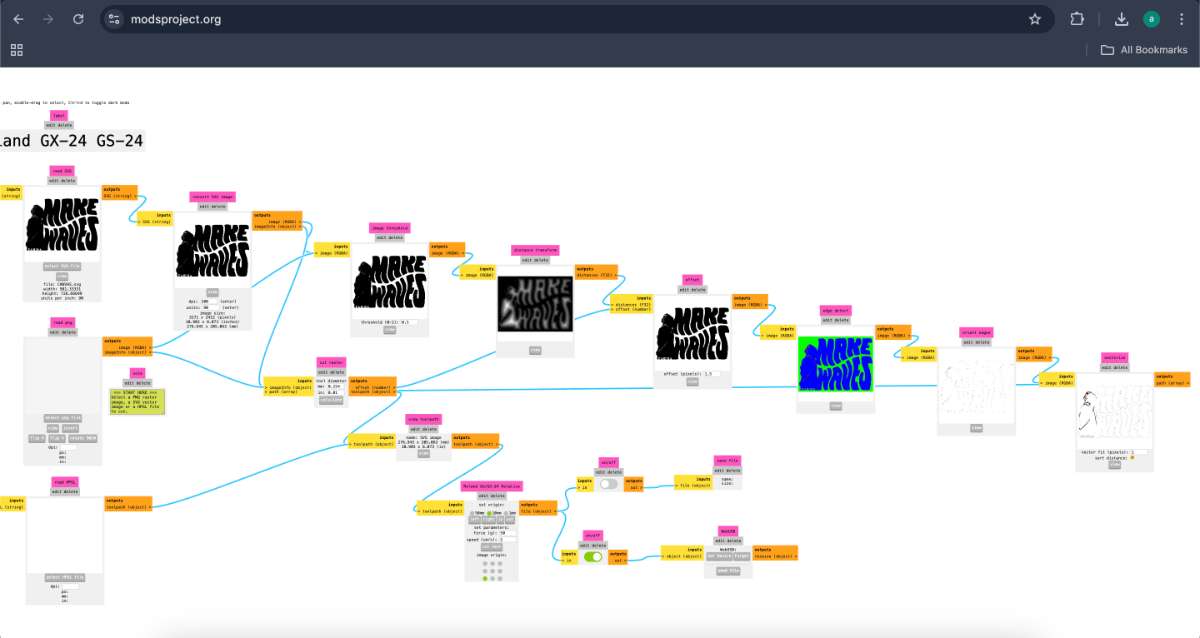
Removed the background from both the typography and her photo using ChatGPT
imported them into Inkscape,applied trace bitmap and arranged the layout.

To make the identity clear, I added her name below the portrait and converted the filled text into strokes for vinyl cutting.

I finalized the design with blue vinyl on a yellow background for better contrast.
We use open source tool called ModsCE to control the vinyl machine.
This is the link to the tool.
We insert the svg file, adjust the speed (force parameter does not work, we have to set it in the vinyl cutter), press 'calculate' and press 'send the saved file' to start the operation. We press 'calculate' and 'send the saved file' every time we adjust some parameter before cutting.
I first put the cutout for the blue part, which the content and then the background yellow part.
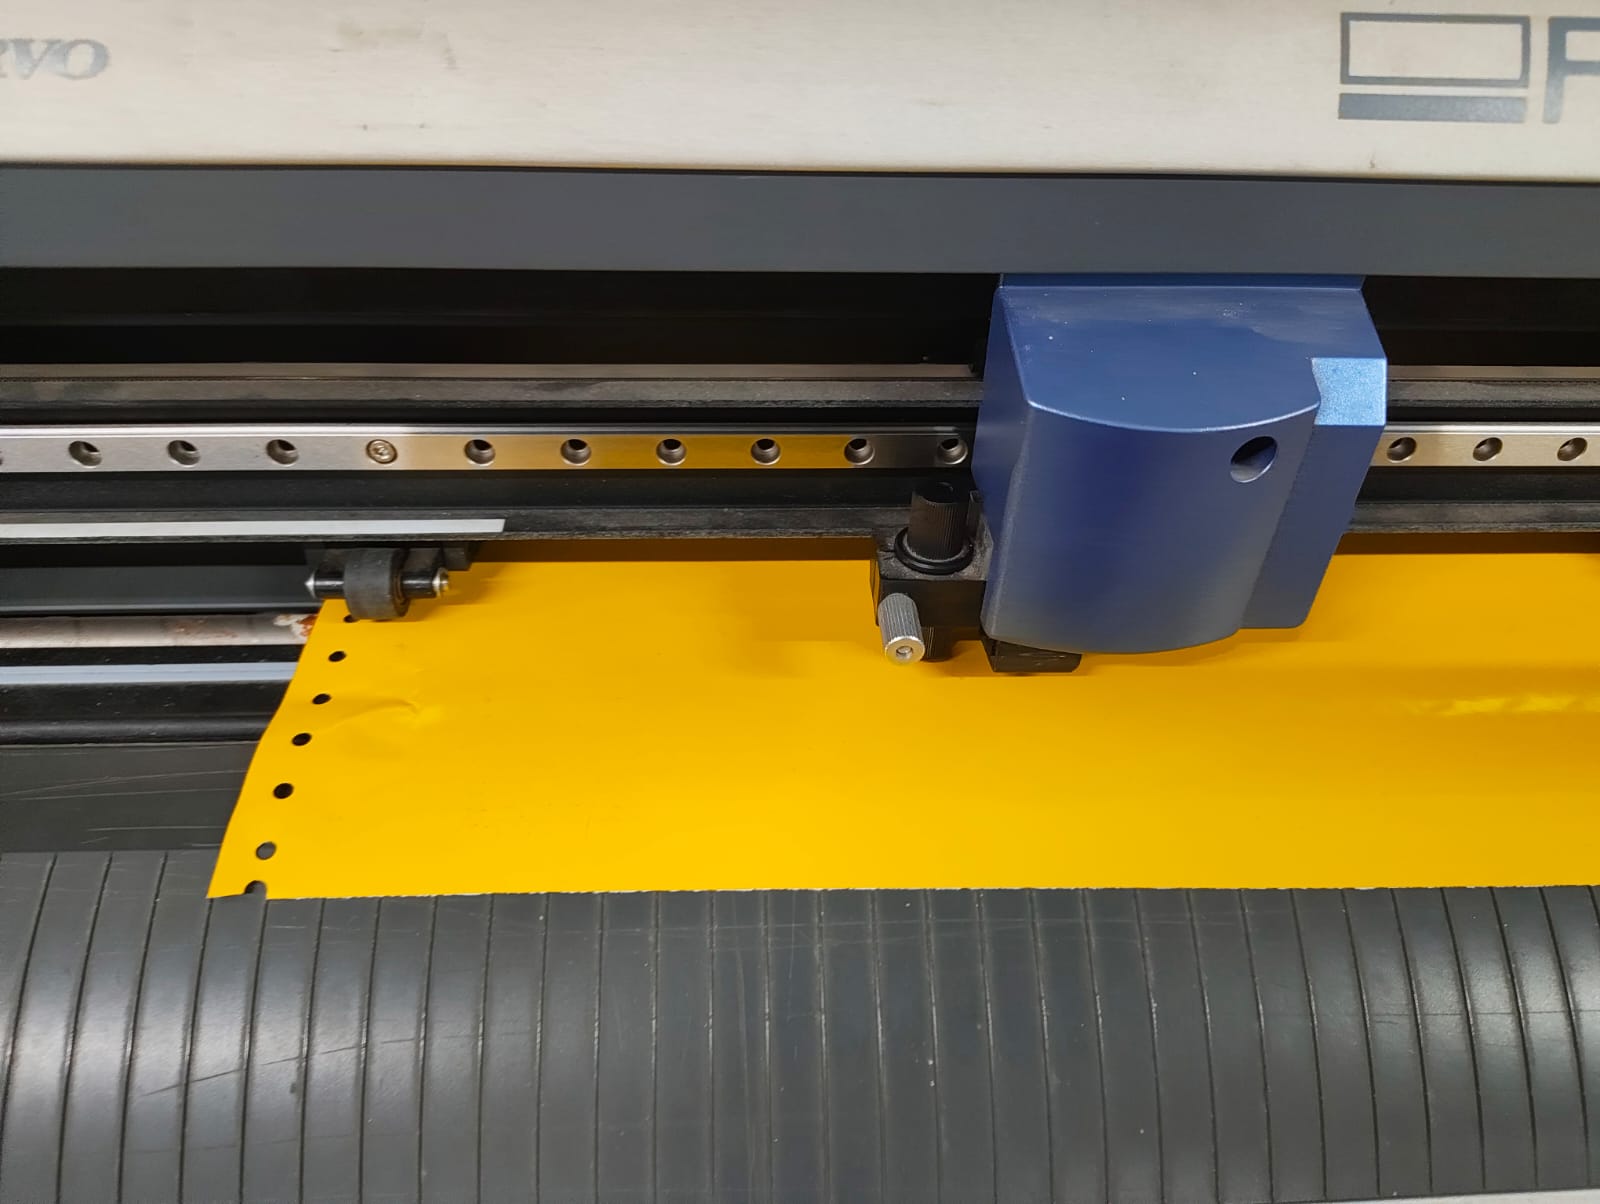
I used a cooling film as a transfer sheet to lift the required part of the sticker from the vinyl sheet and pasted it onto the yellow background.
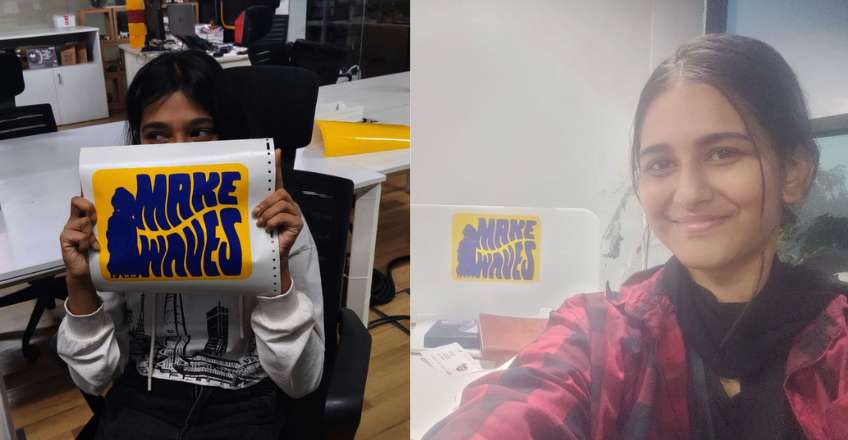
Final output:(a.k.a Hero Shot)
Challenges faced
The challenges I faced during this assignment were basic rookie mistakes.1. Initially, I forgot to adjust the canvas size before sending the design to the vinyl cutter, which caused the background shape to touch the canvas edges. Since the machine only detects lines inside the canvas and not those touching the borders, the first cut only produced the corners of the rectangle instead of a complete shape.
2. In another attempt, I set the canvas size far too small (around 5 cm), which required me to redo the layout with correct dimensions. I also misjudged the background size, making it exactly the same as the typography, which made alignment extremely difficult.
This forced me to resize the background again with extra margins and reprint it. By this point, I had already applied the vinyl incorrectly, so I had to manually remove and reapply each element using transfer paper.
Individual Assignment: Parametric Construction Kit
Here i took reference from one of my senior's from previous year,Noel, and from a website i came across while lookig for reference
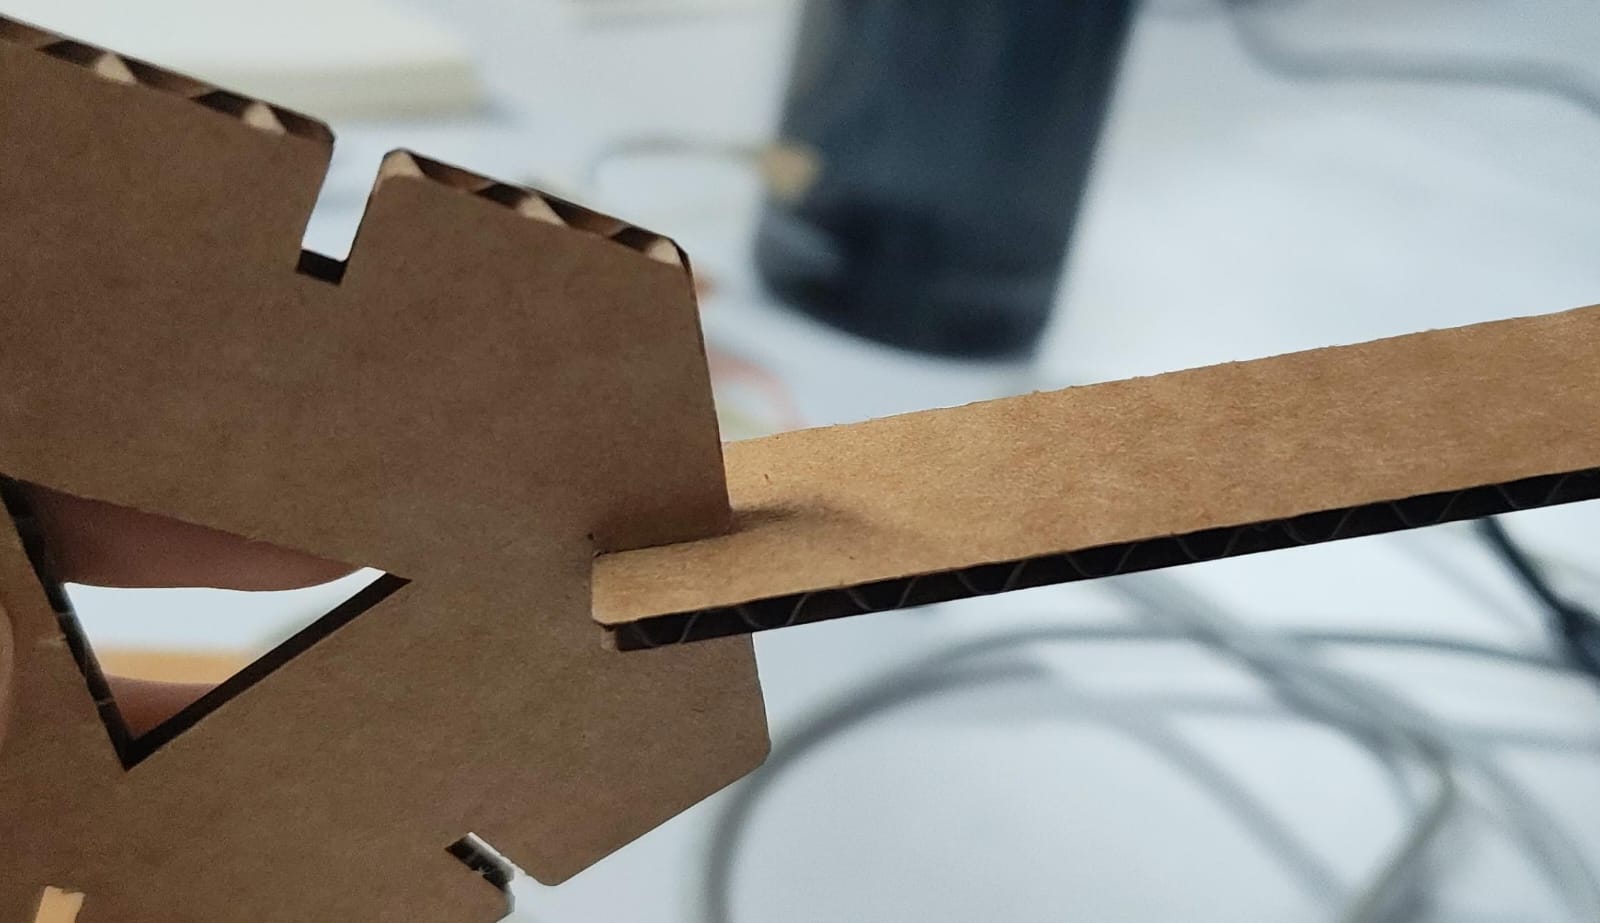
Here, i liked how they made a slot inside the shape to fit in another part.
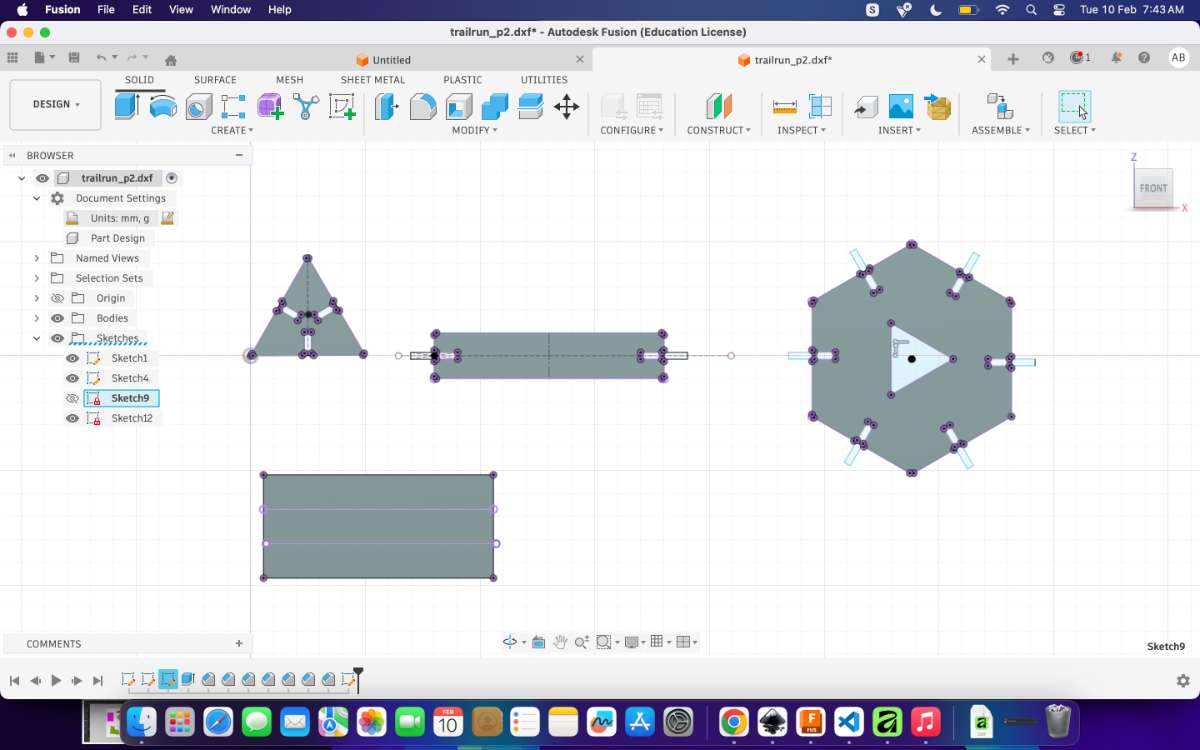
CAD Design
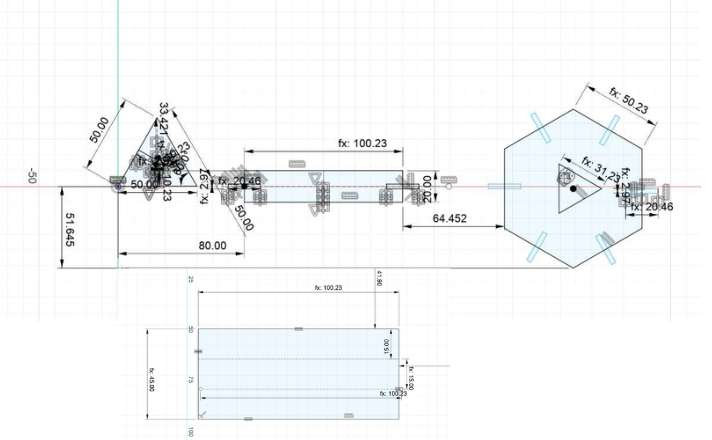
The first step is to make a parametric sketch(i used Fusion 360). There are three main parameters that we used:
Material Thickness (MatThick): Thickness of the material we are using, ie. cardboard = 3 mm
Kirf: The width of the area that is removed by the laser beam in the process of cutting = 0.23 mm
Press Fit Adjustment (PFit_Adjust): Decides how tight or loose our fit will be = 0.2mm
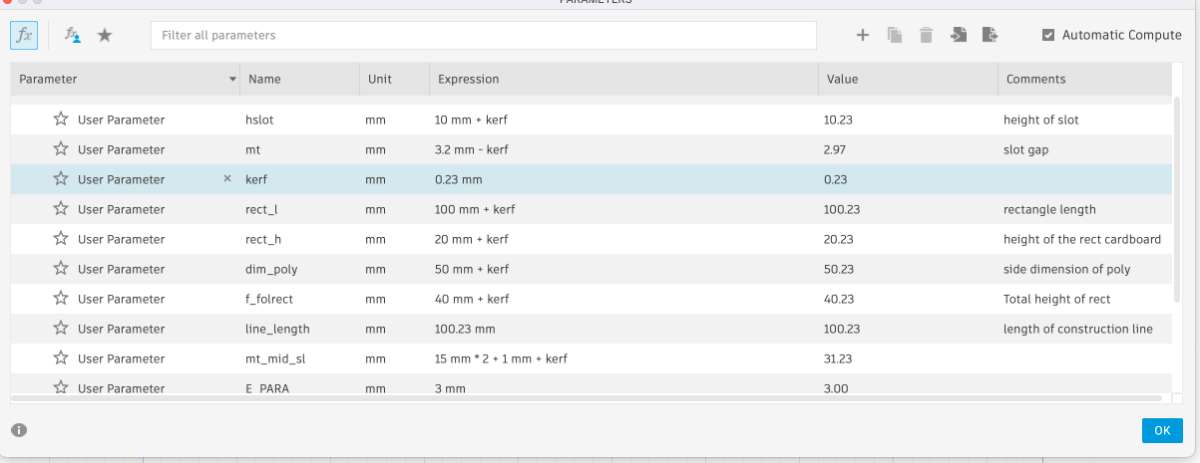
Apart from that I have added parameters for many other dimensions like groove length, edge length for each shape, etc with the idea that I can change them at a later date without breaking the geometry every time. I then project the faces to a new sketch that we then export as a DXF file.
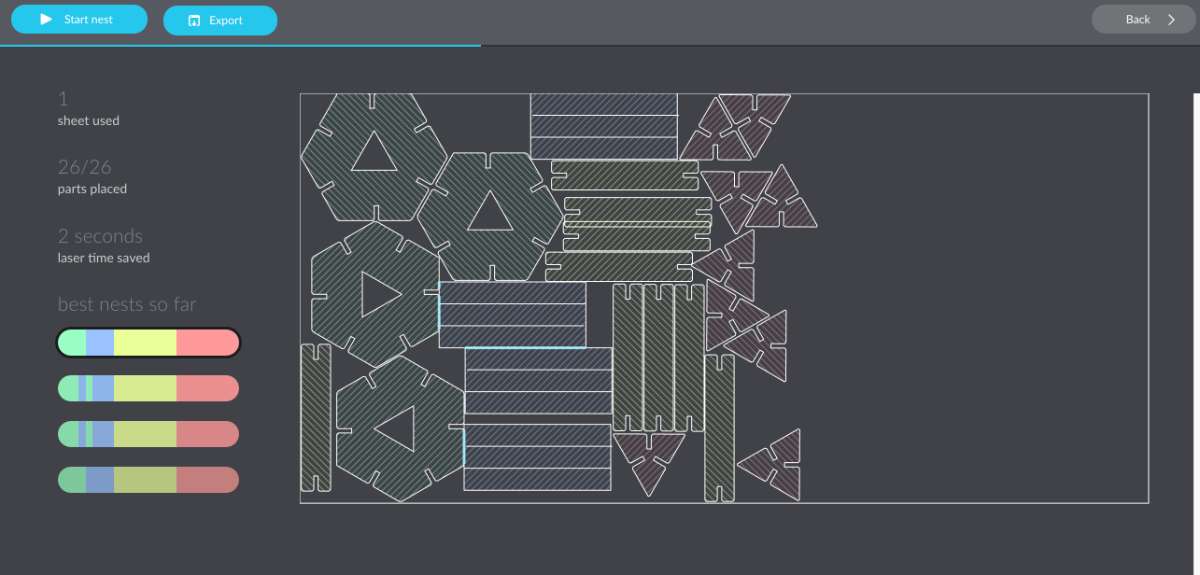
Then i alligned it using Deepnest.
Note for beginners, DeepNest’s default unit settings were configured in pixels rather than millimeters (mm). I was initially unaware of this. Although I changed the main unit setting to pixels (as it appeared by default), The Nesting Configuration was still set to points (pt) instead of millimeters (mm).
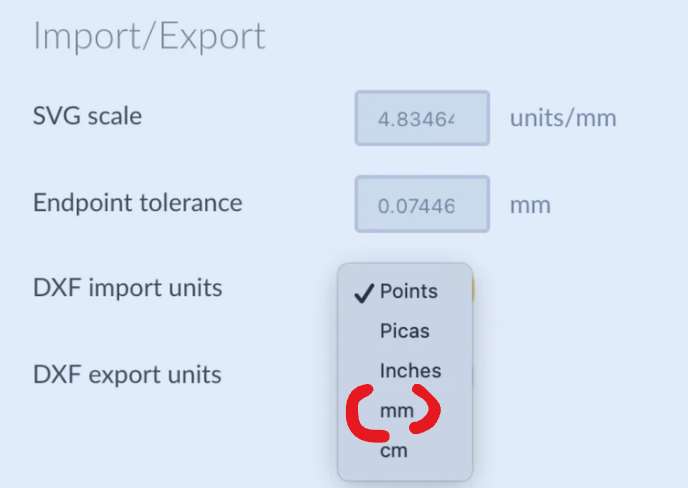
I had not notice that.
As a result:
- The scaling was incorrect.
- All cutouts were approximately half the intended size.
- The physical output did not match the original design dimensions from Fusion 360.
- This caused significant confusion at first, as I had carefully verified my measurements in the design stage.
After doing necessary adjustments, the output came out as i expected.
Laser Cutting
For laser cutting we used Trotec Speedy 100 it a professional-grade, entry-level laser engraving and cutting machine designed for growing businesses, e ducational institutions, and industrial part marking.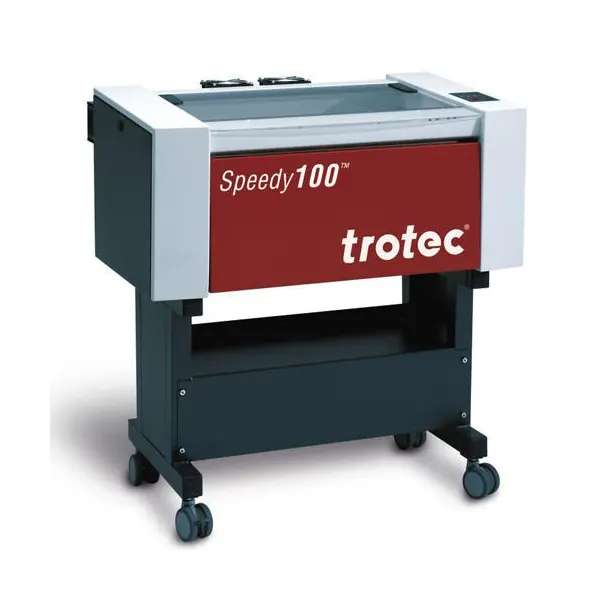
Different cardboard sheets can have differences in thickness and very small differences in kerf, so we always make a test cut and test the joints once before making multiple copies. It also helps us find flaws in our design without wasting material. We figured out parameters through the group assignment.
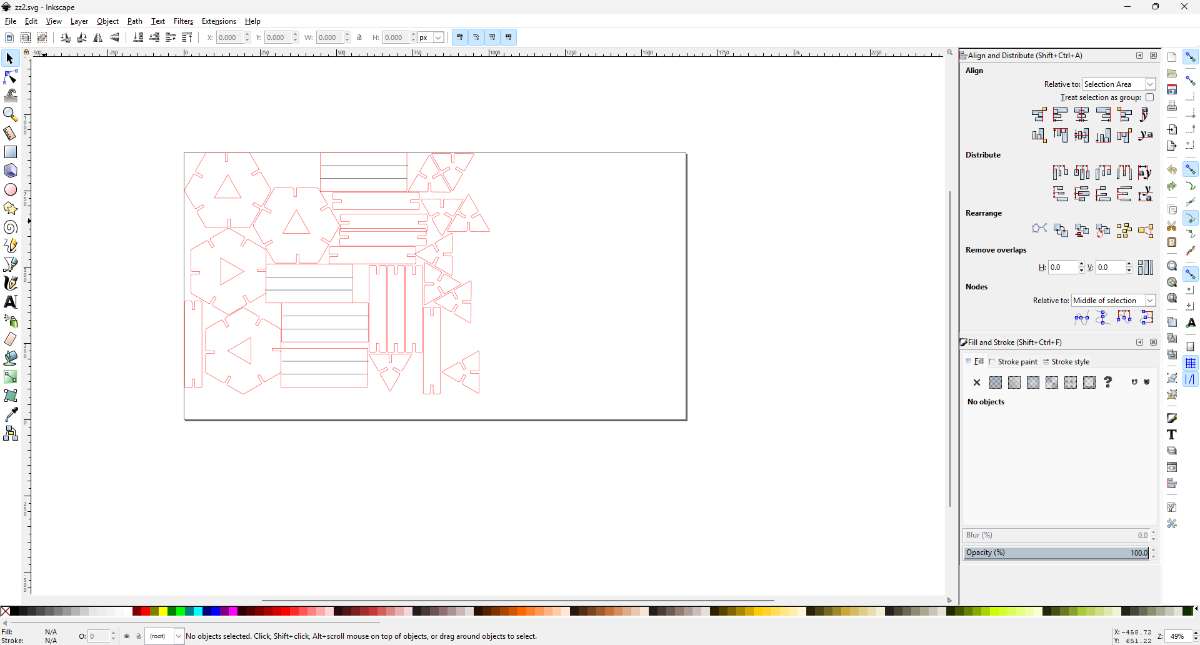
First open the svg file exported from Deepnest in INKSCAPE, make sure that the measurements are what you had in mind.
Then press Control+P, the print window will open, choose print.
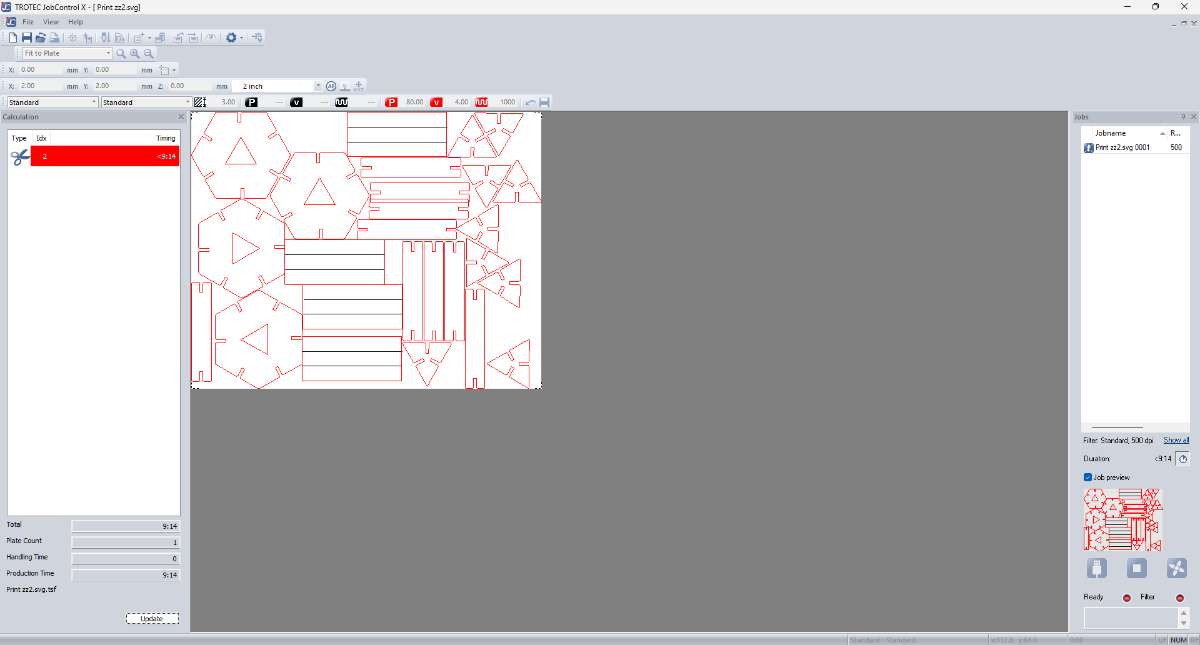
After which you'll be taken to Trotec Jobcontrol X software, where you can align and redefine/set the power/speed according to the colors of your choice, which ultimately defines the type of engraving/cut you want to do. This is what you'll be getting:
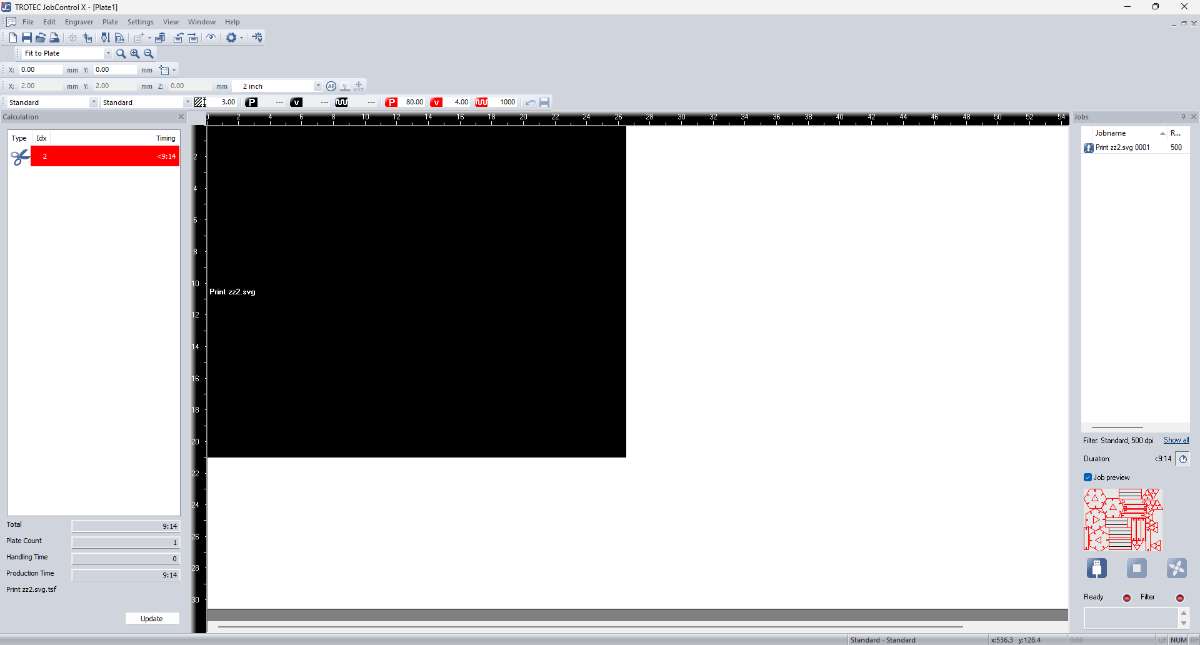
Now, to preview it, you can double click on the black part, then to go back press "esc".
On the end of the top toolbar you can see a button(highlighted in yellow), that will help you adjust the speed/power and also the type of cutting you want to do. The following is how the menu looks like:
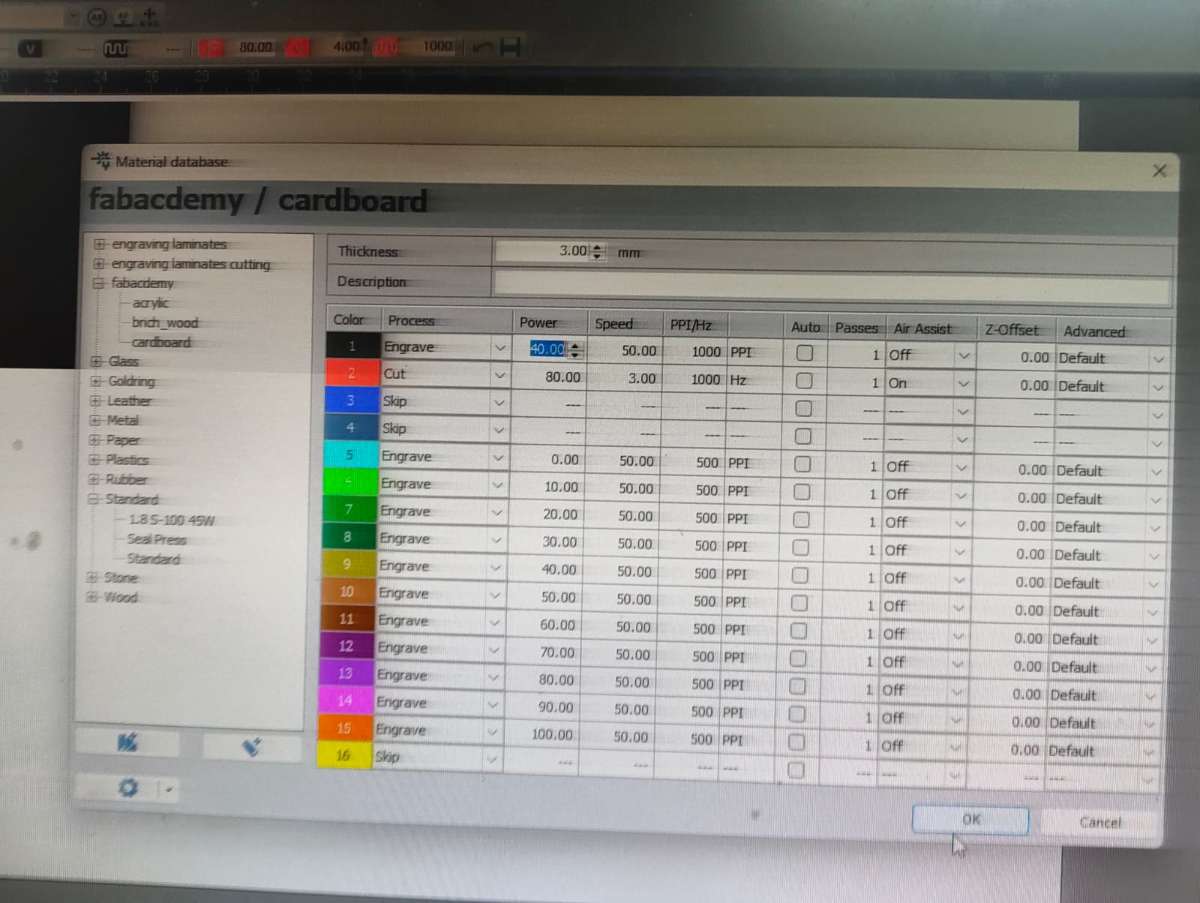
The speed and power settings i have used for the cut are 80% and 3% respectively, and power 40% and speed 50% for engrave, i used egrave for the black lines in the above picture because i just wanted to create a fold on those lines and not cut through the material.
The rest of the configurations do not matter for now, as i am not using those functions.
Close the menu and click on ready to connect to the machine.
.jpg)
Now, you can see a blue cross on the screen that is where your cutter is at(starting point), drag the project to its vertex and make sure it alligns.

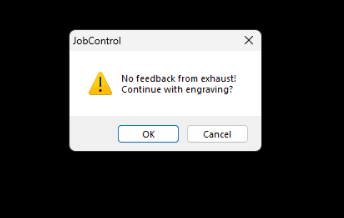
Then you'll get a notification regarding the operation of the exhaust system, check whether its on and the click ''ok'' -> Click ready and the process will begin.
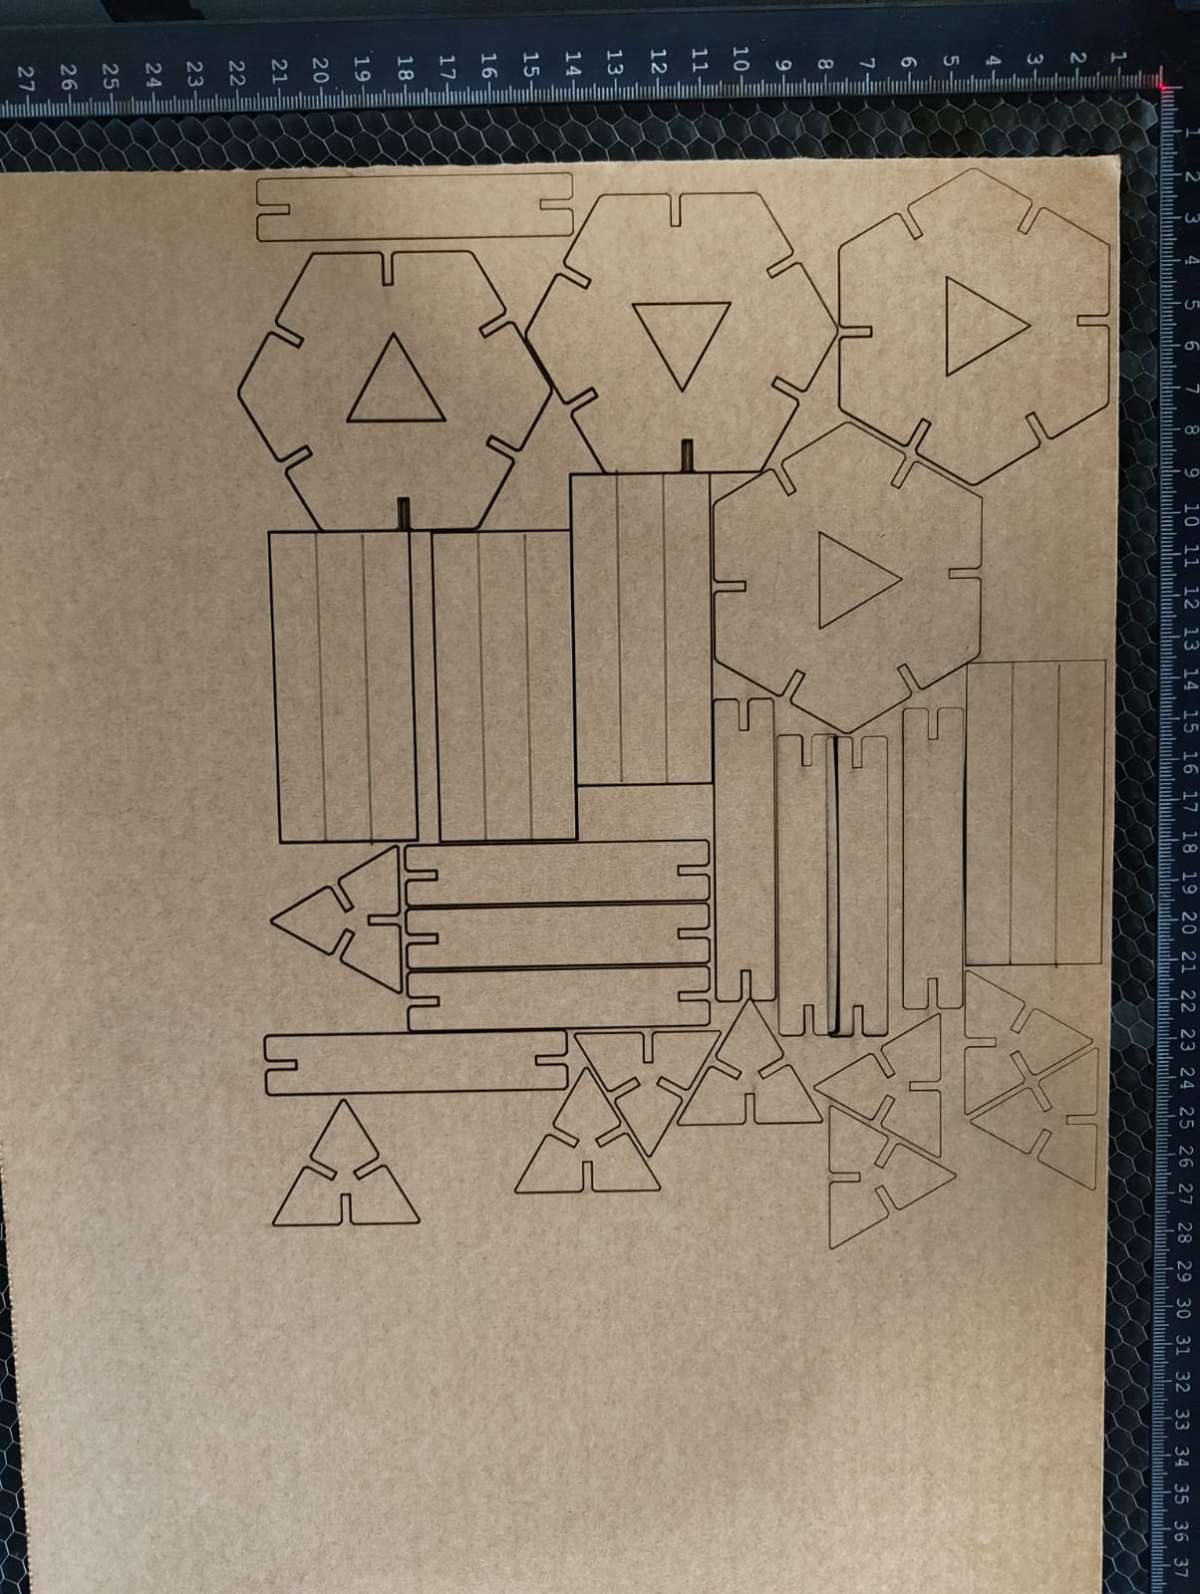
Beta Test:
This is how the test results looked:

After which i made required number of cutouts.
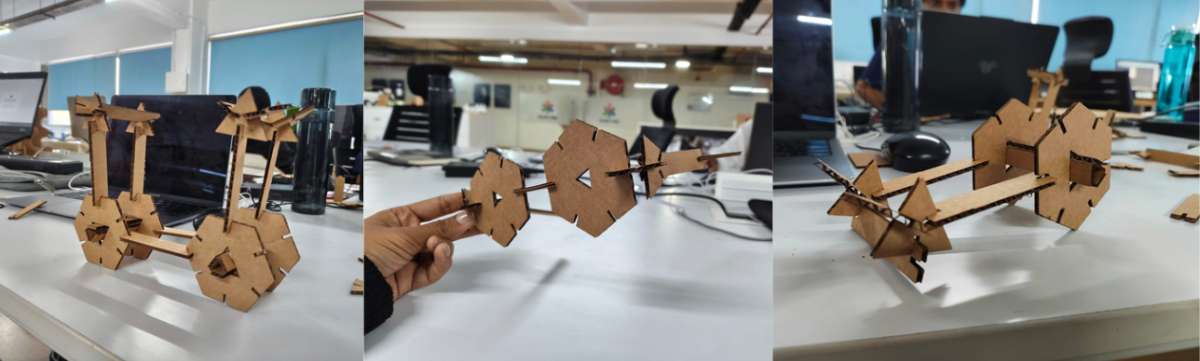
 Assembled models(Hero shots)
Metal Engraving
For Metal engraving we used Xtool, it is an enclosed laser engraver designed to turn digital designs into precise engravings on different materials.Motors move the laser head across the X and Y axes according to the digital design, ensuring accurate and repeatable results.
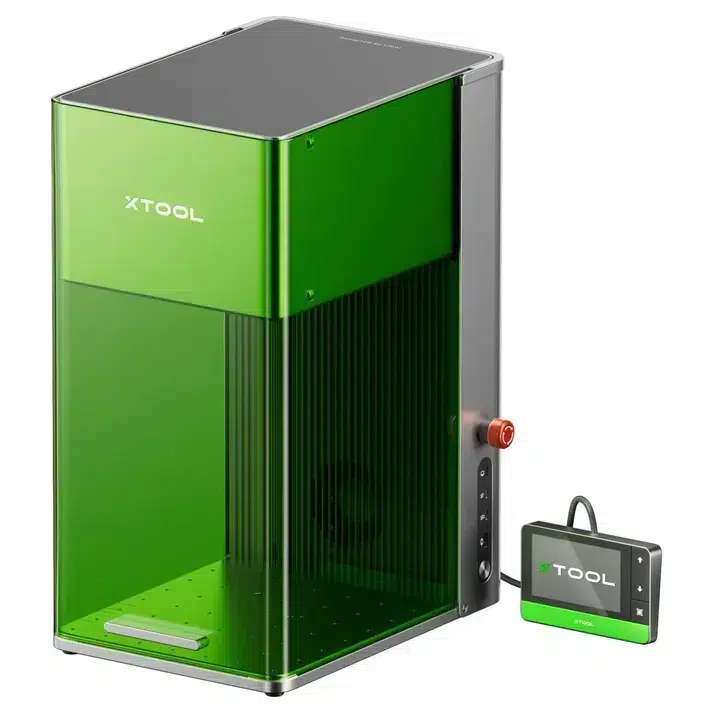
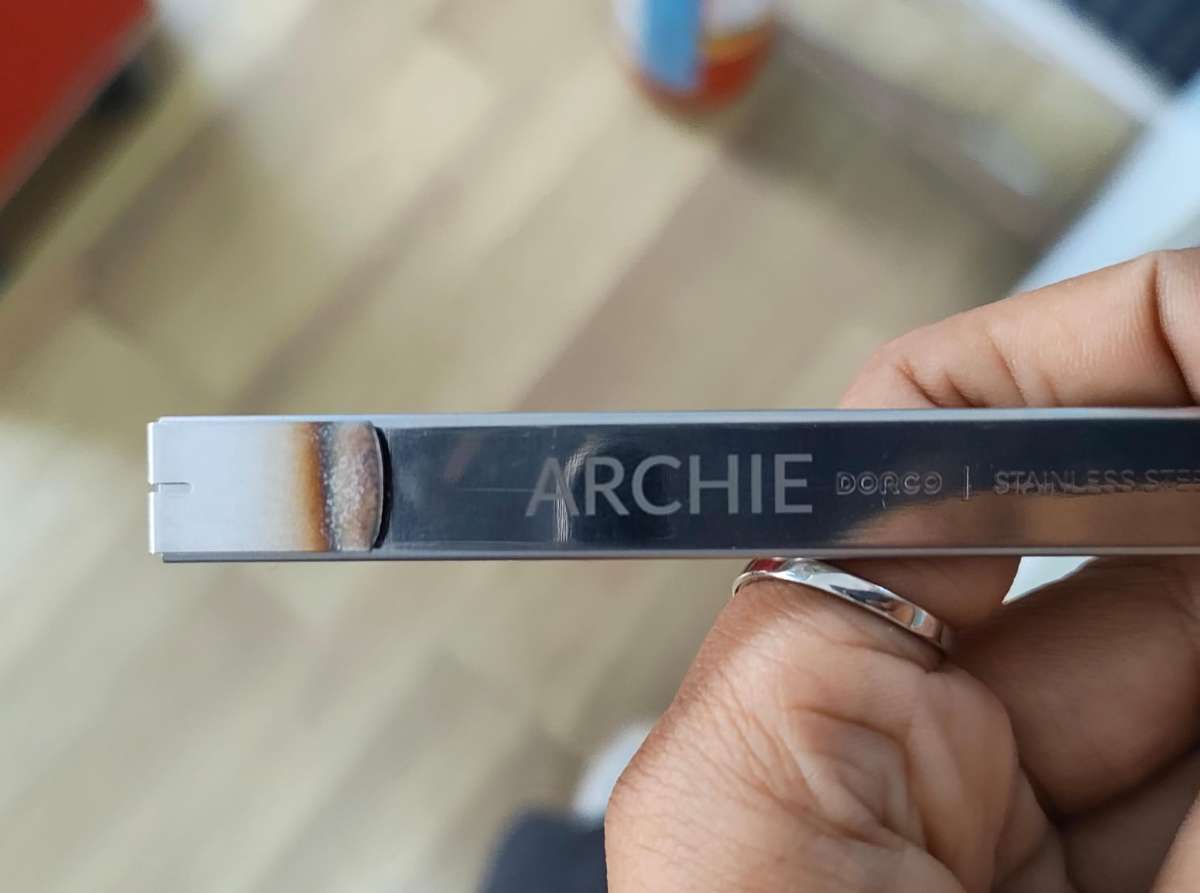
I wanted to engrave my name on the stainless steel knife, it was very easy to use, Xtool has an amazing software which helps you to engrave/cut/score on almost any surface and you can edit on the software itself.
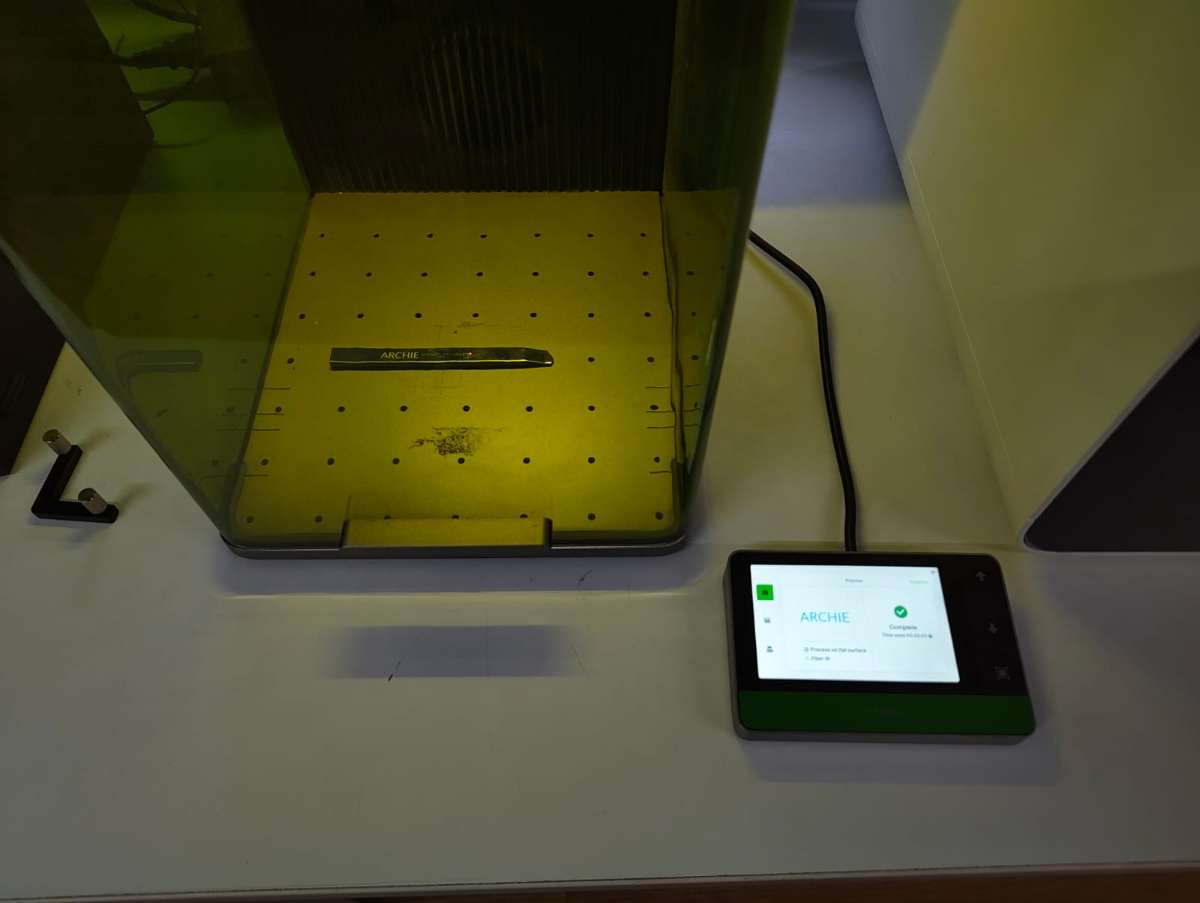
I engraved the name "Archita" on the knife.
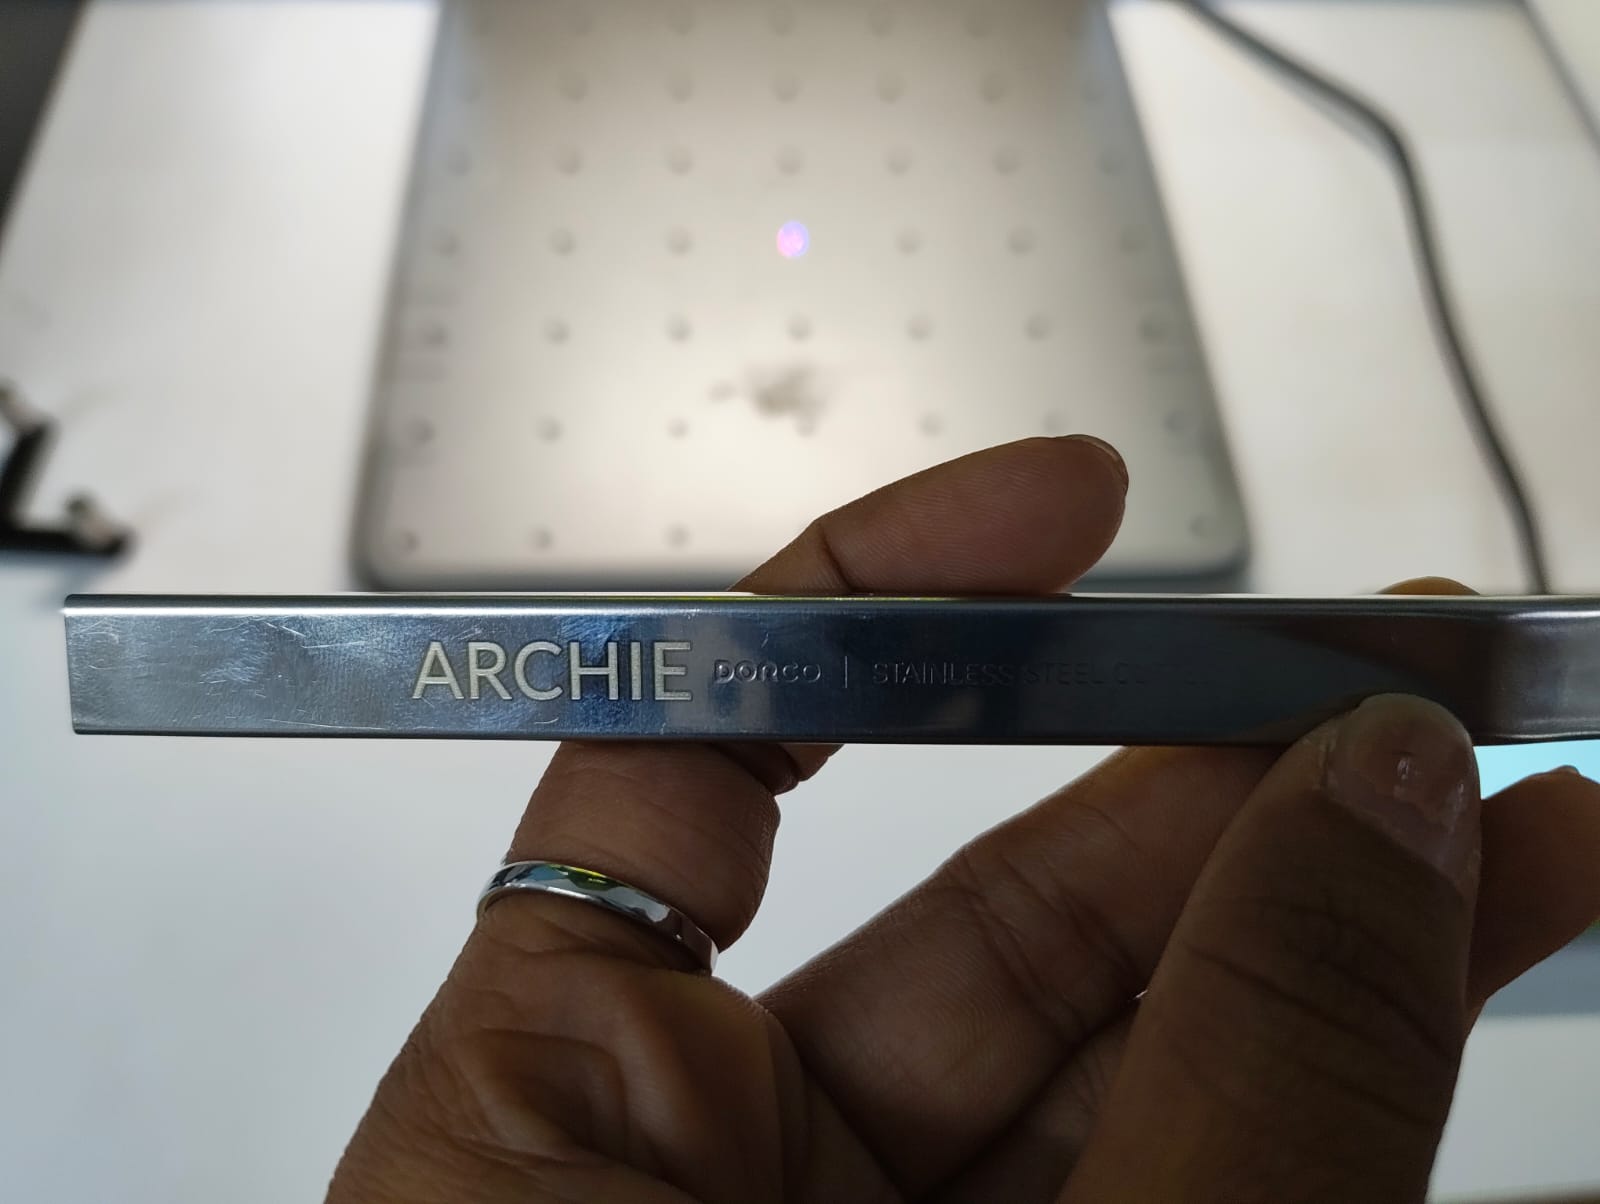
Here, when i engraved the name, i did not consider the length of the knife cap which came on top so i had to cut it out using the xtool.
Final Output: Engrave and Cut
Final Files
Design filesLaser cut - svg file
Vinyl svg file