Week 16 WILD CARD WEEK
Objectives
Design and produce something with a digital process (incorporating computer-aided design and manufacturing) not covered in another assignment, documenting the requirements that your assignment meets, and including everything necessary to reproduce it.
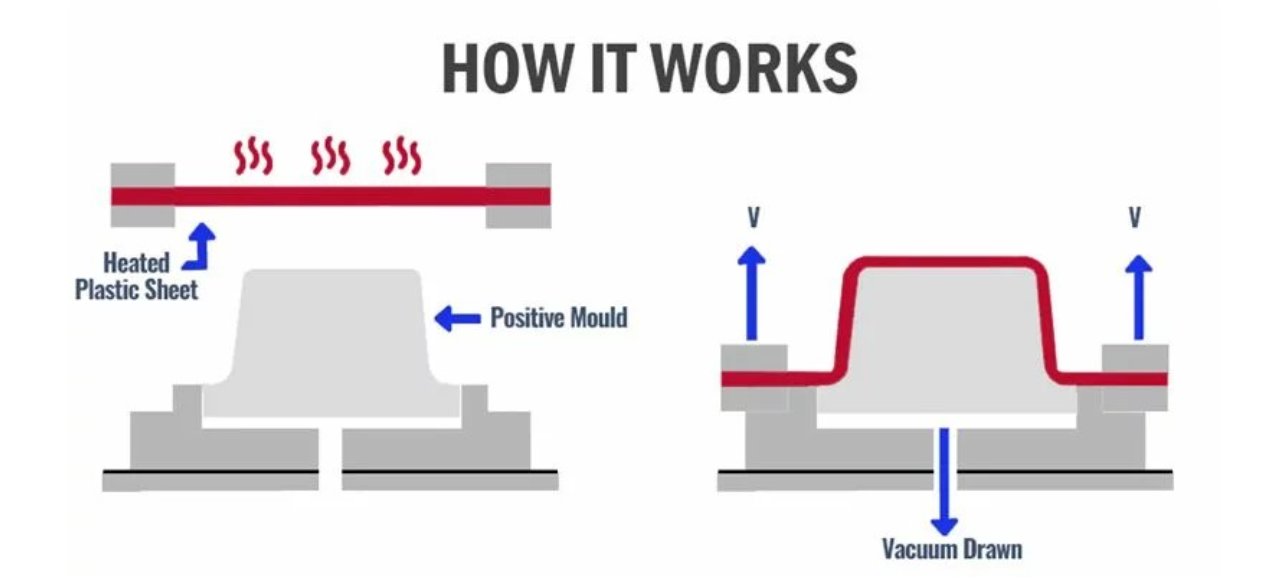
Vacuum Forming
Vacuum forming is a manufacturing technique used to shape plastic sheets. In this process, a plastic sheet is heated until it becomes flexible, then a vacuum is applied to pull the sheet tightly over a mold. As the plastic cools, it hardens and takes on the shape of the mold. The formed plastic part is then trimmed to remove excess material and achieve the final product dimensions.
Source: Vacuum Forming Guide
Design Rules
-
Material Flow and Webbing
Sharp corners are to be avoided as this will hinder the flow of material and maximise the chance of webbing. -
Draft/Taper
These terms relate to the amount of angle on a vertical face to allow the parts to be removed from the tool. -
Draw Ratio / Required Material Thickness
Draw ratio refers to the height of the part to be formed compared to the footprint of the part. -
Pockets and Ribs
Any pockets or space between ribs must conform to a ratio. Depth of pocket or space between ribs cannot be greater than its width and preferably 75% of the pocket depth. -
Designing for Undercuts
Undercuts are design features in which a portion of the mold protrudes into the plastic, preventing its direct removal from the mold. -
Utilizing Radii and Chamfers
One of the most critical aspects is to avoid manufacturing parts with sharp corners. These angles can lead to uneven material distribution, increasing a part's vulnerability and reducing its overall strength. -
Staying Within Tolerances
Measurement tolerances directly affect a part's functionality, performance, and its suitability for its intended application.
Rule 1: Remove all undercuts
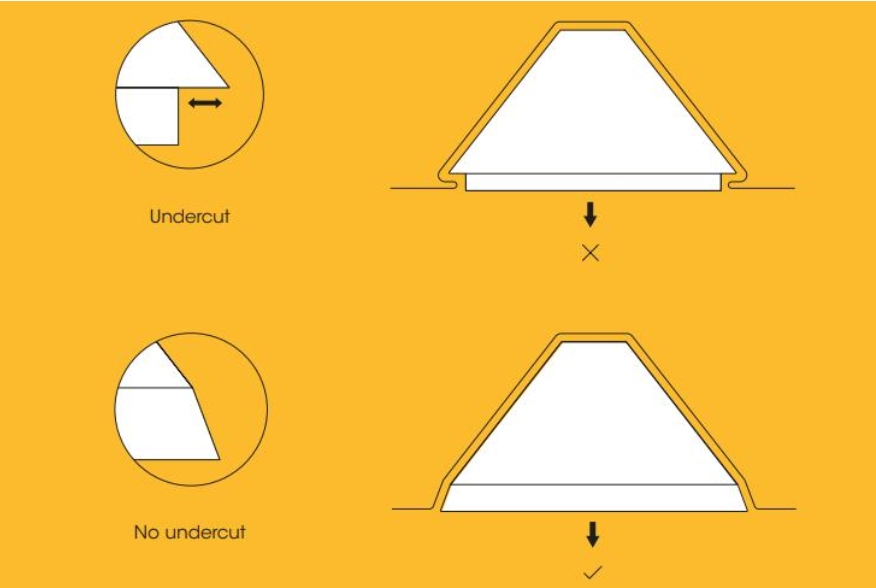
Undercuts make it difficult to remove templates once they have been formed. Make sure your design doesn't have any ledges or indents that could stop a template from being removed.
Photo credit: Mayku Formbox Manual
Rule 2: Add draft angles to vertical faces
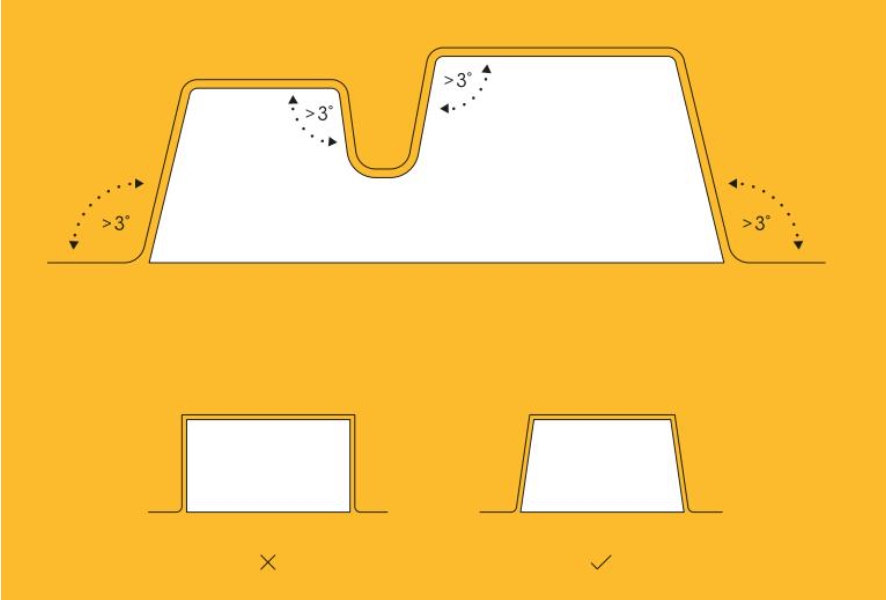
Draft angles help in the smooth removal of the formed part from the mold. Ensure that all vertical faces have a slight angle to facilitate easy demolding.
Photo credit: Mayku Formbox Manual
Rule 3: Avoid sharp corners
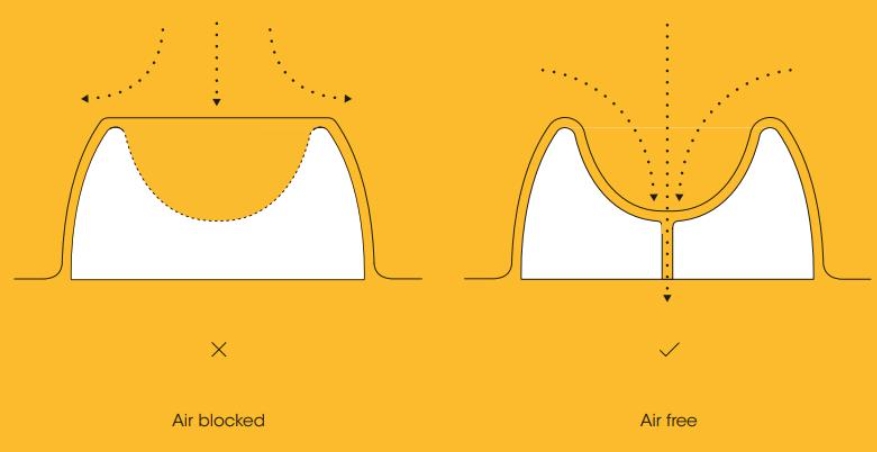
Sharp corners can lead to uneven material distribution and reduce the overall strength of the formed part. Use radii and chamfers to create smoother transitions.
Photo credit: Mayku Formbox Manual
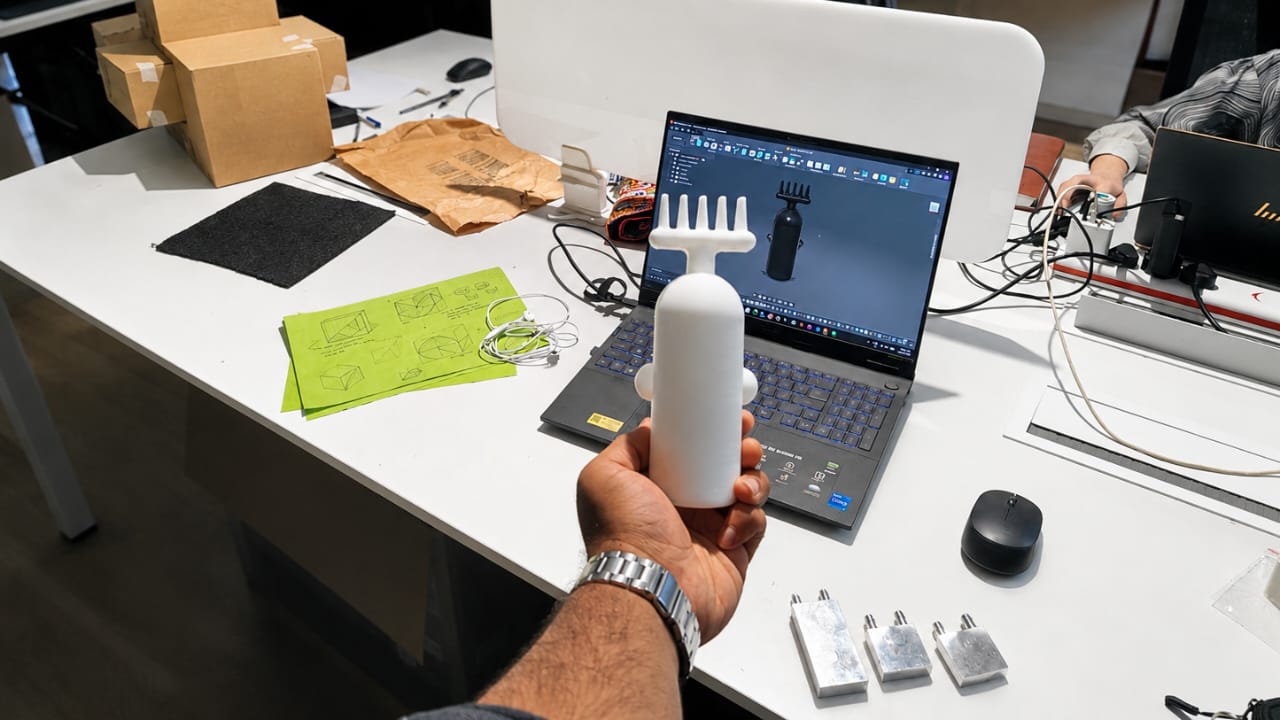
Final Project Packaging – Aura Smart Hair Oil Dispenser
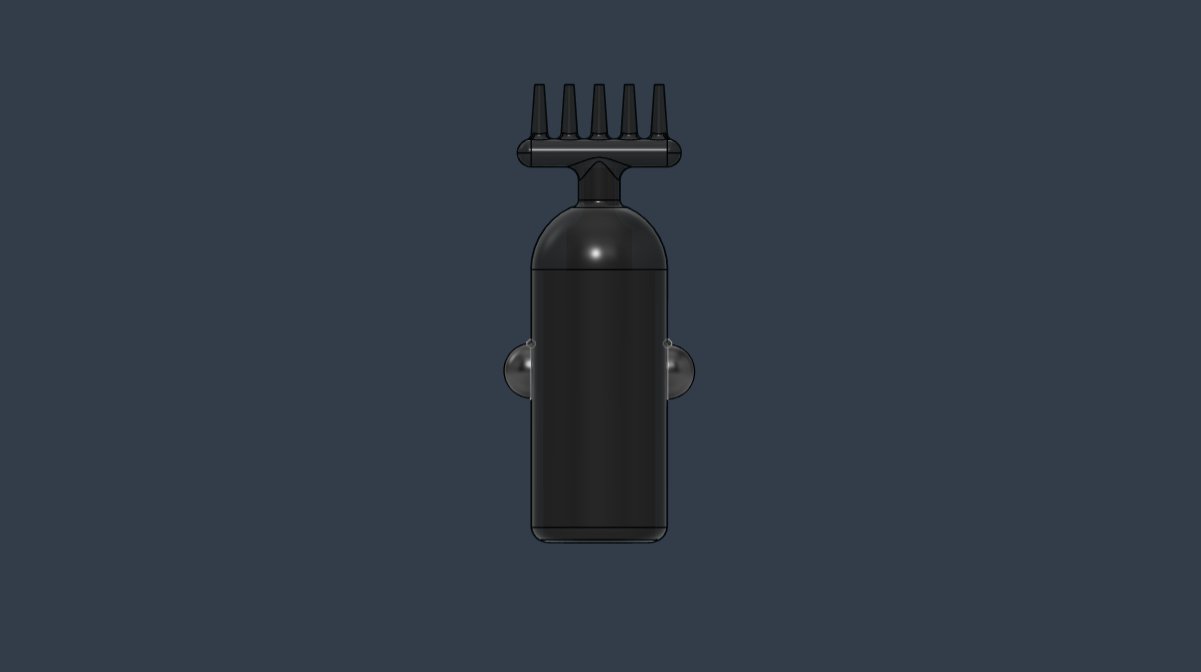
I began by importing the finalized device model into Fusion 360. The model was then split to isolate the required section for packaging design.
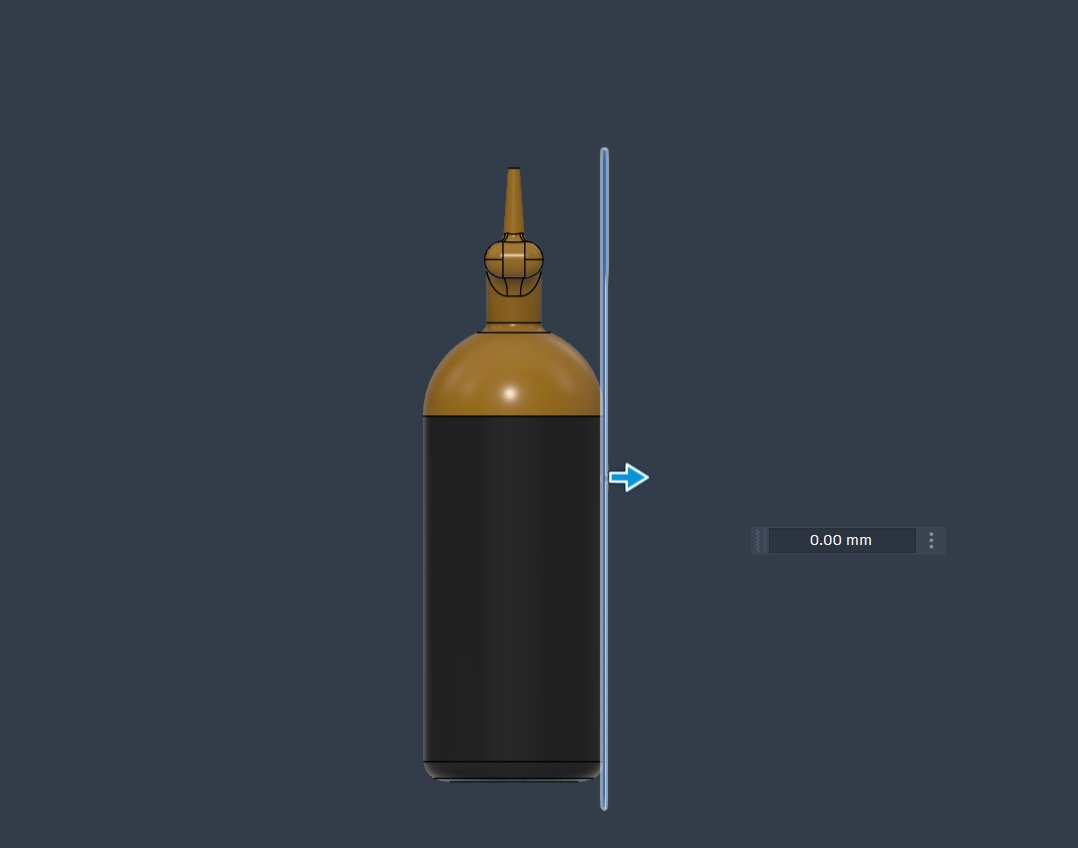
I projected the surface, extruded it by 10 mm, and applied a 2° taper angle.
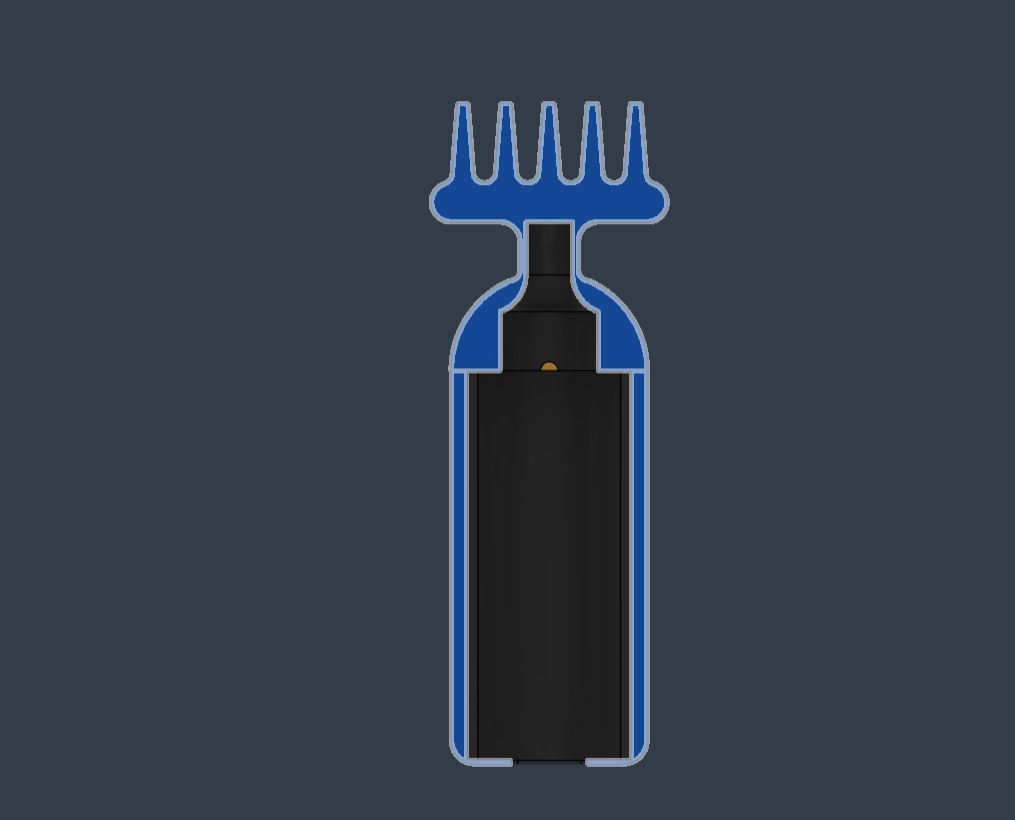
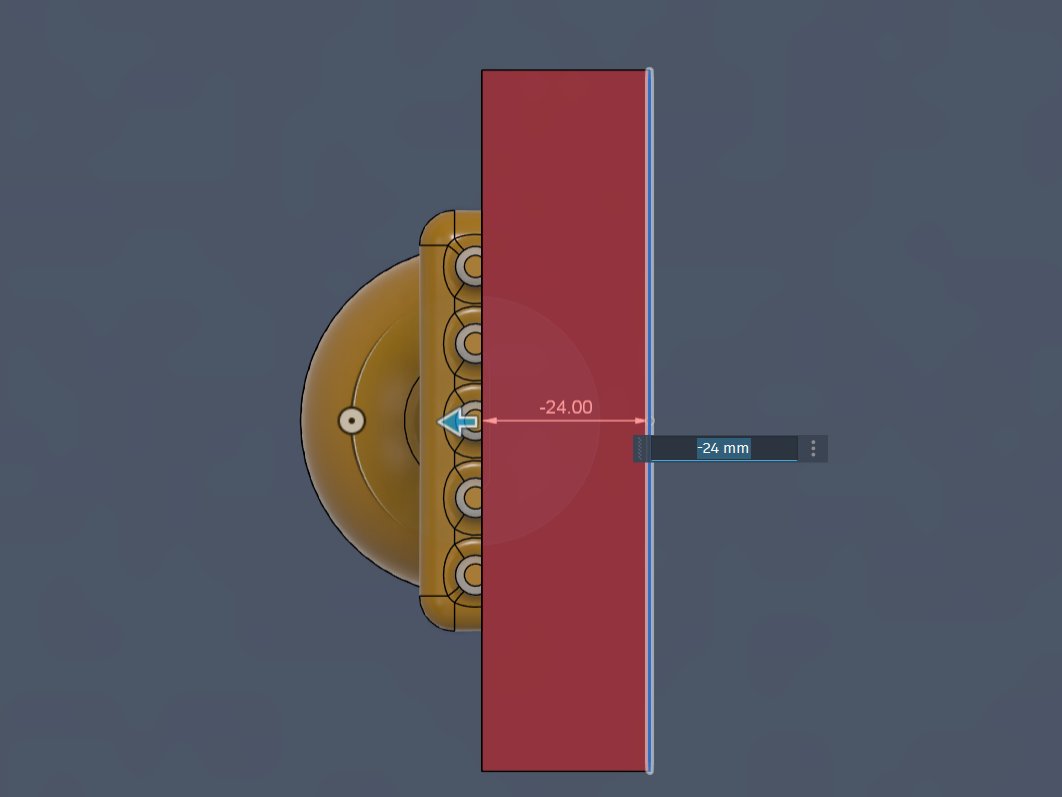
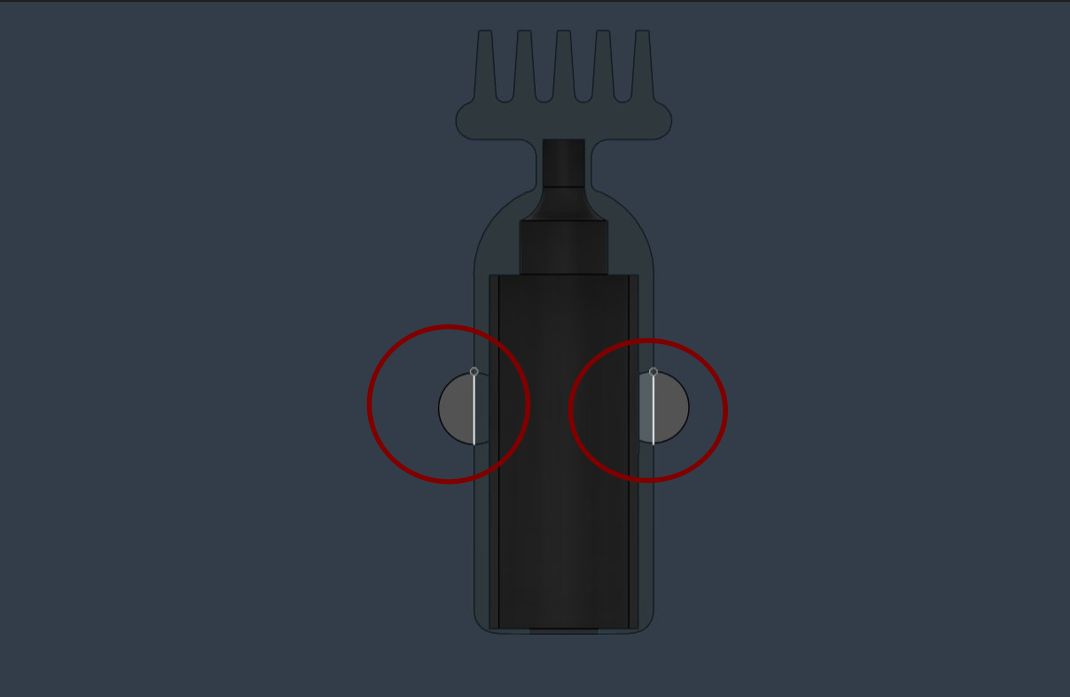
To make it easier to Take the device from the Form, I added a small clearance by creating a spherical feature.
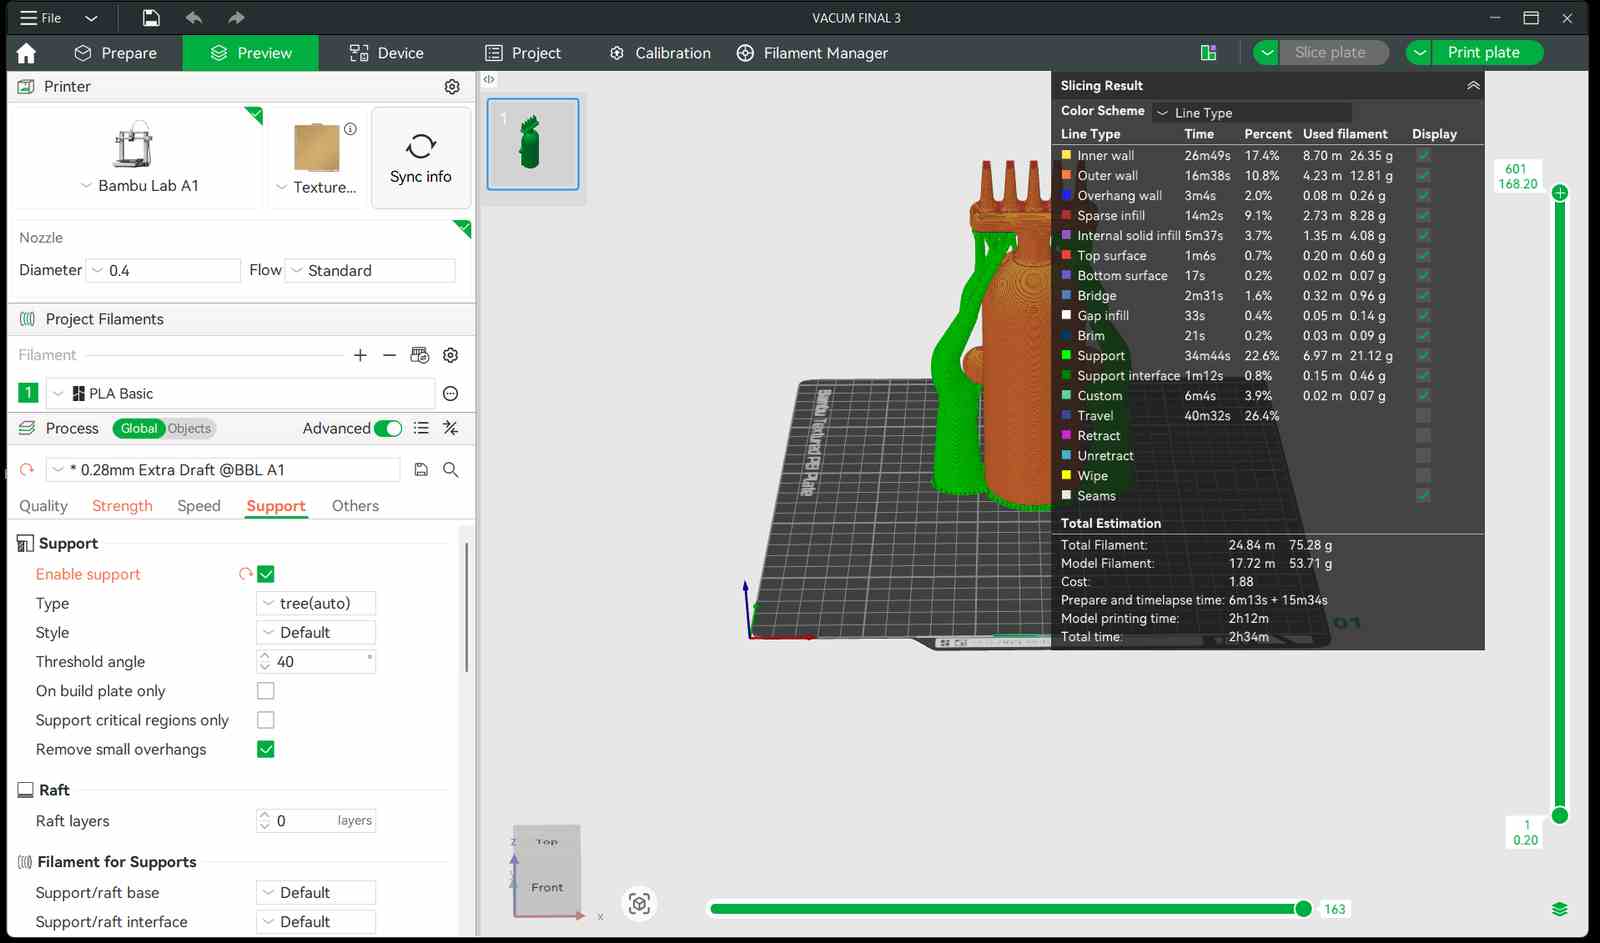
After finalizing the model and reviewing it with Saheen, I exported the file as an STL and opened it in Bambu Studio. I set the infill to 10% before slicing.

I enabled tree supports to provide better support during printing.
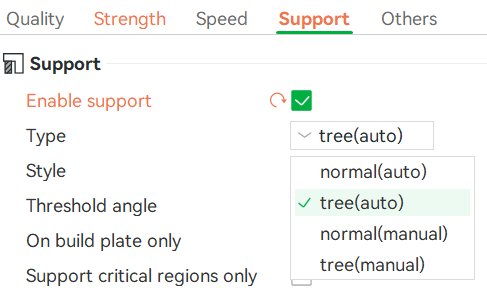
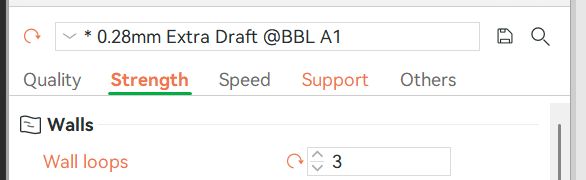
I set the wall loops to 3 to increase strength and prevent deformation during vacuum forming.
I then sliced the model, applied an additional 0.28 draft offset, and sent the file for printing.
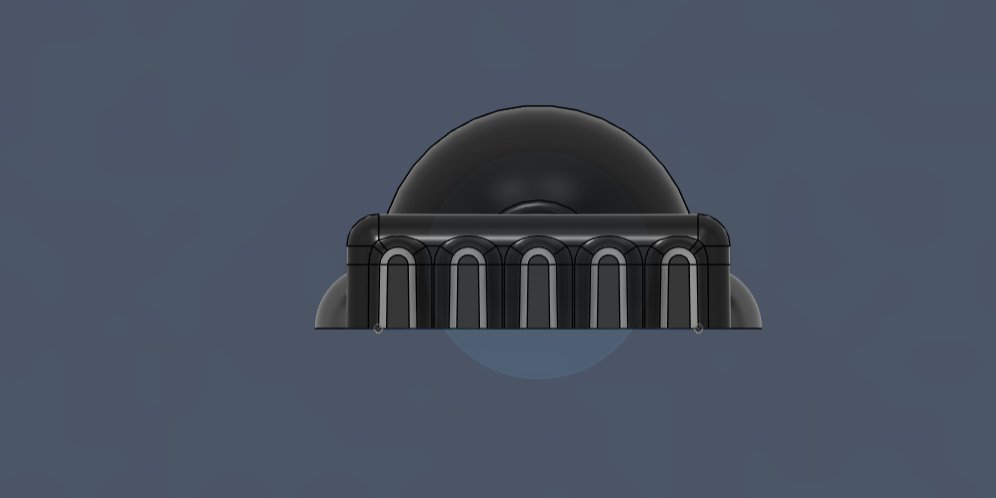
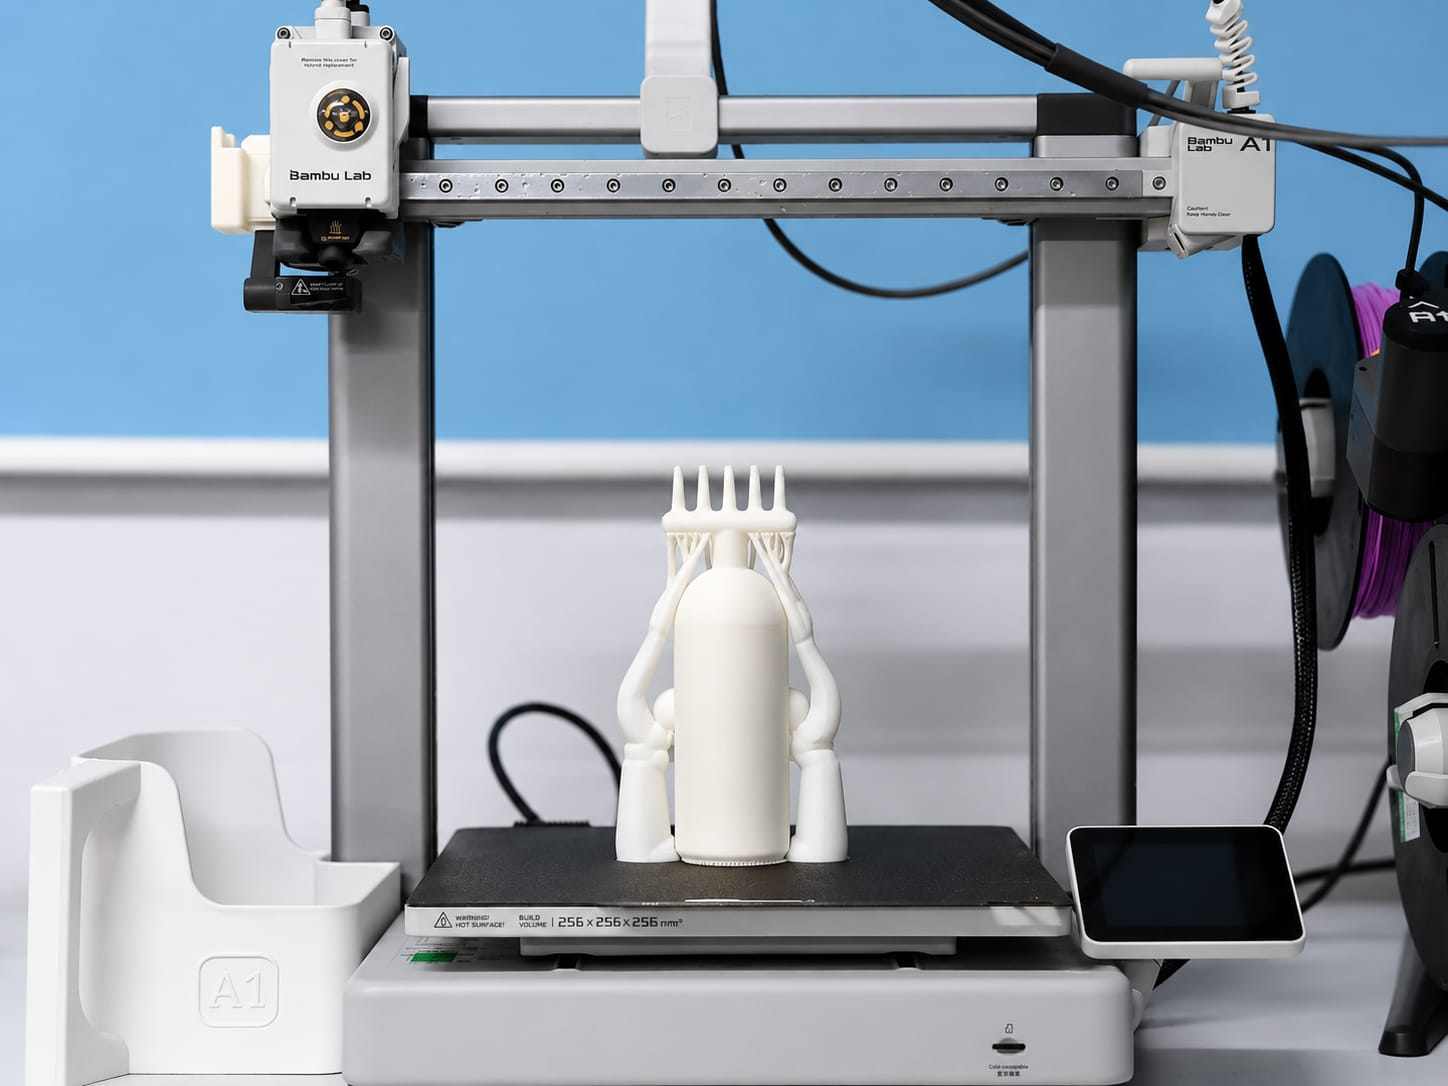
This is the final product after 3D printing.
Post-Processing
Using nose pliers, I removed all the tree supports from the model.
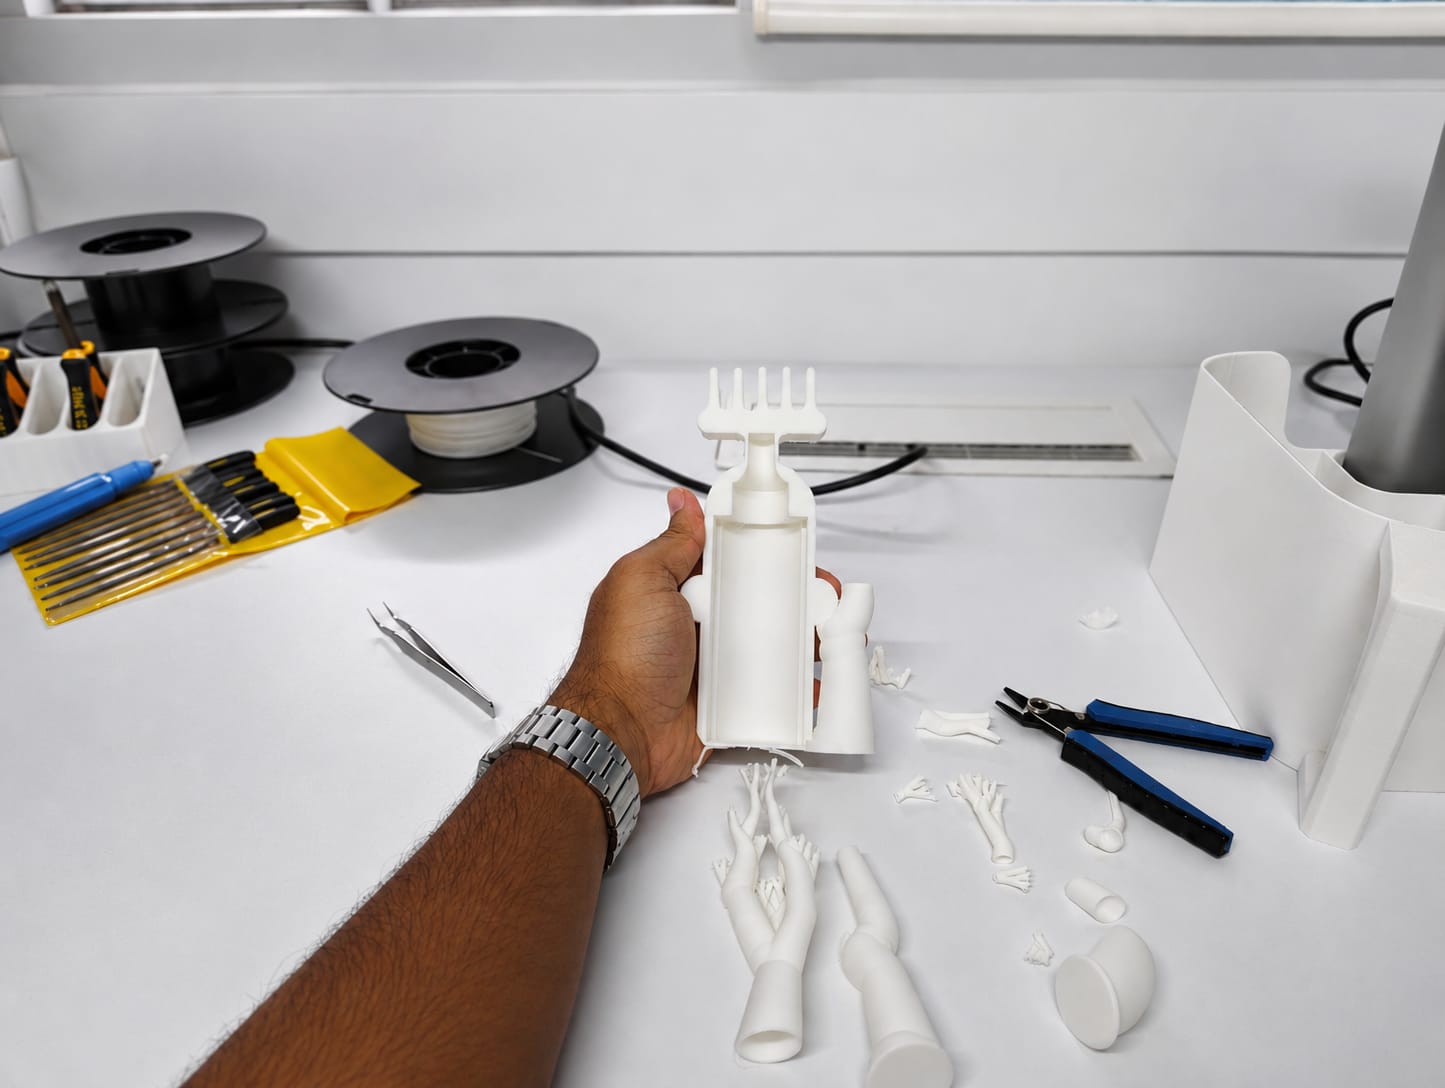
After Post-Processing
VACUUM FORMING
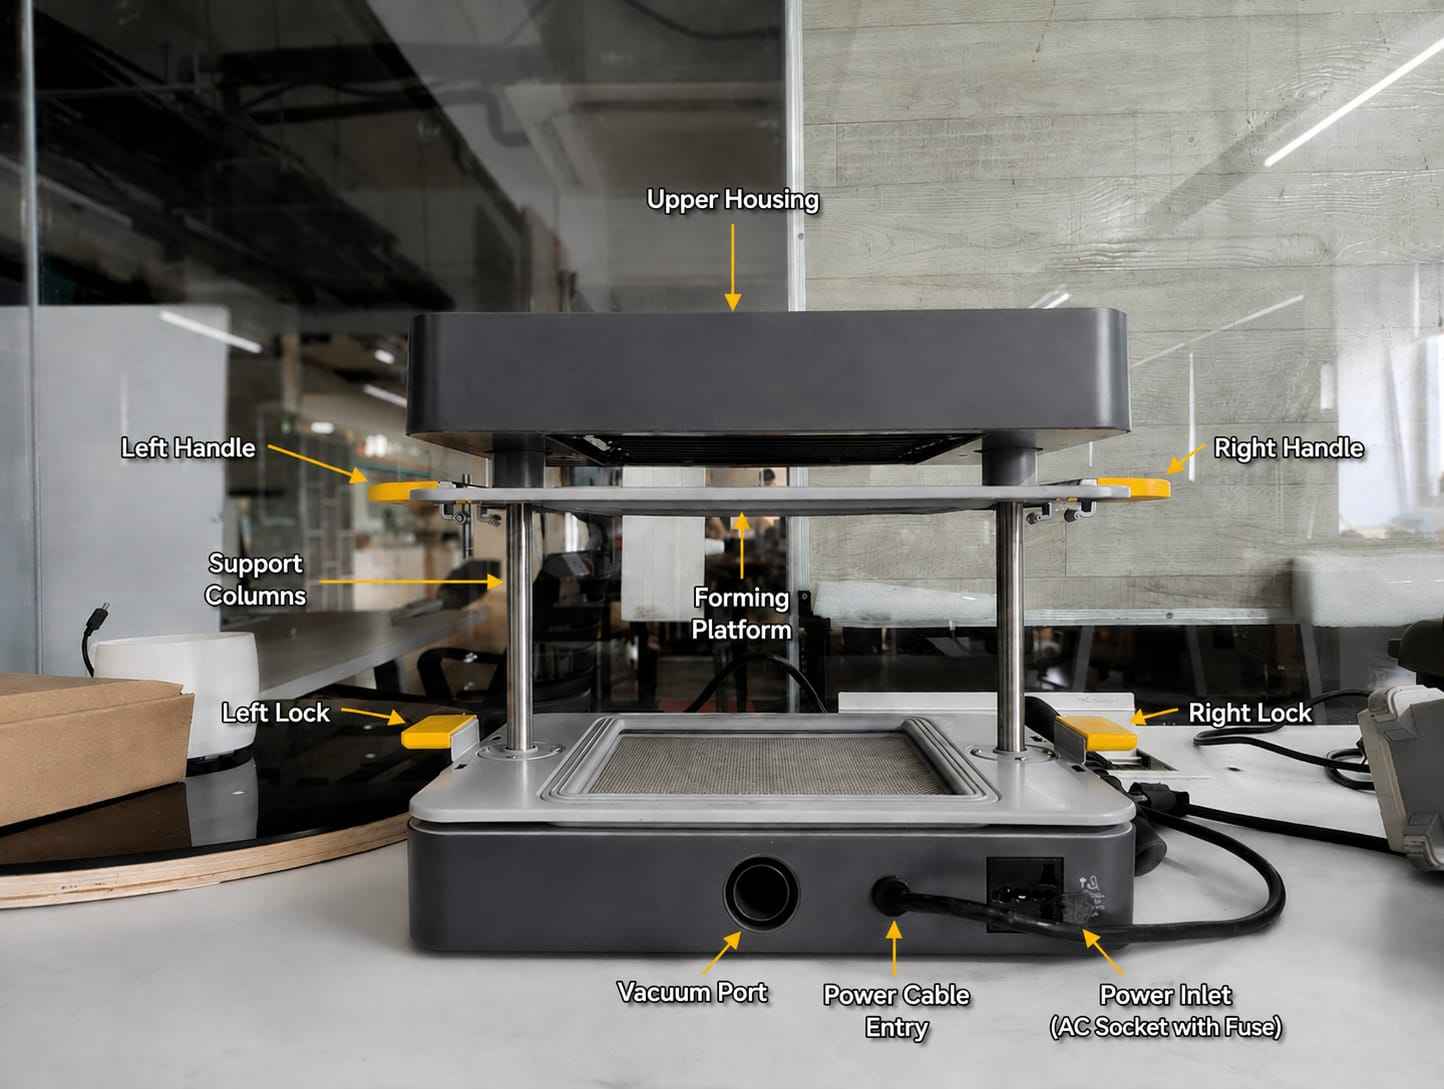
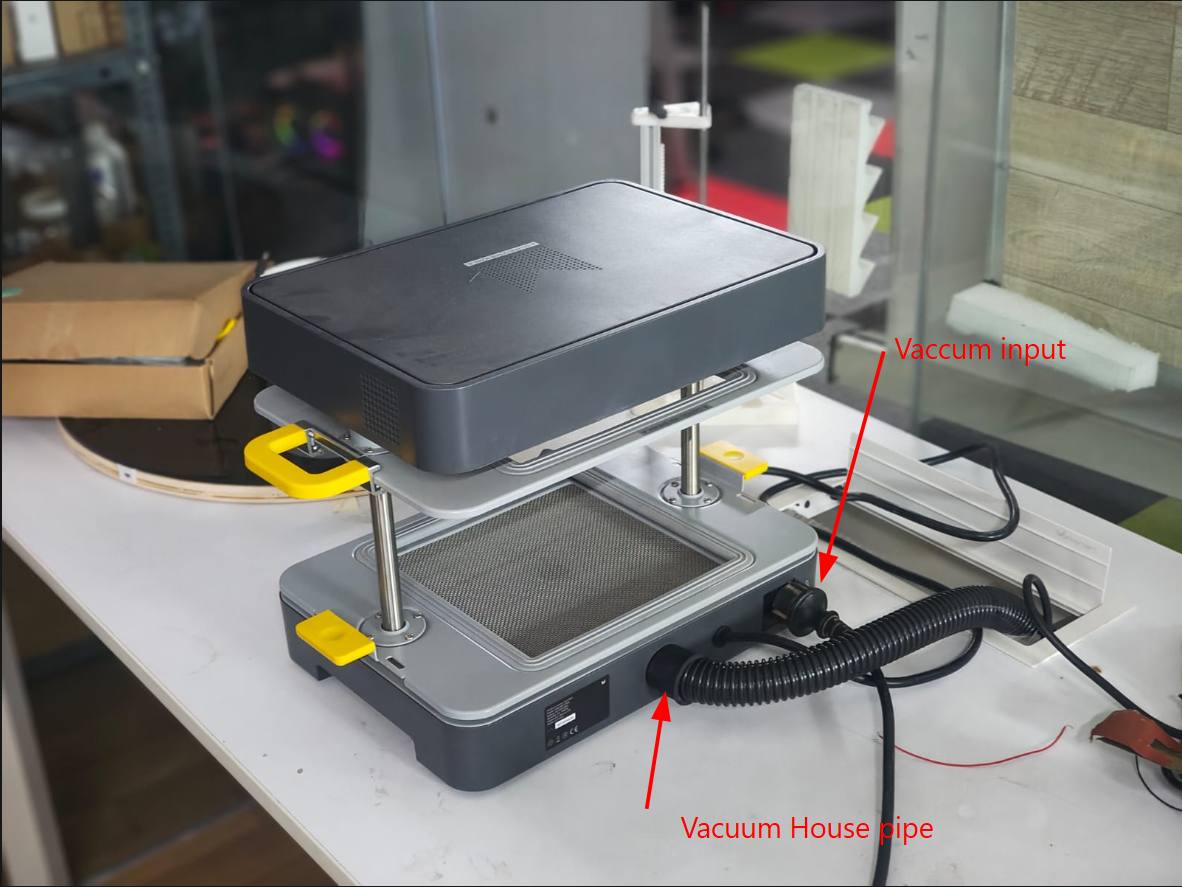
For vacuum forming, I used the Mayku FormBox , a compact vacuum forming machine that allows easy and efficient vacuum forming at home or in a workshop.
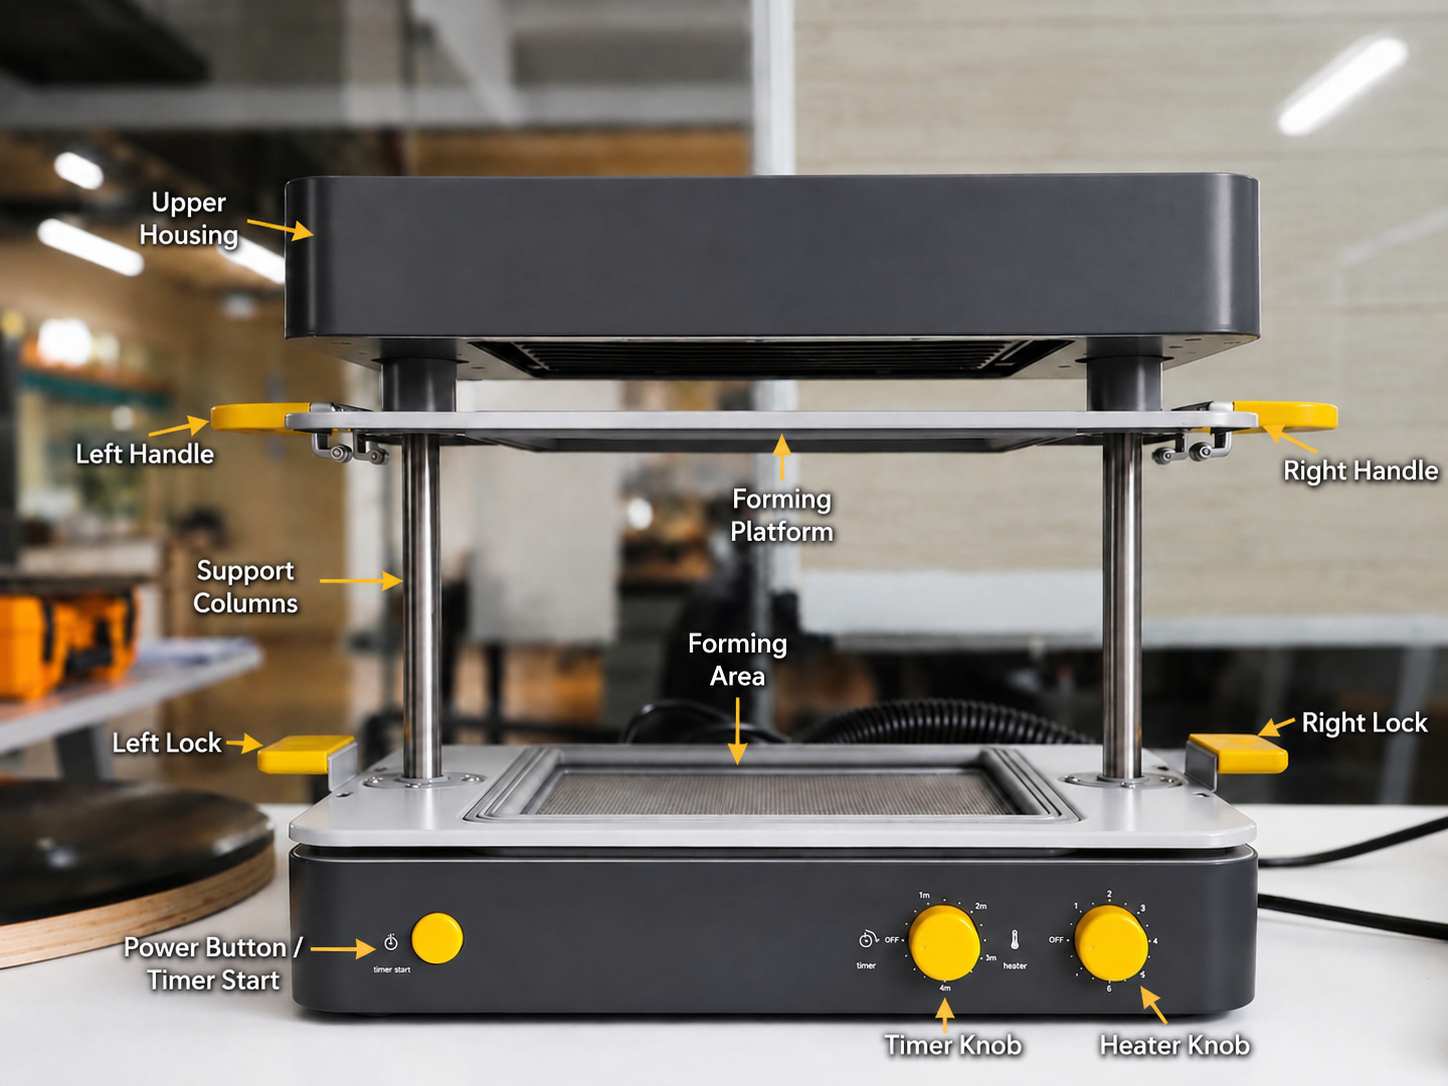
this is the backside of mayku
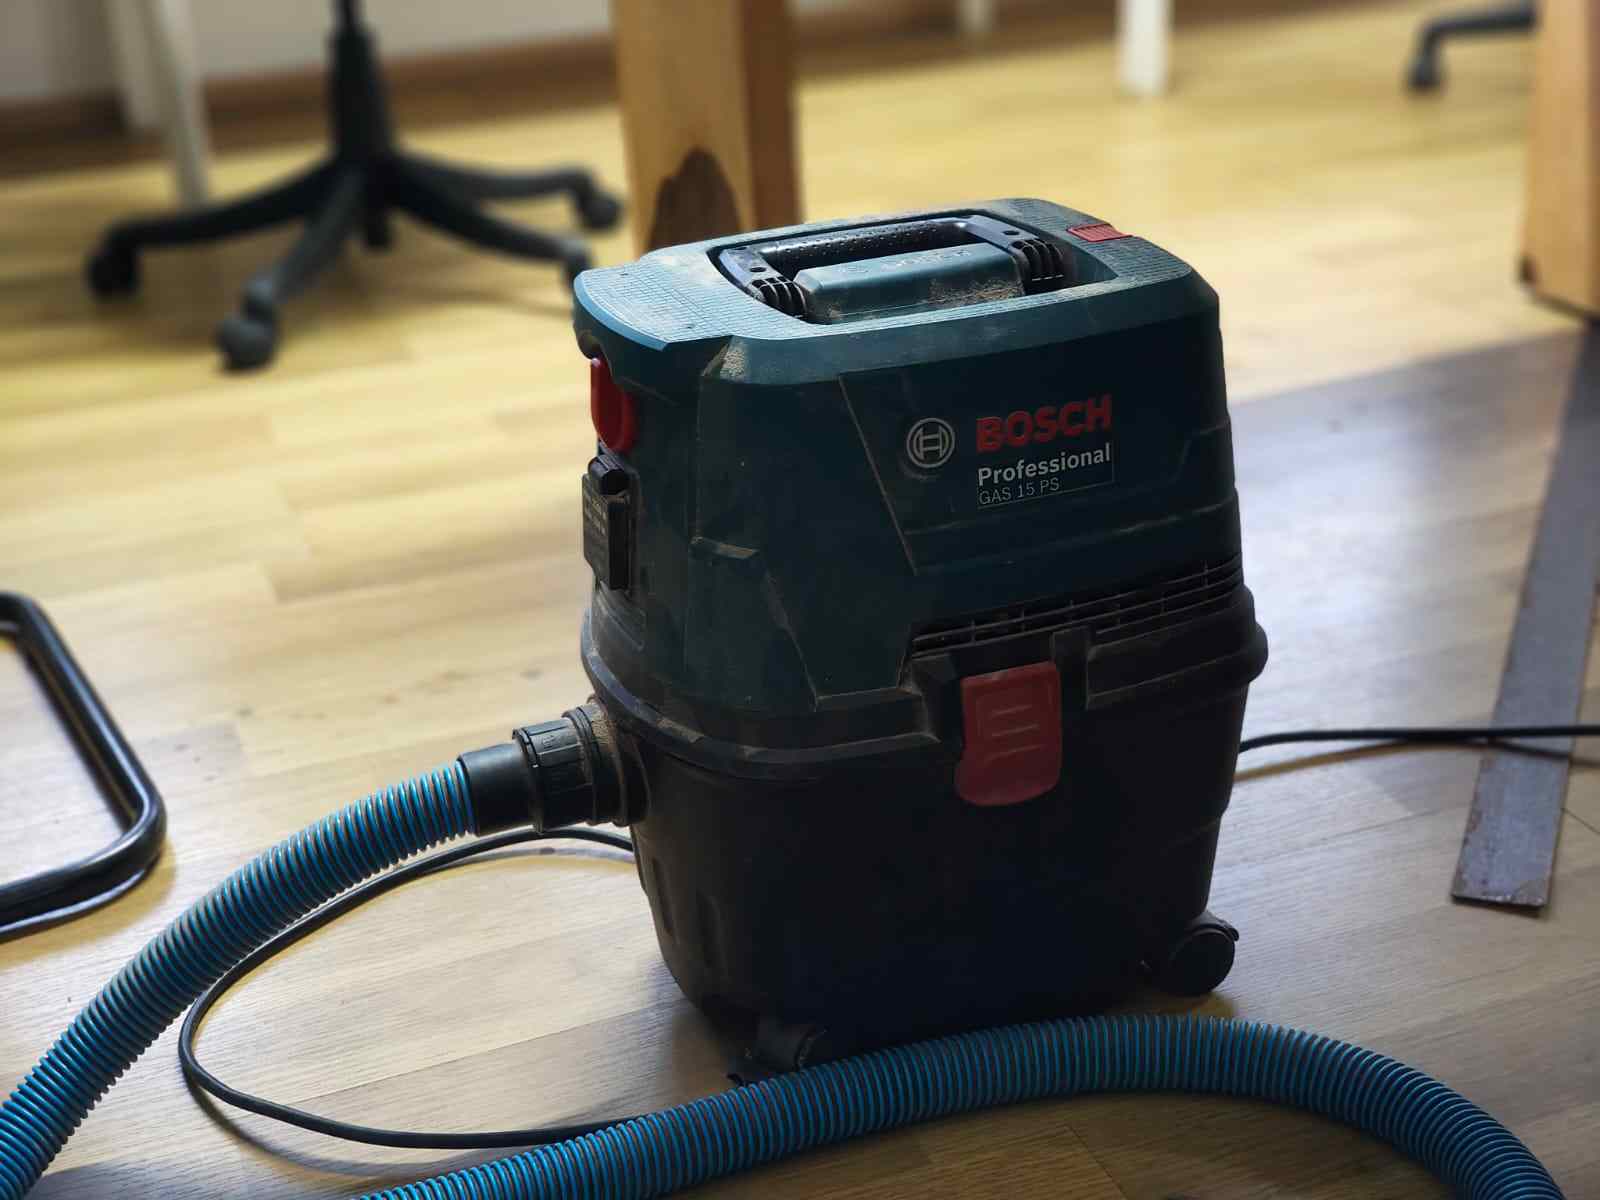
Vacuum Cleaner
For vacuuming I used the
Bosch Professional
vacuum i used here
Initial Setup
- Plug the form box into the main power supply.
- Connect the vacuum cleaner power cable to the back of the form box and switch on the vacuum cleaner.
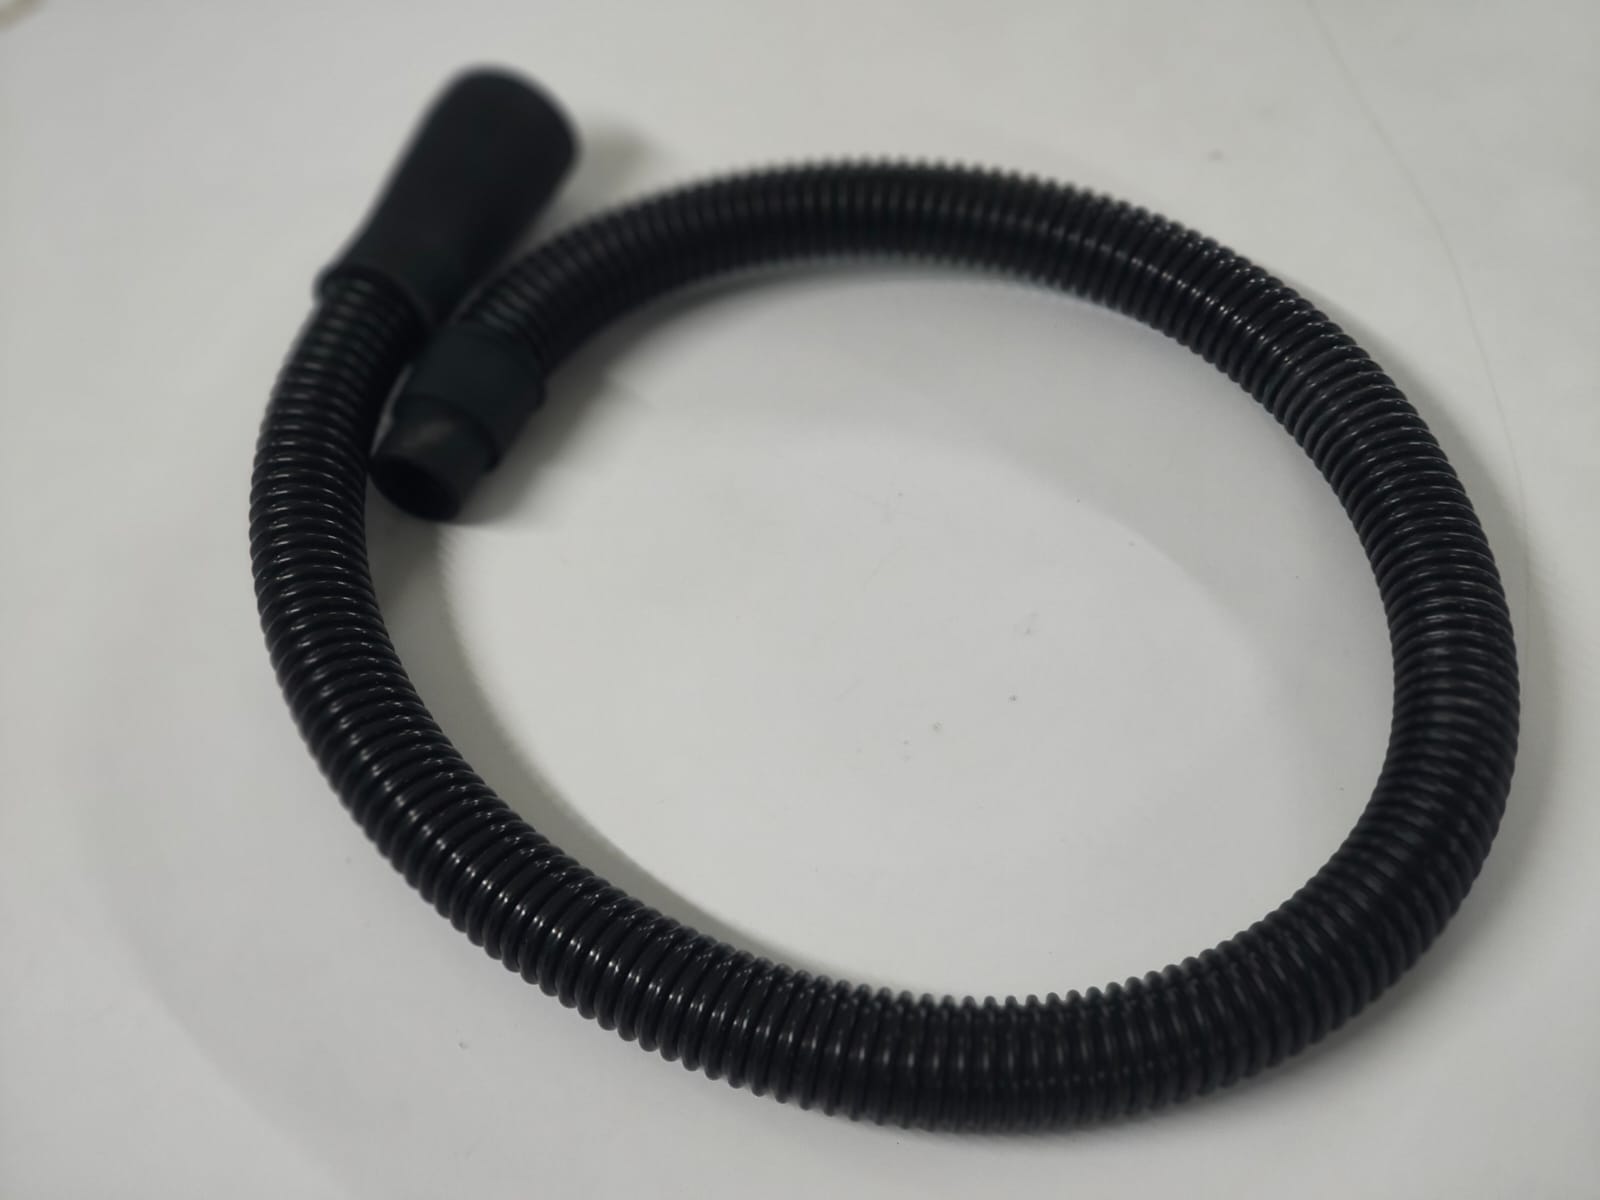
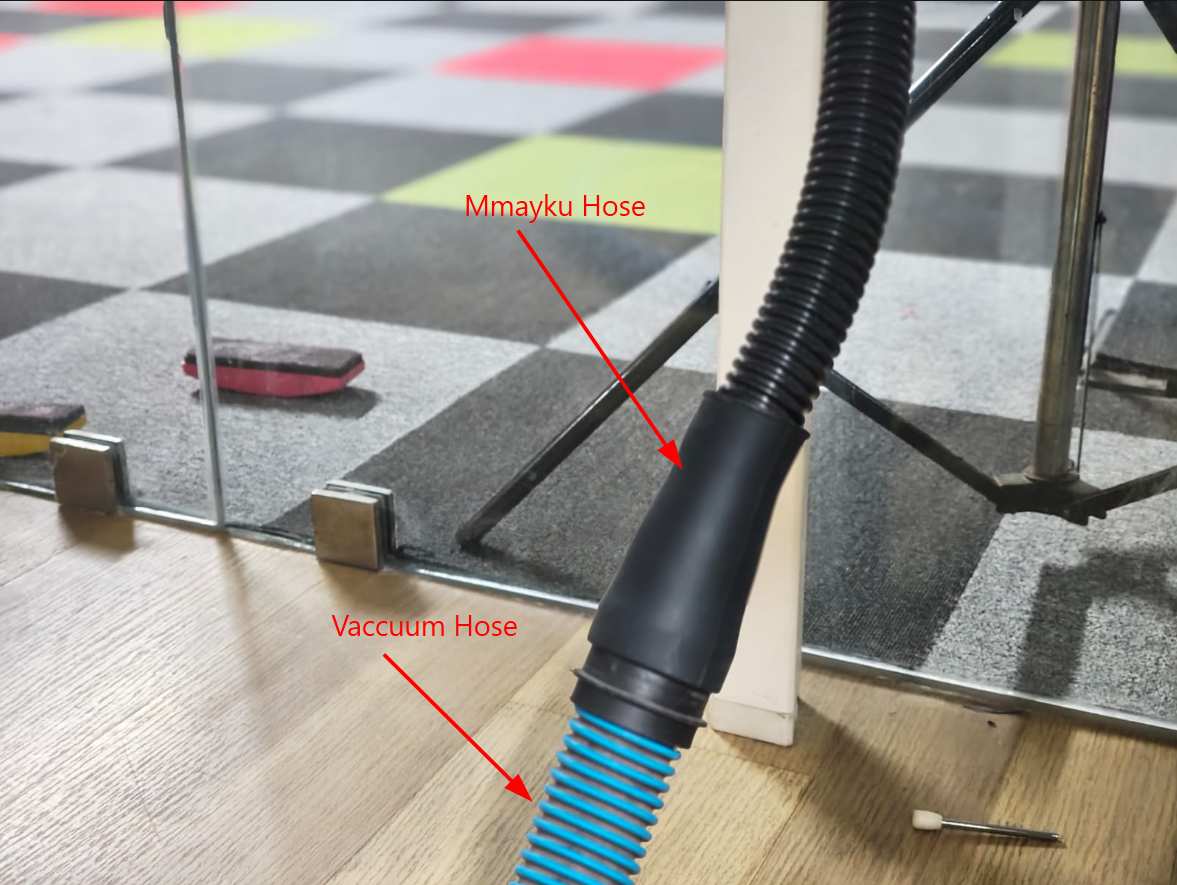
- Attach the vacuum cleaner hose to the vacuum port of the form box.
- Turn on the form box.
Setting Temperature and Time
For this project, I selected appropriate temperature and time settings based on the material used for forming the packaging component.
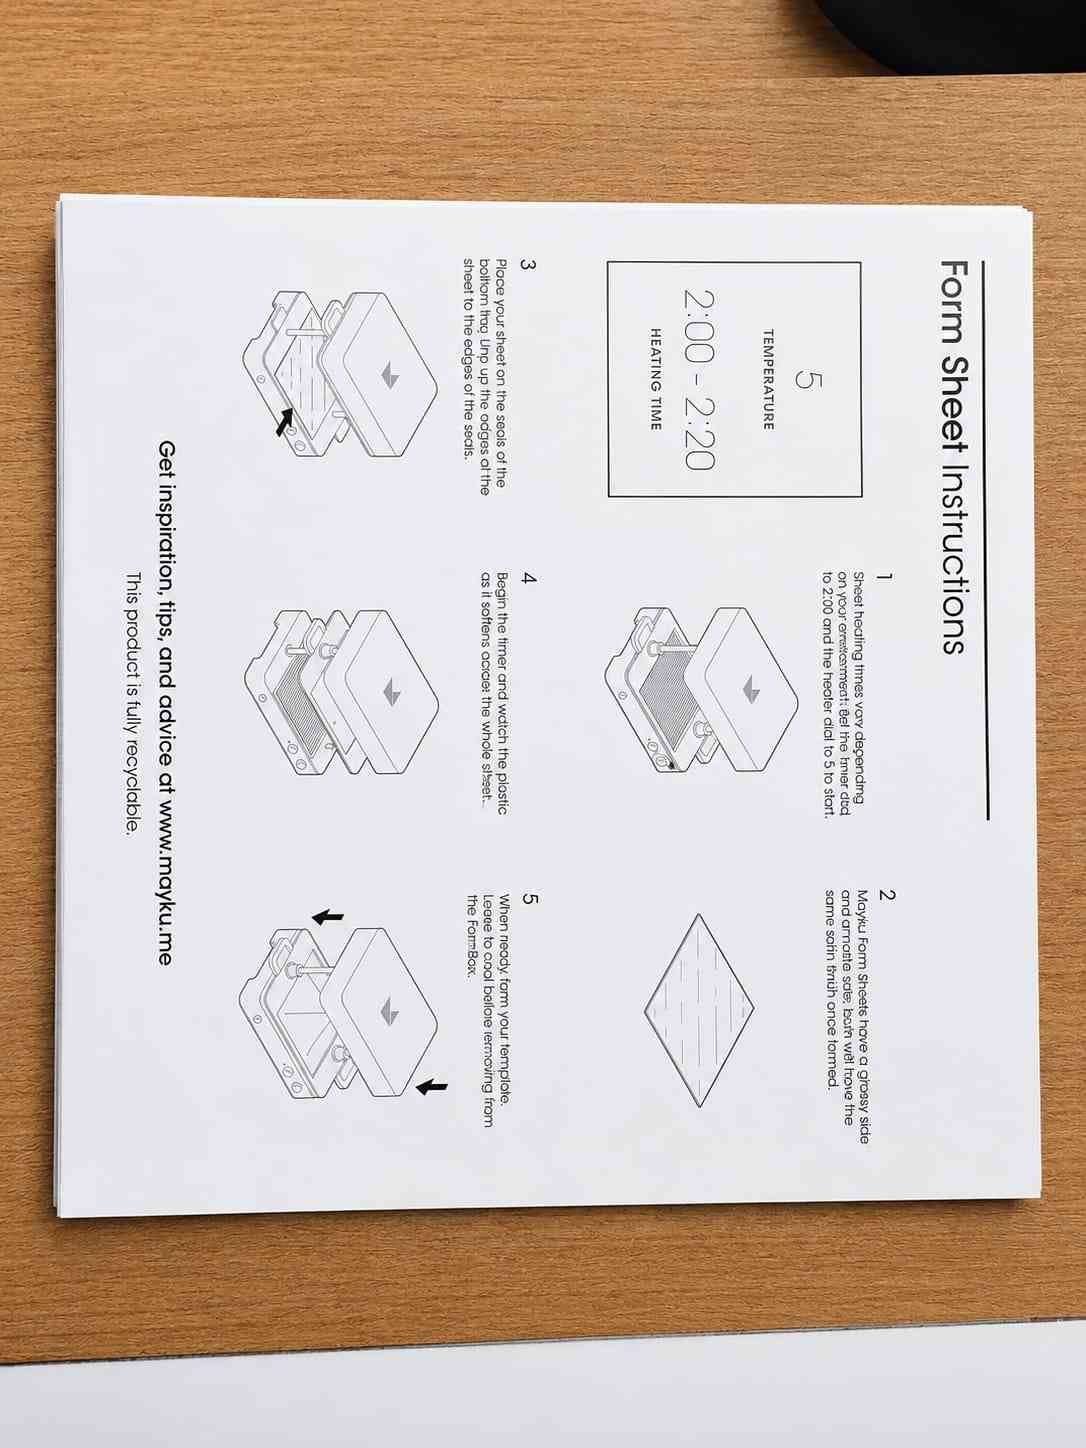
This blow image is instruction for using form sheet
The bellow image is instruction for using Cast sheet
Locate the timer dial (right dial). Turn it to the recommended heating time. This timer controls how long the sheet will be heated before forming.
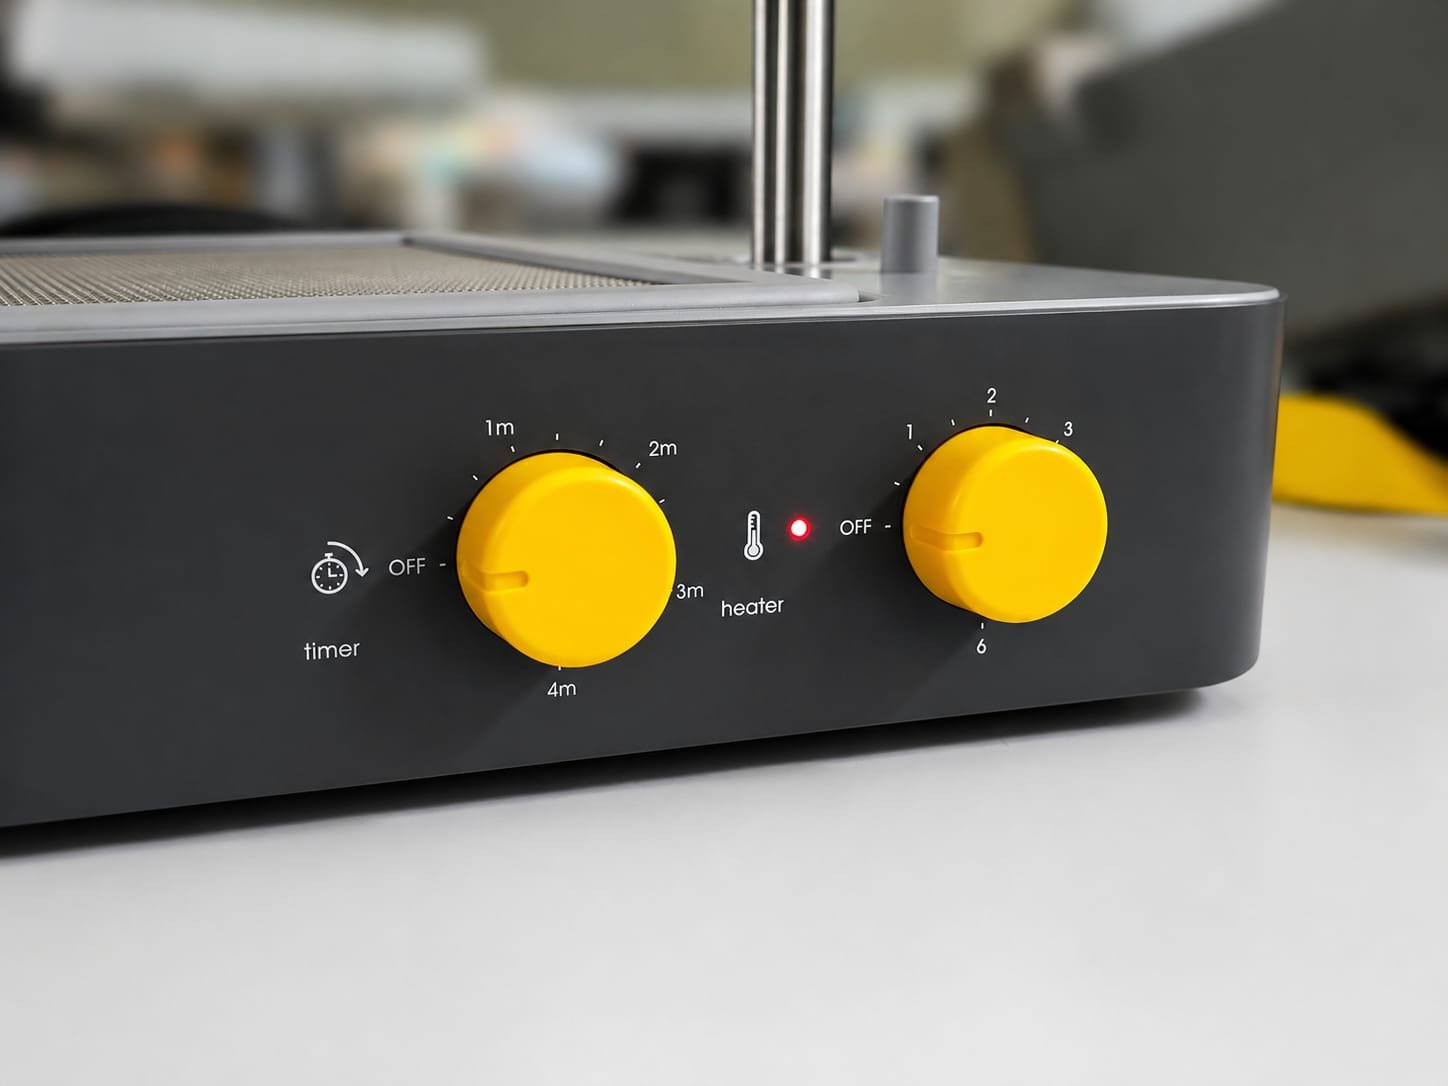
Adjusting Temperature Dial
- Locate the temperature dial (left dial) on the form box.
- Turn the dial to the recommended temperature setting.
- The heater indicator light will begin flashing orange, indicating that the system is heating up.
Heating Status and Material Settings
- When the FormBox reaches the set temperature, the heater indicator light will turn green. Do not insert the sheet until the light turns green.
The exact material composition was not specified. Based on the manufacturer's recommendation, the temperature setting was adjusted to level 5 with a heating time between 2:00 to 2:20 minutes.
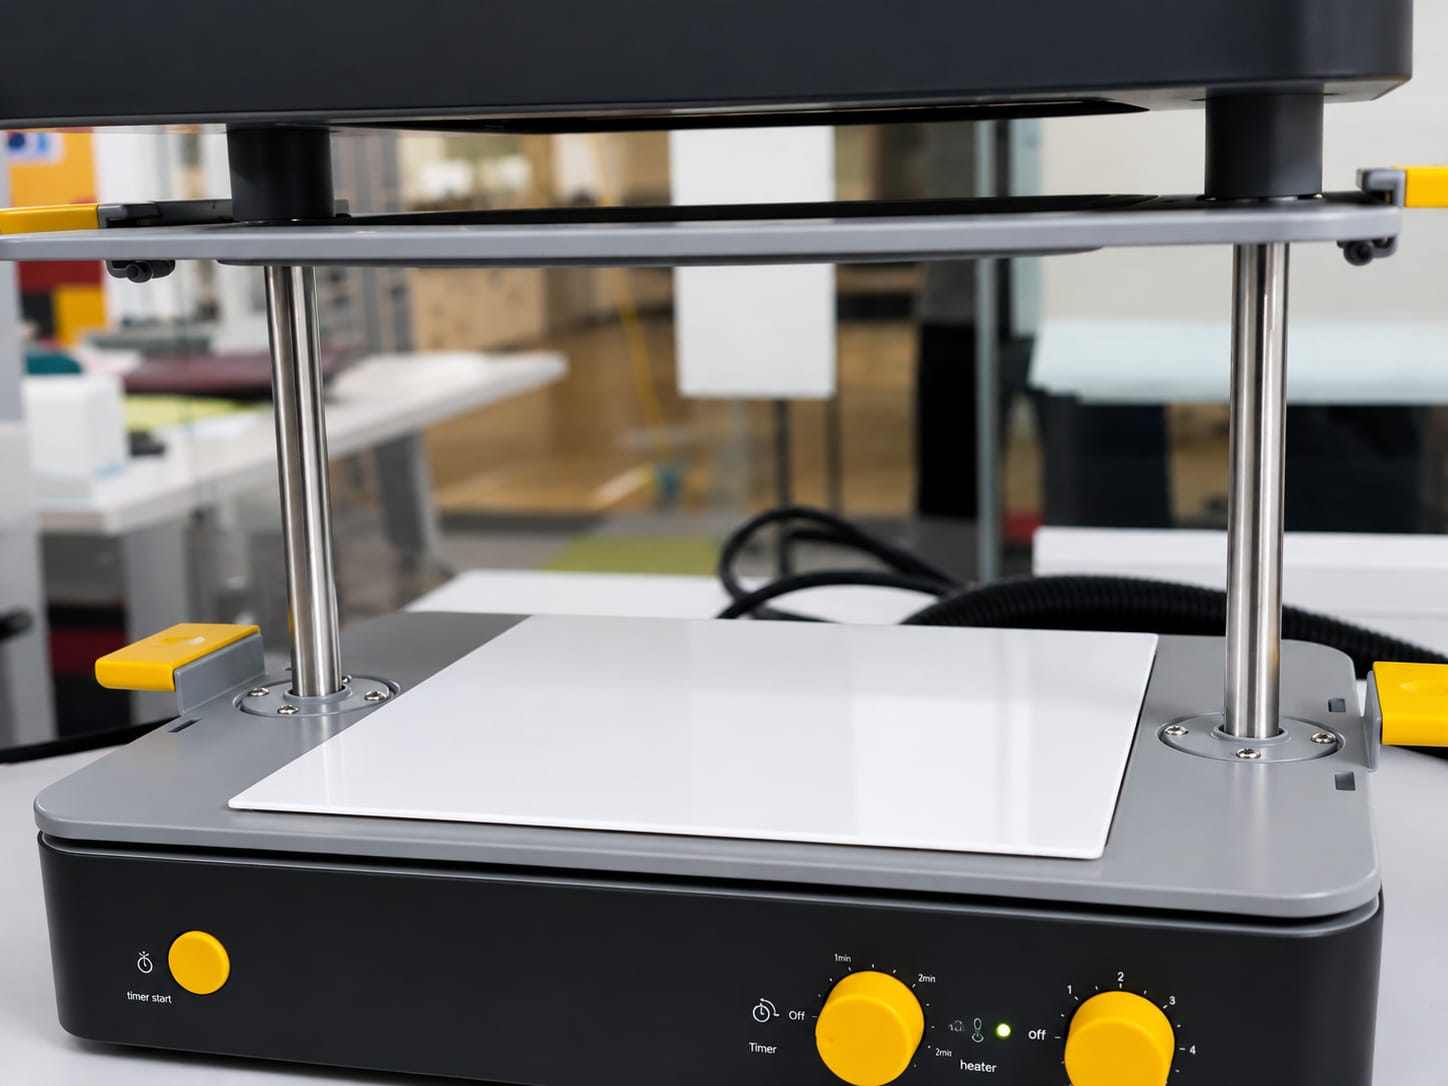
Load and Heat Form Sheet
- Unclamp the tray handles.
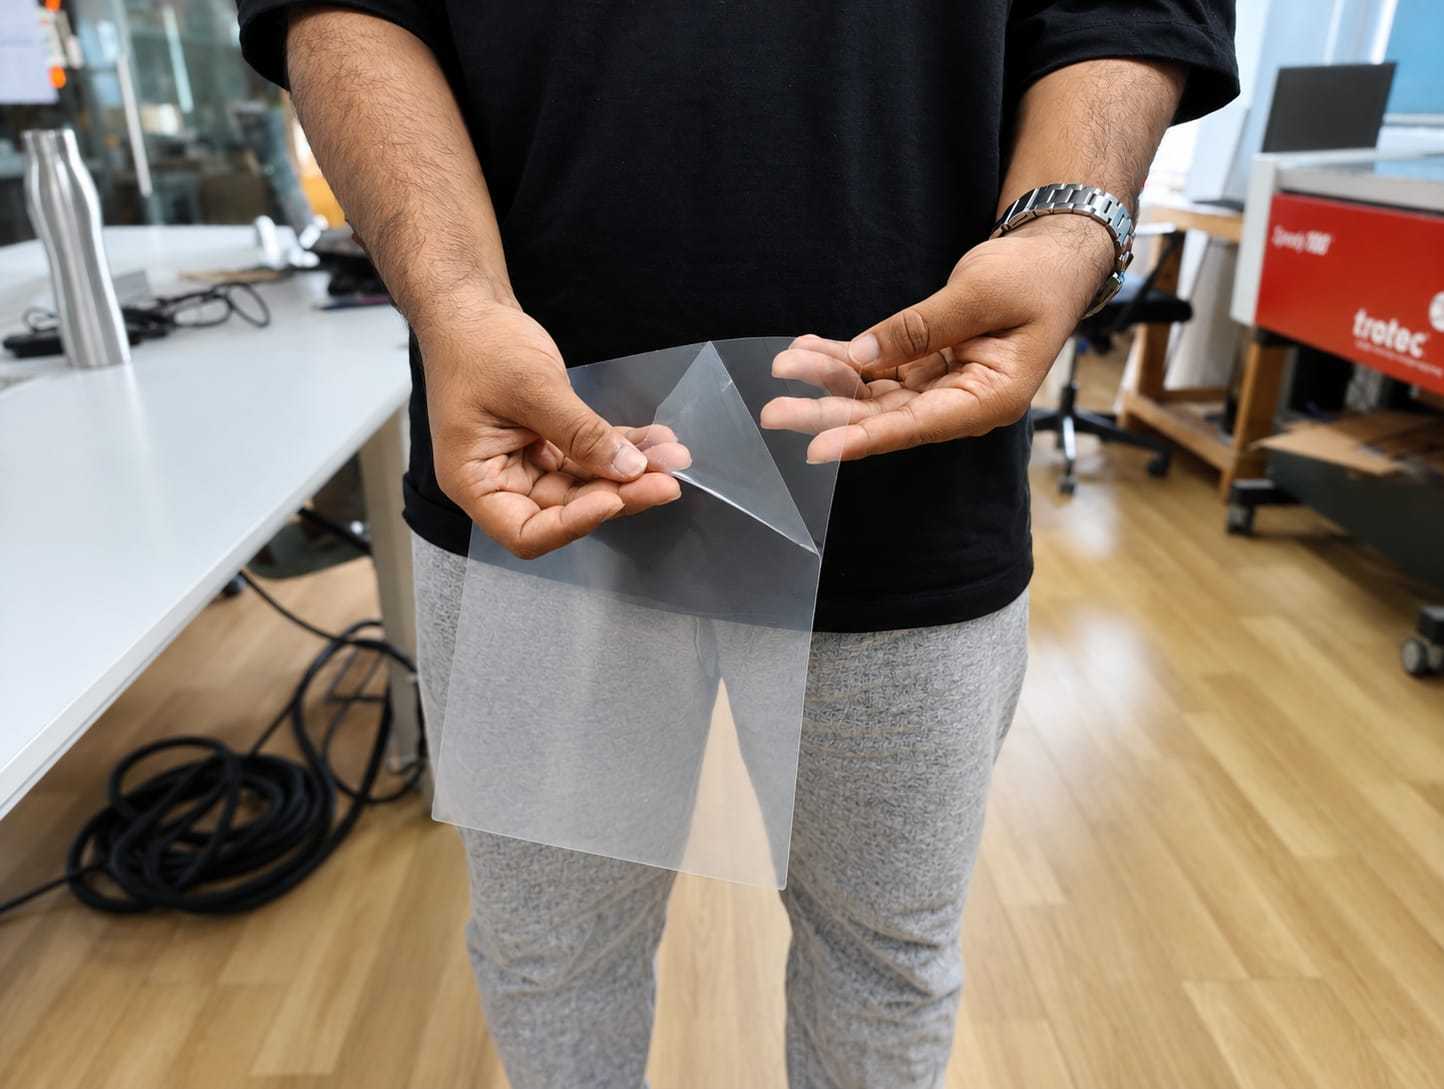
- Remove the protective film from the plastic sheet.
- Place the sheet onto the bottom tray.
- Lower the top tray onto the bottom tray and firmly clamp the handles to secure the sheet in position.
Heating the Sheet
- Raise the clamped trays upward toward the heater until they click into place.
- Press the timer start button. The heater indicator light will flash orange, and a slow ticking sound will begin.
- As the sheet heats, it will become soft and flexible, making it ready for forming.
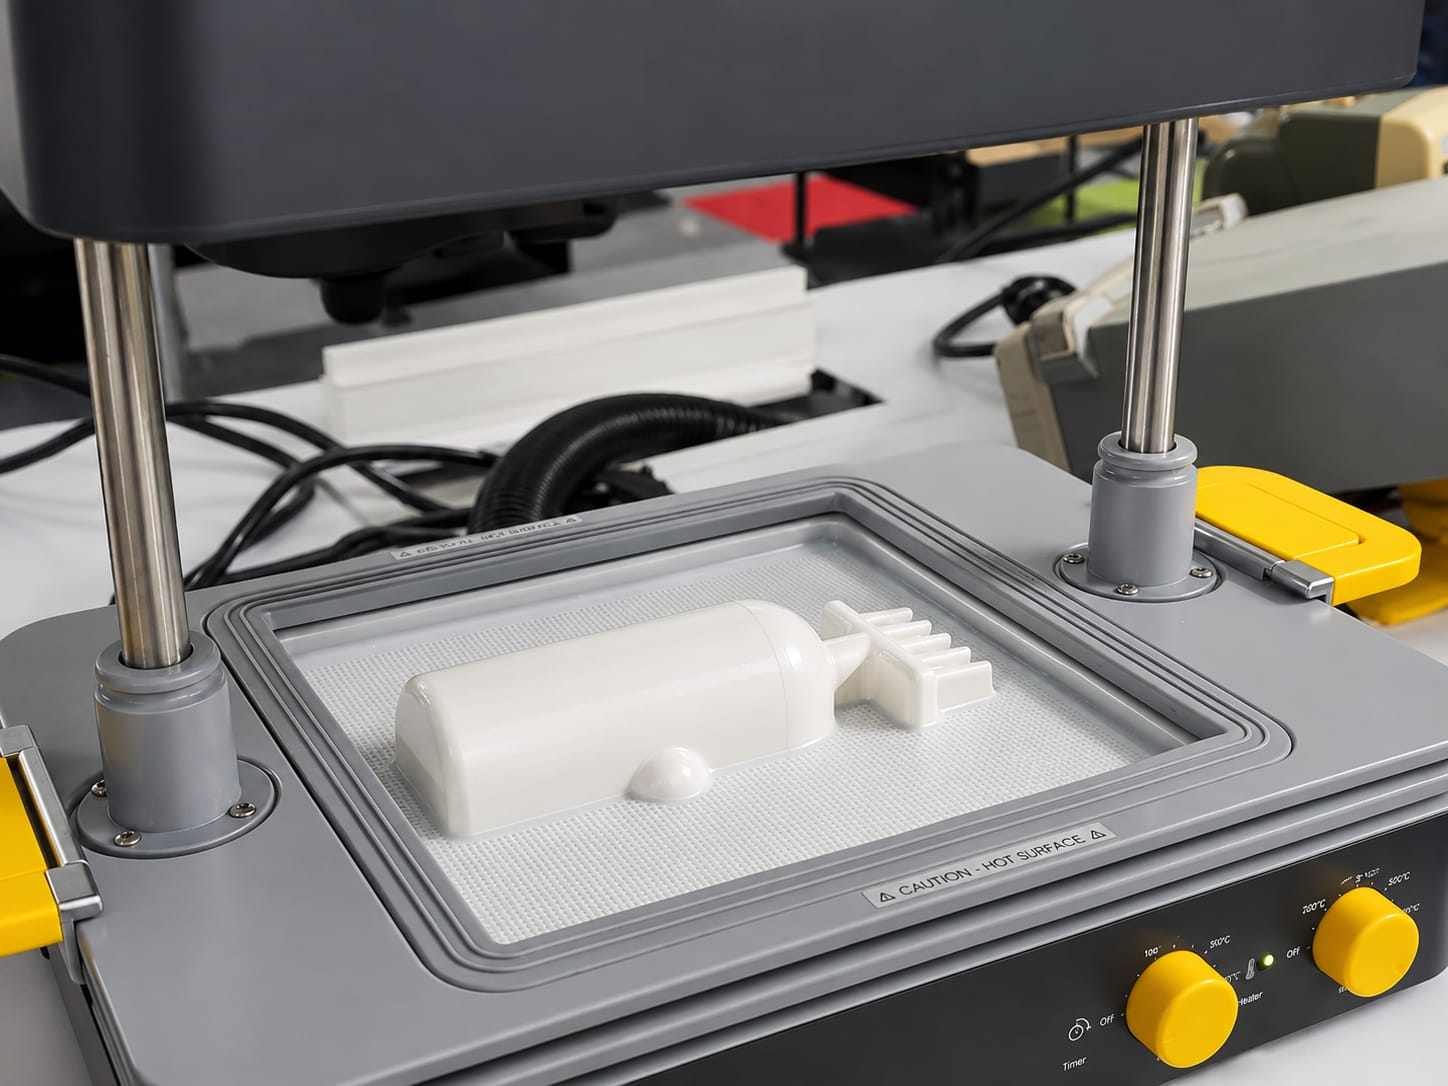
Place the mould
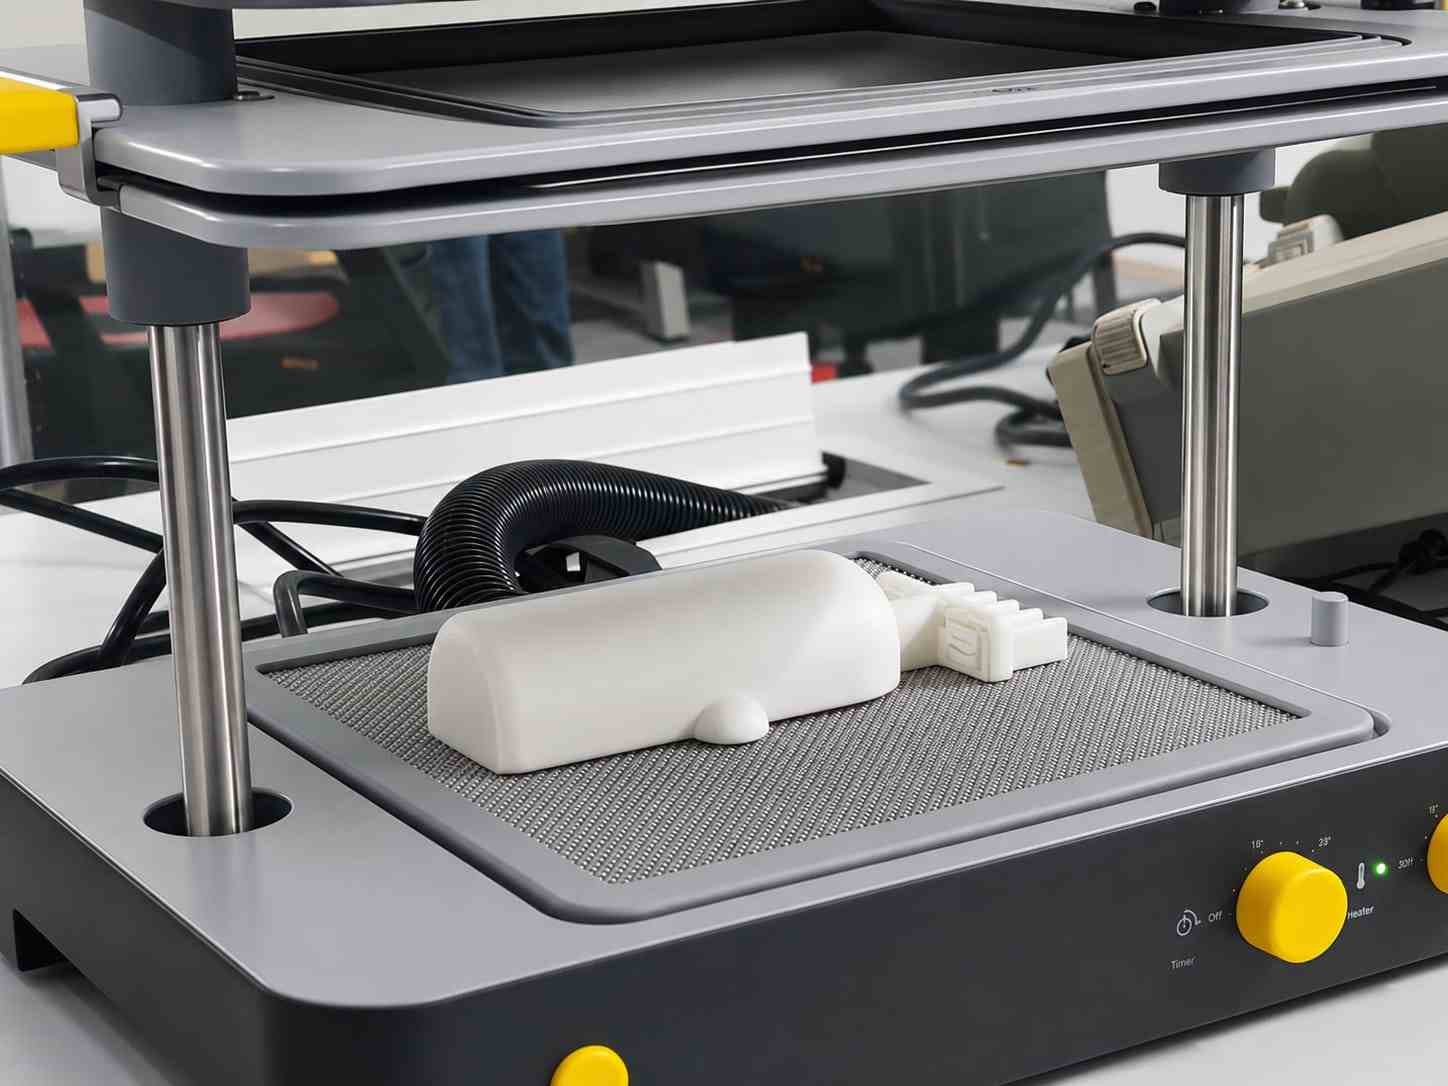
Placing the Mold
- Place the mold at the center of the vacuum bed.
- Ensure the mold is not too close to the edges—leave at least 1–2 cm of space around it.
- Secure the mold if necessary.
Ready for Forming
- Once the sheet has softened and become flexible after heating, pull the tray down over the mold. The vacuum will activate automatically, forming the sheet around the mold.
Cooling and Removal
- After vacuum forming, leave the sheet in place for 1–2 minutes to cool and harden.
- Once cooled, unclamp the tray handles and carefully open the frame to release the formed sheet. Gently lift the formed plastic off the mold.
Hero shots
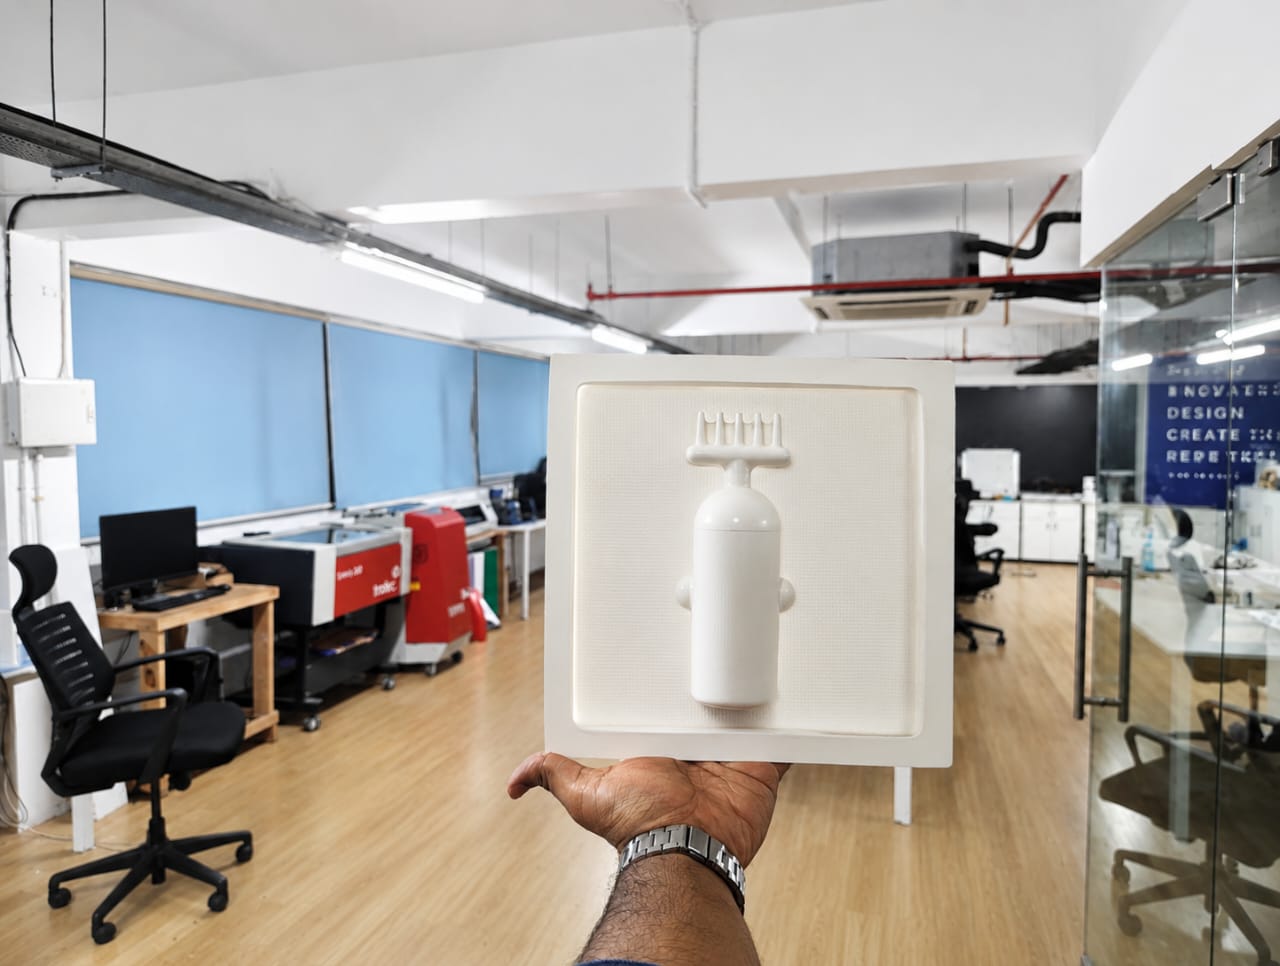
This is the final output made using the Mayku Form sheet
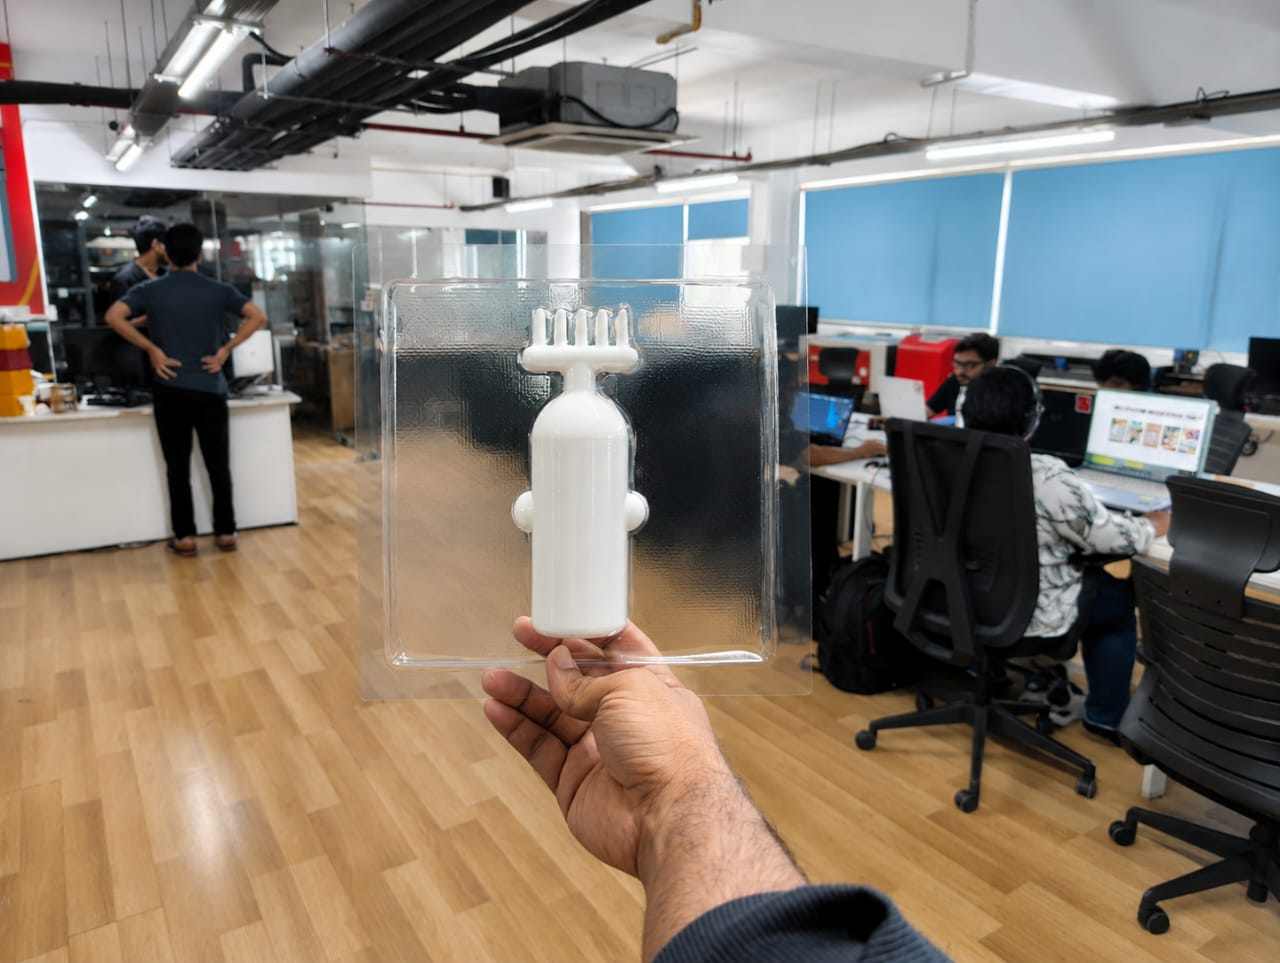
This is the final output made using the Mayku Cast sheet
Issues Faced and Improvements

During the vacuum forming process, deformation occurred in the mold after repeated heating cycles.
After 2–3 forming attempts, the top surface of the mold began to deform due to heat exposure. This affected the final output quality, especially in the highlighted region where surface accuracy is critical.
Reason for Issue
- The mold material was not sufficiently heat-resistant.
- Repeated exposure to high temperature caused softening and deformation.
- Thin sections of the mold were more prone to distortion.
Improvements
- Use heat-resistant materials such as PETG or ABS.
- For better durability, mill the mold using ShopBot plywood.
- Increase mold thickness to improve strength.
- Add proper draft angles to reduce stress during forming.
- Optimize heating time to avoid overheating.
- Allow cooling time between cycles to prevent heat buildup.
Future Plan
In the future, I plan to make a cardboard box for the final packaging.using zund
Conclusion
- The vacuum forming process is an effective and versatile method for creating molds and packaging components. It requires careful design considerations to ensure proper material flow, easy demolding, and accurate final results.
- By following the design rules and optimizing process parameters, high-quality formed parts can be achieved. Addressing issues such as mold deformation through proper material selection and design improvements is essential for successful vacuum forming.