WILD CARD WEEK
Objectives
Design and produce something with a digital process (incorporating computer-aided design and manufacturing) not covered in another assignment, documenting the requirements that your assignment meets, and including everything necessary to reproduce it.
Vaccum Forming
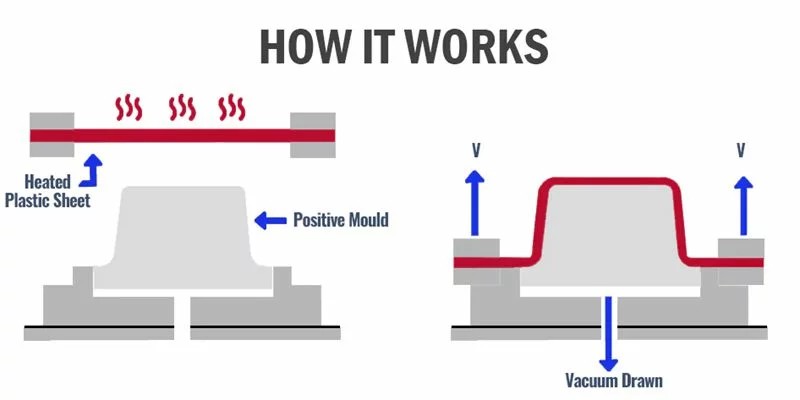
Vacuum forming is a manufacturing technique used to shape plastic sheets. In this process, a plastic sheet is heated until it becomes flexible, then a vacuum is applied to pull the sheet tightly over a mold. As the plastic cools, it hardens and takes on the shape of the mold. The formed plastic part is then trimmed to remove excess material and achieve the final product dimensions.
 Image
Image
Design Rules
- Material Flow and Webbing Sharp corners are to be avoided as this will hinder the flow of material and maximise the chance of webbing.
- Draft/Taper These terms relate to the amount of angle on a vertical face to allow the parts to be removed from the tool.
- Draw Ratio/Required material thickness Draw ratio refers to the height of the part to be formed compared to the footprint of the part.
- Pockets and Ribs Any pockets or space between ribs must conform to a ratio. Depth of pocket or space between ribs cannot be greater than its width and preferably 75% of the pocket depth.
- Designing for Undercuts Undercuts are design features in which a portion of the mold protrudes into the plastic, preventing its direct removal from the mold.
- Utilizing Radii and Chamfers One of the most critical aspects is to avoid manufacturing parts with sharp corners. These angles can lead to uneven material distribution, increasing a part’s vulnerability and reducing its overall strength.
- Staying Within Tolerances Measurement tolerances directly affect a part’s functionality, performance, and its suitability for its intended application.
References
Vacuum Forming – A Design Guide 6 Proven Vacuum Forming Design GuidelinesDesigning petals
I needed to make petals for my final project. So I tried to make petals using vaccum forming. Inorder to make, first I made a positive mold. The mold was designed in Fusion 360 and 3D printed in BambuLab A1. I wanted to close the petals completely and was planning to have six petals. So I started by drawing a 5 cm circle and used spline tool to shape petals.
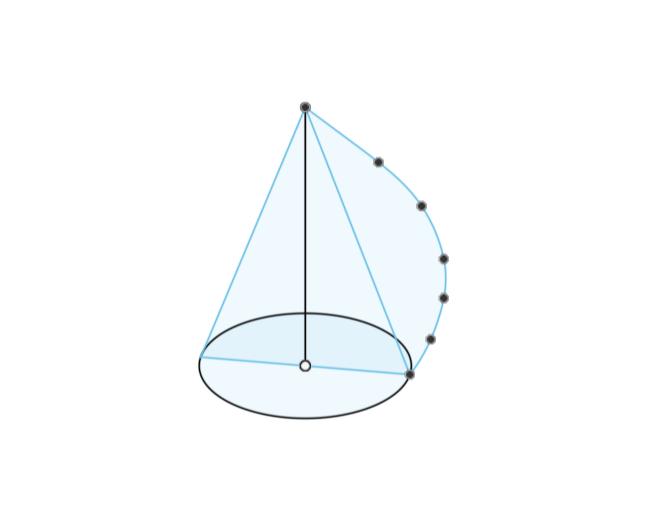
I revolved the spline around the perpendicular line from the centre of the circle and added planes at 60 deg apart each other. The next step was to split the body through the planes to get the required shape.
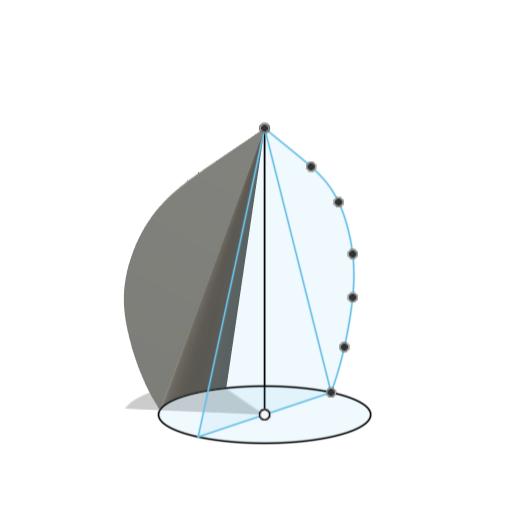
Then I added holes to place the petals in a base and added joints to attach petals to the body. Using rectangular pattern, I got six copies of the same.
 |
 |
3D Printing leaves
I used Bambu Slicer for 3D printing and adjusted the layer height to 0.24 mm. I set the infill density to 15%, which was sufficient for a lightweight, non-structural print. For bed adhesion, I left the brim option on auto, allowing the slicer to decide based on the model’s geometry. The model was then sliced and printed.

A single leaf was 3D printed first.
Five petals were printed after.
Lasercutting the base.
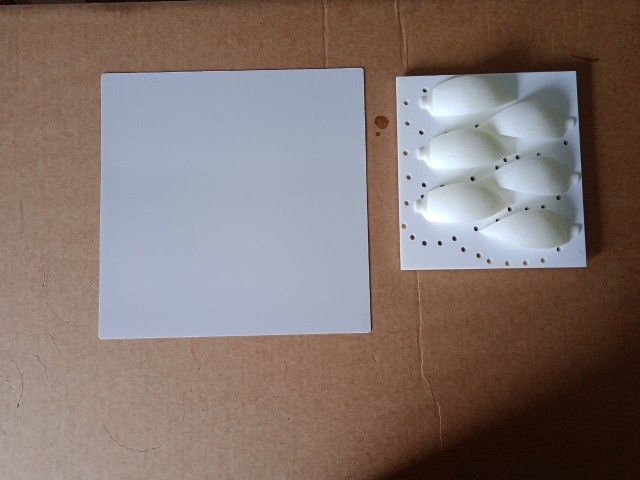
As I needed a base to place the petals, an acrylic sheet was cut with holes to attach the base of the petals.
To cut the base, I first arranged the petals in their desired positions and drew a rectangle around them to define the boundary. I then extruded the rectangle to create the base thickness. After that, I added small circles with a 4 mm diameter around each petal to mark where the holes would go. These circles were then cut through the base to create holes for attaching or aligning the petals.
Then I hid the petals and projected the base along with its holes onto a new sketch.
The sketch was then exported as a DXF file, allowing it to be used for laser cutting process.
And the result

Mistake :-My instructor told me that I needed to add holes for vaccuming, which I didn't add. So I had to add holes around the petals. It was supposed to add right beside the 3d petals in a uniform way. But I placed it in a random order.
To add holes, I cut the outerpart of acrylic in a cardboard. The cardboard is then placed as a reference and made the holes in acrylic sheet.I used M5 nuts to hold petals in place.
 |
 |
|
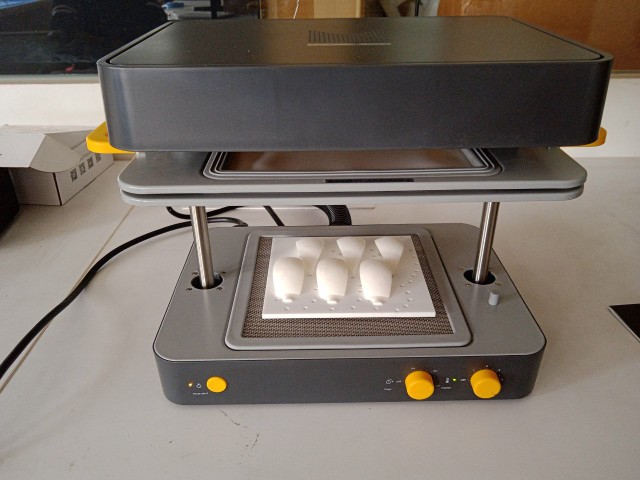
Mayku Form Box
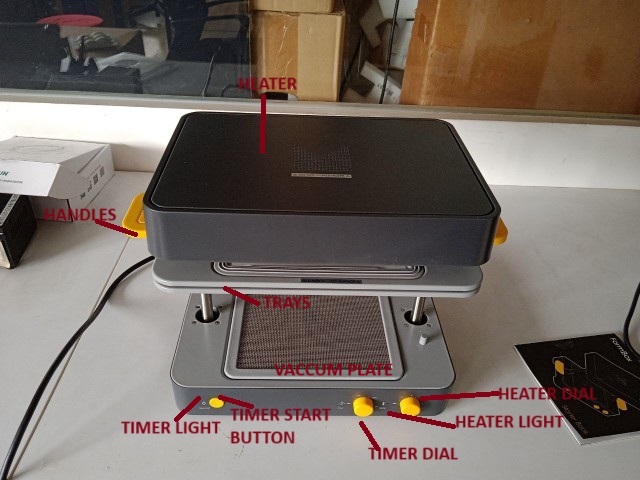
In our lab, we are using the Mayku FormBox , a compact and user-friendly vacuum former that allows us to create high-quality molds in just a couple of minutes. With a forming time of around 2 minutes and a maximum heating power of 340°C, it’s perfect for rapid prototyping and small-scale production. The 200 mm forming bed provides enough space for a variety of templates, whether found objects or custom-made forms. The FormBox captures intricate details with impressive precision, making it ideal for applications like packaging, product housings, and decorative craft elements. Despite its powerful capabilities, it’s lightweight and smaller than a microwave, fitting easily on a desktop.

Initial Setup
- First we need to plug form box into the mains.
- Then plug the vaccum cleaners's power cable into the back of the Formbox and switch vacum cleaner on.
- Connect the vaccum cleaner's hose into the vacum tube of formbox.
- Power on the formbox
Setting temperature and time
- Each type of sheet comes with a recommended temperature setting (numbered 1–6) and heating time (in minutes and seconds). Find these values on the sheet’s packaging or instruction manual. Here I used form sheet to shape my petals.
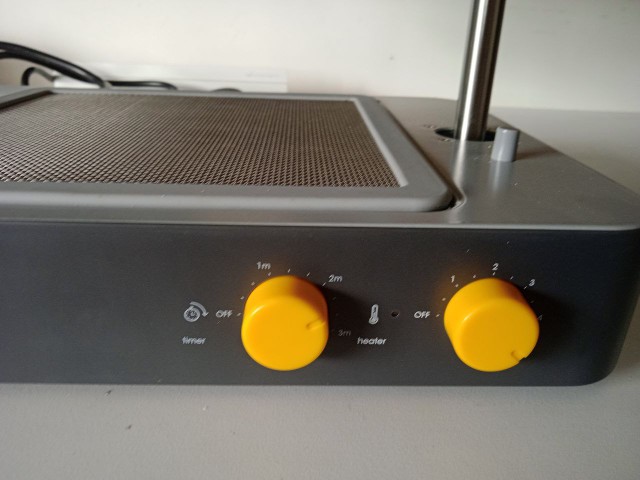
- Locate the timer dial (right dial). Turn it to the recommended heating time. This timer controls how long the sheet will be heated before forming.
- Locate the temperature dial (left dial). Turn the dial to the recommended temperature number. The heater light will begin to flash orange, indicating it is heating up.
- When the FormBox reaches the set temperature, the heater light will turn green. Do not insert the sheet until the light is green.

 (Make sure to set timer dial first)
This 0.5 mm opaque white sheet, referred to as a "Form Sheet," is a versatile and easy-to-use material ideal for various applications such as product packaging, display prototypes, housings, and decorative craft projects.The exact material composition was not specified.
For my material the temperature was written as 5 and heating time in the range 2:00 - 2:20
Load and Heat form Sheet
- Unclamp the Tray Handles
- Peel off the protective film from the sheet
- Position the sheet on the bottom tray.
- Lower the top tray onto the bottom tray. Firmly clamp the tray handles to secure the sheet in place.
- Raise the clamped trays upwards toward the heater until they click into place.
- Press the timer start button. The heater light will flash orange, and a slow ticking sound will begin.
- As it heats, the sheet will become soft and flexible, ready for forming.
Place the Mold
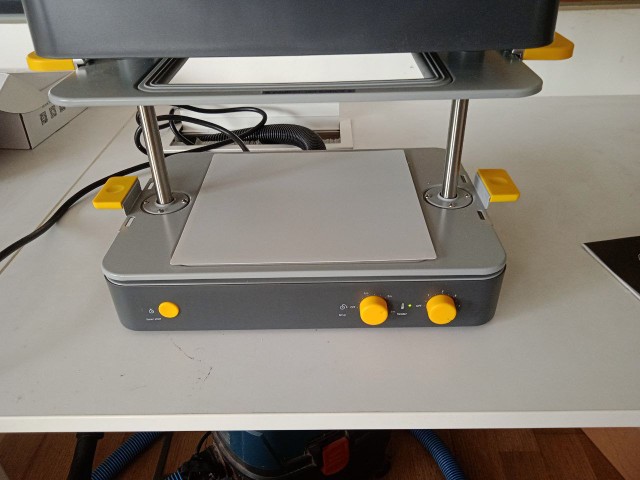
- Place the mold in the center of the vacuum bed.
- Make sure it is not too close to the edges—leave at least 1–2 cm of space all around the mold.
- Secure the Mold (if needed)
Ready for Forming
- Once the sheet has softened and is flexible (after heating), pull the tray down over the mold, and the vacuum will activate automatically to form the sheet around it.
- After vacuum forming, leave the sheet in place for a minute or two to cool and harden.
- Once cooled, unclamp the tray handles and carefully open the tray to release the formed sheet. Gently lift the formed plastic sheet off the mold.
- Using a pair of scissors or a craft knife, cut out the desired shapes from the formed sheet.
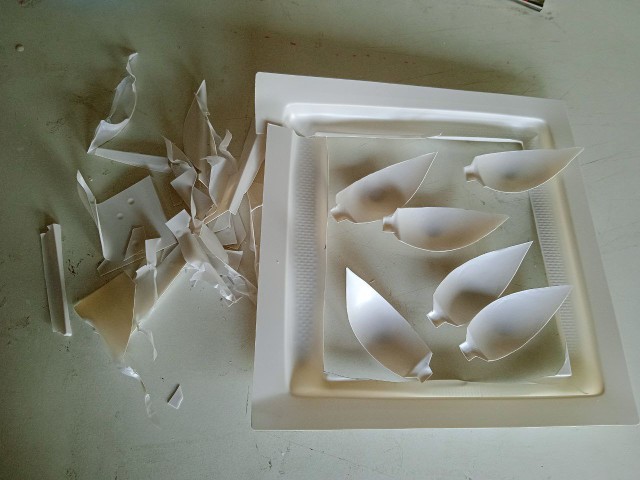
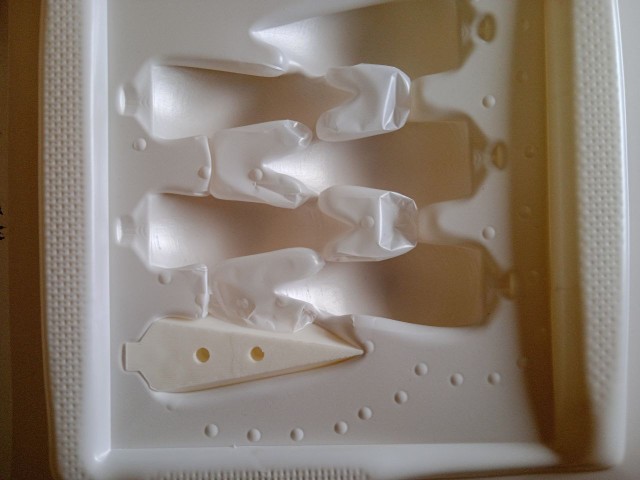
Mistakes:-The holes weren't proper. So the material didn't completely covered the mold. The drag angles were not considered during designing. So the mold couldn't be removed out of the form easily.