INTRODUCTION
This week was a special week in my Fab Academy journey. If you've been following along, you know that I am currently studying abroad in Peru while my wife holds down the fort (takes care of the cat and continues being the breadwinner) back in Toronto. But this week she came to visit me! We took the opportunity to do all the touristy things you do while in Peru, like visiting Cusco and Machu Picchu!

My wife stayed from Sunday to Sunday, so I didn't visit the Fab Lab much during the week except to attend Wednesday's class. After being all teary-eyed dropping her off at the airport, I got right to work on designing something big.
[x] Complete your lab's safety training
[x] Test runout, alignment, fixturing, speeds, feeds, materials and toolpaths for your machine
[x] Document your work to the group work page and reflect on your individual page what you learned
[x] Make (design+mill+assemble) something big

[ ] For my students: Create a resource of vocabulary for different kinds of joinery
USING THE CNC
➔ SAFETY
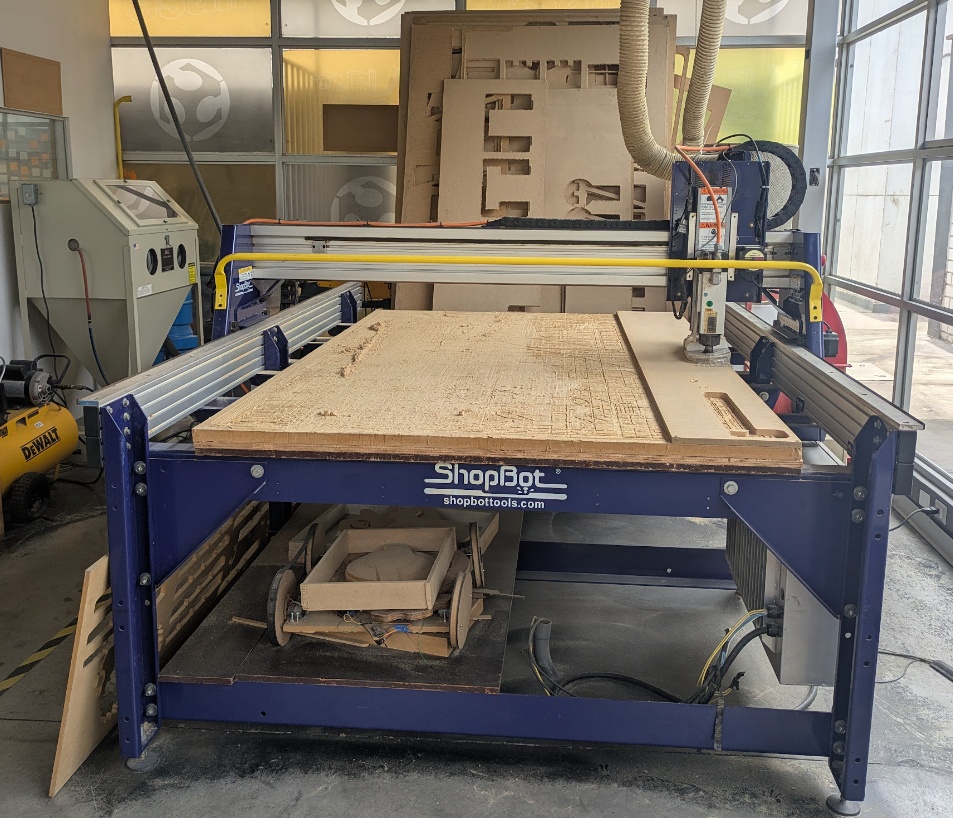
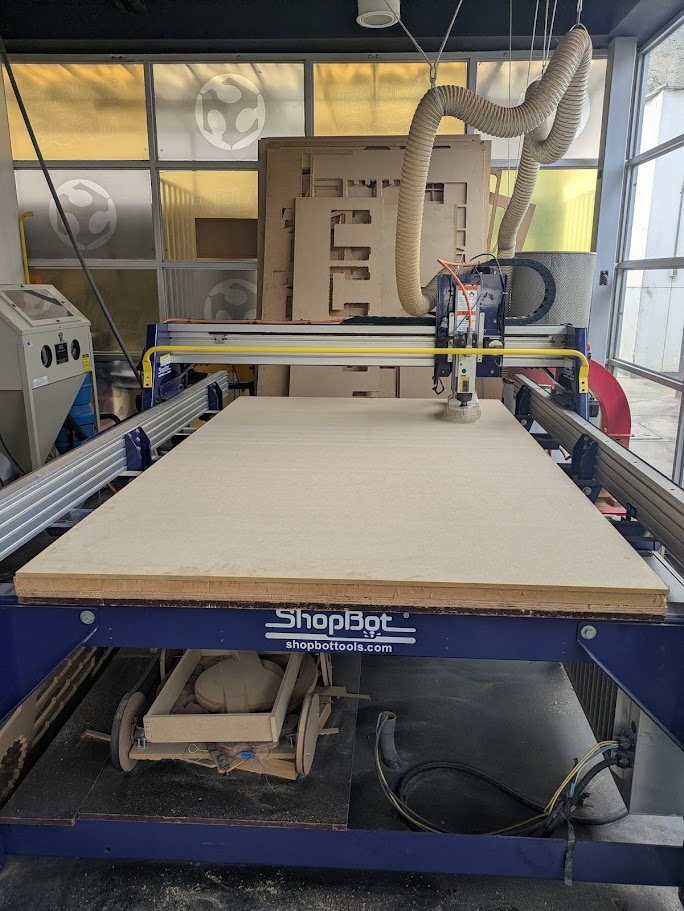
Safety is always top priority in any Fab Lab. CNCs are no joke, especially the room-scale ShopBot that ESAN has. That's why it's important to suit up with the proper PPE for the job before getting started.

Other tips:
- You may want to wear gloves when handling large slabs of material, to avoid splinters.
- Do not approach the machine when in operation. When this thing is moving, it's not going to stop.
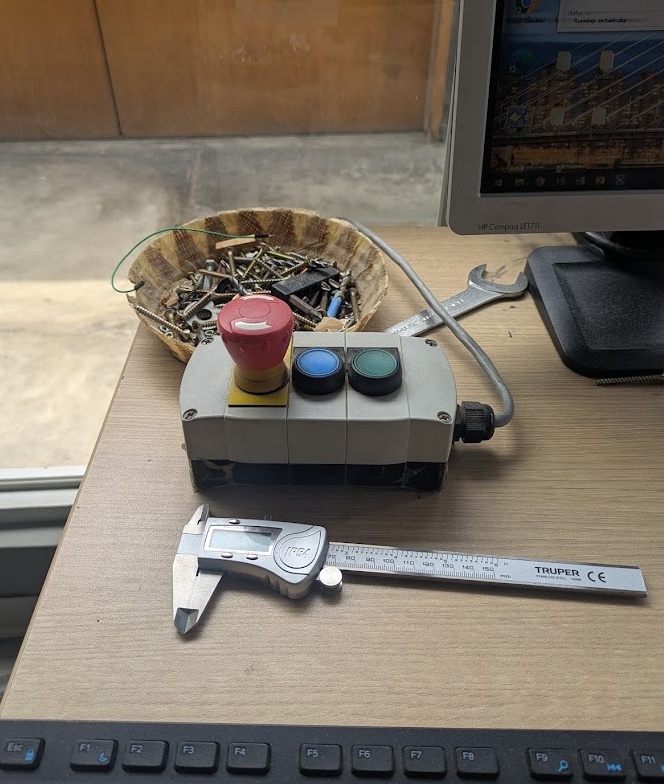
- Always stand in reach of the E-STOP and keep your attention (eyes, ears) on the operation of the machine.
- Turn on the air filter prior to operation.
➔ Machine Quirks
We were having some issue with alignment and speeds with one of the axis on the CNC, the X-axis was dragging, resulting in a slightly squished/skewed horizontal axis, which led to some quirks. Jorge said he would look into it, I continued with my work, and slightly increased the size of my axis in one axis to compensate. Not super precise, but we have things to make!
You can read more about the other aspects of the CNC machine for our group project at Fab Lab ESAN website here.
KIERAN'S CHAIR
I'm Canadian. We love our seasons. We love our summers, we love our winters (most of the time), but most importantly we love the outdoors. That doesn't change when you bring a Canadian to Peru, and to top it off, the ESAN campus is beautiful. Suffice to say, I really like working on my documentation and taking breaks outside.
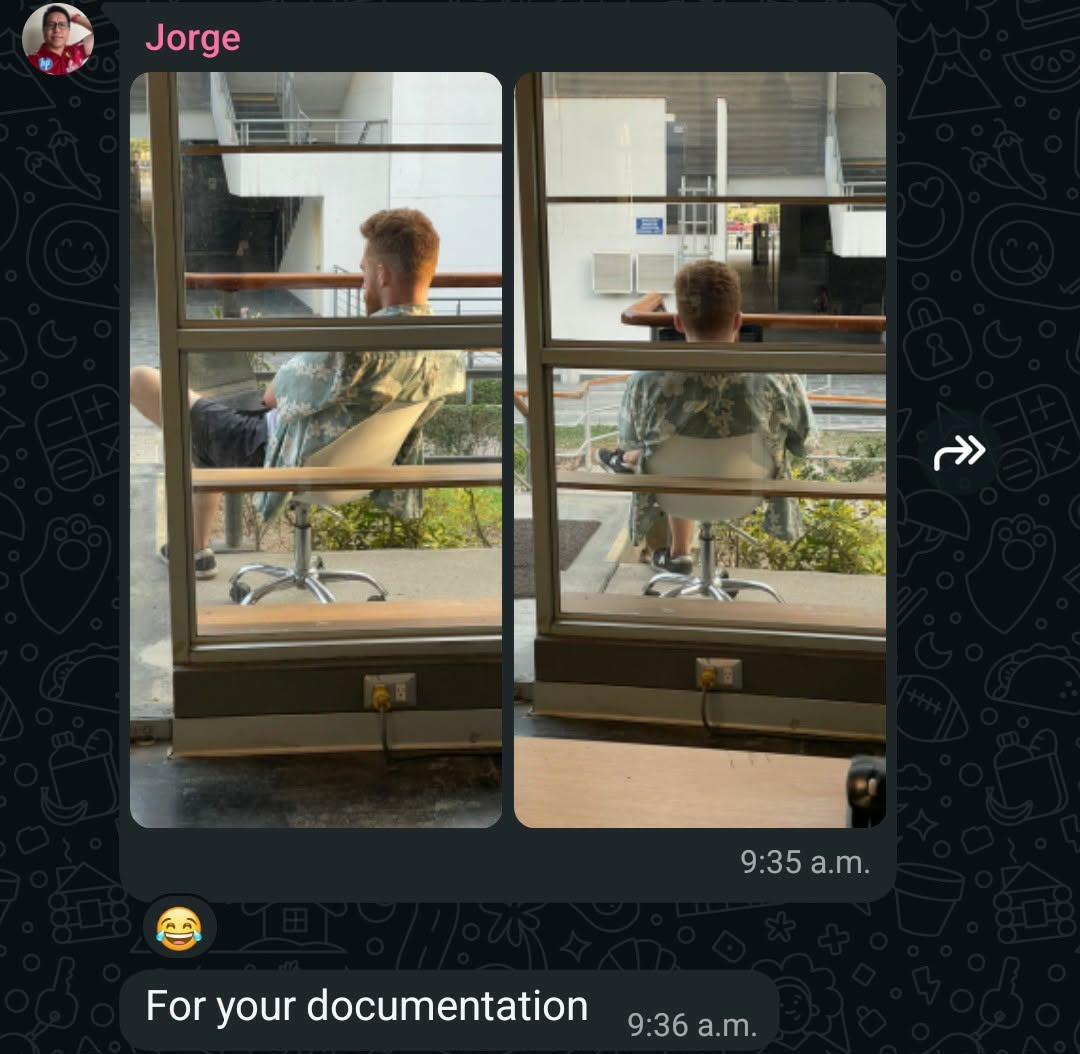
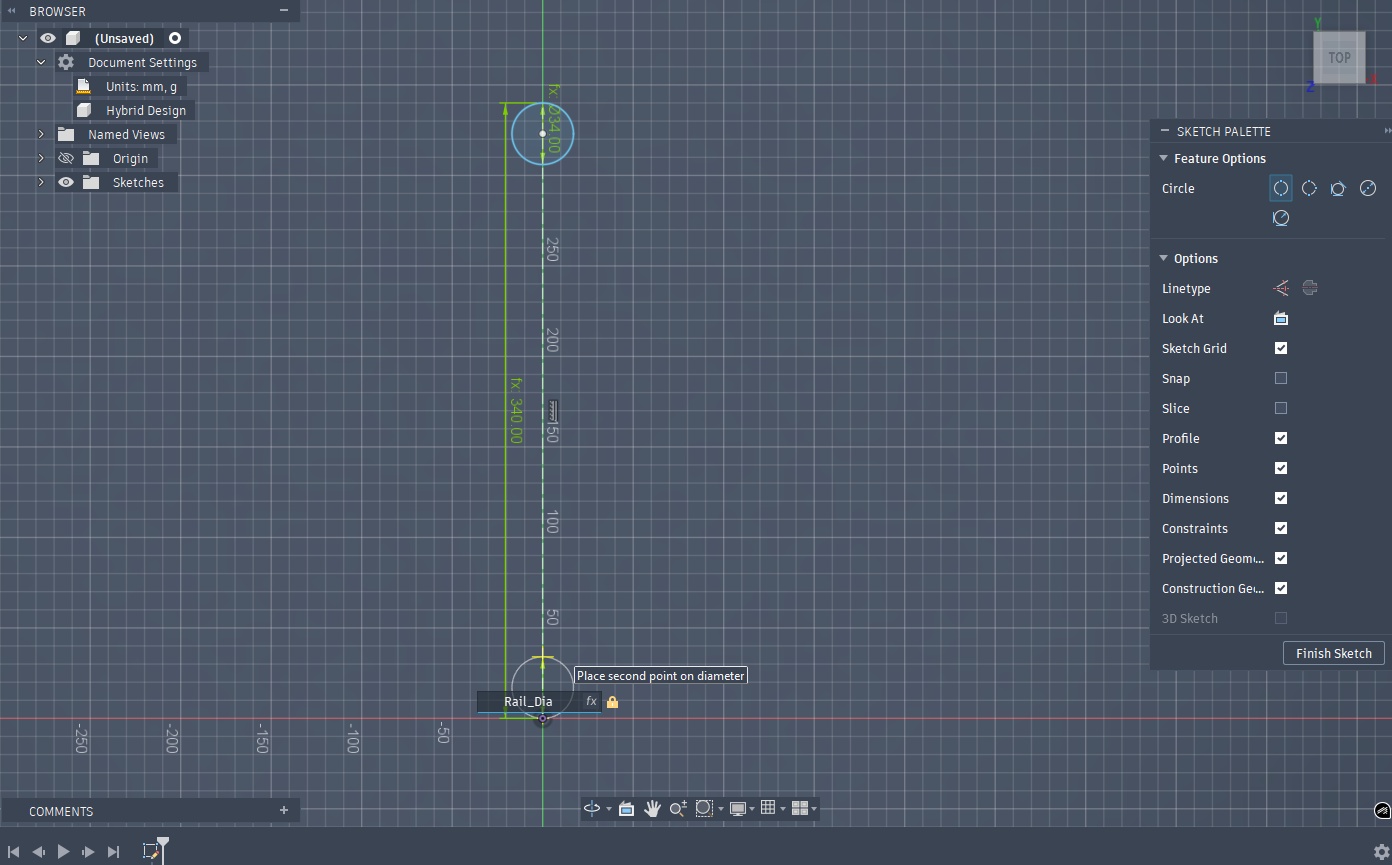
This was where the inspiration for my big thing came from. I should design an easy to use chair for my breaks and appreciation of the Peruvian summertime. Something that I can easily fold up and bring back inside the Fab Lab when complete. Before leaving for Cusco, I took some measurements of the railing outside of the Fab Lab and while I was in the airport I got to designing...
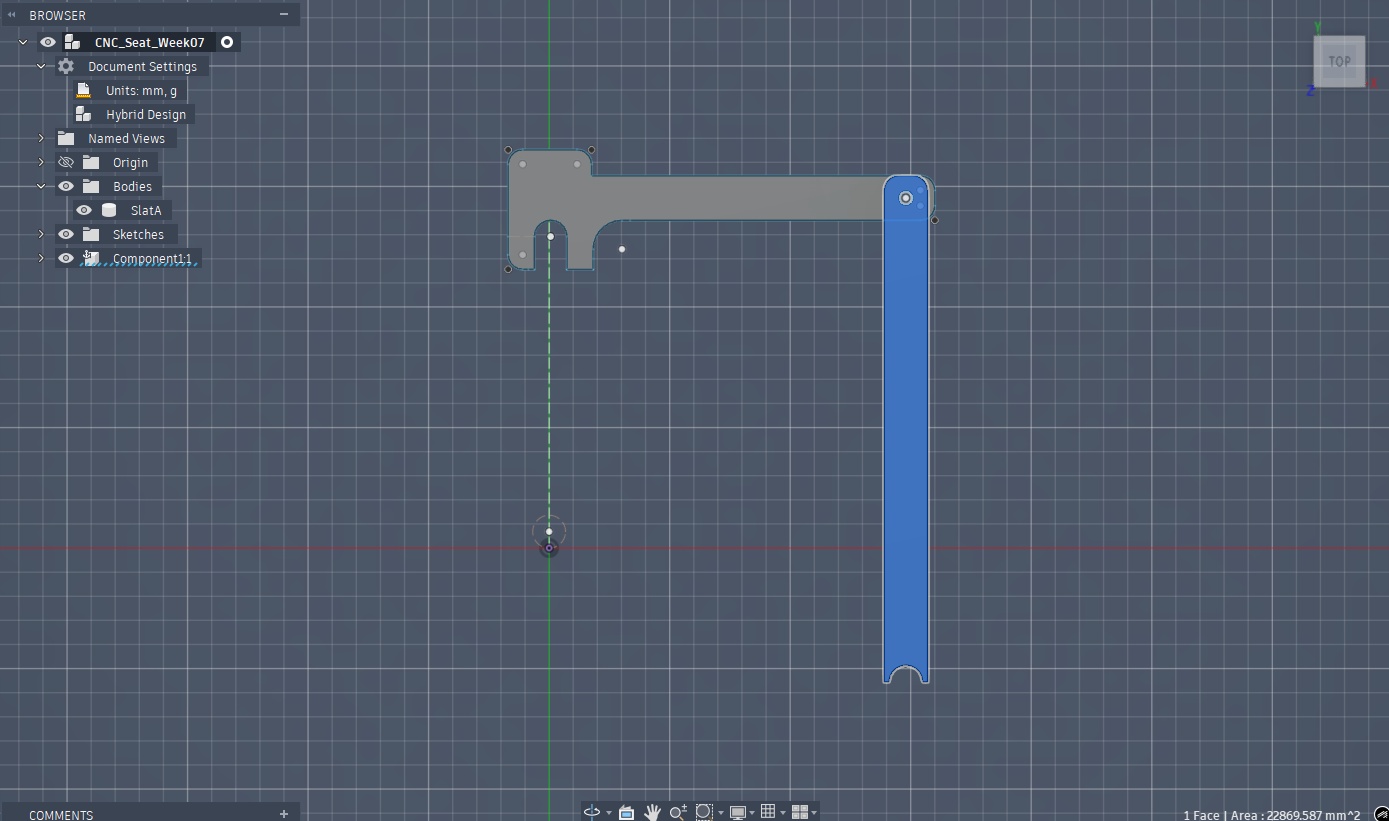
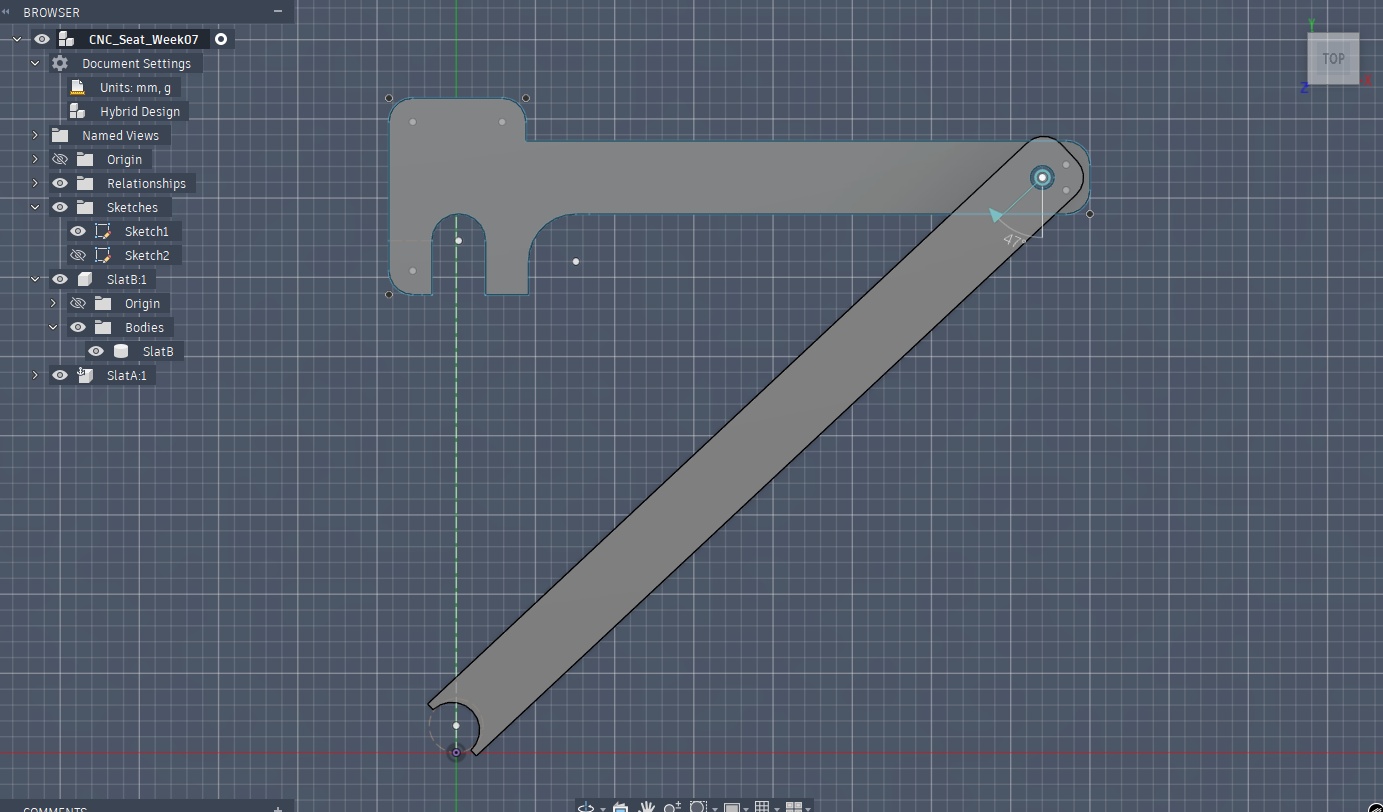
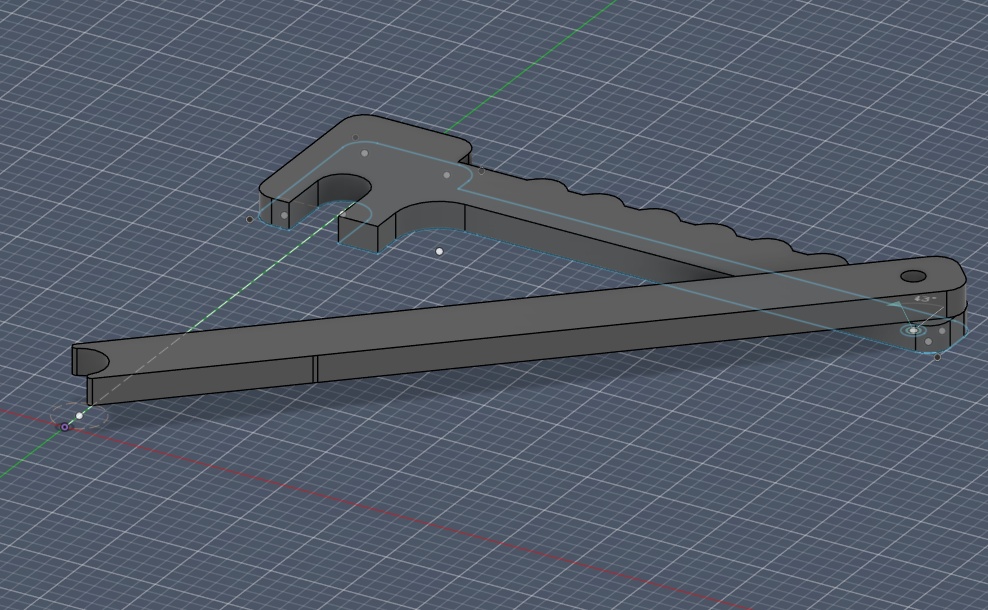
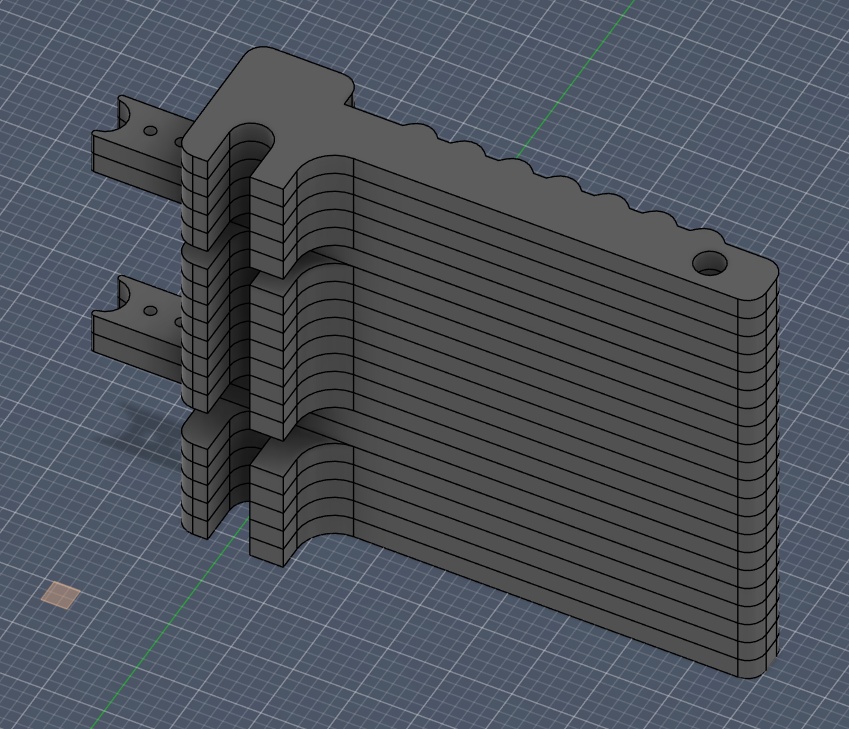
The idea was to create a collapsible chair that could hook on to the railing, made of flat CNC'd parts that could be sandwiched together to create a functional and movable seat.
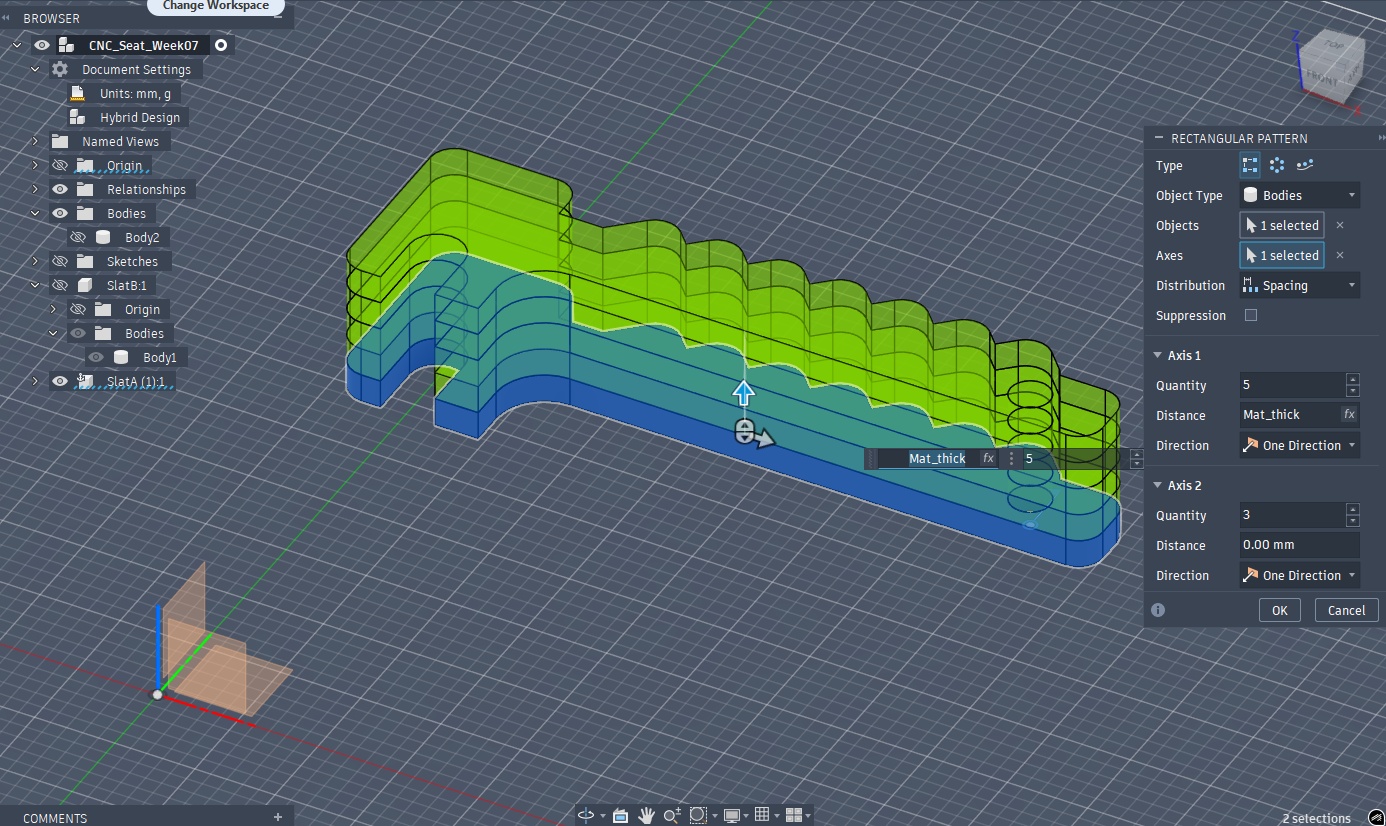
➔ CAD for CNC
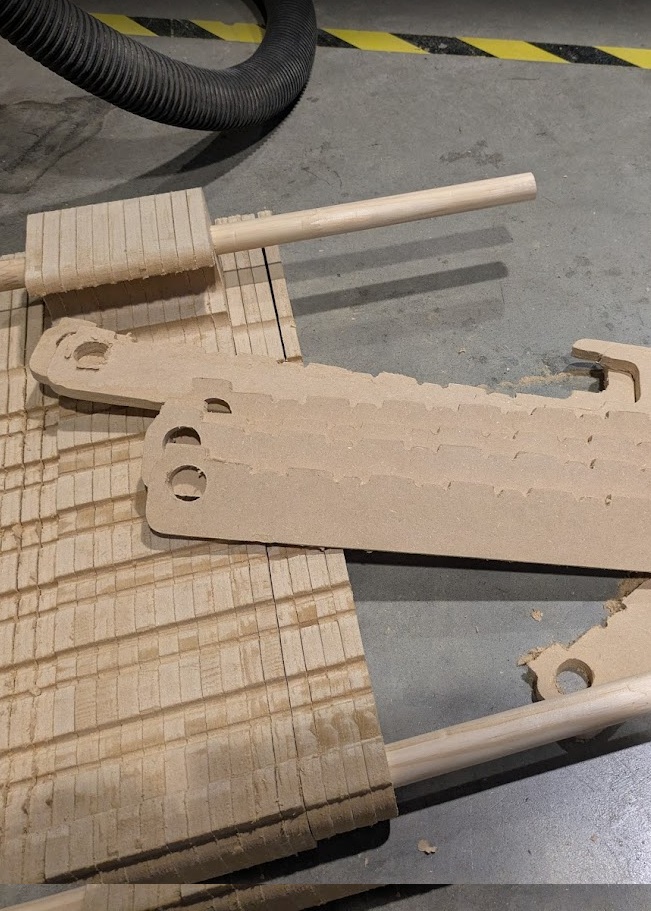
Although CNC is technically a 3D subtractive manufacturing technique, the workflow is quite similar to that of laser cutting, with the major difference being that you specify what exactly you want your toolpath to do on each vector. Since this was my first time using a CNC, I wanted to design simple to start, and integrate more features as I spiralled through a prototype.
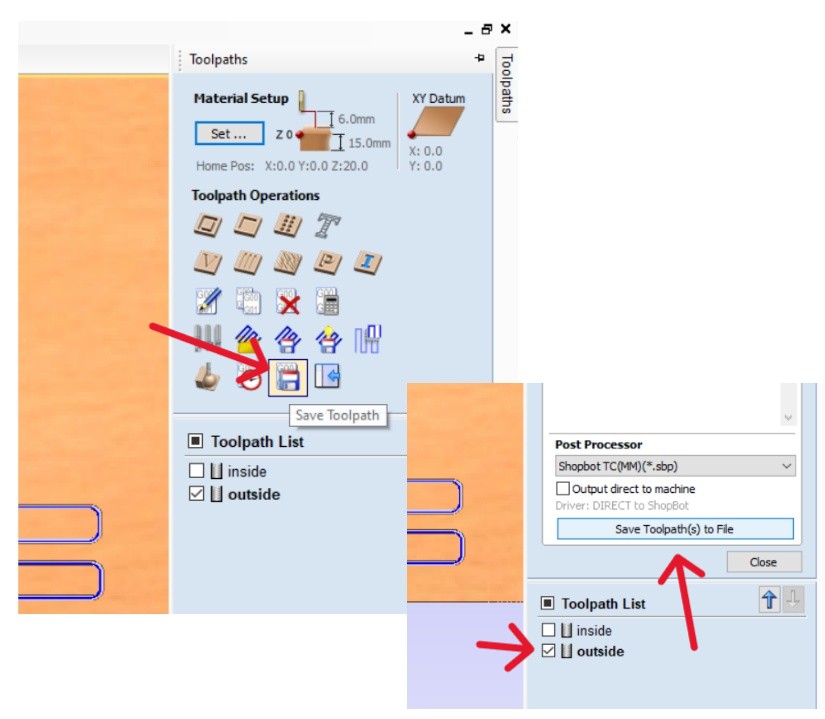
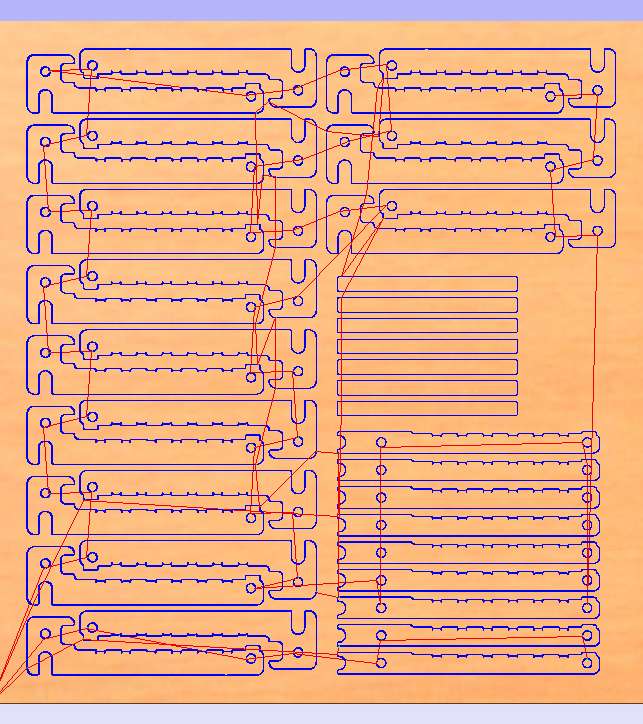
➔ Generating Toolpaths
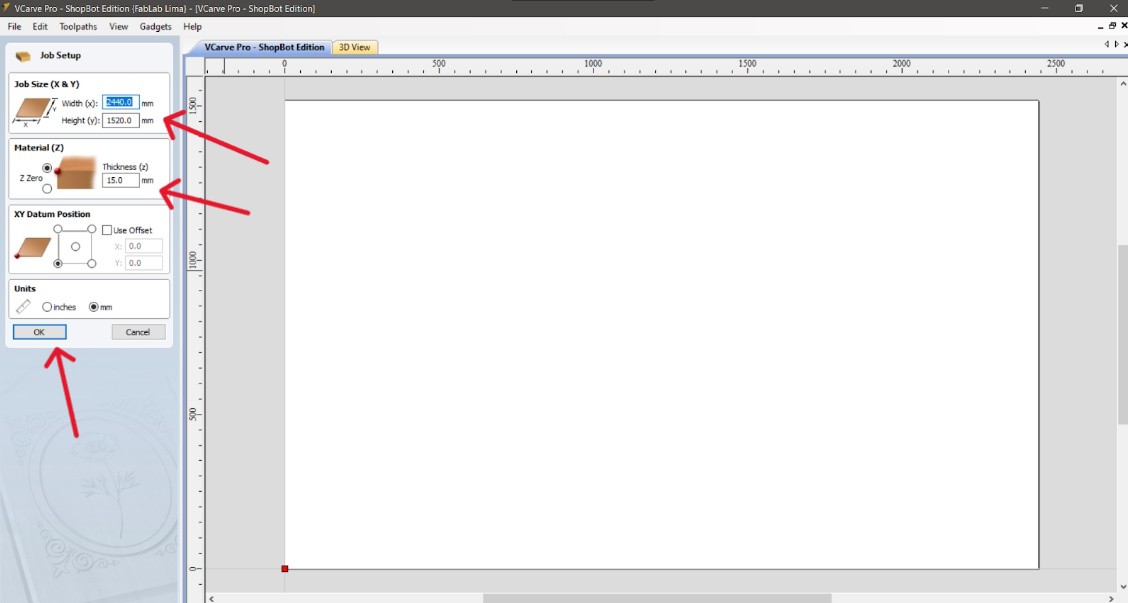
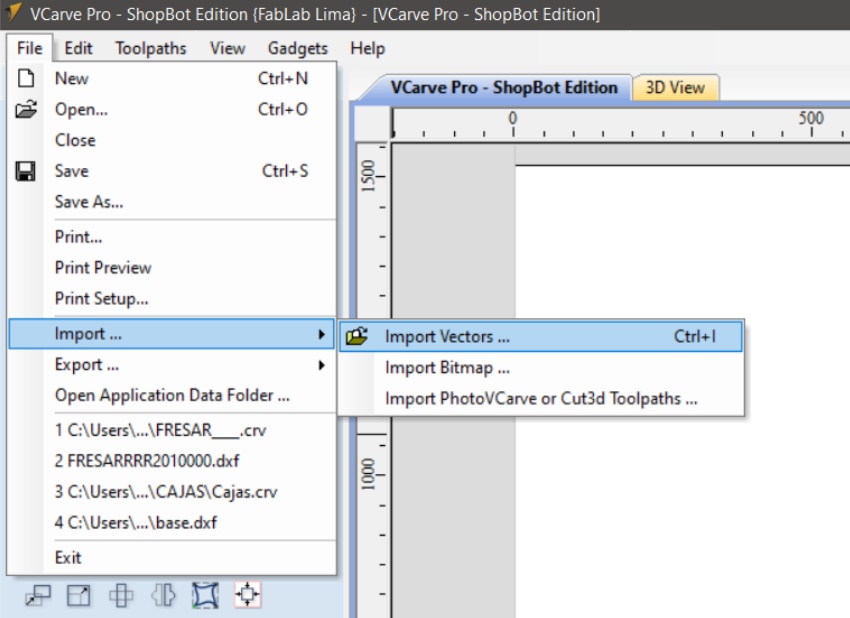
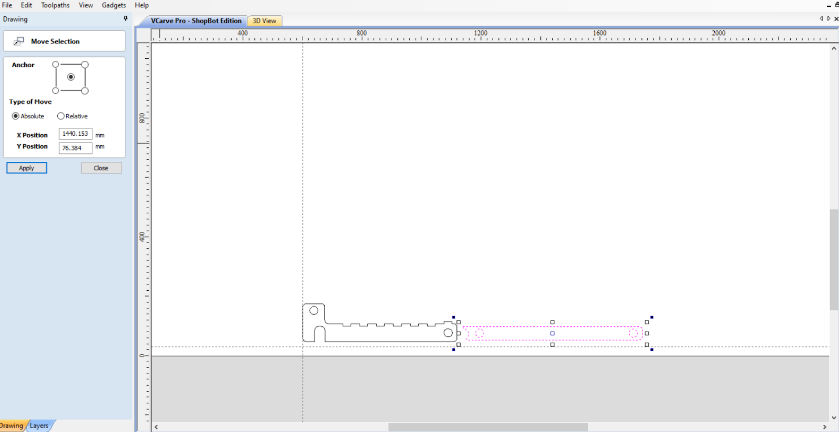
To operate the ShopBot, we need another piece of software, VCarve, that will turn our vectorized DXFs from Fusion into G-Code for the machine's motors.
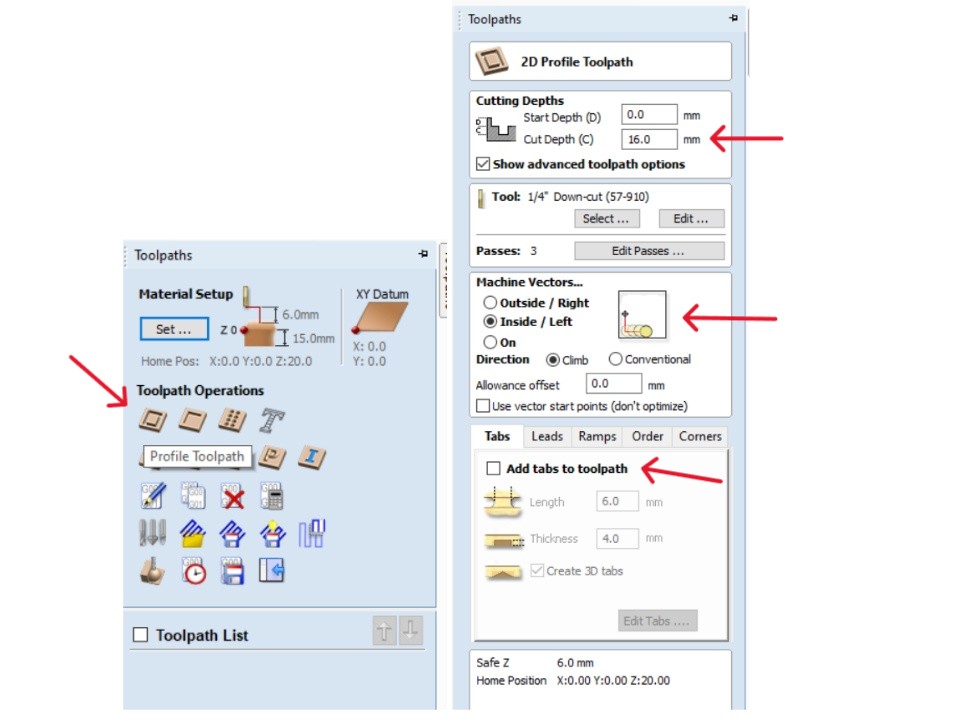


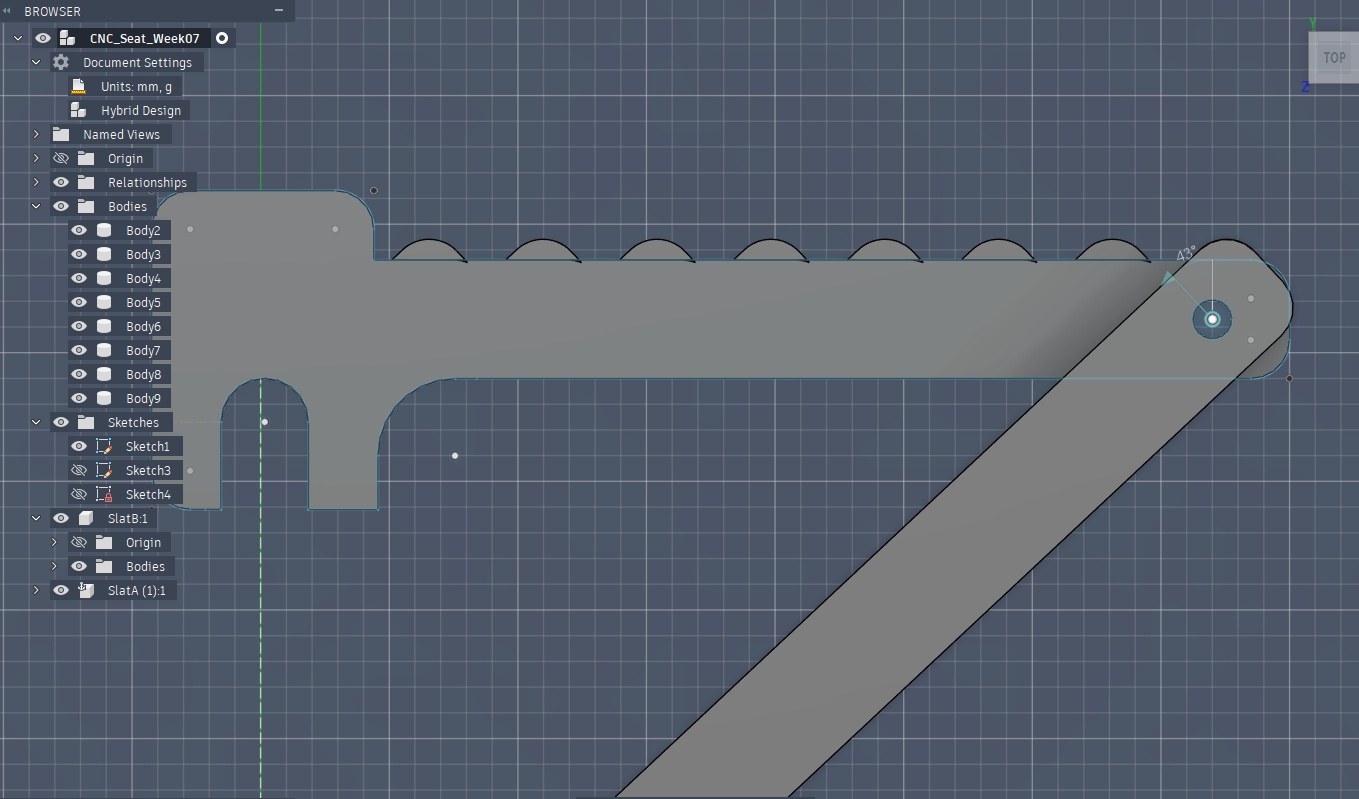
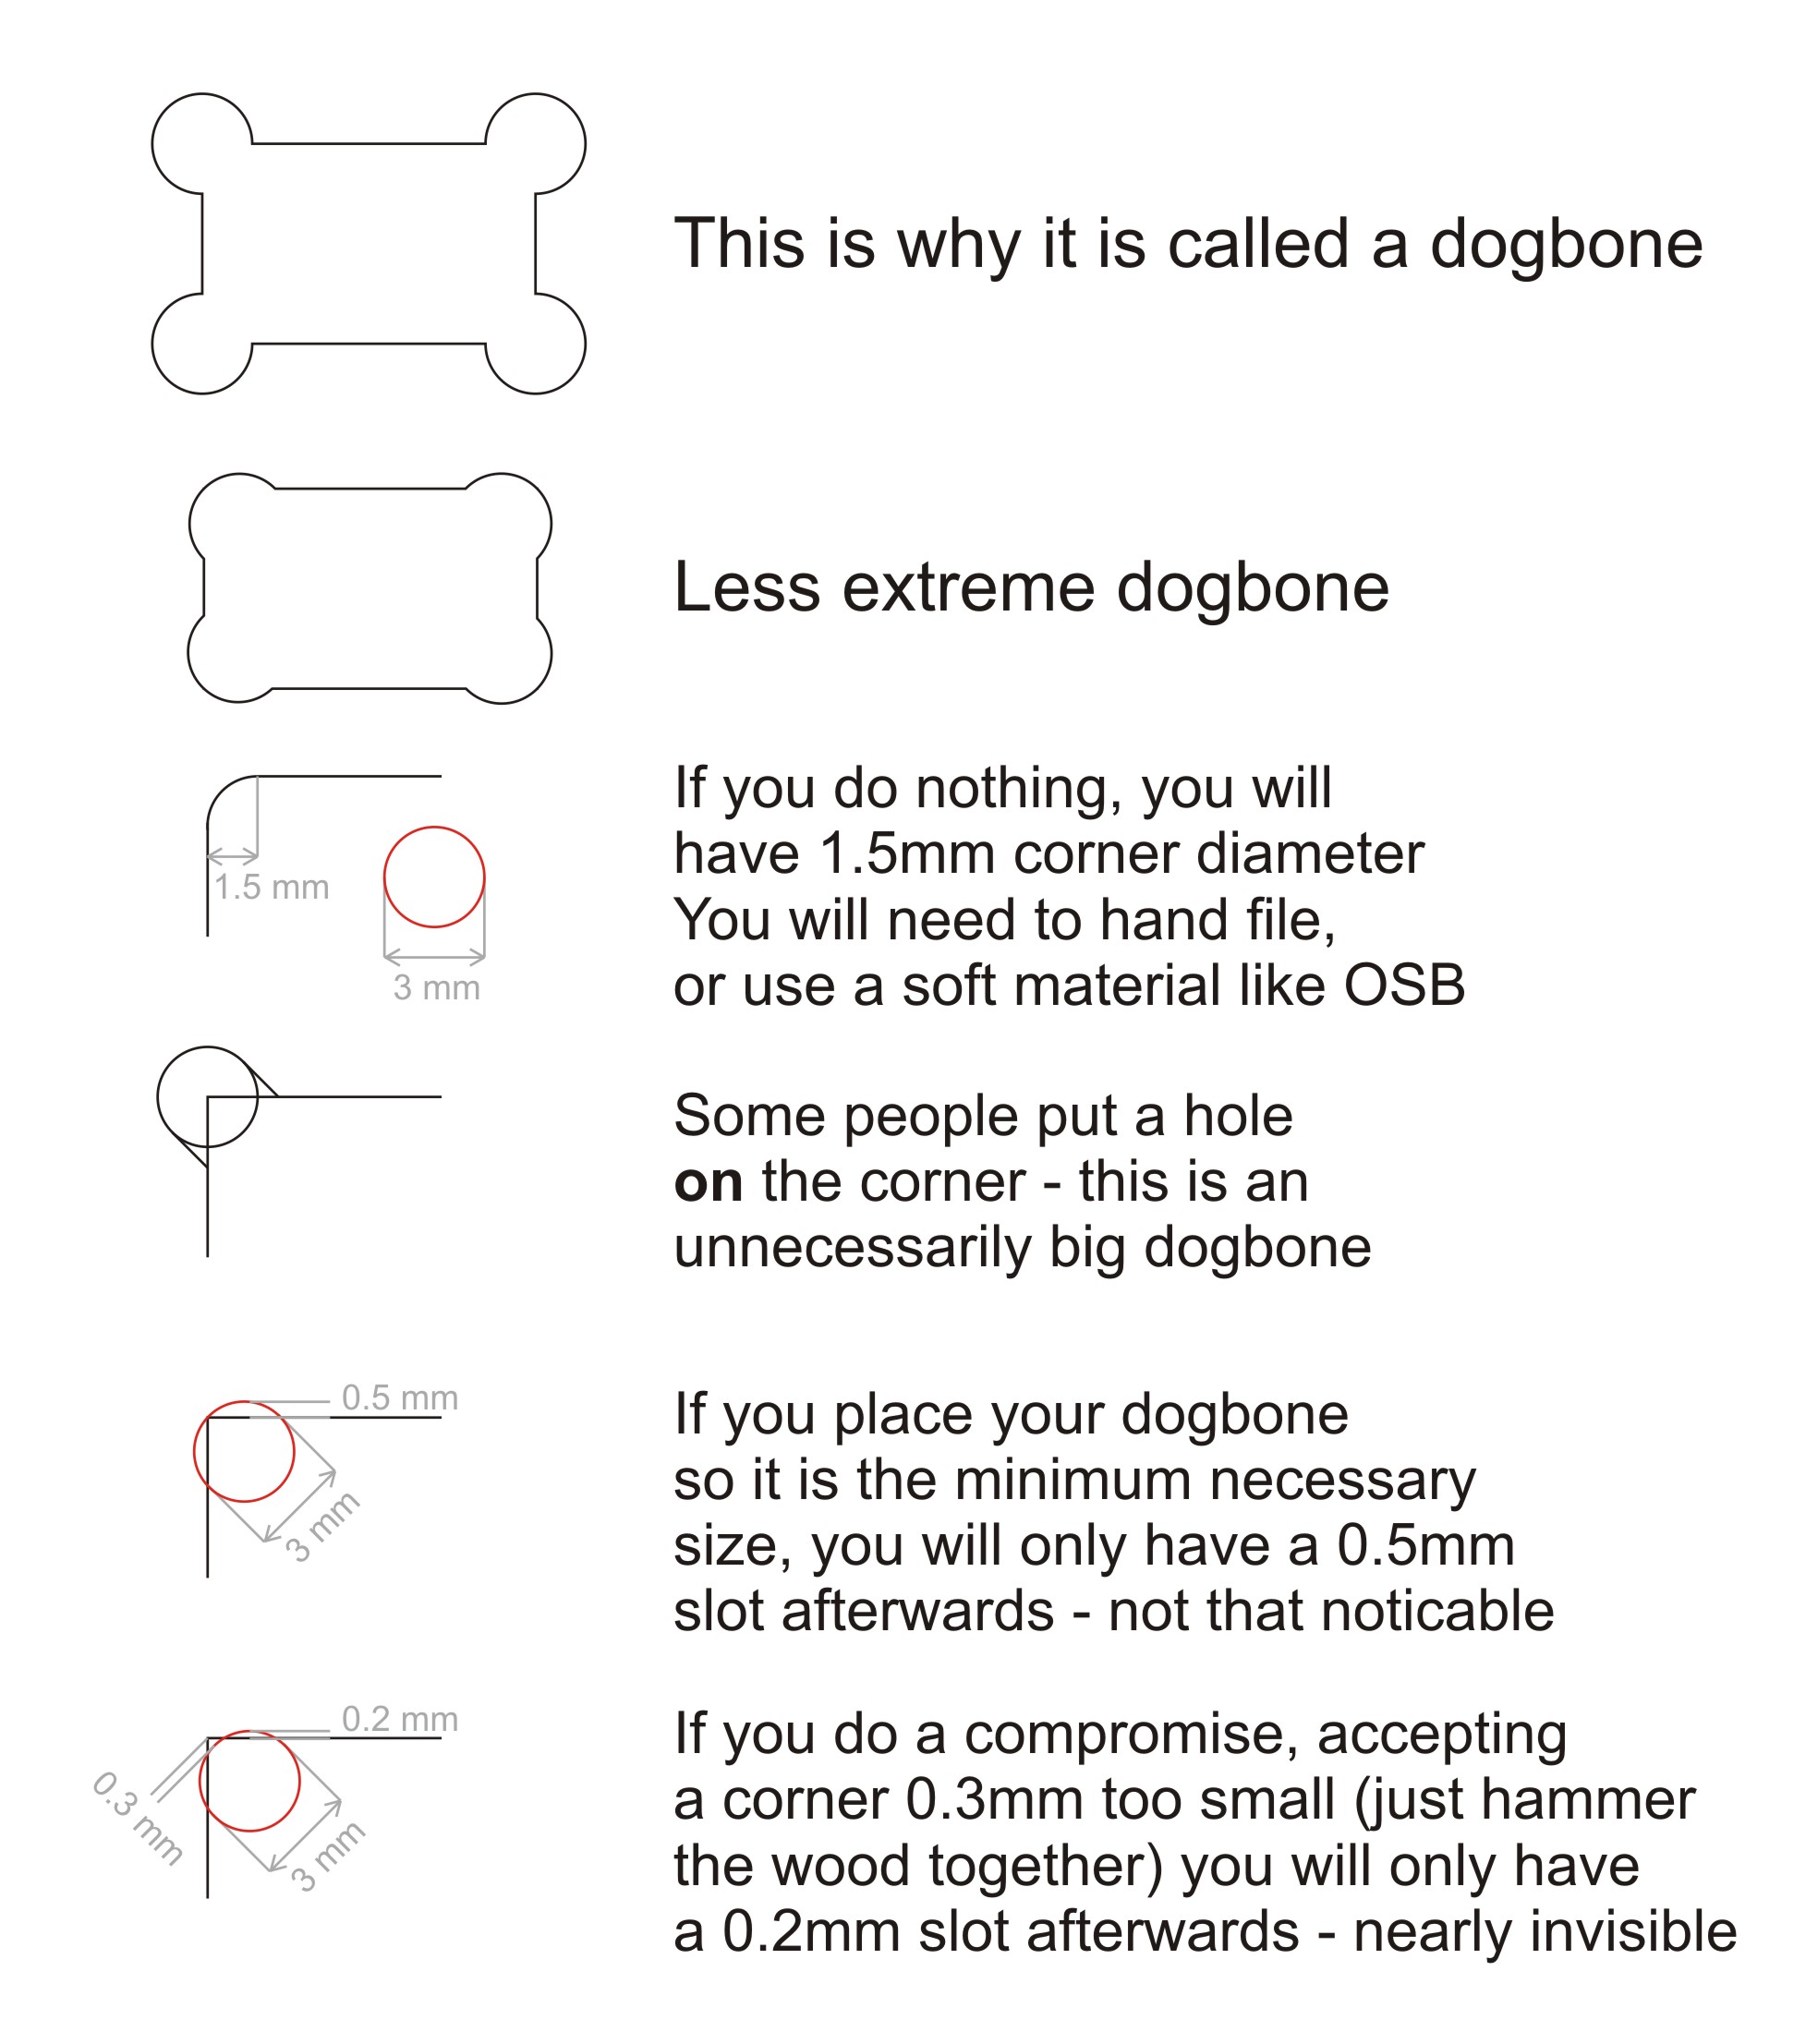
Due to the fact that your spinning drill bit is cylindrical, it's not 100% possible to get 90 degree angles, you'll always end up with a rounded corner. This is a problem for pieces that need to slot together as you won't have your intended depth with the rounding. To fix this, you can add "dog bones" in VCarve (or your CAD software) that will dig out a little extra on the corners of your joints to ensure you get the correct depth for a slot.
➔ Setting Up The Machine
There is an important multi-step process for getting the ShopBot working that you should follow in the correct order.
- Ensure your machine is ready for use. Clear any debris, tripping hazards, dust, and leftover material from previous prints. Have your PPE ready too!
- Screw down your material to the spoilboard (a junk board that you put underneath your cutting material).
- Engage the CNC machine (usually a key) and power it on.
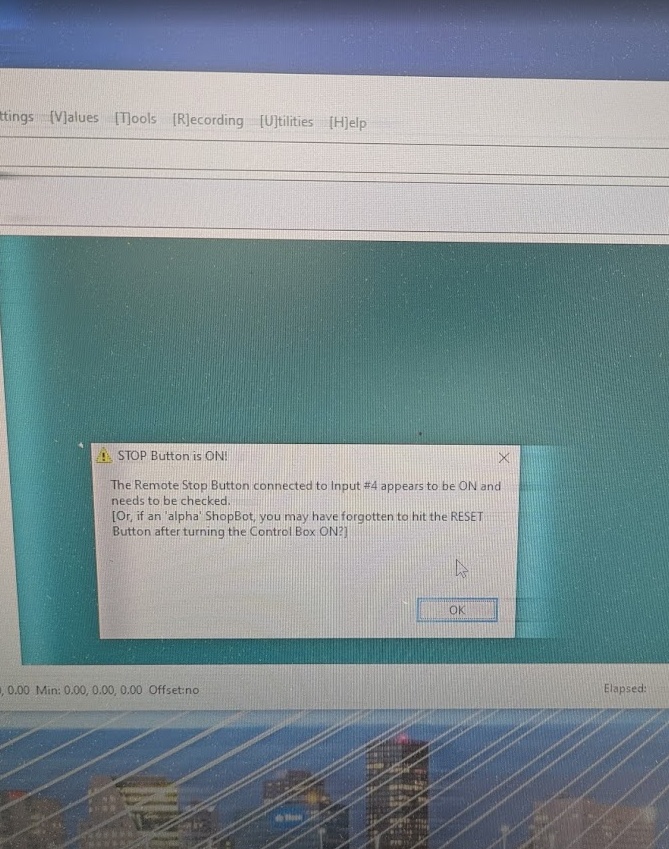
- Launch the ShopBot software on your machine's PC, press the "RESET" button on the remote stop button.
- Calibrate the Z-axis with the levelling plate and alligator clip (remember to put them back after), then calibrate the X and Y axes using the automatic homing.
- Import your file to the software and click "Cut Part", you'll get a dialog box reminding you to turn on the spindle (you should also turn on the fan here too).
- Once you click "OK" here, your part will begin being machined. Always stand by and watch your machine.
➔ Post Processing
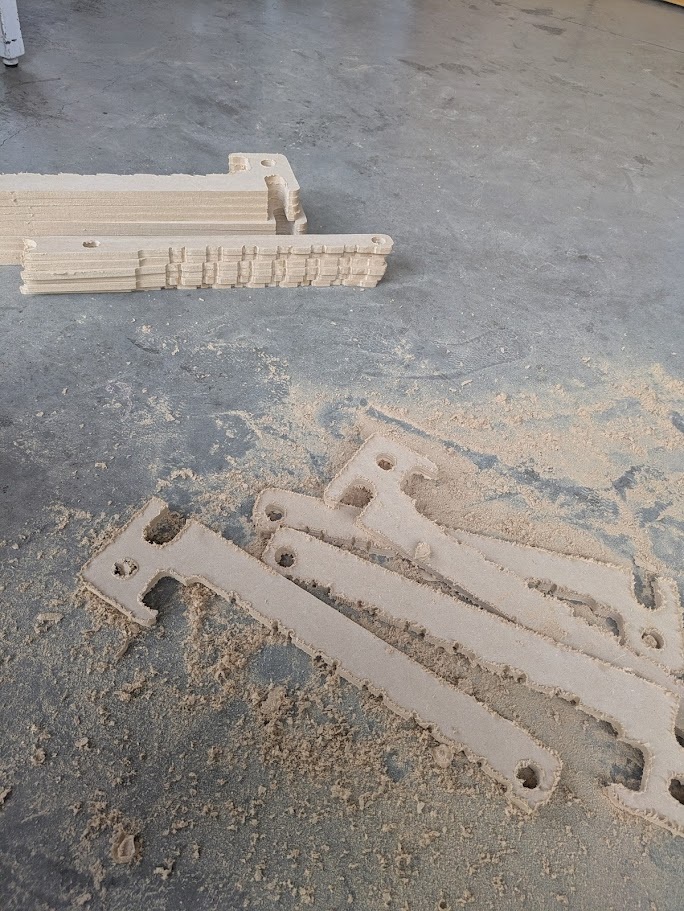
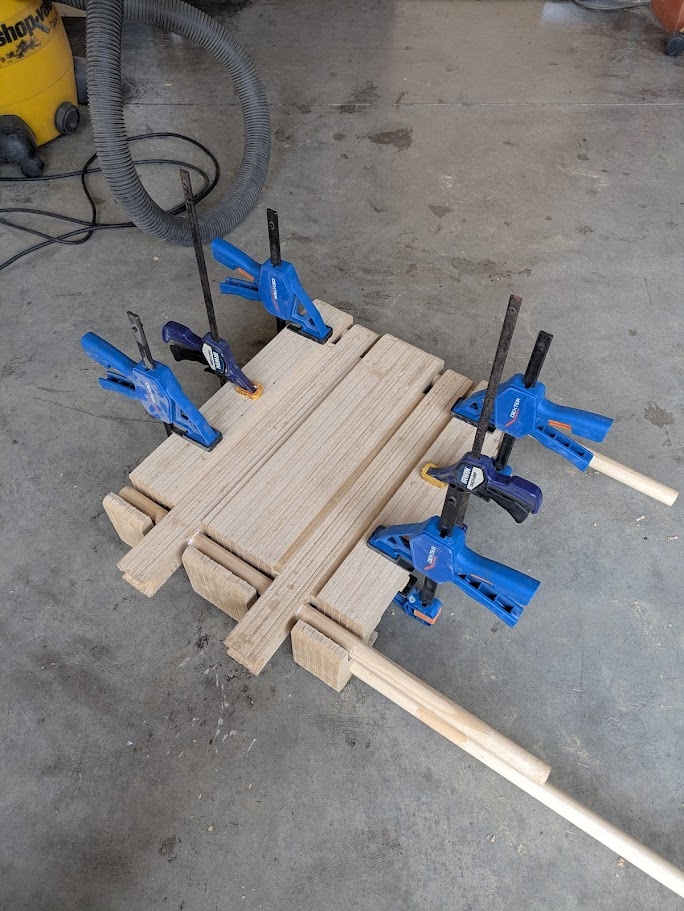
At this point you're probably thinking (or at least I was) "wow, that's so easy! I'll have my parts ready in no time". Alas, young maker, you are forgetting about post processing. Your machined part still needs a lot of work before it's ready to be used in your projects. For the MDF I used, that meant a lot of sanding and scraping down material that was left on the cut.
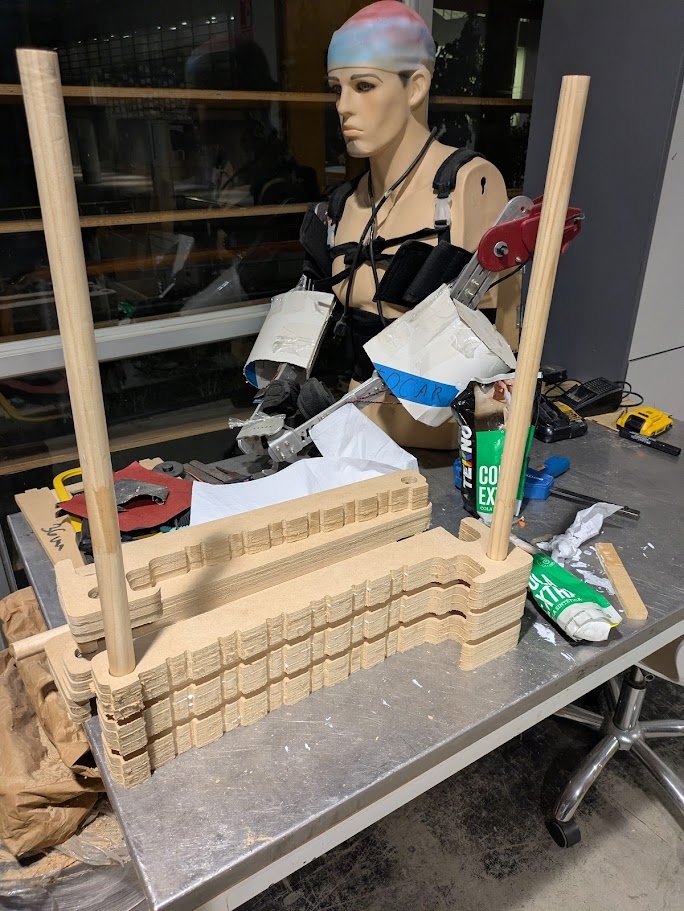
➔ Iteration
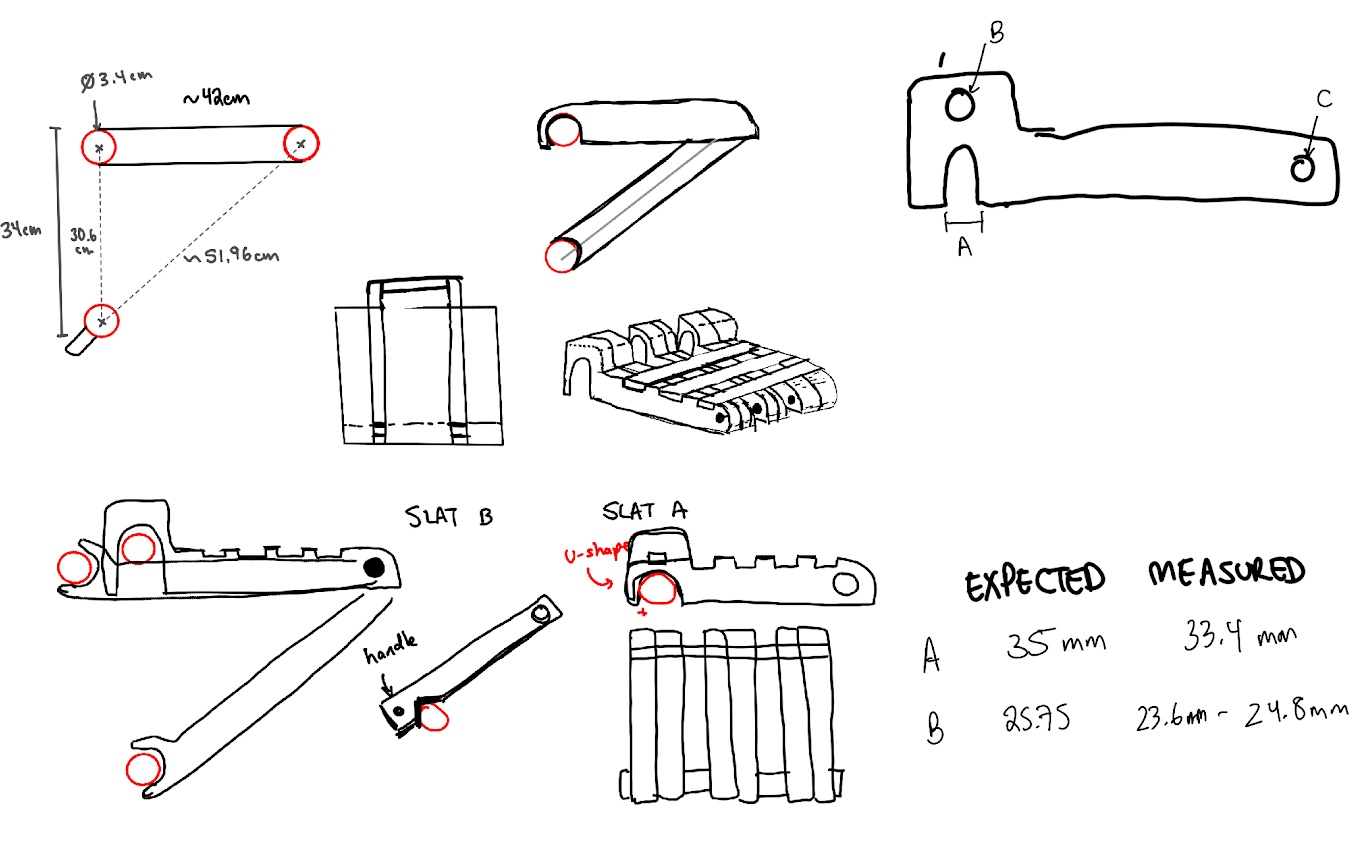
My first attempt wasn't too bad actually. I got the angle slightly off (serves me right for not trusting Pythagoras) and the clearance on the railing wasn't the best. Luckily I parameterized all of the dimensions in my project, so updating things was a (relative) breeze.
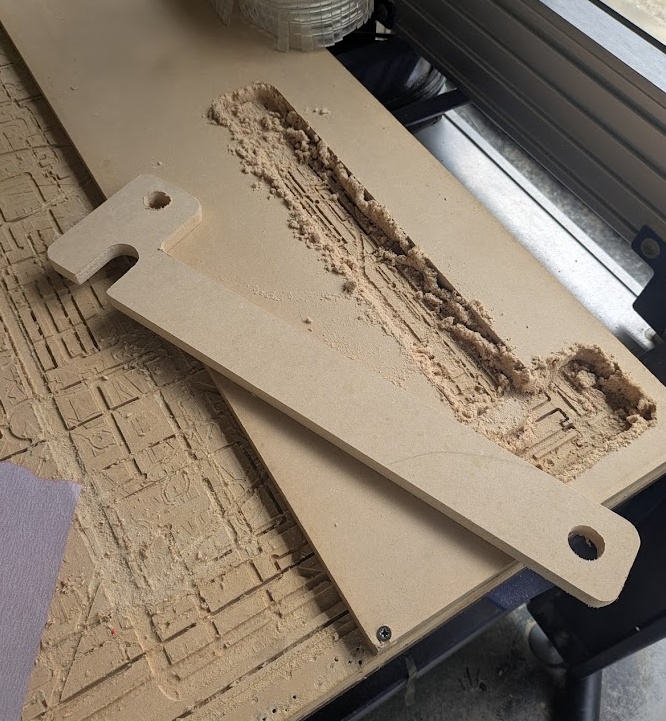
I did one test of the third iteration and found that it was pretty much perfect (aside from errors you'll read about later) so I decided to get the machine ready for a... 2 hour job?!?! Oh boy, I'm in for a long night.

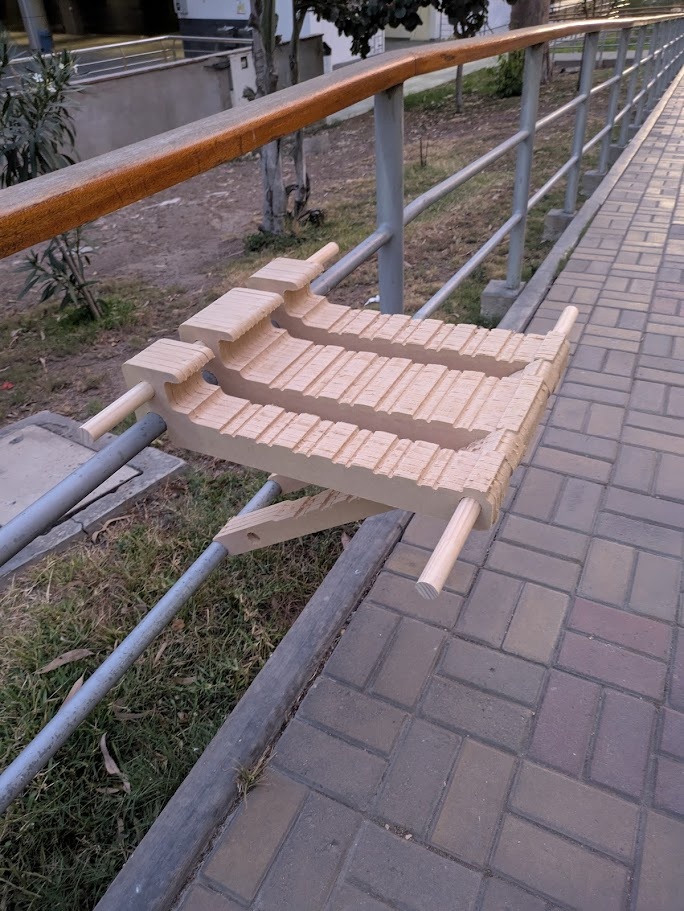
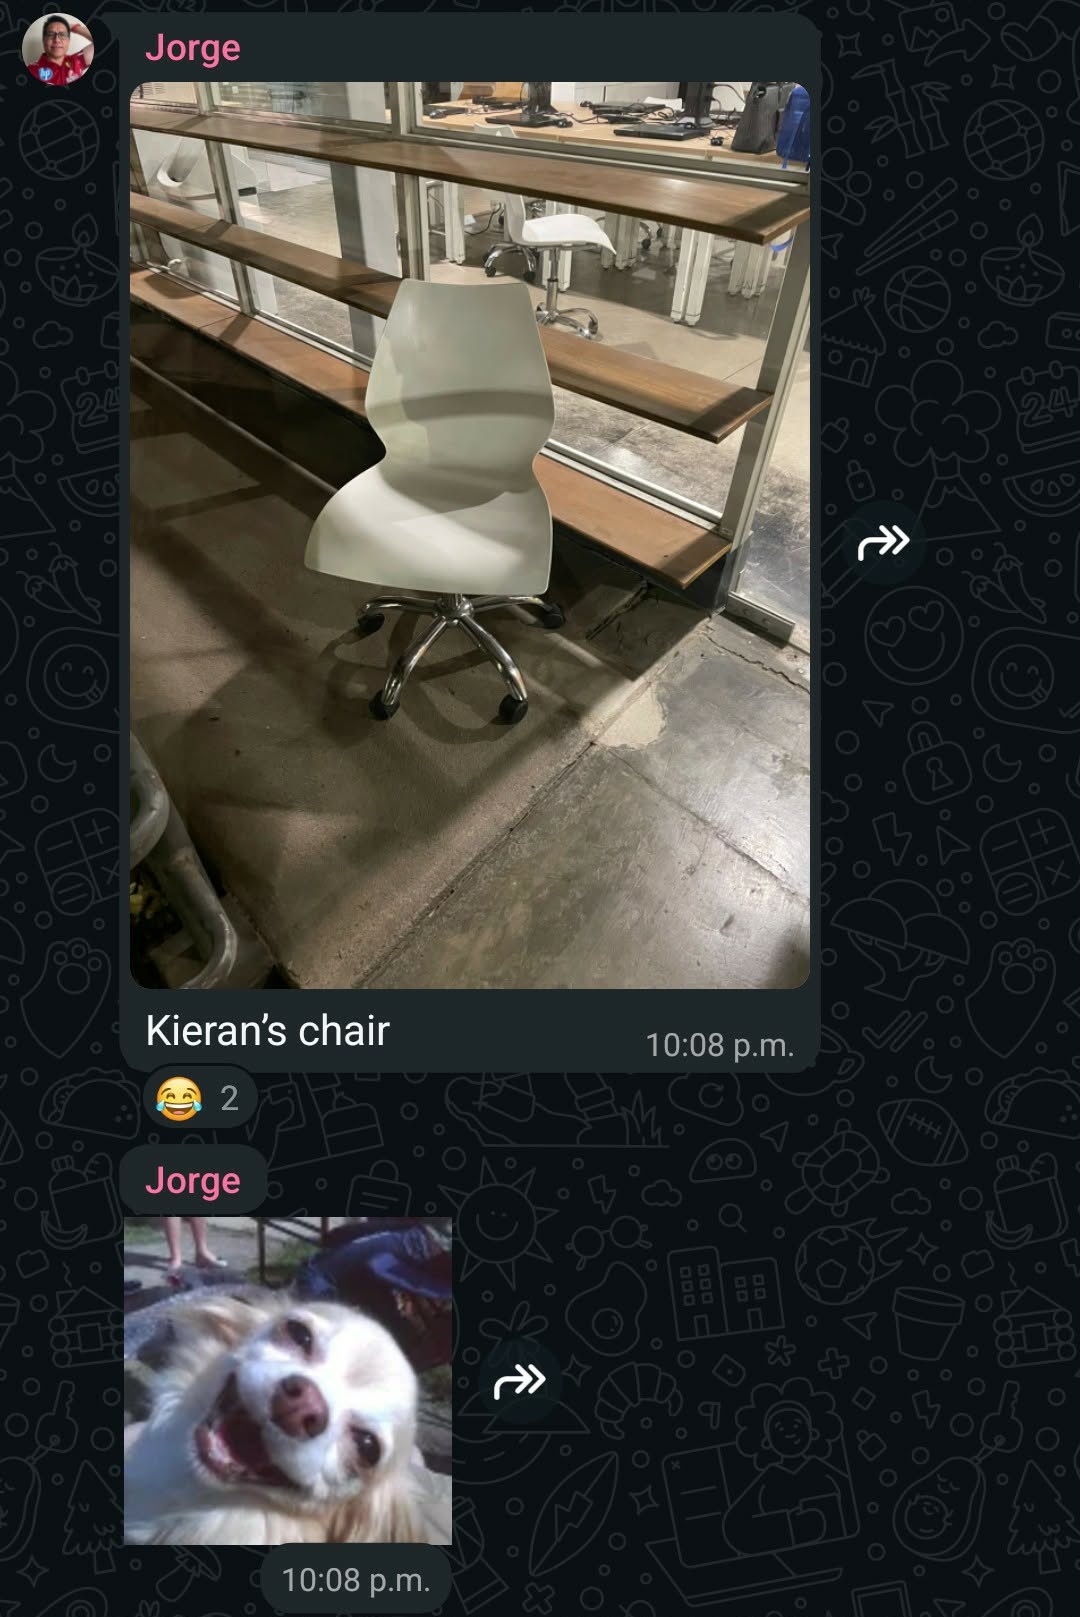
and the final result...
Kieran's Chair.

You can find the vector files here if you'd like to make it at home on your own CNC. Though you might want to edit the CAD file (parametrically!) to get it to fit your railing!

Conclusion
While the machine quirks and my initial math errors made for a rocky start, leaning into parametric modeling early on meant I could pivot and iterate without losing my mind. Happy that I've made the pivot to Fusion instead of stubbornly sticking with TinkerCAD haha!
The final chair is much sturdier than I expected and is a great place to take my 5 minute breaks when my pomodoro timer from Week 4 goes off! If I were to do this again, I’d definitely look for ways to optimize the slat count or at least preview the material I was going to work with instead of making assumptions and then having two hours of manual sanding. Still, seeing it all come together in just a couple days after my wife’s visit was the victory I needed! I feel very accomplished!