Week 2: Computer-Aided Design 第2周:计算机辅助设计
Assignment Checklist 作业清单
- Model (raster, vector, 2D) a possible final project 使用光栅、矢量、2D等方式建模最终项目方案
- Compress images and videos 压缩图片和视频
- Post a description with design files on the class page 在课程页面发布描述与设计文件
Design Software: LaserMaker 设计软件:LaserMaker
For both projects this week, I used LaserMaker — a 2D vector design software specifically built for laser cutting workflows. LaserMaker provides an intuitive interface for designing cut lines, engraving patterns, and parametric shapes that can be sent directly to a laser cutter. It supports importing vector graphics and offers tools for drawing, arranging, and optimizing designs for fabrication. 本周的两个项目,我都使用了 LaserMaker —— 一款专为激光切割工作流程设计的2D矢量设计软件。LaserMaker 提供了直观的界面,可以设计切割线条、雕刻图案和参数化形状,并直接发送到激光切割机。它支持导入矢量图形,并提供绘图、排列和优化制造设计的工具。
Project A: Laser-Cut Violin Wall Mount 项目A:激光切割小提琴壁挂支架
The first project is a custom-designed wall-mounted violin stand for the ISA Innovation Centre. The design combines functional hardware mounting with decorative laser-engraved artwork, featuring a music-themed circuit board pattern, the ISA logo, and Chinese-English labeling. The stand is cut and engraved from plywood using a laser cutter, with an acrylic top piece for the ISA Innovation Centre logo. 第一个项目是为爱莎科创中心定制设计的壁挂式小提琴支架。设计将功能性硬件安装与装饰性激光雕刻艺术相结合,采用音乐主题的电路板图案、ISA标志以及中英文标识。支架使用激光切割机在胶合板上切割和雕刻而成,顶部的ISA科创中心标志则采用亚克力材质切割。
Step 1: 2D Design in LaserMaker 步骤1:在LaserMaker中进行2D设计
The design was created entirely in LaserMaker. The layout includes several carefully composed elements: a rectangular main body featuring a circuit board-inspired pattern with music notes, treble clefs, a violin silhouette, and a heartbeat line. At the top sits the ISA Innovation Centre gear-and-atom logo, designed as a separate cut piece. The text "ISA Innovation Centre" is set to be cut through as a standalone element. Cut lines (red) define the outlines, while engraving lines (lighter) create the surface detail. 设计完全在 LaserMaker 中完成。布局包含多个精心组合的元素:矩形主体采用电路板风格图案,融入了音符、高音谱号、小提琴剪影和心跳线。顶部是ISA科创中心的齿轮原子标志,设计为独立切割件。"ISA Innovation Centre"文字设置为切割穿透的独立元素。红色线条定义轮廓切割,浅色线条创造表面雕刻细节。

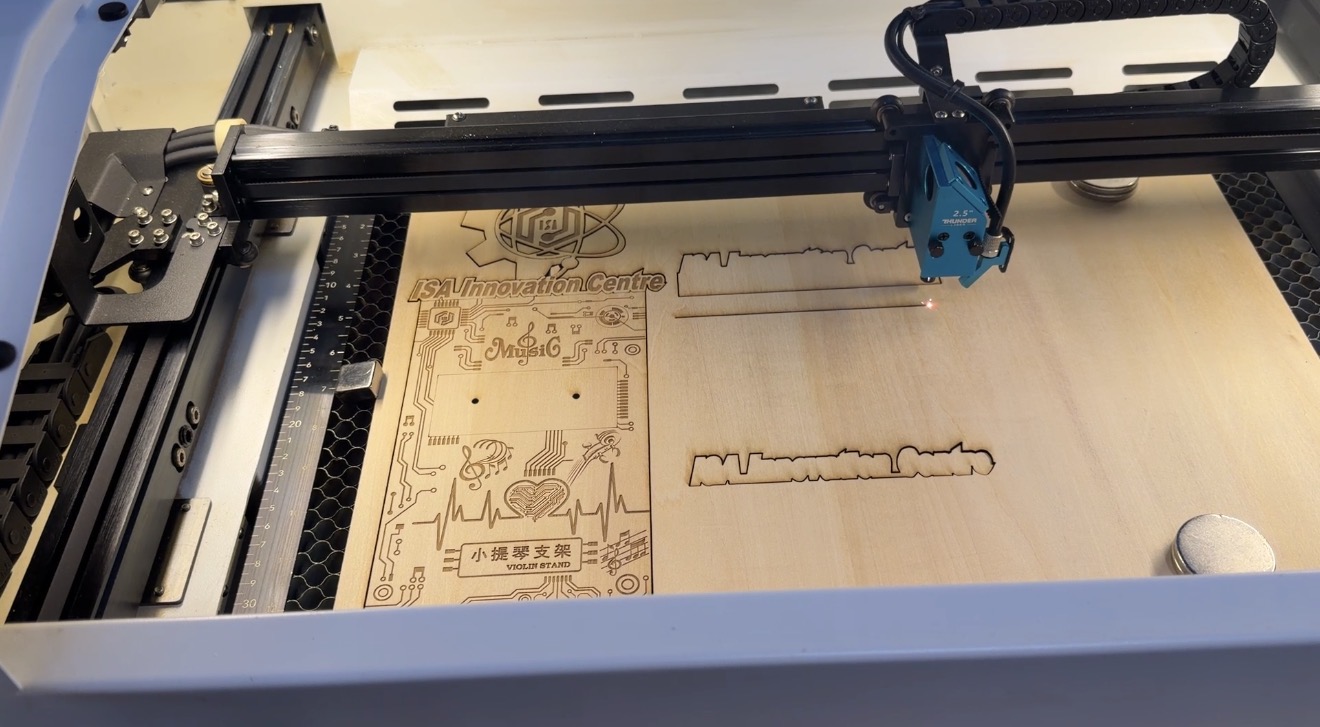
Step 2: Laser Cutting Process 步骤2:激光切割过程
The design was sent to a desktop laser cutter for fabrication. The machine first engraves the surface details (circuit patterns, musical elements, text) at lower power, then cuts through the outlines at full power. The material used is 3mm plywood. You can see the laser head actively cutting the "ISA Innovation Centre" text piece on the right side of the bed, while the main body with its engraved pattern sits on the left. 设计被发送到桌面激光切割机进行加工。机器首先以较低功率雕刻表面细节(电路图案、音乐元素、文字),然后以全功率切割轮廓。使用的材料是3mm胶合板。可以看到激光头正在工作台右侧切割"ISA Innovation Centre"文字件,而带有雕刻图案的主体位于左侧。
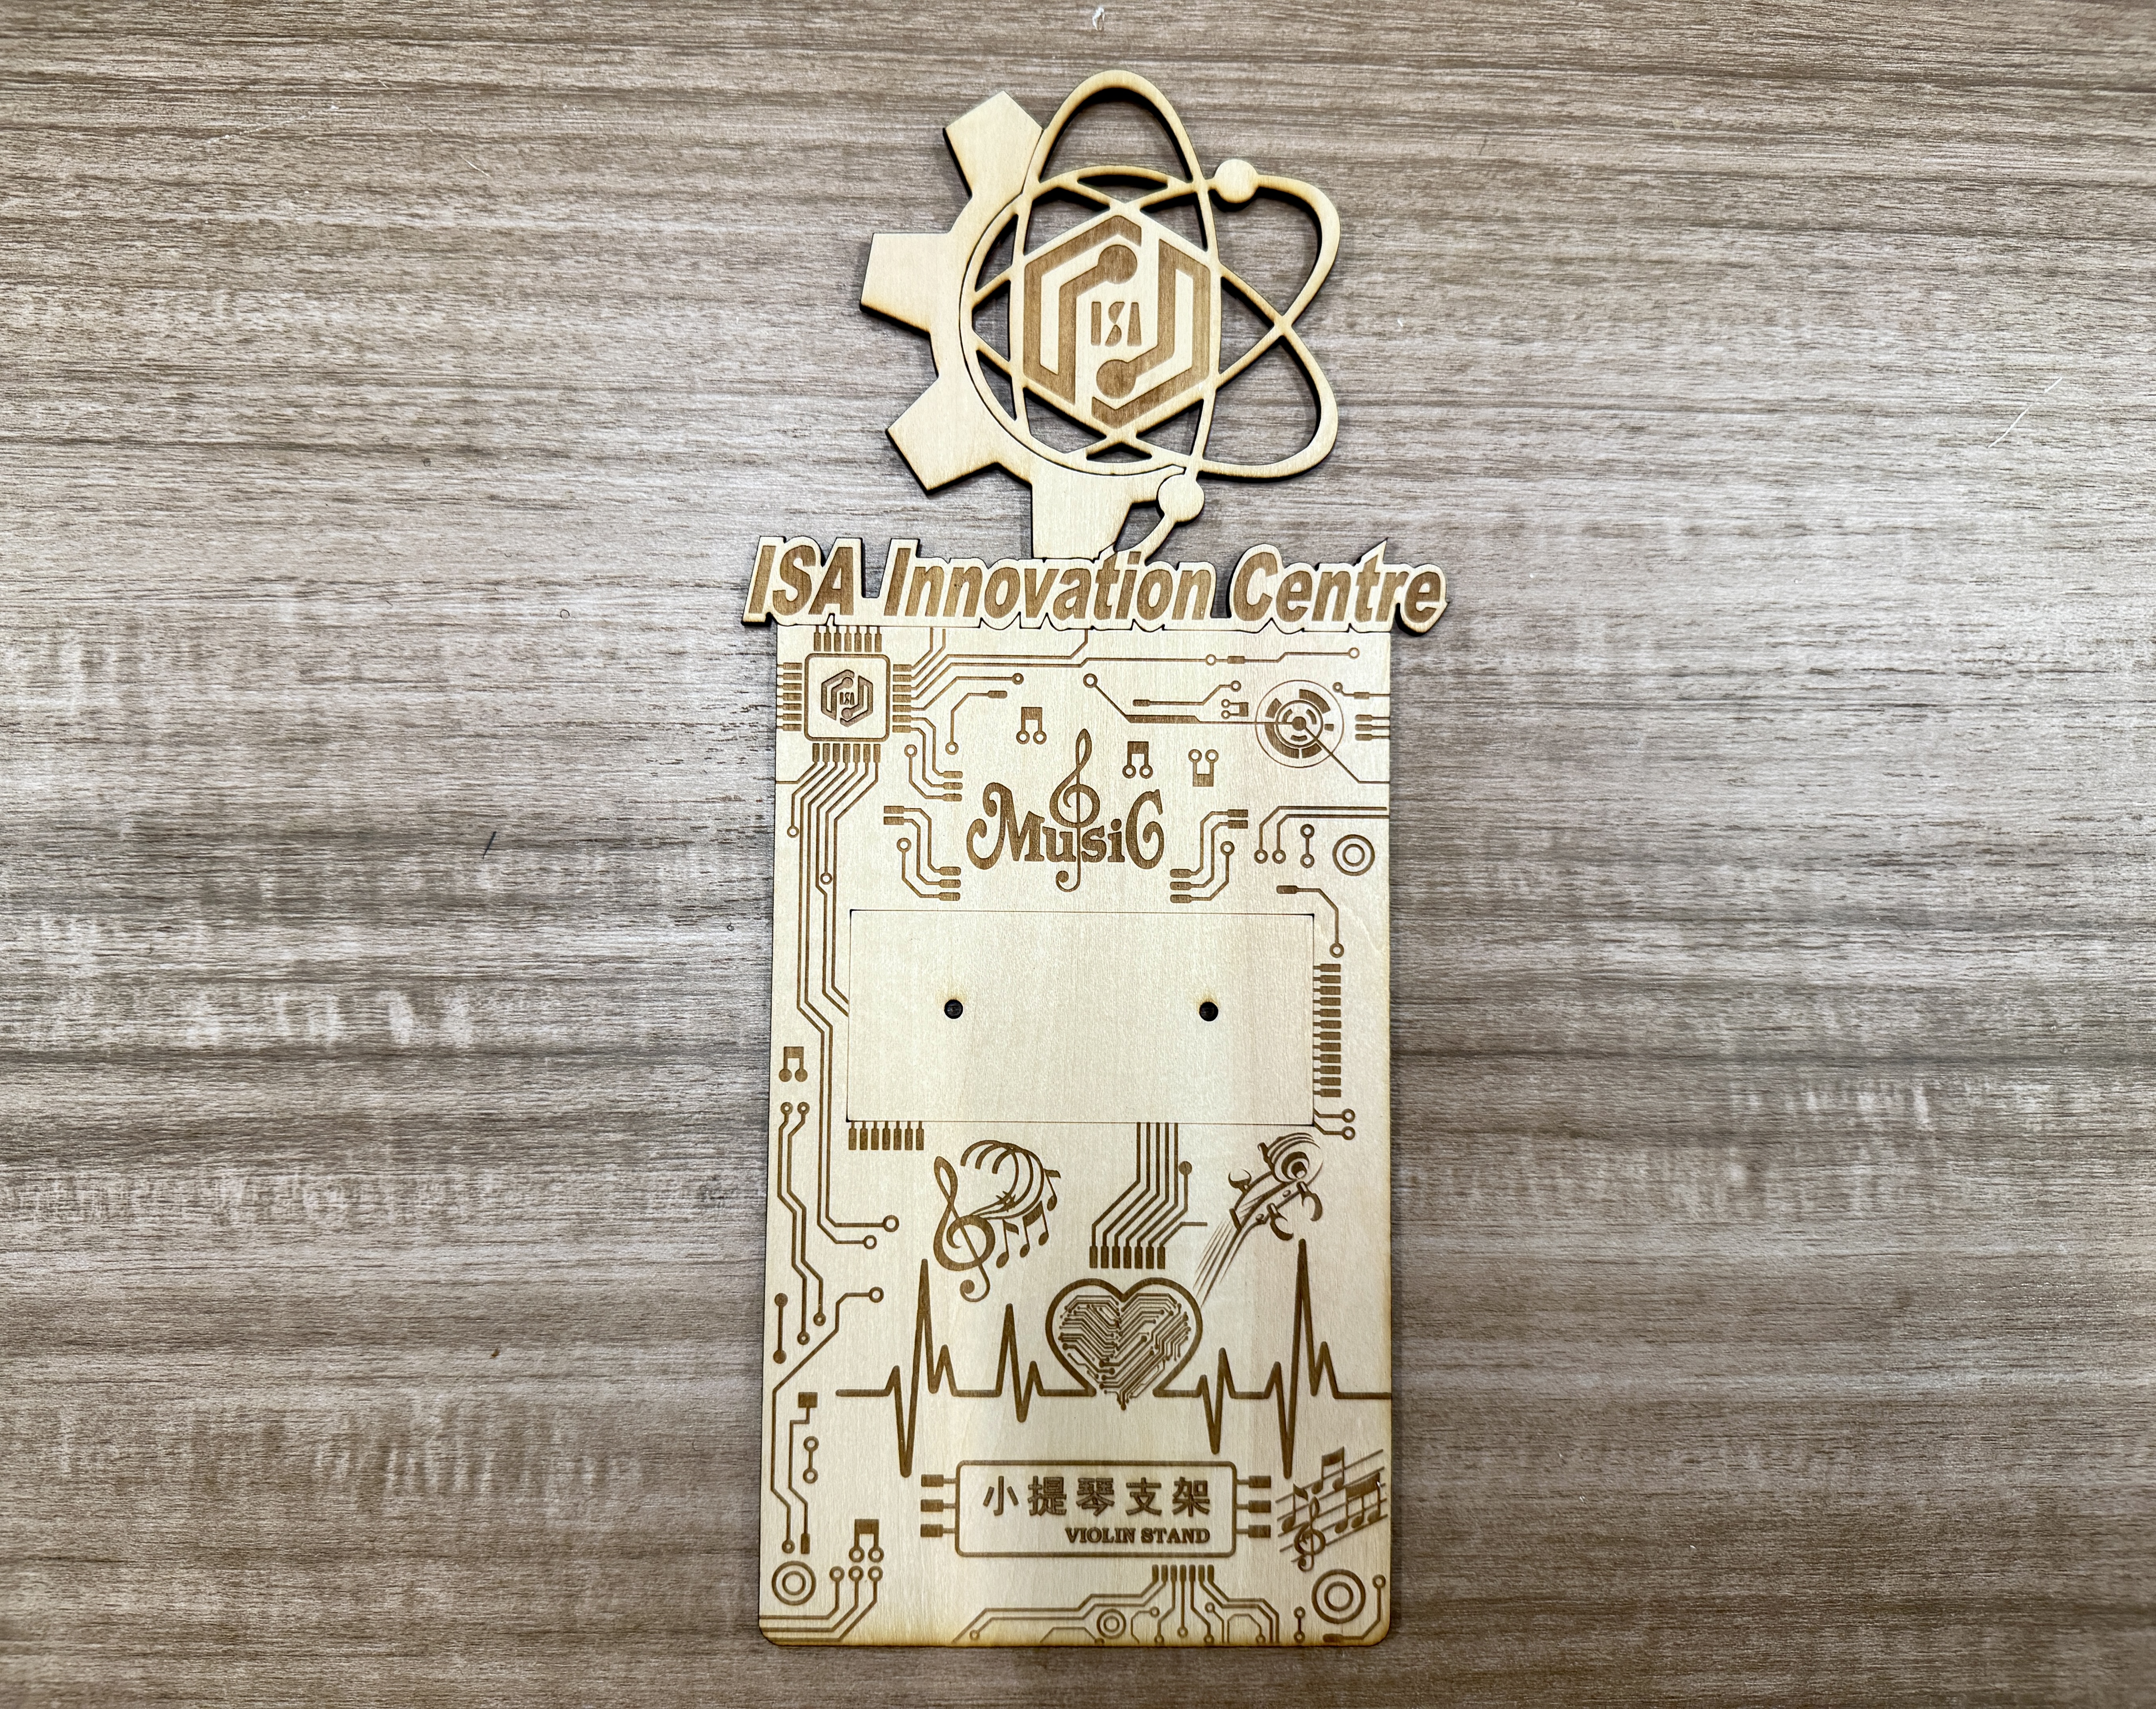
Step 3: Cut Result — Flat Pieces 步骤3:切割成品——平面部件
After cutting, all the pieces were removed from the laser bed. The main body shows the intricate engraved circuit board pattern, music icons, and the "小提琴支架 VIOLIN STAND" label at the bottom. The ISA gear-atom logo is a separate piece that will be mounted on top. The "ISA Innovation Centre" text was cut out as an independent strip to be attached in a contrasting color. 切割完成后,所有部件从激光切割台上取下。主体展示了精致的电路板雕刻图案、音乐图标,以及底部的"小提琴支架 VIOLIN STAND"标签。ISA齿轮原子标志是独立部件,将安装在顶部。"ISA Innovation Centre"文字被切割为独立条带,将以对比色附着。
Step 4: Assembly — Multi-Material Composition 步骤4:组装——多材质组合
The top logo piece was also cut from dark-colored acrylic using the same laser cutter, creating a striking two-tone contrast with the plywood body. The orange "ISA Innovation Centre" text strip was mounted between the logo and the main body. Below you can see two versions: the wood-and-acrylic assembled piece on its own, and a close-up showing the dark acrylic ISA logo detail in the lab environment. 顶部标志件同样使用激光切割机从深色亚克力材料上切割而成,与胶合板主体形成醒目的双色对比。橙色的"ISA Innovation Centre"文字条安装在标志和主体之间。下方可以看到两个版本:单独的木材-亚克力组装件,以及在实验室环境中展示的深色亚克力ISA标志细节特写。


Step 5: Installing the Violin Hook 步骤5:安装小提琴挂钩
A standard rubber-coated violin hook was mounted into the rectangular slot cut into the main body. The slot was precisely measured in the LaserMaker design to fit the hook hardware with screw holes. The hook securely holds the violin by its scroll (the curved top of the neck). 一个标准的橡胶涂层小提琴挂钩被安装到主体上切割好的矩形槽中。该槽在 LaserMaker 设计中精确测量,以匹配挂钩硬件和螺丝孔位。挂钩通过琴头(琴颈顶部的卷曲部分)牢固地固定小提琴。

Step 6: Final Product — Mounted and In Use 步骤6:最终成品——安装与使用
The finished violin stand was mounted on a pegboard wall in the ISA Innovation Centre. The result is both functional and visually appealing — the intricate laser-engraved circuit pattern gives it a maker/tech aesthetic, while the dark acrylic ISA logo adds a professional touch. The final image shows the stand performing its intended purpose: securely holding a 3D-printed electric violin on the wall. 完成的小提琴支架被安装在爱莎科创中心的洞洞板墙上。最终效果既实用又美观——精致的激光雕刻电路图案赋予其创客/科技美感,深色亚克力ISA标志则增添了专业感。最后一张图展示了支架发挥其预期功能:将一把3D打印电子小提琴牢固地挂在墙上。


Project B: Multi-Function Adjustable Desk 项目B:多功能升降桌
The second project is an electric height-adjustable desk with integrated smart features designed using LaserMaker for the 2D panel layouts and cable management components. The desk combines a motorized lifting column with a custom power distribution system, embedded charging ports, and various smart peripherals — all designed to create a compact, self-contained workspace. 第二个项目是一张电动升降多功能桌,使用 LaserMaker 设计了2D面板布局和线缆管理组件。该桌将电动升降柱与定制的电源分配系统、嵌入式充电端口和各种智能外设相结合——所有设计旨在打造一个紧凑、自成一体的工作空间。
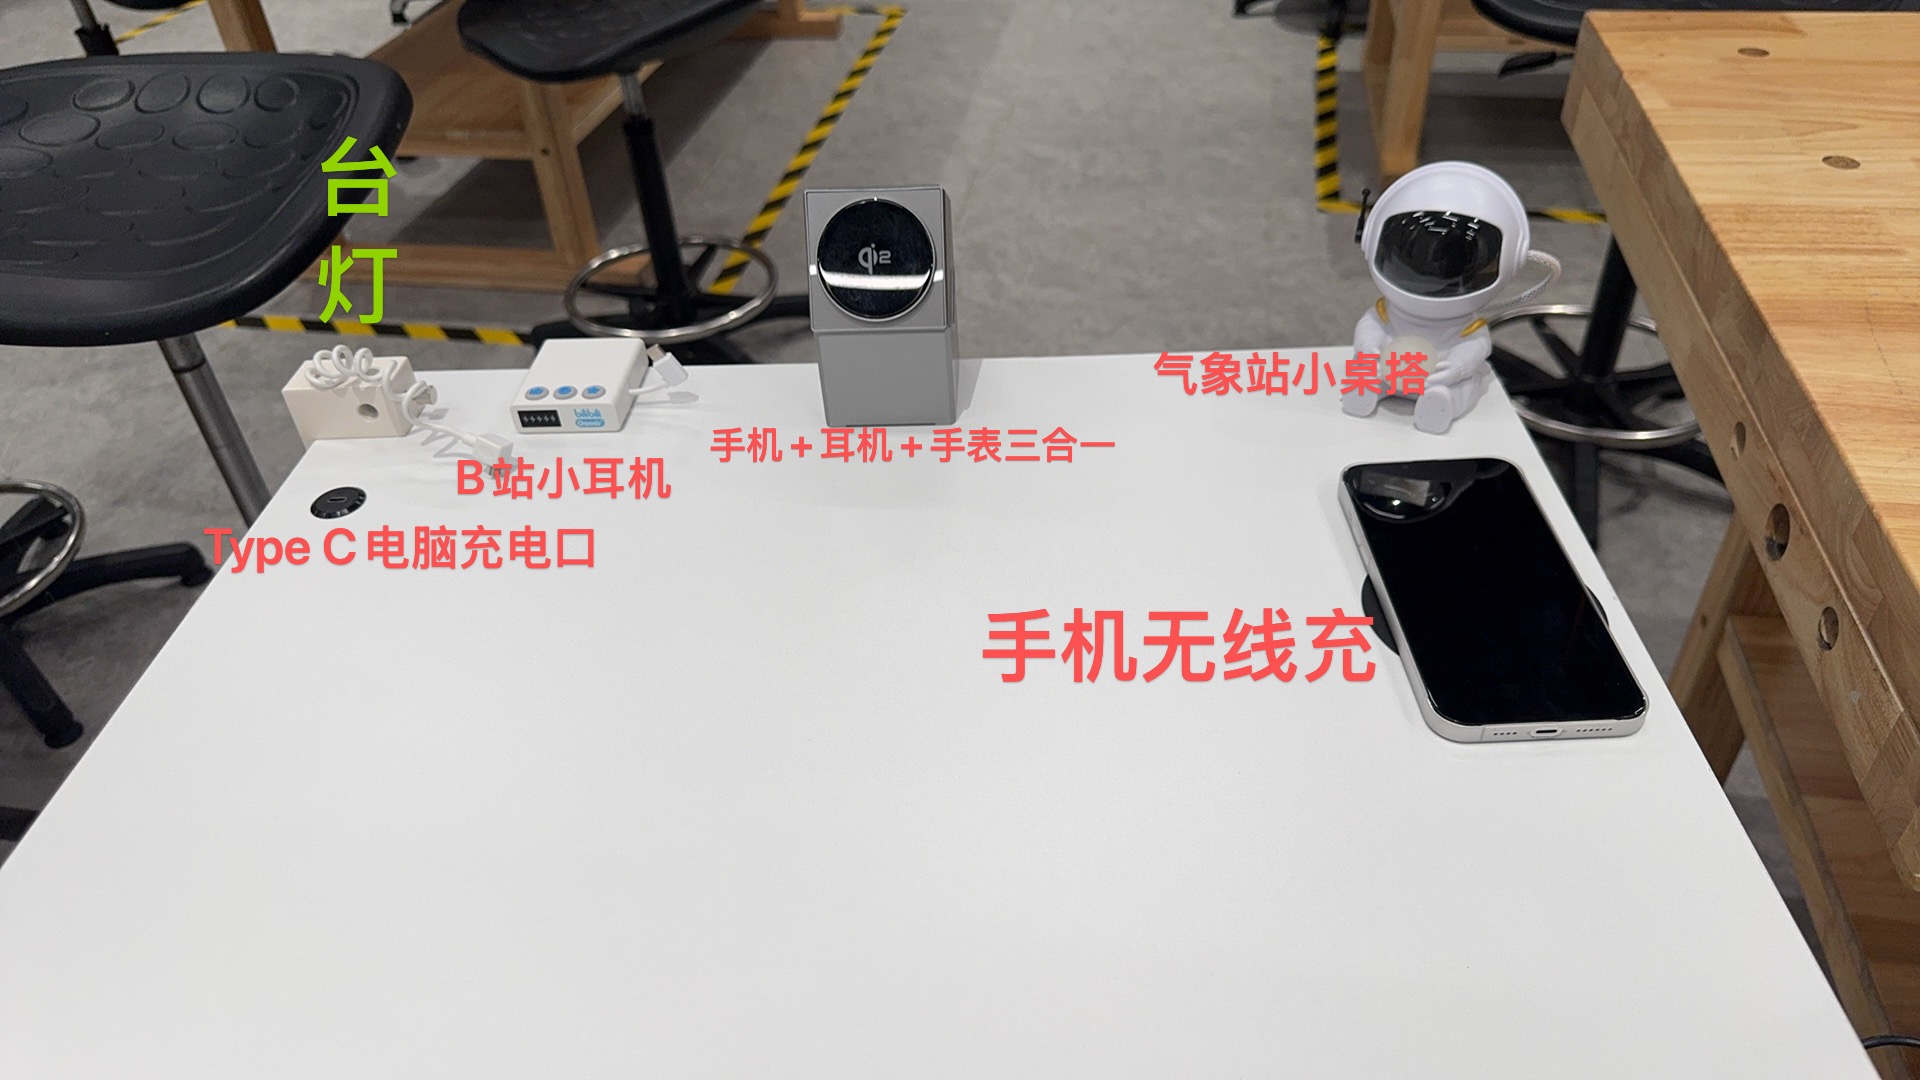
Feature Overview 功能概览
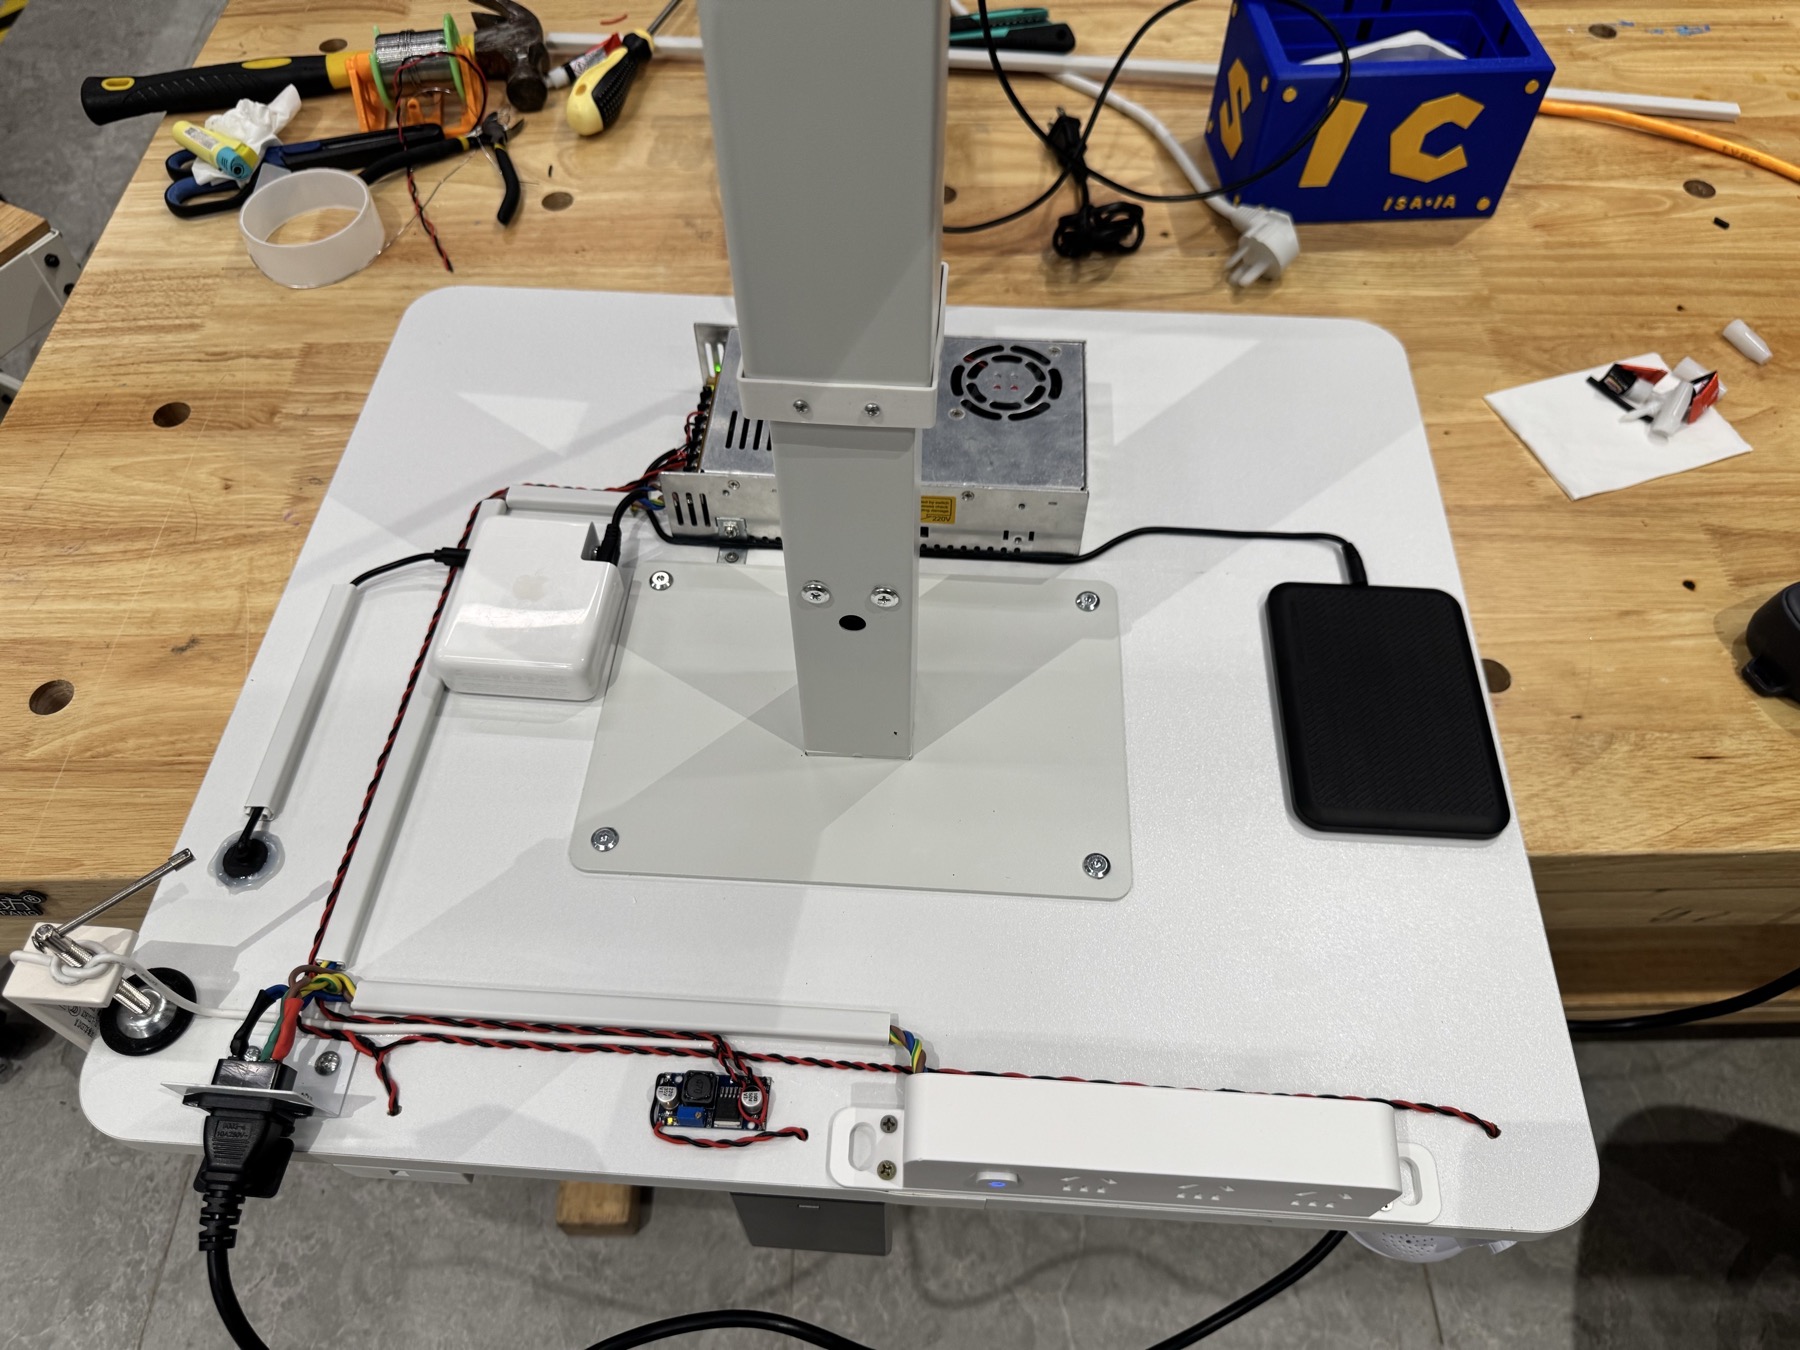
The annotated top-down view below shows all the integrated features of the desk surface. The 2D layout of cutout holes, mounting positions, and cable routing was designed in LaserMaker before fabrication. Key features include: 下方的标注俯视图展示了桌面的所有集成功能。切割孔位、安装位置和走线路径的2D布局都在 LaserMaker 中设计后再进行制造。主要功能包括:
- Desk Lamp — Adjustable LED lamp mounted on the left corner 台灯——可调LED灯安装在左角
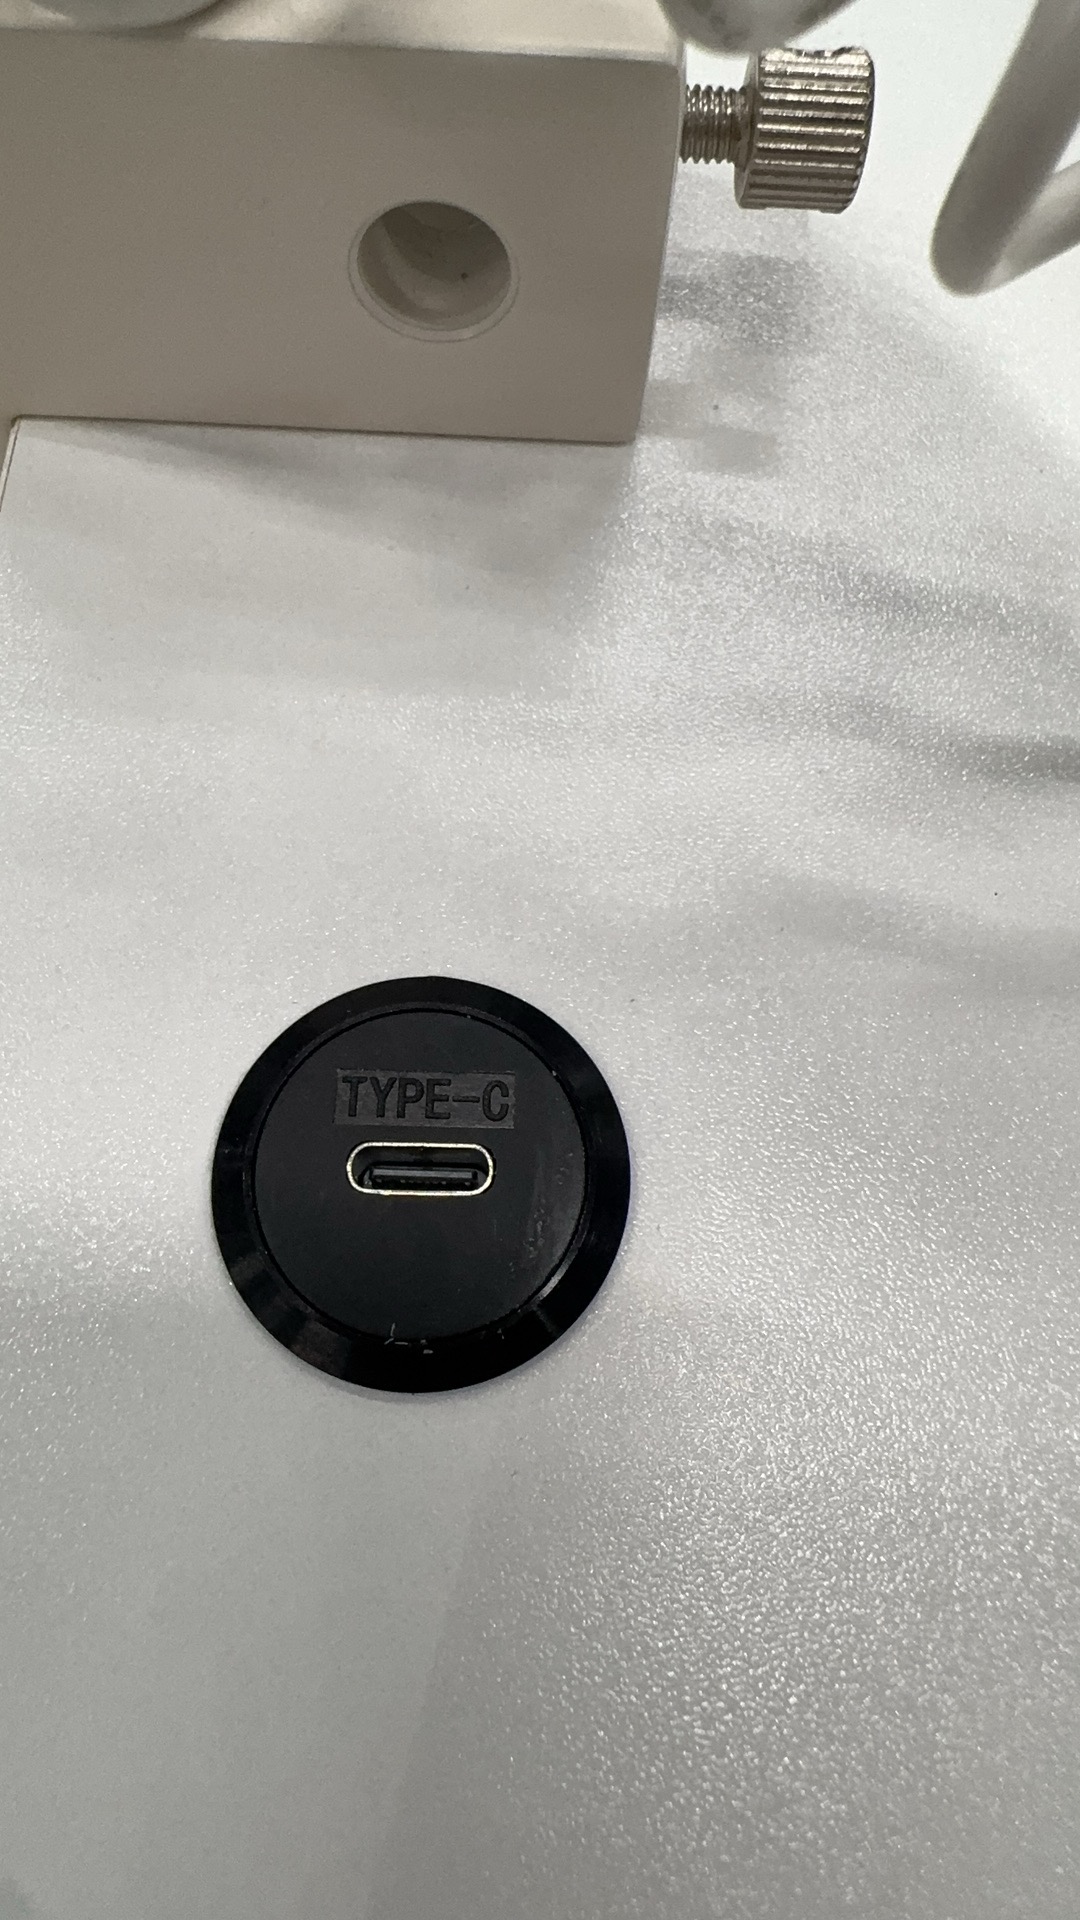
- Type-C Charging Port — Flush-mounted USB Type-C port embedded in the desk surface for laptop charging Type-C 充电口——嵌入桌面的齐平USB Type-C端口,用于笔记本电脑充电
- 3-in-1 Wireless Charger — A vertical charging station for phone, earbuds, and smartwatch simultaneously 三合一无线充电器——可同时为手机、耳机和智能手表充电的立式充电站
- Phone Wireless Charging Pad — Embedded Qi wireless charging coil beneath the desk surface for drop-and-charge convenience 手机无线充电板——桌面下嵌入Qi无线充电线圈,放上即充
- Weather Station Figurine — A small desktop weather monitoring device 气象站小桌搭——小型桌面气象监测装置
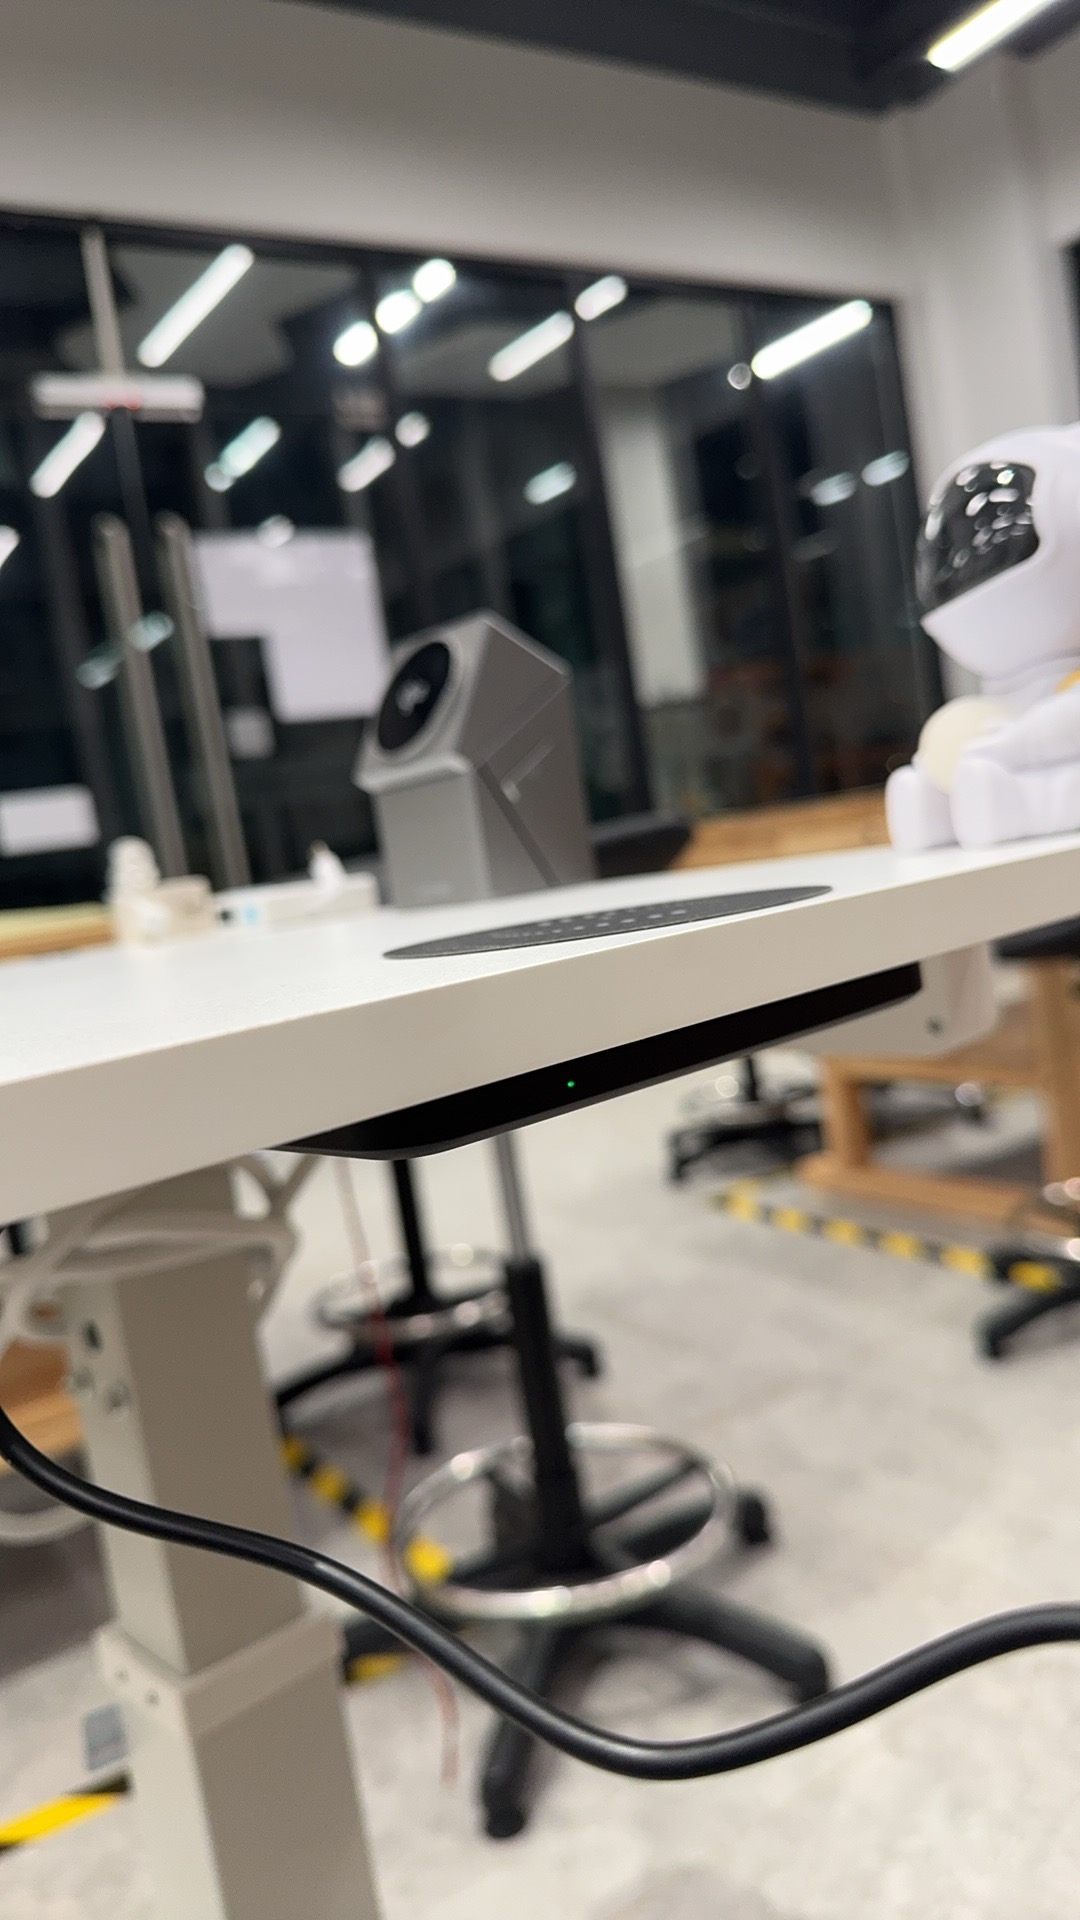
Height Adjustment Mechanism 升降机构
The desk is built on a single-column electric lifting mechanism. The motorized column connects to the underside of the desk surface and can raise or lower the workspace to accommodate sitting or standing positions. A small green indicator light on the column shows the system is powered on. The cable routing runs cleanly through the column interior. 桌子基于单柱电动升降机构搭建。电动升降柱连接桌面底部,可将工作台升降以适应坐姿或站姿。升降柱上的绿色指示灯显示系统已通电。线缆整齐地穿过柱体内部。
Embedded Power Panel Design 嵌入式电源面板设计
One of the key 2D design challenges was planning the precise cutout holes for the embedded charging components. The flush-mounted USB Type-C port shown below required a circular cutout of exact diameter in the desk surface, designed in LaserMaker. The port sits perfectly flush with the surface, providing a clean, professional appearance while offering convenient laptop charging. 2D设计的关键挑战之一是规划嵌入式充电组件的精确开孔。下图所示的齐平USB Type-C端口需要在桌面上开一个精确直径的圆形切口,在 LaserMaker 中进行设计。端口与桌面完美齐平,外观简洁专业,同时提供便捷的笔记本充电功能。
Electronics & Wiring 电子元件与布线
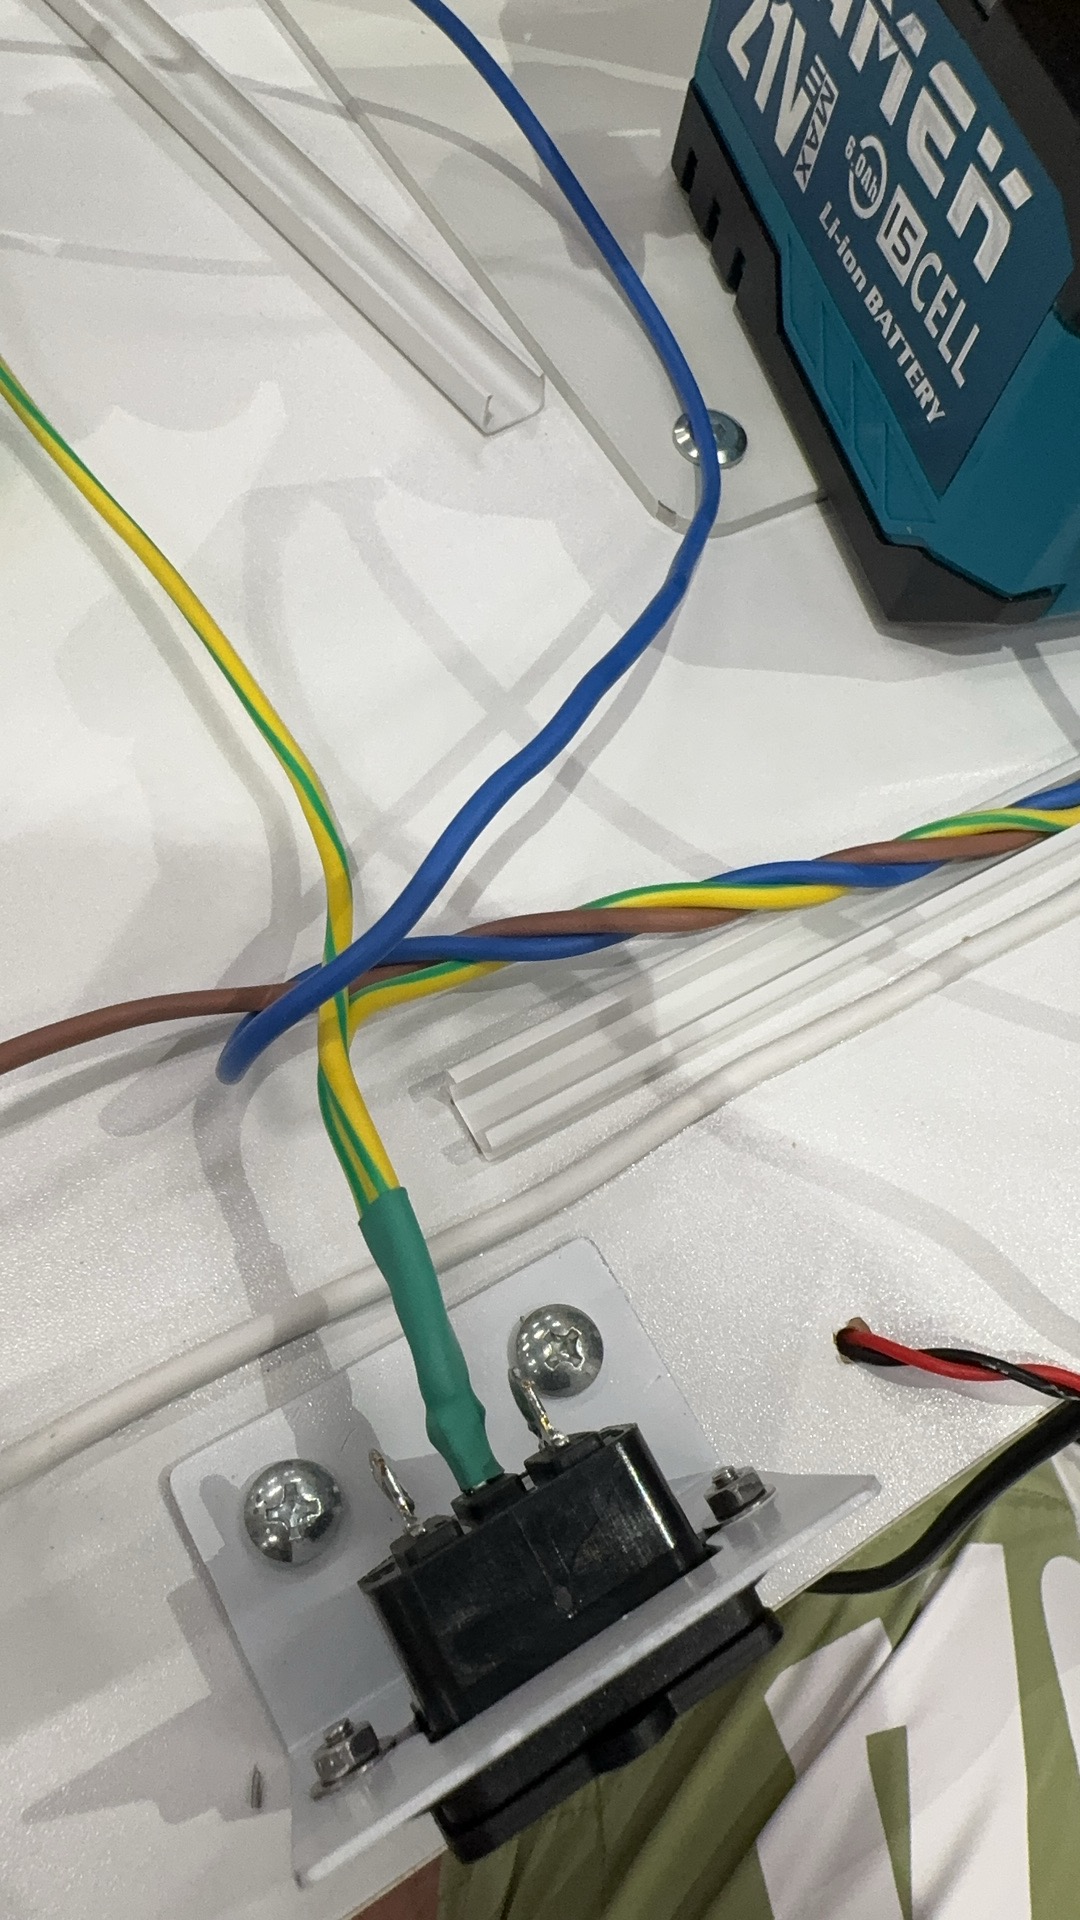
The underside of the desk houses the complete power distribution system. The wiring includes a mains power toggle switch, a 21V lithium-ion battery (Makita compatible), voltage converter modules, and connections running to each of the charging endpoints on the surface. Color-coded wires (blue for signal, brown/green-yellow for power/ground) are routed along channels designed in the 2D layout to keep everything organized and safe. 桌面底部容纳了完整的电源分配系统。布线包括电源总开关、21V锂离子电池(Makita兼容)、电压转换模块,以及连接到桌面各充电端点的线路。彩色编码线缆(蓝色为信号线,棕色/绿黄色为电源/接地线)沿2D布局设计的通道布设,保持整洁和安全。
Reflection 总结与反思
This week's assignment allowed me to explore LaserMaker for two very different applications of 2D design. The violin stand project demonstrated precision cutting and engraving on plywood, combining aesthetic design with functional hardware integration. The multi-function desk project pushed the boundaries of 2D layout planning, requiring careful consideration of electrical component placement, cable routing, and flush-mounted cutouts. Both projects reinforced the importance of accurate 2D design before any physical fabrication begins. 本周的作业让我使用 LaserMaker 探索了2D设计的两种截然不同的应用。小提琴支架项目展示了在胶合板上的精密切割和雕刻,将美学设计与功能性硬件集成相结合。多功能桌项目则突破了2D布局规划的边界,需要仔细考虑电子组件的放置、线缆布设和齐平切口。两个项目都强化了在进行任何实物制造之前精确2D设计的重要性。