What I did in Week 09
This week I'm going to use an ultrasonic sensor to measure distance. This will help me understand how input devices work, how to connect them, and what I could use them for.
- Sensors: These are devices that allow us to measure physical or chemical changes and convert them into an electrical signal that is measured by our development board.
- Grupal: probe an input device's analog levels and digital signals
- Individual: measure something: add a sensor to a microcontroller board that you have designed and read it
Group page
Group page link
Imputs devices(ultrasonic sensor)
In modern electronic systems, it is common to use sensors to gather information from the environment using analog and digital signals. Microcontrollers like the ESP32 allow these signals to be processed and transformed into data useful for automation and control applications. In this exercise, an HC-SR04 ultrasonic sensor was used to measure distances by sending and receiving ultrasonic waves. The ESP32 was responsible for generating the digital signal to activate the sensor and for reading the echo return time to calculate the distance to a near and far object. This exercise also covered input devices, how to connect them, and their potential applications.
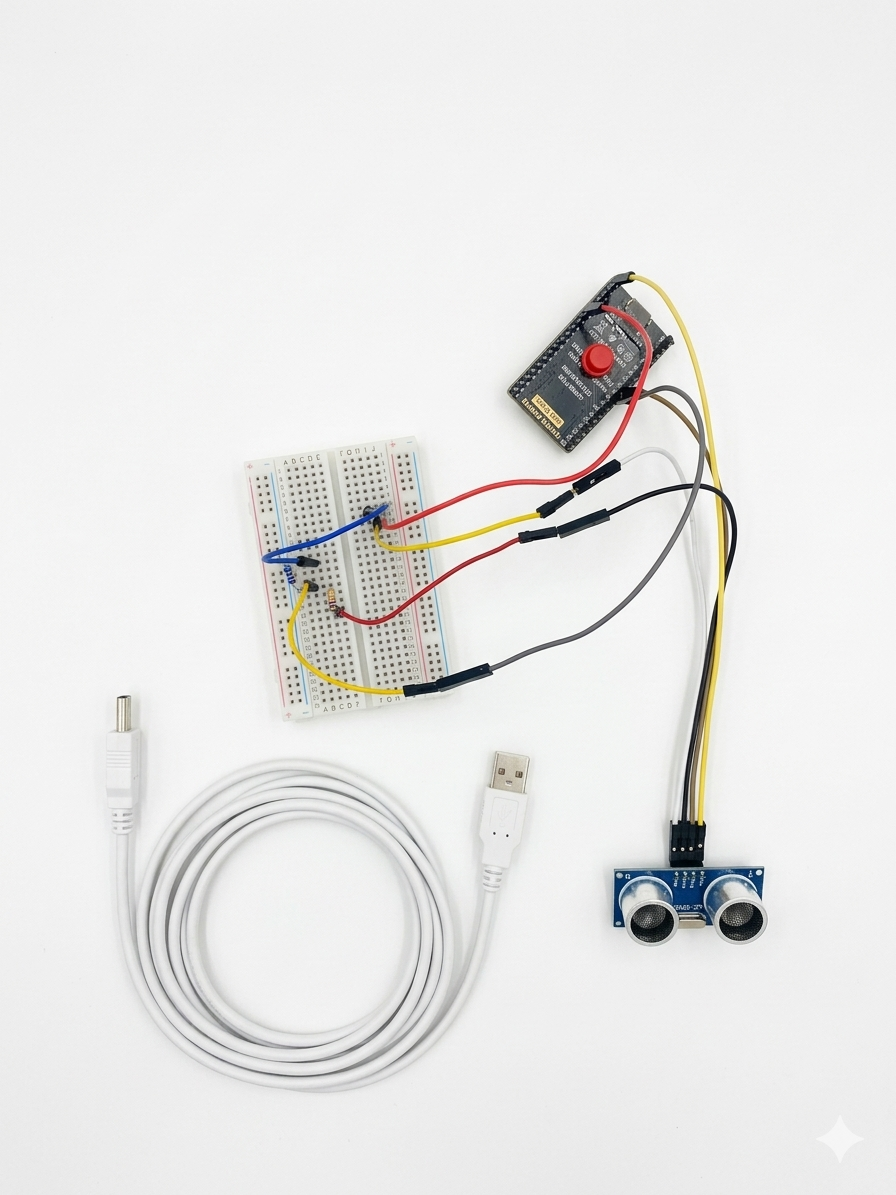
Phase 1 · Materials
The materials used were:
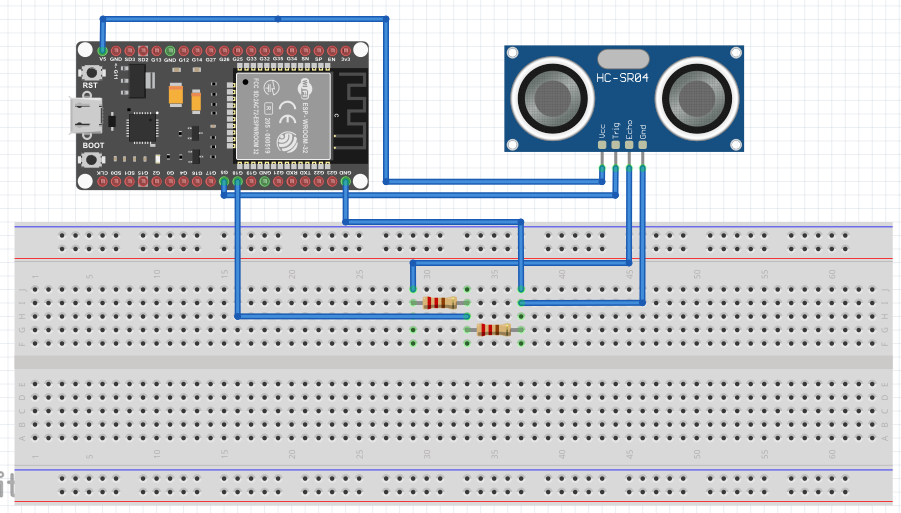
Phase 2 · Connection diagram
| Sensor HC-SR04 | electronic board |
|---|---|
| VCC | 5V |
| GND | GND |
| TRIG | GPIO 5 |
| ECHO | GPIO 18 (with voltage divider) The ECHO pin was connected via a voltage divider formed by 1kΩ and 2kΩ resistors to reduce the 5V signal to 3.3V and protect the ESP32. |
Phase 3 ·
The ultrasonic sensor connections were made to the ESP32 board, verifying the correct power supply and the correct location of the voltage divider for the ECHO pin.
Phase 4 ·
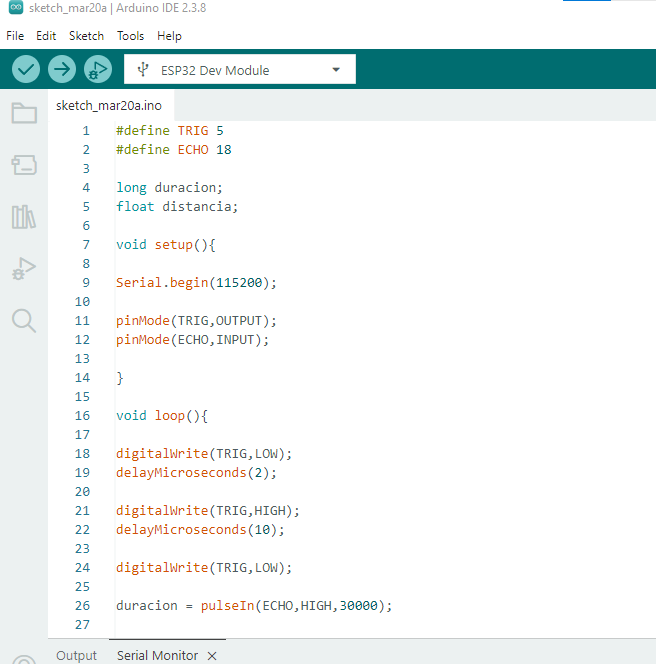
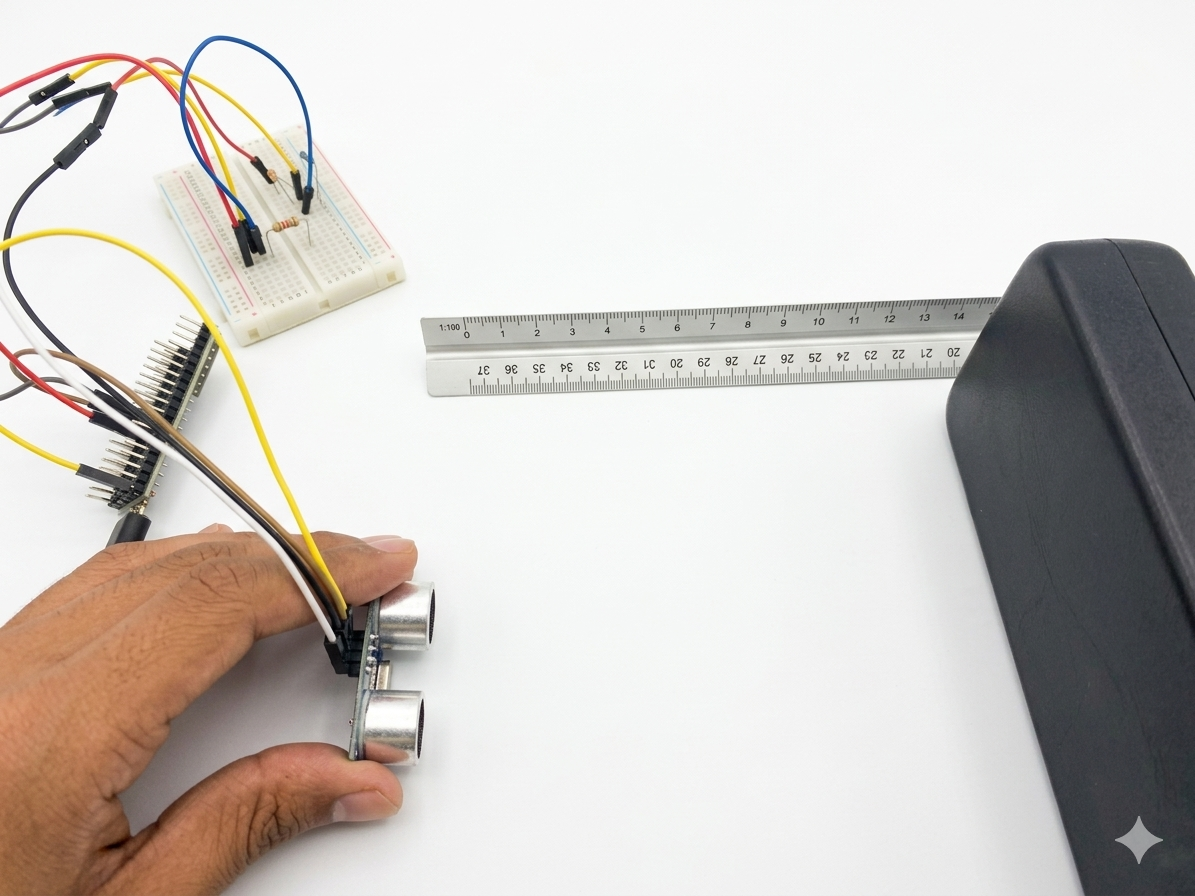
TThe ESP32 was then programmed using the Arduino IDE software, configuring the TRIG pin as a digital output and the ECHO pin as a digital input. Once the program was uploaded, the serial monitor was opened to observe the distance values obtained. To verify the sensor's operation, a black box was placed near a ruler at different distances from the sensor, first close (approximately 5 to 12 cm) and then progressively further away.
Phase 5 ·
During the test, it was observed that the values changed in real time as the position of the box varied, which demonstrates the correct reading of the sensor's digital signals.
Phase 6 ·
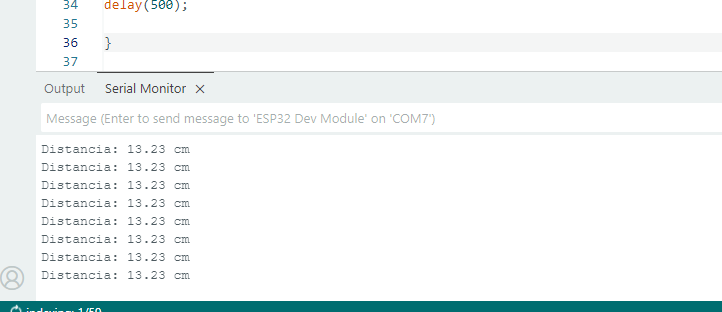
The results observed on the serial monitor were satisfactory and consistent with the actual measurements. It is important to consider that the ultrasonic sensor has a minimum detection distance of approximately 2 to 5 cm, so measurements are not recommended when the object is too close to the sensor. Tests were performed by placing an object at different distances: 5 cm, 10 cm, and 13 cm. To verify the sensor's accuracy, the values obtained on the Arduino IDE serial monitor were compared with measurements taken using a ruler. During the verification, it was confirmed that, for an actual distance of 13 cm, the sensor registered the same value, demonstrating the device's accuracy. Finally, it was observed that the values varied consistently as the object's distance from the sensor changed, confirming the correct operation of the implemented measurement system.
Conclusions
A distance measurement system was successfully implemented using an ultrasonic sensor and an ESP32 microcontroller. The sensor's functionality was verified through digital signals sent to and received by the microcontroller. Furthermore, it was confirmed that distance values change as an object approaches or moves away, demonstrating the correct operation of both the sensor and the data acquisition system. The importance of using a voltage divider to protect the ESP32's digital inputs was also highlighted, demonstrating the application of good electronic design practices.
← Main Page