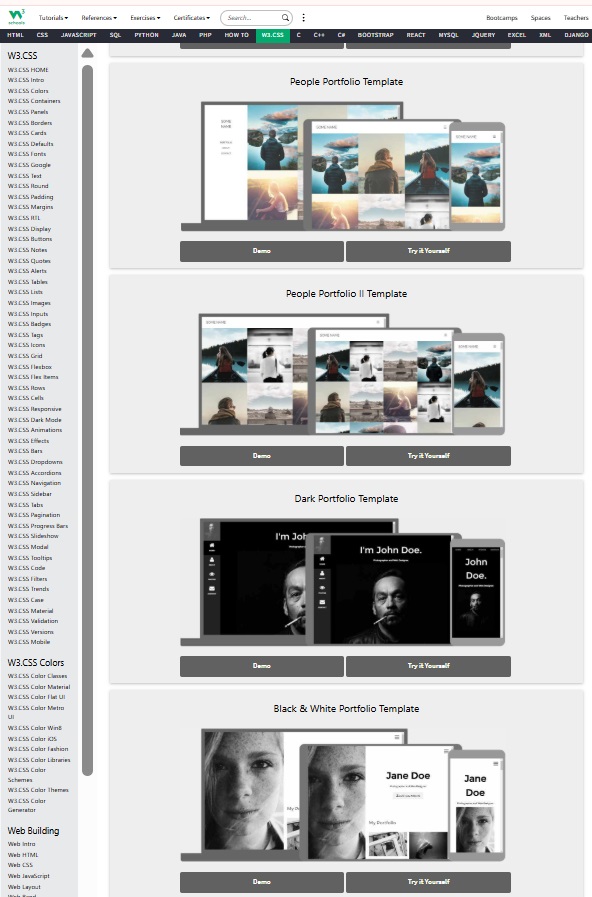
Visual Identity

My final project is related to my current research and doctoral studies. It focuses on architecture and interior design for children, specifically exploring emotional design and participatory methodologies.To reflect this, I chose a colorful, pastel, and creative visual identity. The goal was to capture the essence of the "child's hand"—emphasizing the curiosity and creativity of the little users who will interact with these spaces.

Mastering the code

Learning to work with Visual Studio Code was quite a challenge. While I have collaborated on web design projects before, my experience was limited to the visual side, not the underlying code.

    I found that modifying existing elements in the template was manageable, but writing new lines of code from scratch required more effort. This experience reinforced why choosing an organized template was so crucial—it provided a solid framework to build upon while I familiarized myself with HTML/CSS syntax.

Setting up the Workflow: Git & SSH Keys

Establishing a secure connection between my local environment and the Fab Academy GitLab instance was my first major technical challenge. This setup ensures that I can push my documentation updates seamlessly using Version Control Systems (VCS).

01 Configuring the Terminal: Setting up the environment to communicate with the server.

02 Environment Configuration: Before establishing a connection, I had to ensure my local machine was ready. This involved installing Git and configuring my global identifiers. These identifiers are attached to every "commit" I make, ensuring traceability in the project history.

git config --global user.name "Your Name"

git config --global user.email "your.email@example.com"

Secure Shell (SSH) Key Generation

To communicate with GitLab without entering a password every time—and to maintain high security—I implemented SSH (Secure Shell) authentication. This uses a pair of cryptographic keys: a private key (which stays on my computer) and a public key (which is shared with GitLab).

01 I opened my terminal and executed the RSA algorithm command:

ssh-keygen -t rsa -b 4096 -C "my_email@example.com"

02 Key Storage: I opted for the default directory

(~/.ssh/id_rsa).

03 Passphrase: I added an optional layer of security by setting a passphrase.

Linking the Local Machine to GitLab

The critical step was "introducing" my computer to the server.

01 Locating the Key: I had to retrieve the public portion of the key. I used the cat command to display the content of the .pub file: cat ~/.ssh/id_rsa.pub

02 GitLab Integration: I navigated to User Settings > SSH Keys on the GitLab web interface and pasted the entire string starting with ssh-rsa.

Verification and Connection Test

The final milestone was validating the handshake between my terminal and the server. I ran the following diagnostic command:

ssh -T git@gitlab.com

Success Milestone: Seeing the message Welcome to GitLab, @username! confirmed that the encrypted tunnel was active. This allowed me to clone my repository and begin using Visual Studio Code as my primary interface for documentation.

Reflections & Troubleshooting

Setting up this workflow was a significant learning curve that went beyond just running commands. One of my initial hurdles was simply navigating the file system; since the .ssh folder is a hidden directory by default in most operating systems, it wasn't immediately visible, which forced me to become more comfortable using the terminal to locate sensitive configuration files. This experience also taught me a vital lesson in technical precision: I realized that SSH authentication is incredibly sensitive to formatting. A single accidental space or a missing character while copying the public key can cause the entire handshake with GitLab to fail. Validating the key string and ensuring every step was executed exactly as required was my first real exercise in the meticulous nature of version control and server communication.