
Week 11: Networking and Communications
Assignments:
Group Assignment
- Send a message between two projects
- Document your work to the group work page and reflect on your individual page what you learned
Individual Assignment
- Design, build, and connect wired or wireless node(s) with network or bus addresses and local input &/or output device(s)
Things to Complete This Week
- Explore and test different sensors
- Document process
- Work on Final Project PCB!!!
Here is my schedule for this week.
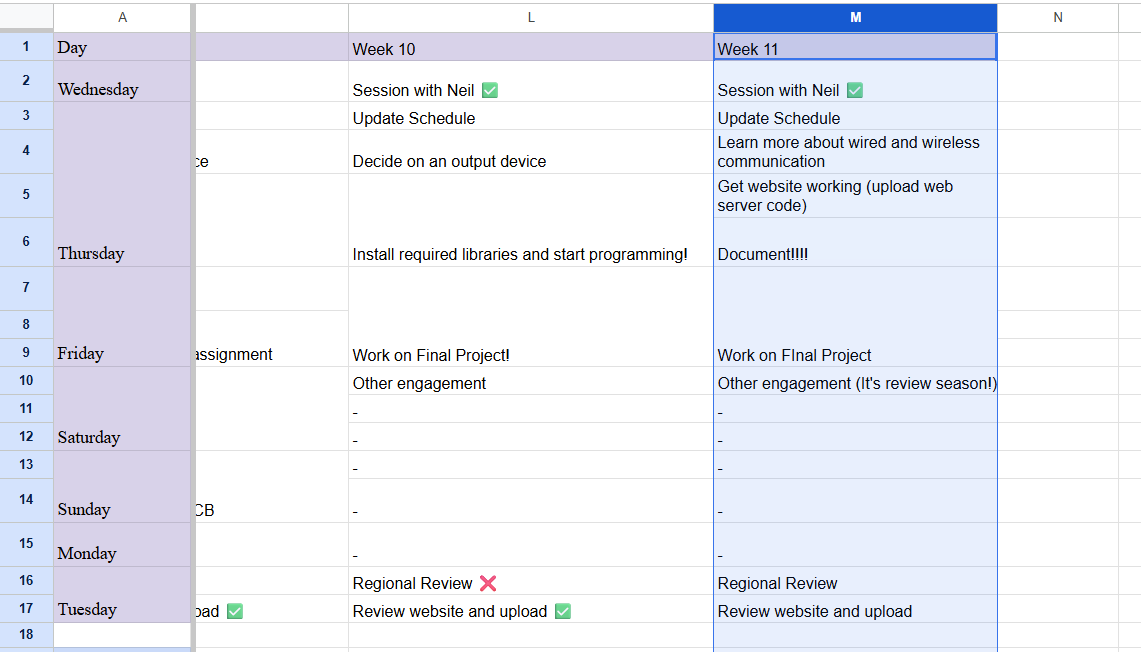
Here is the link to my schedule
Group Assignment
Reflection
This week’s group assignment helped me understand how different boards can actually “talk” to each other in real projects. Seeing the ESP32 boards exchange data wirelessly using ESP-NOW made the idea of networking feel a lot more real and less complicated. I liked how one board could sense the environment and the other could instantly display it, it showed me how powerful simple communication between devices can be when everything is set up correctly.
You can access our group assignment here.
Individual Assignment
Difference between Wired and Wireless Connections
A wired connection uses physical cables (like USB or Ethernet) to link devices together. This means that data travels directly through the wire, making the connection usually faster, more stable, and less affected by interference. The downside is that you’re limited by the length of the cable, so you can’t move around freely.
A wireless connection sends data through the air using signals like Wi-Fi or Bluetooth. This allows devices to connect without cables, giving you more freedom to move and making things more convenient. However, wireless connections can sometimes be slower or less reliable due to distance, obstacles, or signal interference.

This week, I decided to create a web-based control for the LED on my board (The one that I designed during Electronics Production week).
Here are the steps I followed to do exactly that:
Note: I went through Seeed Studio's official page to get the codes for scanning different Wi-Fi networks and then connecting to one after that. You can access the guide by clicking on this link.
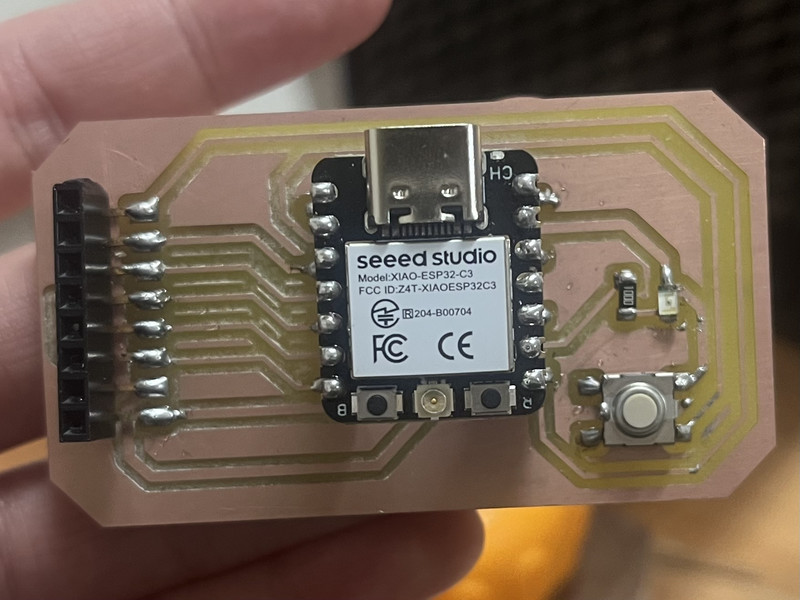
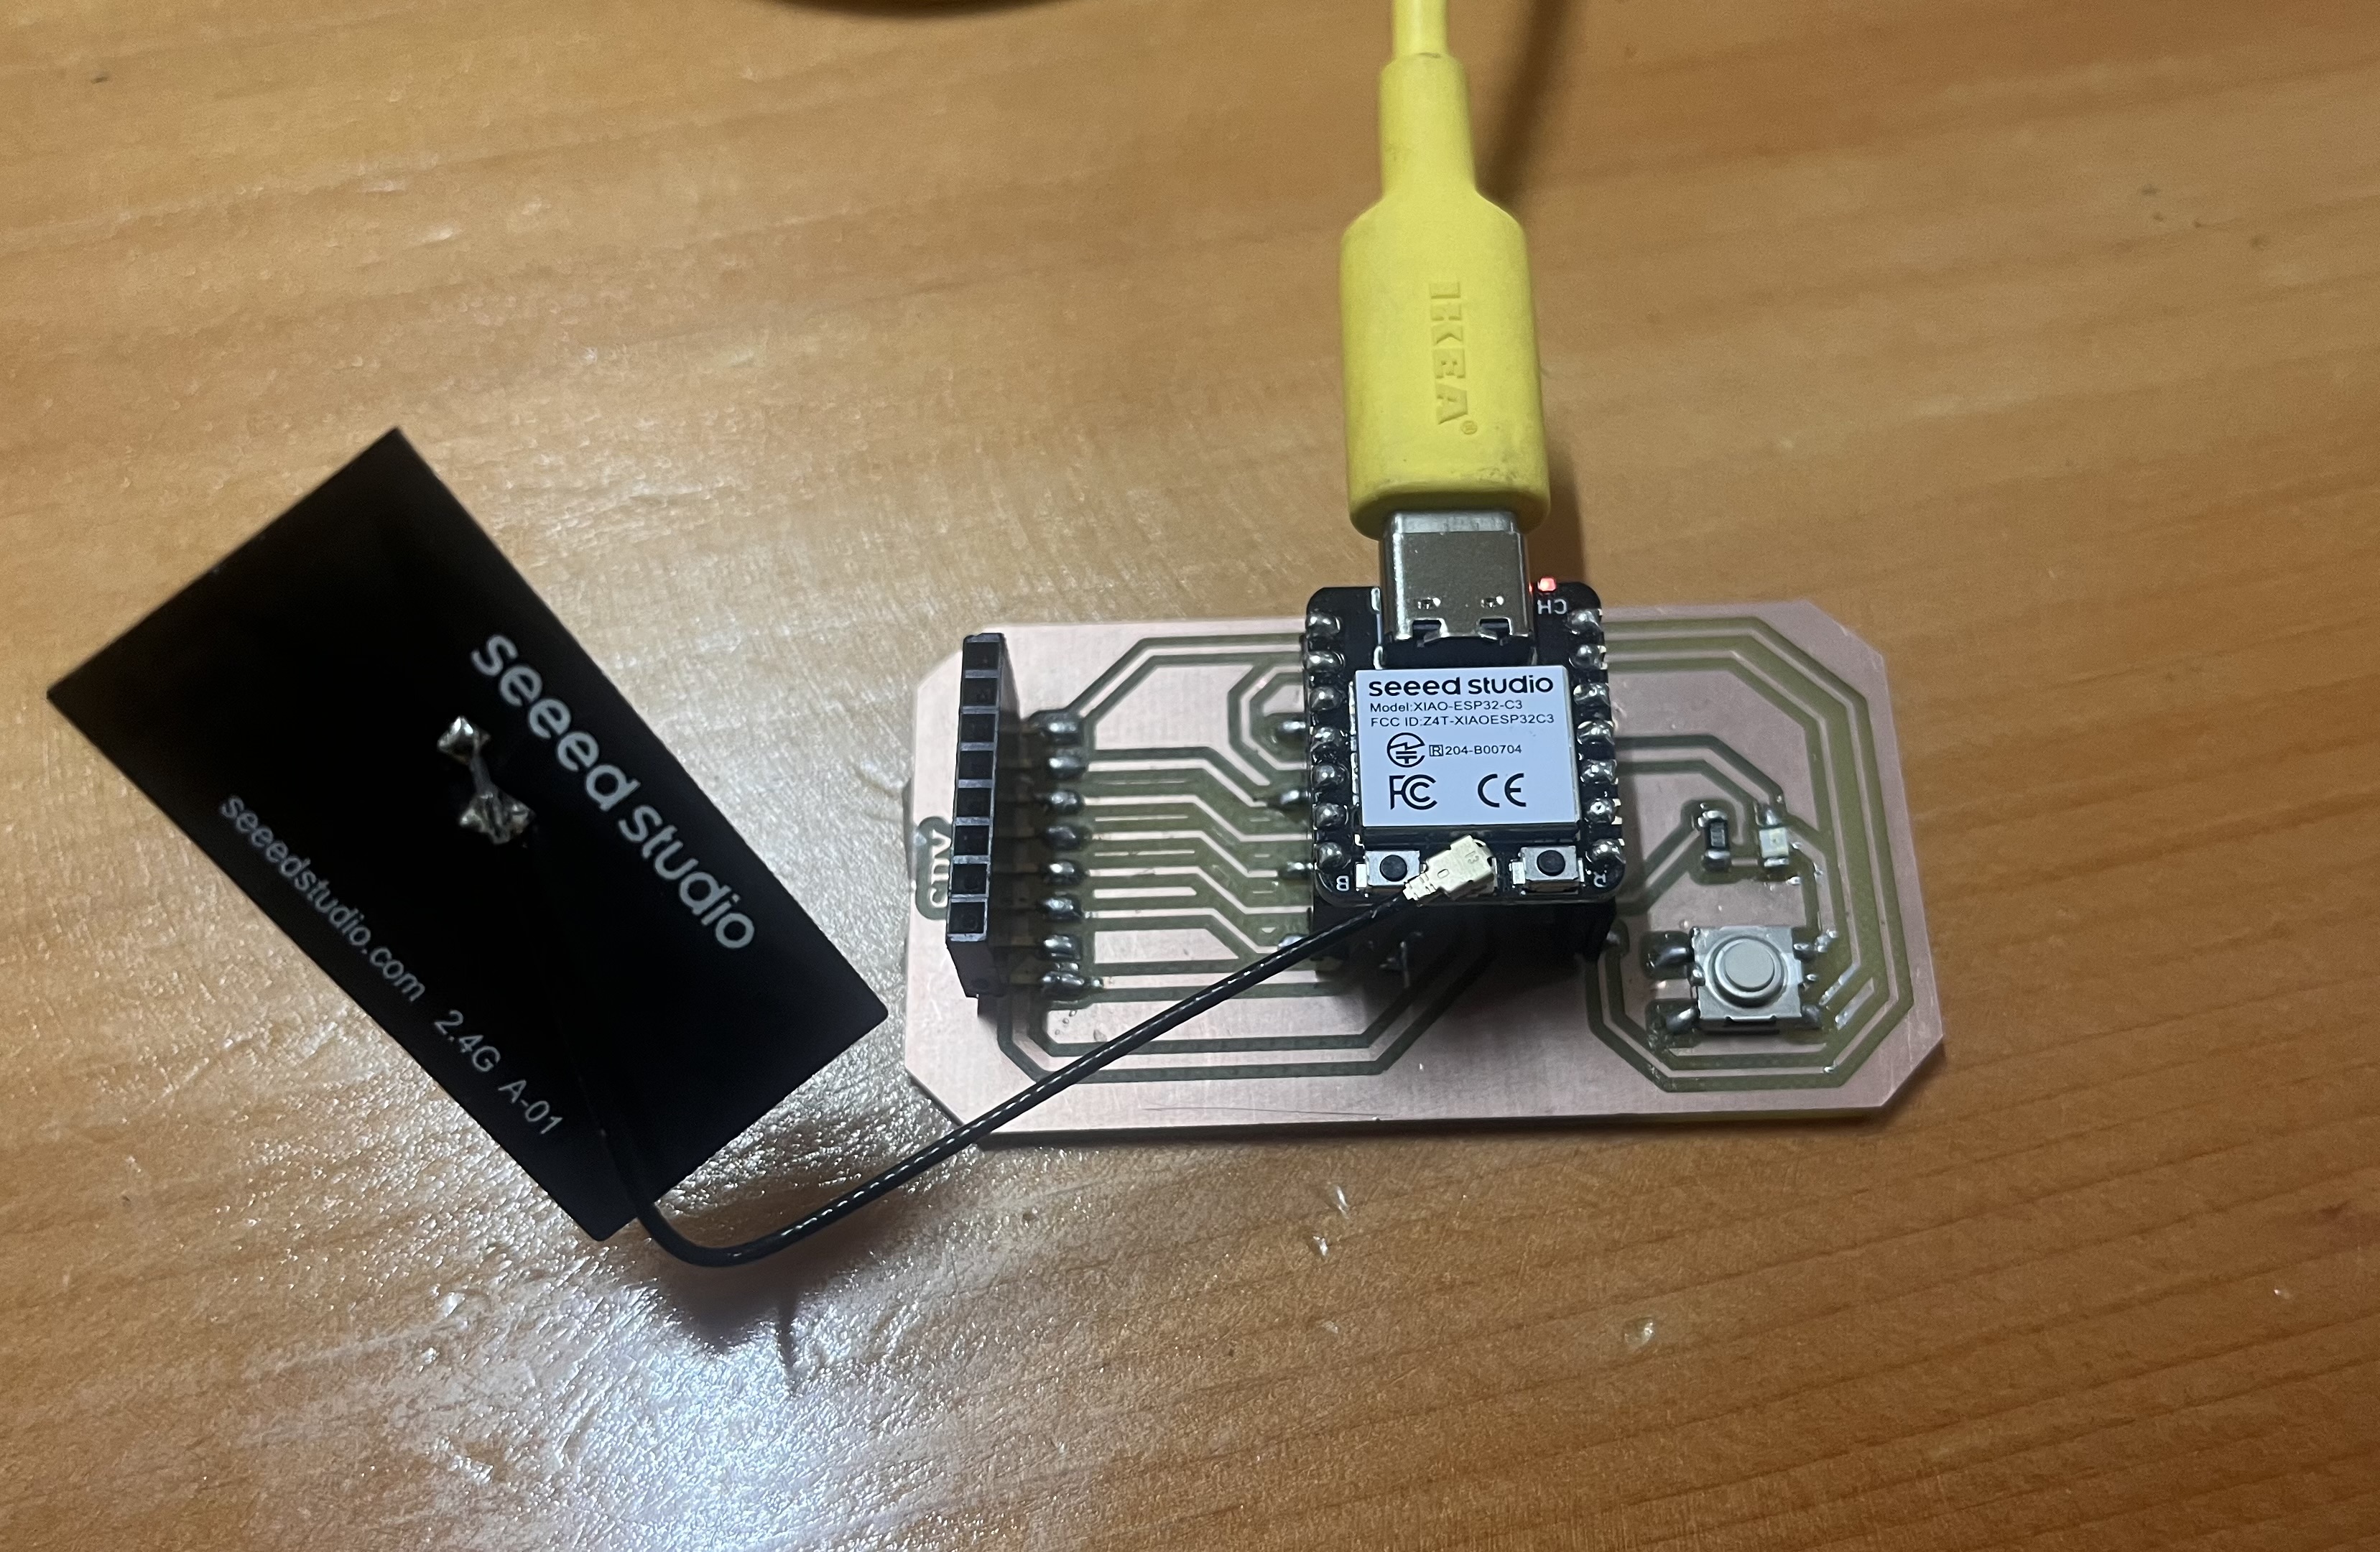
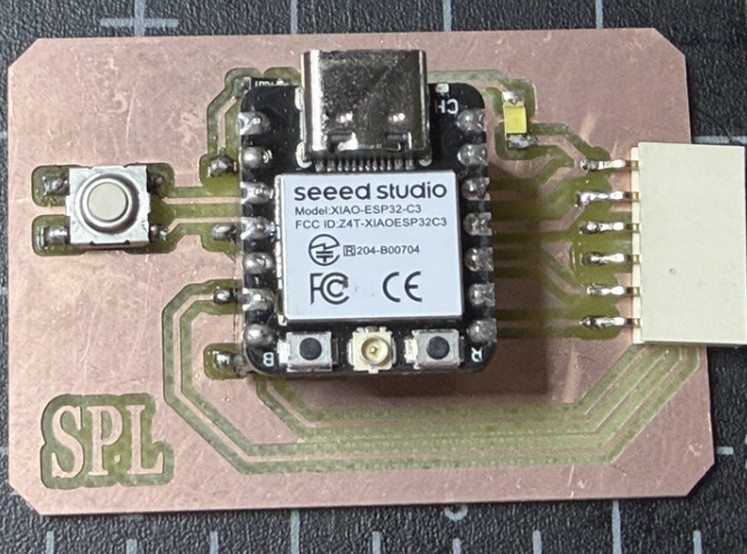
1. I started by connecting the Wi-Fi antenna to my XIAO ESP32C3. I then connected a USB type-C cable to the XIAO.
2. Next I copy-pasted the first code which was given in the guide above for scanning different Wi-Fi networks.
#include "WiFi.h"

void setup() {
  Serial.begin(115200);

  // Set WiFi to station mode and disconnect from an AP if it was previously connected
  WiFi.mode(WIFI_STA);
  WiFi.disconnect();
  delay(100);

  Serial.println("Setup done");
}

void loop() {
  Serial.println("scan start");

  // WiFi.scanNetworks will return the number of networks found
  int n = WiFi.scanNetworks();
  Serial.println("scan done");
  if (n == 0) {
    Serial.println("no networks found");
  } else {
    Serial.print(n);
    Serial.println(" networks found");
    for (int i = 0; i < n; ++i) {
      // Print SSID and RSSI for each network found
      Serial.print(i + 1);
      Serial.print(": ");
      Serial.print(WiFi.SSID(i));
      Serial.print(" (");
      Serial.print(WiFi.RSSI(i));
      Serial.print(")");
      Serial.println((WiFi.encryptionType(i) == WIFI_AUTH_OPEN) ? " " : "*");
      delay(10);
    }
  }
  Serial.println("");

  // Wait a bit before scanning again
  delay(5000);
}
What does the code do? 🤷♂️
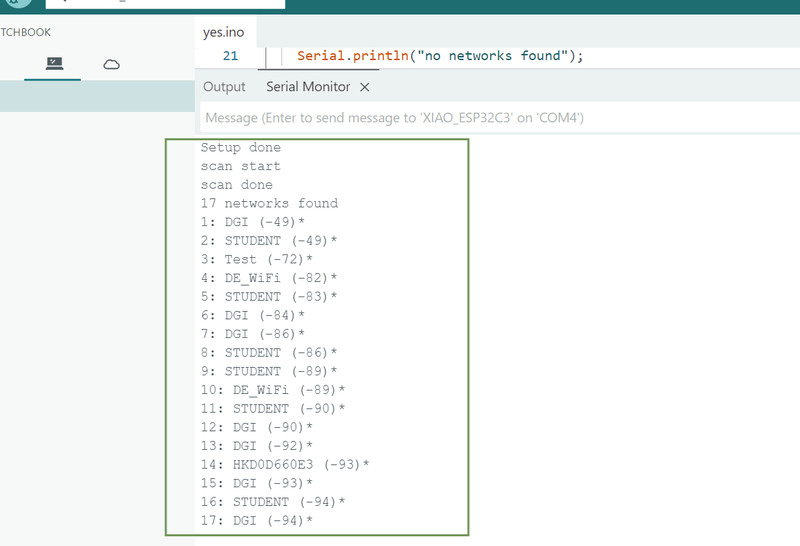
This code makes your board scan for Wi-Fi networks nearby. In setup(), it starts the serial monitor so you can see messages on your computer and sets the Wi-Fi to “station mode” (ready to connect to networks) while disconnecting from any previous network. Then in the loop(), it continuously scans for networks, printing messages like “scan start” and “scan done.”
It counts how many networks it finds and, for each one, it shows the network name (SSID), signal strength (RSSI), and whether it’s open or secured. After each scan, it waits 5 seconds and repeats.
You can see the nearby networks in the serial monitor:
3. I then copy-pasted this code (also from the guide above) to connect to a WI-FI network.
#include "WiFi.h"

const char* ssid = "your-ssid";
const char* password = "your-password";

void setup() {
  Serial.begin(115200);
  delay(10);

  // We start by connecting to a WiFi network
  Serial.println();
  Serial.println();
  Serial.print("Connecting to ");
  Serial.println(ssid);

  WiFi.begin(ssid, password);

  while (WiFi.status() != WL_CONNECTED) {
    delay(500);
    Serial.print(".");
  }

  Serial.println("");
  Serial.println("WiFi connected");
  Serial.println("IP address: ");
  Serial.println(WiFi.localIP());
}
void loop() {}
What does the code do? 🤷♀️
The code tries to connect to the network using the ssid and password that you provide. While it’s connecting, it prints dots to show that it’s still trying. Once connected, it prints “WiFi connected” and shows the board’s IP address on the network. The loop() is empty, so after connecting, the board just stays connected without doing anything else.
Even though you’ll need to reconnect to a network later, I feel like this step can be used to test if the network is working properly.

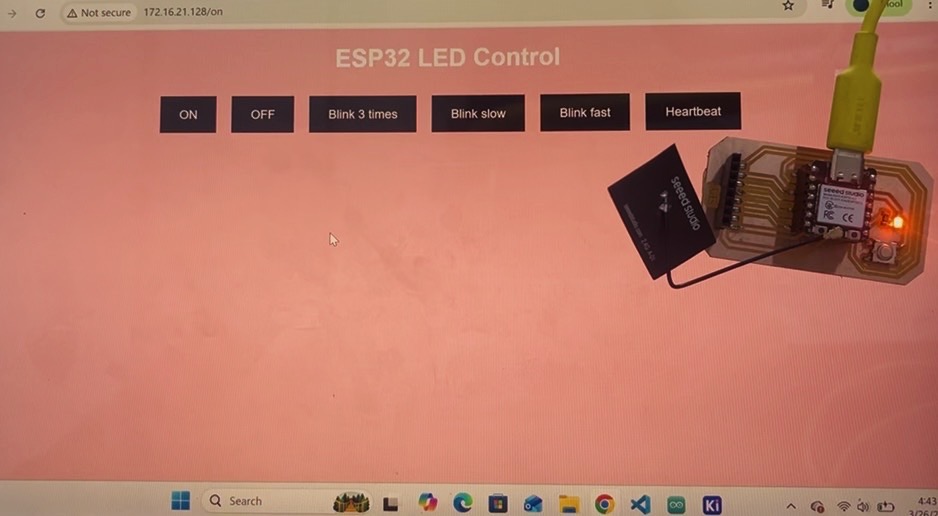
4. I then asked ChatGPT (my bestfriend these days 🫠) to generate me a code for setting up my web server. This was the prompt that I used: Can you generate me an ESP32 Arduino code to control the built-in LED on pin D8 with a web page. I want six buttons: ON, OFF, Blink 3 times, Blink slow, Blink fast, and Heartbeat. Clicking a button should do that action on the LED on my board. Make the web page light pink with black elements and show messages in the Serial Monitor whenever a pattern starts and stops. It came out to be quite long 🤯.
#include <WiFi.h>
#include <WebServer.h>

const char* ssid = "Your ssid";
const char* password = "password";

const int ledPin = 8; // Built-in LED pin (D8)

WebServer server(80);

// Function to blink LED a specific number of times
void blinkLED(int times, int delayTime) {
    Serial.print("Blinking LED ");
    Serial.print(times);
    Serial.println(" times.");
    for (int i = 0; i < times; i++) {
        digitalWrite(ledPin, HIGH);
        delay(delayTime);
        digitalWrite(ledPin, LOW);
        delay(delayTime);
    }
    Serial.println("Blink done.");
}

// Heartbeat pattern (like a heart pulse)
void heartbeat() {
    Serial.println("Heartbeat started.");
    digitalWrite(ledPin, HIGH);
    delay(200);
    digitalWrite(ledPin, LOW);
    delay(200);
    digitalWrite(ledPin, HIGH);
    delay(200);
    digitalWrite(ledPin, LOW);
    delay(600);
    Serial.println("Heartbeat done.");
}

// Handlers for each button
void handleOn() {
    Serial.println("LED turned ON");
    digitalWrite(ledPin, HIGH);
    server.send(200, "text/html", webPage());
}

void handleOff() {
    Serial.println("LED turned OFF");
    digitalWrite(ledPin, LOW);
    server.send(200, "text/html", webPage());
}

void handleBlink3() {
    blinkLED(3, 250);
    server.send(200, "text/html", webPage());
}

void handleBlinkSlow() {
    blinkLED(5, 500);
    server.send(200, "text/html", webPage());
}

void handleBlinkFast() {
    blinkLED(10, 100);
    server.send(200, "text/html", webPage());
}

void handleHeartbeat() {
    heartbeat();
    server.send(200, "text/html", webPage());
}

// HTML web page with light pink background
String webPage() {
    String html = "<!DOCTYPE html><html><head>";
    html += "<meta name='viewport' content='width=device-width, initial-scale=1.0'>";
    html += "<title>ESP32 LED Control</title>";
    html += "<style>";
    html += "body { background-color: lightpink; color: white; font-family: Arial; text-align:center; }";
    html += "button { background-color: black; color: white; padding: 15px 25px; margin: 10px; font-size:16px; border:none; cursor:pointer; }";
    html += "button:hover { background-color: gray; }";
    html += "</style></head><body>";
    html += "<h1>ESP32 LED Control</h1>";
    html += "<button onclick="location.href='/on'">ON</button>";
    html += "<button onclick="location.href='/off'">OFF</button>";
    html += "<button onclick="location.href='/blink3'">Blink 3 times</button>";
    html += "<button onclick="location.href='/blinkSlow'">Blink slow</button>";
    html += "<button onclick="location.href='/blinkFast'">Blink fast</button>";
    html += "<button onclick="location.href='/heartbeat'">Heartbeat</button>";
    html += "</body></html>";
    return html;
}

void setup() {
    pinMode(ledPin, OUTPUT);
    digitalWrite(ledPin, LOW);

    Serial.begin(115200);
    delay(10);
    Serial.println();
    Serial.print("Connecting to ");
    Serial.println(ssid);

    WiFi.begin(ssid, password);
    while (WiFi.status() != WL_CONNECTED) {
        delay(500);
        Serial.print(".");
    }
    Serial.println("");
    Serial.println("WiFi connected.");
    Serial.print("IP address: ");
    Serial.println(WiFi.localIP());

    // Set up routes
    server.on("/", [](){ server.send(200, "text/html", webPage()); });
    server.on("/on", handleOn);
    server.on("/off", handleOff);
    server.on("/blink3", handleBlink3);
    server.on("/blinkSlow", handleBlinkSlow);
    server.on("/blinkFast", handleBlinkFast);
    server.on("/heartbeat", handleHeartbeat);

    server.begin();
    Serial.println("HTTP server started.");
}

void loop() {
    server.handleClient();
}
5. After uploading the code, you should see the same "WIFI connected" message like you did in step 3.
6. I copied the IP address and pasted it into my browser (Google Chrome). Here is how my webserver turned out! 🥳💃
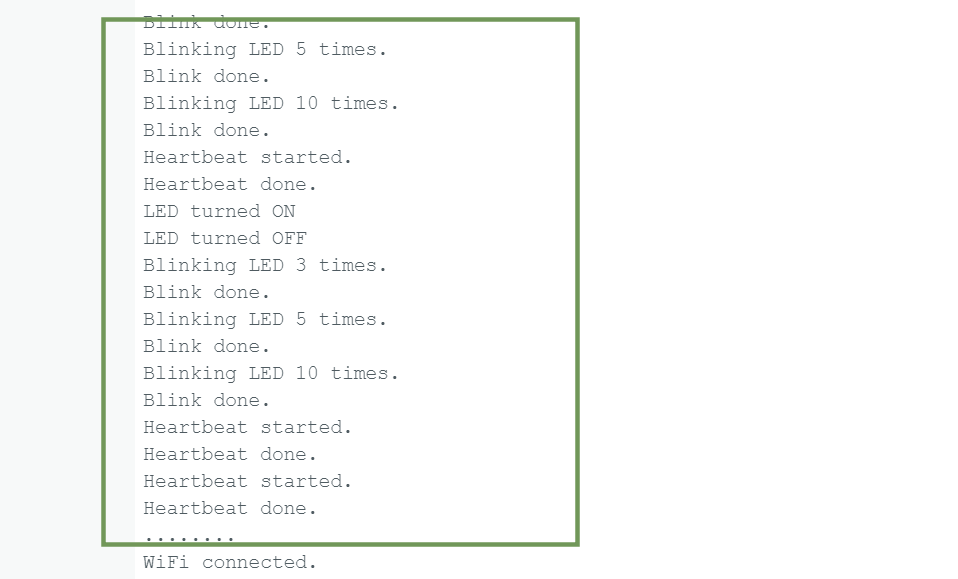
Testing 🤗
In the serial monitor, you can also see all your activities 😯:
Redoing Assignment
For this week's assignment, I actually had to use more than one board and establish communication between them. 😅
To do this, I used the same board that I designed during Week 8 and my friend Pelkeath's board (Thank you Pelkeath! ☺️). I connected the two boards so that pressing the button on one board lit up the LED on the other board.
This required two programs. The Button Board reads the button and transmits 1 (pressed) or 0 (released) over I²C, while the LED Board receives the data and controls the LED accordingly.
What is I²C? 🤷♂️
I²C (Inter-Integrated Circuit) is a communication method that allows multiple electronic devices to exchange data using two wires: SDA (Serial Data) for transferring data and SCL (Serial Clock) for keeping the devices synchronized. For this assignment one XIAO ESP32-C3 reads the button input and sends its state over the I²C connection, while the other XIAO ESP32-C3 receives the data and controls the LED accordingly.
I used the following prompt in ChatGPT to generate the two programs: I want to communicate between my two XIAO boards via I²C communication, where one XIAO has a button connected to D1 and the other XIAO has an LED connected to D0. Therefore, they communicate via the SCL and SDA pins and when I press the button, the LED on the other board turns on.
Button Board Code
#include <Wire.h>

const int buttonPin = D1;      // D1
const byte slaveAddress = 0x08;

void setup() {
  pinMode(buttonPin, INPUT_PULLUP);

  Wire.begin();               // Join I2C bus as Master
}

void loop() {
  byte state = (digitalRead(buttonPin) == LOW) ? 1 : 0;

  Wire.beginTransmission(slaveAddress);
  Wire.write(state);
  Wire.endTransmission();

  delay(20);
}
What does the code do? 🤷♀️
The button board continuously checks if the button is pressed. Since the button is connected using INPUT_PULLUP, the pin normally reads HIGH when the button is not pressed and LOW when it is pressed. It sends 1 over the I²C connection when the button is pressed and 0 when it is released. This allows the LED board to turn the LED on or off based on the button's state.
LED Board Code
#include <Wire.h>

const int ledPin = D0;     // D0

volatile byte receivedData = 0;

void receiveEvent(int howMany) {
  if (Wire.available()) {
    receivedData = Wire.read();
  }
}

void setup() {
  pinMode(ledPin, OUTPUT);
  digitalWrite(ledPin, LOW);

  Wire.begin(0x08);          // Slave address
  Wire.onReceive(receiveEvent);
}

void loop() {
  if (receivedData == 1) {
    digitalWrite(ledPin, HIGH);
  } else {
    digitalWrite(ledPin, LOW);
  }
}
What does the code do? 🤷
The code on the LED board initializes the LED and sets up the board as an I²C receiver. It listens for data sent by the button board, stores the received value and continuously checks it. If the received value is 1, the code turns the LED on. If the value is 0, it turns the LED off. 💡
The two XIAO ESP32-C3 boards were connected using I²C communication by connecting the SDA pins together, the SCL pins together and the GND pins together. This allowed the boards to communicate and exchange data.
Here are the final results!!! 🥳🤗
Code Files: Download ZIP
It's really fascinating to see how wireless communication works. At the beginning of the week, I thought that doing the assignment was going to be really hard but it wasn't all that bad (What I did was pretty simple though 😛😅). Even so, I feel like I was able to learn a great deal. 🥳