Week 1: Project Management, Principles and Practices
Assignments
- Sketch your final project idea and briefly explain what it will do.
- Create a personal website and document the process of building it.
- Add an "About Me" section to introduce yourself on the website.
- Include a dedicated page with sketches and a description of your final project idea.
- Document the steps for setting up your Git repository and adding files to it.
- Push your work to the class GitLab repository.
- Sign and upload the Student Agreement.
This is the schedule I made:
.jpg)
You can access my schedule here.
Software Installation:
Firstly for this assignment, I installed all the following required softwares:
- Git Bash - Command line terminal on Windows to run Git commands
- VS Code - A code editor where you write and edit your website files (HTML, CSS, JavaScript), with built in tools to push those changes to GitLab.
Git Installation
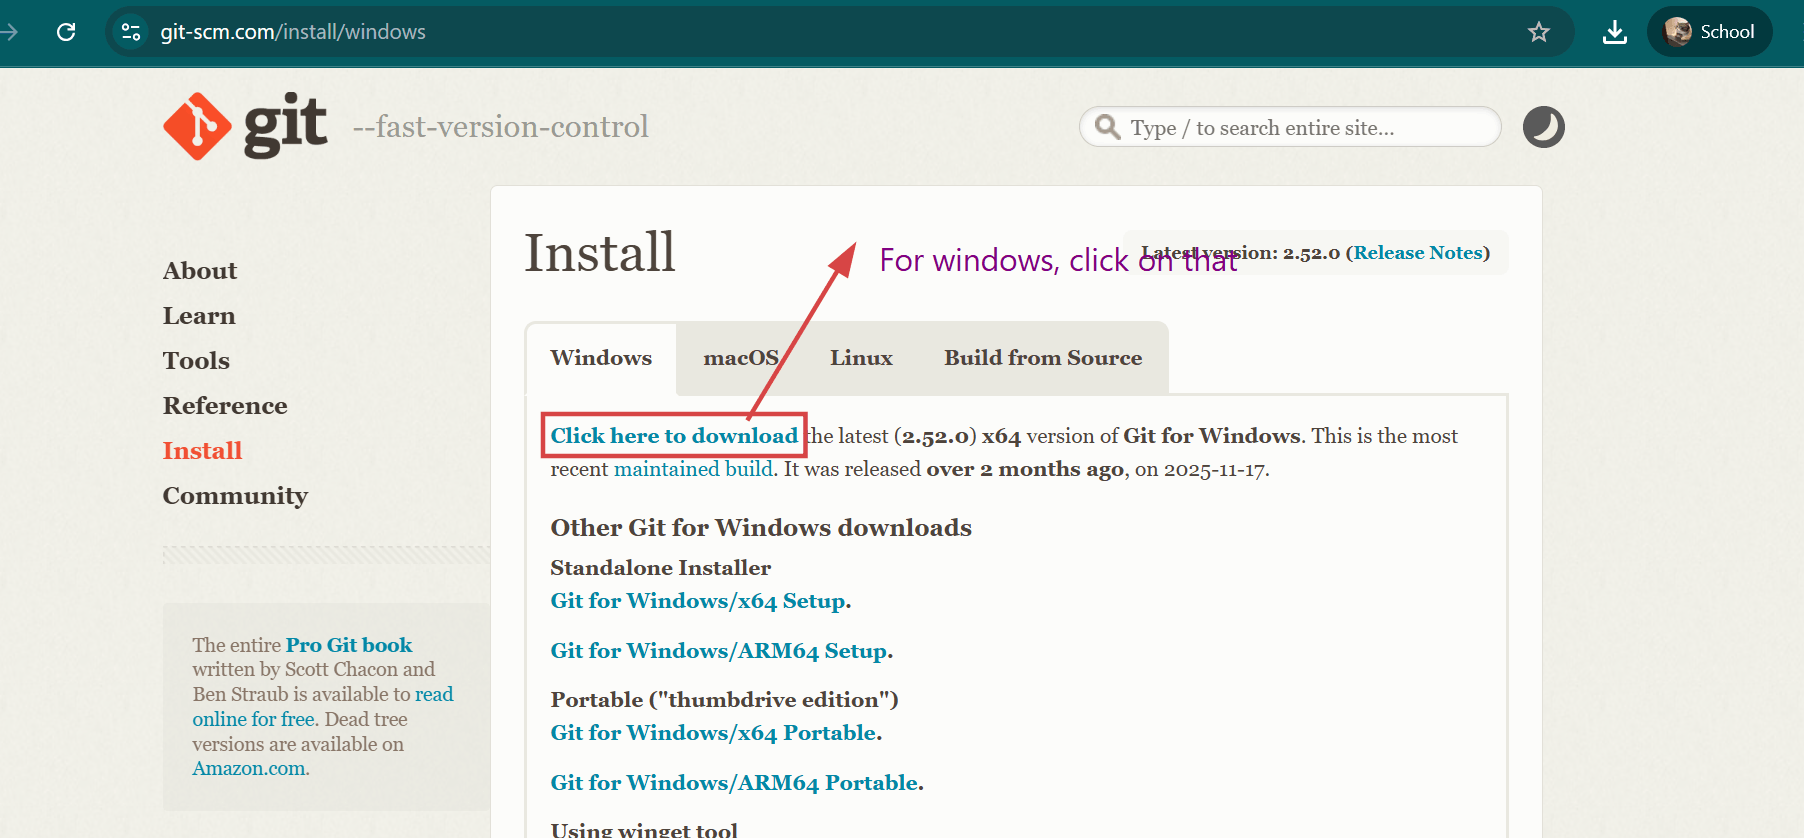
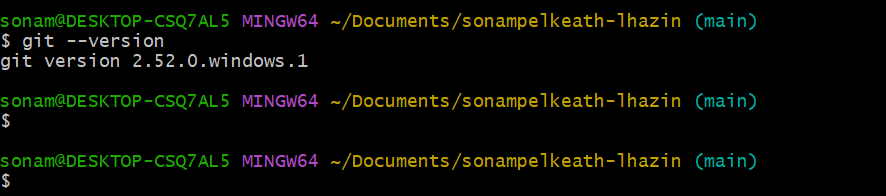
I visited the official Git website to obtain the software. I downloaded the installer specifically designed for my operating system. I then ran the downloaded installer to begin the setup process. During installation, I followed all the prompts presented and accepted the license agreement. I allowed the installation to complete fully before proceeding to the next steps.
Visual Studio Code Installation
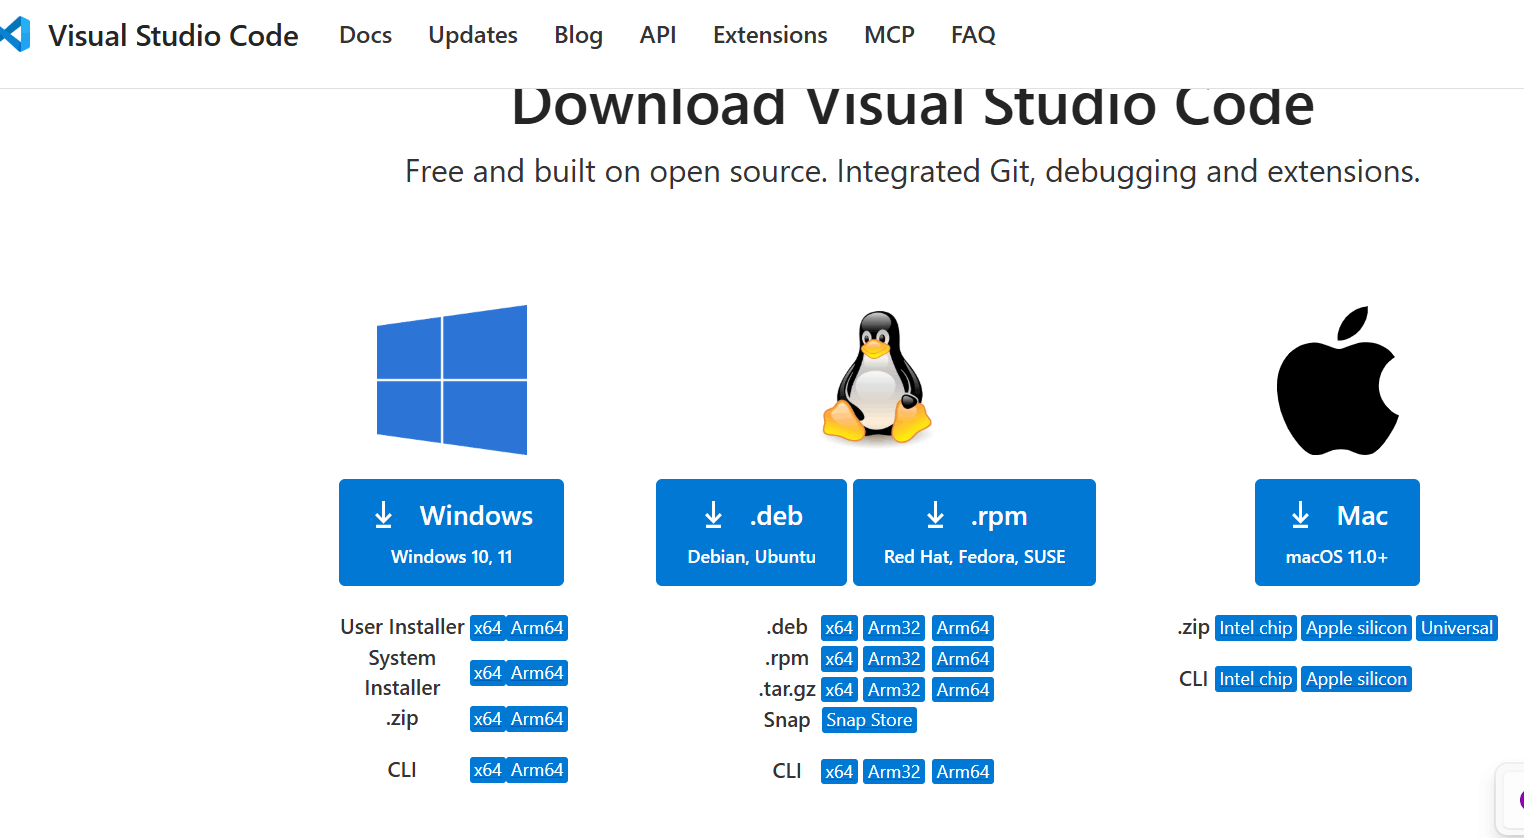
I went to the official Visual Studio Code website to access the software. I downloaded the installer compatible with my computing platform. I ran the installer and accepted the terms of service during the setup. I clicked on the Install button and patiently waited for the process to finish. Then I launched VS Code immediately after the installation completed successfully.
Understanding GitLab
Before getting on with the assignment, it's important to completely understand what GitLab is and what it has to offer. GitLab is a web-based platform that helps people and teams work together on software projects. It uses version control, which keeps track of all changes to files so you can see edits, go back to previous versions, and manage different versions of a project. You can push to upload your changes, pull to get updates, and git clone to copy a project from GitLab to your computer.
To get how this works, it helps to know there are two kinds of repositories:
- Local Repository: This is the version of your project on your own computer. It's where you make changes, test things out, and save different versions before sharing them.
- Remote Repository: This is the version stored on GitLab's servers like FabCloud. It acts as the central backup and sharing point, where everyone can access the latest version.
GitLab also has tools for code review, issue tracking, wikis, and security checks, providing one place where teams can plan, build, test, deploy, and manage projects efficiently. For this course, GitLab is where all of our documentation and website files are stored, versioned, and published to the web.
SSH Key Generation
What are SSH keys?
I heard about this term recently myself, but from my understanding, SSH (Secure Shell) keys are a way for a computer to securely identify itself to another computer or server without needing to type a password every time. They are mainly used for things like logging into remote servers or connecting to Git repositories. SSH keys work like a digital fingerprint and keycard for your computer. They consist of two parts: a private key, which stays on your computer and acts as your secret key, and a public key, which you give to a service like GitLab and acts as the matching lock. When your computer tries to connect, the private key and public key "match," granting secure access automatically.
To connect my text editor to my GitLab repository, I followed a tutorial from azhim Ngawang Pemo Dukpa's page to generate a SSH key.
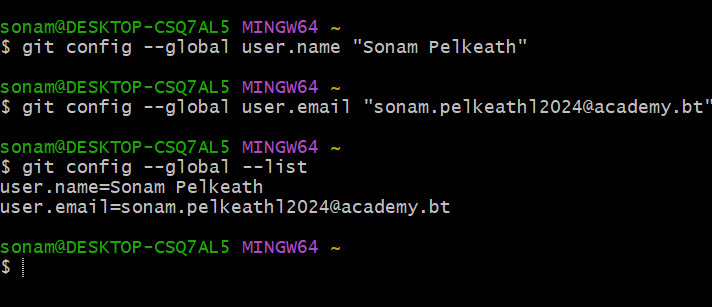
Before generating SSH keys, I first needed to install and configure Git on my system. After installation, I opened Git Bash and set up my global Git configuration with the following commands:
git config --global user.name "UserName"
git config --global user.email "UserEmail"
git config --global --list
git config --global user.name: Sets my display name for all Git repositories on this computer
git config --global user.email: Sets my email address for commit attribution
The --global flag applies these settings to all repositories I work with.
git config --global --list: To confirm my settings were saved correctly
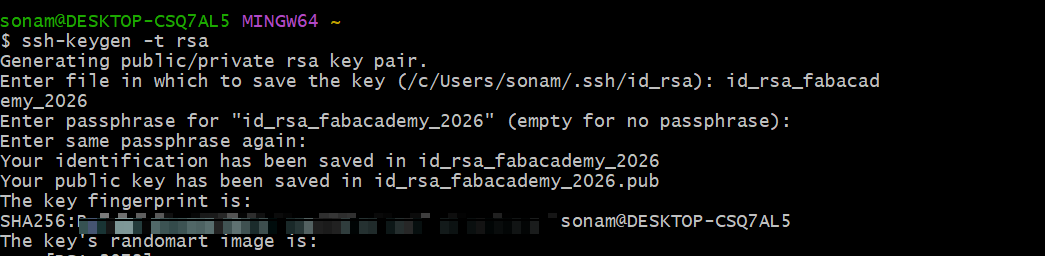
Step 1: Generate SSH key pairs
In Git Bash I ran the command ssh-keygen -t rsa and pressed Enter. After specifying the file name when prompted I pressed enter again and for both the passphrase prompts, I simply pressed Enter to leave them blank.
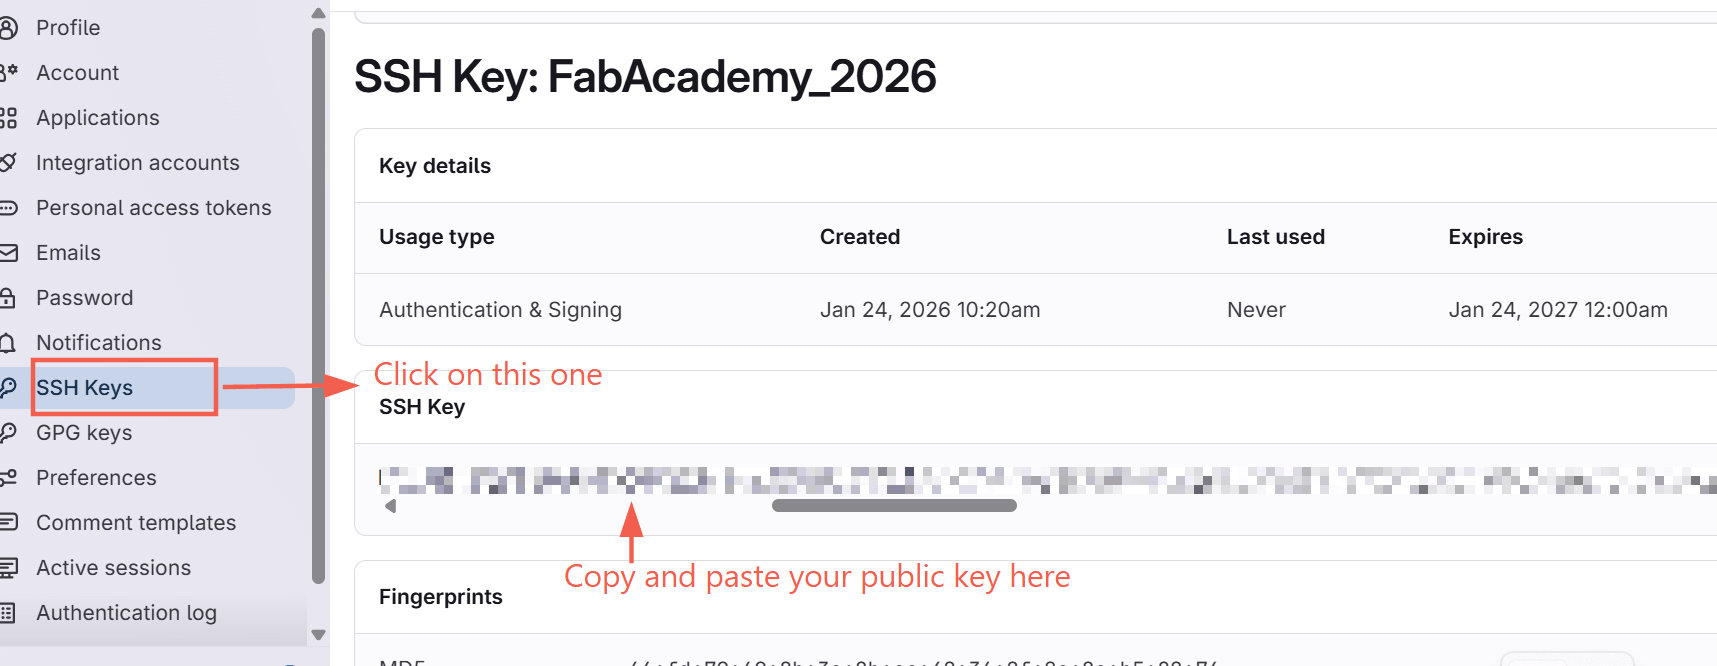
Step 2: Add SSH key to GitLab
- Copy the Public Key: I viewed and copied my newly generated public key using the command:
cat ~/.ssh/id_rsa_fabacademy_2026.pub - I logged into my Fab Academy GitLab account at gitlab.fabcloud.org
- I then clicked my profile picture → Preferences → SSH Keys
- I pasted the copied public key into the Key field
- I gave the key a title
- Left the default expiration date
- And clicked "Add key"

Step 3: Add Public Key to GitLab:
.jpg)
Step 3: Test SSH Connection
To verify everything was working correctly, I tested the connection using the following command:
ssh -T git@gitlab.fabcloud.org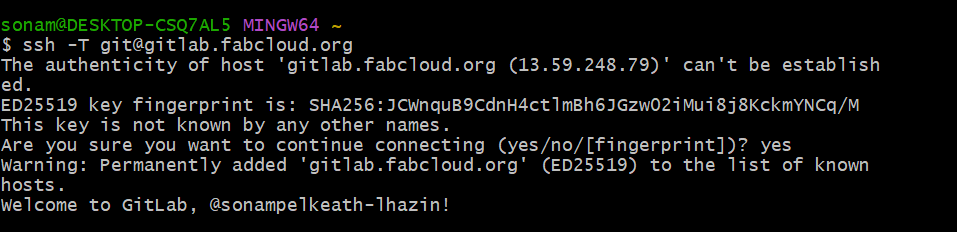
Step 4: Clone Repository to Local Device
With SSH keys successfully configured and tested, let's git clone the repository to my local device!
Cloning Process
- First, I navigated to where I wanted to store my Fab Academy project:
cd ~/Documents
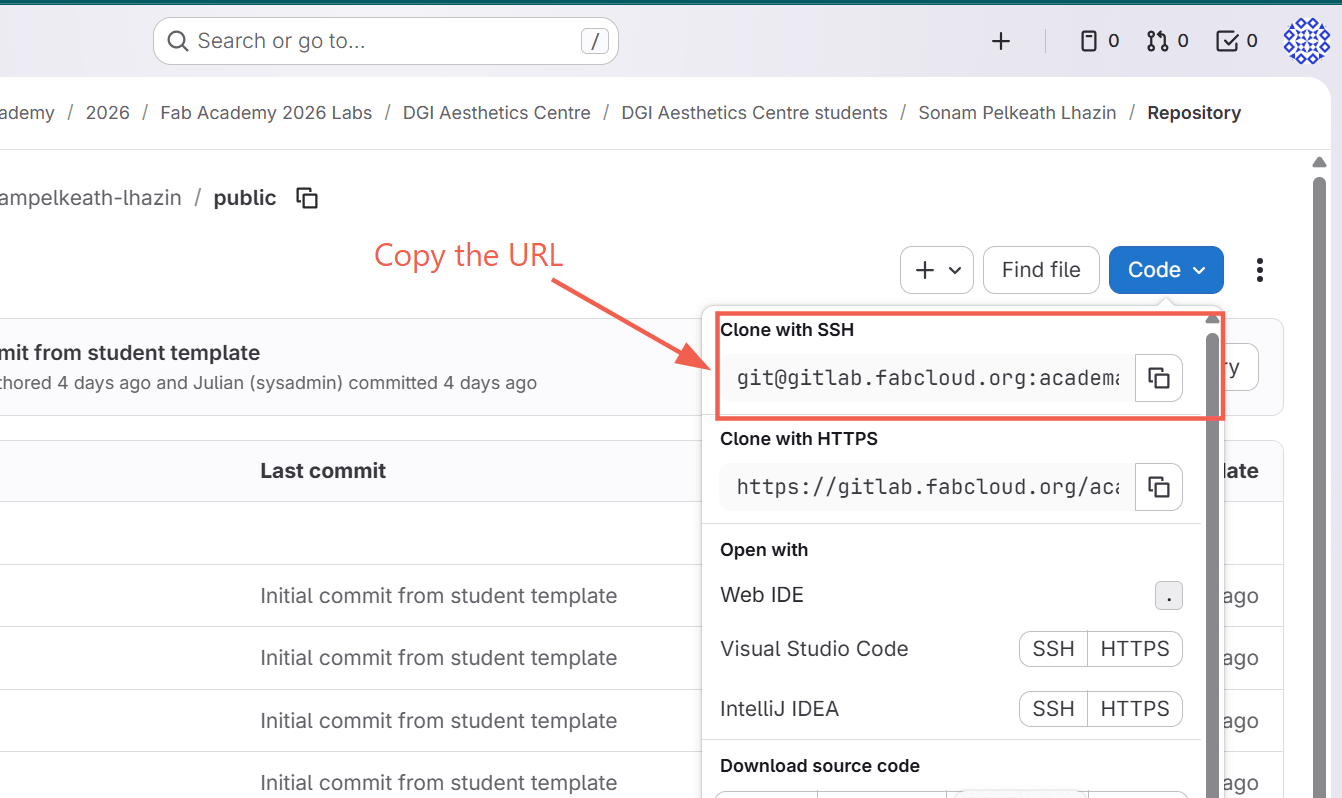
I chose the Documents folder as it's a logical place for academic projects and easy to locate. - Get Repository URL from GitLab: Go back to your GitLab and navigate to your GitLab repository page and copy its clone URL.
- Execute Git Clone Command: With the URL copied, I ran the clone command:
git clone git@gitlab.fabcloud.org:academy/fabacademy2026/labs/dgi/students/sonampelkeath-lhazin.git
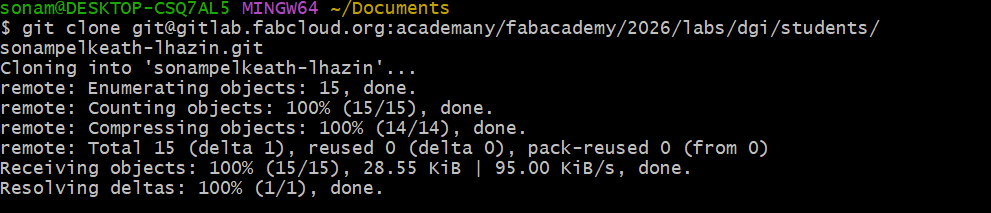
After cloning my Fab Academy repository from GitLab, I needed to navigate into the local copy to begin working with the files. Using the command:
cd sonampelkeath-lhazinI moved into the directory that Git automatically created, which was named after my GitLab username.

Website Creation
Back in 8th grade, I got my first real exposure to website creation when I signed up for Astrolab, a course designed for people interested in astronomy. At the outset, staring at all those lines of code felt completely overwhelming—they might as well have been Morse code scribbled by aliens, with angle brackets and tags everywhere that made no sense. But once I started getting hands-on help from my seniors, who patiently walked me through the structure, and I dove into some beginner-friendly online tutorials, things began to click. Gradually, I pieced together how website creation actually worked behind the scenes and finally understood what HTML was all about.
HTML
HTML stands for HyperText Markup Language, the standard language used to create and structure web pages. It describes the basic structure of a webpage like headings, paragraphs, images, links, and lists by using simple tags that tell browsers how to display content. Think of HTML as the skeleton of a website—it organizes text and media into meaningful sections without handling styling (that's the job of CSS) or interactivity (JavaScript).
HTML uses elements made of tags, like <p> for paragraphs or <h1> for main headings, which wrap around content: <p>This is a paragraph.</p>. Every page starts with a basic template including <!DOCTYPE html>, <html>, <head> (for metadata), and <body> (for visible content).
To solidify my memory, I rewatched an online HTML tutorial.
During the Astrolab course, we also got introduced to this great site called HTML5UP where we could get free website templates. For my Fab Academy page, I've used a template called Phantom from HTML5UP.
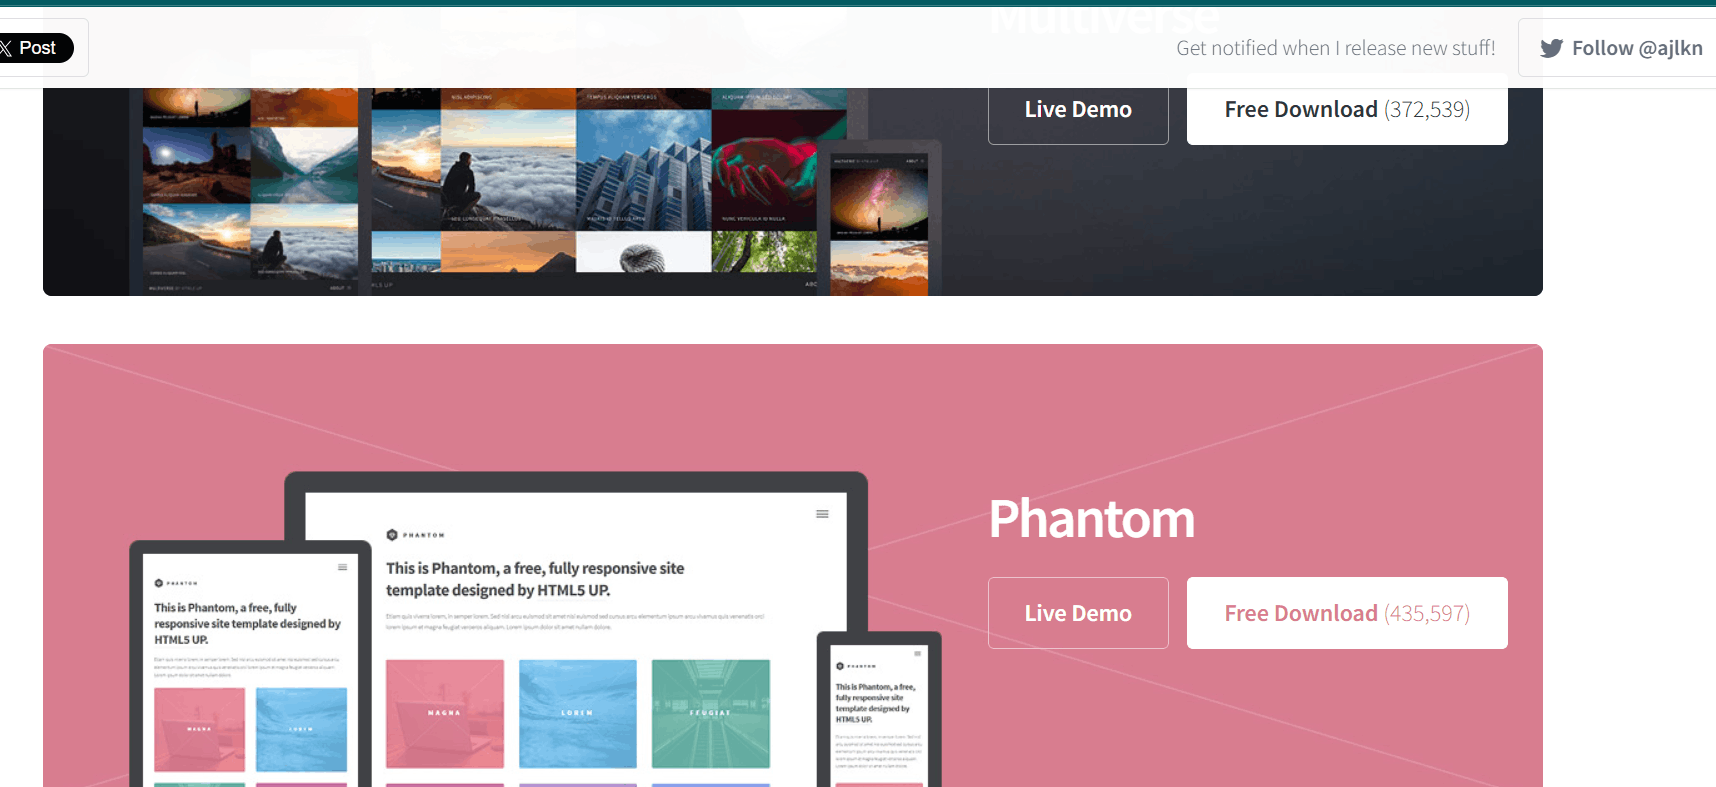
I visited the HTML5UP website to browse through their collection of free, responsive HTML templates. After reviewing several options, I selected the "Phantom" template because it has a clean design and modern layout and I was quite familiar with it since I've already worked with it before. I clicked the download button, which saved a compressed ZIP file named "phantom.zip" to my computer's Downloads folder. This file contained all the template's HTML, CSS, JavaScript, and image assets in a single package.
I downloaded the phantom template and once the download was complete, I extracted all the contents of the compressed file into a folder

.jpg)
To begin editing my Fab Academy website locally, I connected my cloned Git repository to Visual Studio Code:
First, I opened Git Bash and navigated to my local Fab Academy project directory. I used the command cd ~/Documents/sonampelkeath-lhazin to change to the directory where I had previously cloned my GitLab repository. This directory already contained my initial default website files and documentation provided by Fab Academy, and I needed to carefully merge the template files with my existing content.
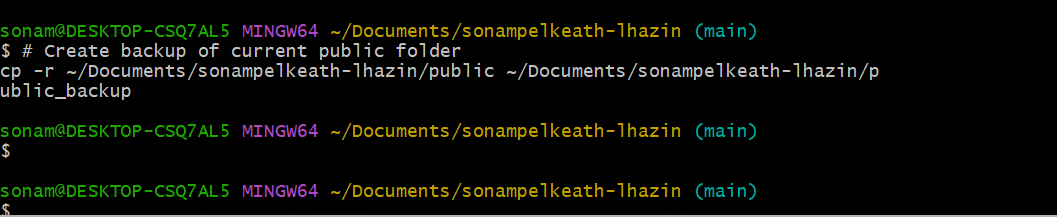
As a precautionary measure, I created a backup of my existing website files before adding the template. I used the command mkdir backup to create a new backup directory, then copied all existing files into this directory using cp -r * backup/. This safety step ensured that I could restore my original files if anything went wrong during the template integration process or if I needed to reference my previous work.
To integrate the template, I copied all files from the extracted template folder into my repository using cp -r ~/Downloads/phantom/* .. This command copied the entire template structure into my current directory, including the assets folder with CSS and JavaScript, images folder with placeholder graphics, and multiple HTML page templates.
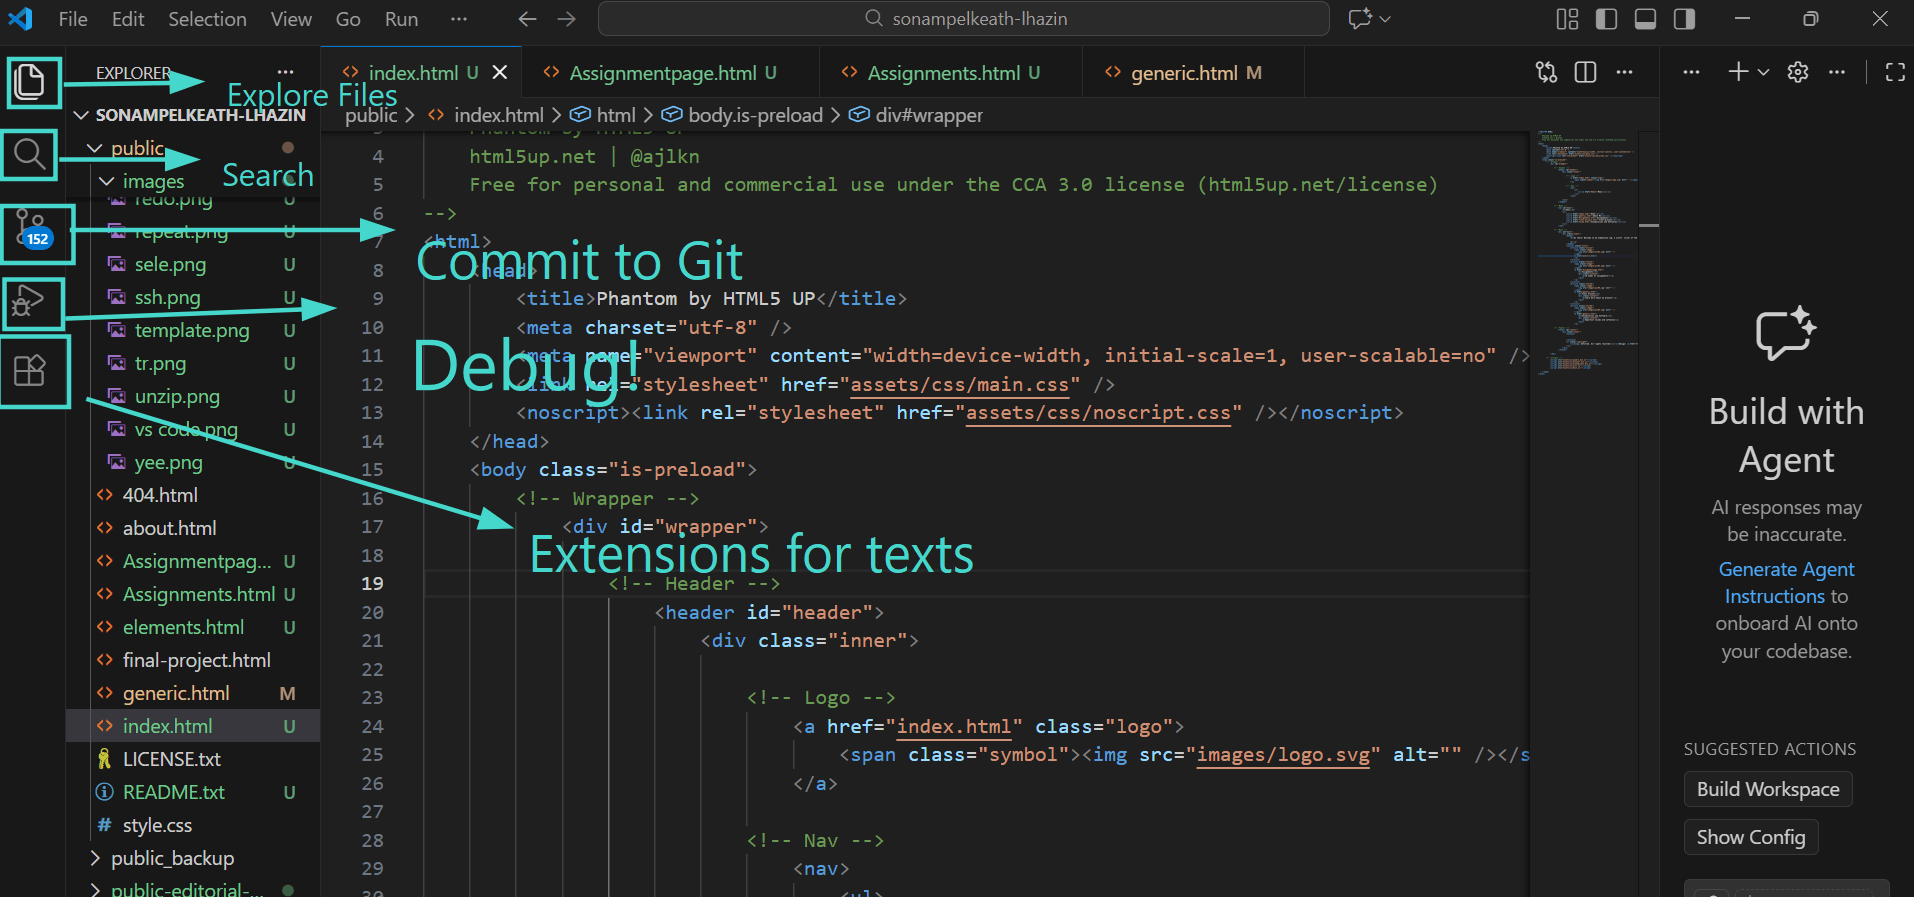
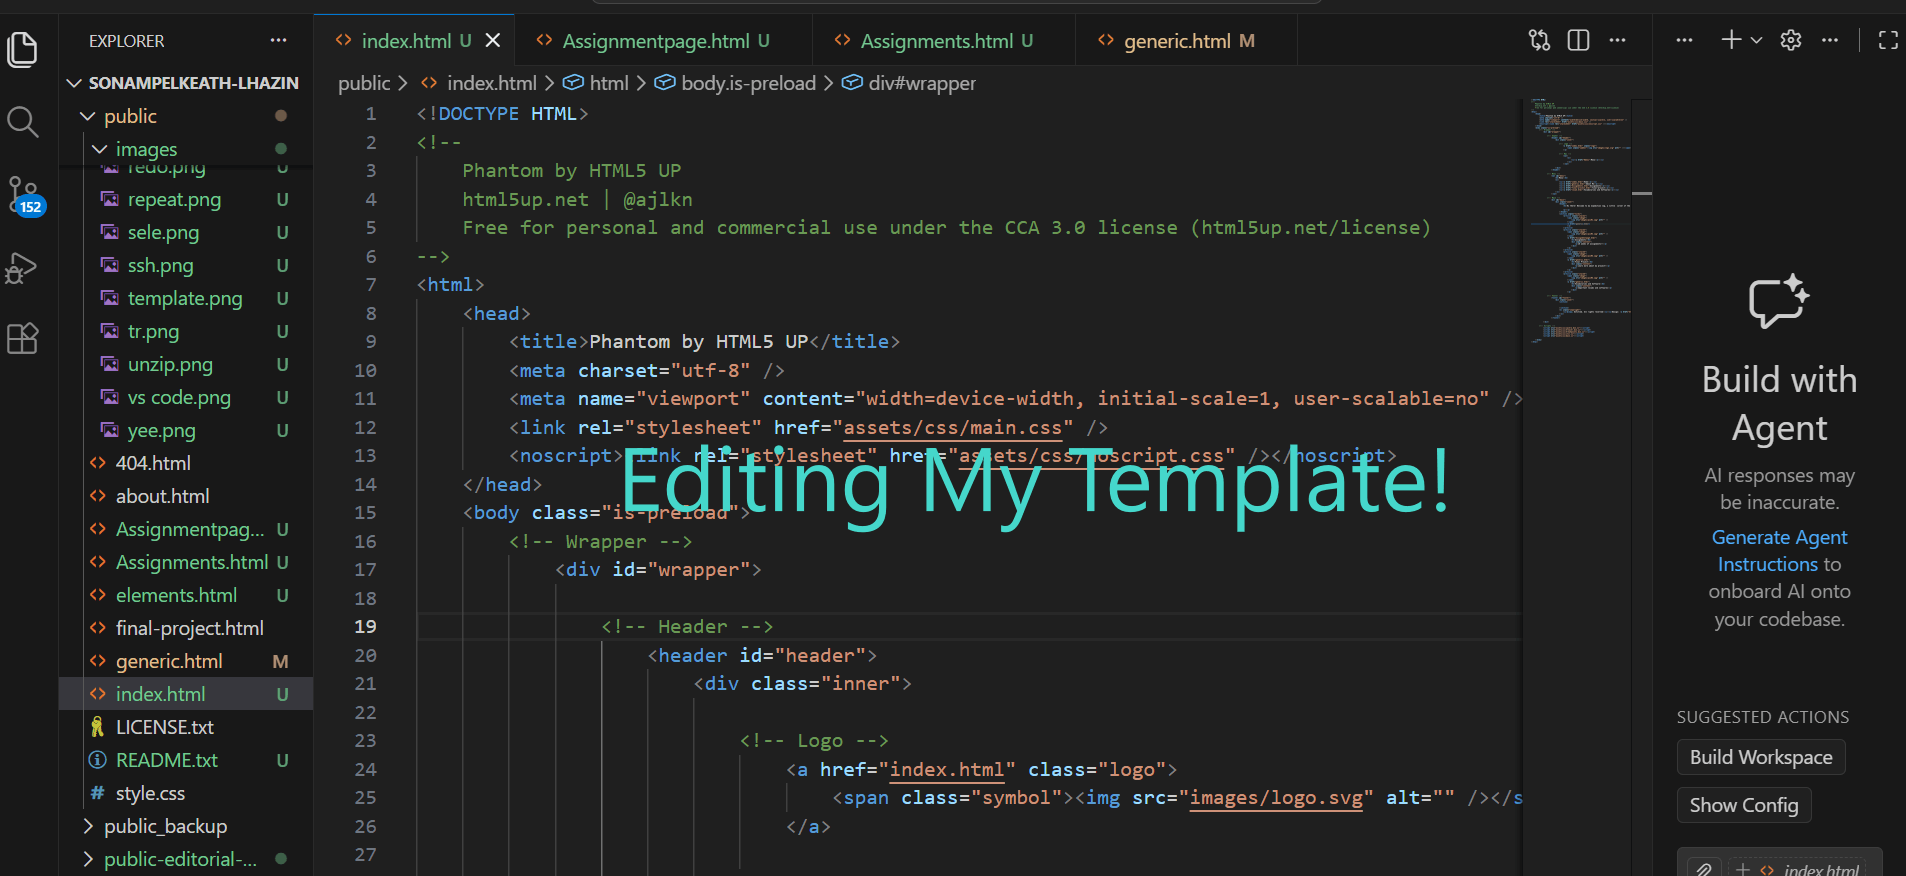
I launched Visual Studio Code directly from the command line by typing code . The period (.) represents the current working directory, telling VS Code to open the folder. Within VS Code, I examined the template structure, then began customizing it by first modifying the navigation menu in index.html to include my specific pages: Home, About Me, Assignments, Final Project, and Vocabularies and Softwares.
The Workplace Structure of Visual Studio Code:
After organizing my screenshots into week-based subfolders, I updated all image paths in the documentation. I tested the site locally by opening index.html in a browser to check navigation, images, responsiveness, and layout before proceeding with Git.
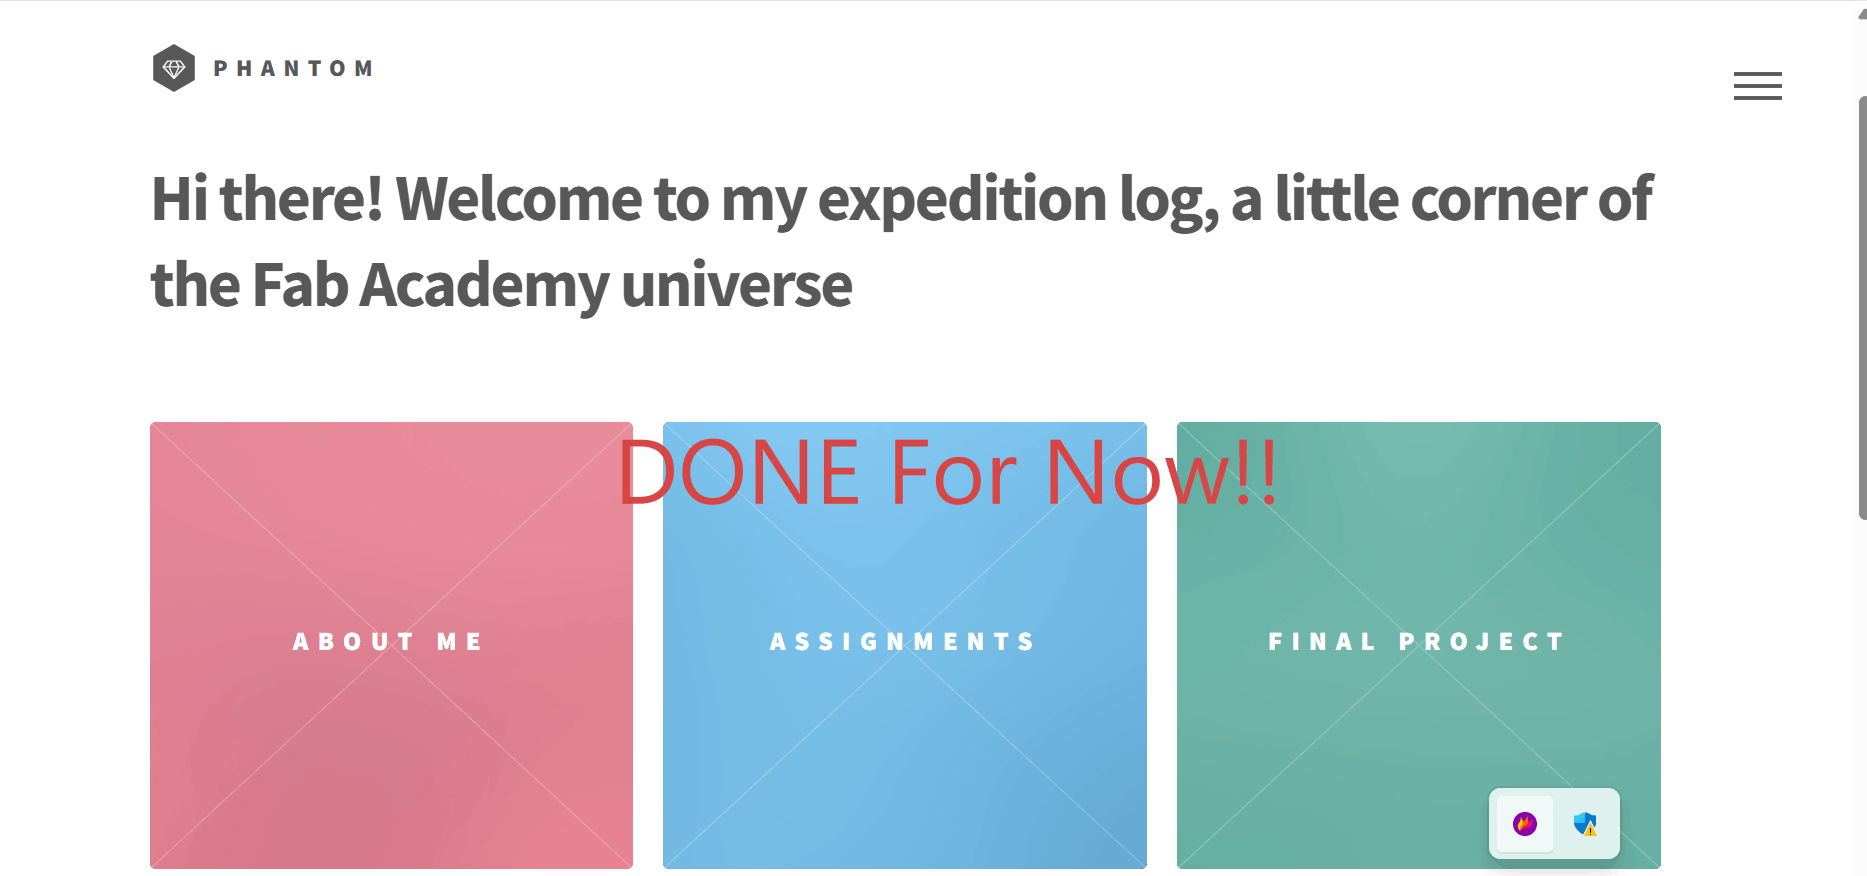
It took a while to edit the template to my liking. I had to modify it to make it suitable for Fab Academy documentation. They had a specific requirement for our documentation. We had to include different pages such as Home, About Me, Assignments, Final Project and Vocabularies and Softwares. And then we could add other pages or customize it if we wanted. Since this was only the first week, I wasn't sure what other pages I would need other than the required ones, so for now, I kept it simple and basic. I will be modifying the site each week depending on new requirements for my own project. I also had to go back and refer to a lot of previous documentation to get an idea of how the documentation is supposed to look like and the required contents of the documentation. The template I used was also used by a lot of other people as well so I referred to their documentations as well.
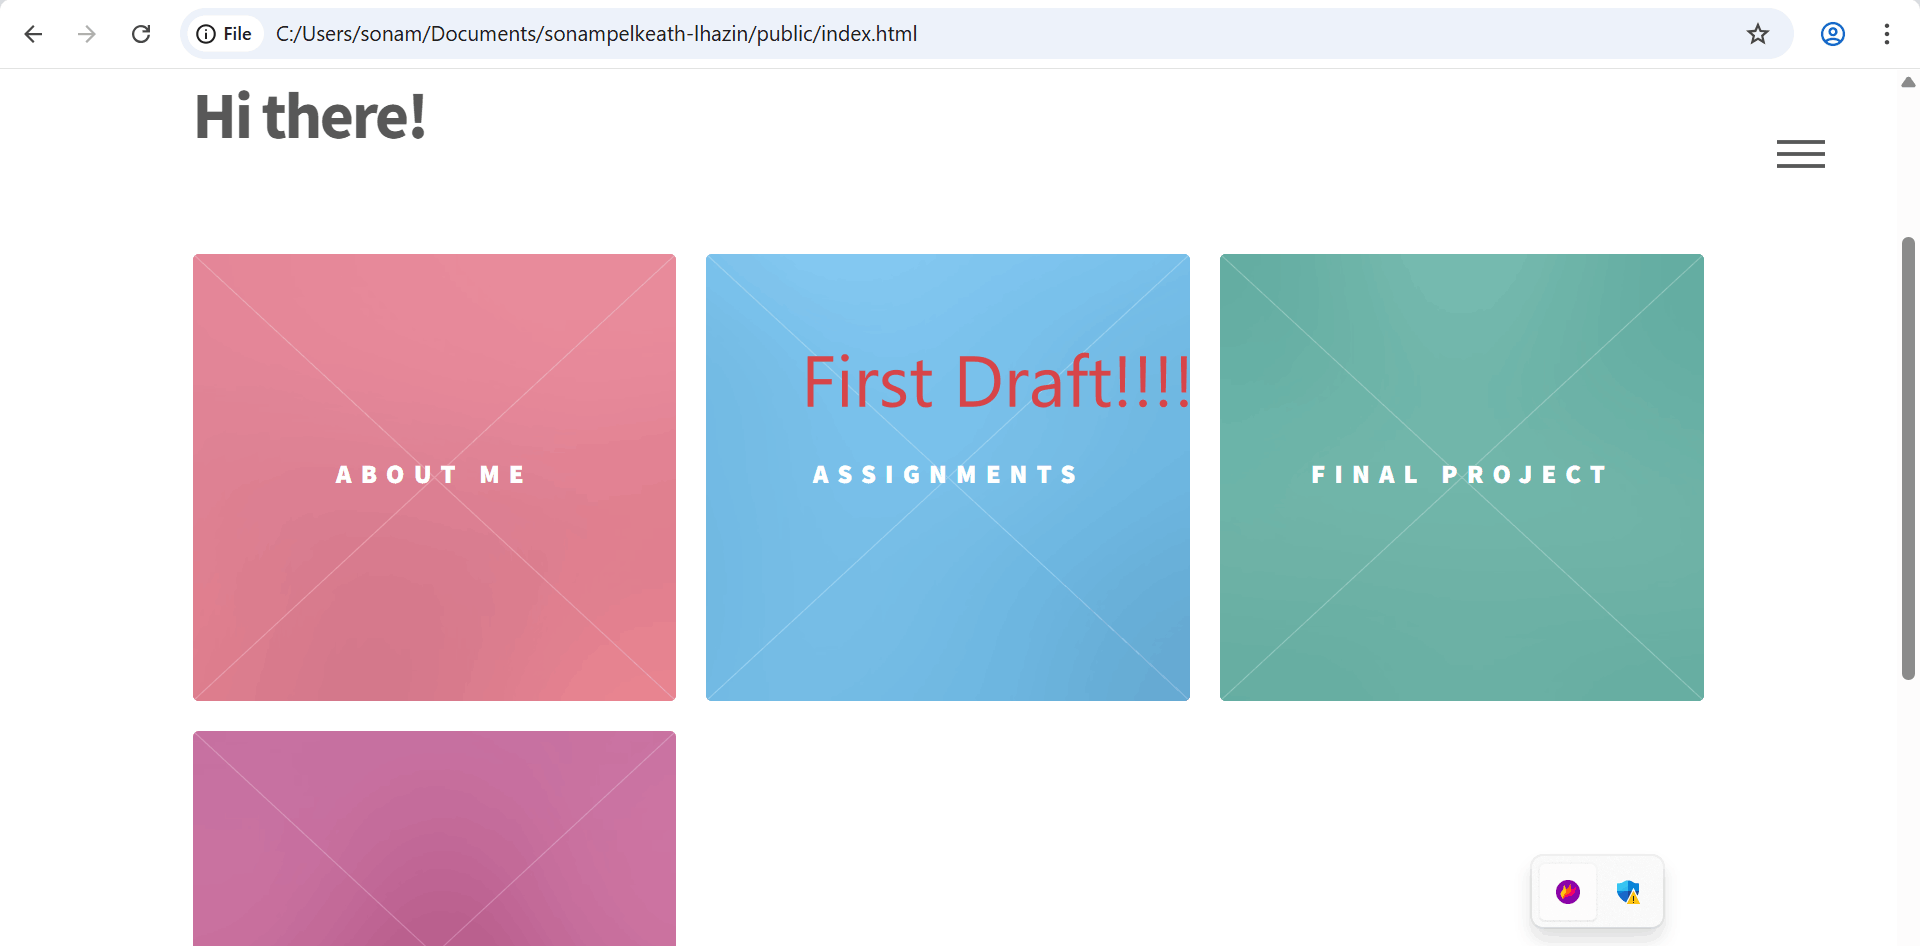
After a while:
Final Project Proposal
ELI
ELI is an interactive desk robot designed to actively train and improve focus and productivity, rather than just tracking it. Unlike conventional focus apps that simply measure time spent on tasks, E.L.I. works as a personal productivity coach that learns your unique work patterns, corrects posture, optimizes your environment, and builds sustainable focus habits through neuroscience-backed techniques.
The Problem: Modern Focus Challenges
Students face significant challenges maintaining focus due to:
- Short attention spans
- Poor workspace setups
- Ineffective focus apps that track productivity but don't train it
- Lack of personalized guidance based on individual work patterns
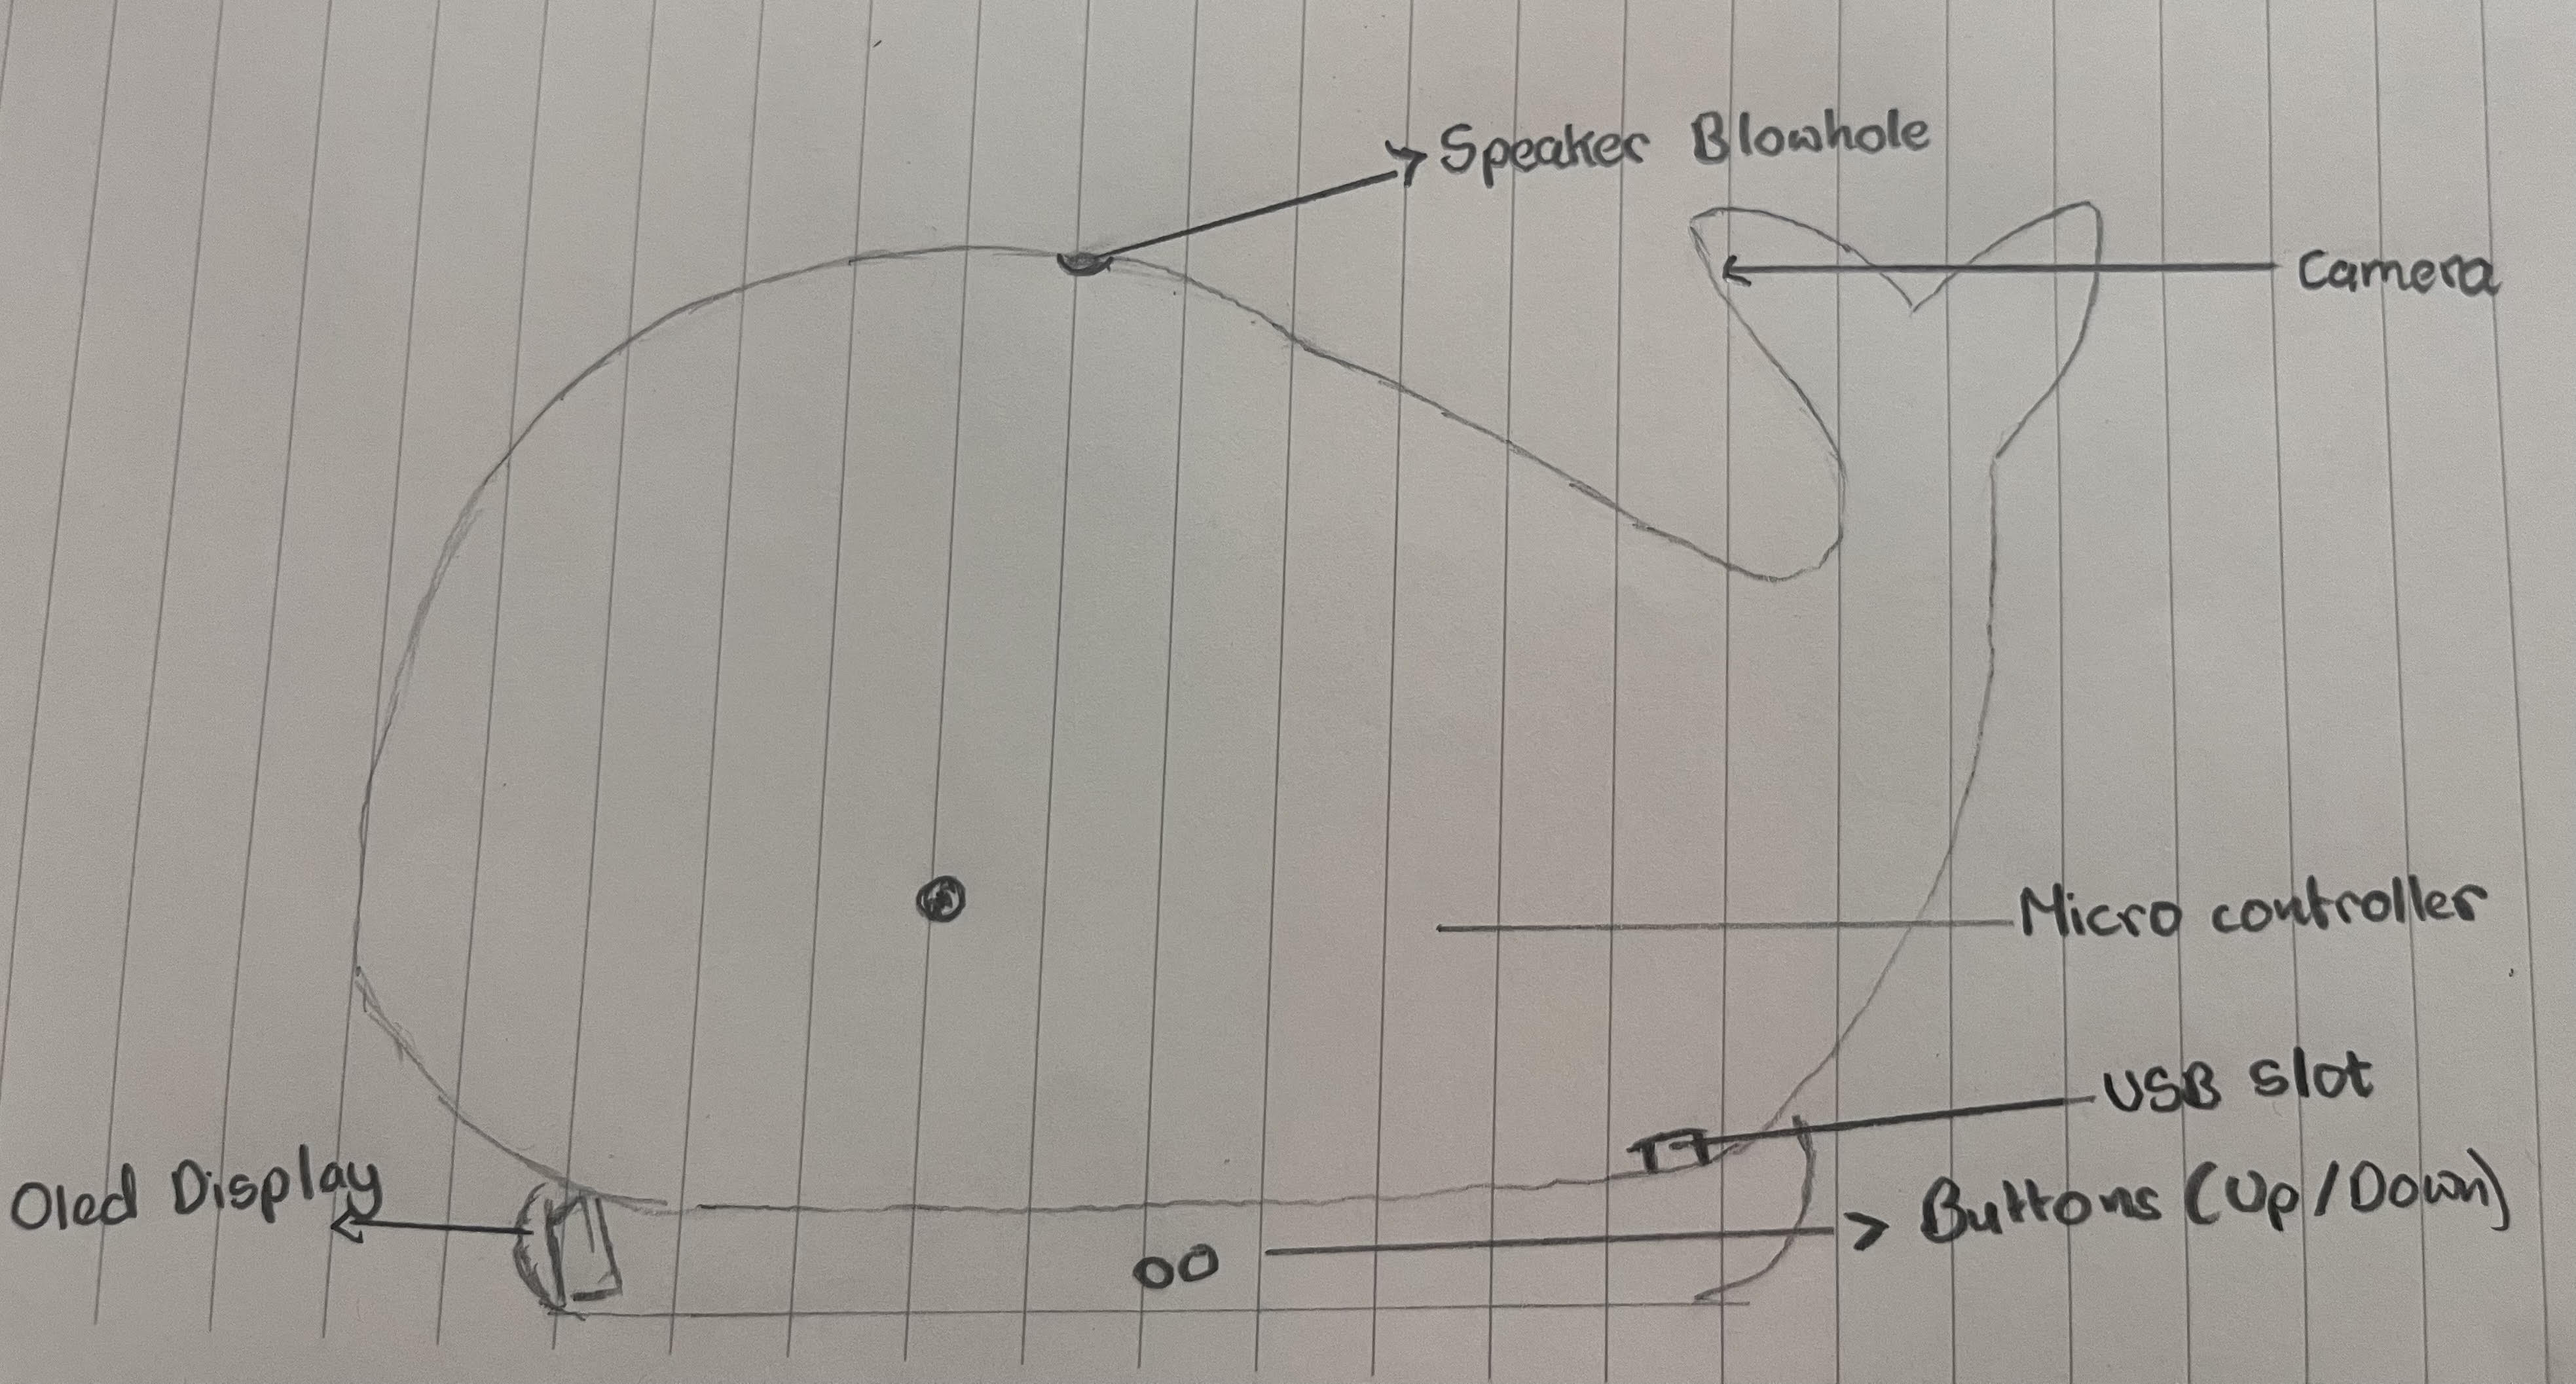
How It Works
- Arducam Mega SPI camera captures real-time posture, gaze, and desk images for local processing.
- A microcontroller like XIAO ESP32 C3 handles all logic: image analysis and pattern detection
- DS3231 RTC tracks precise time/date for peak focus correlation (e.g., 6 AM silence).
- Push buttons (3x) enable navigation: select tasks, set timers, input weekly plans to SD.
- Coin vibration motor buzzes whale body on slouch detection via camera thresholds.
- OLED display shows eyes/expressions, timers, and prompts like "Sit tall, you're slouching!".
- Speaker plays stored ringtones/voice cues from SD like "Breathe, focus here".
- SD card stores everything:focus reports, patterns,ringtones and voice cues
- Offline focus trainer
Who Will Use It
- Students struggling with attention spans or focus.
- Studets trying to manage their time well
- Productivity seekers tired of "tracking-only" phone apps.
Technical Challenges That Might Occur:
- Computer Vision:The microcontroller isn't powerful enough to understand camera images quickly for real-time posture checking.
- Overheating:All the electronics packed together generate excessive heat when running for long periods.
- Learning Patterns:The device doesn't have enough memory to remember and learn everything about your work habits in a short time.
- Lighting Issues: The camera gets confused by different room lights, shadows, or what you're wearing.
- Parts Not Talking: The camera, screen, and speaker sometimes don't work together smoothly.
- Slow Response:It takes too long to notice you're slouching and remind you to sit up.
- Wrong Alerts: It might buzz when you're actually sitting fine, or miss when you're really slouching.
I signed the student agreement by commiting it to my git repository.