Week 14
Check List
This week's project requirements:- Review the safety data sheets for each of your molding and casting materials
- Make and compare test casts with each of them
- Compare printing vs milling molds
- Document your work on the group work page
- Reflect on what you learned on your individual page
Individual Assignment:
- Design a mold around the process you’ll be using
- Produce it with a smooth surface finish that does not show the production process toolpath
- Use it to cast parts
- Document the process
Images/Files:
- Include your original design files
- Properly compress or use a zip folder if needed
- Include hero shots of your results
Group Assignment:
Resources and Helpful Links
- Adjustable Silicone Mold Box
- Silver Clay Shrinkage
- Art Clay Silver MSDS
- Art Clay Silver MSDS
- Art Clay Silver MSDS
- Smooth-Sil 940 MSDS
- Helpful People:
- My Group Partners Camille, Kim, and especially Dorian!
- Garrett Nelson, Barbara Morrow, and Zach Budzichowski for thier resources for milling our wax block
- Our schools art teacher Amanda Allen for her assistance with kiln firing my silver clay
Learning Outcomes
- Design appropriate objects within the limitations of your process
- Demonstrate workflows used in mold design, construction and casting
Group Work
My Contribution to the Group Work
I got our group jump started for this week by making a list of common casting and mold making materials. I then created a chart with some basic information about the materials, thier properties when casting, thier properties when using as a mold, and general safety. I tried to choose materials that we either had in the lab, were common mold and casting materials, or materials I knew my group mates were interested in.
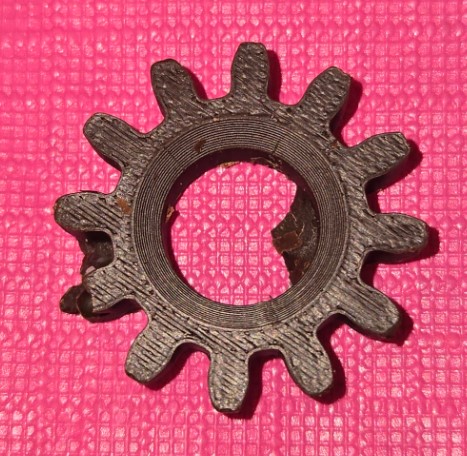
As a group we then each selected one mold making matrerial from the lab to cast the same 3D printed gear in. The goal was to have all the same casted object so we can compare the quality of the mold making materials. The material I choose to work with was Smooth-Sil 940. I really liked working with this material and I liked the quality of the final mold I was able to make with it. This seemed like a successful week for us, as we were able to compare the mold making materials and we can now make better choices for future casting projects.
As a follow up reflection to this week, the following week later my 9th grade students started doing resin epoxy pouring for class and I learned pretty quickly that I am alergic or at least susceptible to the material in its liquid form. This makes me greatful that as a group we casted with natural materials like chocolate and beeswax.
-
My Contributions to this week:
- Created a list of common casting and mold making materials
- Created a chart that lists outs mold making properties, casting properties, average curing time, and PPE needs for standard mold and casting materials
- Created a mold out of Smooth-Sil 940
- Read and documented the MSDS sheet for Smooth-Sil 940
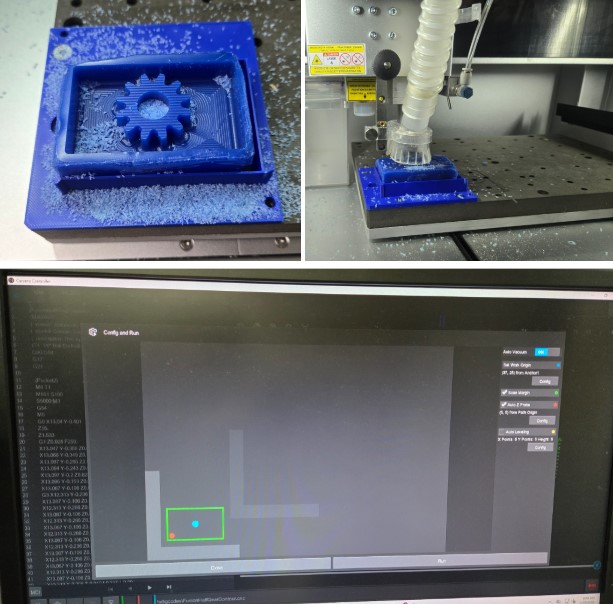
- I worked with Garrett, Kim, and Camille to mill out a wax block on the Carvera CNC
Their are a lot of options for cleaning up 3D prints, but many are questionable on thier health and safety risks. I tried a few common materials to use as a possible post processing option but none were really perfect. Their are a lot of options still to try, so I will continue to see what other, non-toxic, simple to use materials are out thier to smooth PLA prints.
For a more in depth look at my groups week 14 assignment, see my groups Week 14 page.
Introduction
This week was definitely my favorite week so far and the most delicious! I worked with a variety of materials this week including some really unique ones! I also worked with a variety of mold making processes which was a lot of fun.
My only downside to this week was learning I am alergic, or seceptable, to the epoxy resin we use in the lab. I have used UV resin before and didnt seem to have the breathing issues I had with the epoxy resin, but my guess is their is some chemical difference between the two types.
Overall though, this was one of my favorite weeks to date!
Molding and Casting in Smooth-Sil 940
As a group we tested out a variety of different mold making rubber materials. Each of us took a different material and we all casted the same 3d printed gear design. The goal was to have the same design in each of the different materials so we could compare and contrast the outcome.
-
I worked with Smooth Sil- 940
- Notes from the Part A MSDS
- Safety Precautions:
- Wear gloves to avoid contact with skin
- Use soapy water to wash hands after use
- Don't eat it
- Don't get it in your eyes
- Goggles suggested for eye protection
- General Notes:
- This material is safe to handle once fully cured
- This material can be used for food applications once cured
- Notes from the Part B MSDS
- Safety Precautions:
- Wear gloves to avoid contact with skin
- Use soapy water to wash hands after use
- Don't eat it
- Don't get it in your eyes
- Goggles suggested for eye protection
- General Notes:
- This data sheet was essentially the same as the Part A MSDS
- Notes from the Part B MSDS
MSDS
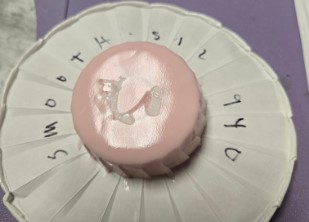
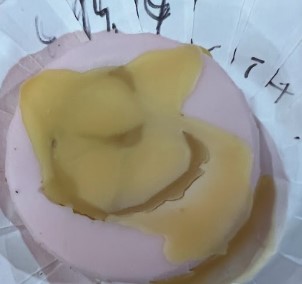
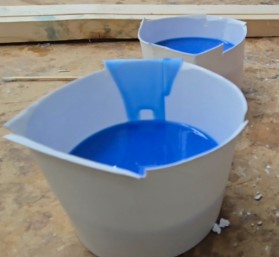
Since I read the data sheet for Smooth-Sil 940, I felt confortable using this material for my portion of my groups testing process. Smooth-Sil 940 is a 2 part rubber silicone material. It needed a mix ratrion by weight of 100A to 10B or 10:1. I used a scale to carefully mixed 94 grams of part A and 9.4 grams of part B for a total mixture weight of 103.4 grams.
I really liked that part A was a white color and part B was a red color because it was really easy to tell when it was well mixed because it became a soft pink color. It was also easy to see the parts that weren't mixed yet, like around the edges of the cup, becuase they were still white or red. After stirring until well mixed, about 3 minutes, I casted my 3D printed gear that each member of my group printed and casted in thier own materials.
Since I had some leftover of my mold making material ready, and I had a pot life of 30 minutes so still had time, I decided to grab random objects around the lab for myself and my groupmates to make additional casts. I grabbed some lego’s and kinex pieces, random small objects left on the table, and as a funny idea I grabbed one of the last little pretzels from the bin I was getting ready to toss. I cast my pretzel in my leftover Smooth-SIL 940 and waited to see what happened.

Molding and Casting Chocolate
Dorian was the true star of this week!
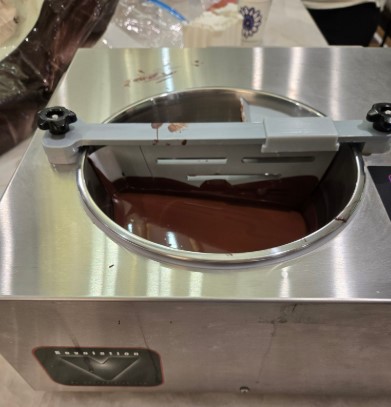
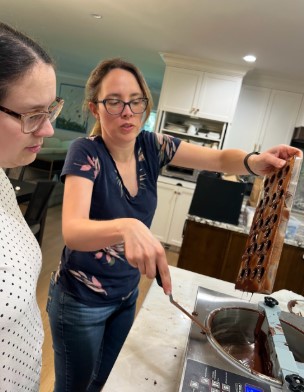
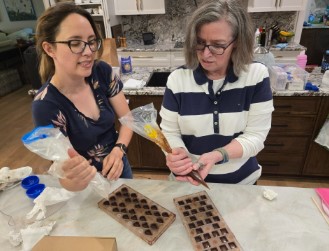
Dorian welcomed our group to her house so we could learn how to do mold and casting with chocolate! Dorian had her chocolate tempering machine set up and a big batch of chocolate ready to go.
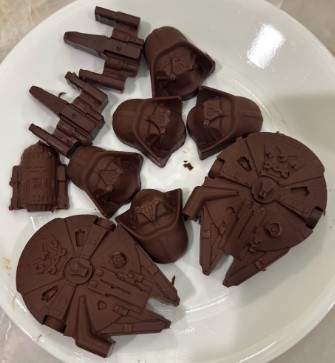
She showed us how to use a variety of molds including Star Wars silicon molds and a multipart chocolate mold. The Star Wars molds were single part molds that we poured the chocolate into.
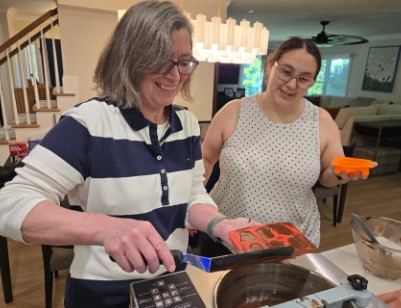
We used a spatula to remove the excess off the top and we tapped the mold to release air bubbles. Once filled, the molds were placed in the fridge for the chocolate to cool and harden.
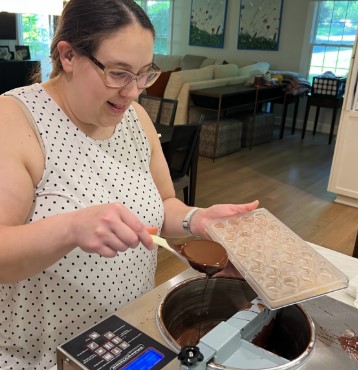
While the Star Wars molds were in the fridge, we moved onto the multipart professional chocolate molds.
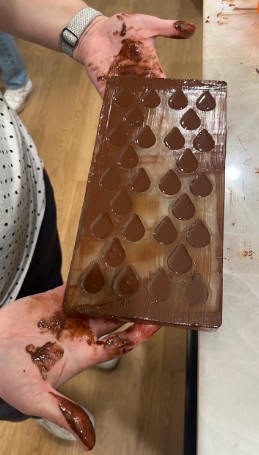
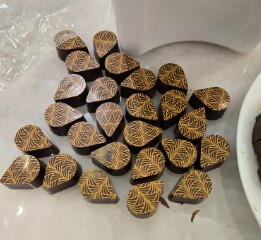
These molds were either a 2 or 3 part mold depending on the style. The one I used was a two part mold that held together with magnets. To start, we chose an edible decorative sheet to place in the bottom of the mold.
Then we slowly poured the chocolate into the molds to fill them.
Once filled, unlike the Star Wars ones, we had to slowly tip all the excess chocolate out.
These molds are designed to create hollow chocolates that can be filled.
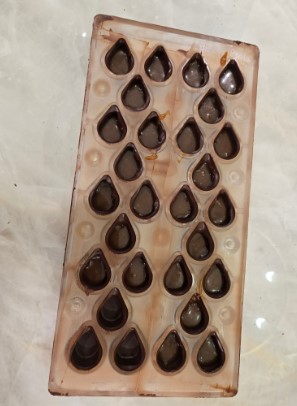
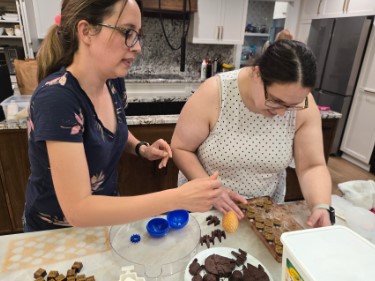
Once I removed as much as I could from the mold by tapping it was time to set the chocolate. While the chocolate was setting we prepared the homemade caramel filling Dorian made for us to use. Camille also prepped some marshmallow fluff to fill some of her molds with.
After about 20-30 minutes, it was time to fill our hollow chocolates and add the top layer of chocolate to close the mold. I was a bit messy during this entire process but it was a lot of fun.
With the chocolate filled and closed it was time to go back in the fridge to set the filling and top layer. Demolding the chocolates was as easy as flipping the mold upside down and tapping out the chocolates. At first I was afraid to tap on the mold hard, but Dorian assured me that a good tap or knock is completely fine!
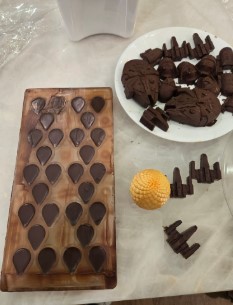
I was so impressed with how they looked (and tasted) once they were done. I am so greatful for Dorian opening her home this week and sharing her talents with us!
Molding and Casting with Bees Wax
While we were at Dorians house, besides the chocolate, she also had a pot ready with melted beeswax we could use to cast with as well. I cleaned out my gear and pretzel mold and I casted a pretzel out of the beeswax! It was a little tricky to demold and I was afraid I was going to break the beeswax cast at first since it was soft, but slowly and surely I was able to get the wax pretzel out of the mold!
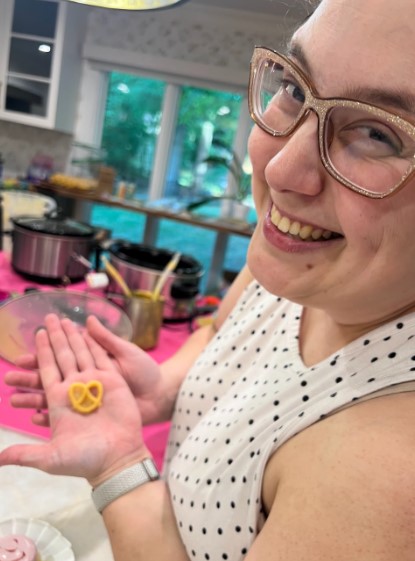
It actually came out really clear and close up you can even see where their was some little salt crystals on the original pretzel!
Since my Smooth-SIL 940 is also food grade safe, I decided to cast my gear in chocolate too!

Molding and Casting with Clay
This was another really exciting part of the week for me! I find playing with clay to be a lot of fun and I find it to be a great material to work with. For this part of mold and casting week I did two clay projects. The first was I made my own bead rolling molds and the second was creating a mold to use with Silver Clay.
Bead Rolling Molds
For the bead roller molds, I saw one being used online and it made me curious. Bead rolling molds are unique two part molds used to create round objects. Unlike a traditional two part mold that you fill though, these types of molds work a bit differently.
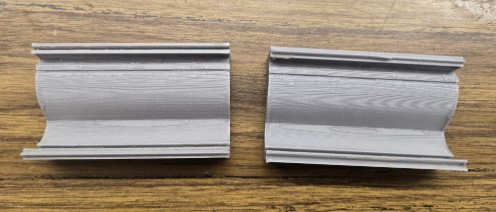
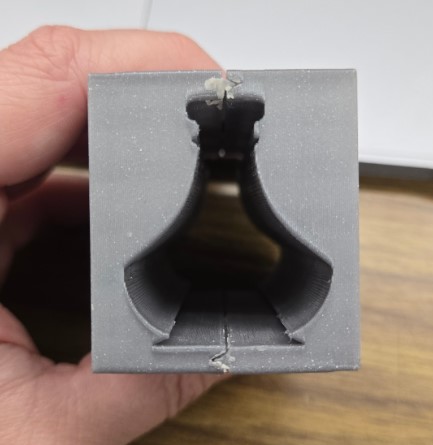
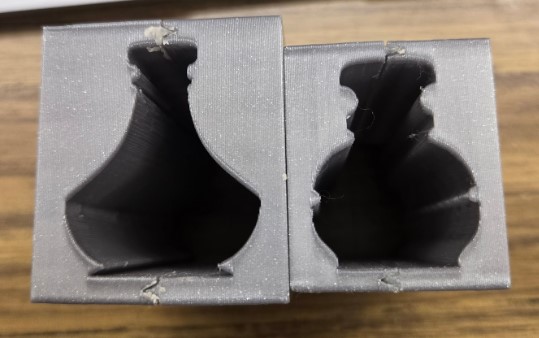
You place a ball of clay in the center of the elongated two part mold. Once the clay is in the center you slide the two mold parts back and forth to shape the clay object.
This is actually a really cool concept, because anything you can make with a revolve tool, in 3D modeling, can be turned into one of these molds. This creates a really cool visual artifact that can be created along side the typical revolve tool Fusion projects.
Plus, its really fun to slide the molds back and forth.

Post Processing a 3D Print
Their are a varietyy of ways to finish a PLA based 3D print to remove the layer lines.
-
The most common methods are:
- Sanding
- Start coarse with approximatly 120 to 220 grit
- Move up to finer grits until print is smooth
- Wet sanding can also be used and is a good way to contain the plastic dust from sanding
- Filler Primer and Sanding
- Use a spray primer like Rust-Oleum Automotive Filler Primer
- Spray the part
- Sand
- Repeat
- Brush on Coatings
- Use a brush on coating like resin, epoxy, or 3D print coating
- Brush on or dip in the coatin
- Let dry
- Repeat as needed
- Heat smoothing
- Use a heat gun to slightly melt the surface of the print
- Use a heat gun to slightly melt the surface of the print
- Heat smoothing
- Brush on Coatings
- Filler Primer and Sanding
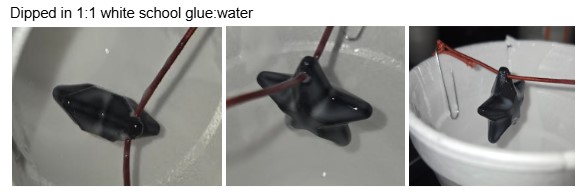
Elmers White School Glue
I created a 1:1 mixture of white school glue and water. I dipped my print into the cup of the mixture, fixing it to the cup with two paperclips and some string. Then I let the print and mixture dry, it took about 10 minutes for each layer to dry enough to dip again. I probably could have let the mixture dry more between layers for better adhesion. I repeated this step about 5 times.Outcome: The mixture performed better as it hardend and thickened in the cup, so I think my mixture of 1:1 may need to be adjusted
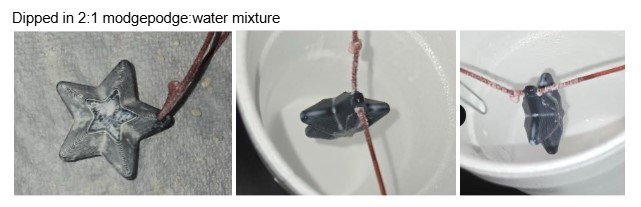
ModgePodge
I created a 2:1 mixture of Modgepodge and water. I dipped my print into the cup of the mixture then let the print hang to dry over the cup. Then I repeated about 3 times.Outcome: This mixture filled in corner areas on the star really well but previous layers would slide off in consecutive dips. Modgpodge is water based and mixing it with water made it thin and so unless I really let it dry well it didnt hold. After a few dips and FULL drys of the mixture, I did coat the print and smooth it out, just not fully. I think with a few more layers, and bit more drying time, it may have been a sucessful test.
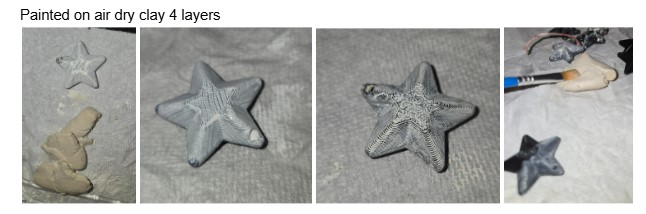
Airdry Clay
I noticed that when touching the clay with my wet fingers that it left behind a thin coating of the clay on my hands. This gave me an idea to try and use that property to my advantage. At first I tried to mix some of the air dry clay into the modgepodge mixture to make a slurry. This was unsuccessful as I could not stir the clay well enough, so I just kept getting big wet clumps. If I had an immersian blender or a better way to stir I think this could have worked really well.But since it didn't, I tried a different method. This time I tried paitning the clay on with a paintbrush dipped in water.
Outcome: The water dipped paint brush method worked suprisingly well, but it required a long amount of drying time inbetween layers. If I tried to paint the clay before the previous layer was dry the paintbrush just lifted the clay off the previous layer. I used a hair dryer to help speed up the process between layers, which helped.
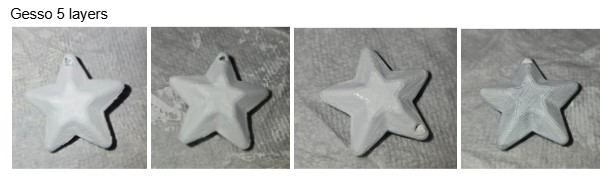
Gesso
Gesso is a chalky white primer that is used for painting. It is typically brushed onto a canvas to add a nice texture and grip. It can also be used on wood, paper, and other mixed media art surfaces. It is a mixture of glue or binders, chalk, and white pigment, which is very similar to what I was trying to make above when I tried to make my slurry.Since its already a type primer I had high hopes for this option. I brushed on a thin layer and then used the hair dryer to quickly harden the layer. After dry and hardened I brushed on another layer. I repeated this process and brushed on a total of 5 layers.
Outcome: This was by far the best results of my tests! You can clearly see in the images that after only 5 thin layers the star almost was completly layer line free. Even with only 1 layer painted on, this method beat out all of the other materials I tried.
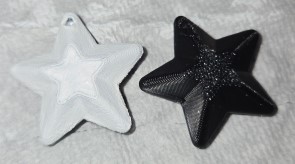
Final Results
I tested the gesso covered star versus the control, the unfinished 3D printed star, in some crayola playdough to see if the layer lines were visible. The gesso coated star left behind NO layer lines.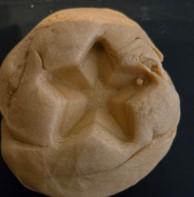
Molding and Casting with Clay
Silver Clay Casting
For the final part of my mold and casting week, I had the opportunity to work with Silver Clay as a casting material. Silver Clay is essentially silver powder mixed with a clay material binder. When fired in a kiln, the binder material is fired off and you are left with just the silver.
I was gifted a 50 gram bag of Art Clay Silver Clay last year. I purposly held onto it to try for this weeks mold and casting project. Since 50gs doesn't seem like a lot, I decided I wanted to do something small like a pendant or earrings. I decided on making a design and casting two if possible to make earrings but if not I would use the same design for a pendant.
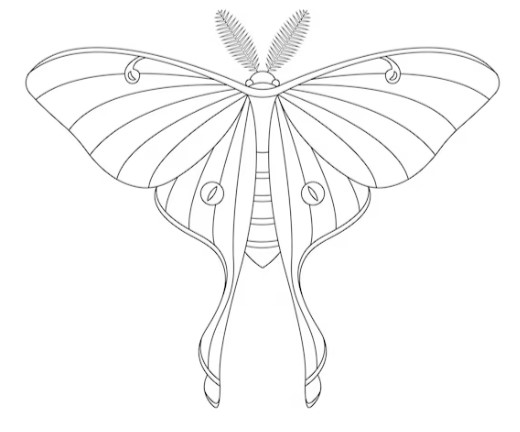
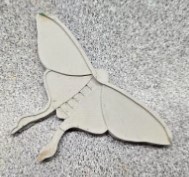
The hardest decision for this was figuring out what I wanted to cast in silver. Like a stroke of fate, I actually found a beautiful Luna Moth in the stairwell in my apartment complex.

It inspired me to create a luna moth design for my pendant/earrings.
I found a clipart style reference image on the internet and used TinkerCAD to create my luna moth design.
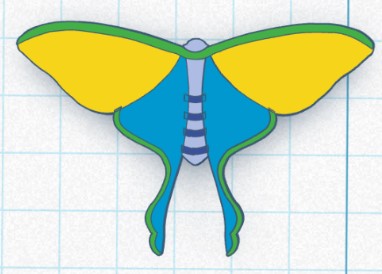
How it was made:
I created the base sketch using the Extrude Sketch tool.

I drew out the points roughly based off of the clipart reference image. Then converted the points to rounded edges. I fine tuned the design using the vertice Handles allowing me control over the shape of my curves.
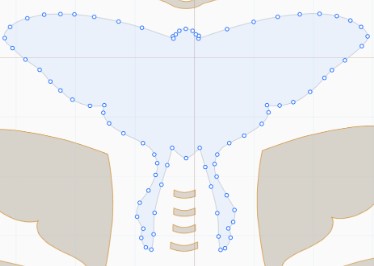
I used these controls to make the left and right side of the month as even as I could. I wasn't super strict on this since things in nature are not always perfectly symmetrical. It wasn't perfect but visually at the small scale it looks great.
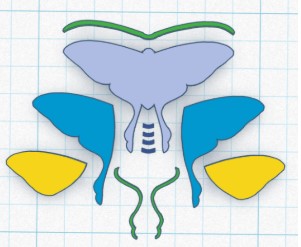
I used this base design to make all of the other pieces by copy and pasting the sketch and modifying the vertices. For pieces like the wings, I made one side the way I liked it by deleting all of the extra vertices on the month and shaping the ones I kept. To keep the left and right symmetrical I would copy the piece I edited and use the Mirror tool to make a mirrored copy for the other side.
Test Printing my Design
Since the Silver Clay is expensive, and I only have 50g total to work with, I wanted to make sure my design was not using a large amount of the clay. I test print my moth design in a variety of wing span sizes ranging from .5in to about 3in and with thicknesses between 1/16 and 1/4in.
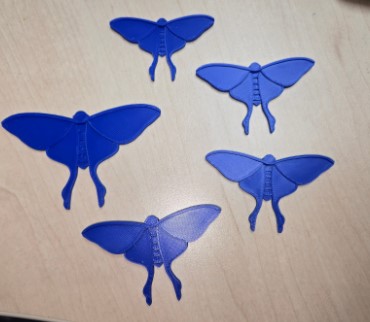
I narrowed down my size to a wig span of 2in and a height of 1.5in. For the thickness, I liked the thickness of 1/8in but I realized that at 1/4in the small details were more pronounced. Since the design is going to shrink potentially up to 20% during firing I decided to go with the thicker, more pronounced version.
Making my Mold
For the mold making process, I tested a couple options before deciding to cast in silicone rubber. My first thought was to make the mold out of PLA on my 3D printer. I printed my mold in a few different sizes to gauge moth size and how much clay I would need.

This was a helpful test in the fact that I was severely over estimating my clay usage, but the hard mold was really difficult to remove the soft clay without deforming it.
I also tried letting the clay partially harden before removal, in hopes the shrinkage would help demold it, but my patience got the better of me. I did not let the clay sit long enough, so when I demolded it, the smaller/thinner parts broke off. I used this information to actually help do some minor redesigns on my moth.
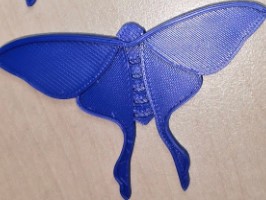
Visibly these changes are not really noticeable, but I widened the thinnest part of the bottom of the wings, I enlarged the head where I plan to add the earring hole, I thickened the entire body, and I cut the lines into the body instead of having them pop out. These are all really small details that I think will help create a stronger and overall more successful cast in silver.
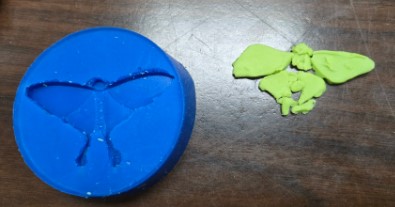
With my updated design, I printed two and cast them in the silicone. For this process, I hot glued each piece to the bottom of a paper cup. To make it easier to see and handle the cup, I took a scissor and cut the top half of the cup off, leaving me with a shallow cup to work with.
I used Moldstar 30 to case my 3D printed moth and let it sit overnight to fully cure. The next morning I removed my 3D printed moths from the mold and cleaned up the edges of the mold using angled snippers. Since I am using a clay and not a liquid material to fill the mold I wanted to be able to clearly see the edges so I can easily smoosh the clay into the small corners.
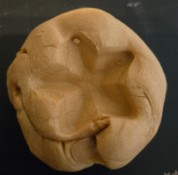
Practice Testing the Molds with regular clay
Before my final test with the expensive silver clay, I did a test with inexpensive play dough. I wanted to see two things from this test.
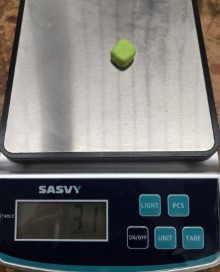
How much clay is used in the mold.
How well the details show up in the clay.
My excitement was hard to contain, but I let the play dough sit for about 20 minutes. After 20 minutes it was starting to get hardened/rubbery. To speed up the process I popped the play dough and mold in the freezer for about 5 minutes.
The 5 minute timer either wasn't enough or play dough just isnt a great sample material. The clay broke into a bunch of pieces while demolding. However I did collect all of the pieces to weigh, so not a complete waste of time.
This failure led me to the art teacher who offered me better clay options to test with. I also decided to try somthing to help with demolding. I decided to take some excess clay and flatten it around the top of the mold. My thought process was that id have something easier to pull off and I could always trim the excess clay away.

This test went exceptionally well!
Time to Cast in Silver!
After having a successful cast with traditional style clays I felt confident in my mold. I took out my silver clay and kneaded it between my fingers to help warm it up and make it more elastic. This was a trick I learned from my research online about this clay. The packaging process can sometimes make the clay feel hardened, so kneading it until its elastic is required to make it usable.
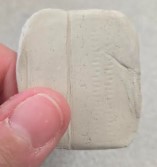
I was surprised by just how little the 50 grams was. The packaged was split into two 25 gram sealed baggies so I only opened opened one. In the picture below, you can see that one 25 gram baggies worth of clay was about 1.5in by 2in by approximatley 1/16in. I ended up using about 20 grams of the clay to fill just one of my molds. This was a lot more than the test clays needed to fill the same mold.
After talking with the art teacher, we decided it was best to only try one mold to start. Just in case we messed something up while firing in the kiln, we would still have the other half of the package to try again. I put my clay in one of my molds and I left it to FULLY dry for 24 hours. The data sheet for this clay states that it needs to be bone dry before firing.
After waiting for 24 hours, it was time to demold. I noticed right away that their was some cracking in the in the clay so I had to be really gentle when removing it.
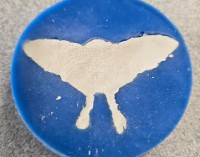
It actually came out very smoothly, but the cracking was at the thinnest part and the right part of the moths tendrils broke off. I looked up to see if possibly I could get it to reform during kilning, but it wont be possible. Even with the break, the clay moth looks beautiful!
The solution to the broken tendril was to carefully break the left tendril at the same point. The plan is to file all the pieces and attempt to put a hole in the tendrils and the bottom of the wings to make the tendril dangle using a jump ring.
Fire Time! The art teacher is helping me fire the clay in the kiln at the school very soon. I am really excited to see how this turns out. Final picture coming soon!
Week 14 Files
In my repo is a zip folder containing files for my week 14.
What files are inside my Folder:
My Luna Moth Mold 3D File
One of my Potion Bottle Bead Rollers 3D File
A Star Keychain 3D File by Humbledandelion on Makerworld
The scaled down Gear 3D file used in our Group Work
Download My Week 14 Project Files Zip Folder